Cranberry Orange Glazed Pork Roast

Cranberry Orange Glazed Pork Roast

Cranberry Orange Glazed Pork Roast

Cranberry Orange Glazed Pork Roast

December 18, 2024 by Kimberly

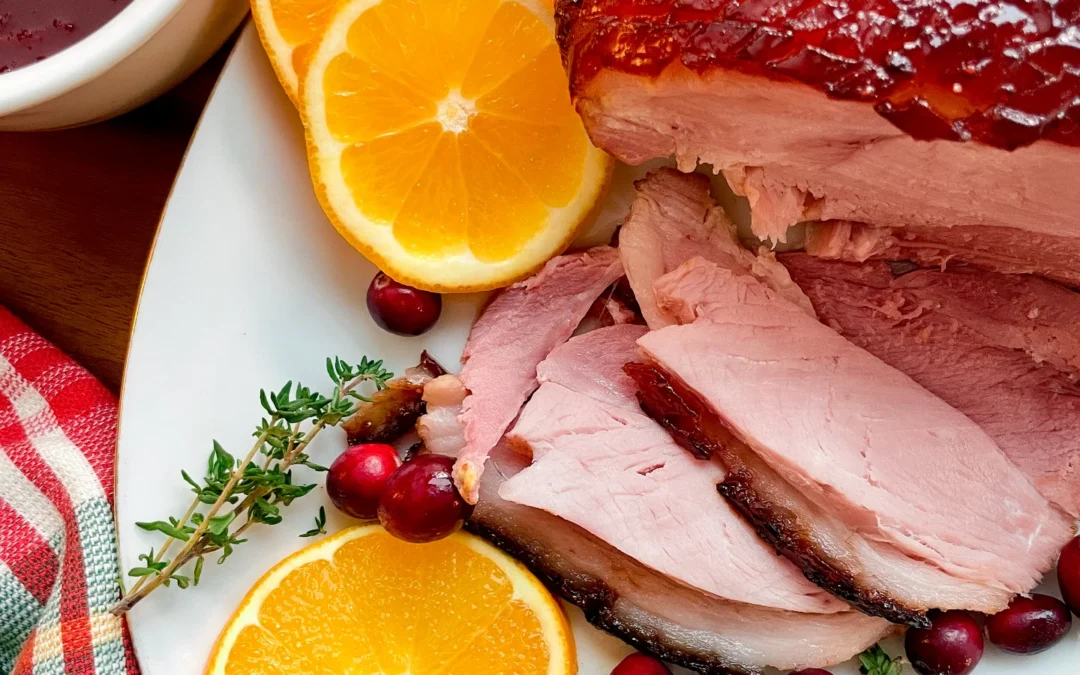
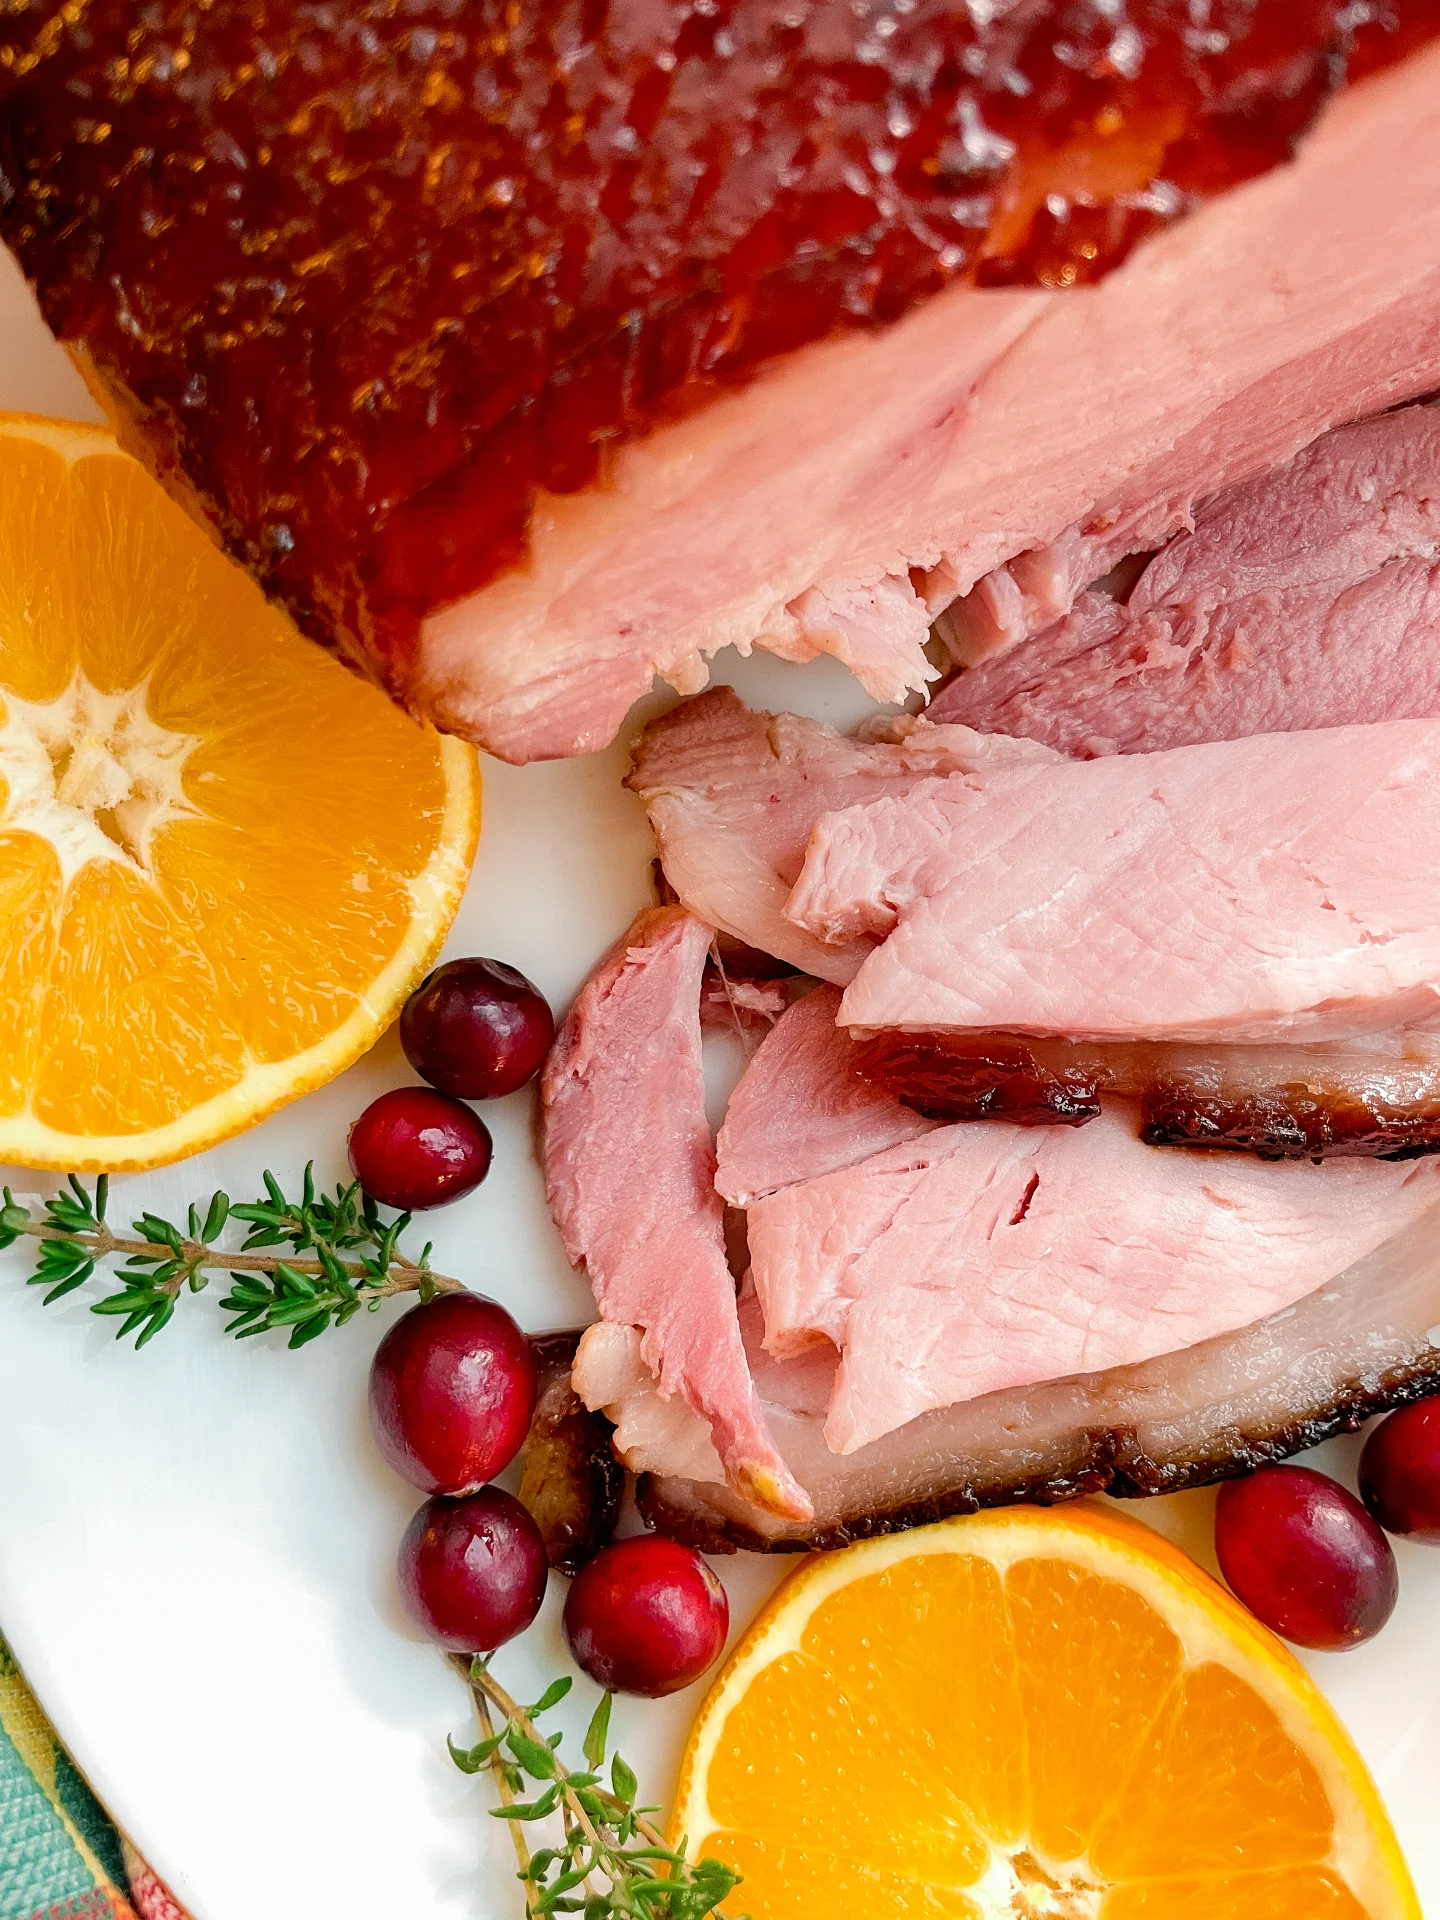
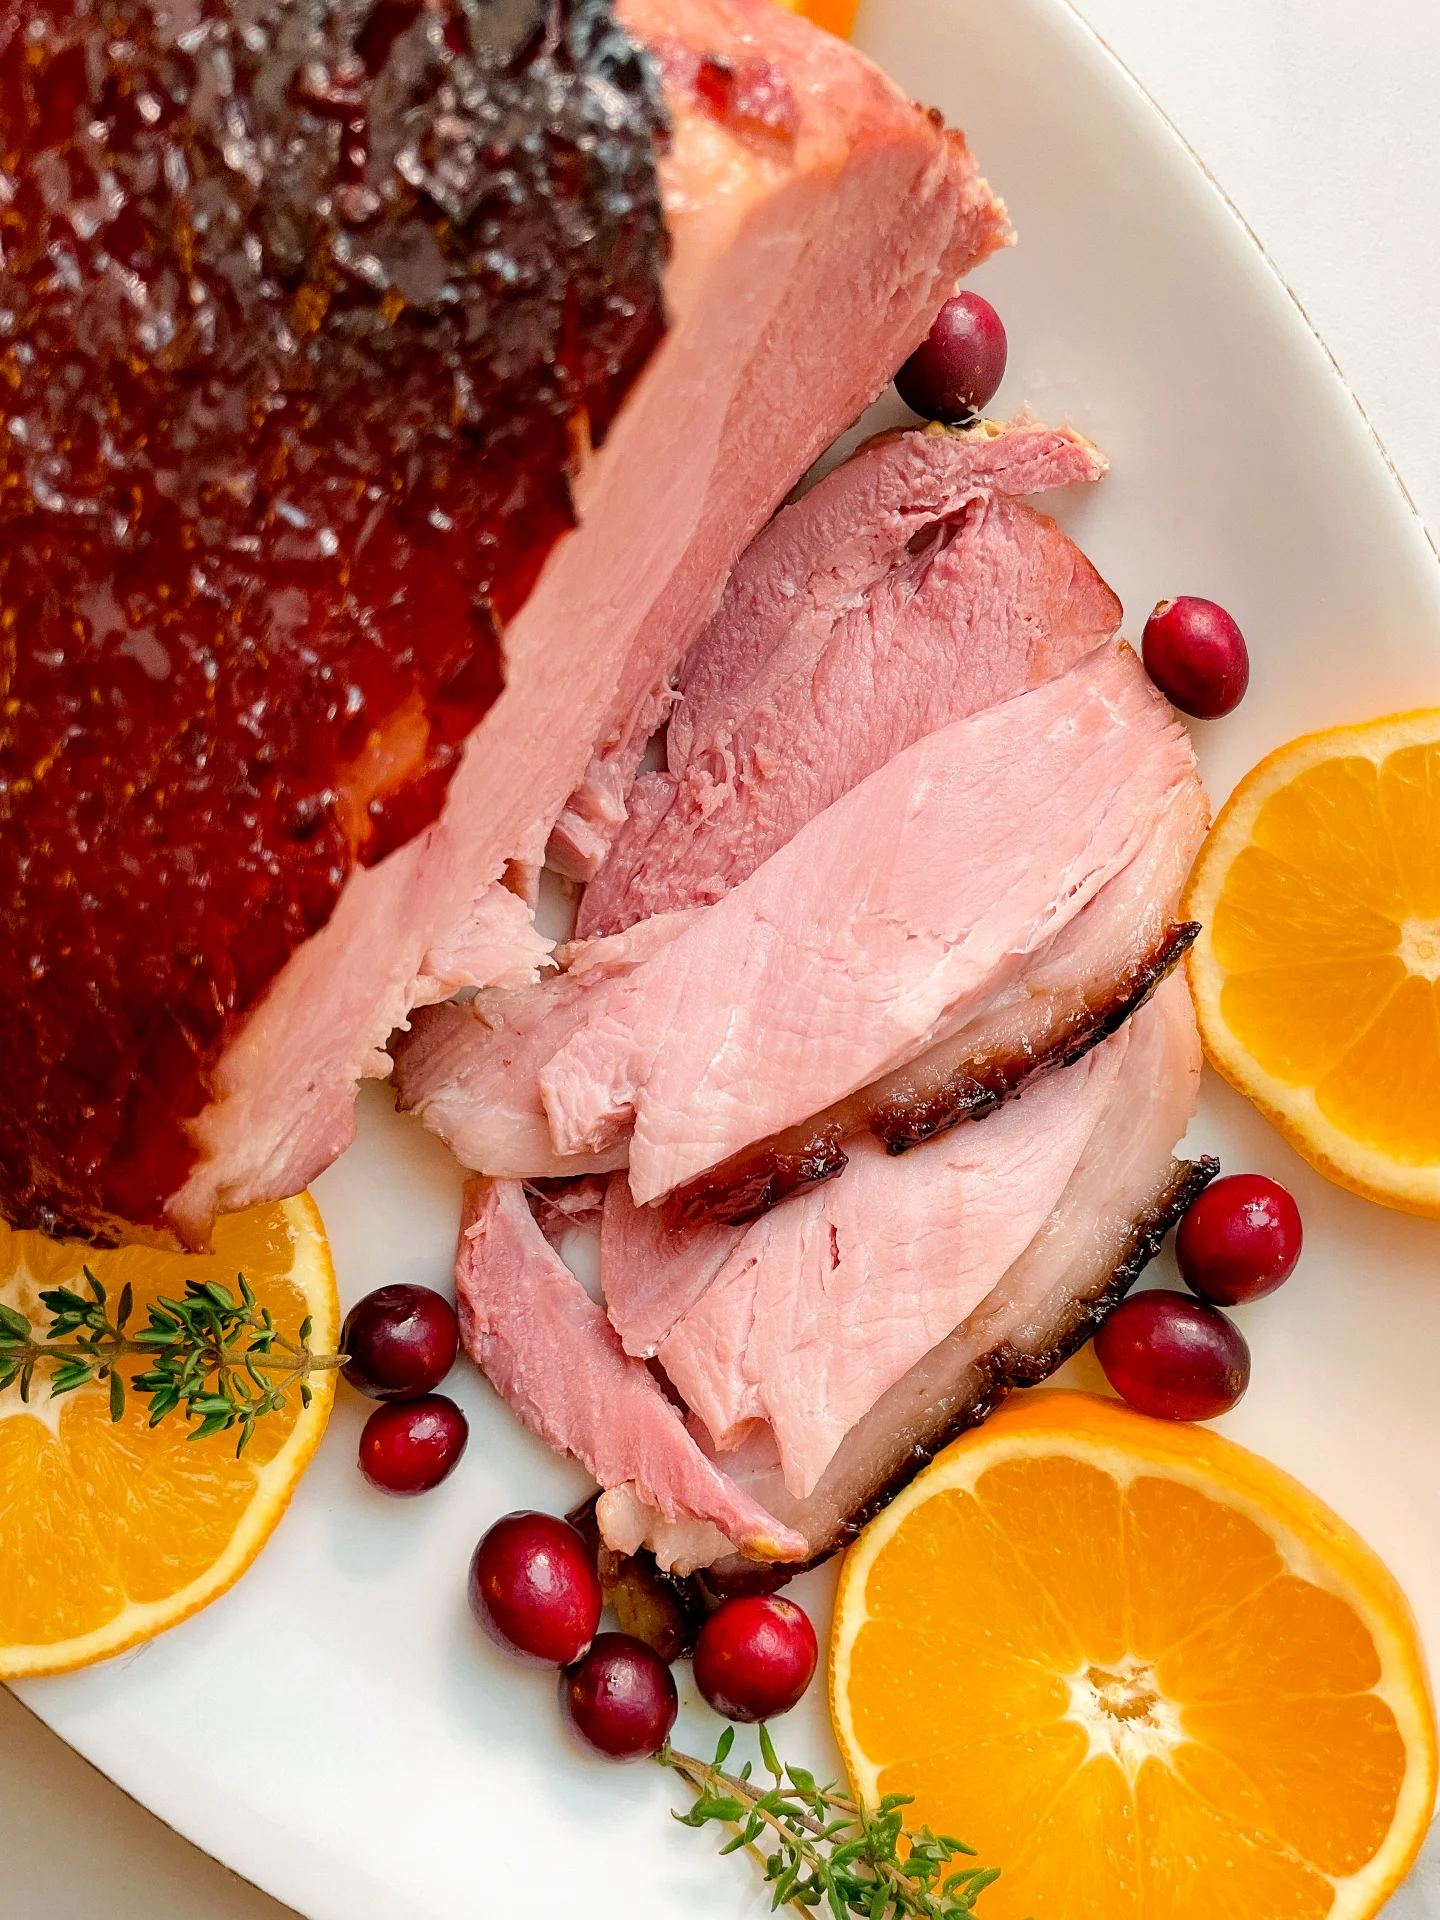
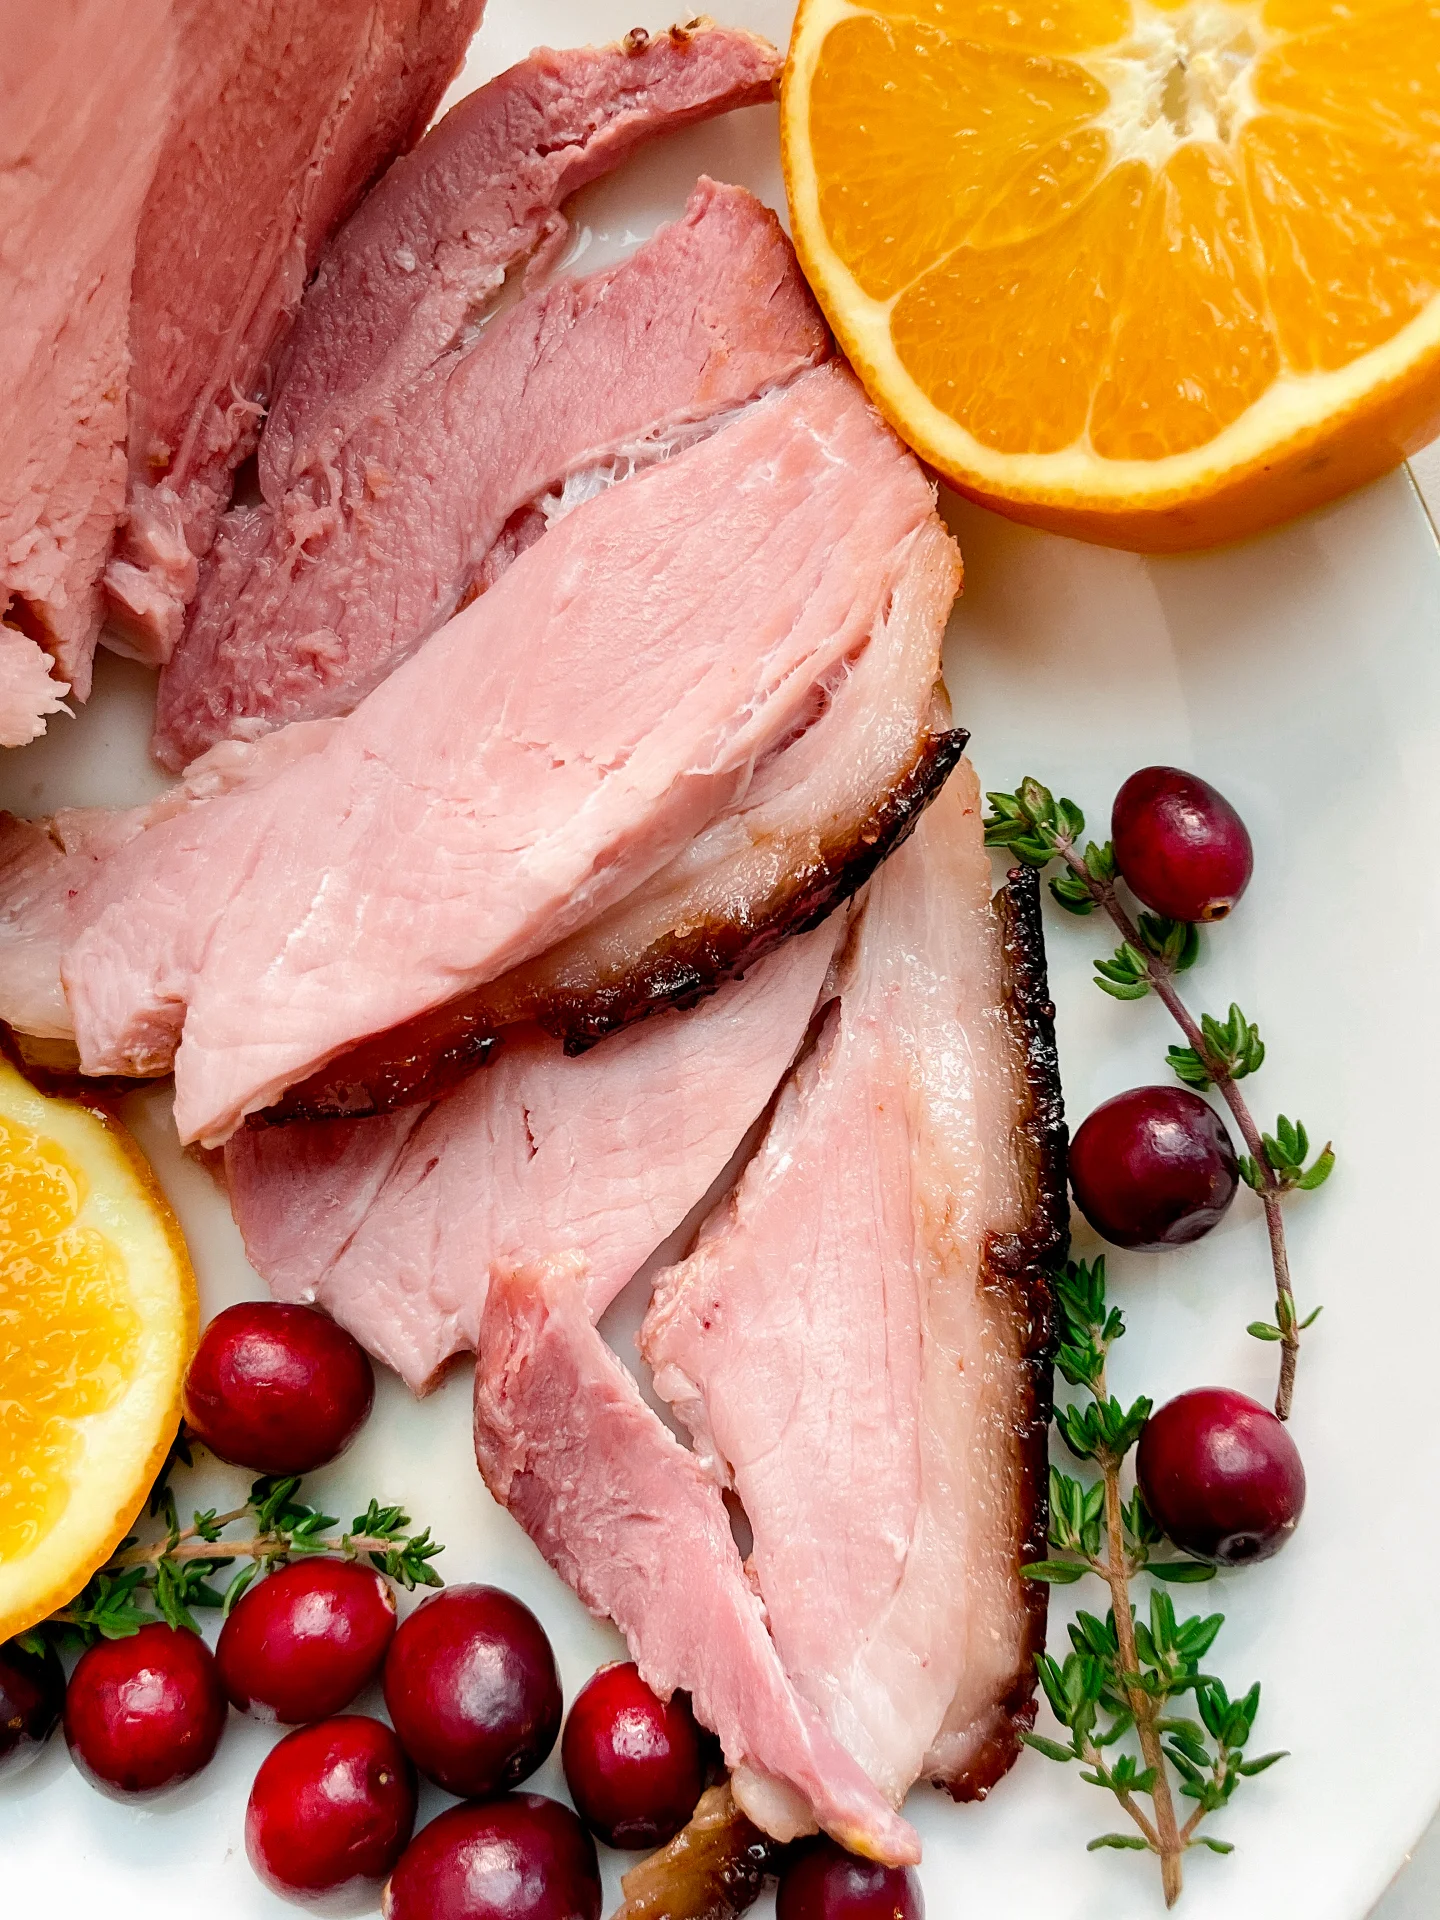
This juicy, tender pork roast with a sweet-tangy cranberry orange glaze tastes like the holidays on a plate. Perfectly crispy on the outside and bursting with bold, festive flavors inside.

2 HOURS
40 MINUTES

INTERMEDIATE

OMNIVORE

GERMAN

500 PER PORTION

COMFORT FOOD

CHRISTMAS

DINNER

WINTER

INTRODUCTION

ABOUT THE RECIPE

This roast is what holiday dreams are made of—crispy crackling, juicy pork, and a sweet-tangy cranberry orange glaze that brings all the festive vibes. The glaze is inspired by a classic Cumberland sauce, with tart cranberries, bright orange zest, and a splash of Port wine for richness. Whether it’s for a holiday feast or a special family dinner, this roast is guaranteed to steal the show and have everyone asking for seconds.

How to serve
Pair this roast with creamy mashed potatoes, roasted Brussels sprouts, or a crisp green salad to balance the richness. The cranberry orange glaze adds just the right amount of tang, so it shines with simple sides. For an extra festive touch, drizzle a bit of the warm glaze over the carved slices. The best part? This roast is just as amazing the next day! Slice it paper-thin and enjoy it as a snack, or layer it into a sandwich with some extra glaze for a seriously delicious leftover treat.

How to store
Wrap leftover pork in foil or store it in an airtight container in the fridge for up to three days. Enjoy it cold in a sandwich with a dollop of leftover glaze.

Hi, I'm Kimberly!

Hi, I'm Kimberly.

A passionate food lover who believes in the magic of homemade deliciousness that spreads love and warmth. Join me on this culinary adventure as I prepare wonderful dishes and let’s spread some happiness together!

Kimberly the Zett Signature

If you want to get to know me better, click here!


Cranberry Orange Glazed Pork Roast
„Let’s make a piece of happiness“
Print
clock clock iconcutlery cutlery iconflag flag iconfolder folder iconinstagram instagram iconpinterest pinterest iconfacebook facebook iconprint print iconsquares squares iconheart heart iconheart solid heart solid icon
Cranberry Orange Glazed Pork Roast

Cranberry Orange Glazed Pork Roast


5 Stars 4 Stars 3 Stars 2 Stars 1 Star

No reviews

  • Author: Kimberly
  • Total Time: 2 hrs + 40 min
  • Yield: 6 - 8 1x

Description

RECOMMENDED EQUIPMENT

  • deep baking dish or roasting pan
  • aluminum foil
  • sharp knife
  • cutting board
  • kitchen brush for glazing
  • meat thermometer
  • vegetable peeler
  • small pot

Ingredients

Units Scale

PORK HAM

  • 1.8 kilogramm cured pork ham with rind
  • 2 tsp dijon mustard
  • salt & pepper

COOKING LIQUID

  • 750 milliliter vegetable stock
  • 1.5 white onions
  • 3 garlic cloves
  • 2 carrots
  • 2 bay leaves
  • 1 tbsp black pepper corns

CRANBERRY ORANGE GLAZE

  • 1 lemon
  • 1 orange
  • 200 milliliter port wine
  • 1 shallot
  • 3/4 tsp fresh ginger, grated
  • 1 tsp dijon mustard
  • 100 grams fresh cranberries
  • 200 grams redcurrant jelly
  • salt & black pepper

Instructions

  1. Take the meat out of the fridge and let it rest at room temperature for about 30 minutes to ensure even cooking later.
  2. In the meantime, prepare the glaze. You can find the recipe for the cranberry-orange sauce here, which we’ll use both as a glaze and a sauce later.
  3. Preheat the oven to 150°C/300°F (fan).
  4. Peel the onions, garlic, and carrots, then cut them into large chunks.
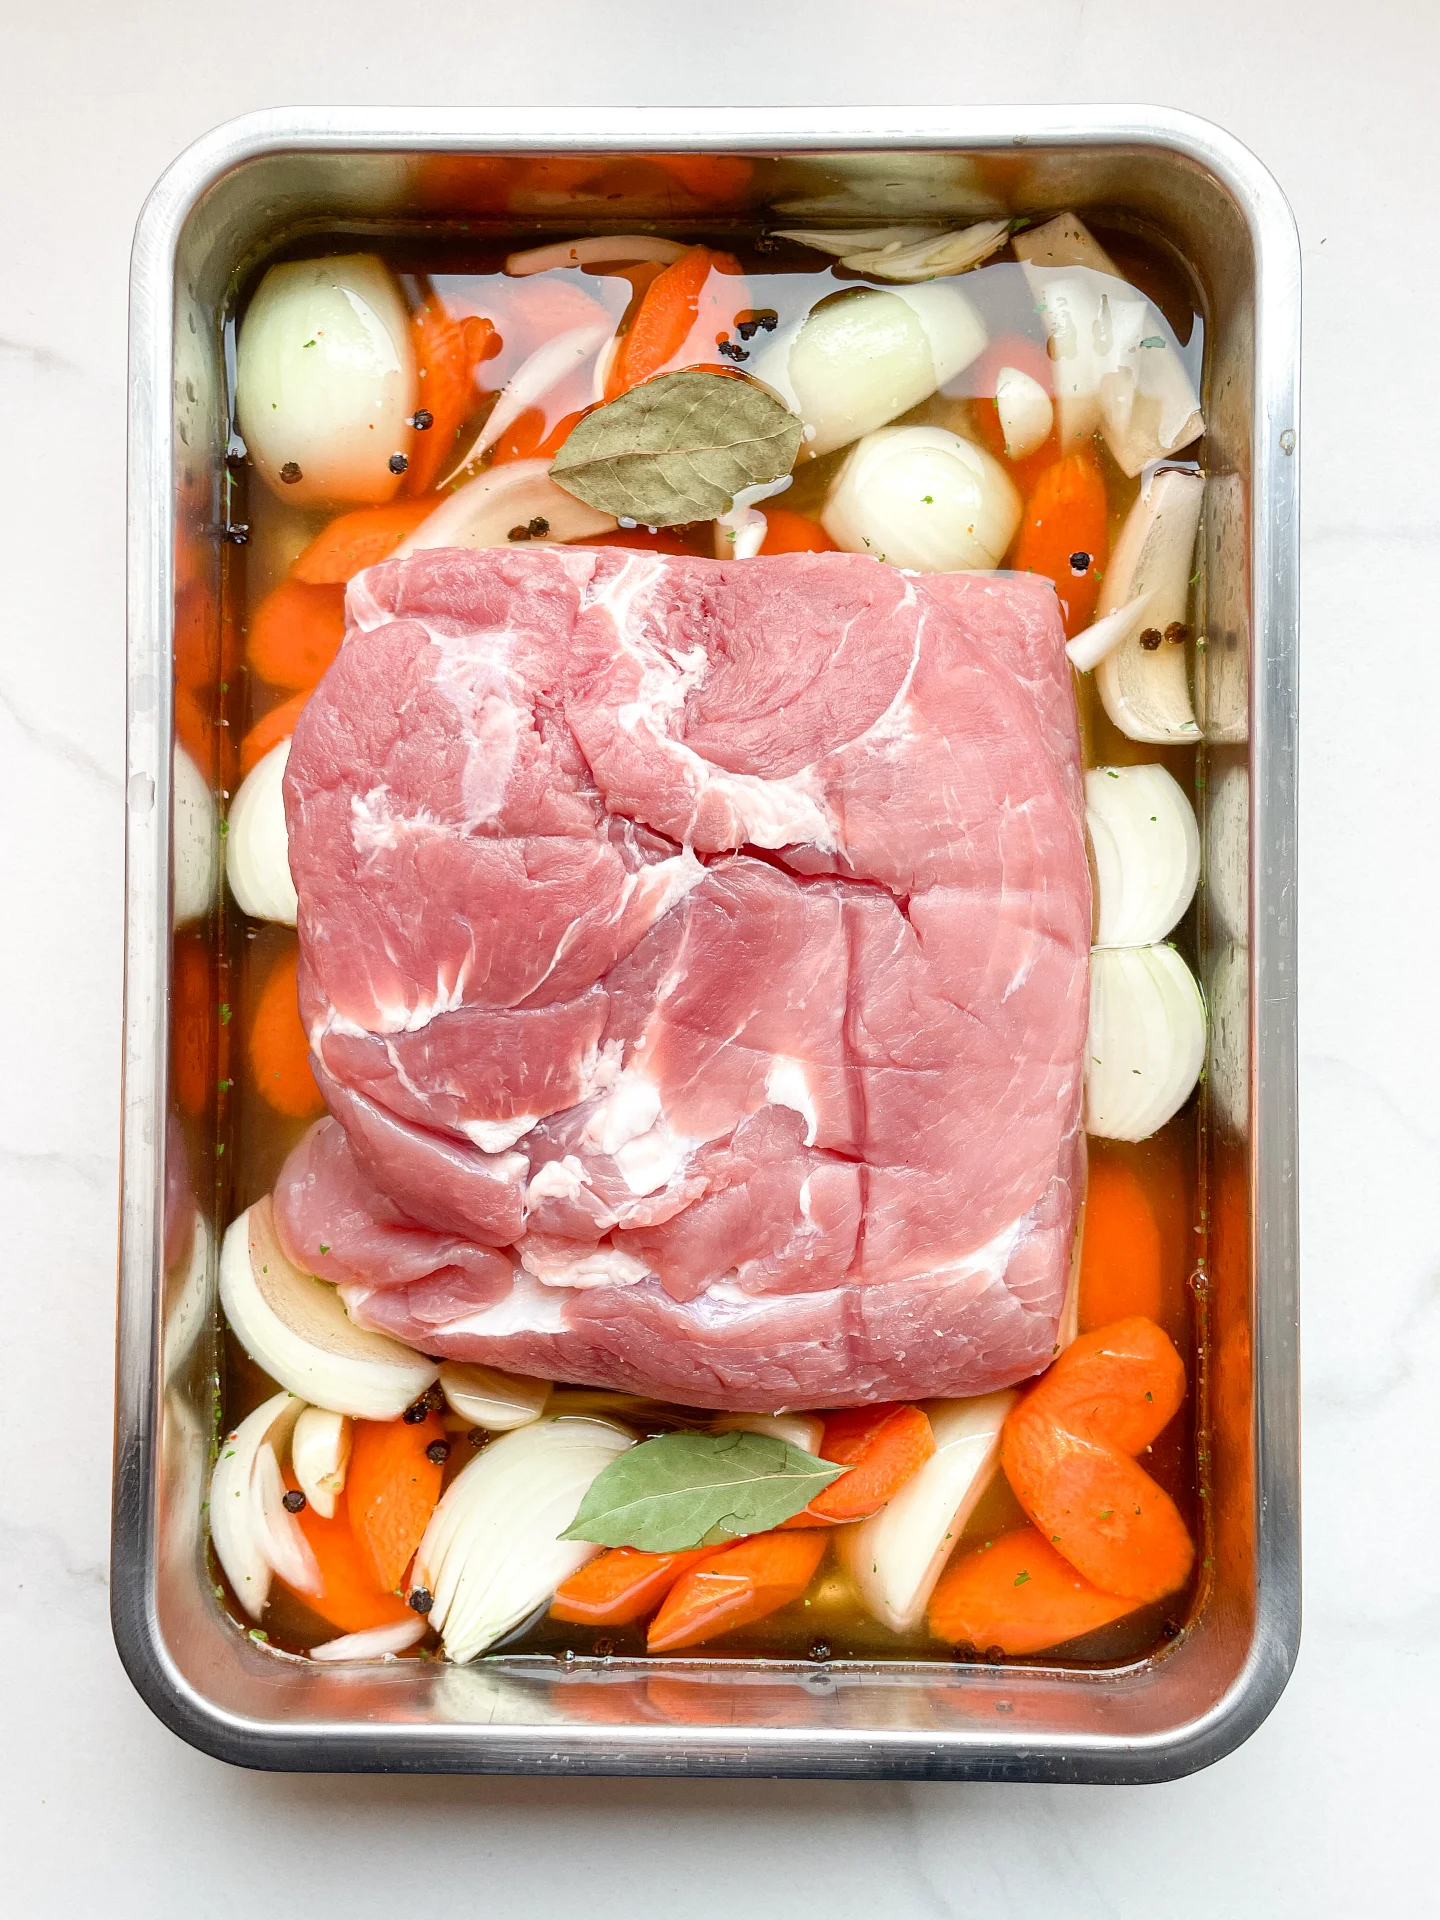
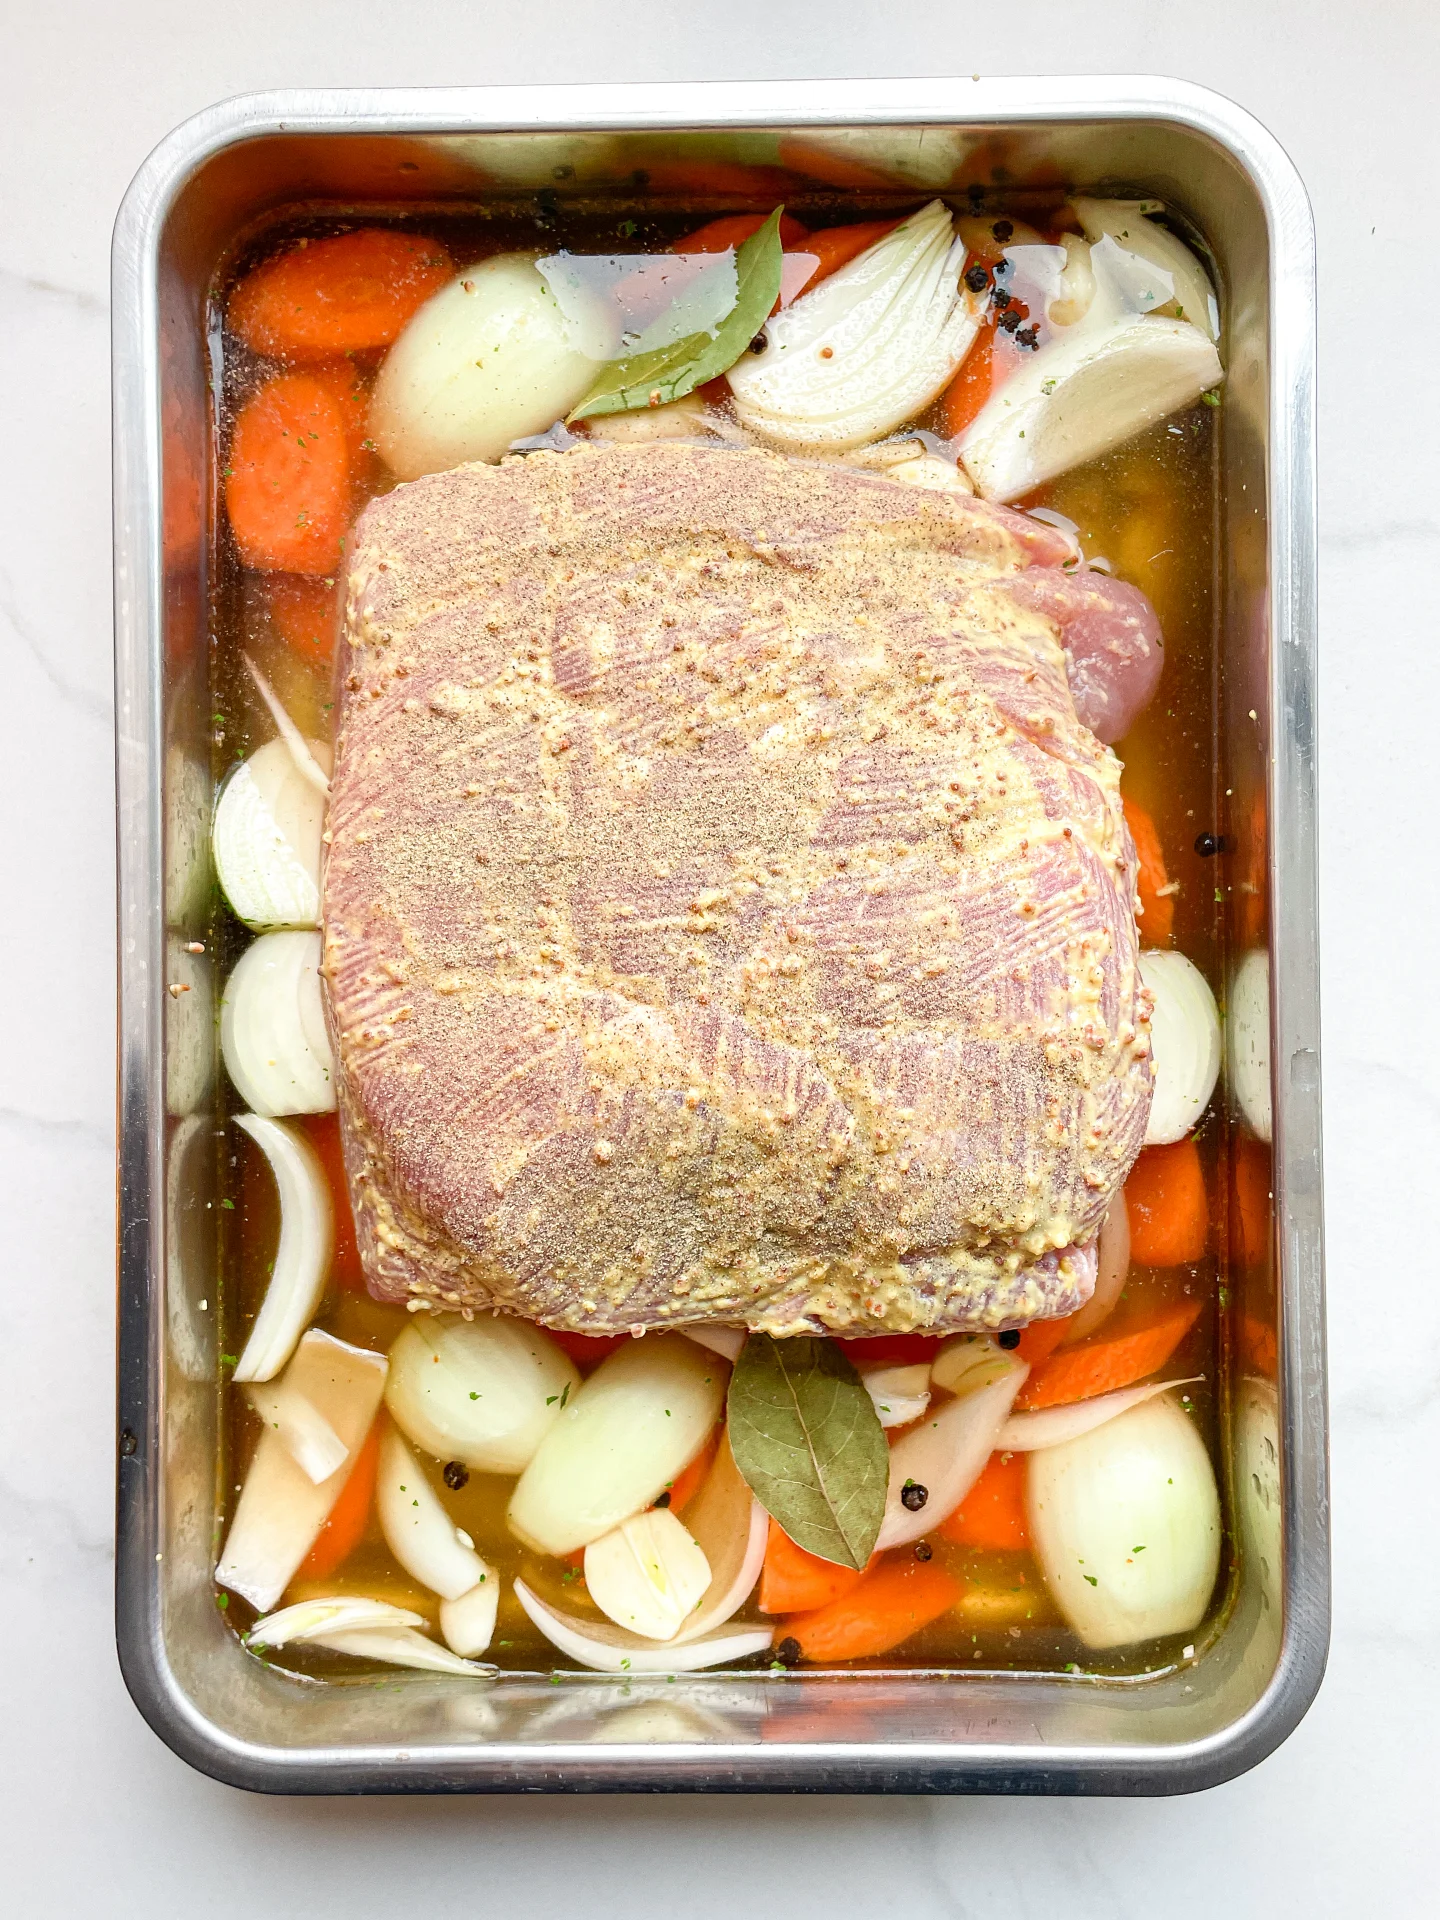
  5. Pour vegetable broth into a deep baking dish or roasting pan and place the meat in it, rind side down. Distribute the chopped vegetables, pepper, and bay leaves around it.
  6. Cover the dish with aluminum foil and place it in the oven for 40 minutes.
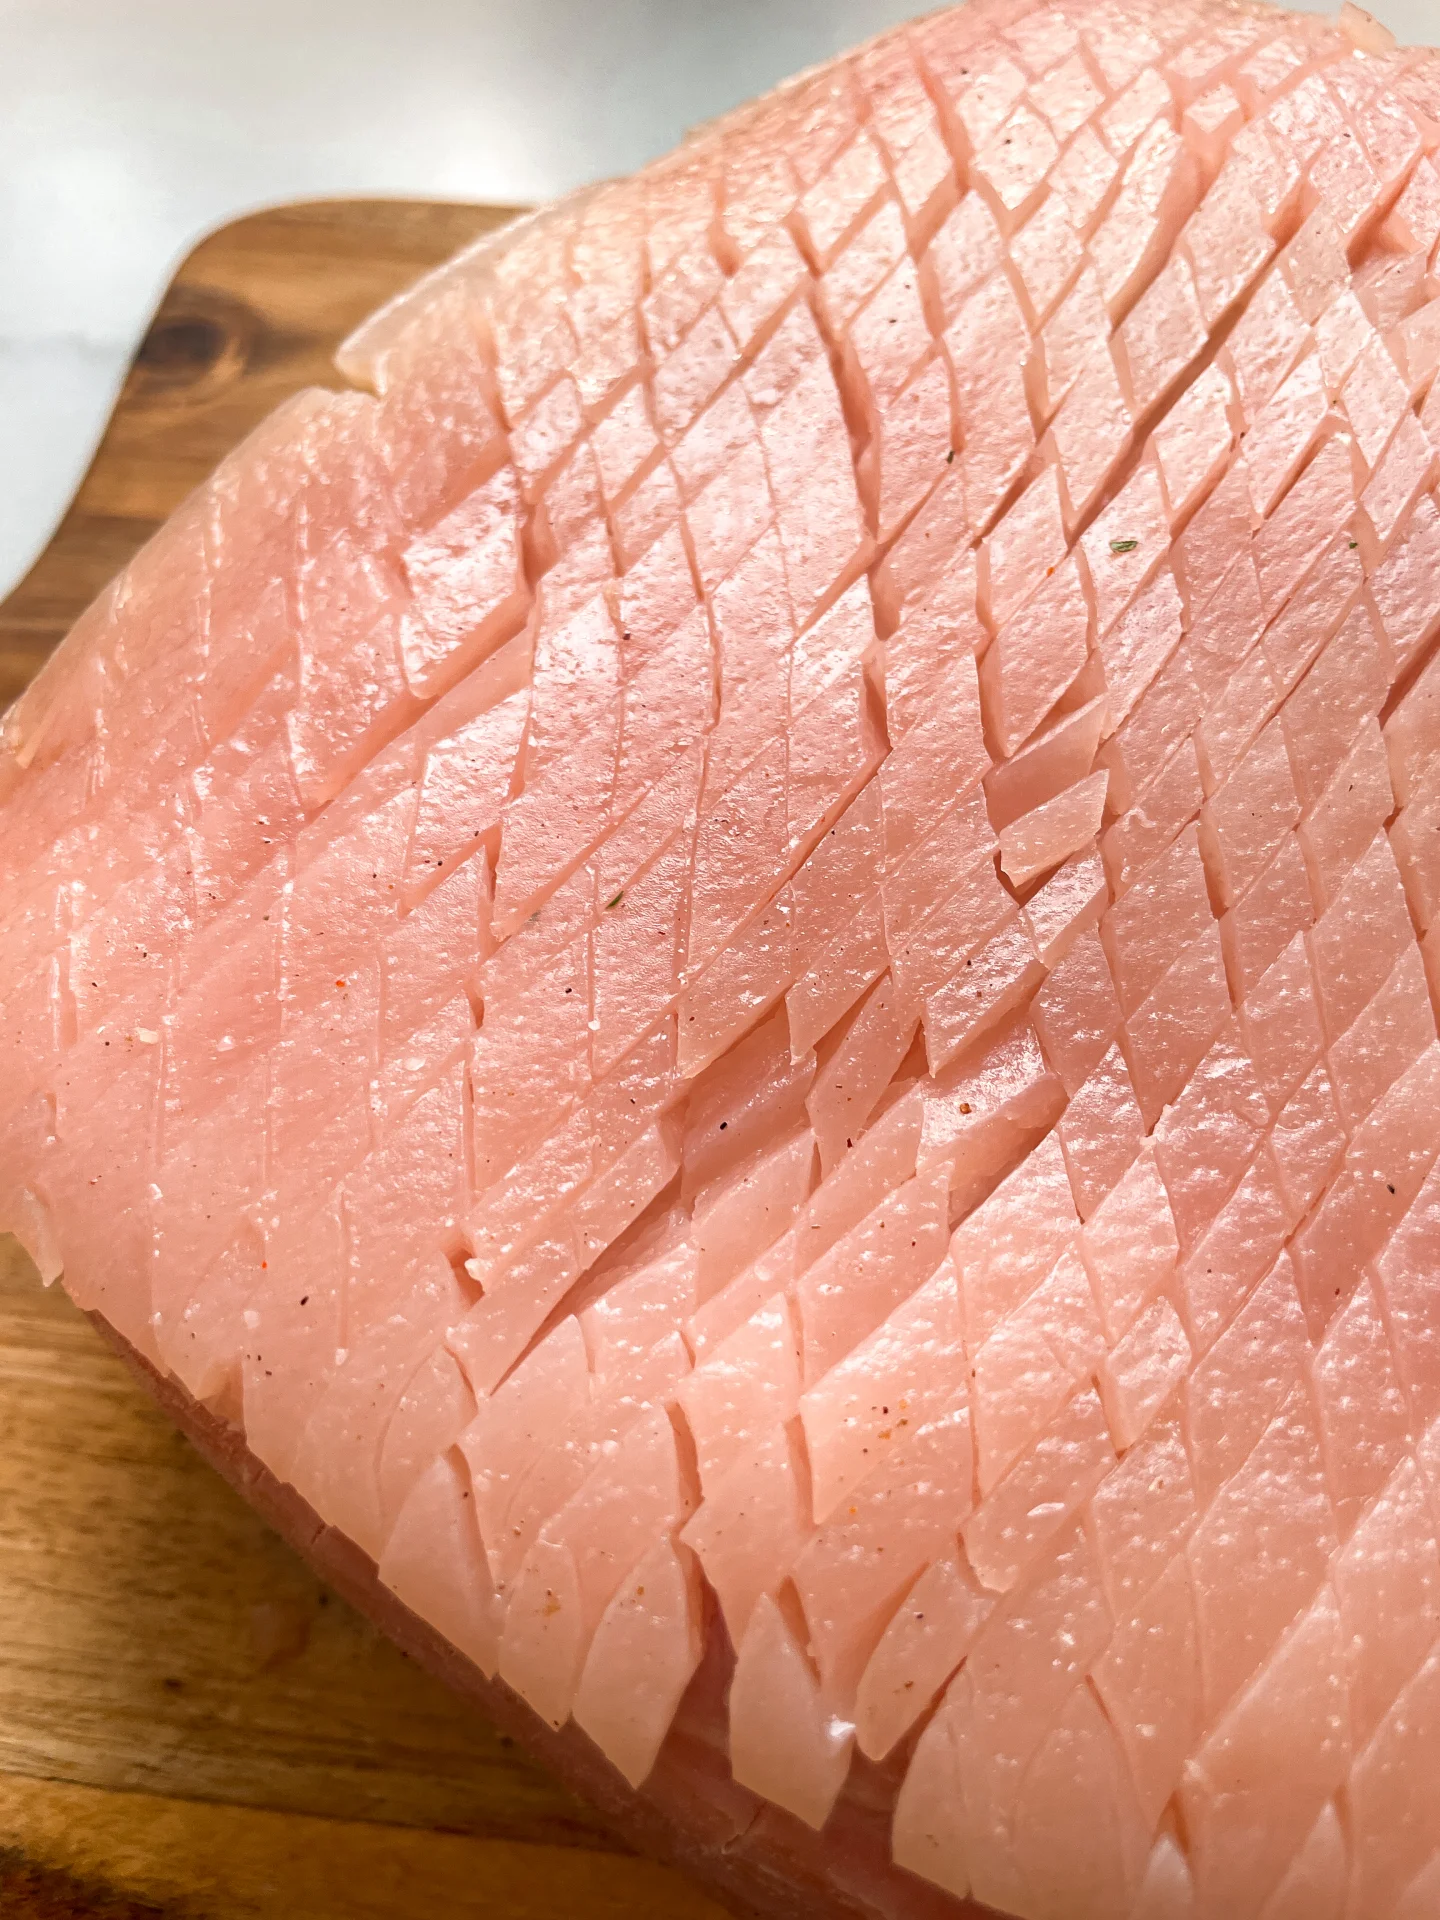
  7. Remove the dish from the oven and transfer the meat to a cutting board, placing it rind side up. You now have two options: either remove the rind completely, leaving the fat layer intact, and score the fat closely with a sharp knife without cutting into the meat. Or, leave the rind on and score it diagonally in a tight pattern, again without cutting into the meat. Return the meat to the oven uncovered and roast for an additional hour.
  8. After 30 minutes, brush the rind with the first layer of glaze. Repeat this every 10 minutes (a total of 3 times). Be sure to save some of the glaze, as it will be used as a sauce later. Once the meat reaches an internal temperature of 65°C/149°F, switch the oven to grill mode and roast the rind for about 10 minutes until it becomes perfectly crispy. The roast should now have an internal temperature of around 68-69°C/154-156°F.
  9. Remove the meat from the oven, cover it with aluminum foil, and let it rest for 10-15 minutes. During this time, the internal temperature will rise to about 72°C/162°F, and the juices will redistribute within the meat.
  10. Slice the meat against the grain into thick slices for serving as a main course or into thin slices for making sandwiches. Enjoy!
  • Passive Time: 2 hrs + 10 min
  • Cook Time: 30 min

Milk Buns with Gingerbread Filling

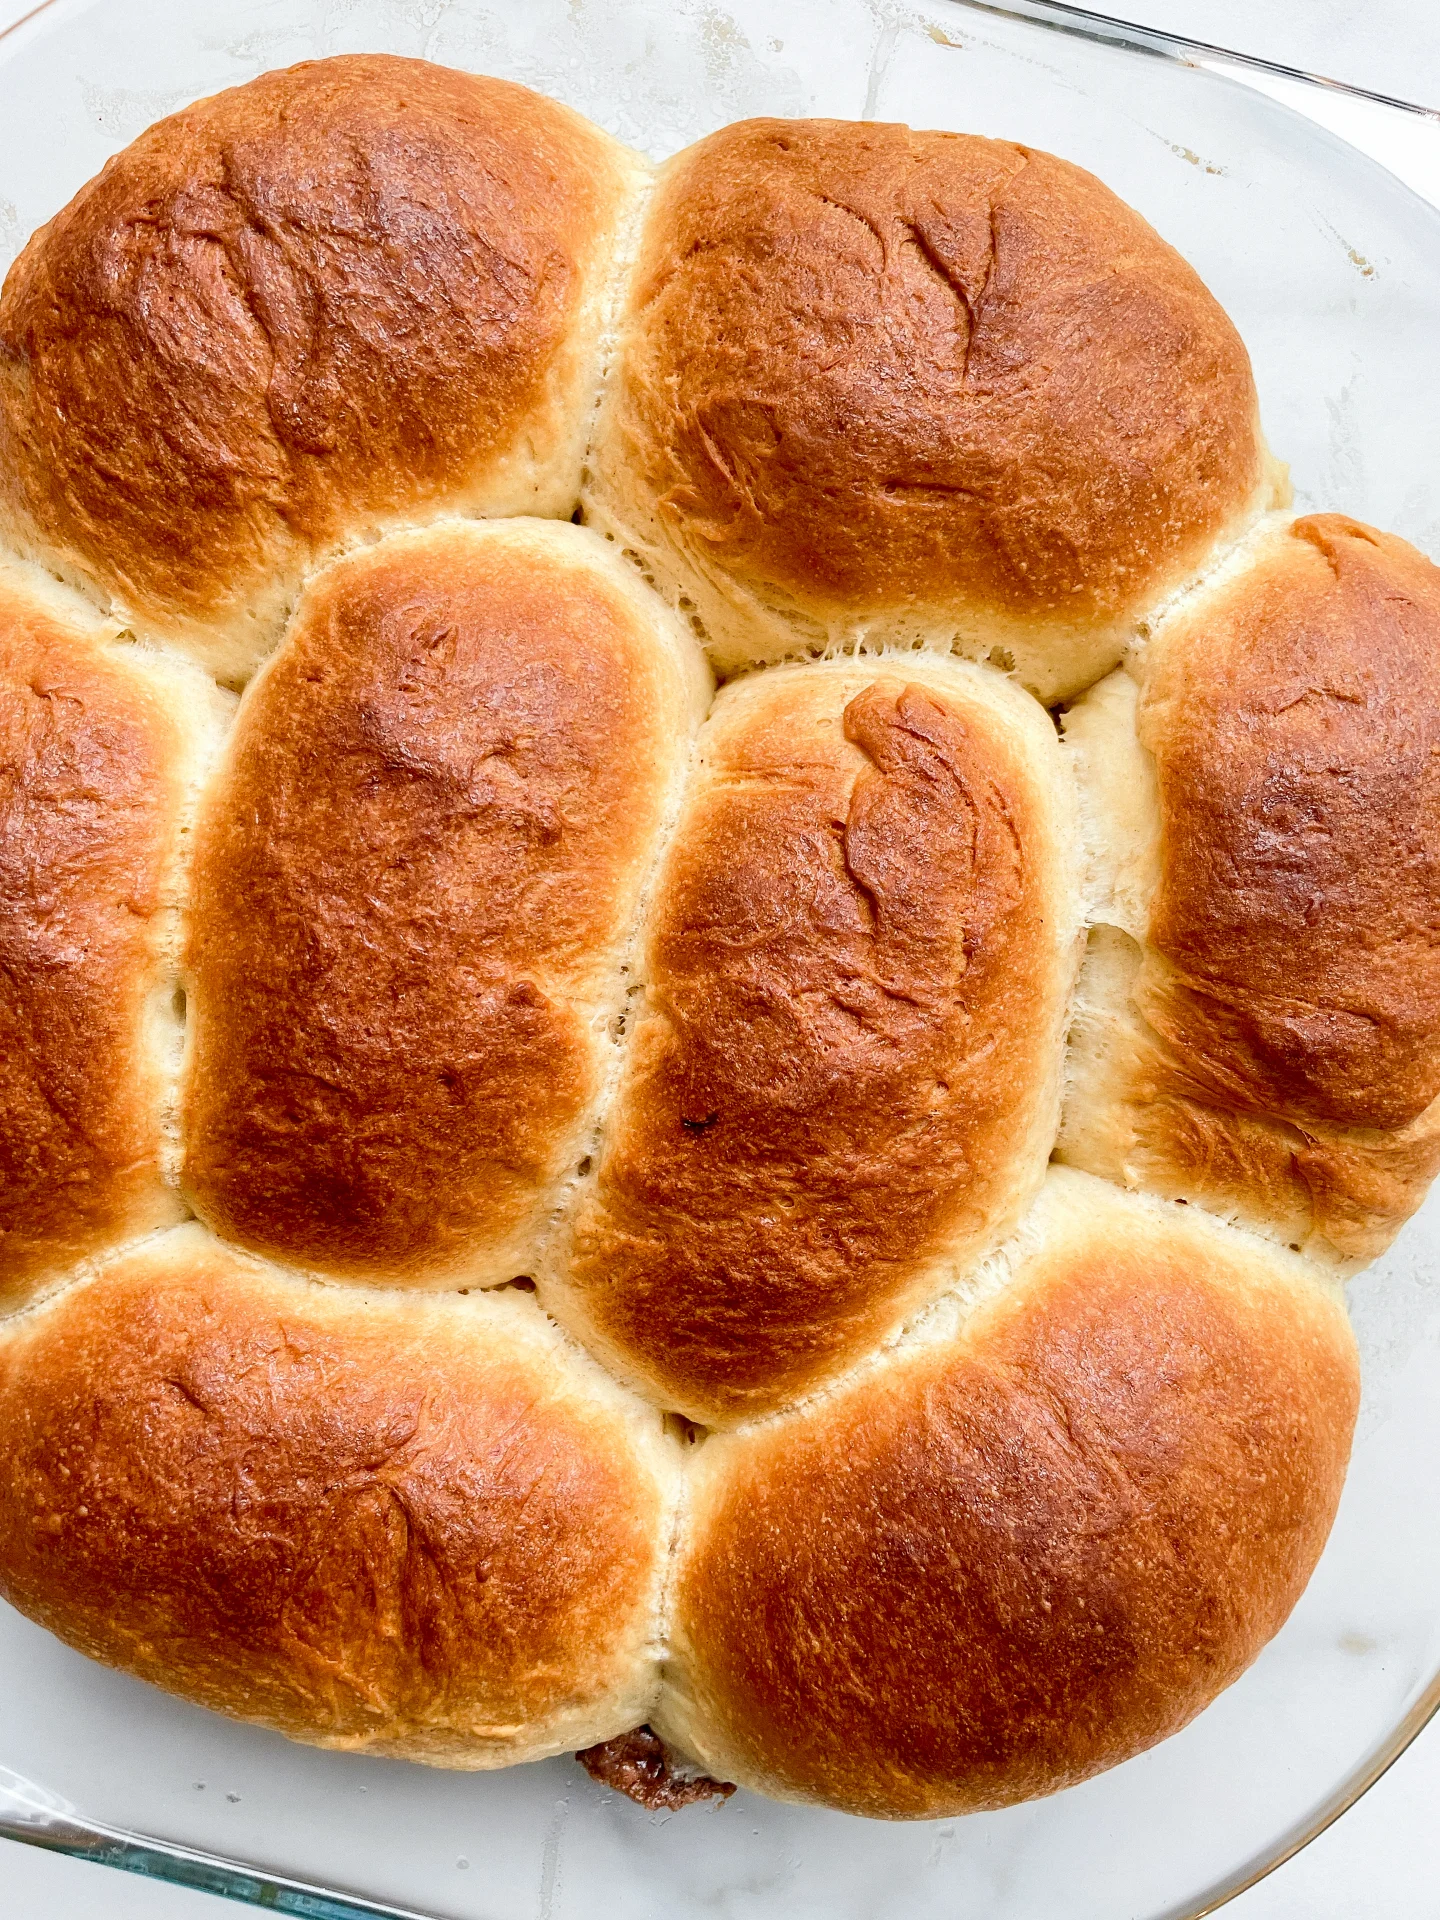
Milk Buns with Gingerbread Filling

Milk Buns with Gingerbread Filling

Milk Buns with Gingerbread Filling

December 16, 2024 by Kimberly

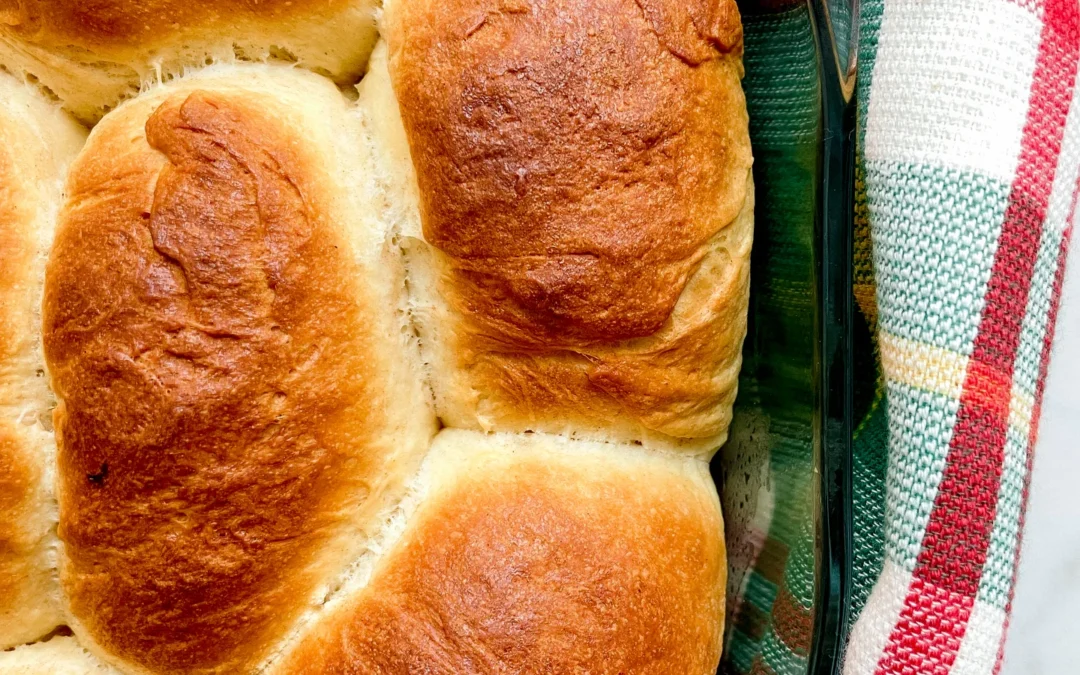
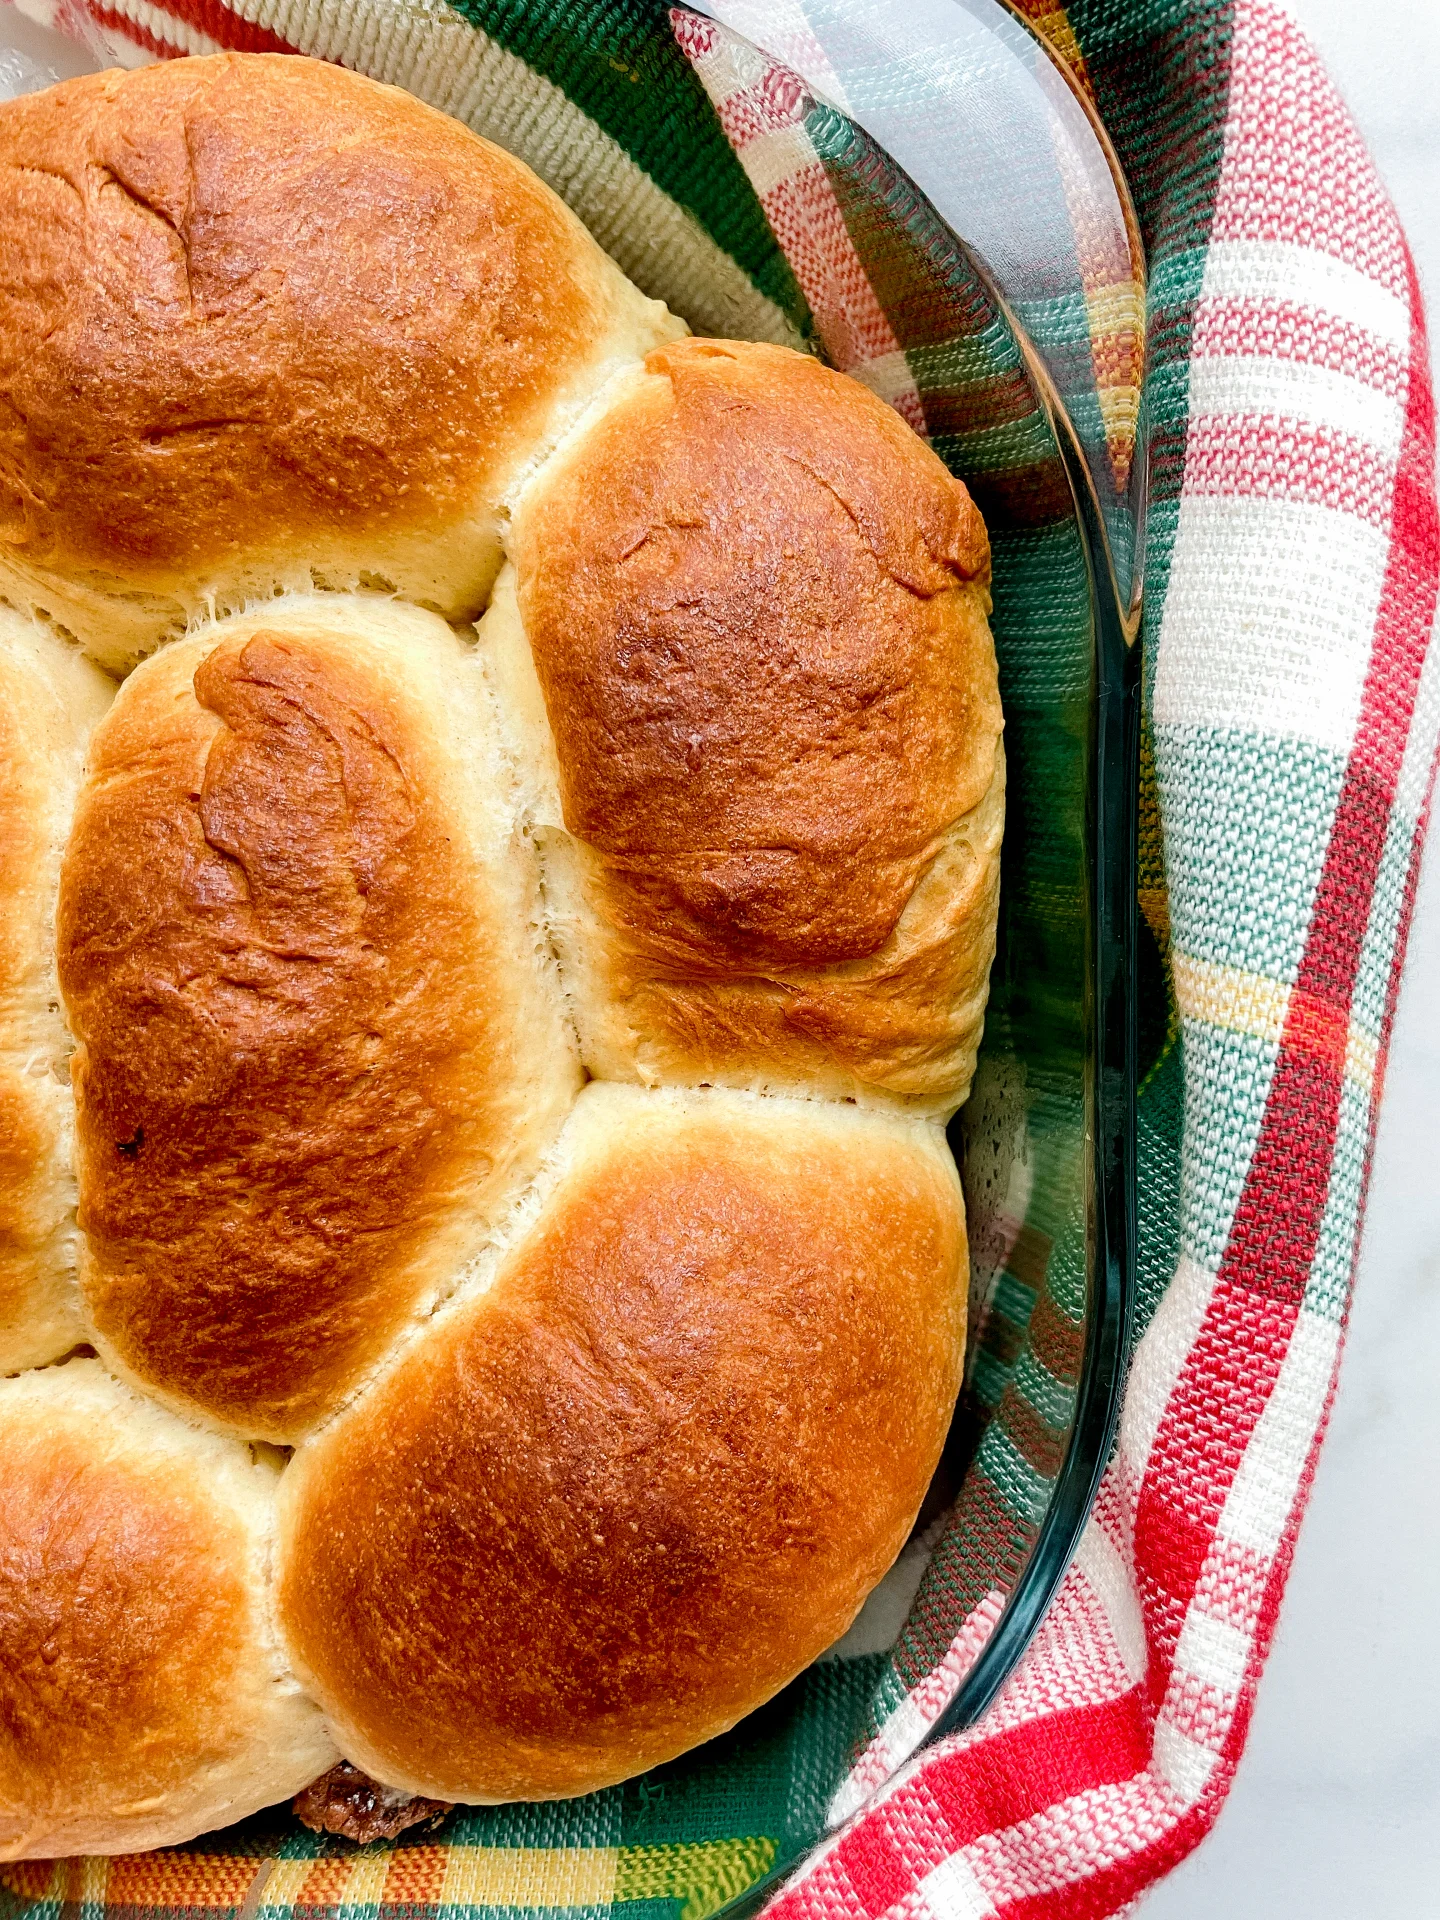
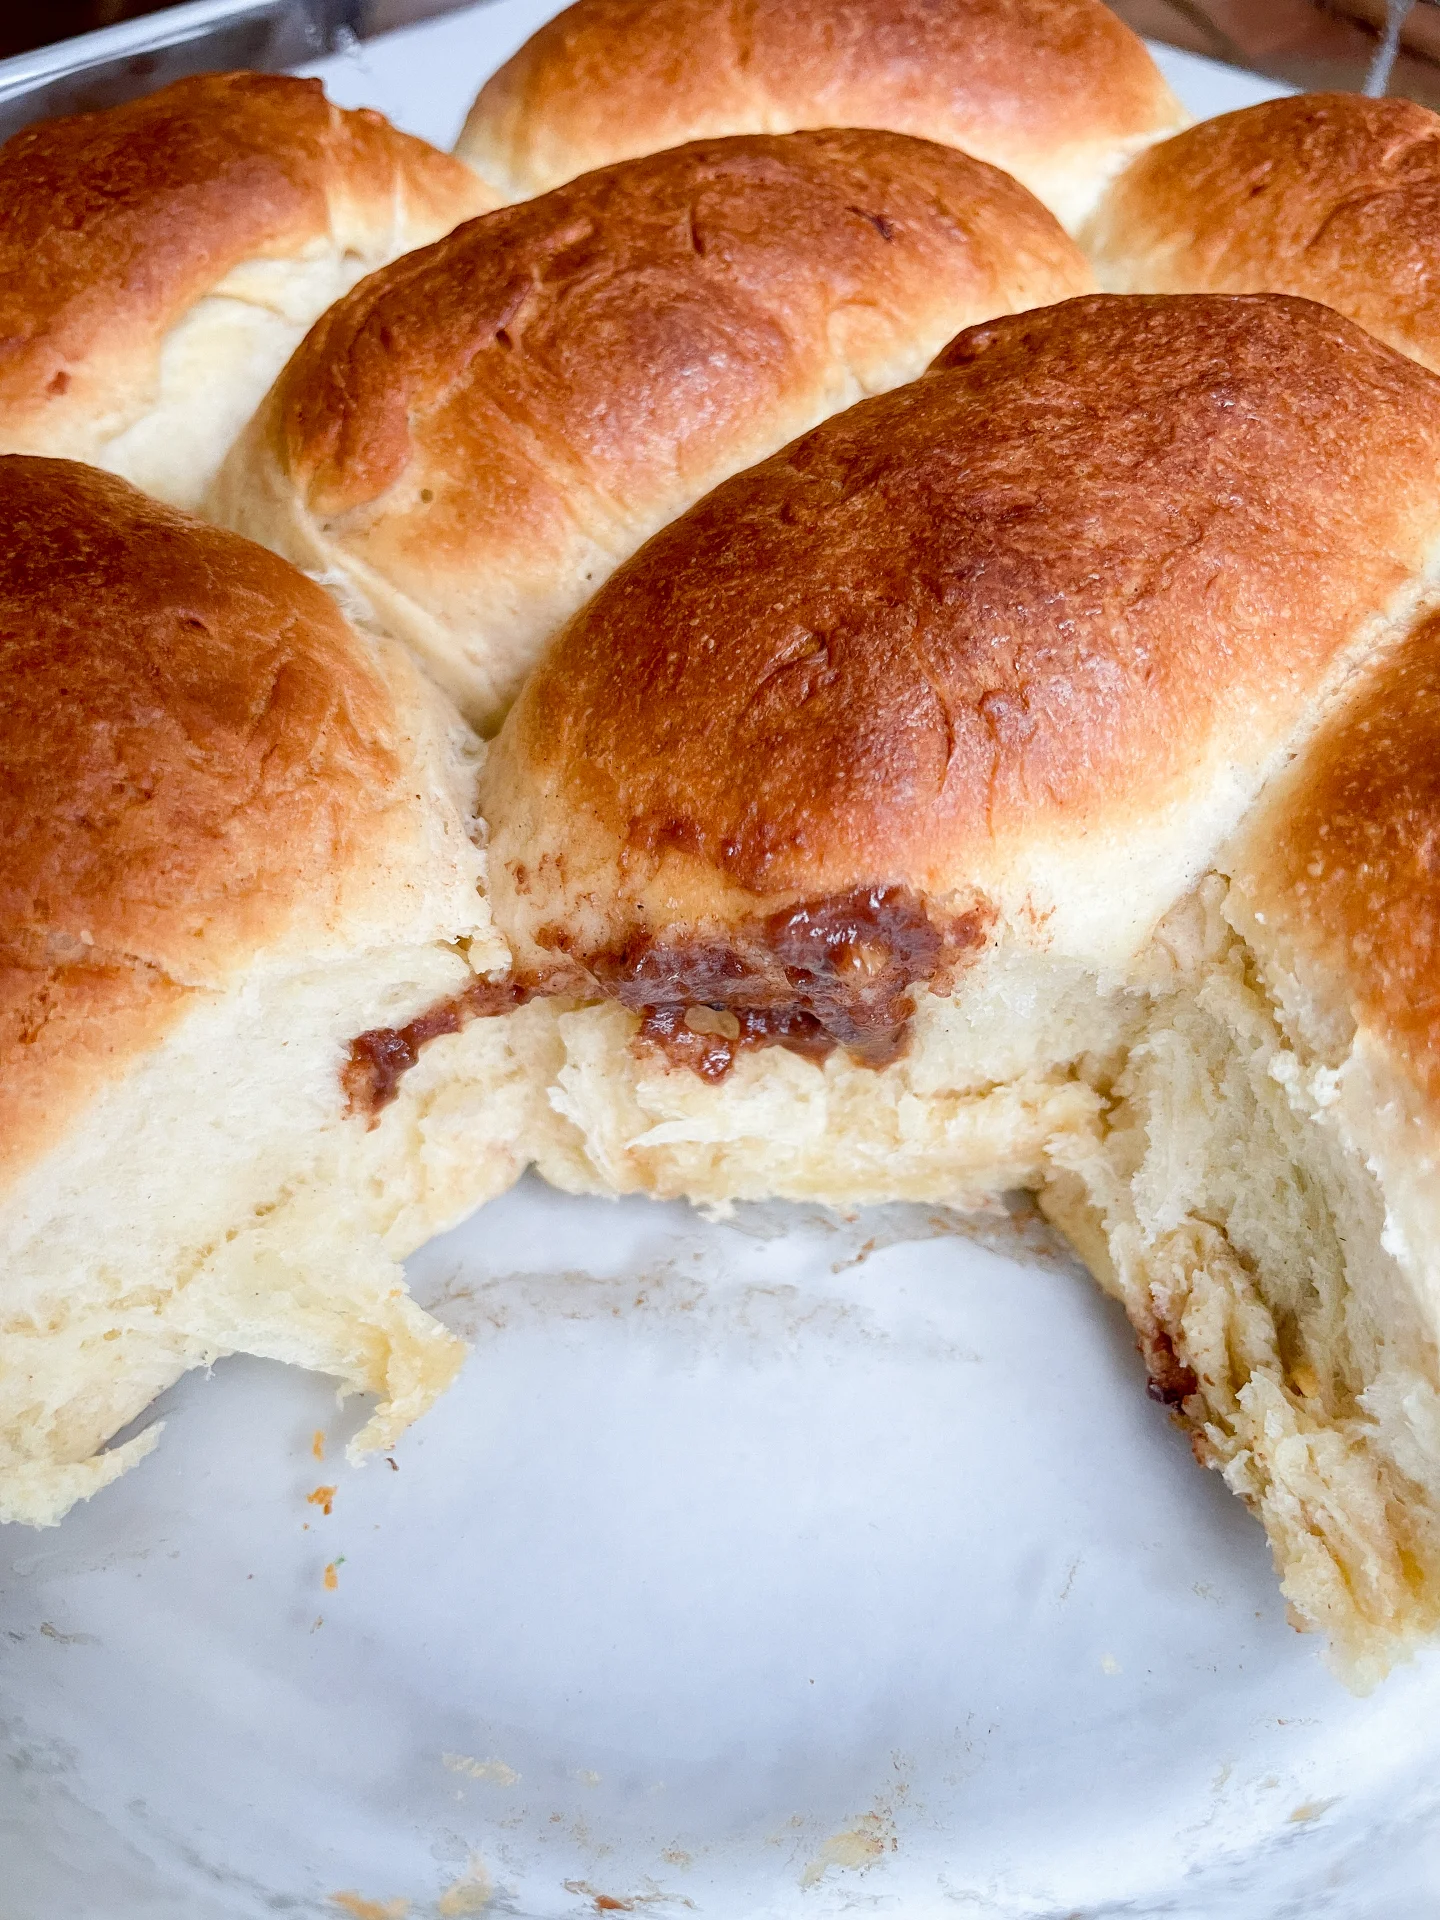
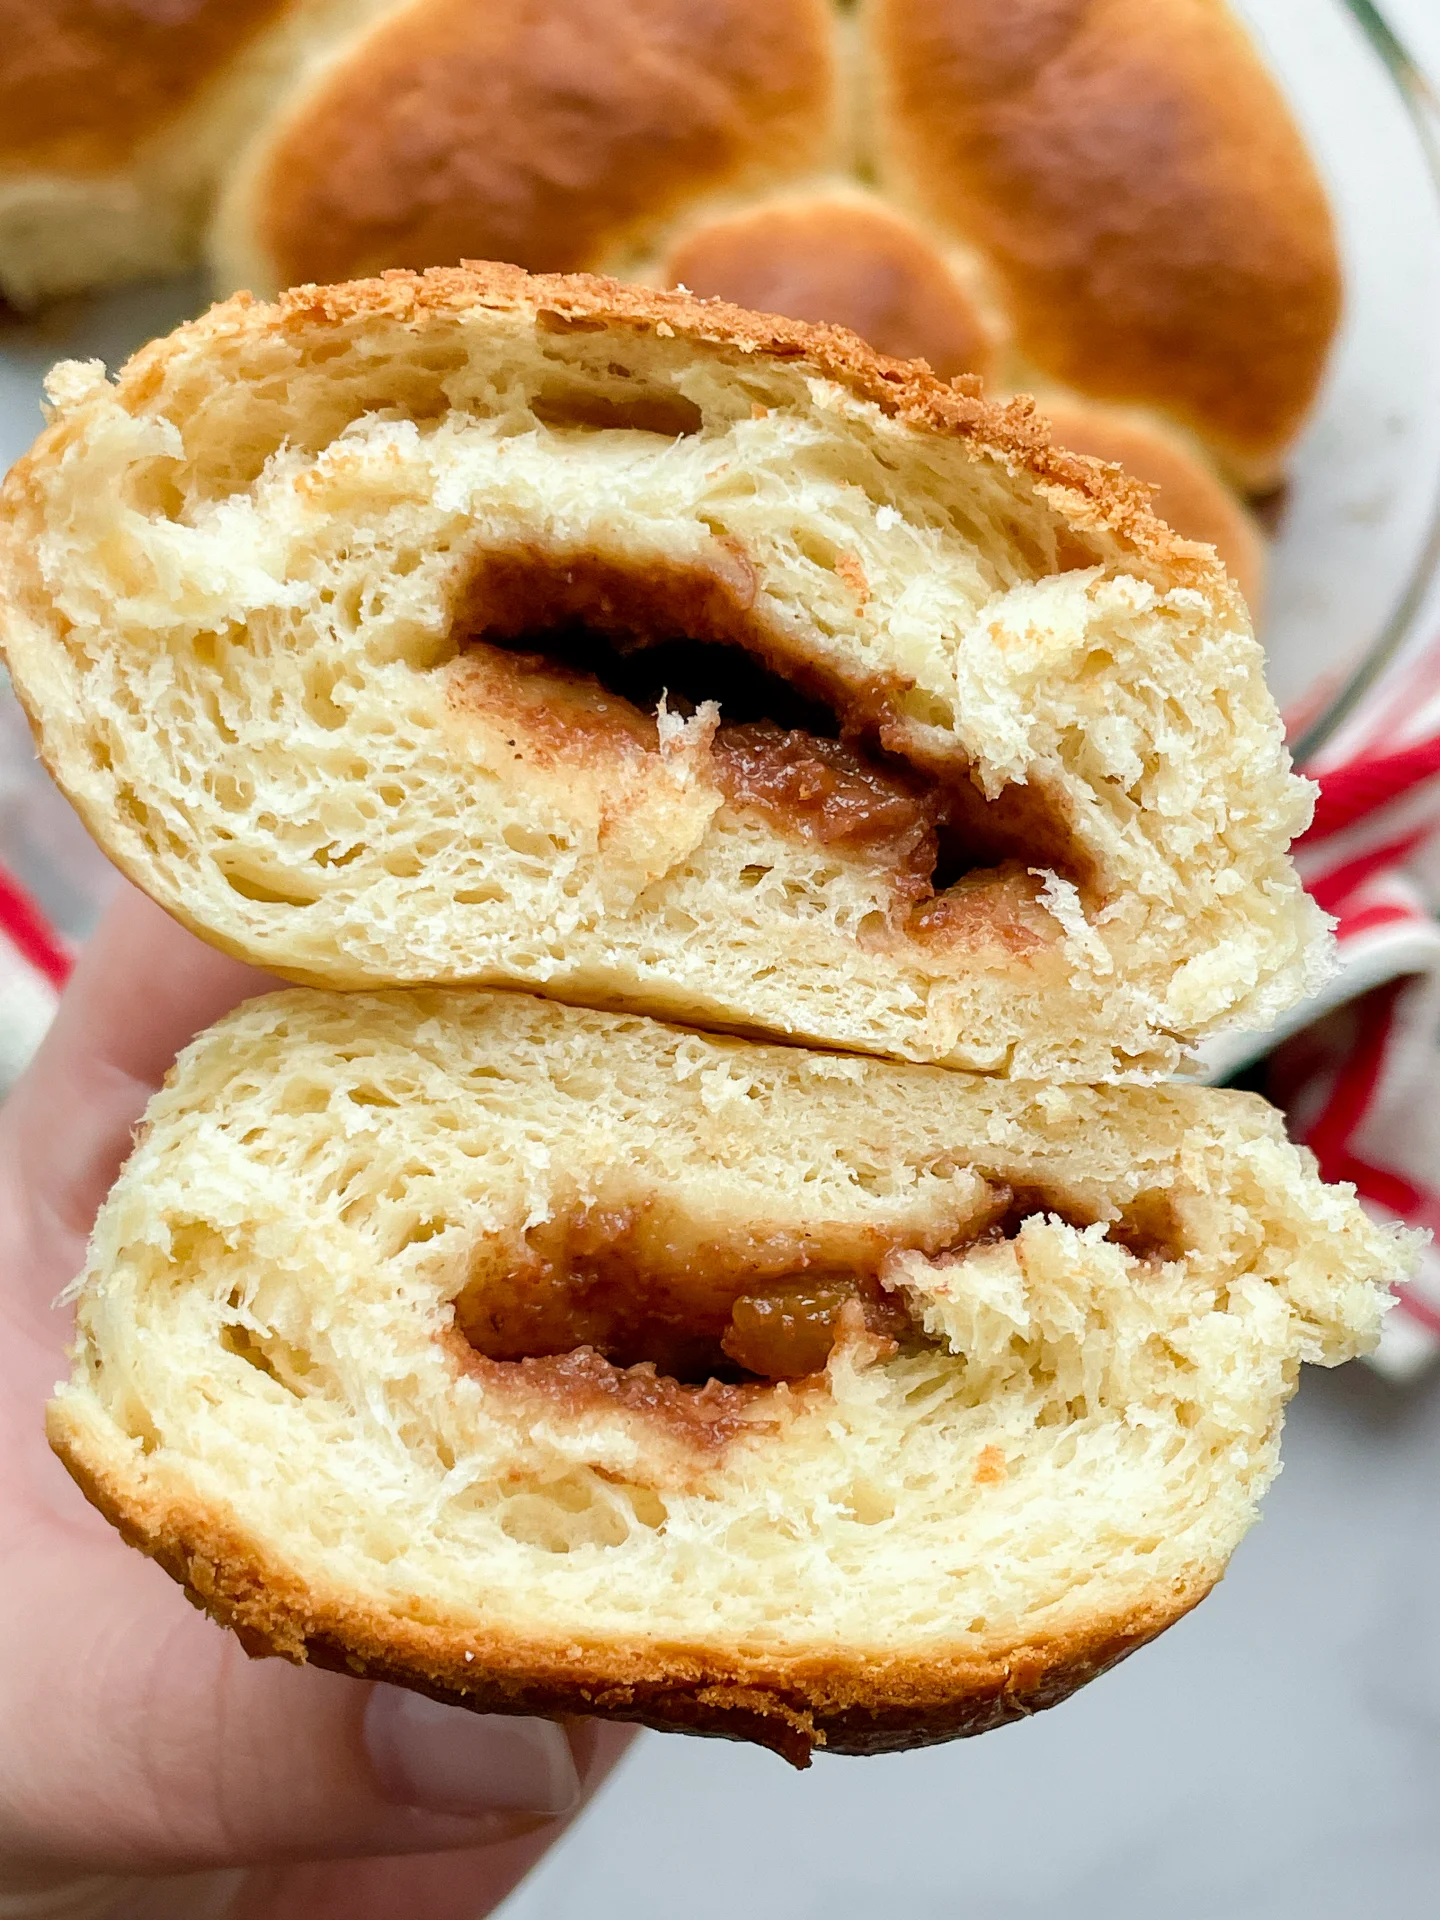
Soft, fluffy buns filled with a creamy spiced mascarpone chocolate magic that tastes like a cozy holiday hug. Perfectly baked for that melt-in-your-mouth festive treat you didn’t know you needed.

2 HOURS

INTERMEDIATE

VEGETARIAN

INT.

348 PER BUN

FLUFFY

BRUNCH

DESSERS & SWEETS

WINTER

INTRODUCTION

ABOUT THE RECIPE

Imagine biting into a soft, cloud-like bun filled with a creamy mix of spiced mascarpone, chocolate, and gingerbread vibes. That’s this recipe – an edible holiday dream! These buns are everything cozy wrapped up in one delicious bite. Whether you’re serving them at a festive brunch or enjoying one with your afternoon coffee, they’re the ultimate way to make your kitchen smell like Christmas and your taste buds very, very happy.

How to serve
Serve these buns warm for the best experience! They’re perfect as they are, but you can glaze them with a spiced sugar syrup or a light gingerbread oil drizzle for an extra festive touch. Pair them with a steaming cup of hot chocolate, a chai latte, or even mulled wine for maximum holiday vibes. Pro tip: Sprinkle a little powdered sugar on top for that snow-dusted look – it’s giving cozy holiday bakery.

How to store
Keep your buns soft and fresh by storing them in an airtight container at room temperature for up to 2 days. To enjoy them later, reheat gently in the oven or microwave for that just-baked taste. You can also freeze them and defrost as needed!

Hi, I'm Kimberly!

Hi, I'm Kimberly.

A passionate food lover who believes in the magic of homemade deliciousness that spreads love and warmth. Join me on this culinary adventure as I prepare wonderful dishes and let’s spread some happiness together!

Kimberly the Zett Signature

If you want to get to know me better, click here!


Milk Buns with Gingerbread Filling
„Let’s make a piece of happiness“
Print
clock clock iconcutlery cutlery iconflag flag iconfolder folder iconinstagram instagram iconpinterest pinterest iconfacebook facebook iconprint print iconsquares squares iconheart heart iconheart solid heart solid icon
Milk Buns with Gingerbread Filling

Milk Buns with Gingerbread Filling


  • Author: Kimberly
  • Total Time: 2 hours
  • Yield: 10-12 1x

Description

Recommended Equipment

  • large mixing bowl
  • medium bowl
  • plastic wrap
  • rolling pin

Ingredients

Units Scale

MILK BUNS

  • 500 grams all-purpose flour (type 550 in Germany)
  • 1 tsp salt
  • 1 egg
  • 50 grams white sugar
  • 7 grams dry active yeast
  • 200 milliliter full-fat cow milk
  • 100 grams butter

GINGERBREAD FILLING

  • 125 grams mascarpone
  • 50 grams milk chocolate
  • 15 grams powdered sugar
  • pinch of salt
  • 1 tsp cinnamon
  • 1/2 tsp clove, ground
  • 1/4 tsp ginger, ground
  • 1/4 tsp allspice, ground
  • 1/8 tsp cardamom, ground
  • 1/8 tsp nutmeg, ground
  • 25 grams candied oranges
  • 25 grams hazelnuts, chopped & roasted

GLAZE

  • 2 tbsp butter
  • 2 tbsp heavy cream

Instructions

  1. For the yeast dough, heat milk, butter until melted in a small saucepan to 35°C (95°F). Add 1 tsp of the sugar and the yeast and stir until dissolved. Let sit for about 3-4 minutes until bubbles form.
  2. Meanwhile, in a large mixing bowl, whisk together the egg, sugar, and salt. Add the yeast-butter-milk mixture and the flour, then knead into a smooth dough. Cover the bowl with plastic wrap and let it rest for about 40 minutes, until the dough has doubled in size.
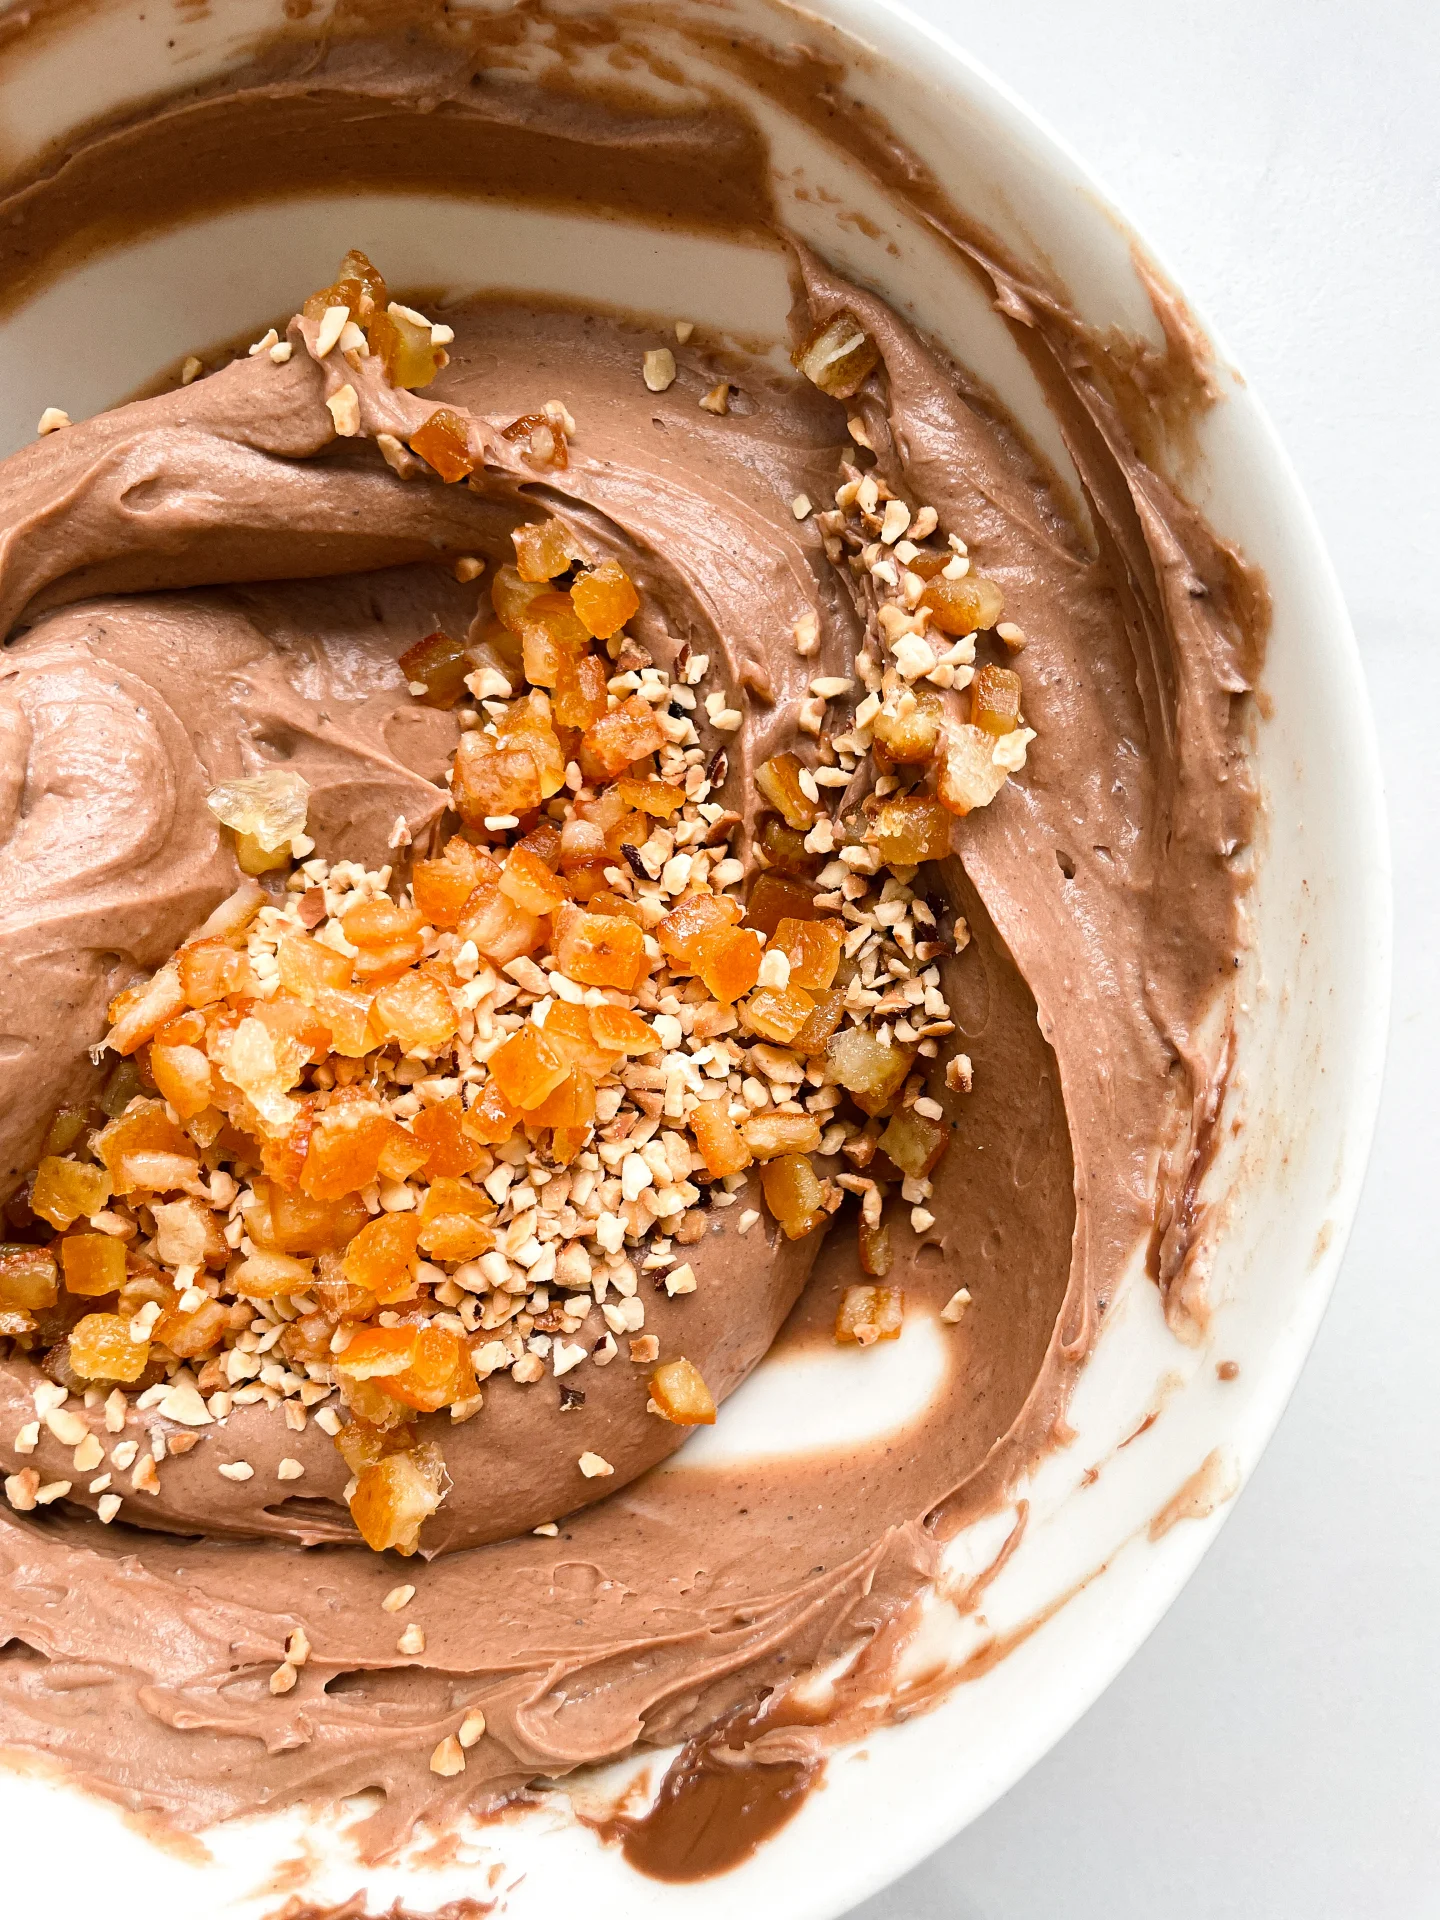
  3. In the meantime, prepare the gingerbread cream. In a bowl, mix mascarpone, powdered sugar, cinnamon, cardamom, cloves, allspice, nutmeg, and ginger. Melt the chocolate and stir it into the mascarpone mixture. Finally, fold in chopped hazelnuts and candied orange pieces, mix well, and set aside.
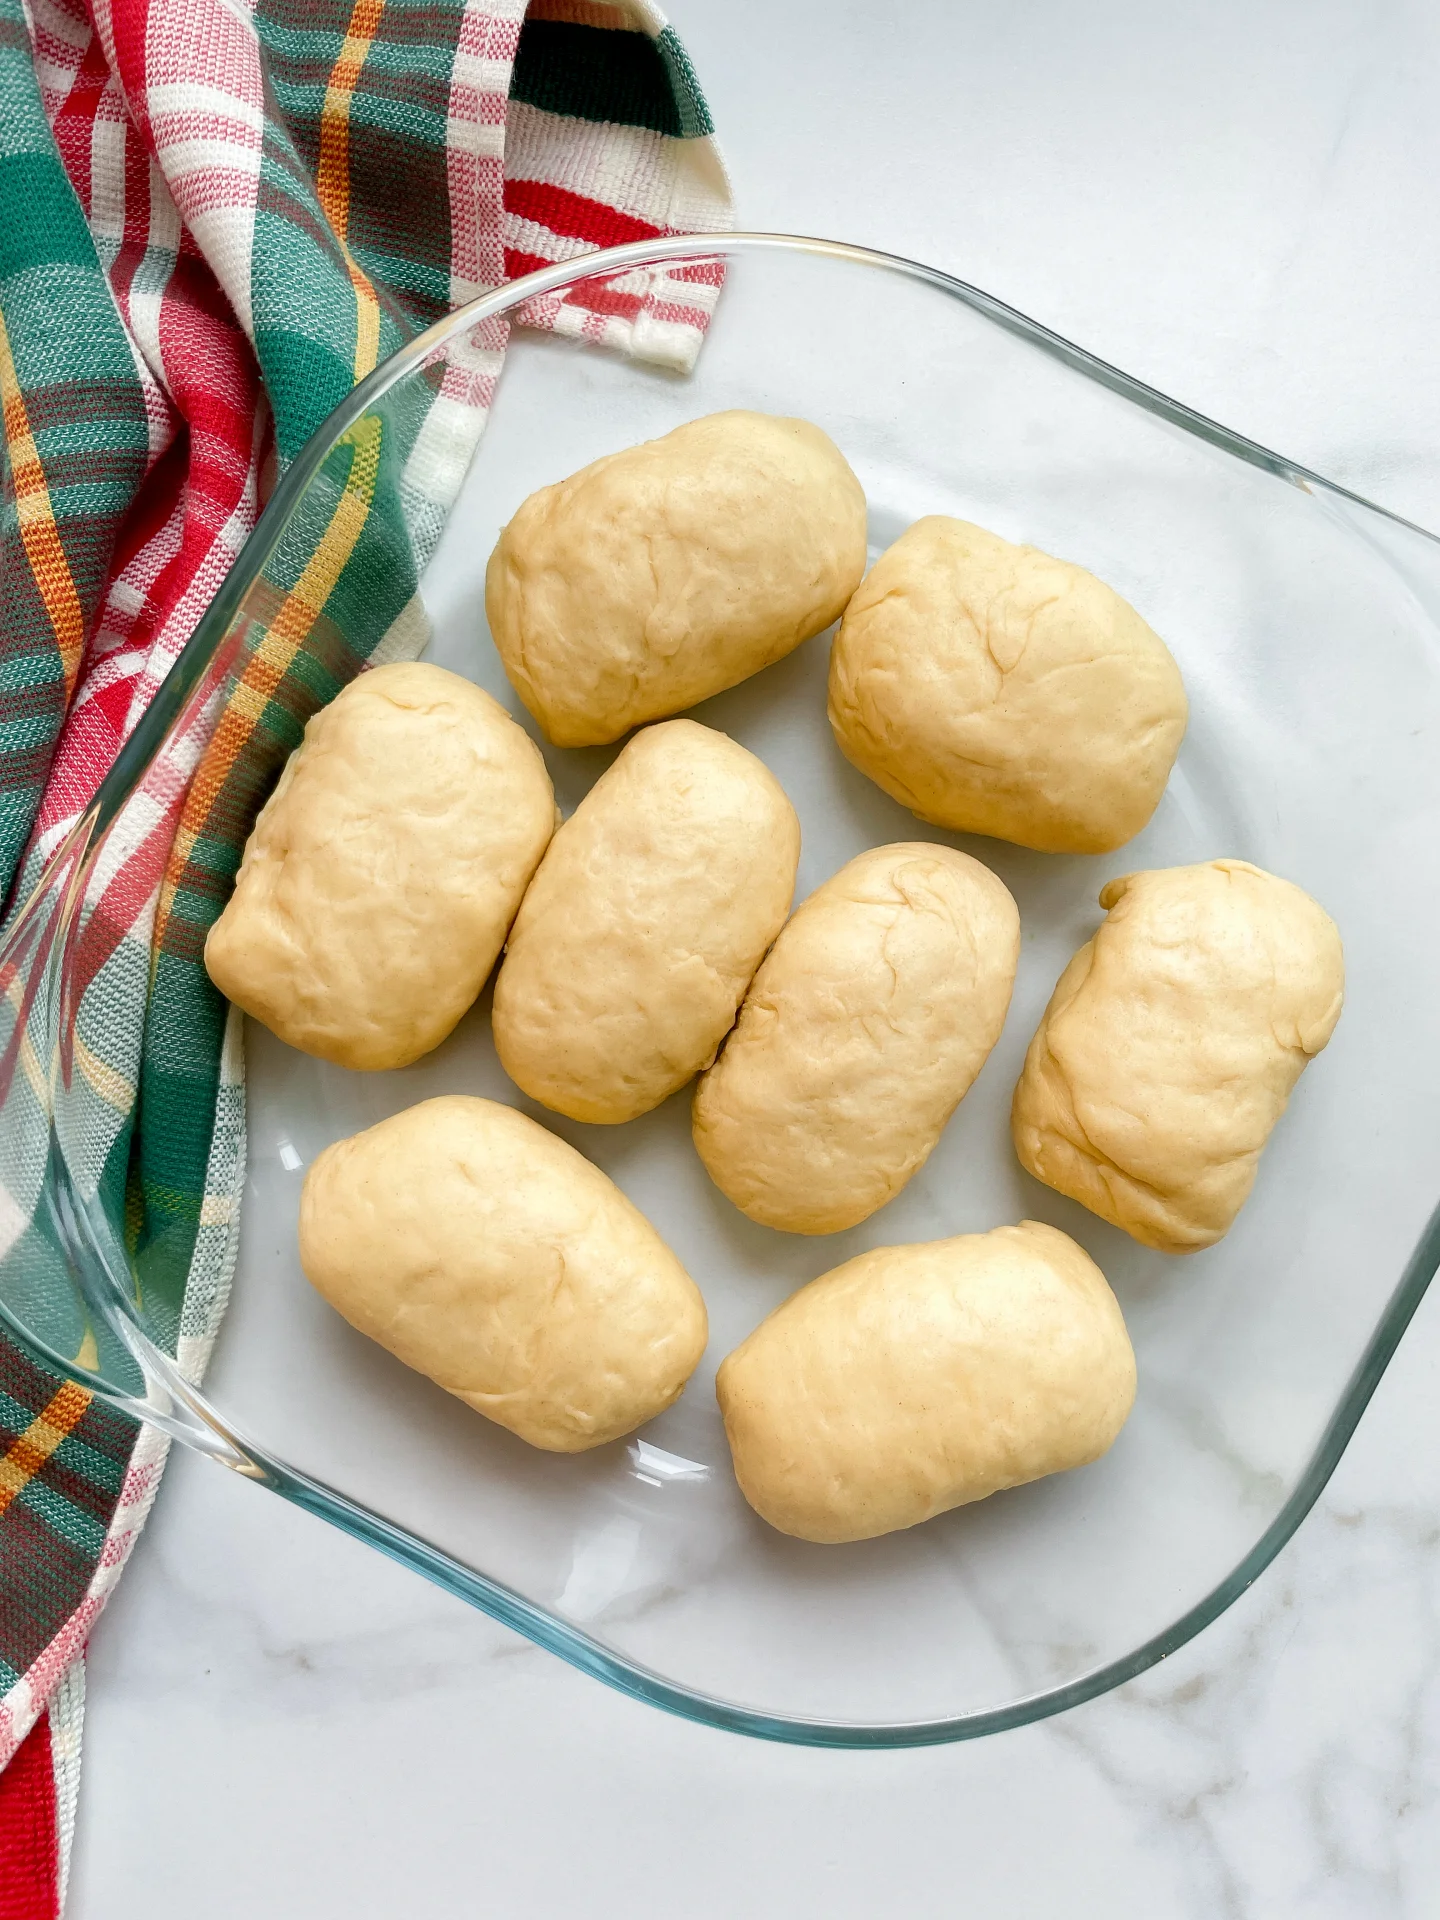
  4. Once the dough has doubled in size, transfer it to a lightly floured surface. Knead it briefly and shape it into a long roll. Divide the roll into 10-12 equal pieces. Flatten each piece and spread 1 tablespoon of gingerbread cream on top, leaving a 1 cm border. Roll them up from the bottom. Pinch the ends tightly to prevent the filling from leaking while baking.
  5. Place the rolls into a baking dish, cover again with plastic wrap, and let them rise for another 40 minutes.
  6. Preheat the oven to 190°C (375°F) during the second rise.
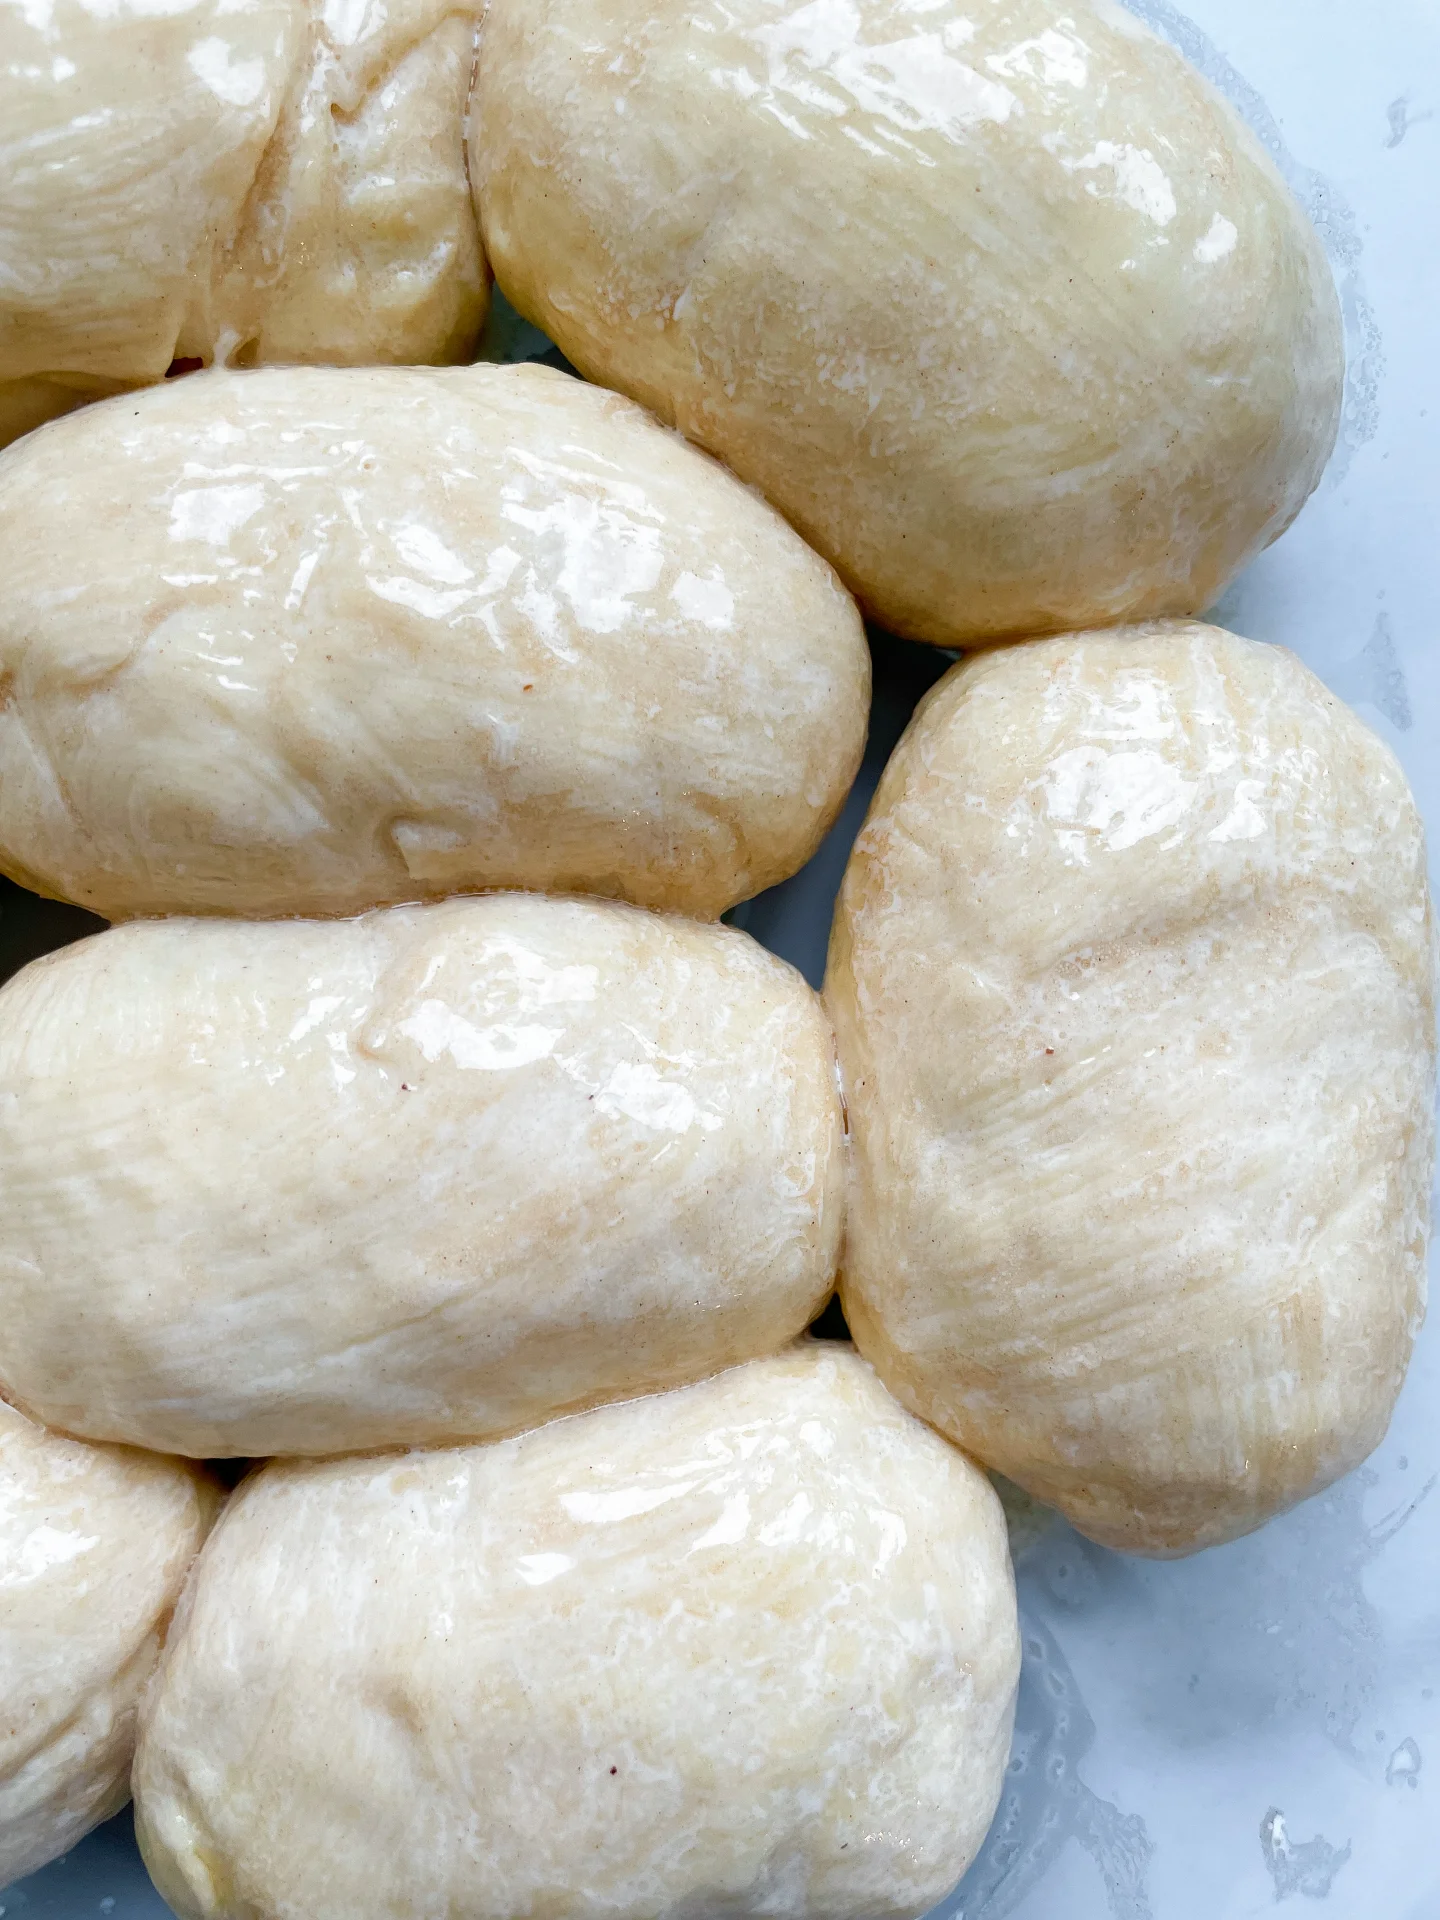
  7. Just before baking, brush the rolls with a mixture of cream and melted butter.
  8. Bake the rolls for about 20-25 minutes until golden brown.
  • Passive Time: 100 min
  • Cook Time: 20 min

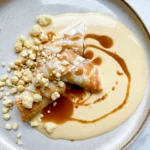
Apple Pie Rolls with Vanilla & Caramel Sauce & Milk Crumble

Apple Pie Rolls with Vanilla & Caramel Sauce & Milk Crumble

Apple Pie Rolls with Vanilla & Caramel Sauce & Milk Crumble

Apple Pie Rolls with Vanilla & Caramel Sauce & Milk Crumble

December 14, 2024 by Kimberly

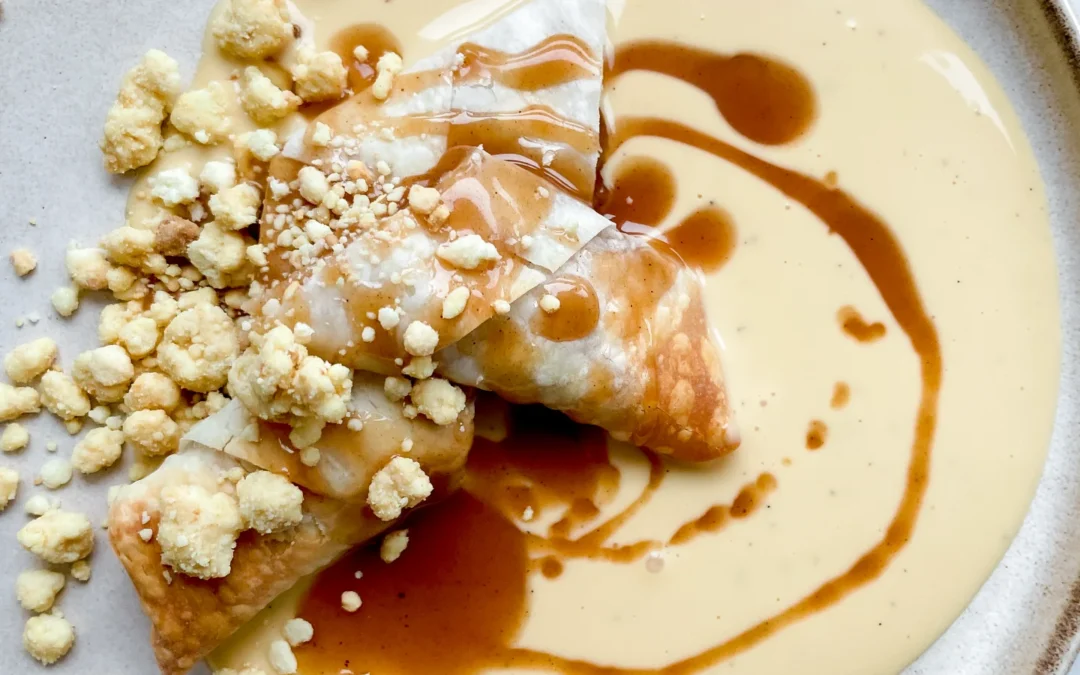
Golden rolls packed with spiced apples, drizzled with caramel, and topped with crunchy milk crumble – this dessert is a little masterpiece that’ll make your kitchen smell like pure magic.

75 MINUTES

INTERMEDIATE

VEGETARIAN

INT.

340 PER PORTION

COMFORT FOOD

DINNER PARTY

DESSERT

WINTER

INTRODUCTION

ABOUT THE RECIPE

These crispy golden rolls, filled with spiced apples and topped with caramel & vanilla sauce and milk crumble, are everything you love about desserts. They’re the perfect blend of sweet, buttery, and crunchy, delivering big seasonal vibes in every bite. Whether you’re making them for a dinner party or just for yourself, this dessert promises to steal the show and leave everyone asking for seconds.

How to serve
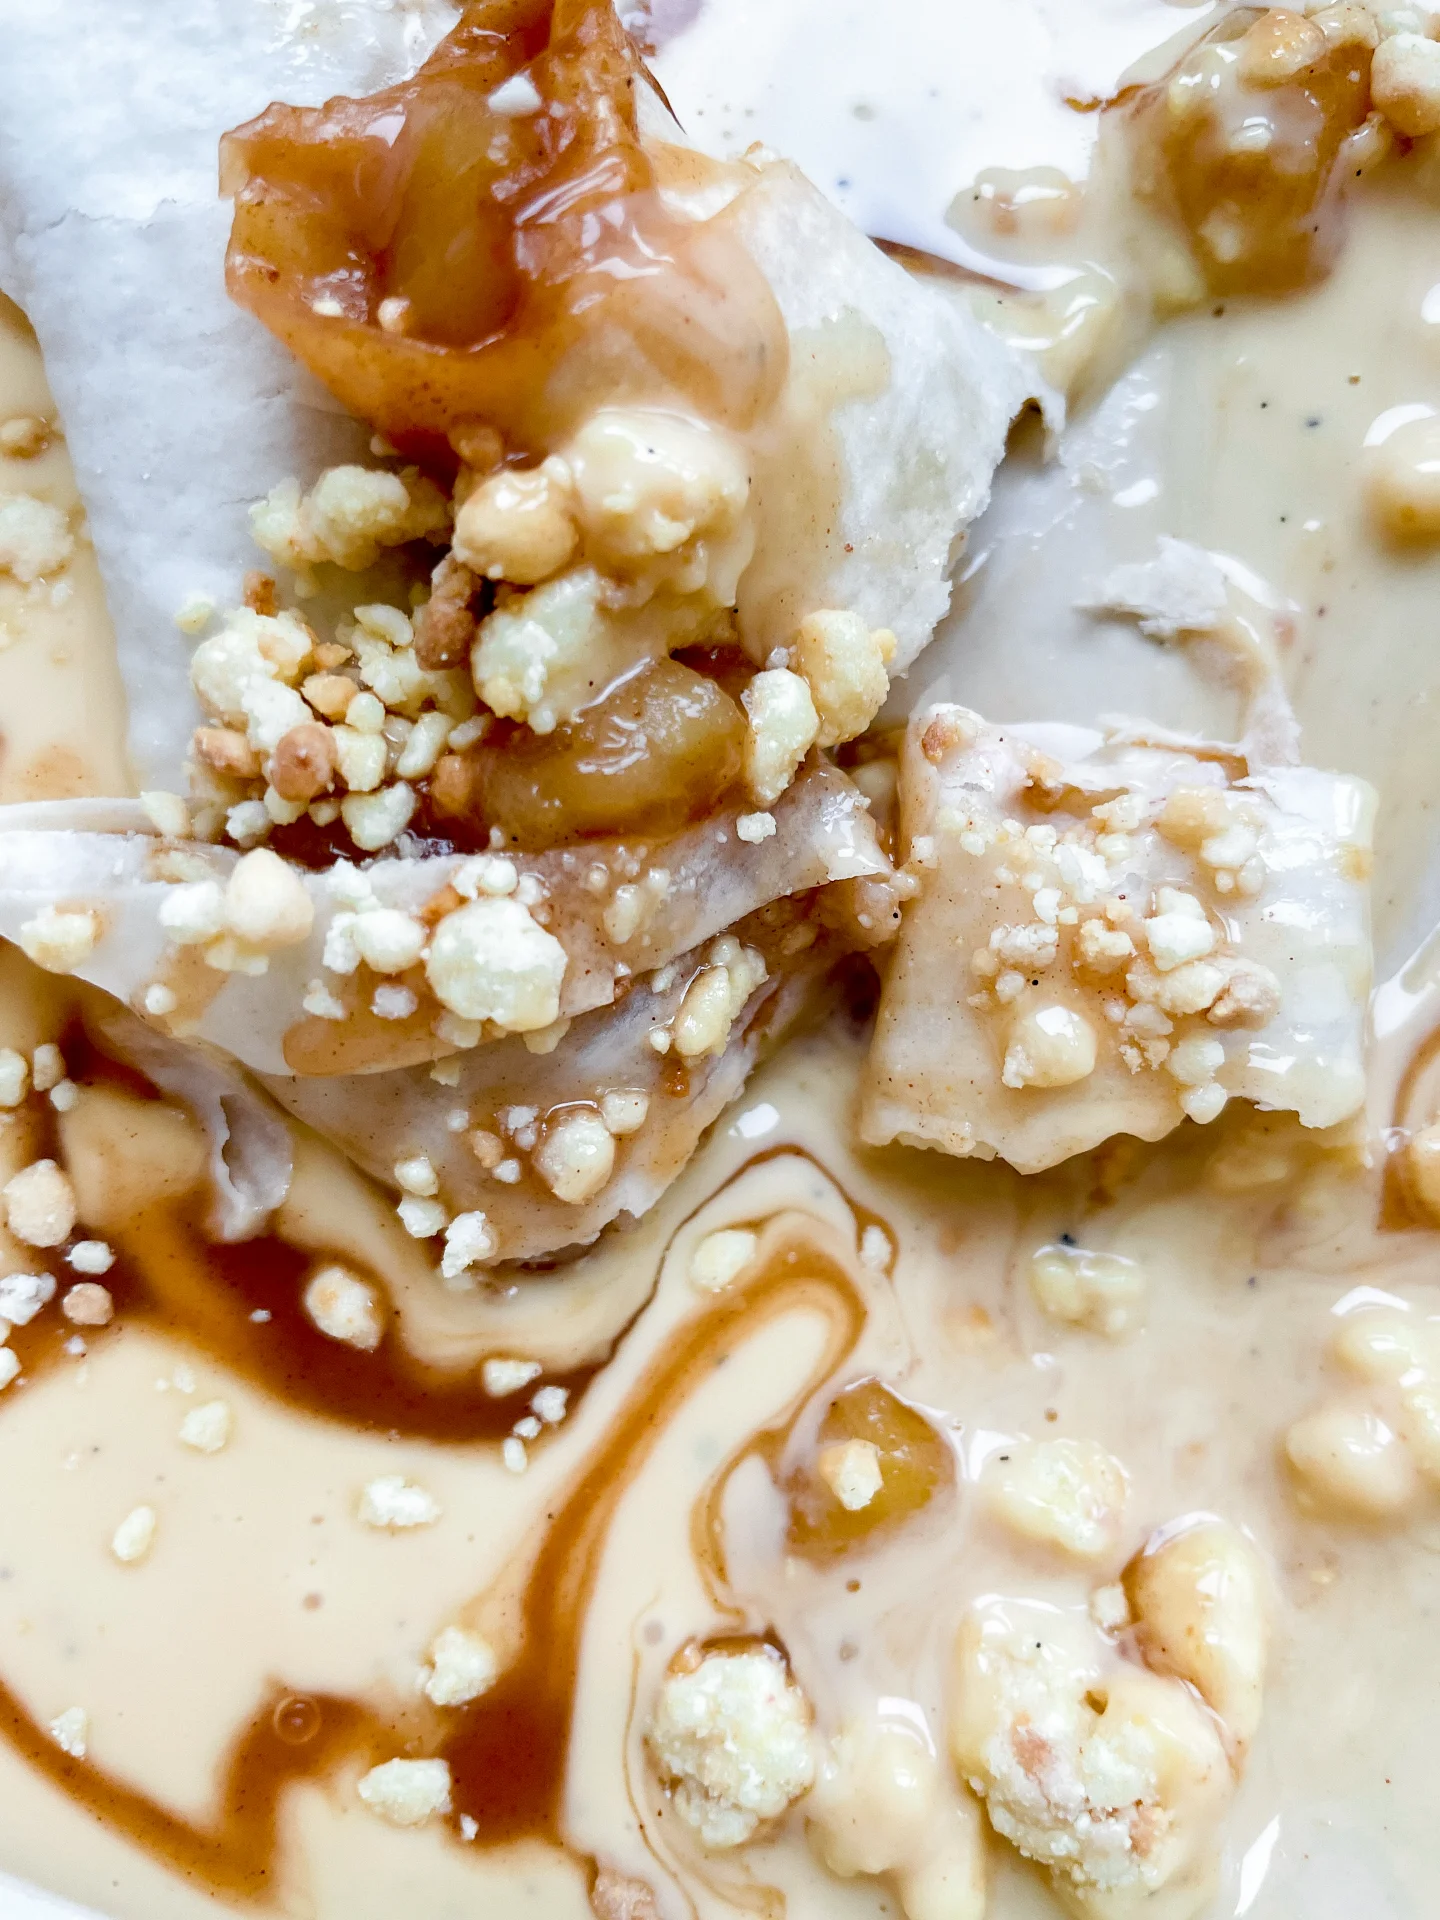
Lay the rolls on a warm puddle of vanilla sauce, drizzle generously with caramel, and finish with a sprinkle of milk crumble for that perfect texture. Serve them while they’re still warm to keep the filo dough crisp and the apple filling gooey.

How to store
Store leftover rolls in an airtight container in the fridge for up to 3 days. Reheat them in the oven at 180°C (350°F) for about 10 minutes to bring back their crisp texture.

Hi, I'm Kimberly!

Hi, I'm Kimberly.

A passionate food lover who believes in the magic of homemade deliciousness that spreads love and warmth. Join me on this culinary adventure as I prepare wonderful dishes and let’s spread some happiness together!

Kimberly the Zett Signature

If you want to get to know me better, click here!


Apple Pie Rolls with Vanilla & Caramel Sauce & Milk Crumble
„Let’s make a piece of happiness“
Print
clock clock iconcutlery cutlery iconflag flag iconfolder folder iconinstagram instagram iconpinterest pinterest iconfacebook facebook iconprint print iconsquares squares iconheart heart iconheart solid heart solid icon
Apple Pie Rolls with Vanilla & Caramel Sauce & Milk Crumble

Apple Pie Rolls with Vanilla & Caramel Sauce & Milk Crumble


  • Author: Kimberly
  • Total Time: 75 min
  • Yield: 4-6 1x

Description

Recommended Equipment

  • sharp knife
  • cutting board
  • two small pots
  • two small bowls
  • oven

Ingredients

Units Scale

APPLE PIE ROLLS

  • 8 filo pastry sheets
  • 1 apple
  • 150 milliliter apple juice
  • 2 tsp cornstarch
  • 15 grams white sugar
  • 1 tsp vanilla extract
  • 1 tsp lemon juice
  • 1/2 tsp cinnamon
  • 1/8 tsp nutmeg
  • pinch of salt

CARAMEL CINNAMON SAUCE

  • 75g white sugar
  • 2 tbsp water
  • 20 grams butter
  • 75 grams heavy cream
  • 1/2 tsp cinnamon
  • 1/4 tsp vanilla extract
  • pinch of salt

VANILLA SAUCE

  • 150 grams heavy cream
  • 150 milliliter full-fat milk
  • 3 egg yolks
  • 1 vanilla bean
  • 50 grams brown sugar
  • pinch of salt

MILK CRUMBLE

  • 30 grams full-fat milk powder
  • 50 grams all-purpose flour
  • 30 grams powdered sugar
  • 1/8 tsp salt
  • 25 grams butter
  • 45 grams white chocolate

Instructions

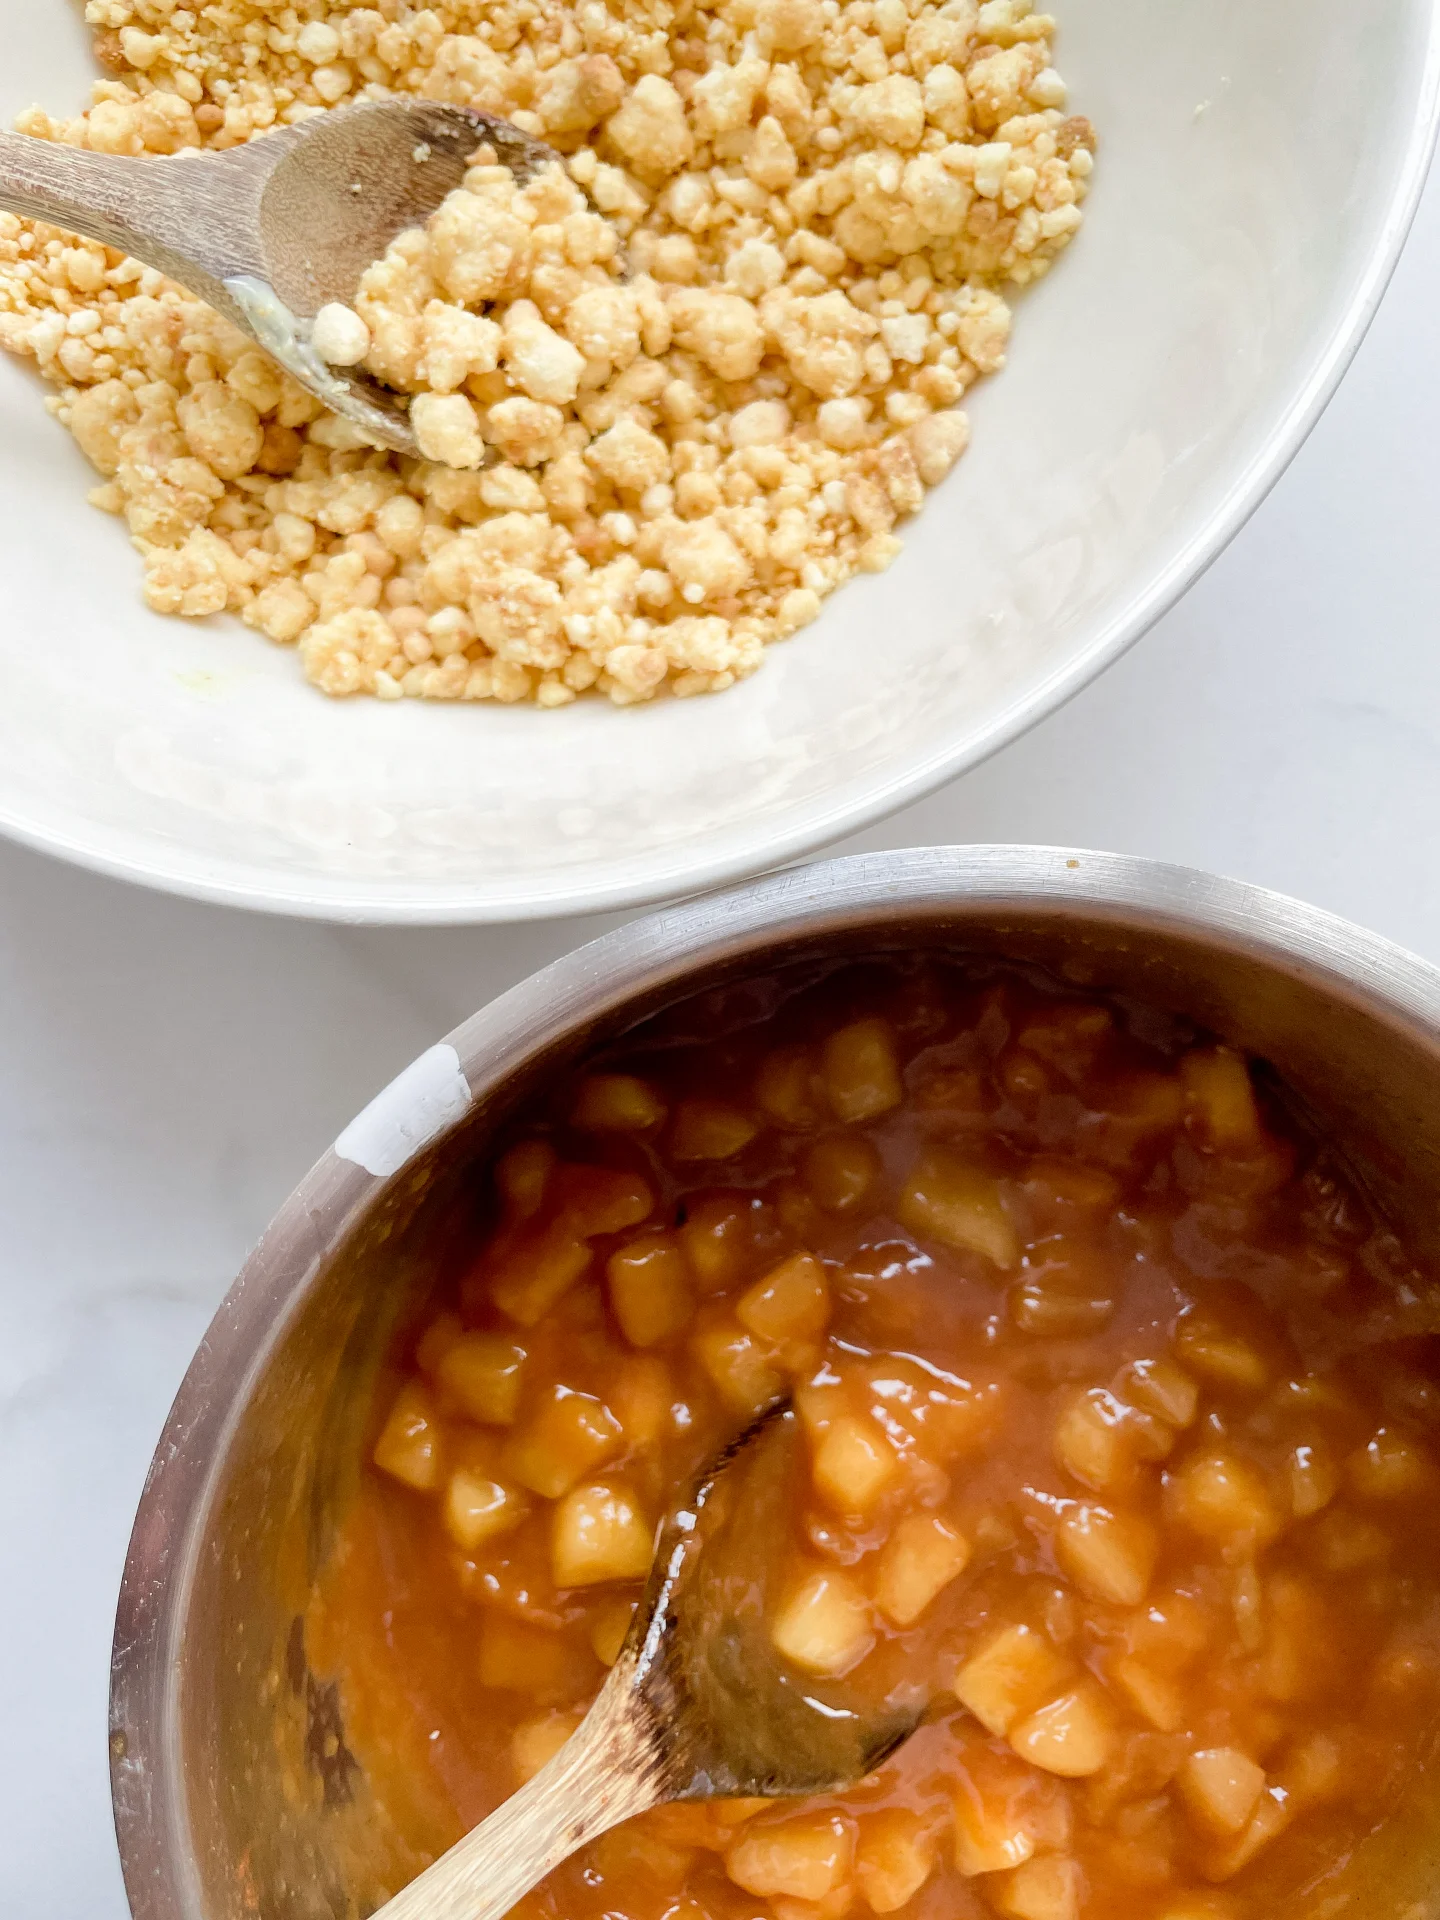
  1. For the apple filling, dice the apples and add them to a pot with apple juice, sugar, cinnamon, nutmeg, salt, vanilla extract, and lemon juice. Simmer over medium heat for about 10 minutes until the apples are soft. Mix cornstarch with 2 tbsp of cold water, then stir it into the apple mixture. Bring to a quick boil until it thickens, then remove from heat and let cool.
  2. For the caramel-cinnamon sauce, heat sugar and water in a pot until it reaches 170°C (340°F) and turns a light golden caramel (about 10–15 minutes). Remove from heat and carefully stir in butter and cream – it may clump, but just keep stirring. Add a pinch of salt, vanilla extract, and cinnamon, mix well, and let it cool.
  3. For the milk crumble, combine milk powder, flour, powdered sugar, and salt in a bowl. Add melted butter and mix with your hands until crumbly. Spread the mixture onto a baking sheet and bake at 140°C (285°F) for about 10 minutes. While it bakes, melt the white chocolate. Once the crumble is baked, transfer it to a bowl, drizzle the melted chocolate over it, and stir until it forms larger clusters. Set aside.
  4. Next, prepare the vanilla sauce. You can find the recipe here.
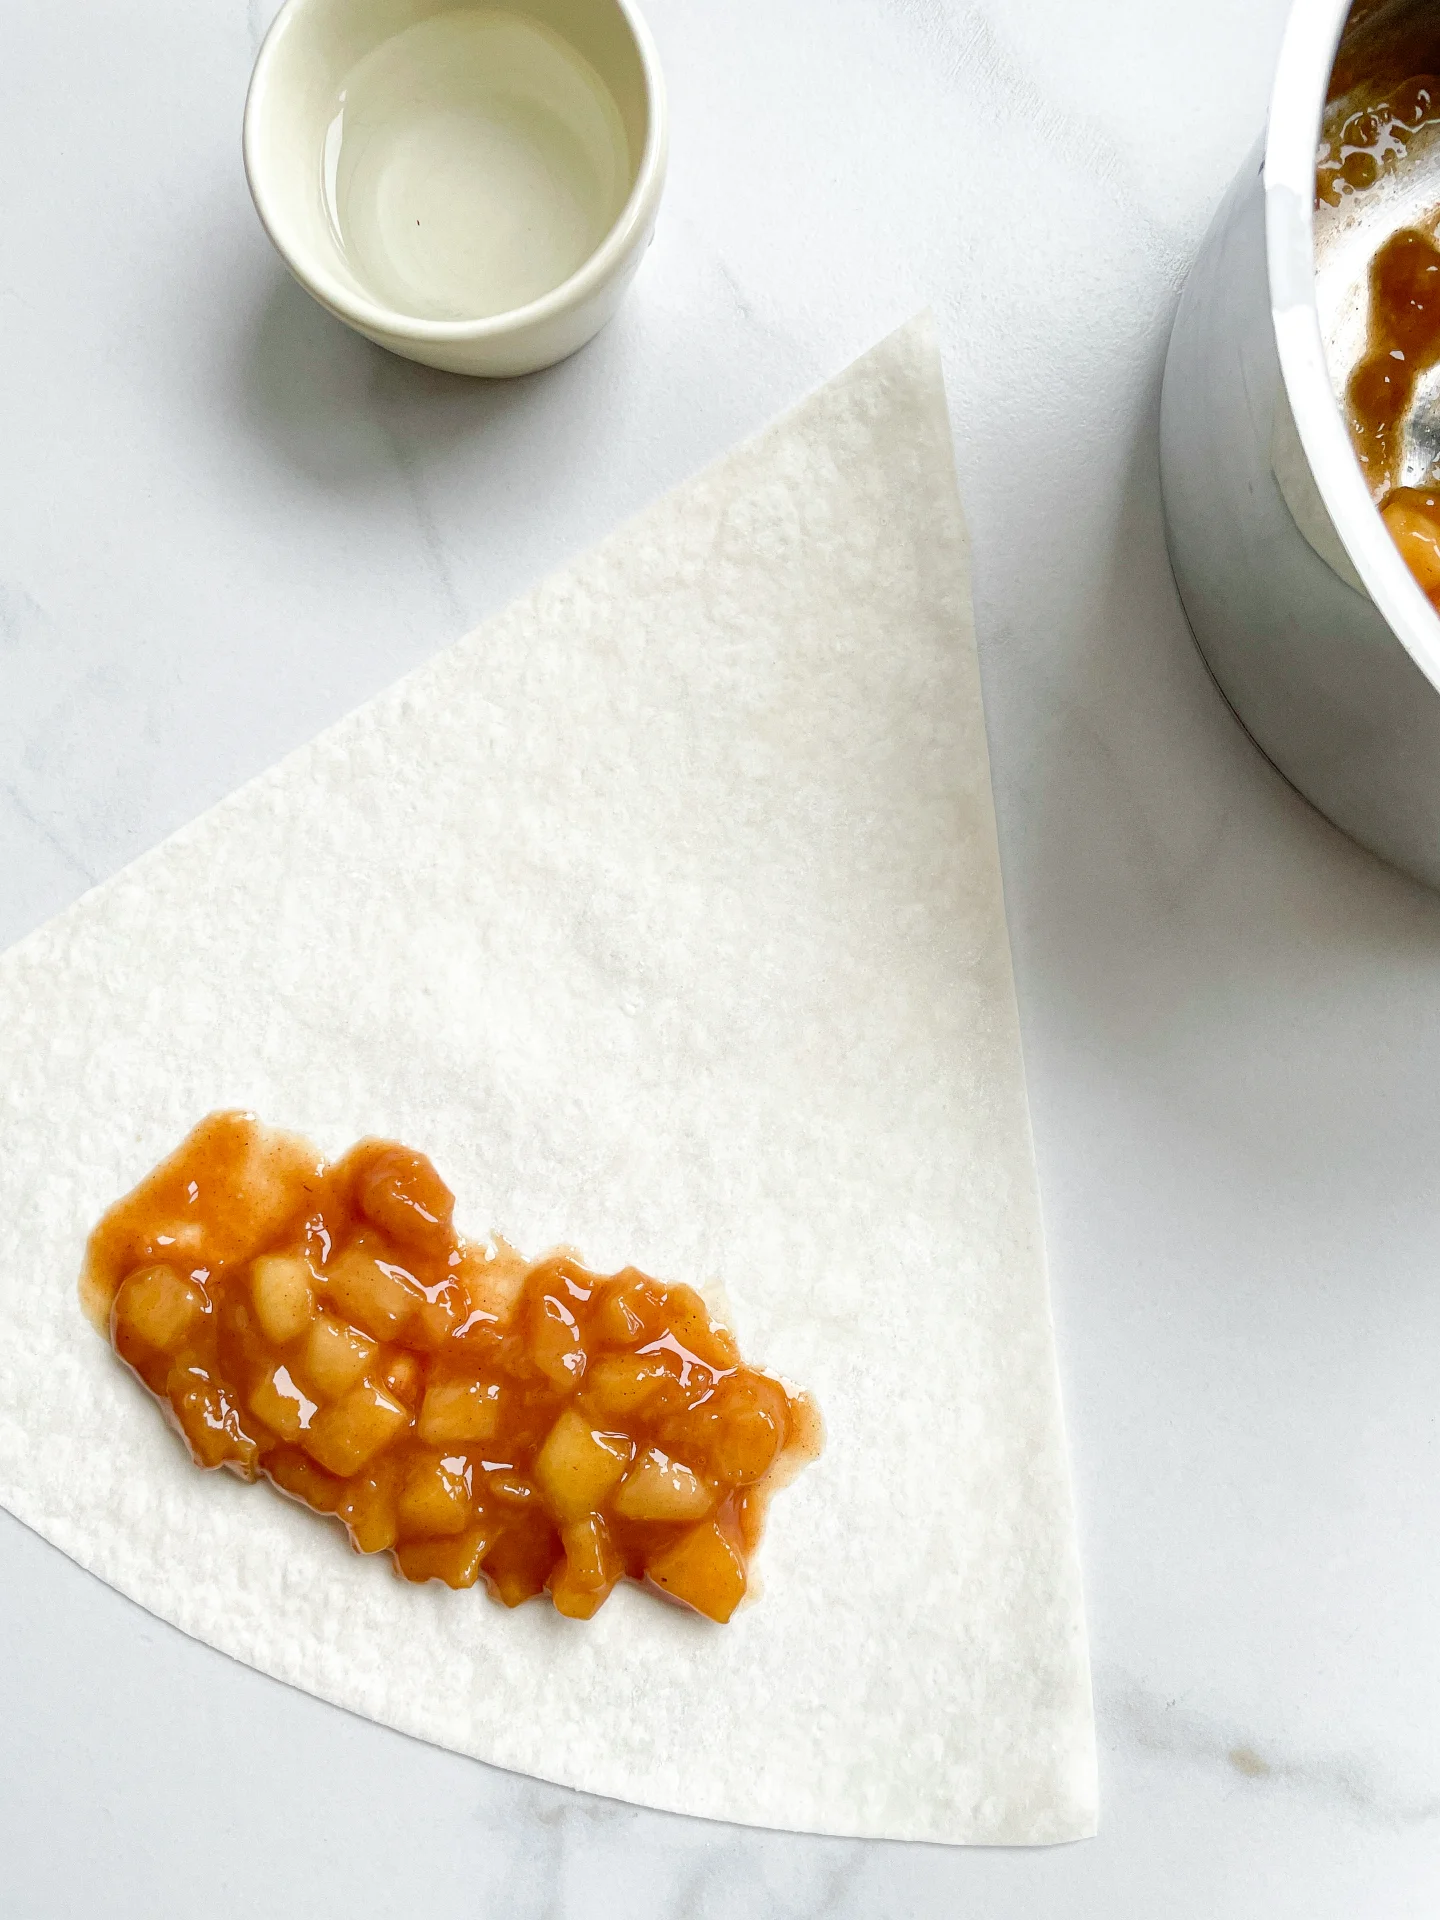
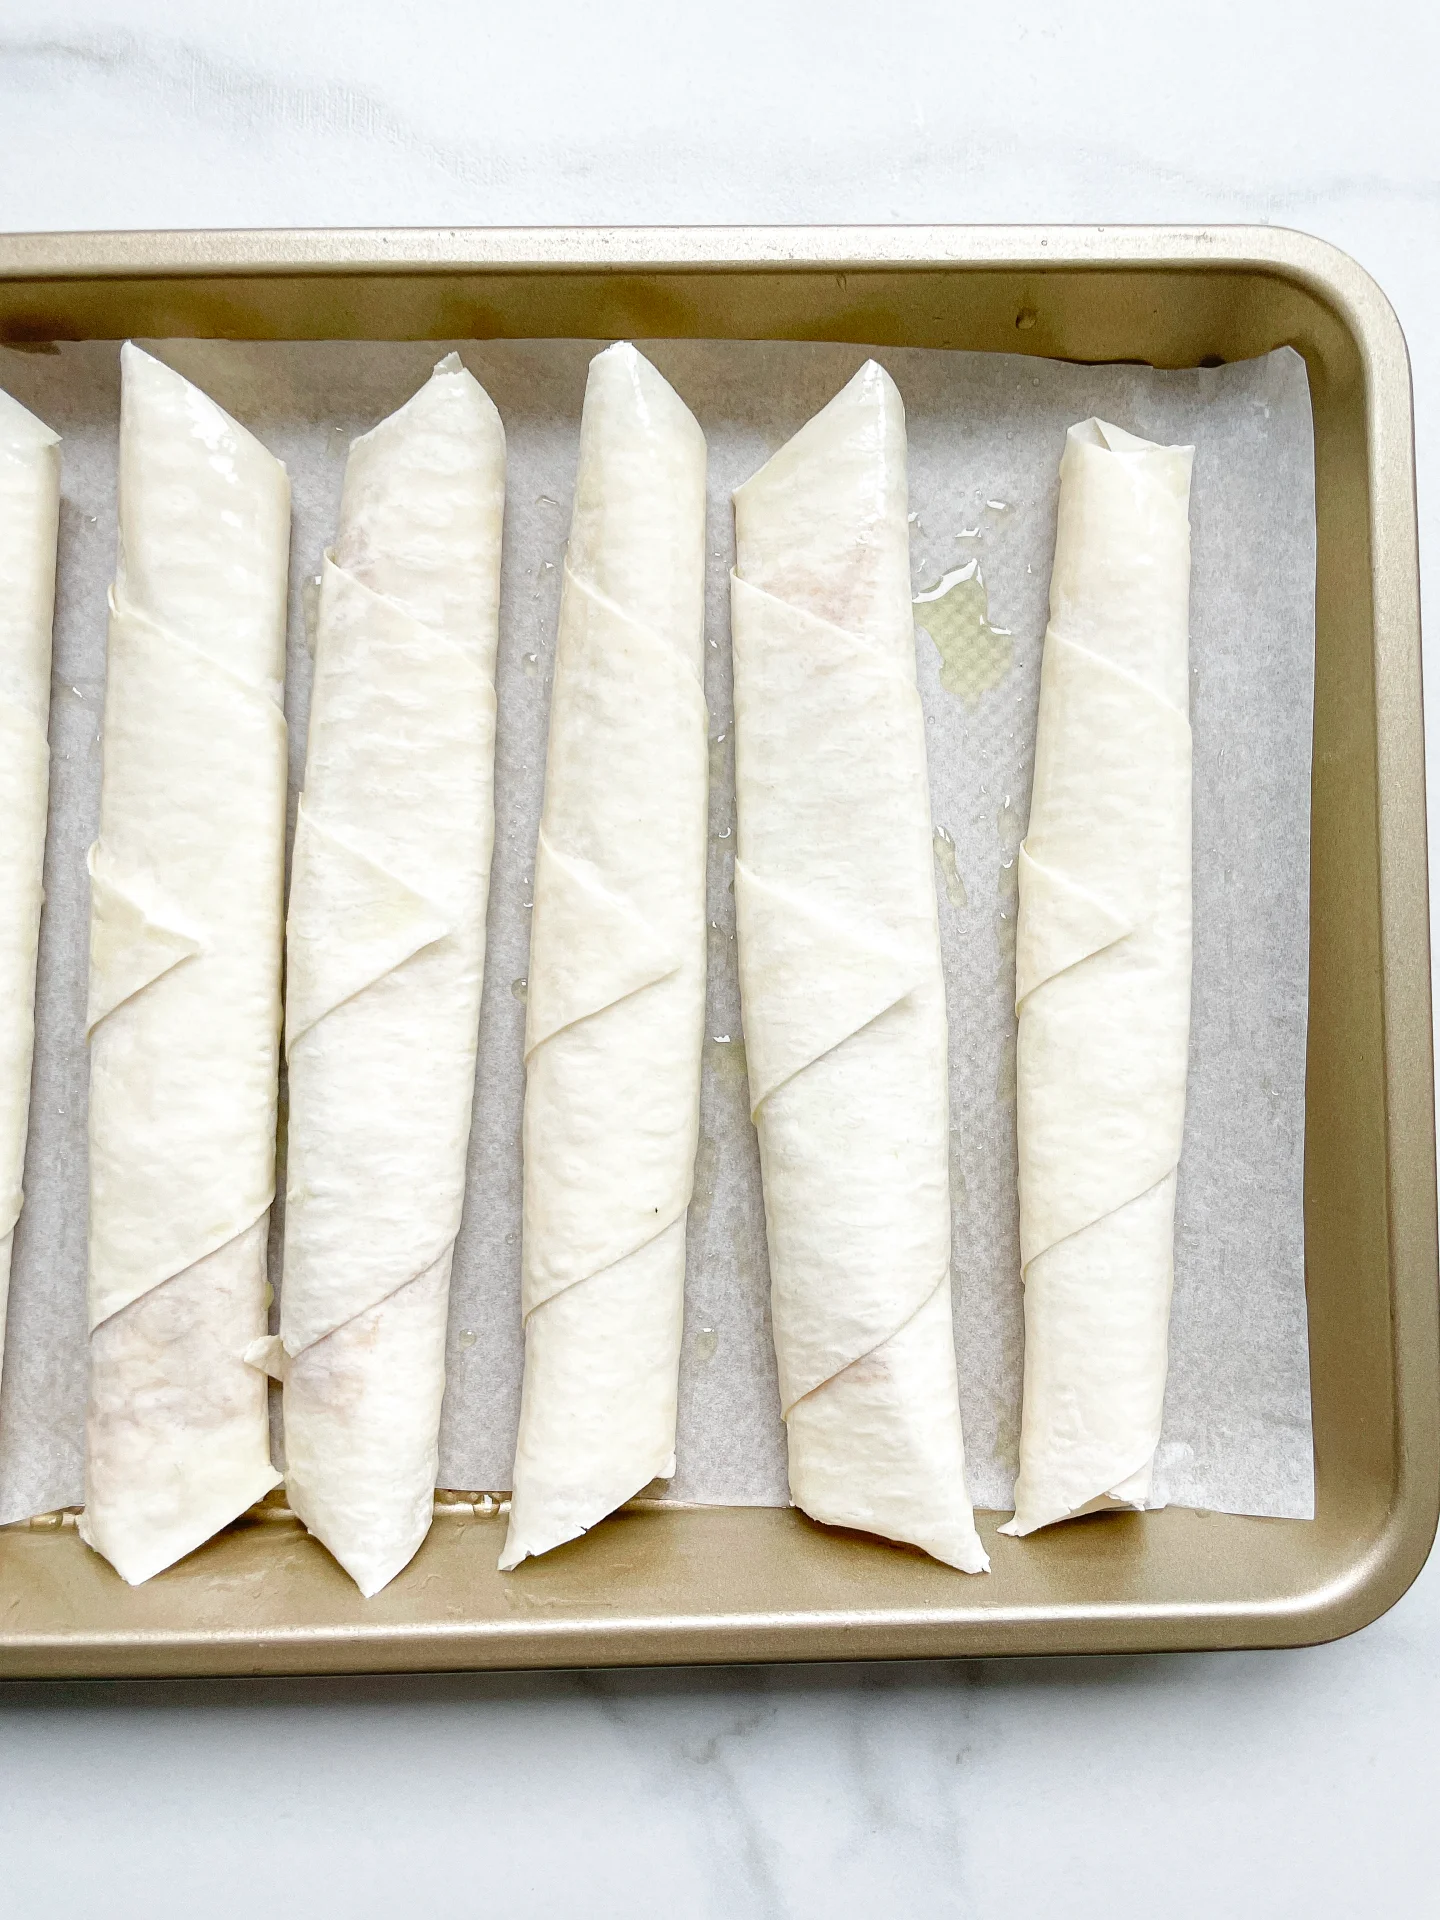
  5. For the filo rolls, place a heaping tablespoon of the apple filling on each sheet of filo dough. Fold in the sides, roll them up, and seal the ends with a bit of water. Arrange the rolls on a baking sheet lined with parchment paper, brush them with melted butter, and bake at 180°C (355°F) for about 15 minutes until golden brown.
  6. To serve, pour the vanilla sauce onto plates or bowls, cut the filo rolls into three pieces each, and arrange them on top of the sauce. Drizzle with the caramel-cinnamon sauce and finish with milk crumbles. Enjoy!
  • Passive Time: 15 min
  • Cook Time: 60 min

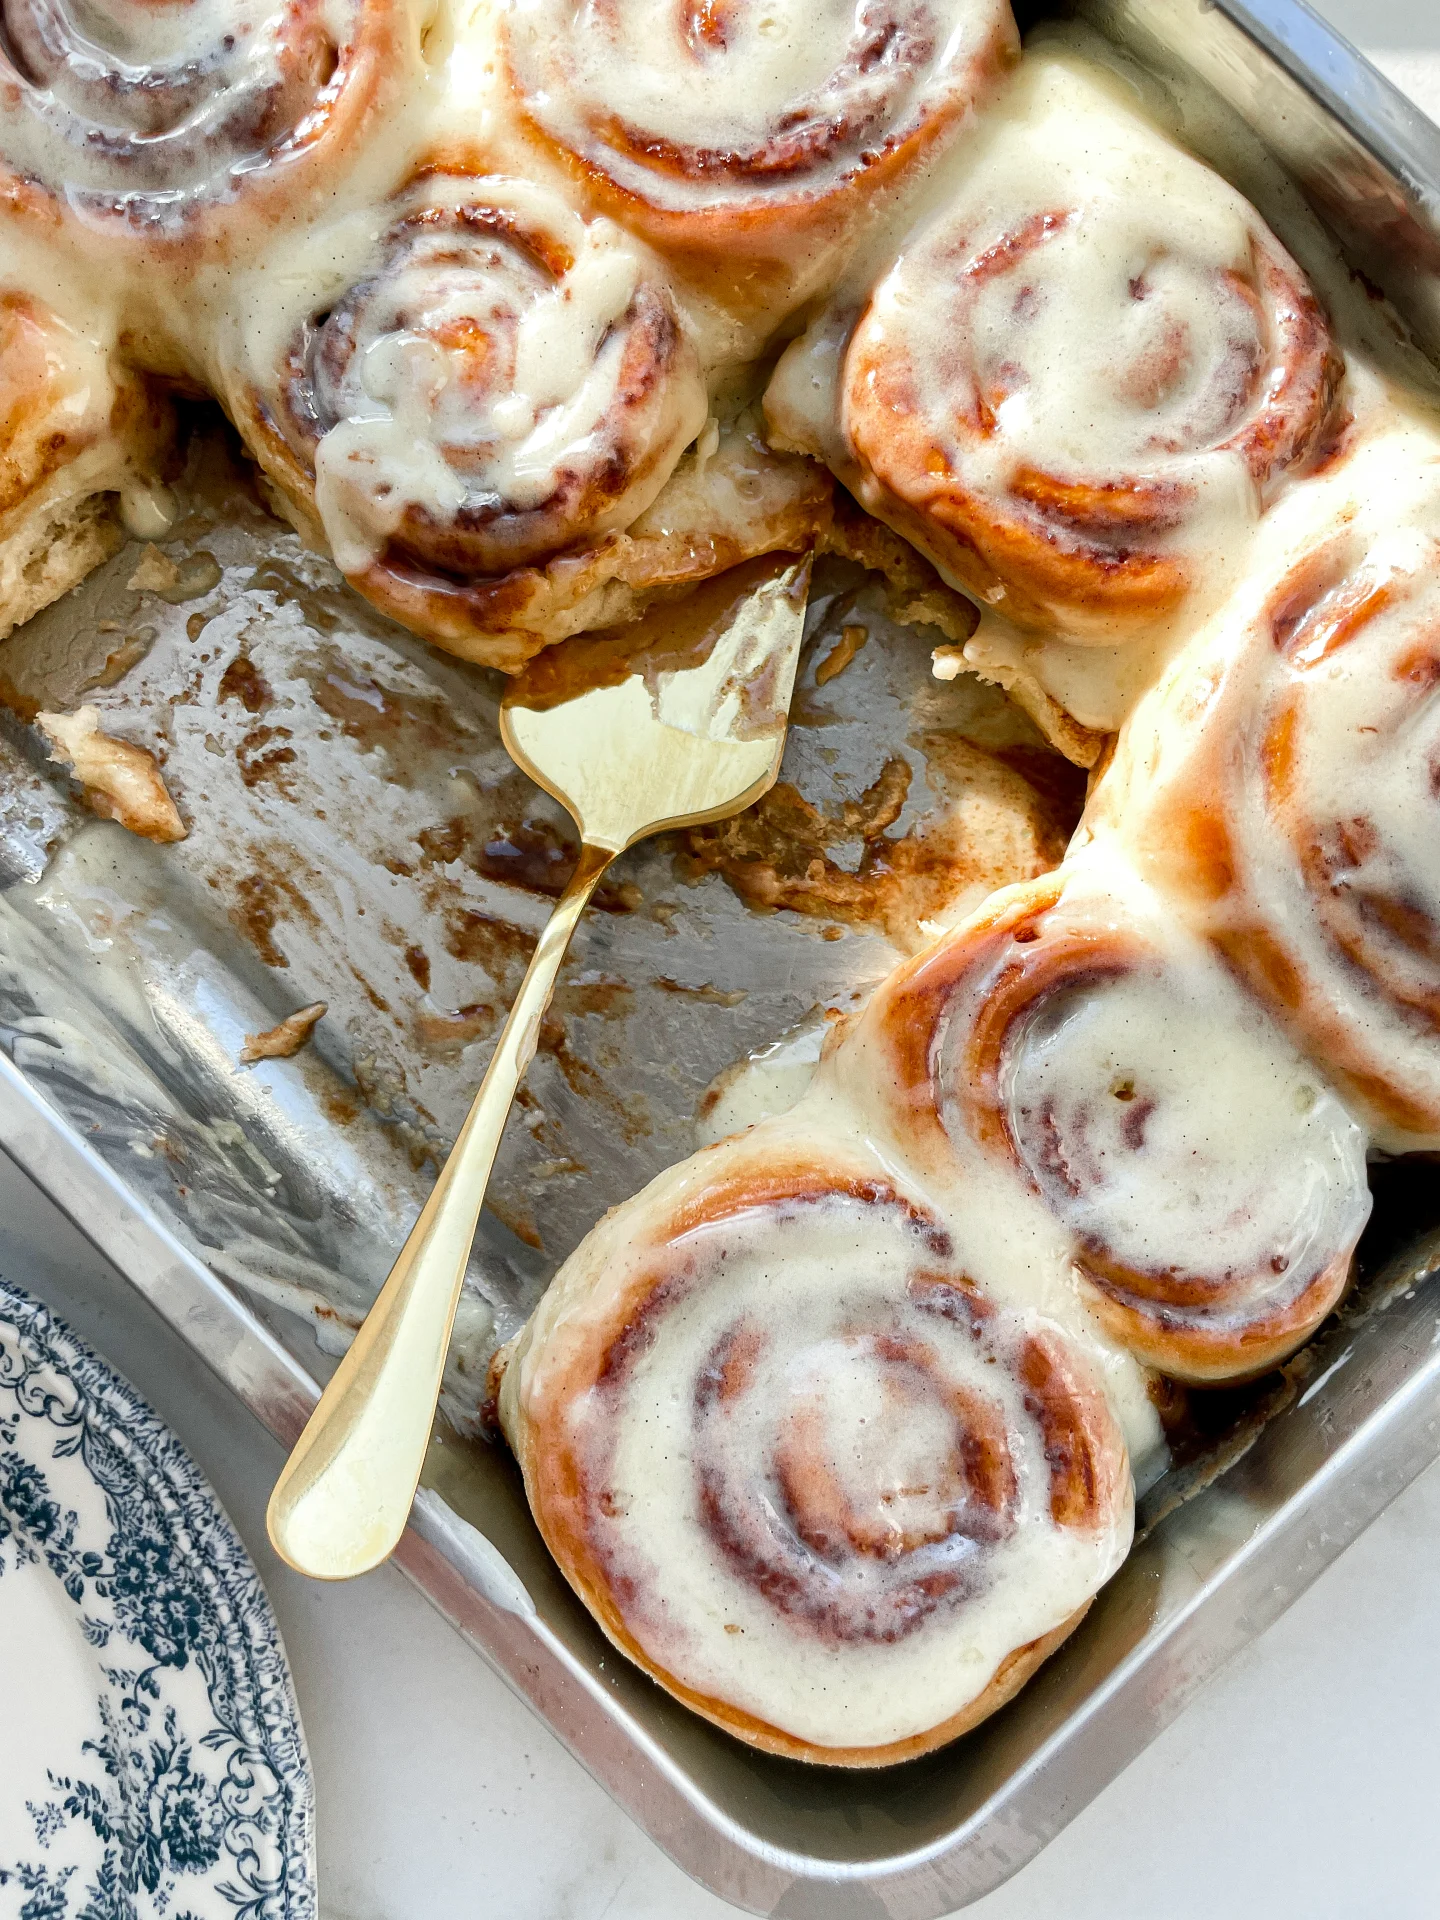
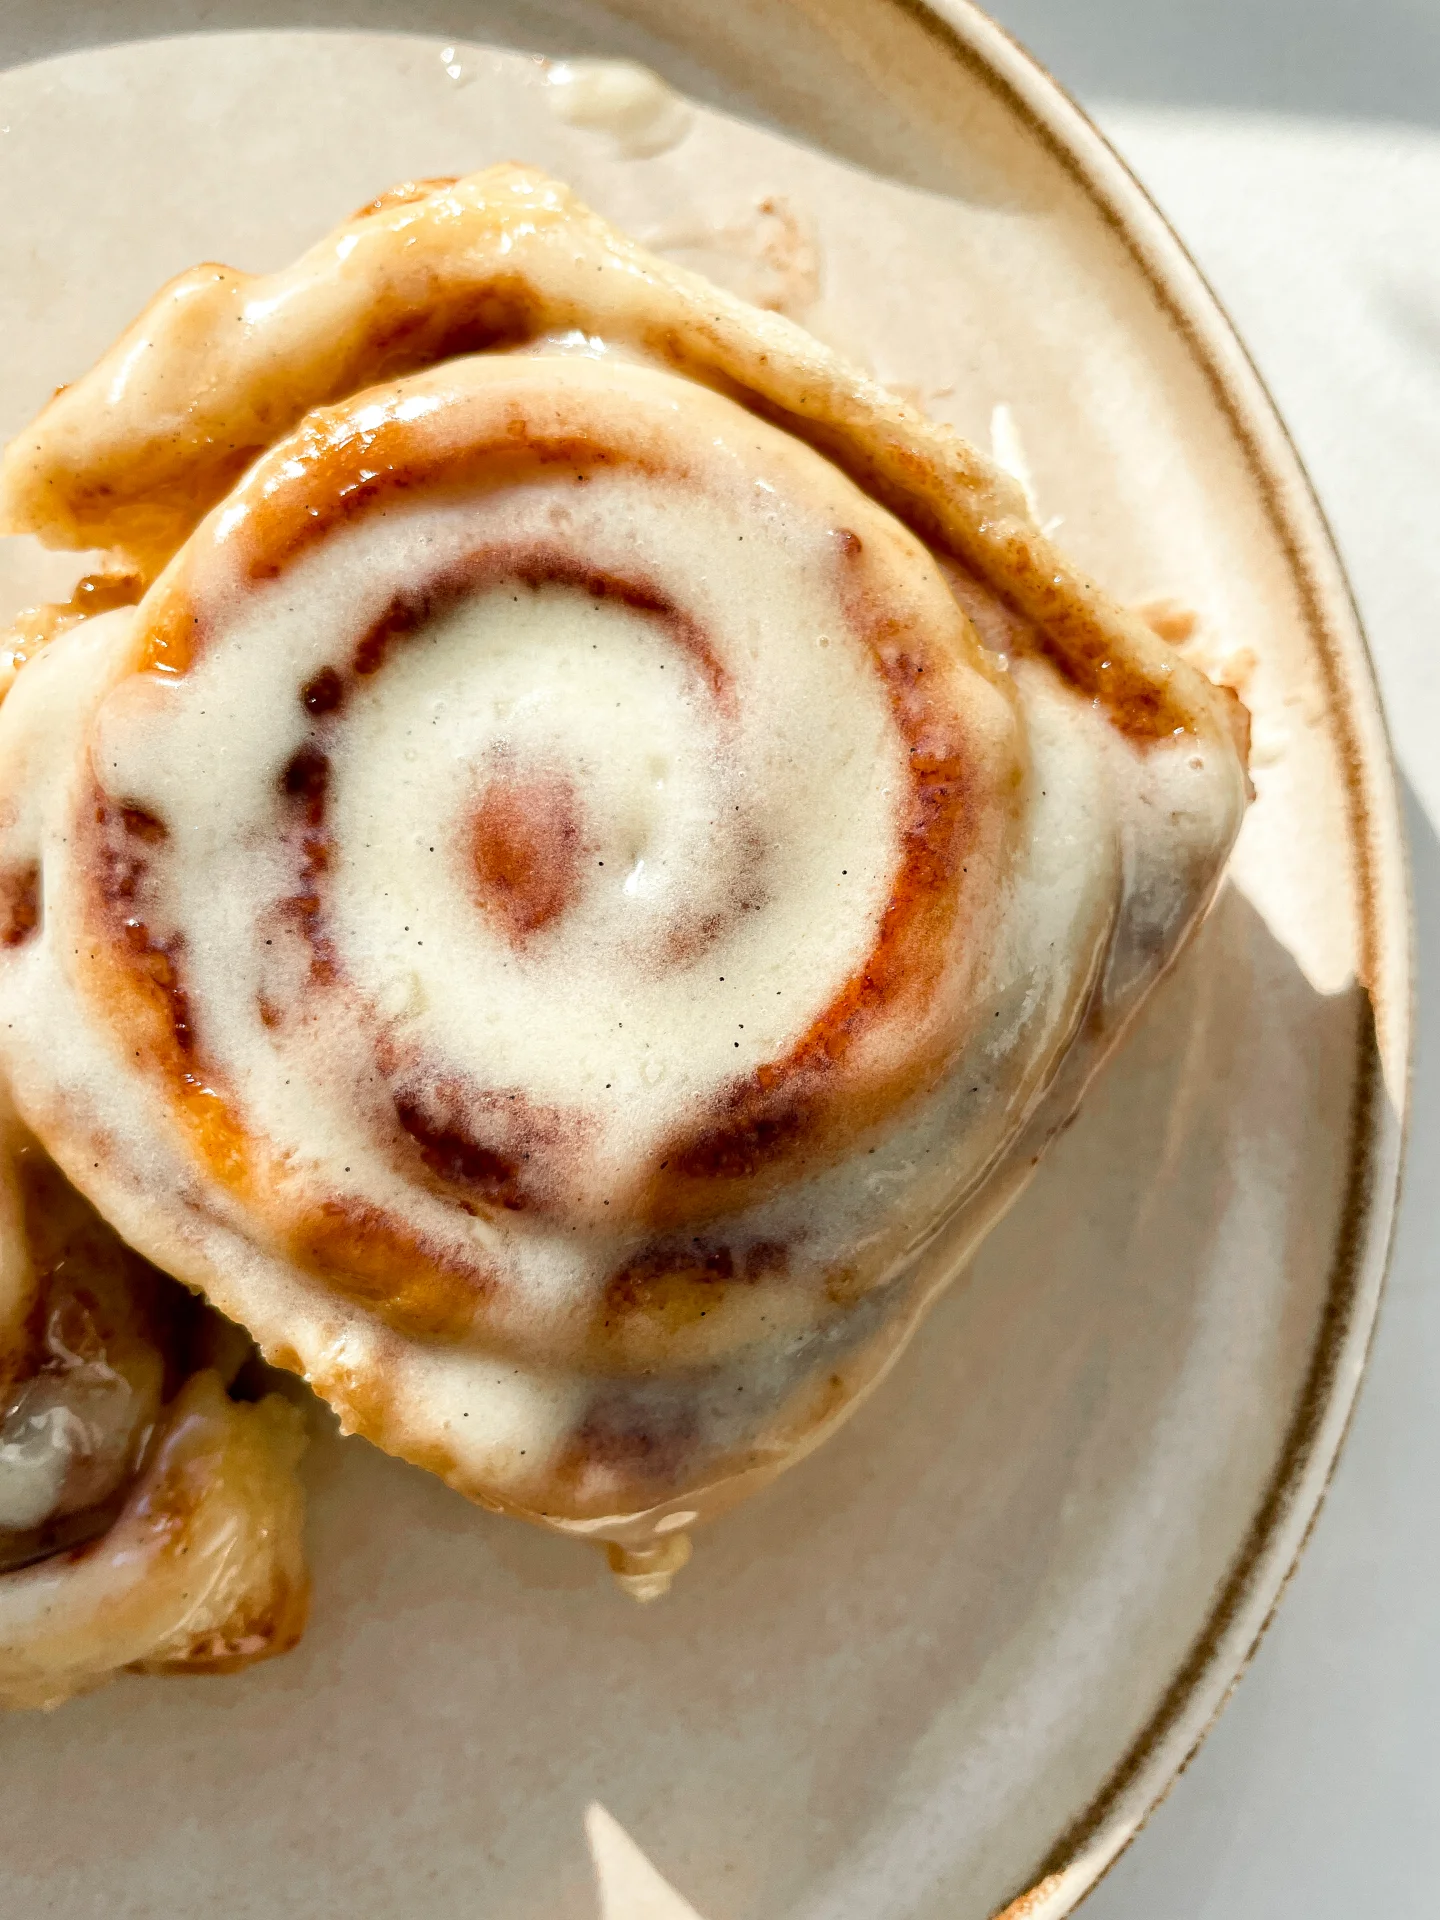
Cinnamon Rolls

Cinnamon Rolls

Cinnamon Rolls

Cinnamon Rolls

October 2, 2024 by Kimberly

Get ready for the fluffiest, most melt-in-your-mouth rolls ever! Soft, buttery layers soaked in cream before baking—it’s like biting into a cloud of sweet cinnamon heaven with every bite.

100 MINUTES

INTERMEDIATE

VEGETARIAN

US AMERICAN

429 PER ROLL

SWEET
FLUFFY
CREAMY

BRUNCH

DESSERT

AUTUMN
WINTER

INTRODUCTION

ABOUT THE RECIPE

Imagine starting your day with soft, pillowy rolls that are bursting with cinnamon sweetness. The secret? A little heavy cream poured between the rolls before baking. It creates the dreamiest, most moist cinnamon rolls you’ll ever try. These rolls are more than just a treat – they’re a cozy, comforting hug wrapped in cinnamon-sugar goodness. Whether you’re baking them for a holiday morning or just because, they bring that extra something special to the table.

How to serve
These rolls are perfect fresh out of the oven, still warm and gooey. Drizzle them with a sweet vanilla glaze or a classic cream cheese frosting for that extra indulgent touch. Pair them with your morning coffee, or serve them up as a weekend brunch star alongside fresh fruit or a light mimosa. Trust me, they’re a hit at any gathering, or even for a solo cozy morning in!

How to store
To keep these rolls soft and fluffy, store them in an airtight container at room temperature for up to two days. Want to enjoy them later? Pop them in the fridge and reheat in the oven to bring back that fresh-baked magic.

Hi, I'm Kimberly!

Hi, I'm Kimberly.

A passionate food lover who believes in the magic of homemade deliciousness that spreads love and warmth. Join me on this culinary adventure as I prepare wonderful dishes and let’s spread some happiness together!

Kimberly the Zett Signature

If you want to get to know me better, click here!


Cinnamon Rolls
Cinnamon Rolls
Cinnamon Rolls
„Let’s make a piece of happiness“
Print
clock clock iconcutlery cutlery iconflag flag iconfolder folder iconinstagram instagram iconpinterest pinterest iconfacebook facebook iconprint print iconsquares squares iconheart heart iconheart solid heart solid icon
Cinnamon Rolls

Cinnamon Rolls


5 from 1 review

  • Author: Kimberly
  • Total Time: 100 min
  • Yield: 12 rolls 1x

Description

Recommended Equipment

  • small bowl
  • small whisk
  • large bowl
  • plastic wrap
  • two medium bowls
  • rolling pin
  • sharp knife
  • baking dish
  • oven

Ingredients

Units Scale

DOUGH

  • 500 grams bread flour (in Germany that’s Type 550)
  • 170 grams yogurt
  • 1/2 tsp salt
  • 1 egg
  • 130 milliliters full-fat milk
  • 1 tbsp white sugar
  • 21 grams fresh yeast

FILLING

  • 115 grams butter, room temperature
  • 150 grams brown sugar
  • 2 tbsp cinnamon
  • 1/4 tsp salt
  • 100 milliliters heavy cream
  • 50 milliliters cinnamon oil (optional)

FROSTING

  • 120 grams cream cheese
  • 120 grams powdered sugar
  • 50 grams butter, room temperature
  • 1 tsp vanilla extract
  • 1 tsp lemon juice

Instructions

  1. First, we activate the fresh yeast. Heat the milk to a temperature between 32°C and 38°C (90°F to 100°F). Add the white sugar and stir well. Crumble the fresh yeast into the warm milk and whisk it until fully dissolved. Let the mixture sit for 5 minutes. You should see small bubbles forming on the surface by then.
  2. Meanwhile, in a large bowl, add the flour, salt, yogurt, and egg. Pour in the yeast mixture and stir everything together with a wooden spoon. Transfer the dough to a clean work surface and knead by hand for about 10-15 minutes. The goal is to get a smooth and elastic dough. Using an electric mixer will cut the time in half. The dough is ready when you can stretch a piece thin enough to let light through without tearing. Place the dough back in the bowl and cover it with plastic wrap to keep it from drying out. Let it rise in a warm, draft-free spot for about an hour until it doubles in size.
  3. In the meantime, prepare the filling. Mix together softened butter, brown sugar, cinnamon, and a pinch of salt into a creamy mixture. Set it aside at room temperature.
  4. Next, prepare the frosting. Mix together cream cheese, powdered sugar, softened butter, vanilla extract, and lemon juice until smooth and creamy. Store in the fridge until ready to use.
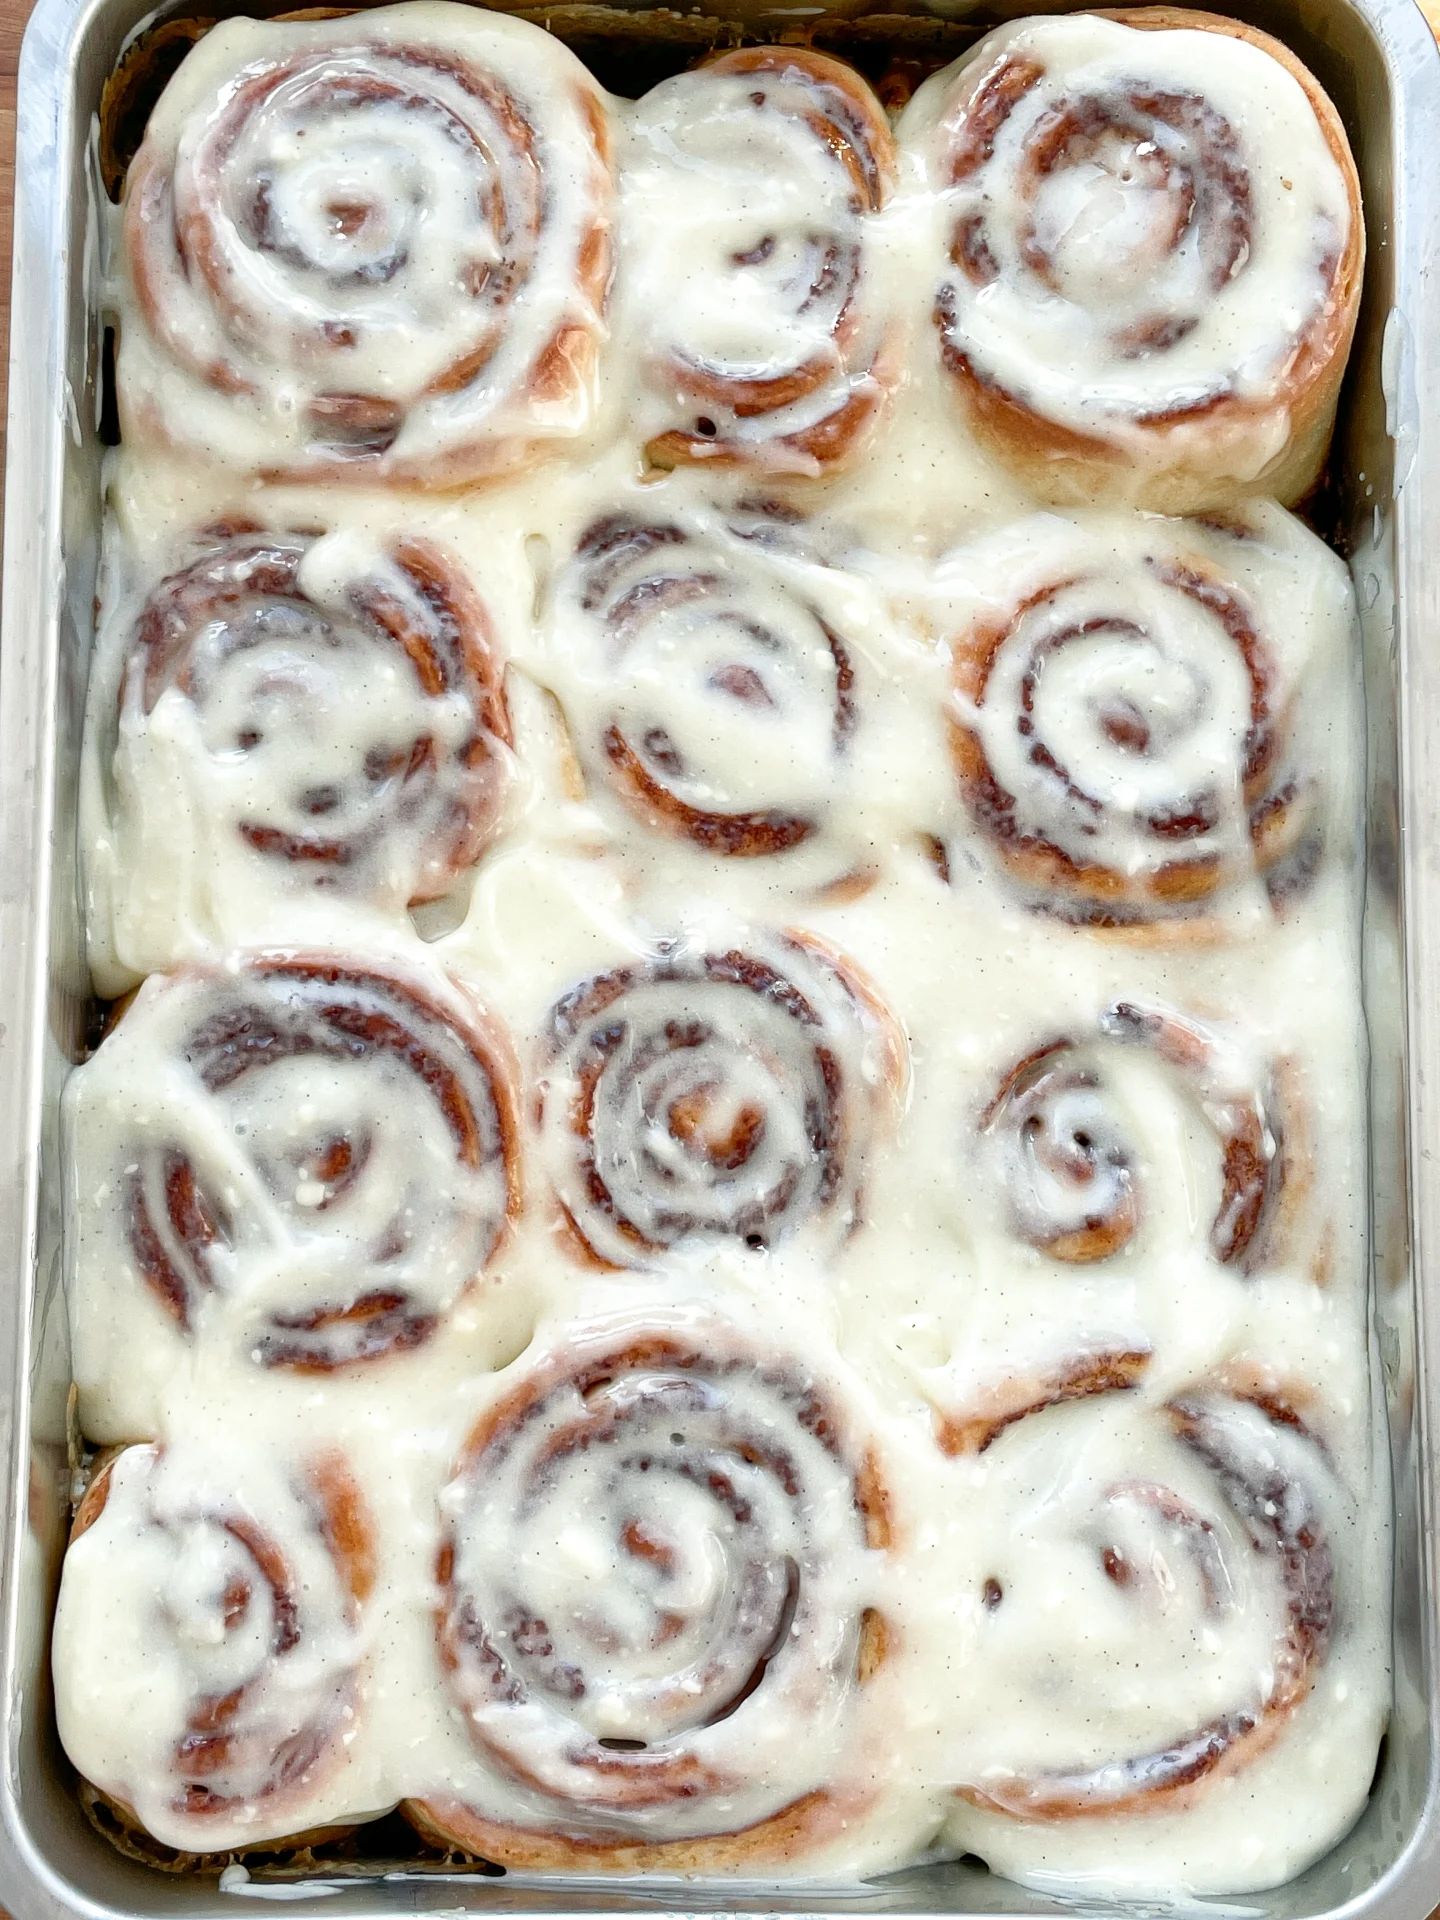
  5. After the dough has risen for an hour, it should have doubled in size and is ready to work with. Prepare a large baking dish. Transfer the dough to a lightly floured, clean surface and roll it out to a 50×30 cm (about 20×12 inch) rectangle. Spread the butter-sugar-cinnamon mixture evenly over the dough. Then, cut the dough lengthwise into 12 equal strips. Roll each strip into a spiral and place them in the baking dish, forming 3 rows of 4 rolls. Let the rolls rise again for another 30 minutes.
  6. About 10 minutes before the rising time is up, preheat the oven to 190°C (375°F). Once the rolls have risen, pour the heavy cream and optional cinnamon oil in between the rolls. Bake for 20-25 minutes until the tops are golden brown. Be careful not to overbake them, as they may become dry.
  7. Remove the rolls from the oven and let them cool for about 10 minutes. Take the frosting out of the fridge and spread it evenly over the warm rolls. Enjoy!
  • Passive Time: 60 min
  • Cook Time: 40 min

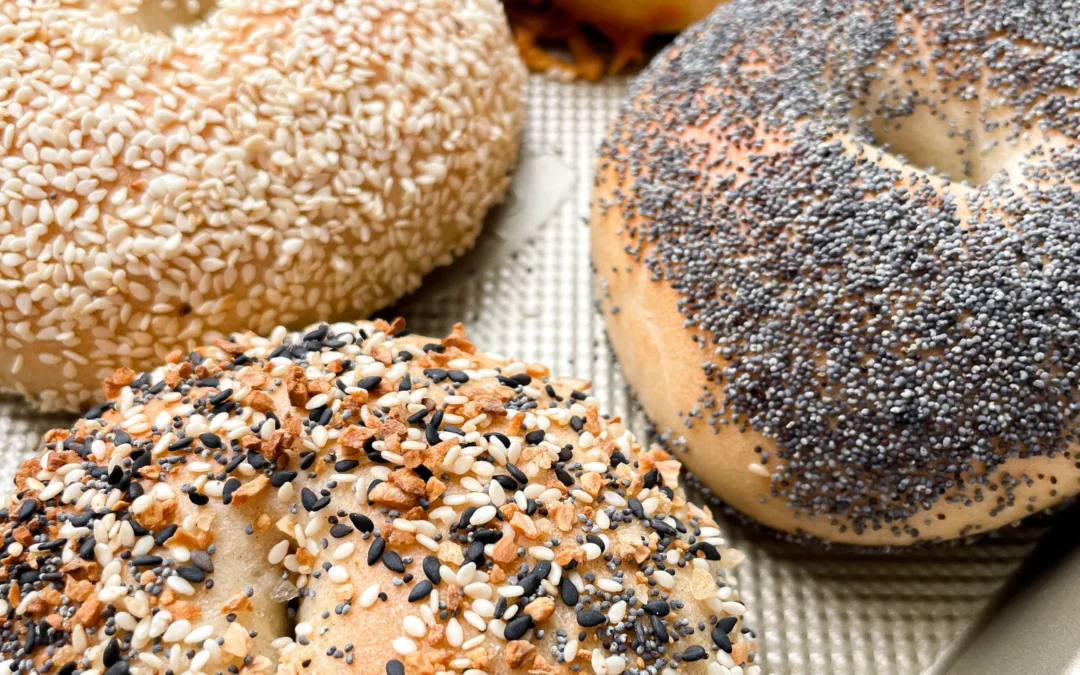
Homemade Bagels

Homemade Bagels

Homemade Bagels

Homemade Bagels

August 15, 2024 by Kimberly

Indulge in these cozy, chewy homemade bagels with irresistible toppings! Perfect for breakfast or brunch, they bring a warm, homemade touch to your mornings. Once you try these, you’ll never buy bagels again!

2 HOURS

INTERMEDIATE

VEGETARIAN

US AMERICAN

274 PER BAGEL

CHEWY

BRUNCH

BREAKFAST

ALL YEAR

INTRODUCTION

ABOUT THE RECIPE

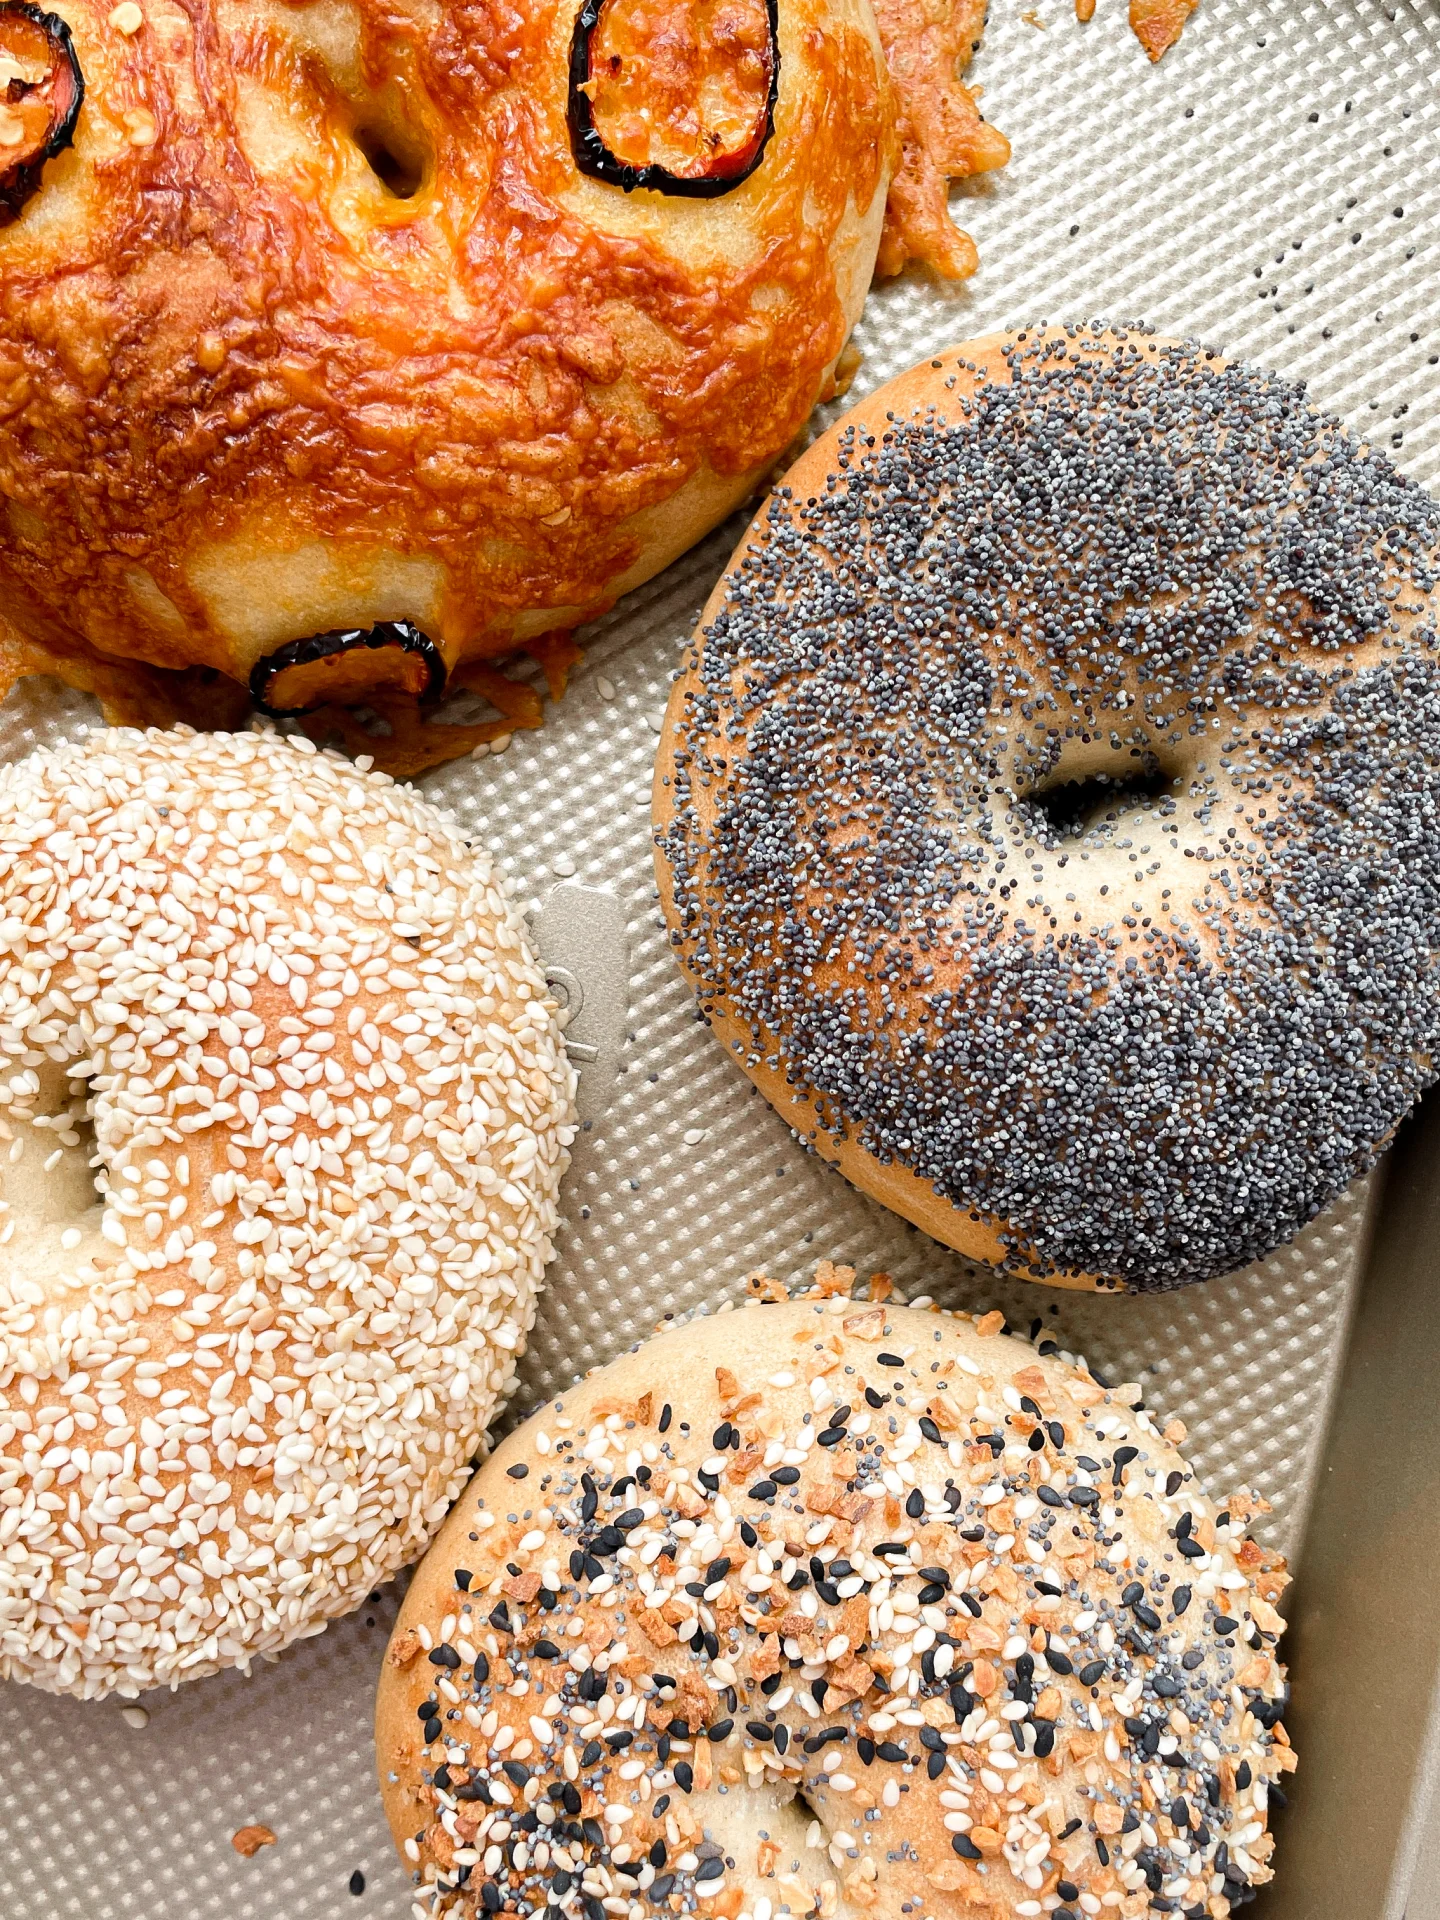
Imagine starting your day with the warm, comforting aroma of freshly baked bagels wafting through your kitchen. These delightful homemade bagels are not only easy to make but also offer a chewy, satisfying bite that pairs perfectly with your favorite toppings. Whether you prefer the nutty flavor of sesame seeds, the subtle crunch of poppyseeds, the spicy kick of cheddar and jalapeno, or the classic mix of everything bagel seasoning, there’s a bagel for everyone to love.

How to serve
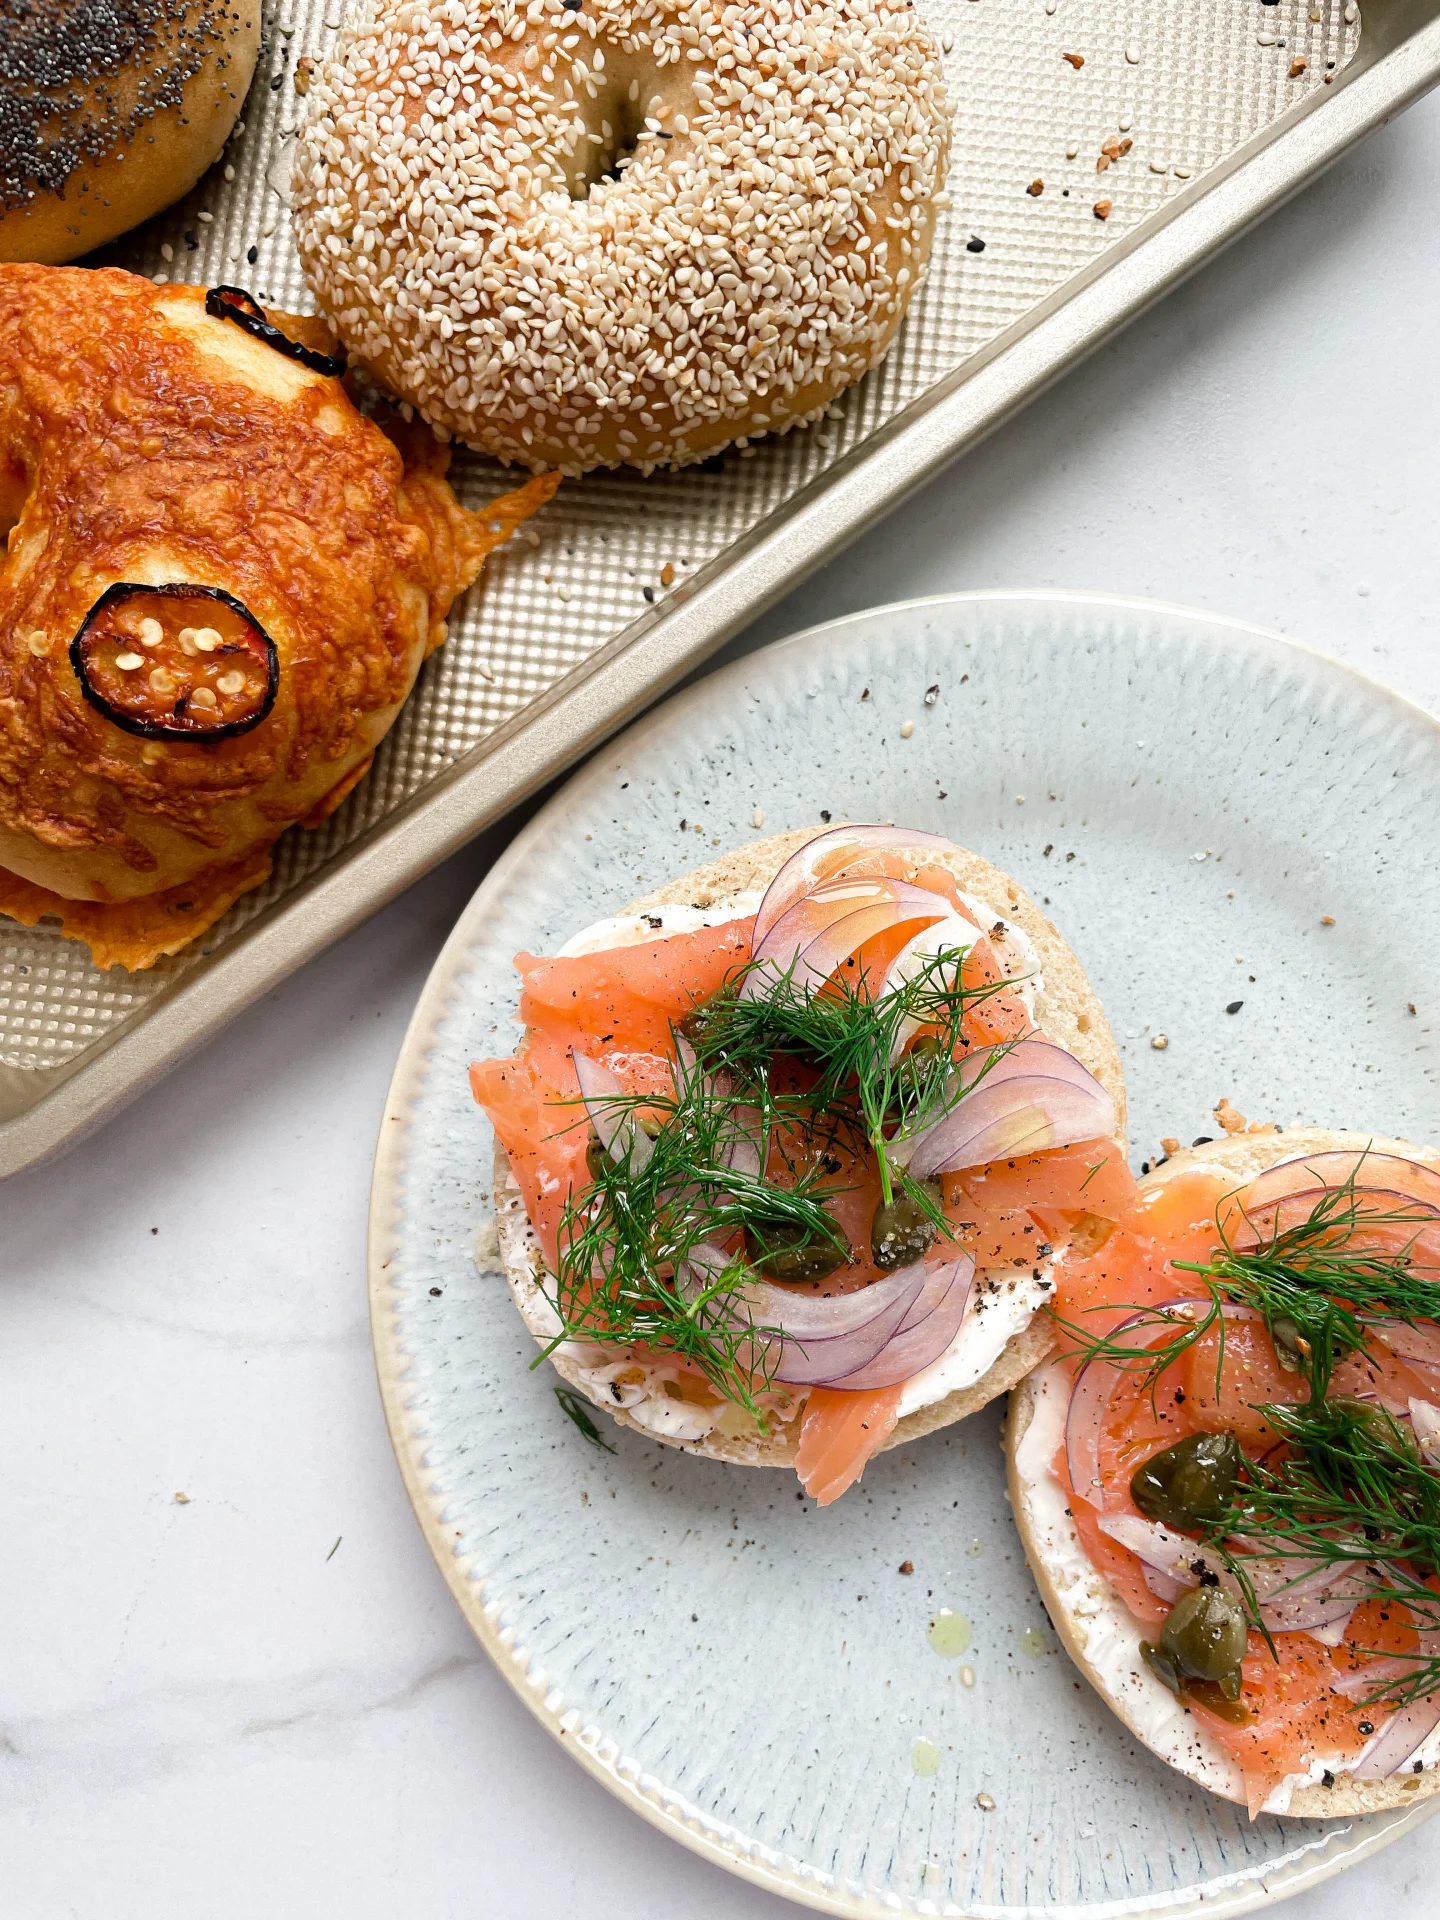
Slice them in half and spread on some creamy butter, tangy cream cheese, or your favorite jam. They also make fantastic bases for sandwiches – think smoked salmon with capers and red onion on a sesame bagel, or a turkey and avocado combo on a poppyseed bagel. For a real treat, try a cheddar and jalapeno bagel with a smear of guacamole. These bagels are versatile enough to be enjoyed any time of day, making them a must-have in your kitchen.

How to store
To keep your bagels fresh, store them in an airtight container at room temperature for up to two days. For longer storage, slice them in half and freeze them. When you’re ready to enjoy, simply pop them in the toaster straight from the freezer. This way, you’ll always have a delicious bagel ready whenever the craving strikes.

Hi, I'm Kimberly!

Hi, I'm Kimberly.

A passionate food lover who believes in the magic of homemade deliciousness that spreads love and warmth. Join me on this culinary adventure as I prepare wonderful dishes and let’s spread some happiness together!

Kimberly the Zett Signature

If you want to get to know me better, click here!


Homemade Bagels
Homemade Bagels
Homemade Bagels
„Let’s make a piece of happiness“
Print
clock clock iconcutlery cutlery iconflag flag iconfolder folder iconinstagram instagram iconpinterest pinterest iconfacebook facebook iconprint print iconsquares squares iconheart heart iconheart solid heart solid icon
Homemade Bagels

Homemade Bagels


  • Author: Kimberly
  • Total Time: 2 hrs
  • Yield: 8-12 1x

Description

Recommended Equipment

  • tall container
  • large bowl
  • damp cloth
  • oven
  • large pot

Ingredients

Units Scale

DOUGH – YEAST MIXTURE

  • 500 milliliters lukewarm water
  • 7 grams active dry yeast
  • 1 tbsp sugar

DOUGH – DRY INGREDIENTS

  • 900 grams bread flour (in Germany flour type 550)
  • 2 tsp salt
  • 30 grams white sugar

WATER BATH

  • 2 liters simmering water
  • 1/4 cup brown sugar

TOPPINGS

  • white sesame seeds
  • poppy seeds
  • everything but the bagel seasoning
  • cheddar & jalapeño

Instructions

  1. In a tall container, briefly stir together the yeast mixture ingredients: lukewarm water, yeast, and sugar, then let it sit for 10 minutes.
  2. Meanwhile, in a large bowl, mix the dry ingredients: flour, salt, and sugar. Add the yeast-water-sugar mixture and stir until just combined.
  3. Transfer the dough to a clean work surface and knead by hand until it barely sticks anymore.
  4. Shape the dough into 8 balls of 180g / 6oz each for large bagels or 12 balls of 120g / 4oz each for smaller bagels. Let them rest under a damp cloth for about 20 minutes.
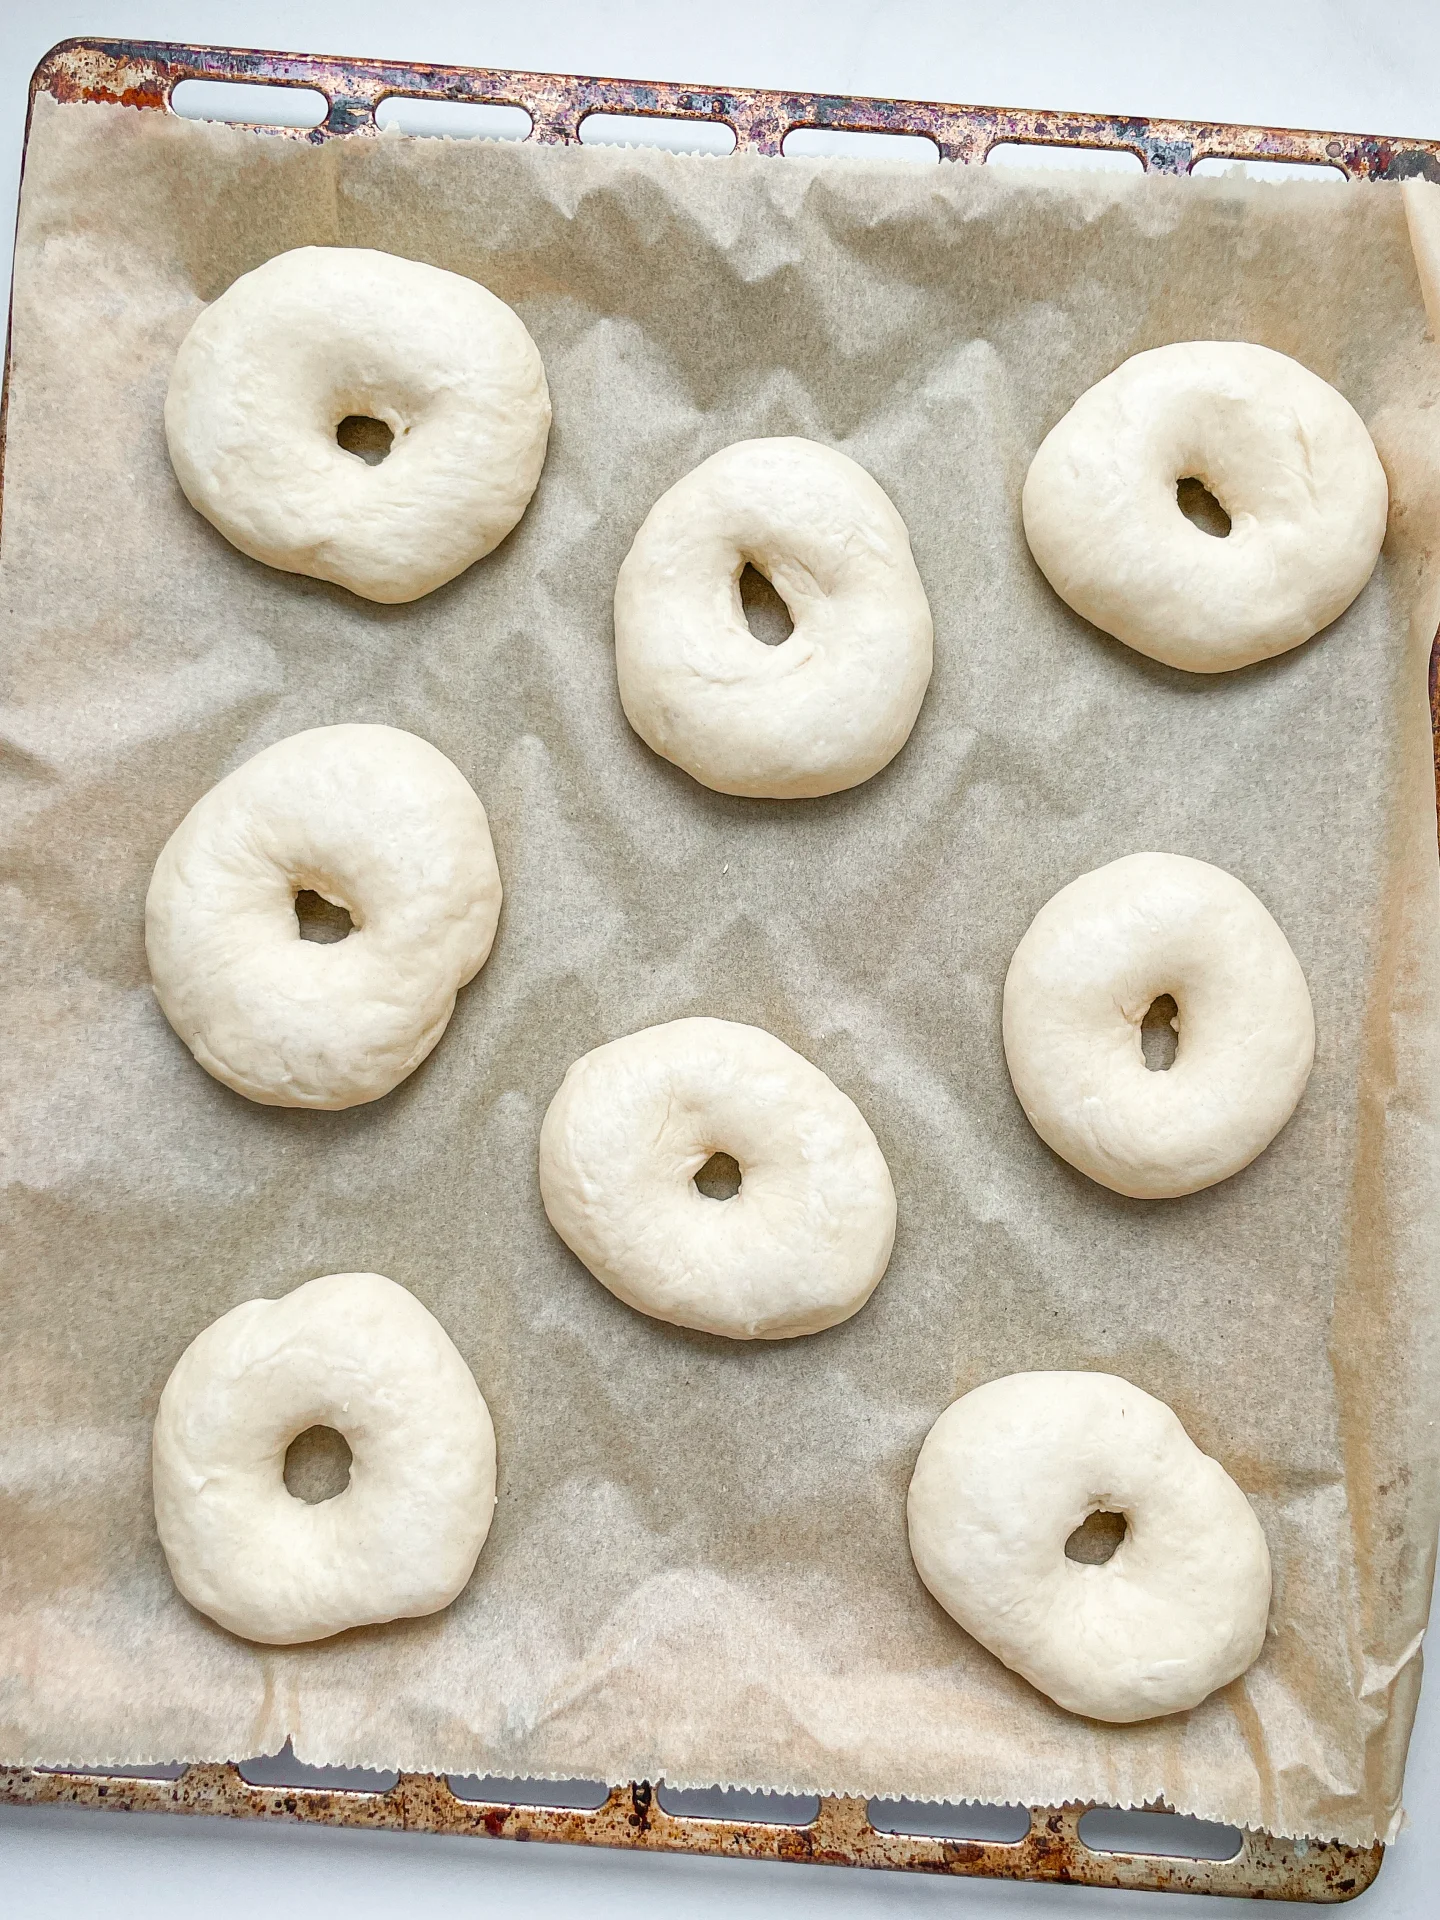
  5. Poke a hole in the center of each dough ball with your finger and form a bagel by stretching the dough evenly.
  6. Place the bagels on parchment paper and let them rise for another 30 minutes.
  7. Preheat the oven to 175°C / 350°F. Bring water to a simmer in a large pot and dissolve the brown sugar in it. Simmer each bagel for 1 minute on each side.
  8. Remove the bagels from the water and dip them in your favorite toppings or leave them plain. I like using poppy seeds, sesame seeds, everything but the bagel seasoning, or jalapenos and cheddar cheese.
  9. Once all bagels are topped, place them on a parchment-lined baking sheet and bake in the oven for about 25-30 minutes depending on their size.
  10. Remove the baking sheet and enjoy the bagels 🙂
  • Passive Time: 1 hr 30 min
  • Cook Time: 30 min

Poppyseed Crepe with Lemon Pastry Cream & Blueberry Meringue

Poppyseed Crepe with Lemon Pastry Cream & Blueberry Meringue

Poppyseed Crepe with Lemon Pastry Cream & Blueberry Meringue

Poppyseed Crepe with Lemon Pastry Cream & Blueberry Meringue

August 11, 2024 by Kimberly

Delight in every bite with these poppyseed crepes! Filled with zesty lemon cream and topped with crunchy blueberry meringue, it’s like a sunny day wrapped up just for you.

2 HOURS
30 MINUTES

INTERMEDIATE

VEGETARIAN

INT.

329 PER PORTION

CREAMY
FRUITY

EVERYDAY

DESSERT

SPRING
SUMMER

INTRODUCTION

ABOUT THE RECIPE

Get ready to elevate your dessert game with these fabulous poppyseed crepes. Imagine the nutty crunch of poppyseeds paired with a tangy soft lemon pastry cream and a crunchy blueberry meringue on top. It’s a treat that’s perfect for a special Sunday dessert or impressing friends at brunch. Each bite is a delightful mix of flavors and textures that will make you feel like you’re dining at a chic café.

How to serve
For a picture-perfect breakfast, fold the crepes elegantly and fill them with a generous dollop of lemon pastry cream and a swirl of blueberry sauce. Sprinkle some crunched blueberry meringue on top. A drizzle of honey and a few fresh blueberries will add the final touch.

How to store
To keep your poppyseed crepes fresh, store any leftovers in an airtight container in the fridge. They’ll stay good for about a day. You can also prepare everything in advance and enjoy them when you’re ready.

Hi, I'm Kimberly!

Hi, I'm Kimberly.

A passionate food lover who believes in the magic of homemade deliciousness that spreads love and warmth. Join me on this culinary adventure as I prepare wonderful dishes and let’s spread some happiness together!

Kimberly the Zett Signature

If you want to get to know me better, click here!


Poppyseed Crepe with Lemon Pastry Cream & Blueberry Meringue
„Let’s make a piece of happiness“
Print
clock clock iconcutlery cutlery iconflag flag iconfolder folder iconinstagram instagram iconpinterest pinterest iconfacebook facebook iconprint print iconsquares squares iconheart heart iconheart solid heart solid icon
Poppyseed Crepe with Lemon Pastry Cream & Blueberry Meringue

Poppyseed Crepe with Lemon Pastry Cream & Blueberry Meringue


  • Author: Kimberly
  • Total Time: 2 hr + 30 min
  • Yield: 6 1x

Description

Recommended Equipment

  • two small pots
  • vegetable peeler
  • medium-sized bowl
  • whisk
  • two mixing bowls
  • electric mixer
  • mortar & pestle
  • spatula
  • small frying pan
  • spatula

Ingredients

Units Scale

BATTER

  • 90 milliliters full-fat milk
  • 60 milliliters water
  • 1 egg
  • 1 tbsp melted butter
  • 1 tbsp poppyseeds
  • zest of 1/2 lemon
  • 60 grams all-purpose flour
  • 1/8 tsp salz

LEMON PASTRY CREAM

  • 90 milliliters full-fat milk
  • 90 milliliters heavy cream
  • 2 egg yolks
  • 50 grams white sugar
  • 1 tsp vanilla extract
  • 1 tbsp flour
  • zest of 1 lemon

BLUEBERRY MERINGUE

  • 2 egg whites
  • 100 grams white sugar
  • pinch of salt
  • 1/8 tsp cream of tartar
  • 1.5 tbsp freeze-dried blueberries

BLUEBERRY SAUCE

  • 100 grams frozen blueberries
  • juice of 1/2 lemon
  • 1 tsp white sugar
  • pinch of salt

TOPPINGS

  • fresh blueberries
  • honey

Instructions

  1. Start by preparing the blueberry meringue. Preheat the oven to 100°C (212°F) with the fan on. Separate two eggs and place the egg whites into a bowl. Save the yolks for later, as you’ll use them to make the lemon pastry cream. Add a pinch of salt and the cream of tartar to the egg whites. Measure out the sugar and set it aside in a small bowl. Using an electric hand mixer, beat the egg whites on medium to high speed until they start to stiffen. Gradually add the sugar while continuing to beat the mixture until the egg whites are creamy, firm, glossy, and snow-white.
  2. Prepare the blueberry powder. Use a mortar and pestle to grind the freeze-dried blueberries into a fine powder. Gently fold the powder into the egg white mixture using a spatula until the mixture turns a light lavender color.
  3. Shape the meringues. Line a baking sheet with parchment paper. Using two tablespoons, spoon the egg white mixture onto the parchment, forming six individual mounds. Place the baking sheet in the oven for about 2 hours.
  4. Make the crepe batter. In a mixing bowl, combine flour, salt, milk, water, egg, melted butter, lemon zest, and poppy seeds. Stir until smooth, then refrigerate the batter for about 30 minutes.
  5. Prepare the lemon cream. In a small pot, combine milk and cream. Use a peeler to remove large strips of zest from a lemon, ensuring they are big enough to remove later. Heat the pot over medium heat, stirring occasionally to prevent a skin from forming. Heat until it begins to steam. Remove from the heat and set aside.
  6. Mix the lemon pastry cream. In a heatproof glass or metal bowl, combine the reserved egg yolks with flour, sugar, and vanilla extract. Stir until you have a smooth, creamy mixture.
  7. Combine and cook the cream. Gradually pour the warm milk and cream mixture into the egg yolk mixture, stirring constantly. Rinse the pot and fill it halfway with water. Bring the water to a simmer over medium heat, then place the bowl with the cream mixture over the pot, creating a double boiler. Heat the mixture to about 78°C (172°F) while stirring continuously, until it thickens to a creamy consistency. Once thickened, remove the bowl from the heat. Cover the cream with plastic wrap, pressing it directly onto the surface to prevent a skin from forming, and refrigerate.
  8. Prepare the blueberry sauce. In a small pot, combine the frozen blueberries with lemon juice, sugar, and a pinch of salt. Simmer over medium heat until the blueberries release their juices. Set aside.
  9. Cool the meringues. Once the meringues have finished baking, remove them from the oven and allow them to cool slightly.
  10. Cook the crepes. Heat a 20cm (8-inch) frying pan over medium heat. Add a small amount of butter, then wipe out the excess with a paper towel, leaving only a thin film. Pour about 4 tablespoons of batter into the pan, swirling quickly to spread it evenly. Cook for 1-2 minutes on one side, then flip and cook for another 30 seconds to 1 minute. Repeat with the remaining batter.
  11. Assemble the dish. Spread lemon pastry cream over each crepe, fold in half, then fold again to form a triangle. Drizzle the blueberry sauce over the crepes, crumble one meringue over each serving, and garnish with fresh blueberries and a drizzle of honey. Enjoy immediately!
  • Passive Time: 1 hr 30 min
  • Cook Time: 60 min