


Description
Recommended Equipment
- sharp knife
- cutting board
- medium bowl
- large plate
- three small bowls
- measuring spoons
- large pan with lid
- scissors
- small pan or pot
Ingredients
Units Scale
- 20 Gyoza wrapper, homemade or store-bought
- 1 tbsp high heat oil
- 80 milliliters cold water
- 400 grams seaweed salad (optional)
- 250 grams ground pork
- 4 garlic cloves
- 1 tsp sesame oil
- 1 tsp ginger oil
- 1 spring onion
- 1.5 tbsp Hoisin sauce
- 1 tsp soy sauce
- 1/4 tsp Chinese Five Spice
- 1 small egg
- 2 tbsp miso paste
- 1 tbsp mirin
- 1 tsp honey
- 2 tsp soy sauce
- 2 tsp ginger oil
- 3 tbsp warm water
- 1 Nori sheet
- 1 tsp cornstarch
- 2 tsp cold water
- fresh cilantro
- ginger oil
Instructions
PREPARATIONS
- Here’s the recipe for Gyoza dough. You’ll need about 20 sheets, cut them into squares rather than rounds. Or, just get ready-made Gyoza wrappers from the Asian market.
- Here’s the recipe for ginger oil. You’ll need about 2-3 tablespoons.
- Here’s the recipe for Chinese Five Spice. You’ll need 1/4 teaspoon.
INSTRUCTIONS
- First, prepare the Gyoza filling. Peel and finely grate the garlic cloves into a medium bowl. Then, slice the spring onion into thin rings and add to the garlic. Next, add the ground pork, ginger oil, sesame oil, hoisin sauce, Chinese Five Spice, and the egg. Mix everything well.
- Take a large plate and sprinkle some flour on it. This will be the resting place for the filled Gyoza so they don’t stick to the plate. Also, prepare a small bowl with some cold water and have your Gyoza dough ready.
- Fill each Gyoza wrapper with 1 teaspoon of the pork filling. Dab a little water around the edge of the wrapper, fold it diagonally to seal, and press out all the air so the filling is well enclosed. Wet one side of the long edge, fold it over, and press firmly. Place on the floured plate. Repeat until all the filling is used up.
- Heat 1 tbsp of high-heat oil in a large pan over medium heat and add the Gyoza. Fry for a few minutes until the bottoms are crispy. Lower the heat and add about 100ml / 1/3 cup of cold water to the pan (be careful, it may splatter if the oil is too hot). Cover the pan with a lid and let the Gyoza steam.
- Meanwhile, fold the Nori sheet three times in the middle and cut it into thin strips with scissors. Mix the Nori strips with cornstarch in a small bowl. Add a bit of water and stir well. Heat about 1 cm of high-heat oil in a small pan or pot to around 180°C / 356°F. Fry the Nori strips for 2-3 minutes, then remove and drain on paper towels.
- The Gyoza should now be a bit translucent and the filling cooked through. Remove the lid and turn the heat back to medium to crisp up the Gyoza again.
- Meanwhile, make the Miso Glaze. In a small bowl, mix Mirin, honey, soy sauce, and ginger oil. Heat for a few seconds in the microwave (or in a small pan) until it simmers. Stir in the Miso paste well, add 3 tbsp warm water to thin it a bit and set aside.
- Finely chop the fresh coriander and set aside.
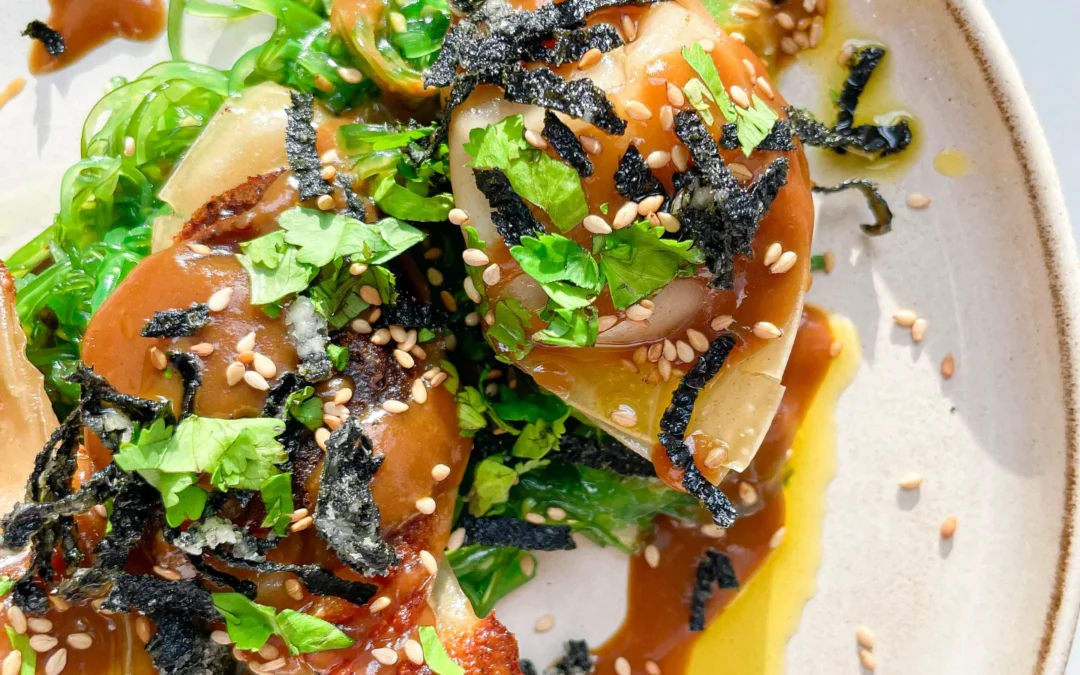
- Optionally, place seaweed salad in the center of the plate, arrange 5 Gyoza on top. Drizzle with Miso Glaze and top with fried Nori strips, chopped coriander, and toasted sesame seeds. Finish with a splash of ginger oil and serve immediately.
- Cook Time: 40 min