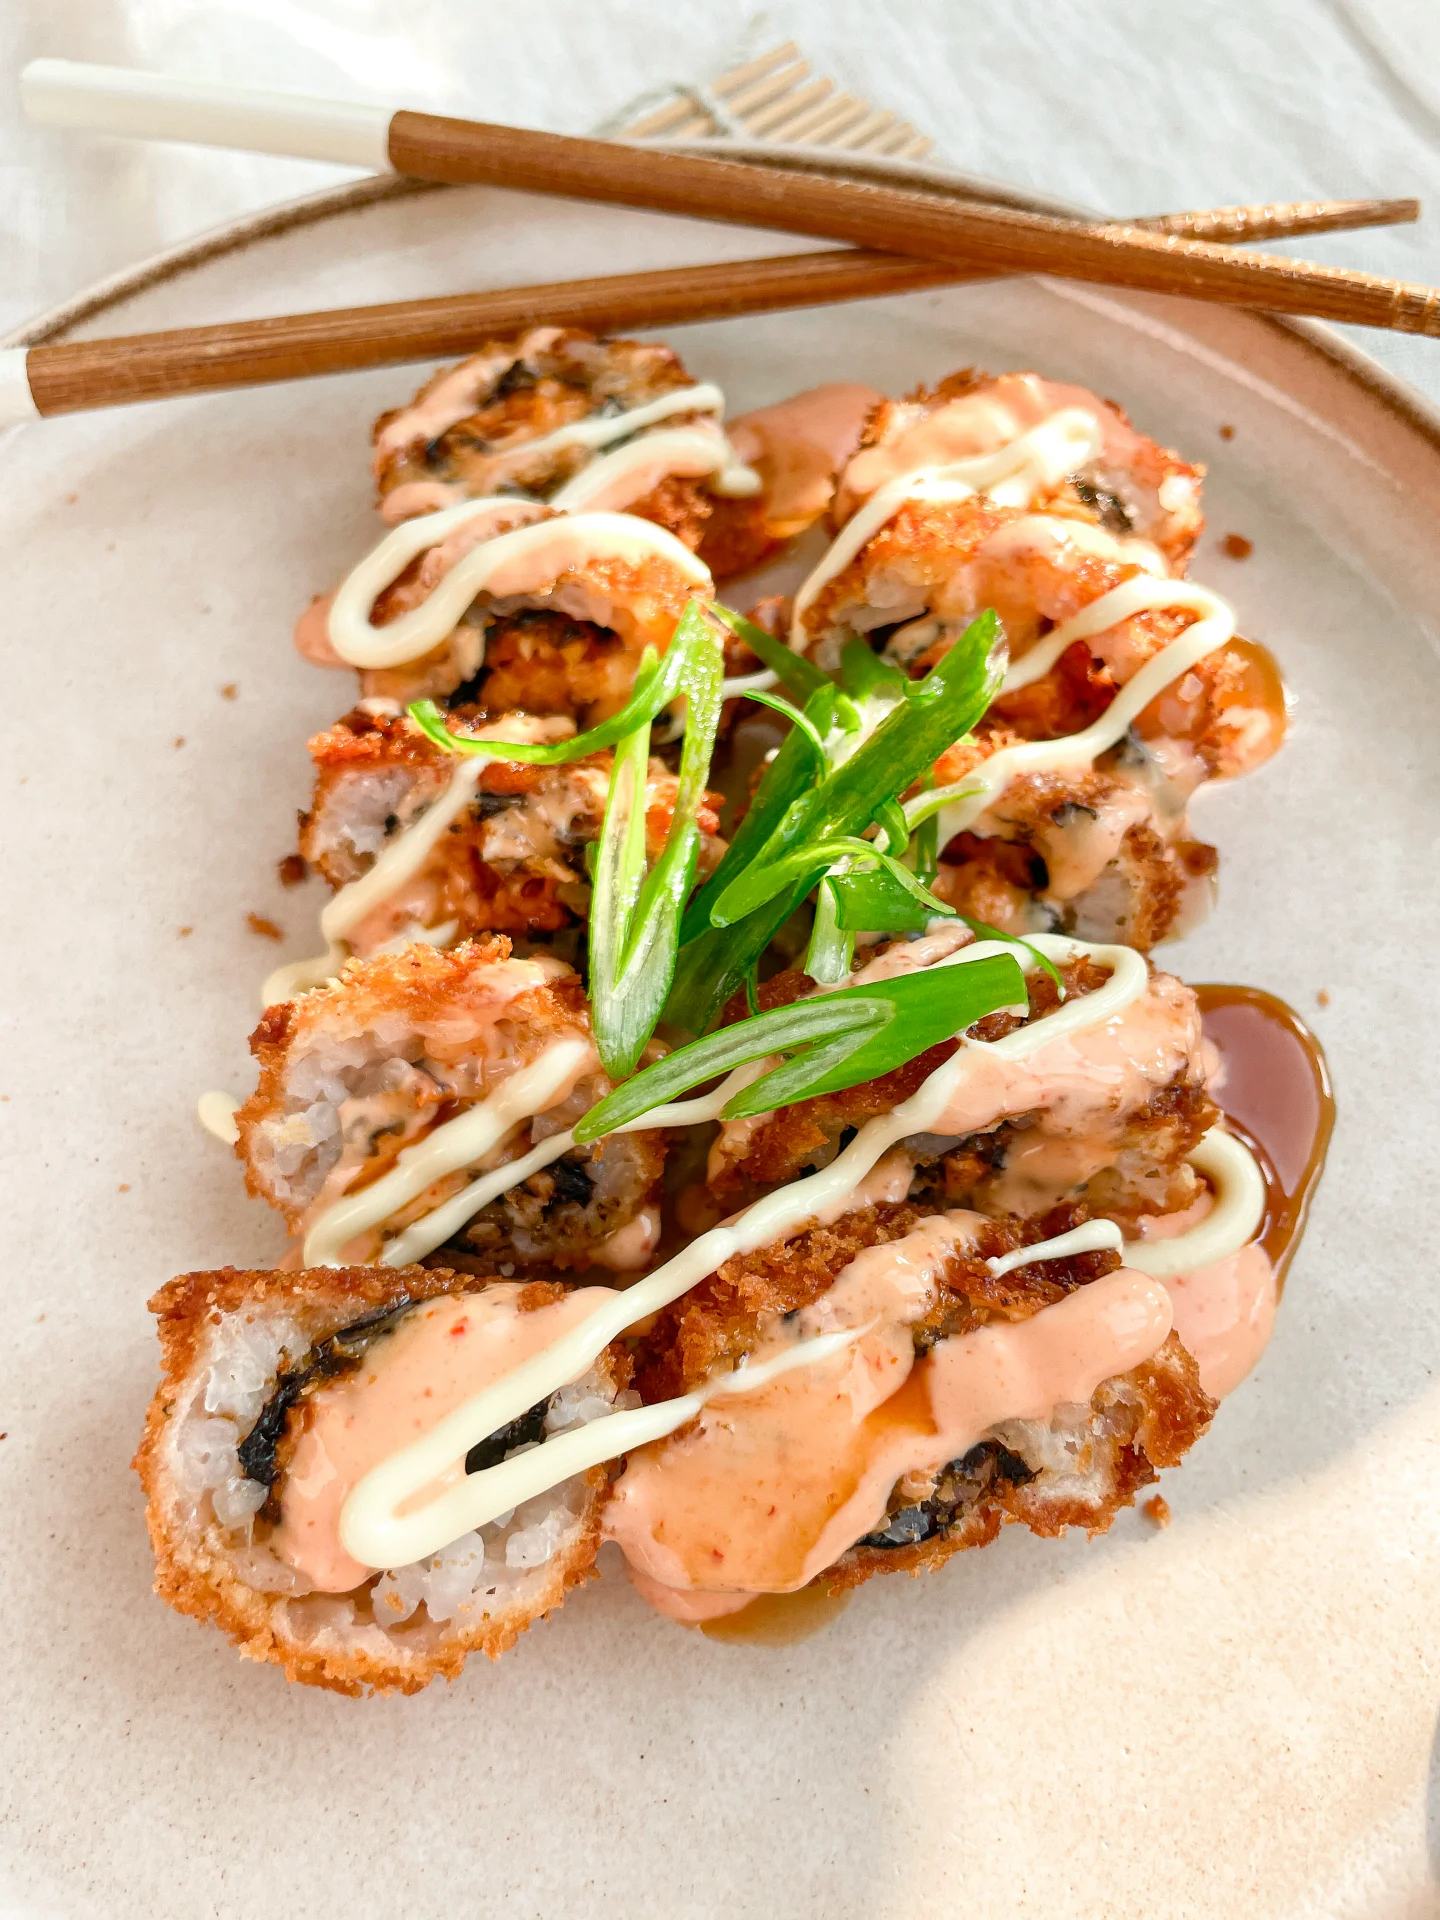
Spicy Salmon Fried Sushi Rolls
May 24, 2024 by Kimberly
Spicy salmon meets crispy, fried perfection in this delightful dish. With a kick of heat, rich flavors, and a comforting texture, every bite offers a cozy yet exciting sushi experience.
This website uses affiliate links which may earn commission for purchases made at no additional cost to you.
TOTAL TIME
1 hr + 15 min
SERVES
4 portions
DIET
omnivore
EVERY RECIPE DESERVES
A Little Love Letter
Imagine if your favorite spicy tuna roll and a sizzling tempura dish had a delicious rendezvous. Sounds intriguing, right? Well, let me introduce you to Crispy Spicy Salmon Sushi Rolls. They’re bursting with the bold flavors of traditional sushi but transformed into a delightful fried sensation. Wrapped in a light, crispy coating with a kick of spicy salmon nestled inside, you’ve just discovered your new favorite dish. Perfect for any gathering or a tantalizing meal at home!
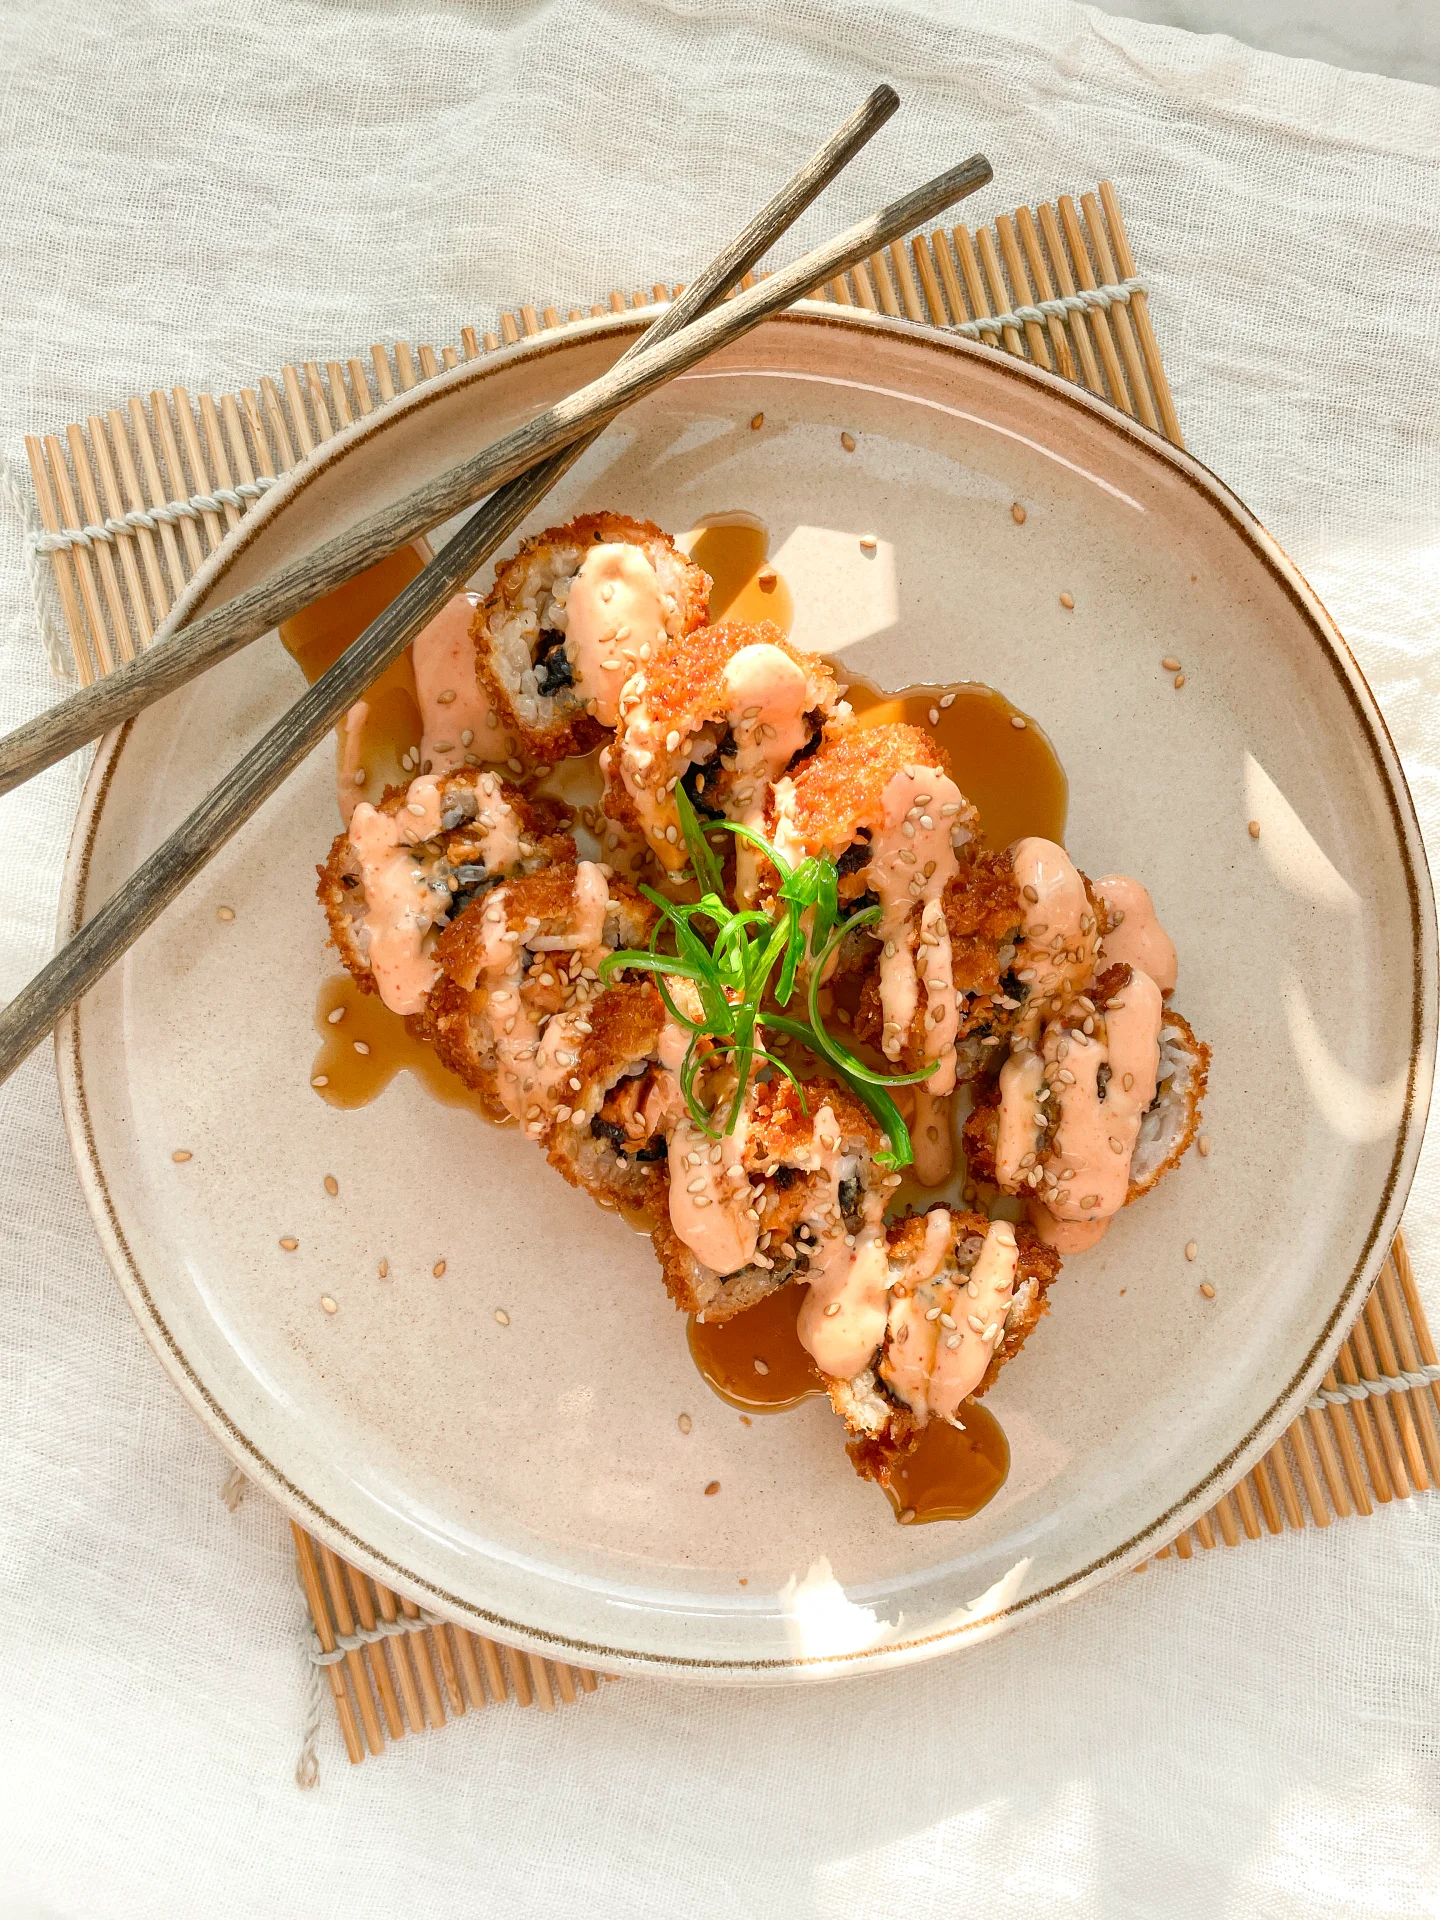
Serve these deep-fried spicy salmon rolls hot and crispy. Cut each roll into six even pieces for easy sharing. Drizzle them generously with the two sauces – a spicy mayo-Sriracha sauce and a sweet and savory soy-mirin sauce. For the final touch, sprinkle sesame seeds and thinly sliced spring onions over the top for a beautiful contrast in color and a burst of freshness. These rolls are packed with flavor, but if you enjoy a bit more heat, they also pair wonderfully with a dab of wasabi. This delightful combination of textures and tastes makes them a standout dish at any gathering.
Due to their crispy nature, it’s best to enjoy these spicy salmon rolls fresh. Once fried, they tend to lose their crunchiness if stored, so they are not recommended for later consumption. However, if you find yourself with leftovers, you can briefly re-fry them to bring back some of the crispiness. But really, these rolls are so delicious, consider it the perfect excuse to indulge and enjoy them all in one sitting!

Hi, I'm Kimberly.
A hopeless romantic when it comes to food. Every recipe I share is a love letter to food itself. I’m so glad you’re here. Make yourself at home and stay a while.
Love,
Kimberly

If you want to get to know me better,
click here!

LET’S MAKE A PIECE OF HAPPINESS
Spicy Salmon Fried Sushi Rolls
- Total Time: 75 min
- Yield: 4
Description
GOOD TO HAVE ON HAND
- sharp knife
- cutting board
- rice cooker (or pot)
- three small pots (or one that you wash twice)
- two small bowls
- squeeze bottles (or tablespoons)
- two medium-sized bowls
- bamboo rolling mat (called Makisu)
- plastic wrap
- large bowl
- whisk
- drinking glass
- two flat dishes
- two forks
- foam spoon
Ingredients
- 150 grams sushi rice
- 2 tbsp rice vinegar
- 1 tbsp white sugar
- 1/2 tsp salt
- 50 grams mayonnaise
- 10 grams Sriracha (or any other hot sauce you like)
- 50 grams soy sauce
- 50 grams Mirin
- 50 grams white sugar
- 100 grams all-purpose flour
- 100 grams corn starch
- 1 egg
- 100 milliliters ice-cold water
- 1/2 tsp salt
- 150 grams salmon filet
- 2 tbsp Sriracha (or any other hot sauce you like)
- 2 full-sized Nori sheets
- 70 grams Panko (or regular bread crumbs)
- 500 milliliters deep-frying oil
- sesame seeds
- spring onions
Instructions
- Let’s start with the sushi rice: Wash the rice under cold water until the water runs clear. This is important as it removes all the starch and prevents the rice from becoming mushy. Now, place the rice in a rice cooker or pot and add 400ml (1 + 2/3 cup) of water. I use a little less than 1:1.5 ratio rice to water, as there’s still water left on the rice from washing. Let the rice cook.
- To get that authentic sushi flavor, the rice will be soaked in a sauce. For this, heat rice vinegar, sugar, and salt in a small pot until the sugar and salt have dissolved. Set aside to cool. As it cools, the sauce will thicken slightly.
- Now, let’s prepare the salmon filling. Rinse the salmon under cold water, dry it, then chop it into rough cubes. In a bowl, mix it with Sriracha, and it’s ready. Keep the salmon chilled until use.
- By now, the rice should be cooked. Transfer it to a medium-sized bowl and pour over the rice vinegar-sugar-salt sauce. Mix everything until the sauce is distributed and absorbed by the rice. Let the rice cool completely.
- Meanwhile, prepare the topping sauces. For the light sauce, simply mix mayonnaise and Sriracha, thinning it with a bit of water to make it easier to spread. For the dark sauce, heat soy sauce, Mirin, and sugar in a small pan or pot until the sugar dissolves. Set aside to cool. Once the sauce is cold, it will thicken a bit. I like to pour the sauces into squeeze bottles, but you can also spoon them over the sushi later or use them for dipping. Keep the sauces chilled until use.
- In the meantime, you can prepare your work surface. Take a bamboo rolling mat, also known as Makisu, and wrap it on both sides with a layer of plastic wrap. Press the ends well onto the mat. Then fill a medium-sized bowl with a little water, as you’ll need it for your fingers to prevent the rice from sticking to them. Then you’ll need a cutting board and a sharp knife to halve the rolls. Finally, halve your Nori sheets and set them aside.
- Once the rice is cold, you can start rolling. Place the Makisu with the sticks horizontally in front of you. Place a Nori sheet with the shiny, smooth side down on the bamboo mat. Dip your fingers in the water and take about 1 heaped tablespoon of rice, spreading it with your fingers on the Nori sheet. It takes a bit of practice to handle the rice, but just take your time and moisten your fingers again if it becomes difficult to spread the rice. I press and push it in the direction I want it. I leave about 1/2-1cm (0.2″-0.4″) free at the top edge of the Nori sheet. When the rice is evenly distributed, turn the Nori sheet over so that the rice side is now facing down. Place a strip of the salmon filling in the center of the Nori sheet, a bit more than a finger thick. Now roll the Nori sheet so that the bottom end lands directly over the salmon filling. Then press everything tightly from the outside, then close the roll with a twist and press again. Take the finished sushi roll and halve it on the cutting board. Proceed the same way with the other rolls and set them aside.
- Now prepare the tempura batter. Mix flour, cornstarch, and salt in a large bowl. In a glass, stir the egg and ice-cold water starting with 100ml (3.5 oz) of water, and pour it into the dry ingredients. Quickly whisk everything until it’s creamy. If the batter is too thick, add 1 tablespoon of water and stir. We aim for a creamy-thick consistency. Better too thick than too thin, so really only adjust the water carefully. It also depends on how much liquid the egg brings. Pour the batter into a flat dish. Do the same with the Panko.
- Now you can bread the rolls. Take two forks and place the first roll in the tempura batter, distributing the batter over the entire roll. You can also gently turn it. Lift it up and let the excess batter drip off. Now place the roll directly into the Panko and press it onto the roll with the forks. You should now have a compact roll where the batter adheres well and nothing drips. Bread the rolls one by one and set aside.
- Now heat the frying oil to 190°C/375°F in a small, deep pot. Make sure to use enough oil so that the rolls can be completely submerged. I used solid vegetable fat in block form. Once the temperature is reached, place two rolls at a time into the oil. Be careful as the oil may bubble when the rolls are added. It’s best to use a foam spoon for this. The temperature will then drop to about 175°C/347°F. Fry the rolls in the oil for a total of 5 minutes. Each roll only absorbs about 10g (1/3 oz) of fat. I weighed the fat before and after 😀 This is because the fat is hot enough to instantly seal the crust. That’s why it’s also important to bring the fat to the right temperature. If the fat is too cold, the roll absorbs more fat and becomes soggy and not crispy.
- When the rolls are done frying, remove them from the fat and let them drain on a rack and cool slightly. Cut the rolls into 6 pieces each and arrange them on a plate. Next, drizzle the light and dark sauces over the rolls in a zigzag direction. Finally, you can sprinkle some sesame and finely chopped spring onions as a topping.
Notes
The calorie information may vary depending on the product used, country and region.
- Passive Time: 20 min
- Cook Time: 55 min
CRAVING MORE?
Follow along here & don’t forget to subscribe to my substack!
MORE PIECES OF HAPPINESS



Wow, das war next level. Habe diese Rollen mit meinen Mädels letztens gemacht und musste dir einfach sagen, wie toll du dieses Rezept beschrieben hast. Alles hat reibungslos geklappt und so unglaublich lecker geschmeckt. Kommt ab sofort ins Standard-Repertoire! Danke.
Wie lieb von dir! Freut mich sehr und tolle Idee Sushi gemeinsam mit Freunden zu machen 🙂