Pistachio White Chocolate Cookies

Pistachio White Chocolate Cookies

Pistachio White Chocolate Cookies

Bakery Style Pistachio White Chocolate Cookies

June 14, 2026 by Kimberly

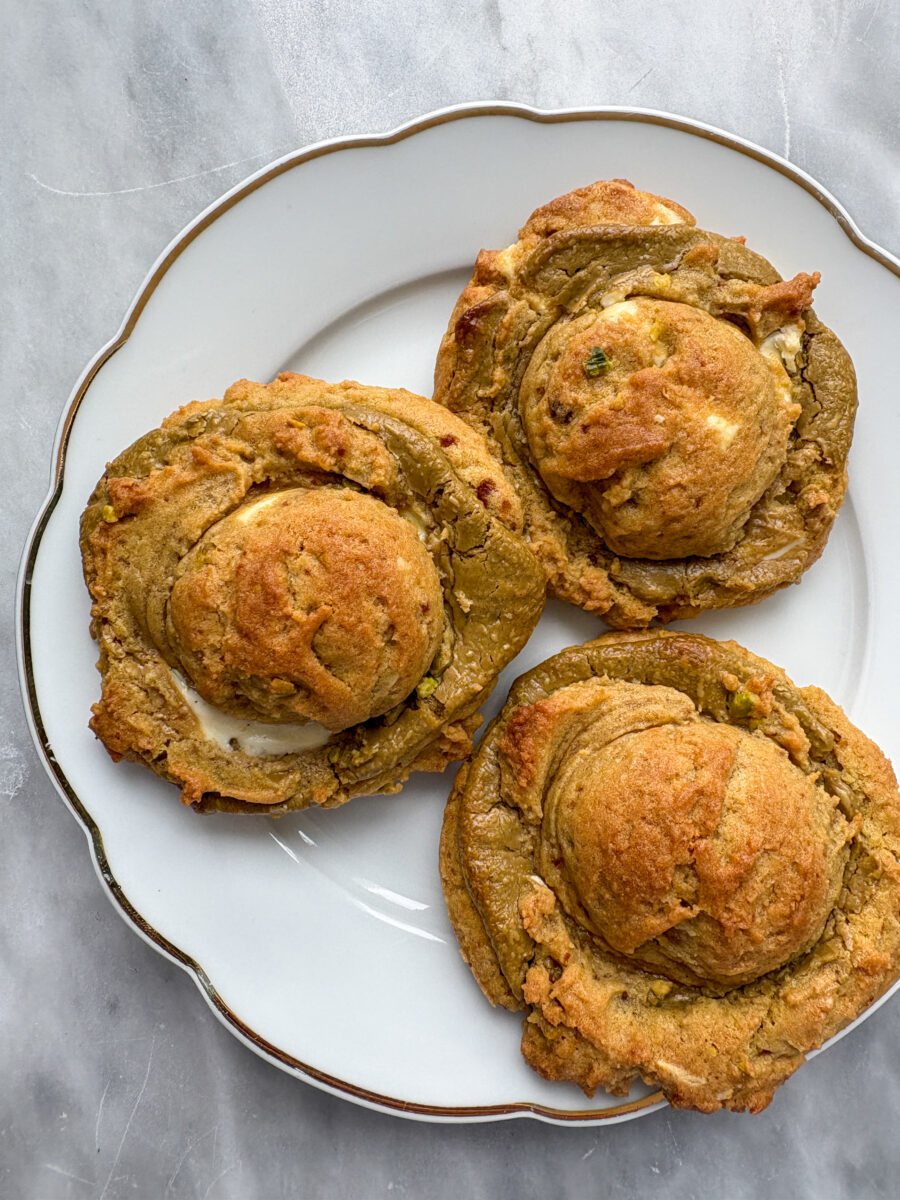
These cookies are soft, thick, chewy, and filled with creamy pistachio cream. They are based on my bakery style vanilla cookie dough, but made with sweet white chocolate and a little pistachio cream filling that melts into the middle while baking. The dough is shaped like a little cookie sandwich, chilled until firm, and baked straight from frozen for that perfect bakery-style texture: slightly crisp on the outside, soft in the middle, and beautifully rich without being complicated.

This website uses affiliate links which may earn commission for purchases made at no additional cost to you.

TOTAL TIME

30 min

SERVES

10 cookies

DIET

vegetarian

EVERY RECIPE DESERVES

A Little Love Letter

I already knew I loved this cookie. It is the kind of dough that makes you understand why bakery cookies always feel a little more special than regular homemade cookies. Thick, soft, slightly chewy, buttery in the best way, and honestly just dramatic enough to deserve its own little moment.

This recipe is based on my Bakery Style Vanilla Cookie dough, which has quickly become one of those recipes I want to use again and again. Once you have a good base cookie dough, it almost feels rude not to play around with it. And because I love pistachio cream this version had to happen.

These cookies are made with white chocolate and filled with a little spoonful of pistachio cream in the center. The dough is shaped almost like a tiny cookie sandwich: one small scoop of dough, a little press with a spoon, a spoonful of pistachio cream, and then another scoop of dough on top.

After baking, the cookies are slightly crisp on the outside, soft and chewy in the middle, with little pockets of white chocolate and that creamy pistachio center. They are rich, but not too much. Sweet, but balanced by the nutty pistachio. And honestly, they feel like the kind of cookie you would buy from a tiny bakery where everything is a little expensive, but somehow still completely worth it.

And the best part: you can freeze the shaped cookie dough balls and bake them straight from frozen whenever you want. Which means warm pistachio white chocolate cookies are never really that far away.

Hi, I'm Kimberly!

Hi, I'm Kimberly.

A hopeless romantic when it comes to food. Every recipe I share is a love letter to food itself. I’m so glad you’re here. Make yourself at home and stay a while.

Love,
Kimberly

Kimberly the Zett Signature

If you want to get to know me better,
click here!


Pistachio White Chocolate Cookies

LET’S MAKE A PIECE OF HAPPINESS

Print
clock clock iconcutlery cutlery iconflag flag iconfolder folder iconinstagram instagram iconpinterest pinterest iconfacebook facebook iconprint print iconsquares squares iconheart heart iconheart solid heart solid icon
Pistachio White Chocolate Cookies

Bakery Style Pistachio White Chocolate Cookies


5 Stars 4 Stars 3 Stars 2 Stars 1 Star

No reviews

  • Author: Kimberly
  • Total Time: 30 min
  • Yield: 10 cookies 1x

Description

These bakery style pistachio white chocolate cookies are soft, thick, chewy, and filled with creamy pistachio cream in the center. They are based on my bakery style vanilla cookie dough, but made with sweet white chocolate and a little pistachio cream filling that melts into the middle while baking. The dough is shaped like a little cookie sandwich, chilled until firm, and baked straight from frozen for that perfect bakery-style texture: slightly crisp on the outside, soft in the middle, and beautifully rich without being complicated.

GOOD TO HAVE ON HAND

  • electric mixer with bowl
  • scale
  • small cookie scoop
  • parchment paper
  • small spoon

Ingredients

Units Scale
  • 115 grams soft butter
  • 90 grams brown sugar
  • 40 grams white sugar
  • 1 egg
  • 1 tsp vanilla extract
  • 240 grams all-purpose flour
  • 1 tsp corn starch
  • 1/2 tsp baking soda
  • 1/2 tsp salt
  • 100 grams white chocolate
  • 60 grams pistachio cream (about 10 tsp)

Instructions

  1. Add the butter to a mixing bowl and beat for about 3 minutes, until pale and fluffy. Add the brown sugar and white sugar and beat for another 1–2 minutes, until creamy.
  2. Add the egg, vanilla extract, and butter flavoring, and mix just until everything is combined. Do not overmix.
  3. Add the flour, cornstarch, baking soda, and salt, and mix briefly until the dough has almost come together. Add the white chocolate and mix just until no streaks of flour remain and everything is evenly incorporated.
  4. Line a small baking sheet with parchment paper. Using a small cookie scoop, scoop 10 small balls of dough and place them onto the baking sheet. Gently press each dough ball down with a spoon to flatten it slightly.
  5. Add about 1 tsp of pistachio cream to the center of each flattened cookie dough ball.
  6. Scoop 10 more small balls of cookie dough and place one on top of each pistachio-filled cookie. Gently press down so the dough sticks together and forms a little sandwich.
  7. Place the shaped cookie dough balls in the freezer for at least 3 hours.
  8. Before baking, fully preheat the oven to 190°C / 375°F. Place the frozen cookie dough balls on a baking sheet with enough space between them so they do not spread into each other.
  9. Bake the cookies for about 12–14 minutes, depending on how browned you like them. Let them cool on the baking sheet for at least 30 minutes.
  10. The cookies can be eaten once they have cooled, but they are especially good if you let them rest in the fridge for a few hours after they have cooled completely. That is when they get that real bakery-style texture.

  • Prep Time: 15 min
  • Cook Time: 13 min

CRAVING MORE?

Follow along here & don’t forget to subscribe to my substack!

Pecan Caramel Pie Cobbler

Pecan Caramel Pie Cobbler

Pecan Caramel Pie Cobbler

Pecan Caramel Pie Cobbler

November 27, 2024 by Kimberly

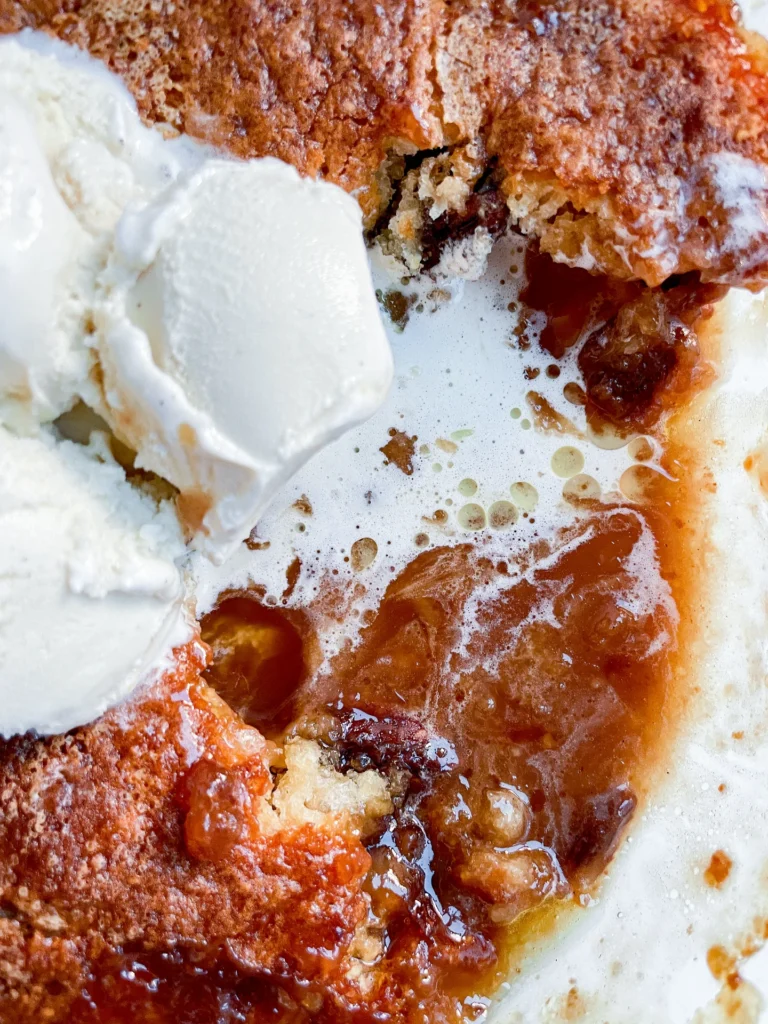
This warm, gooey cobbler is the ultimate comfort dessert – melty caramel candies, crunchy pecans, and buttery dough baked into golden perfection. A cozy, sweet treat for every dessert lover out there!

This website uses affiliate links which may earn commission for purchases made at no additional cost to you.

TOTAL TIME

1 hr + 15 min

SERVES

8 portions

DIET

vegetarian

EVERY RECIPE DESERVES

A Little Love Letter

There’s something magical about desserts that feel like a warm hug, and this cobbler delivers just that. Melty caramel candies and crunchy pecans create a gooey filling, while the buttery dough bakes into a golden, rustic crust. It’s the perfect dessert for chilly evenings or holiday gatherings, combining the cozy flavors of caramel and pecans into one irresistible dish. Trust me, once you try this cobbler, it’ll quickly become a go-to comfort dessert for every season.

This cobbler is best served warm, straight out of the oven, with a scoop of vanilla ice cream or a dollop of whipped cream on top. The cold creaminess of the topping perfectly balances the gooey caramel and crunchy pecans. Sprinkle a few extra pecans over the top for added texture. It’s perfect for family gatherings, dinner parties, or just a cozy night in.

Store any leftovers in an airtight container at room temperature for up to one day, or in the fridge for up to four days. Reheat individual portions in the microwave for 20-30 seconds to bring back the gooey, warm goodness.

Hi, I'm Kimberly!

Hi, I'm Kimberly.

A hopeless romantic when it comes to food. Every recipe I share is a love letter to food itself. I’m so glad you’re here. Make yourself at home and stay a while.

Love,
Kimberly

Kimberly the Zett Signature

If you want to get to know me better,
click here!


Pecan Caramel Pie Cobbler

LET’S MAKE A PIECE OF HAPPINESS

Print
clock clock iconcutlery cutlery iconflag flag iconfolder folder iconinstagram instagram iconpinterest pinterest iconfacebook facebook iconprint print iconsquares squares iconheart heart iconheart solid heart solid icon
Pecan Caramel Pie Cobbler

Pecan Caramel Pie Cobbler


4.3 from 3 reviews

  • Author: Kimberly
  • Total Time: 75 min
  • Yield: 8 1x

Description

RECOMMENDED EQUIPMENT

  • baking dish (approx. 20×30 cm or similar)
  • mixing bowl
  • whisk or hand mixer
  • kettle (for boiling water)


Ingredients

Units Scale
  • 120 grams butter
  • 125 grams all-purpose flour
  • 125 grams white sugar
  • 3 tsp baking powder
  • 1/4 tsp salt
  • 170 milliliter full-fat cow milk
  • 1 tsp vanilla extract
  • 100 grams pecans
  • 50 grams brown sugar
  • 125 grams caramel candies
  • 250 milliliter boiling water
  • vanilla ice cream

Instructions

  1. Preheat the oven to 175°C / 350°F. Grab a baking dish, drop in the butter, and pop it into the oven for a few minutes and let it melt.
  2. In a bowl, combine flour, sugar, baking powder, and a pinch of salt. Stir in milk and a splash of vanilla extract until it’s all smooth, creamy, and totally lump-free.
  3. Carefully pull the now-buttery baking dish out of the oven. Pour the batter right over that melted butter. Trust the process – it looks weird now, but it’s all part of trust the process. Sprinkle pecans on top and follow up with a layer of brown sugar. Finally, add the caramel candies. Whole or crushed? Dealer’s choice.
  4. Next, get that kettle boiling and slowly pour the hot water over everything in the dish. Yes, everything. No stirring allowed! Just trust me on this one.
  5. Bake uncovered for 30–35 minutes or until the top is golden brown and smells like a caramel dream.
  6. Take it out and let it cool for about 30 minutes. Patience is key – the caramel sauce underneath thickens and gets all creamy during this time.
  7. Scoop it into bowls, drizzle with that caramel sauce hiding underneath, and top with a big ol’ scoop of vanilla ice cream.

  • Passive Time: 60 min
  • Cook Time: 15 min

CRAVING MORE?

Follow along here & don’t forget to subscribe to my substack!

Almond Milk

Almond Milk

Almond Milk

Almond Milk

November 23, 2024 by Kimberly

Start your day with a bottle of fresh, homemade almond milk waiting in the fridge. Smooth, creamy, and naturally nutty, this dairy-free milk alternative is made with just two simple ingredients: almonds and water and perhaps any flavor twist you’re in the mood for. Whether you’re blending up a smoothie, pouring it over your morning granola, or adding a splash to your iced coffee, this almond milk turns everyday moments into a little plant-based luxury.

This website uses affiliate links which may earn commission for purchases made at no additional cost to you.

TOTAL TIME

17 min + overnight

SERVES

1 liter / 4 cups

DIET

vegan

EVERY RECIPE DESERVES

A Little Love Letter

I honestly used to think making almond milk at home was some sort of witchcraft, like you’d need a shiny high-speed blender, nut milk bags, and basically a degree in food science. And what can I say? You really don’t. Haha. All it actually takes is almonds, water, and a little bit of patience. That’s it. And at the end, you’re rewarded with this fresh, creamy, silky-smooth plant-based milk that feels so much more real than anything you’ll find in a carton at the store. No additives, no gums, no ingredients you can’t even pronounce.

The fun part? You can make it your own in about a million ways. Cinnamon almond milk for cozy fall vibes? Absolutely. Vanilla almond milk that tastes like dessert in a glass? Always yes. A drizzle of maple syrup for that subtle sweetness? Yessss, please. Once you try customizing it, you’ll realize how versatile it really is. I use homemade almond milk especially in smoothies. One of my favorites is this Banana Bliss Smoothie with Poppy Seeds, Marzipan & Almond Butter. It makes everything so creamy without feeling heavy. But it’s also amazing poured over granola or blended into iced coffee.

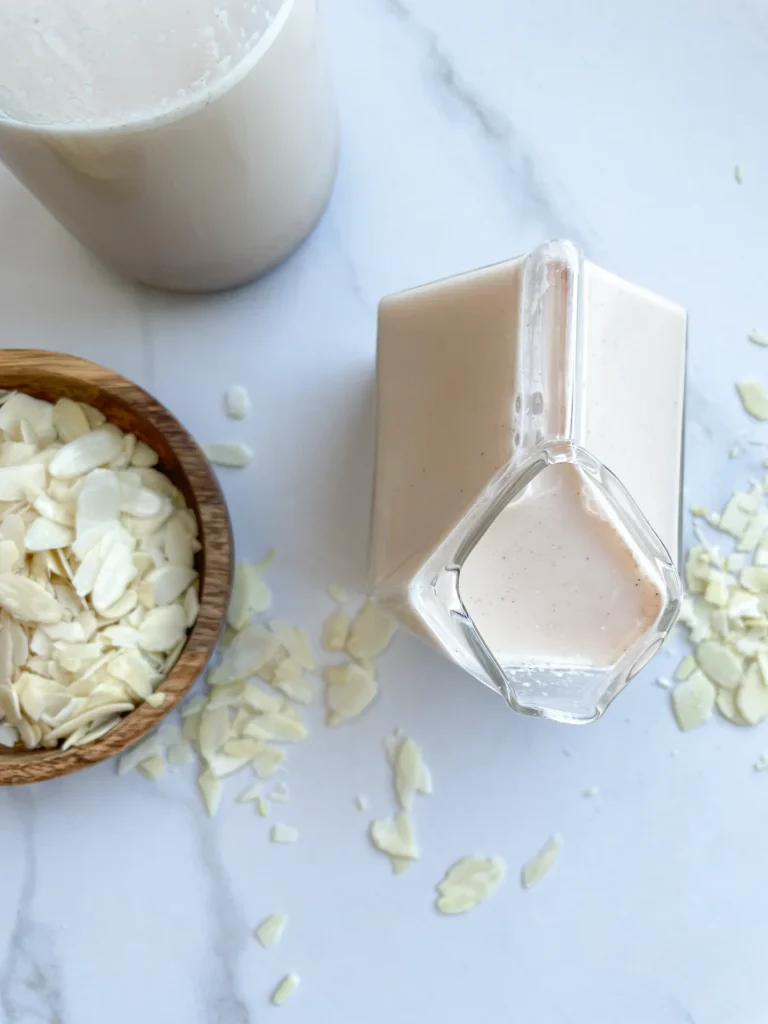
And yes, I’ll admit, I’m also in it for the aesthetic. I always pour my almond milk into a classic glass bottle before popping it into the fridge. There’s just something about opening the door and seeing that little bottle waiting there. But it’s practical as well: in a clean bottle with a lid, it keeps fresh for three to four days. Just give it a good shake before using, since it tends to separate naturally.

So yeah, homemade almond milk might sound fancy, but really it’s one of the simplest little kitchen habits you can build. And once you’ve tried it, I promise you’ll wonder why you ever thought it was complicated.

Hi, I'm Kimberly!

Hi, I'm Kimberly.

A hopeless romantic when it comes to food. Every recipe I share is a love letter to food itself. I’m so glad you’re here. Make yourself at home and stay a while.

Love,
Kimberly

Kimberly the Zett Signature

If you want to get to know me better,
click here!


Almond Milk
Dreamy Homemade Almond Milk

LET’S MAKE A PIECE OF HAPPINESS

Print
clock clock iconcutlery cutlery iconflag flag iconfolder folder iconinstagram instagram iconpinterest pinterest iconfacebook facebook iconprint print iconsquares squares iconheart heart iconheart solid heart solid icon
Almond Milk

Almond Milk


  • Author: Kimberly
  • Total Time: 17 min + overnight
  • Yield: 1 liter / 4 cups 1x

Description

Start your day with a bottle of fresh, homemade almond milk waiting in the fridge. Smooth, creamy, and naturally nutty, this dairy-free milk alternative is made with just two simple ingredients: almonds and water and perhaps any flavor twist you’re in the mood for. Whether you’re blending up a smoothie, pouring it over your morning granola, or adding a splash to your iced coffee, this almond milk turns everyday moments into a little plant-based luxury.

GOOD TO HAVE ON HAND

  • medium-sized bowl
  • blender
  • fine mesh strainer
  • bottle

Ingredients

Units Scale
  • 200 grams raw almonds
  • 1000 milliliters cold, filtered water
OPTIONAL
  • 3 dates, pitted
  • 1 tsp vanilla extract
  • pinch of salt

Instructions

IN THE EVENING
Place the almonds (and dates) in a bowl and add enough water to fully cover them. Set the bowl in the fridge to soak overnight.

THE NEXT MORNING

  1. Drain the almonds (and dates) through a fine-mesh strainer and discard the soaking water.
    Transfer the almonds (and dates) to a blender and add 1 liter / 4 cups of fresh cold water.
  2. Blend on the highest setting for about 1 minute, until the liquid turns white and frothy. Now you can add flavoring to taste. I used a pinch of salt and 1 teaspoon of vanilla extract, but 1 teaspoon of cinnamon is also a super delicious option.
  3. Place a fine-mesh strainer over a bowl and pour the almond milk through it. Press the pulp firmly to extract as much liquid as possible. If you’d like, you can strain the milk again through a cheesecloth or nut milk bag. Alternatively, place the almond pulp in a clean kitchen towel and squeeze it out by hand — but honestly, that’s not really necessary.
  4. Pour the finished almond milk into a clean glass bottle. It will keep in the fridge for about three to four days. Be sure to shake well before using, as the solids naturally settle to the bottom over time.
  • Prep Time: 17 min
  • Passive Time: overnight
  • Cook Time: 0 min

CRAVING MORE?

Follow along here & don’t forget to subscribe to my substack!

Carrot Oil

Carrot Oil

Carrot Oil

Carrot Oil

May 21, 2024 by Kimberly

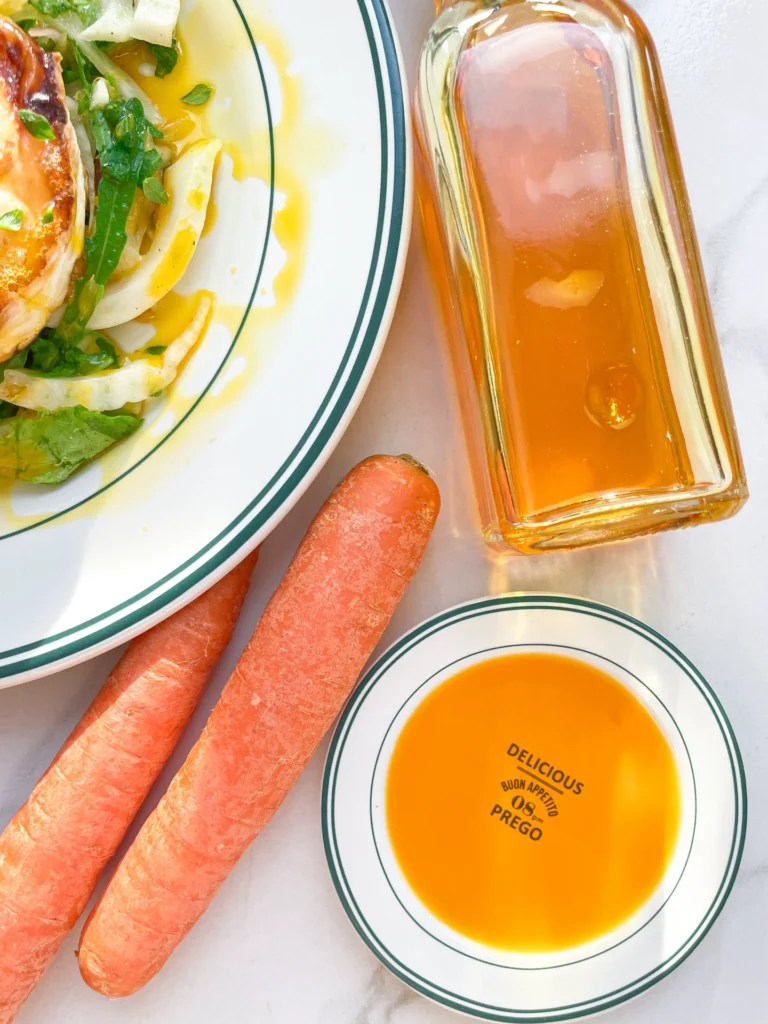
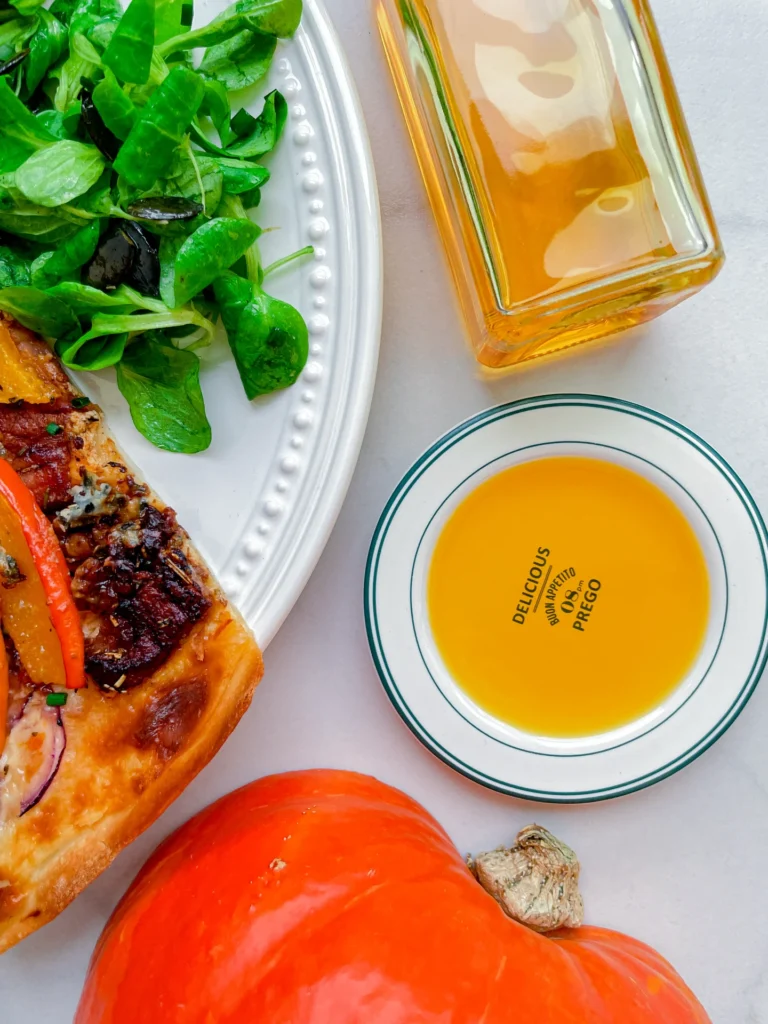
You’ve got to try this Carrot Oil! Made with rapeseed oil and fresh carrots, it adds an amazing burst of flavor to salads and cheese.

This website uses affiliate links which may earn commission for purchases made at no additional cost to you.

TOTAL TIME

1 hr + 35 min

SERVES

1 cup / 250 ml

DIET

vegan

EVERY RECIPE DESERVES

A Little Love Letter

Take your culinary creations to the next level with homemade Carrot Oil! This easy recipe blends the sweet earthiness of carrots with the light, nutty flavor of rapeseed oil. Perfect for drizzling over salads or adding a gourmet touch to your favorite cheeses, this carrot oil is a must-try for any foodie.

Drizzle this vibrant carrot oil over fresh salads for an extra burst of flavor. It’s also fantastic for adding a gourmet touch to cheese platters. Just a few drops can transform simple dishes into something truly special. Experiment by using it as a finishing oil on roasted vegetables or as a dip for artisan bread.

Store your carrot oil in a dark, airtight bottle to maintain its freshness. Keep it in a cool, dry place away from direct sunlight. Properly stored, your carrot oil will stay delicious and vibrant for up to a few weeks.

Hi, I'm Kimberly!

Hi, I'm Kimberly.

A hopeless romantic when it comes to food. Every recipe I share is a love letter to food itself. I’m so glad you’re here. Make yourself at home and stay a while.

Love,
Kimberly

Kimberly the Zett Signature

If you want to get to know me better,
click here!


Carrot Oil
Carrot Oil
Carrot Oil
Carrot Oil

LET’S MAKE A PIECE OF HAPPINESS

Print
clock clock iconcutlery cutlery iconflag flag iconfolder folder iconinstagram instagram iconpinterest pinterest iconfacebook facebook iconprint print iconsquares squares iconheart heart iconheart solid heart solid icon
Carrot Oil

Carrot Oil


  • Author: Kimberly
  • Total Time: 105 min
  • Yield: 250 ml / 1 cup 1x
  • Diet: Vegan

Description

RECOMMENDED EQUIPMENT

  • blender
  • medium-sized saucepan
  • whisk
  • a bowl which the medium saucepan fits into
  • 2 medium-sized bowls
  • 2 fine sieves
  • sealable container (oil bottle)
  • ice cubes
  • coffee filter

Ingredients

Units Scale
  • 150 grams carrot
  • 250 milliliters unrefined/cold-pressed rapeseed oil

Instructions

  1. Peel the carrots, roughly chop them and put them into the blender. Pour in the oil. Blend on the highest setting until there are only tiny pieces of the carrots left.
  2. Pour the mixture from the blender into a medium-sized pot and heat it over medium heat to a temperature of about 104°-106°C (219°-222°F), and maintain this temperature for the next 40 minutes. Stir occasionally, making sure the temperature remains steady and nothing gets burned.
  3. Prepare a bowl large enough to fit a medium-sized pot, and fill it with cold water and a handful of ice cubes. Also, hang a fine sieve strainer over one medium-sized bowl and another fine sieve strainer, with a coffee filter inside it, over another medium-sized bowl.
  4. Now, place the pot in the ice water and stir to cool the oil quickly. Once the oil is almost cold, remove the pot from the water and pour the oil into the prepared fine sieve to catch the coarse particles.
  5. Then, pour the oil into the second sieve, which is equipped with a coffee filter, to catch the remaining finer particles.
  6. Allow the oil to drip through for about 1 hour or maybe less depending on how many remaining particles are in the coffee filter. Once all the oil has passed through the coffee filter, transfer the collected amount of oil into a sealable container or directly into an oil bottle. Store in the refrigerator for up to one week.

Notes

The calorie information may vary depending on the product used, country and region.

  • Prep Time: 5 min
  • Passive Time: 60 min
  • Cook Time: 40 min
  • Category: OILS
  • Method: COOKING
  • Cuisine: INTERNATIONAL

CRAVING MORE?

Follow along here & don’t forget to subscribe to my substack!

Pink Hummus

Pink Hummus

Pink Hummus

Pink Hummus

May 20, 2024 by Kimberly

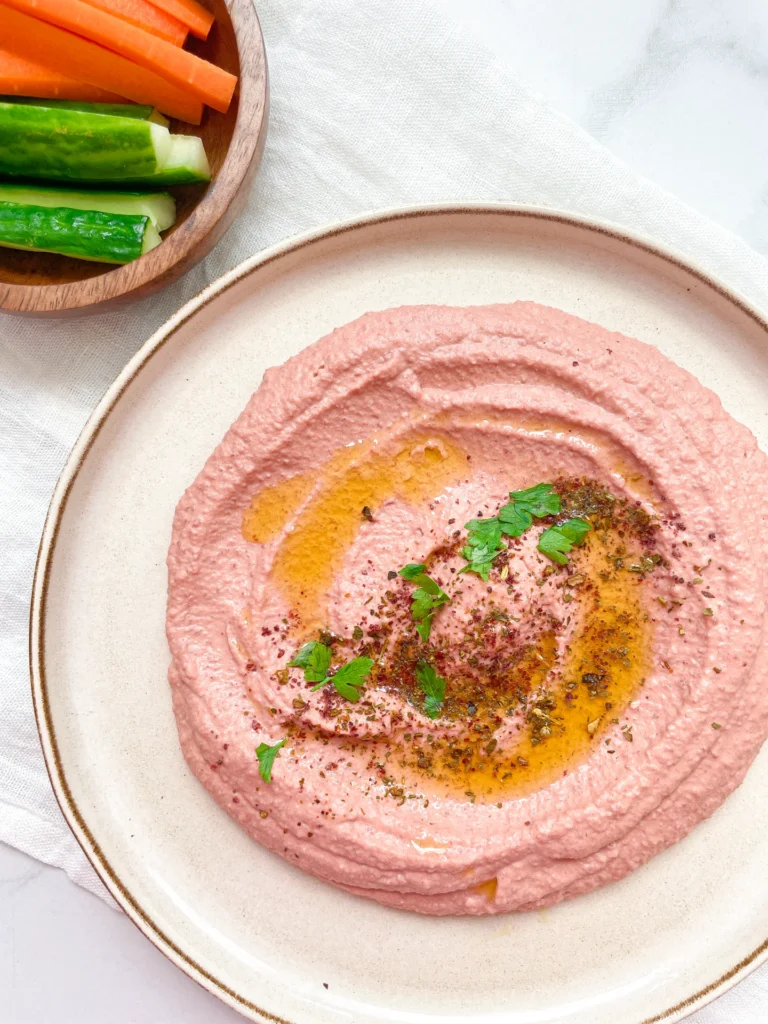
Get ready to wow your taste buds with this vibrant pink beetroot hummus! It’s creamy, delicious, and packed with nutrients – a perfect, colorful twist on a classic.

This website uses affiliate links which may earn commission for purchases made at no additional cost to you.

TOTAL TIME

10 min

SERVES

6 portions

DIET

vegan

EVERY RECIPE DESERVES

A Little Love Letter

If you’re looking to add a pop of color and a burst of flavor to your snack game, pink beetroot hummus is your go-to recipe! This delightful dip combines the earthy sweetness of beetroots with the creamy goodness of traditional hummus. Not only is it visually stunning, but it’s also packed with nutrients, making it a healthy choice for any occasion. Perfect for impressing guests or just treating yourself!

Pink beetroot hummus is incredibly versatile and can be served in numerous ways. Spread it on toast for a vibrant breakfast, pair it with fresh veggies for a healthy snack, or use it as a flavorful addition to your sandwich or wrap. It’s also a hit at parties when served with pita chips or crackers. The possibilities are endless, and each bite is as delightful as the last!

To keep your pink beetroot hummus fresh, store it in an airtight container in the refrigerator. It will stay delicious for up to a week. Just give it a good stir before serving, and you’re ready to enjoy!

Hi, I'm Kimberly!

Hi, I'm Kimberly.

A hopeless romantic when it comes to food. Every recipe I share is a love letter to food itself. I’m so glad you’re here. Make yourself at home and stay a while.

Love,
Kimberly

Kimberly the Zett Signature

If you want to get to know me better,
click here!


Pink Hummus
Pink Hummus

LET’S MAKE A PIECE OF HAPPINESS

Print
clock clock iconcutlery cutlery iconflag flag iconfolder folder iconinstagram instagram iconpinterest pinterest iconfacebook facebook iconprint print iconsquares squares iconheart heart iconheart solid heart solid icon
Pink Hummus

Pink Hummus


  • Author: Kimberly
  • Total Time: 10 min
  • Yield: 6 1x
  • Diet: Vegan

Description

GOOD TO HAVE ON HAND

  • sharp knife
  • cutting board
  • sieve
  • food processor


Ingredients

Units Scale
  • 265 grams chickpeas (drained)
  • 2 garlic cloves
  • juice of 1/2 lemon
  • 60 grams tahini
  • 2 tbsp olive oil
  • 1/4 tsp salt
  • 1/4 tsp - 1/2 tsp cumin
  • 4 ice cubes
  • 200 grams beetroot (cooked)

Instructions

PREPARATIONS

  • Pour the canned chickpeas into a sieve and rinse with cold water until the Aquafaba stops foaming. You can save the Aquafaba for other recipes.
  • Peel the garlic cloves.
  • Halve the lemon.
  • Cut the beetroot into chunks. If using fresh beetroot, peel it first.

INSTRUCTIONS

  1. Pour the chickpeas into the food processor. Add the garlic cloves, tahini, salt, olive oil, and cumin. Blend on medium until you get a chunky but creamy consistency.
  2. While the machine is running, gradually add the ice cubes. Blend for about 1-3 minutes (depending on your machine) until smooth and creamy. Adjust the seasoning with salt and lemon juice if needed.
  3. Add the beetroot chunks and blend again until well combined.
  4. Transfer the hummus to a bowl and garnish with olive oil, chickpeas, herbs, and paprika as desired.

Notes

The calorie information may vary depending on the product used, country and region.

  • Prep Time: 5 min
  • Cook Time: 5 min
  • Category: DIP
  • Cuisine: ARABIC

CRAVING MORE?

Follow along here & don’t forget to subscribe to my substack!

Apricot Cashew Honey Bliss Balls

Apricot Cashew Honey Bliss Balls

Apricot Cashew Honey Bliss Balls

Apricot Cashew Honey Bliss Balls

April 13, 2024 by Kimberly

Dive into the world of deliciousness with these Apricot Cashew Honey Bliss Balls! Perfectly sweet, nutty, and chewy, they’re the ultimate healthy snack for any time of day.

This website uses affiliate links which may earn commission for purchases made at no additional cost to you.

TOTAL TIME

10 min

SERVES

12 balls

DIET

vegetarian

EVERY RECIPE DESERVES

A Little Love Letter

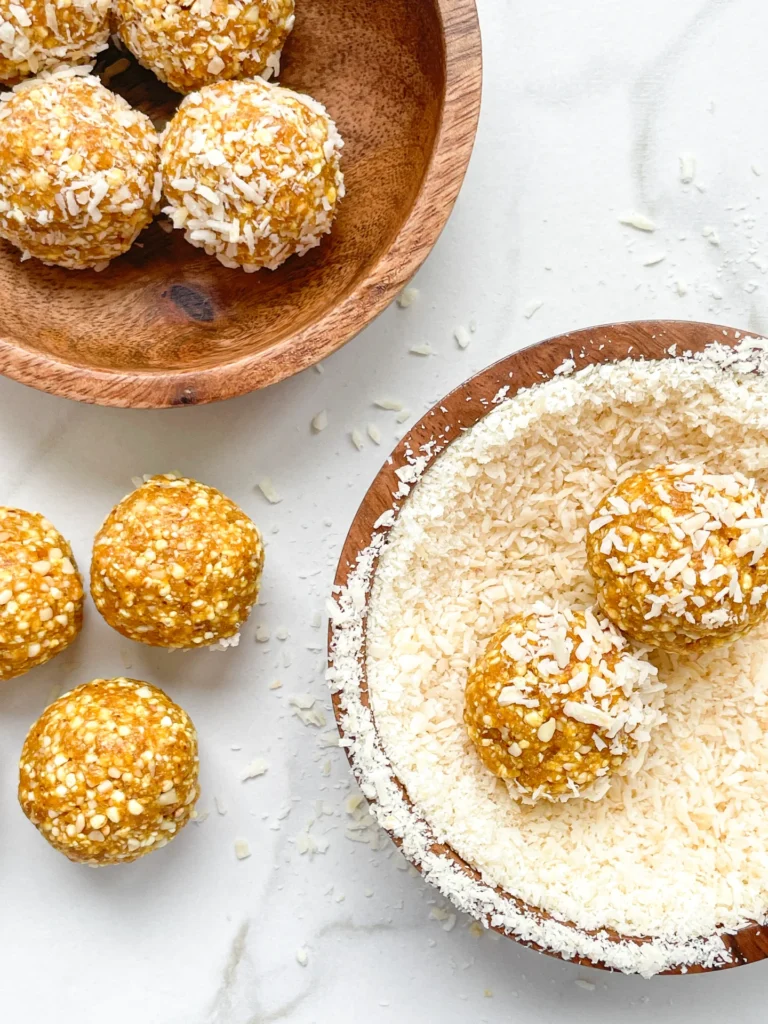
Welcome to your new favorite snack: Apricot Cashew Honey Bliss Balls! These no-bake energy balls are a blissful blend of sweet apricots, creamy cashews, and natural honey. Perfect for those seeking a quick, healthy dessert idea or a nutritious energy boost, these bliss balls are sure to delight with their chewy texture and nutty flavor.

Serve these delightful Apricot Cashew Honey Bliss Balls as a mid-morning snack, a post-workout energy boost, or a sweet after-dinner treat. Pair them with a cup of your favorite tea or a cold glass of almond milk for a refreshing snack. These bliss balls are also perfect for sharing at gatherings or gifting to friends and family who appreciate healthy, homemade treats.

Store your Bliss Balls in an airtight container in the refrigerator for up to two weeks. For longer storage, freeze them on a baking sheet before transferring to a freezer-safe bag, keeping them fresh and delicious for up to three months.

Hi, I'm Kimberly!

Hi, I'm Kimberly.

A hopeless romantic when it comes to food. Every recipe I share is a love letter to food itself. I’m so glad you’re here. Make yourself at home and stay a while.

Love,
Kimberly

Kimberly the Zett Signature

If you want to get to know me better,
click here!


Apricot Cashew Honey Bliss Balls

LET’S MAKE A PIECE OF HAPPINESS

Print
clock clock iconcutlery cutlery iconflag flag iconfolder folder iconinstagram instagram iconpinterest pinterest iconfacebook facebook iconprint print iconsquares squares iconheart heart iconheart solid heart solid icon
Apricot Cashew Honey Bliss Balls

Apricot Cashew Honey Bliss Balls


  • Author: Kimberly
  • Total Time: 10 min
  • Yield: 12 1x

Description

GOOD TO HAVE ON HAND

  • food processor
  • small bowl


Ingredients

Units Scale
  • 60 grams salted cashew nuts
  • 40 grams hazelnuts
  • 80 grams dried apricots
  • 20 grams puffed quinoa
  • 2 tbsp honey
  • 20 grams coconut flakes
  • 1/4 tsp turmeric

Instructions

  1. Place the coconut flakes in a small bowl and set aside.
  2. Put the following ingredients into the food processor and blend on high for 1 minute: 60g cashew nuts, 20g hazelnuts, 80g dried apricots, and 20g puffed quinoa.
  3. Then add 1/4 tsp turmeric and 2 tbsp honey to the mixture in the food processor and blend again on high for another minute.
  4. Divide the mixture into 12 equal portions and roll them into balls and then in the coconut flakes, press lightly, and enjoy 🙂
  • Cook Time: 10 min

CRAVING MORE?

Follow along here & don’t forget to subscribe to my substack!