Yogurt Lime Swirl Ice Cream

Yogurt Lime Swirl Ice Cream

Yogurt Lime Swirl Ice Cream

Yogurt Lime Swirl Ice Cream

July 7, 2026 by Kimberly

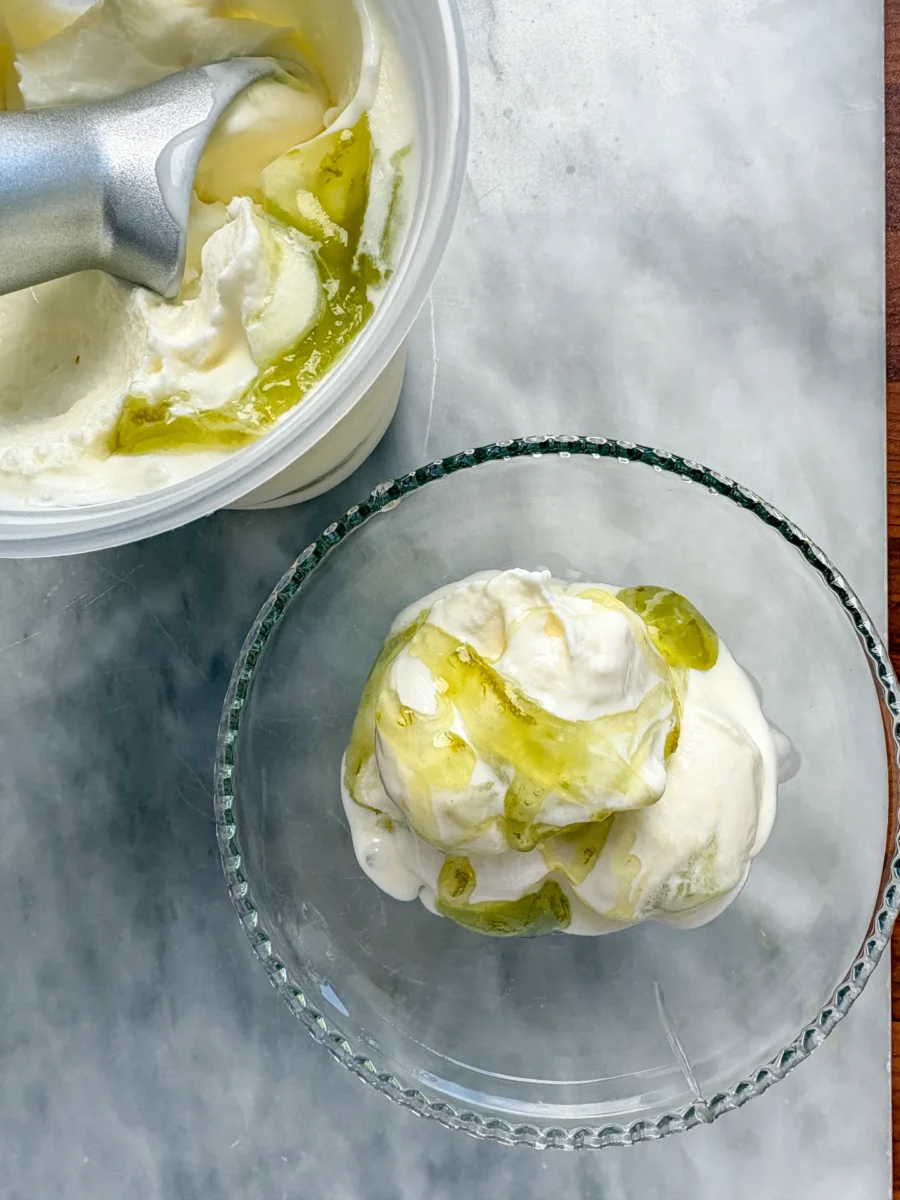
Creamy yogurt ice cream meets a fresh lime swirl. This homemade frozen yogurt is summer in a bowl. The yogurt base stays wonderfully creamy and scoopable even after freezing, while the lime swirl brings natural color and a bright hint of tartness for that wow-worthy marble look. Whether as a refreshing dessert, a sweet cool-down on hot days, or a showstopper at your next dinner party: this yogurt lime ice cream makes every summer moment a little more refreshing.

This website uses affiliate links which may earn commission for purchases made at no additional cost to you.

TOTAL TIME

1 hour

SERVES

6 portions

DIET

vegetarian

EVERY RECIPE DESERVES

A Little Love Letter

Some recipes work on the first try. And then there’s this yogurt lime swirl ice cream. The lime swirl took me four attempts. Four! But hey, for a yogurt lime swirl ice cream, I wanted nothing less than perfect. My goal was clear: I wanted a homemade ice cream that doesn’t turn rock hard in the freezer, but stays beautifully creamy and scoopable. Sounds simple, but it isn’t. Anyone who has ever had to chisel ice cream out of the freezer knows exactly what I mean. So I tinkered, tested, tossed and on the fourth try, everything finally came together. Creamy, fresh, scoopable. Exactly the way I had imagined it.

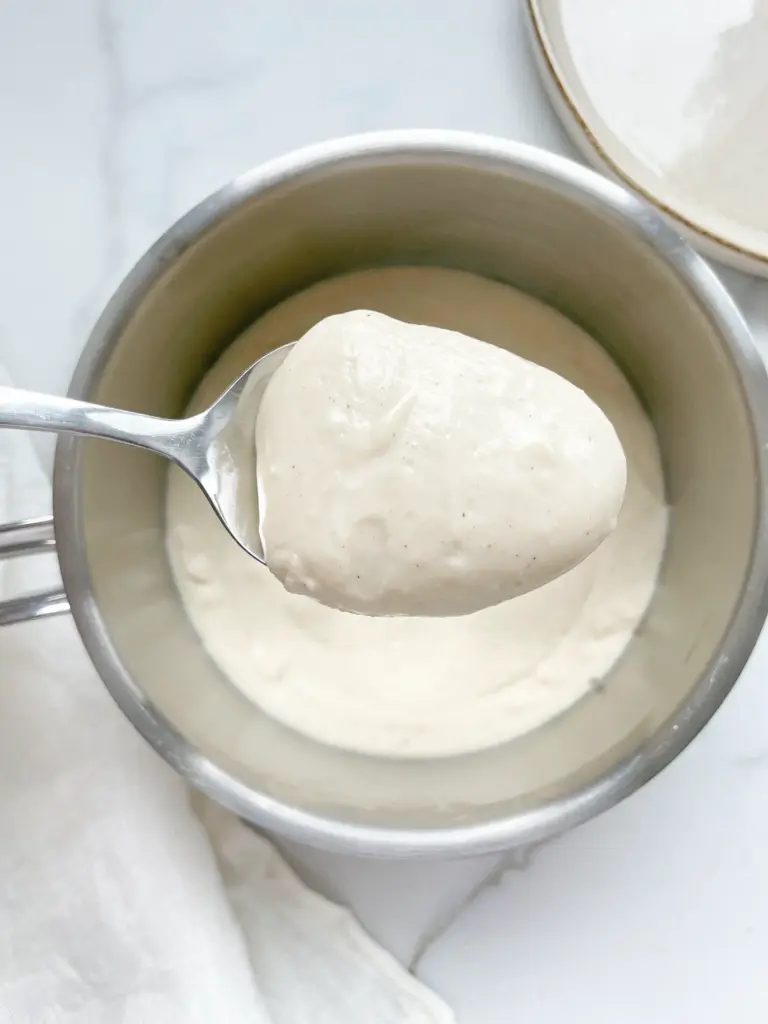
I didn’t want to compromise on the color either. The swirl in this recipe gets its color entirely from natural ingredients. It was supposed to look like real lime not like plastic. The base is my tried-and-true Yogurt Ice Cream. Yogurt ice cream is my absolute favorite anyway that light freshness, that creaminess, that feeling of summer in a bowl. But paired with the tangy, fresh lime swirl? It takes the whole thing to a completely different level. The best part comes when you layer it: the yogurt base and lime swirl are added to the container in alternating layers and gently swirled with a knife, creating a gorgeous marble look.

Every scoop looks a little different, and that’s exactly what makes this frozen yogurt so special to me. It’s one of those recipes where even the plating is pure joy. Whether as dessert on a warm summer evening, a little cool-down in between, or the highlight of your next dinner with friends, this yogurt lime ice cream is my personal summer favorite. And I promise you: after the first spoonful, you’ll understand why I don’t regret a single one of those four attempts. I simply love everything about it.

Hi, I'm Kimberly!

Hi, I'm Kimberly.

A hopeless romantic when it comes to food. Every recipe I share is a love letter to food itself. I’m so glad you’re here. Make yourself at home and stay a while.

Love,
Kimberly

Kimberly the Zett Signature

If you want to get to know me better,
click here!


Yogurt Lime Swirl Ice Cream

LET’S MAKE A PIECE OF HAPPINESS

Print
clock clock iconcutlery cutlery iconflag flag iconfolder folder iconinstagram instagram iconpinterest pinterest iconfacebook facebook iconprint print iconsquares squares iconheart heart iconheart solid heart solid icon
Yogurt Lime Swirl Ice Cream

Yogurt Lime Swirl Ice Cream


5 Stars 4 Stars 3 Stars 2 Stars 1 Star

No reviews

  • Author: Kimberly
  • Total Time: 1 hours
  • Yield: 6 portions 1x

Description

Creamy yogurt ice cream meets a fresh lime swirl. This homemade frozen yogurt is summer in a bowl. The yogurt base stays wonderfully creamy and scoopable even after freezing, while the lime swirl brings natural color and a bright hint of tartness for that wow-worthy marble look. Whether as a refreshing dessert, a sweet cool-down on hot days, or a showstopper at your next dinner party: this yogurt lime ice cream makes every summer moment a little more refreshing.

GOOD TO HAVE ON HAND


Ingredients

Units Scale
ICE CREAM BASE
  • 750 grams greek yogurt (10% fat)
  • 145 milliliters full-fat cow milk
  • 145 grams heavy whipping cream
  • 125 grams white sugar
  • juice of 1 lemon
LIME SWIRL
  • 120 milliliters water
  • juice of 1 lime
  • 50 grams white sugar
  • zest of 1 lime
  • 6 grams clear cake glaze powder
  • 25 grams corn syrup
  • green food coloring

Instructions

LIME SWIRL

  1. Add the water, sugar, corn syrup, lime zest, and clear cake glaze powder to a small saucepan and whisk until smooth. Bring to a brief boil while stirring, until the mixture thickens slightly and turns glossy.
  2. Remove from the heat. Stir in the lime juice and food coloring and let it cool completely.

YOGURT ICE CREAM

  1. Depending on your ice cream maker, place the freezer bowl in the freezer at least 24 hours in advance.
  2. For the ice cream base, add the yogurt, milk, cream, sugar, and a little lemon juice to a large bowl. Whisk everything thoroughly until the sugar has dissolved and the mixture is smooth.
  3. Turn on the ice cream maker and pour in the yogurt mixture. Let it churn for about 15 minutes, until it reaches a creamy frozen yogurt consistency.

ASSEMBLY

  1. Layer the ice cream with the lime swirl in a freezer-safe container and swirl it gently with a knife, if desired.
  2. If you want to enjoy the ice cream soft and creamy right away, serve it immediately. For firmer scoops, freeze it for another 3–4 hours.
  • Prep Time: 1 hours

CRAVING MORE?

Follow along here & don’t forget to subscribe to my substack!

Mini Turkish Lahmacun Flatbreads with Herb Garlic Sauce

Mini Turkish Lahmacun Flatbreads with Herb Garlic Sauce

Mini Turkish Lahmacun Flatbreads with Herb Garlic Sauce

Mini Turkish Lahmacun Flatbreads with Herb Garlic Sauce

June 21, 2026 by Kimberly

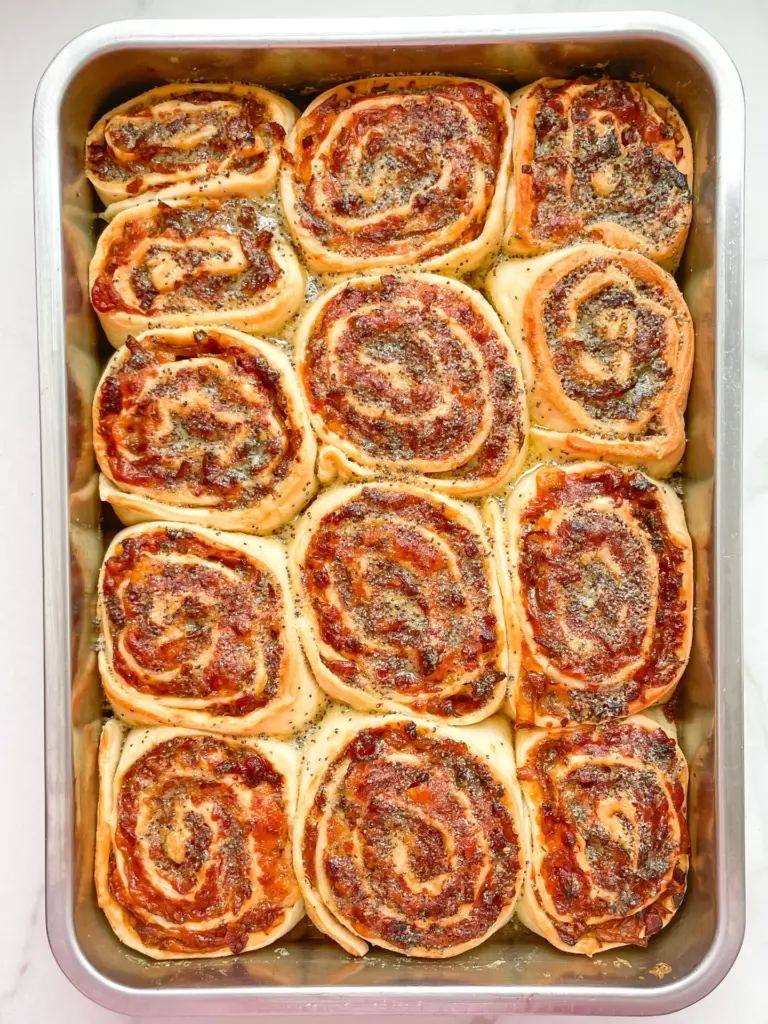
These Mini Turkish Lahmacun Flatbreads are my little special version of Turkish pizza: thin, crispy dough, a flavorful beef filling with pomegranate molasses, and fresh toppings like romaine lettuce, bell peppers, tomatoes, red onions, sumac, and parsley. This recipe is perfect if you want to make something special at home, but are looking for a modern, easy, and shareable version. It’s ideal for serving, mixing up the toppings, and using up leftover vegetables.

This website uses affiliate links which may earn commission for purchases made at no additional cost to you.

TOTAL TIME

90 minutes

SERVES

10 flatbreads

DIET

omnivore

EVERY RECIPE DESERVES

A Little Love Letter

We’re not just having Turkish pizza today, we’re having Mini Turkish Lahmacun Flatbreads. Small, crispy, savory, topped with sauce, fresh vegetables, and exactly the kind of “I’ll just have one more” energy that, of course, is never actually true.

Making Turkish pizza from scratch had been on my to-do list for ages. Not because you can’t buy it on almost every corner, but because I simply love being able to make these kinds of things myself. Also, lahmacun is genuinely one of the best ways to use up leftover vegetables. A little bell pepper, tomato, lettuce, onion, a few herbs, and suddenly fridge leftovers turn into a special dinner.

The thing I was most curious about was the dough, because this dish really stands or falls with it. And what can I say: it turned out perfect. Super easy to work with. After baking, it gets beautifully crispy on the outside while still staying soft on the inside. Exactly how you want it. And the beef filling? A 10 out of 10. I added pomegranate molasses, which makes the savory, spiced mixture a little fruitier and more rounded.

The best part about the mini version is: you will definitely eat more than one. And that is very much part of the concept here. Each flatbread can be topped a little differently: a little more herb garlic sauce, more sumac, extra tomato, or a little more lettuce. I love dishes that let you try a bit of everything.

And honestly, every now and then I just love a recipe that happens in the oven. The beef mixture is spread onto the thin flatbreads, baked for a few minutes, and then all that’s left to do is top them with sauce, romaine, bell peppers, tomatoes, red onions, sumac, and fresh parsley.

Hi, I'm Kimberly!

Hi, I'm Kimberly.

A hopeless romantic when it comes to food. Every recipe I share is a love letter to food itself. I’m so glad you’re here. Make yourself at home and stay a while.

Love,
Kimberly

Kimberly the Zett Signature

If you want to get to know me better,
click here!


Mini Turkish Lahmacun Flatbreads with Herb Garlic Sauce

LET’S MAKE A PIECE OF HAPPINESS

Print
clock clock iconcutlery cutlery iconflag flag iconfolder folder iconinstagram instagram iconpinterest pinterest iconfacebook facebook iconprint print iconsquares squares iconheart heart iconheart solid heart solid icon
Mini Turkish Lahmacun Flatbreads with Herb Garlic Sauce

Mini Turkish Lahmacun Flatbreads with Herb Garlic Sauce


  • Author: Kimberly
  • Total Time: 0 hours
  • Yield: 10 flatbreads 1x

Description

These Mini Turkish Lahmacun Flatbreads are my little special version of Turkish pizza: thin, crispy dough, a flavorful beef filling with pomegranate molasses, and fresh toppings like romaine lettuce, bell peppers, tomatoes, red onions, sumac, and parsley. This recipe is perfect if you want to make something special at home, but are looking for a modern, easy, and shareable version. It’s ideal for serving, mixing up the toppings, and using up leftover vegetables.

GOOD TO HAVE ON HAND

  • electric mixer
  • rolling pin
  • oven
  • large bowl
  • medium bowl
  • sharp knife
  • cutting board

Ingredients

Units Scale
DOUGH
  • 250 grams all-purpose flour
  • 1 tsp salt
  • 1 tsp instant yeast
  • 125 milliliters lukewarm water
  • 1 tsp sugar
  • 1 tbsp olive oil
  • 1 tbsp yogurt
BEEF FILLING
  • 250 grams ground beef
  • 1/2 red bell pepper
  • 1 tomato
  • 4 garlic cloves
  • 1 tbsp parsley
  • 1 tbsp spicy red pepper paste
  • 1 tbsp tomato paste
  • 1 tbsp pomegranate molasses
  • 1 tsp chili powder
  • 1/2 tsp cumin
  • 1/2 tsp coriander
  • 1/2 tsp salt
  • 1/4 tsp black pepper
  • 1/4 tsp onion powder
HERB GARLIC SAUCE
  • 100 grams yogurt
  • 100 grams mayonnaise
  • 2-3 tbsp water
  • 2 tbsp parsley
  • 1 tbsp white wine vinegar
  • 1 tbsp lemon juice
  • Pinch of sugar
  • Salt & pepper to taste
OTHER INGREDIENTS
  • Milk for brushing
  • All-purpose flour for rolling out
  • Sumac for topping
  • Lemon juice for topping

Instructions

MAKE THE DOUGH

  1. Add the instant yeast, sugar, and olive oil to the lukewarm water and let it bloom briefly. Combine the flour and salt in a bowl and set aside. Then add the yeast mixture together with the yogurt to a large mixing bowl. Add the flour-salt mixture and knead everything for 15 minutes. If the dough is too sticky, add a little flour by the tablespoon as needed.
  2. Cover the dough in the bowl and let it rise in a warm place for about 1 hour.

MAKE THE MEAT FILLING

  1. In a large bowl, add the ground beef, red bell pepper, tomatoes, parsley, garlic, chili powder, cumin, coriander, salt, black pepper, onion powder, tomato paste, spicy red pepper paste, and pomegranate molasses. Mix everything well and set aside.

ASSEMBLY & BAKING

  1. Preheat the oven to 250°C/480°F.
  2. Meanwhile, prepare the herb garlic sauce. To do this, mix all the ingredients in a bowl and set aside.
  3. Take the dough out of the bowl and divide it into 10 equal portions. Shape each piece into a tight ball. Using enough extra flour, roll each piece of dough into a very thin circle. Place the flatbreads on a baking sheet lined with parchment paper. Spread about 2 tablespoons of the meat filling onto each flatbread and press it down well so the meat sticks to the dough. Brush the edges with milk. Bake for about 10 to 12 minutes, until the edges are golden brown.
  4. Meanwhile, cut additional bell peppers, tomatoes, romaine lettuce, parsley, and red onions for filling the flatbreads and set aside.
  5. Finally, spread the herb garlic sauce over the flatbreads and top with the vegetables. Finish with sumac, lemon juice and fresh parsley, then enjoy.

  • Prep Time: 1 hr
  • Cook Time: 30 min

CRAVING MORE?

Follow along here & don’t forget to subscribe to my substack!

Chicken Tikka Masala with Passionfruit Yogurt & Chili Lime Garlic Naan

Chicken Tikka Masala with Passionfruit Yogurt & Chili Lime Garlic Naan

Chicken Tikka Masala with Passionfruit Yogurt & Chili Lime Garlic Naan

Chicken Tikka Masala with Passionfruit Yogurt & Chili Lime Garlic Naan

March 26, 2025 by Kimberly

Bold, creamy, tangy, and just the right amount of spicy. A rich, slow-simmered tomato-coconut sauce meets tender chicken, cooled down with tropical yogurt and scooped up with garlicky, buttery, chili-lime naan.

This website uses affiliate links which may earn commission for purchases made at no additional cost to you.

TOTAL TIME

90 min

SERVES

3 portions

DIET

omnivore

EVERY RECIPE DESERVES

A Little Love Letter

This is the kind of meal that feels like a warm hug, but, like, an effortlessly cool one. Tender chicken, slow-simmered in a rich, creamy tomato-coconut sauce packed with warm spices and just the right amount of heat. It’s bold and deep in flavor, but then? Enter the tangy, tropical yogurt that balances it all out, plus fluffy, garlicky naan to scoop up every last drop. It’s cozy, it’s indulgent, and honestly, it just hits different.

The key here is layering flavors. Start with a generous spoonful of the rich, velvety sauce, pile on the juicy, spice-kissed chicken, and finish with a drizzle of the bright, citrusy yogurt. And the naan? It’s non-negotiable. Tear, dip, repeat. This dish is best served fresh, straight from the pot, but if you want to go all out, a side of fluffy basmati rice wouldn’t hurt. Bonus points if you add a sprinkle of fresh herbs before serving.

Store the chicken and sauce together in an airtight container for up to two days in the fridge. The naan keeps best wrapped in foil at room temp for a day or in the fridge for up to 3 days. Reheat gently to keep things soft and saucy.

Hi, I'm Kimberly!

Hi, I'm Kimberly.

A hopeless romantic when it comes to food. Every recipe I share is a love letter to food itself. I’m so glad you’re here. Make yourself at home and stay a while.

Love,
Kimberly

Kimberly the Zett Signature

If you want to get to know me better,
click here!


Chicken Tikka Masala with Passionfruit Yogurt & Chili Lime Garlic Naan
Chili Lime Garlic Naan
LET’S MAKE A PIECE OF HAPPINESS
Print
clock clock iconcutlery cutlery iconflag flag iconfolder folder iconinstagram instagram iconpinterest pinterest iconfacebook facebook iconprint print iconsquares squares iconheart heart iconheart solid heart solid icon
Chicken Tikka Masala with Passionfruit Yogurt & Chili Lime Garlic Naan

Chicken Tikka Masala with Passionfruit Yogurt & Chili Lime Garlic Naan


  • Author: Kimberly
  • Total Time: 90 min
  • Yield: 3 1x

Description

RECOMMENDED EQUIPMENT

  • stand mixer
  • sharp knife
  • cutting board
  • large pan

Ingredients

Units Scale
BASE SAUCE
  • 2 tbsp avocado oil
  • 2 red onions
  • 400 grams tomatoes
  • 1/2 tsp cinnamon powder
  • 1/2 tsp cardamom powder
  • 1/2 tsp pepper
  • 1/4 tsp cloves powder
  • 1/4 tsp salt
  • 1 bay leaf
  • 1 tbsp ginger, grated
  • 4 garlic cloves
  • 1/2 tsp dried chili flakes
  • 1/4 tsp cayenne pepper
  • 2 tbsp tomato paste
  • 250 milliliter vegetable stock
COCONUT SAUCE
  • 1 tbsp avocado oil
  • 1/2 tsp cumin
  • 1/2 tsp mustard seeds
  • 4 garlic cloves
  • 1/2 tsp turmeric powder
  • 1 tsp garam masala
  • 200 grams coconut milk
CHICKEN
  • 400 grams boneless, skinless chicken thighs
  • 1 tbsp turmeric powder
  • 1 tbsp avocado oil
TOPPINGS
  • lime juice
  • fresh cilantro
  • 2 tbsp yogurt
  • 2 tbsp passionfruit purée

Instructions

  1. Start by preparing the chili lime garlic naan according to this recipe, up to Step 4. Once 40 minutes of resting time have passed, proceed with Step 2 of this recipe.
  2. Finely dice the onions and tomatoes, keeping them separate.
  3. Coat the chicken in turmeric (gloves recommended, as turmeric stains easily). Heat avocado oil in a large pan and sear the chicken on both sides. It doesn’t need to be fully cooked yet, as it will finish simmering in the sauce. Remove from the pan and set aside.
  4. In the remaining oil, add ground cinnamon, cardamom, black pepper, and ground cloves. Toast briefly until fragrant. Add the diced onions and a bay leaf, season generously with salt, and let them soften. Meanwhile, peel and finely chop the ginger and garlic, then add them to the pan. Let everything cook down gently.
  5. Once softened, add coriander powder, chili powder, and cayenne pepper, toasting briefly. Stir in tomato paste and diced tomatoes, then pour in vegetable broth. Cover with a lid and let it simmer until the tomatoes break down. Transfer everything to a blender and blend until smooth. Keep the mixture in the blender while reheating the pan.
  6. Continue preparing the naan from Step 5 to Step 6, allowing the dough to rest for another 10-15 minutes.
  7. Heat more avocado oil in the pan and toast ground cumin and mustard seeds until they start popping. Add pressed garlic, turmeric, and garam masala, stirring until fragrant. Pour in the coconut milk and mix well. Then, return the blended tomato mixture to the pan, stirring until combined. Add the seared chicken, cover with a lid, and bring to a simmer.
  8. Once simmering, remove the lid and stir in more garam masala and a splash of lime juice. Optionally, add a tablespoon of butter for extra richness. Let everything simmer over medium heat for another 20 minutes until the chicken is fully cooked.
  9. While the dish simmers, complete the naan recipe from Step 7 onward, so it’s freshly served.
  10. Remove the pan from the heat and top the chicken with yogurt, passionfruit purée, and fresh cilantro. Serve with warm naan and enjoy!
  • Passive Time: 30 min
  • Cook Time: 60 min
CRAVING MORE?
Follow along here & don’t forget to subscribe to my substack!

Chili Lime Garlic Naan

Chili Lime Garlic Naan

Chili Lime Garlic Naan

Chili Lime Garlic Naan Bread

March 26, 2025 by Kimberly

Golden, pillowy, buttery goodness with a little heat, a little zing, and a whole lot of garlic. The kind of flatbread that somehow steals the show, no matter what it’s served with.

This website uses affiliate links which may earn commission for purchases made at no additional cost to you.

TOTAL TIME

90 min

SERVES

6 naans

DIET

vegetarian

EVERY RECIPE DESERVES

A Little Love Letter

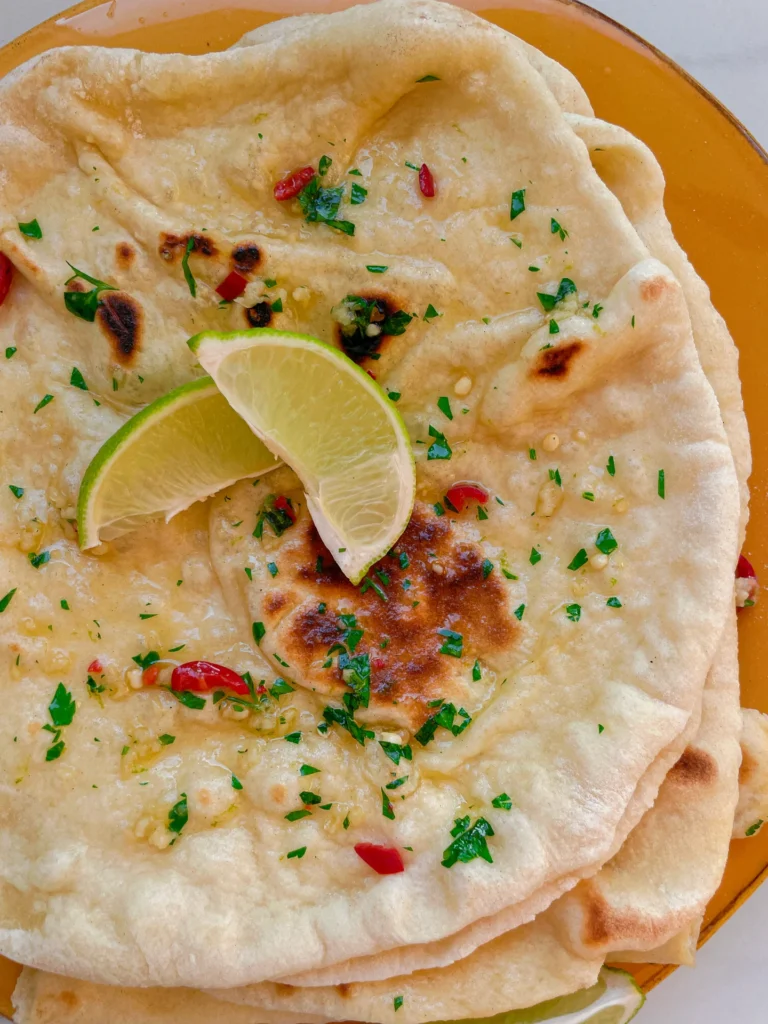
Somehow, warm, buttery flatbread just makes life better. This one is extra special: soft, fluffy, brushed with melted butter, garlic, chili, fresh herbs, and a hit of lime zest for that unexpected, almost-too-good touch. It’s got that perfect balance of richness, freshness, and just a little spice, making it dangerously easy to eat. Whether you’re scooping up curry, using it as a base for something wild, or just eating it straight up, this one’s a keeper.

This one is best served straight from the pan. Warm, pillowy, and soaked in that garlicky, buttery goodness. It’s the perfect sidekick to just about anything: curries, dips, grilled meats, or even a fancy little cheese plate. But let’s be honest, it’s also pretty great just by itself. Tear it, fold it, dunk it. No rules here.

If, by some miracle, you have leftovers, wrap them in foil and store at room temp for a day or in the fridge for up to two days. Reheat in a dry pan or warm oven for that fresh-off-the-stove feel.

Hi, I'm Kimberly!

Hi, I'm Kimberly.

A hopeless romantic when it comes to food. Every recipe I share is a love letter to food itself. I’m so glad you’re here. Make yourself at home and stay a while.

Love,
Kimberly

Kimberly the Zett Signature

If you want to get to know me better,
click here!


Chili Lime Garlic Naan

LET’S MAKE A PIECE OF HAPPINESS

Print
clock clock iconcutlery cutlery iconflag flag iconfolder folder iconinstagram instagram iconpinterest pinterest iconfacebook facebook iconprint print iconsquares squares iconheart heart iconheart solid heart solid icon
Chili Lime Garlic Naan

Chili Lime Garlic Naan


  • Author: Kimberly
  • Total Time: 90 min

Description

RECOMMENDED EQUIPMENT

  • stand mixer
  • small bowl
  • large bowl
  • plastic wrap

Ingredients

Units Scale
DOUGH
  • 300 grams pizza flour (or any flour that contains at least 12g protein per 100g)
  • 1 tsp dry active yeast
  • 1/2 tsp white sugar
  • 125 milliliters lukewarm water
  • 1 tsp salt
  • 2 tbsp yogurt
  • 1 tbsp avocado oil
GLAZE
  • 1-2 tbsp butter, melted
  • fresh chili
  • zest of 1 lime
  • fresh parsley
  • 2 garlic cloves

Instructions

  1. Add the dry yeast to lukewarm water, stir in the sugar, and let it sit for a few minutes until it becomes foamy and bubbles form.
  2. In the stand mixer, combine the flour with salt, yogurt, and avocado. Once the yeast mixture is ready, pour it in and knead everything into a smooth dough. It should be slightly sticky but not cling to your fingers or the bowl.
  3. Transfer the dough to a lightly floured bowl, dust the top with a little flour, cover tightly with plastic wrap, and let it rest in a warm place for about 1 hour or until it doubles in size.
  4. While the dough is rising, finely chop a fresh chili and the parsley leaves. Mix them in a bowl with the zest of one lime and two pressed garlic cloves. Set this mixture aside—melted butter will be added later.
  5. Once the dough has risen, divide it into six equal pieces, shape them into balls, and let them rest under a damp towel for another 15 minutes.
  6. In the meantime, heat a cast-iron skillet until it’s very hot.
  7. Roll out each dough ball into a thin, flat round. Cook in the dry, hot skillet for about 2 minutes per side until bubbles form and the bread is fully cooked.
  8. Stir the melted butter into the prepared chili-lime-garlic mixture.
  9. Remove the naan from the pan, brush each one with the flavored butter using a pastry brush, and stack them on top of each other.
  10. Either keep the naan warm in the oven or cover them with a towel until ready to serve.
  • Passive Time: 60 min
  • Cook Time: 30 min

CRAVING MORE?

Follow along here & don’t forget to subscribe to my substack!

White Chocolate Shortbread Passionfruit Bars

White Chocolate Shortbread Passionfruit Bars

White Chocolate Shortbread Passionfruit Bars

White Chocolate Shortbread Passionfruit Bars

March 19, 2025 by Kimberly

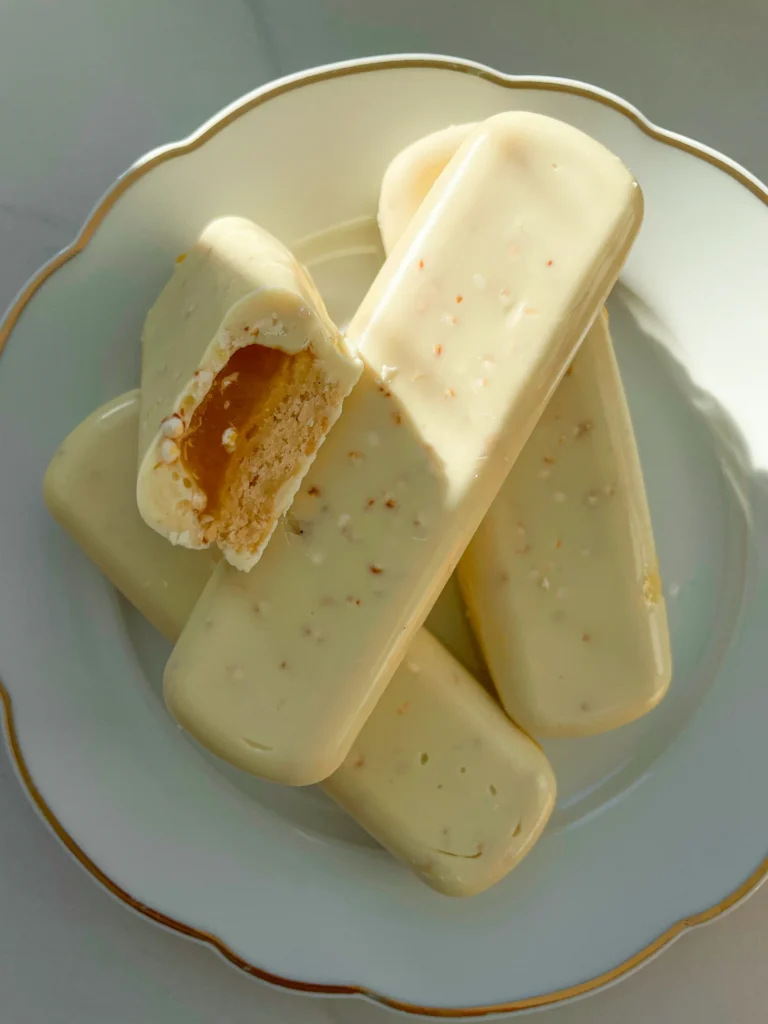
Golden, buttery shortbread, silky passionfruit filling, and a crisp white chocolate shell with puffed quinoa. It’s sweet, tangy, crunchy, basically what I imagine luxury tastes like. A little indulgent, absolutely worth it.

This website uses affiliate links which may earn commission for purchases made at no additional cost to you.

TOTAL TIME

70 min

SERVES

16 bars

DIET

vegetarian

EVERY RECIPE DESERVES

A Little Love Letter

If you love desserts that are crispy, creamy, and have just the right amount of freshness, these bars are about to be your new obsession. A golden, melt-in-your-mouth base holds a smooth, tangy passionfruit filling, all wrapped in a crisp layer of white chocolate with puffed quinoa for that extra crunch. It’s sweet, tart, creamy, and light all at once. Basically, if tropical sunshine had a dessert form, this would be it. Perfect for when you want something a little extra but totally effortless.

These bars are best served straight from the fridge when the chocolate is still crisp and the filling is perfectly creamy. They’re great as a mid-afternoon pick-me-up, a stunning party dessert, or honestly, just something to have stashed away when your sweet tooth hits. Pro tip: Pair with an iced coffee.

Store these in an airtight container in the fridge for up to 5 days. The chocolate coating keeps everything fresh, and the flavors only get better with time.

Hi, I'm Kimberly!

Hi, I'm Kimberly.

A hopeless romantic when it comes to food. Every recipe I share is a love letter to food itself. I’m so glad you’re here. Make yourself at home and stay a while.

Love,
Kimberly

Kimberly the Zett Signature

If you want to get to know me better,
click here!


White Chocolate Shortbread Passionfruit Bars

LET’S MAKE A PIECE OF HAPPINESS

Print
clock clock iconcutlery cutlery iconflag flag iconfolder folder iconinstagram instagram iconpinterest pinterest iconfacebook facebook iconprint print iconsquares squares iconheart heart iconheart solid heart solid icon
White Chocolate Shortbread Passionfruit Bars

White Chocolate Shortbread Passionfruit Bars


  • Author: Kimberly
  • Total Time: 70 min
  • Yield: 8-16 1x

Description

This post may contain affiliate links, please see privacy policy for details.

RECOMMENDED EQUIPMENT

  • silicone molds in various sizes (I used these and trimmed the shortbread bars slightly)
  • small bowl
  • whisk
  • double boiler
  • sharp knife
  • cutting board
  • medium bowl


Ingredients

Units Scale
SHORTBREAD
  • 120 grams all-purpose flour
  • 115 grams butter, soft
  • 50 grams white sugar
  • 1 tsp vanilla extract
  • pinch of salt
PASSIONFRUIT FILLING
  • 150 grams passionfruit purée
  • 6 grams instant gelatine
CHOCOLATE SHELL
  • 350 grams white chocolate
  • 15 grams puffed quinoa

Instructions

  1. Preheat the oven to 175°C / 347°F.
  2. Make the shortbread dough. In a medium bowl, mix flour, butter, sugar, vanilla extract, and salt until the texture resembles firm sand. Refrigerate the dough for 10 minutes to allow the butter to firm up slightly.
  3. Prepare the passionfruit filling. While the dough chills, set aside the smallest silicone mold. Pour the passionfruit purée into a bowl and whisk in the instant gelatin until fully dissolved. (Make sure to use cold-soluble gelatin.) Transfer the mixture into the smallest silicone mold and freeze until completely solid.
  4. Bake the shortbread base. Remove the dough from the fridge and press it into the medium silicone mold. Bake for about 20 minutes until lightly golden. Let cool completely.
  5. Temper the white chocolate. Prepare a double boiler and melt only 200g of the 350g white chocolate, heating it carefully to 35°C / 95°F. Meanwhile, finely chop the remaining 150g of white chocolate. Once melted, remove from heat and stir in the chopped chocolate until fully melted.
  6. Keep the chocolate at a working temperature of 29-30°C / 84-86°F over the double boiler to ensure smooth assembly.
  7. Assemble the bars. Once the shortbread is fully cooled and the passionfruit filling is frozen, get the largest silicone mold ready.
  8. Coat the mold. Stir the puffed quinoa into the tempered white chocolate. Fill each mold cavity halfway with the mixture. Immediately press a frozen passionfruit strip and a shortbread piece into each cavity, ensuring they are surrounded by the chocolate.
  9. Seal the bars. Pour the remaining white chocolate over the top to fully encase the bars.
  10. Let the bars set. Thanks to the tempered chocolate and frozen passionfruit filling, they will firm up quickly. For extra security, chill them in the fridge for 10 minutes. After that, they’re ready to enjoy!
  • Passive Time: 30 min
  • Cook Time: 40 min

CRAVING MORE?

Follow along here & don’t forget to subscribe to my substack!

Milk Buns with Gingerbread Filling

Milk Buns with Gingerbread Filling

Milk Buns with Gingerbread Filling

Milk Buns with Gingerbread Filling

December 16, 2024 by Kimberly

Soft, fluffy buns filled with a creamy spiced mascarpone chocolate magic that tastes like a cozy holiday hug. Perfectly baked for that melt-in-your-mouth festive treat you didn’t know you needed.

This website uses affiliate links which may earn commission for purchases made at no additional cost to you.

TOTAL TIME

2 hrs

SERVES

10 buns

DIET

vegetarian

EVERY RECIPE DESERVES

A Little Love Letter

Imagine biting into a soft, cloud-like bun filled with a creamy mix of spiced mascarpone, chocolate, and gingerbread vibes. That’s this recipe – an edible holiday dream! These buns are everything cozy wrapped up in one delicious bite. Whether you’re serving them at a festive brunch or enjoying one with your afternoon coffee, they’re the ultimate way to make your kitchen smell like Christmas and your taste buds very, very happy.

Serve these buns warm for the best experience! They’re perfect as they are, but you can glaze them with a spiced sugar syrup or a light gingerbread oil drizzle for an extra festive touch. Pair them with a steaming cup of hot chocolate, a chai latte, or even mulled wine for maximum holiday vibes. Pro tip: Sprinkle a little powdered sugar on top for that snow-dusted look – it’s giving cozy holiday bakery.

Keep your buns soft and fresh by storing them in an airtight container at room temperature for up to 2 days. To enjoy them later, reheat gently in the oven or microwave for that just-baked taste. You can also freeze them and defrost as needed!

Hi, I'm Kimberly!

Hi, I'm Kimberly.

A hopeless romantic when it comes to food. Every recipe I share is a love letter to food itself. I’m so glad you’re here. Make yourself at home and stay a while.

Love,
Kimberly

Kimberly the Zett Signature

If you want to get to know me better,
click here!


Milk Buns with Gingerbread Filling

LET’S MAKE A PIECE OF HAPPINESS

Print
clock clock iconcutlery cutlery iconflag flag iconfolder folder iconinstagram instagram iconpinterest pinterest iconfacebook facebook iconprint print iconsquares squares iconheart heart iconheart solid heart solid icon
Milk Buns with Gingerbread Filling

Milk Buns with Gingerbread Filling


  • Author: Kimberly
  • Total Time: 2 hours
  • Yield: 10-12 1x

Description

Recommended Equipment

  • large mixing bowl
  • medium bowl
  • plastic wrap
  • rolling pin

Ingredients

Units Scale
MILK BUNS
  • 500 grams all-purpose flour (type 550 in Germany)
  • 1 tsp salt
  • 1 egg
  • 50 grams white sugar
  • 7 grams dry active yeast
  • 200 milliliter full-fat cow milk
  • 100 grams butter
GINGERBREAD FILLING
  • 125 grams mascarpone
  • 50 grams milk chocolate
  • 15 grams powdered sugar
  • pinch of salt
  • 1 tsp cinnamon
  • 1/2 tsp clove, ground
  • 1/4 tsp ginger, ground
  • 1/4 tsp allspice, ground
  • 1/8 tsp cardamom, ground
  • 1/8 tsp nutmeg, ground
  • 25 grams candied oranges
  • 25 grams hazelnuts, chopped & roasted
GLAZE
  • 2 tbsp butter
  • 2 tbsp heavy cream

Instructions

  1. For the yeast dough, heat milk, butter until melted in a small saucepan to 35°C (95°F). Add 1 tsp of the sugar and the yeast and stir until dissolved. Let sit for about 3-4 minutes until bubbles form.
  2. Meanwhile, in a large mixing bowl, whisk together the egg, sugar, and salt. Add the yeast-butter-milk mixture and the flour, then knead into a smooth dough. Cover the bowl with plastic wrap and let it rest for about 40 minutes, until the dough has doubled in size.
  3. In the meantime, prepare the gingerbread cream. In a bowl, mix mascarpone, powdered sugar, cinnamon, cardamom, cloves, allspice, nutmeg, and ginger. Melt the chocolate and stir it into the mascarpone mixture. Finally, fold in chopped hazelnuts and candied orange pieces, mix well, and set aside.
  4. Once the dough has doubled in size, transfer it to a lightly floured surface. Knead it briefly and shape it into a long roll. Divide the roll into 10-12 equal pieces. Flatten each piece and spread 1 tablespoon of gingerbread cream on top, leaving a 1 cm border. Roll them up from the bottom. Pinch the ends tightly to prevent the filling from leaking while baking.
  5. Place the rolls into a baking dish, cover again with plastic wrap, and let them rise for another 40 minutes.
  6. Preheat the oven to 190°C (375°F) during the second rise.
  7. Just before baking, brush the rolls with a mixture of cream and melted butter.
  8. Bake the rolls for about 20-25 minutes until golden brown.
  • Passive Time: 100 min
  • Cook Time: 20 min

CRAVING MORE?

Follow along here & don’t forget to subscribe to my substack!