Crunchy Tortilla Blackened Chicken Bowl with Ranch Dressing

Crunchy Tortilla Blackened Chicken Bowl with Ranch Dressing

Crunchy Tortilla Blackened Chicken Bowl with Ranch Dressing

Crunchy Tortilla Blackened Chicken Bowl with Ranch Dressing

April 16, 2026 by Kimberly

Since you unfortunately can’t eat fried chicken every single day, here is my favorite everyday alternative: a chicken salad with flavorful, completely fat-free cooked chicken, crisp romaine lettuce, fresh vegetables, creamy ranch dressing, and crunchy tortilla pieces. Quick to make, perfect for meal prep, and anything but boring, this salad is exactly what you need if you are looking for an easy chicken salad recipe that is packed with flavor.

This website uses affiliate links which may earn commission for purchases made at no additional cost to you.

TOTAL TIME

30 min

SERVES

2 people

DIET

omnivore

EVERY RECIPE DESERVES

A Little Love Letter

I’m probably the biggest fan of crispy chicken in every form. Preferably with a really thick, crunchy, fried coating. But in everyday life, it unfortunately can’t be fried chicken every single day, so I had to come up with a version that uses no extra fat at all and still tastes just as good. It may not have that crispy coating, but it makes up for it with the most flavorful, delicious spice coating you could imagine.

And this recipe gets a huge bonus point from me because it fits so effortlessly into everyday life in our home. I make this chicken almost every week anyway and often keep it sliced in the fridge, because we also love using it as homemade deli-style chicken for sandwiches like this Apple Cucumber Brie Turkey Sandwich. That means this salad usually comes together in no time, and that is exactly what I love most about it.

And then you have everything that makes a really good salad: crisp romaine lettuce, fresh vegetables, sweet corn, thinly sliced onion, a creamy dressing, and those golden pan-fried tortilla pieces. Add the flavorful chicken, a little lime juice, and a few flakes of salt, and suddenly it is not just a salad anymore, but a really good example of how delicious a quick meal can be even without fried chicken.

So if you are looking for a salad that is easy, full of flavor, and perfect for prepping ahead, this is one of those recipes you will probably end up making just as often as I do.

Hi, I'm Kimberly!

Hi, I'm Kimberly.

A hopeless romantic when it comes to food. Every recipe I share is a love letter to food itself. I’m so glad you’re here. Make yourself at home and stay a while.

Love,
Kimberly

Kimberly the Zett Signature

If you want to get to know me better,
click here!


Crunchy Tortilla Blackened Chicken Bowl with Ranch Dressing

LET’S MAKE A PIECE OF HAPPINESS

Print
clock clock iconcutlery cutlery iconflag flag iconfolder folder iconinstagram instagram iconpinterest pinterest iconfacebook facebook iconprint print iconsquares squares iconheart heart iconheart solid heart solid icon
Crunchy Tortilla Blackened Chicken Bowl with Ranch Dressing

Crunchy Tortilla Blackened Chicken Bowl with Ranch Dressing


5 Stars 4 Stars 3 Stars 2 Stars 1 Star

No reviews

  • Author: Kimberly
  • Total Time: 30 min
  • Yield: 2 1x

Description

Since you unfortunately can’t eat fried chicken every single day, here is my favorite everyday alternative: a chicken salad with flavorful, completely fat-free cooked chicken, crisp romaine lettuce, fresh vegetables, creamy ranch dressing, and crunchy tortilla pieces. Quick to make, perfect for meal prep, and anything but boring, this salad is exactly what you need if you are looking for an easy chicken salad recipe that is packed with flavor.

RECOMMENDED EQUIPMENT

  • plate for marinating the chicken
  • oven
  • sharp knife
  • cutting board
  • large salad bowl
  • small bowl for the dressing
  • small pan for the tortilla pieces

Ingredients

Units Scale
BLACKENED CHICKEN
  • 400 grams chicken breast filet
  • 2 1/4 tsp paprika powder
  • 1 1/4 tsp salt
  • 3/4 tsp oregano, dried
  • 1/2 tsp garam masala
  • 1/2 tsp curry powder
  • 1/2 tsp cayenne pepper
  • 1/2 tsp garlic powder
  • 1/4 tsp black pepper
RANCH DRESSING
  • 100 grams full-fat yogurt
  • splash of milk
  • 3 tsp chives, dried
  • 1 tsp onion powder
  • 1 tsp parsley, dried
  • 1/2 tsp dill, dried
  • 1/2 tsp garlic powder
  • 1/4 tsp black pepper
  • 1/8 tsp salt
SALAD
  • romaine salad
  • 1 small cucumber
  • 1 green bell pepper
  • 120 grams corn
  • 1 small red onion
  • 2 tortilla wraps
  • 1 tbsp olive oil
  • 1/2 tsp smoked paprika powder
  • 1/2 tsp garlic powder
  • 1 lime

Instructions

  1. Preheat your oven to 175°C / 345°F.
  2. On a plate, mix together all the spices for the blackened chicken until well combined: salt, oregano, garam masala, garlic, cayenne pepper, curry powder, black pepper, and paprika.
  3. Coat the chicken breast all over in the spice mixture so it is evenly covered. Place it on a baking tray and bake for 45 minutes.
  4. Once baked, remove the chicken from the oven and let it cool completely. Then slice it into thin strips. You can also make it a day ahead and keep it in the fridge overnight.
  5. While the chicken is in the oven, make the dressing. Mix the yogurt with onion powder, dried parsley, dried chives, dried dill, garlic powder, salt, and pepper. Set aside until ready to use.
  6. Chop the romaine lettuce and wash it well. Slice the cucumber, cut the bell pepper into small pieces, and slice the onion into thin strips. Drain the corn well.
  7. Cut the tortilla wraps into small squares and toss them with a little olive oil, smoked paprika powder, and garlic powder. Fry them in a pan until golden and crispy.
  8. Add the romaine lettuce, cucumber, bell pepper, corn, and onion to a large salad bowl. Pour over the ranch dressing and toss everything together well. Add the crispy tortilla chips and gently mix again.
  9. Slice the cooled chicken breast into thin strips and spread it over the salad. Finish with flaky salt and a squeeze of fresh lime juice.
  • Cook Time: 30 min

CRAVING MORE?

Follow along here & don’t forget to subscribe to my substack!

Rhubarb Strawberry Almond Galette

Rhubarb Strawberry Almond Galette

Rhubarb Strawberry Almond Galette

Rhubarb Strawberry Almond Galette

May 1, 2025 by Kimberly

It tastes like warm weekends and early summer light. Flaky pastry, buttery almond cream, jammy fruit on top. It’s rustic in the best way. Best served with friends or a spoon.

This website uses affiliate links which may earn commission for purchases made at no additional cost to you.

TOTAL TIME

2 hrs + 40 min

SERVES

8 pieces

DIET

vegetarian

EVERY RECIPE DESERVES

A Little Love Letter

You know those desserts that feel like you didn’t try too hard, but still look like a dream? This is one of them. A buttery, golden crust, soft-set fruit, and the kind of almond cream that makes you wonder why we ever stopped baking with frangipane in the first place. It’s the dessert you make when you’re trying to impress someone (including yourself) without sweating over it. Peak cozy elegance, especially in spring or early summer when berries and rhubarb are at their best.

This tart doesn’t need much, just something creamy on the side to balance the tang and crunch. A scoop of vanilla ice cream? Always. Lightly whipped cream? Also yes. A drizzle of vanilla sauce? Go for it. Serve it slightly warm or at room temp so the flavors can really come through. I like it best the day it’s made, shared at a table that’s maybe still messy from dinner and filled with good company.

Wrap up any leftovers and pop them in the fridge. It keeps well for up to two days, just reheat slightly before serving. And the best part: the crust stays crisp, which honestly feels like a little bit of magic

Hi, I'm Kimberly!

Hi, I'm Kimberly.

A hopeless romantic when it comes to food. Every recipe I share is a love letter to food itself. I’m so glad you’re here. Make yourself at home and stay a while.

Love,
Kimberly

Kimberly the Zett Signature

If you want to get to know me better,
click here!


Rhubarb Strawberry Almond Galette

LET’S MAKE A PIECE OF HAPPINESS

Print
clock clock iconcutlery cutlery iconflag flag iconfolder folder iconinstagram instagram iconpinterest pinterest iconfacebook facebook iconprint print iconsquares squares iconheart heart iconheart solid heart solid icon
Rhubarb Strawberry Almond Galette

Rhubarb Strawberry Almond Galette


  • Author: Kimberly
  • Total Time: 2 hrs + 40 min
  • Yield: 8 1x

Description

RECOMMENDED EQUIPMENT

  • mixing bowl
  • plastic wrap
  • sharp knife
  • cutting board
  • two small bowls
  • rolling pin

Ingredients

Units Scale
DOUGH
  • 200 grams all-purpose flour
  • 150 grams butter, cold &; cubed
  • 1 tbsp brown sugar
  • 1/4 tsp salt
  • 60 milliliters cold water
  • 1 tbsp apple cider vinegar
  • 1 egg (for brushing the crust)
  • 2 tbsp white sugar (for topping the crust)
ALMOND CREAM
  • 50 grams butter, soft
  • 50 grams brown sugar
  • 70 grams grounded almonds
  • 1 egg
  • 1 tsp vanilla extract
FRUITS
  • 200 grams fresh rhubarb
  • 200 grams fresh strawberries
  • 1 tsp powdered sugar
  • 1 tbsp corn starch
TOPPINGS
  • sliced almonds
  • ice cream, whipped cream or vanilla sauce

Instructions

  1. For the dough, combine the flour, sugar, and salt in a large mixing bowl. Add the cold butter in small cubes and work it in quickly with your hands until the mixture resembles coarse crumbs with pea-sized bits of butter throughout. Add the cold water and apple cider vinegar, then bring everything together with your hands until a rough dough forms. Shape it into a rectangle on your work surface, cut it into four equal pieces, stack them on top of each other, gently press together, and wrap the stack in plastic wrap. Chill in the fridge for about 45 minutes.
  2. Meanwhile, wash the rhubarb thoroughly, peel if necessary, and cut it into finger-length pieces. Depending on your preference, slice them into thin strips or slightly thicker chunks. Toss the rhubarb in a bowl with cornstarch and powdered sugar, then set aside. Wash and hull the strawberries, then slice them as well.
  3. Next, prepare the almond cream. Cream the soft butter and sugar until light and fluffy, then add the egg, salt, vanilla extract, and ground almonds. Mix until smooth and set aside.
  4. Preheat the oven to 200 °C / 392 °F. Remove the chilled dough from the fridge, let it rest briefly on a floured surface, then roll or press it out into a large, rustic circle using short movements. Don’t worry if the dough tears slightly, this is typical for shortcrust pastry and can be patched with leftover scraps. Gently roll the dough around your rolling pin and transfer it to a baking sheet lined with parchment paper.
  5. Spread the almond cream evenly over the dough, leaving a border of about 8 cm (3 inches) all around. Distribute the prepared fruit over the almond cream, then fold the edges of the dough over the filling and press them down gently. Brush the crust with oil or a beaten egg, sprinkle with sliced almonds and a bit of sugar, and bake the galette for about 40 minutes, or until golden brown.
  6. Serve best while still slightly warm paired with a scoop of ice cream, whipped cream, or vanilla sauce. I used pistachio ice cream, which pairs beautifully with the almond cream and the tart rhubarb.
  • Passive Time: 1 hr + 40 min
  • Cook Time: 60 min

CRAVING MORE?

Follow along here & don’t forget to subscribe to my substack!

Vanilla Cream and Strawberry Jam Streusel Buns

Vanilla Cream and Strawberry Jam Streusel Buns

Vanilla Cream and Strawberry Jam Streusel Buns

Vanilla Cream & Strawberry Jam Streusel Buns

April 16, 2025 by Kimberly

Fluffy, golden buns filled with vanilla cream and strawberry jam, topped with buttery streusel. The kind of thing you’d bring out on Easter Sunday for coffee, cake, and quiet joy.

This website uses affiliate links which may earn commission for purchases made at no additional cost to you.

TOTAL TIME

3 hrs + 30 min

SERVES

12 buns

DIET

vegetarian

EVERY RECIPE DESERVES

A Little Love Letter

These soft, pillowy buns are one of those things that somehow feel both nostalgic and wildly indulgent. We’re talking golden, fluffy dough, a silky vanilla filling, and a bright hit of strawberry jam, all topped with a delicate crumble of streusel. It’s giving cozy Sunday morning, messy counter, and a “just one more” situation. Whether you grew up with German-style sweet buns or not, this combo is the kind of thing that makes you pause mid-bite and just… smile.

These are lovely served warm, when the vanilla cream is still soft and the jam gently melts into the dough. But honestly? They’re just as dreamy cold. Straight from the fridge works, especially with a cup of coffee on a slow morning. Serve them stacked on a brunch platter or individually in cupcake liners for that little bakery moment. Optional, but highly recommended: a dusting of powdered sugar to make them feel extra special.

Store in an airtight container at room temperature for up to 2 days, or refrigerate for up to 4.

Hi, I'm Kimberly!

Hi, I'm Kimberly.

A hopeless romantic when it comes to food. Every recipe I share is a love letter to food itself. I’m so glad you’re here. Make yourself at home and stay a while.

Love,
Kimberly

Kimberly the Zett Signature

If you want to get to know me better,
click here!


Vanilla Cream and Strawberry Jam Streusel Buns

LET’S MAKE A PIECE OF HAPPINESS

Print
clock clock iconcutlery cutlery iconflag flag iconfolder folder iconinstagram instagram iconpinterest pinterest iconfacebook facebook iconprint print iconsquares squares iconheart heart iconheart solid heart solid icon
Vanilla Cream and Strawberry Jam Streusel Buns

Vanilla Cream and Strawberry Jam Streusel Buns


  • Author: Kimberly
  • Total Time: 3 hrs + 30 min

Description

RECOMMENDED EQUIPMENT

  • small saucepan
  • whisk
  • small bowl
  • stand mixer or electric hand mixer
  • plastic wrap
  • rectangular baking dish

Ingredients

Units Scale
DOUGH
  • 250 milliliters full-fat cow milk
  • 7 grams dry active yeast
  • 60 grams white sugar
  • 525 grams all-purpose flour (in Germany 550er)
  • 75 grams butter, soft
  • 1 egg
  • pinch of salt
VANILLA CREAM
  • 200 grams heavy cream
  • 90 milliliters full-fat cow milk
  • 1 tsp vanilla extract
  • 60 grams white sugar
  • 1 egg yolk
  • 20 grams cornstarch
STREUSEL
  • 100 grams all-purpose flour
  • 70 grams butter, soft
  • 70 grams white sugar
  • 1 tsp vanilla extract
  • pinch of salt
OTHER INGREDIENTS
  • 200 grams strawberry jam (homemade or store-bought)
  • confectioners sugar

Instructions

  1. In a small saucepan, heat the cream with the sugar, vanilla extract, and half of the milk until it comes to a boil. In a separate bowl, whisk together the cornstarch, egg yolk, and remaining milk. Slowly pour the starch mixture into the boiling cream while whisking constantly until it thickens into a smooth pudding. Remove from heat and let cool completely. Set aside for later.
  2. Gently warm the milk to 38°C / 100°F and stir in the yeast and 1 tablespoon of the sugar. Let it sit for a few minutes until slightly foamy. In a large mixing bowl, combine the flour, remaining sugar, egg, soft butter, and salt. Add the yeast mixture and knead for about 10 minutes until you get a smooth, soft dough that doesn’t stick. Cover the bowl tightly with plastic wrap and let rise in a warm spot for 90 minutes.
  3. Combine the butter, sugar, flour, vanilla extract and a pinch of salt and mix until crumbly. Chill the streusel until ready to use.
  4. Once the dough has risen, knead it briefly and divide into 12 equal balls, about 80g / 3oz each. Line a rectangular baking dish with parchment paper and arrange the dough balls inside. Let them rest for 20 minutes.
  5. Use your thumbs and press in the middle of the dough ball to form kind of a bowl shape that is going to be filled each with 1 tablespoon of vanilla pudding and 1 heaping teaspoon of strawberry jam side by side.
  6. Preheat the oven to 180°C / 350°Ft. Sprinkle the chilled streusel generously over the buns and bake for about 55 minutes, or until golden. Serve slightly warm or fully cooled—both are delicious. Finish with a dusting of powdered sugar before serving.
  • Passive Time: 3 hours
  • Cook Time: 30 min

CRAVING MORE?

Follow along here & don’t forget to subscribe to my substack!

Ham & Cheese Scones with Ranch Compound Butter

Ham & Cheese Scones with Ranch Compound Butter

Ham & Cheese Scones with Ranch Compound Butter

Ham & Cheese Scones with Ranch Compound Butter

April 14, 2025 by Kimberly

Flaky, buttery, and loaded with cheddar, ham, and chives. These savory scones are what your brunch dreams are made of. Especially with that ranch butter. Comfort food, but make it interesting.

This website uses affiliate links which may earn commission for purchases made at no additional cost to you.

TOTAL TIME

35 min

SERVES

10 scones

DIET

omnivore

EVERY RECIPE DESERVES

A Little Love Letter

There’s something about warm, cheesy pastries that just hits differently. Especially when they’re packed with melty cheddar, smoky ham, and fresh chives. These golden, flaky scones aren’t your typical dainty teatime snack, they’re the brunch version of it. The kind of thing you bake once and instantly regret ever offering to share.

Serve these warm from the oven with a generous slather of the ranch butter melting into every crevice. Add a fried egg on the side if you’re feeling extra, or go classic with a cup of black coffee and your favorite playlist on repeat. They’re great for lazy Sundays, fancy brunch tables, or mid-week I-deserve-this moments. Pro tip: break them in half and turn them into a breakfast sandwich with scrambled eggs or crispy bacon. Zero judgment.

Store leftovers (if you’re lucky enough to have any) in an airtight container for up to 2 days at room temp. Reheat in the oven for that just-baked vibe.

Hi, I'm Kimberly!

Hi, I'm Kimberly.

A hopeless romantic when it comes to food. Every recipe I share is a love letter to food itself. I’m so glad you’re here. Make yourself at home and stay a while.

Love,
Kimberly

Kimberly the Zett Signature

If you want to get to know me better,
click here!


Ham & Cheese Scones with Ranch Compound Butter

LET’S MAKE A PIECE OF HAPPINESS

Print
clock clock iconcutlery cutlery iconflag flag iconfolder folder iconinstagram instagram iconpinterest pinterest iconfacebook facebook iconprint print iconsquares squares iconheart heart iconheart solid heart solid icon
Ham & Cheese Scones with Ranch Compound Butter

Ham & Cheese Scones with Ranch Compound Butter


  • Author: Kimberly
  • Total Time: 35 min
  • Yield: 10 1x

Description

RECOMMENDED EQUIPMENT

  • box grater
  • mixing bowl
  • sharp knife
  • cutting board
  • round cookie cutter
  • spatula

Ingredients

Units Scale
SCONES
  • 300 grams all-purpose flour
  • 1/2 tsp salt
  • 1/4 tsp pepper
  • 4 tsp backing powder
  • 2 tbsp brown sugar (optional)
  • 90 grams butter, cold
  • 1 egg
  • 160 milliliters full-fat cow milk
  • 150 grams cheddar cheese
  • 150 grams ham
  • 20 grams fresh chives
RANCH COMPOUND BUTTER
  • 125 grams butter, soft
  • 3 tsp dried chives
  • 1 tsp dried parsley
  • 1 tsp dried onion powder
  • 1/2 tsp dried dill
  • 1/2 tsp dried garlic powder
  • 1/8-1/4 tsp salt
  • 1/8 tsp white pepper

Instructions

  1. Place the butter for the scones in the freezer for 15 minutes. Let the butter for the ranch compound butter soften at room temperature. Line a baking sheet with parchment paper and preheat the oven to 200°C/390°F. Dice the ham into small squares, grate the cheese, and finely slice the chives. Set aside about 1/3 of each to top the scones later.
  2. In a medium bowl, combine the flour, brown sugar, baking powder, salt, and pepper. Grate the cold butter directly into the dry ingredients using a box grater.
  3. In a small glass or bowl, whisk together the milk and egg, then pour into the dry mixture. Mix with a spoon just until the dough comes together. You should still see streaks of flour. Add the ham, cheese, and chives and gently fold in. Transfer the dough to a clean work surface and shape it into a rectangle (about 20x30cm) using a spatula. Avoid using your hands because keeping the butter cold is key to flaky scones. Sprinkle the remaining ham, cheese, and chives over the top.
  4. Use a round cutter to cut out as many scones as possible. Gather and gently reshape the scraps to cut more until all the dough is used. If you don’t have a cutter, simply slice the dough into triangles. This recipe yields about 10 scones.
  5. Arrange the scones on the baking sheet with a bit of space in between and bake for about 15 minutes until golden. Let cool slightly and serve fresh.
  • Passive Time: 15 min
  • Cook Time: 20 min

CRAVING MORE?

Follow along here & don’t forget to subscribe to my substack!

Lemony Spring Chicken Soup with Chive Oil

Lemony Spring Chicken Soup with Chive Oil

Lemony Spring Chicken Soup with Chive Oil

Lemony Spring Chicken Soup with Chive Oil

April 13, 2025 by Kimberly

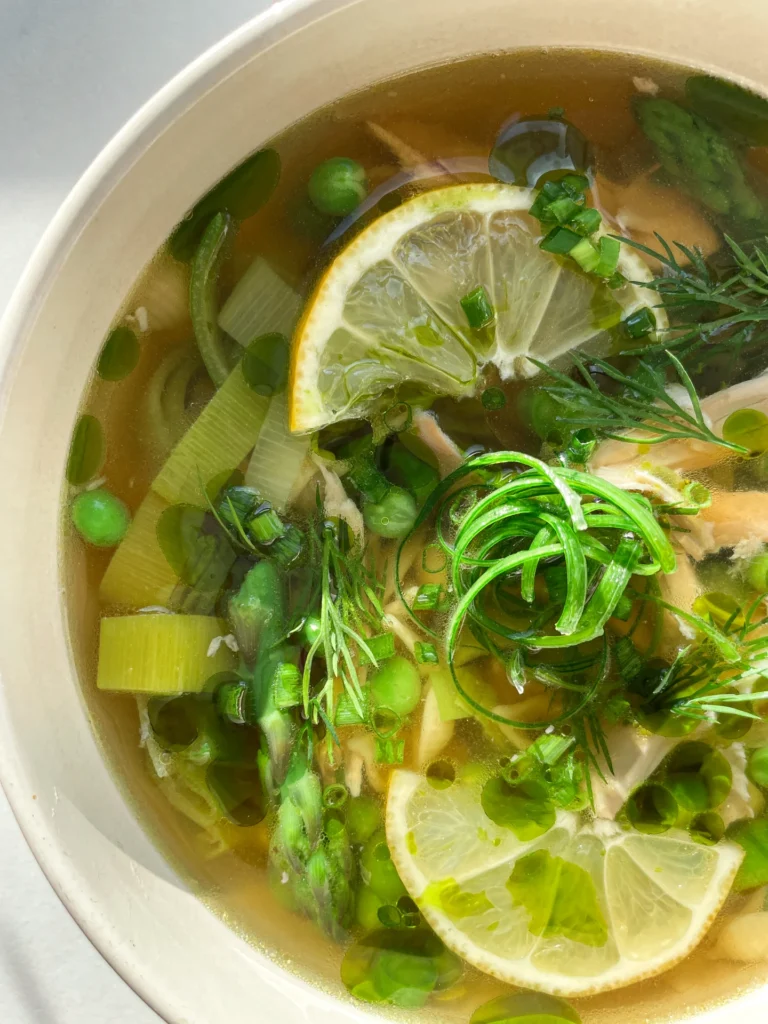
This clear chicken soup with tiny noodles and spring vegetables is true comfort food, inspired by the classic German wedding soup. With tender chicken, little noodles, fresh greens, and that finishing drizzle of chive oil, it’s the perfect broth for both special occasions and cozy Sundays. A timeless recipe full of flavor, ideal for spring, and a real bowl of soul-soothing comfort.

This website uses affiliate links which may earn commission for purchases made at no additional cost to you.

TOTAL TIME

4 hrs  + 45 min


SERVES

2 portions

DIET

omnivore

EVERY RECIPE DESERVES

A Little Love Letter

There are dishes that are so much more than just food. They are memories and little time machines. For me, that’s exactly what a clear chicken broth with all the fixings is. The one my grandmother always made for me when I was a child. In Germany, it’s called Hochzeitssuppe, or wedding soup. And honestly, the moment I hear the name, I can picture her standing at the stove, stirring that steaming pot of soup. It was this broth that filled her house with warmth and comfort. It was simply Grandma’s soup, and with every spoonful, you knew you were home.

Today, years later, I cook my own version. Still clear, still light, and with the same amount of love. Chicken bones, vegetables, and a little patience. But also with a touch of my own style. I love finishing it with my homemade chive oil, which makes the soup not only prettier but also a little more exciting.

This is not the kind of soup you throw together on the side. It asks for attention, a bit of devotion. And that’s exactly what makes it special. You take your time and in the end, you get something that warms not just your stomach, but also your heart.

And that’s why I’m sharing this recipe with you. Maybe it will become more than just a broth for you too. Maybe it’s the scent that fills your home when the first spring rain falls outside. Or the dish you cook for people you love. Just like my grandmother once did for me.


Hi, I'm Kimberly!

Hi, I'm Kimberly.

A hopeless romantic when it comes to food. Every recipe I share is a love letter to food itself. I’m so glad you’re here. Make yourself at home and stay a while.

Love,
Kimberly

Kimberly the Zett Signature

If you want to get to know me better,
click here!


Lemony Spring Chicken Soup with Chive Oil

LET’S MAKE A PIECE OF HAPPINESS

Print
clock clock iconcutlery cutlery iconflag flag iconfolder folder iconinstagram instagram iconpinterest pinterest iconfacebook facebook iconprint print iconsquares squares iconheart heart iconheart solid heart solid icon
Lemony Spring Chicken Soup with Chive Oil

Lemony Spring Chicken Soup with Chive Oil


  • Author: Kimberly
  • Total Time: 4 hrs + 45 min
  • Yield: 2 1x

Description

This clear chicken soup with tiny noodles and spring vegetables is true comfort food, inspired by the classic German wedding soup. With tender chicken, little noodles, fresh greens, and that finishing drizzle of chive oil, it’s the perfect broth for both special occasions and cozy Sundays. A timeless recipe full of flavor, ideal for spring, and a real bowl of soul-soothing comfort.

GOOD TO HAVE ON HAND

  • large pot
  • small pot
  • fine mesh strainer
  • cheesecloth
  • sharp knife
  • cutting board

For the consommé version, you’ll also need:

  • an extra small pot
  • whisk
  • small bowls

Ingredients

Units Scale
CHICKEN STOCK
  • 3 liters cold water
  • 2 carrots
  • 4 small yellow onions
  • 1 leek (only the green part)
  • 2 bay leaves
  • 3 sprigs of fresh thyme
  • 1 tsp black pepper corns
  • 1 lemon
  • 4 garlic cloves
  • 1 kilogram skin-on, bone-in chicken thighs
  • 4 egg whites (only for the Consommé version)
SOUP COMPONENTS
  • 10 stems green asparagus
  • 1 leek (only the white part)
  • 100 grams frozen peas
  • 100 grams tiny pasta shells
TOPPINGS
  • fresh dill
  • fresh chives
  • scallions
  • 1 lemon
  • homemade chive oil

Instructions

  1. Peel the carrots, trim the ends, and slice. Cut the roots off the onions and halve them. Separate the white and green parts of the leek. Wash the green part thoroughly and cut it into large pieces. Halve the lemon. Peel the garlic cloves. Pat the chicken thighs dry with paper towels.
  2. Heat a large pot over medium heat (no oil). Place the onion halves cut side down and let them brown. Then add the carrots, leek, lemon, herbs, peppercorns, and chicken thighs. Pour in 3 liters of cold water.
  3. Slowly bring the pot to a gentle simmer, do not let it boil. Skim off any foam with a spoon. Let it cook uncovered on the lowest heat for 4 to 8 hours, making sure it stays at a gentle simmer. Skim off any foam occasionally and add cold water if too much evaporates.
  4. In the meantime, prepare the chive oil and store it in the fridge until needed.
  5. Once the broth is done, remove it from the heat. Take out the chicken thighs, let them cool, and then shred the meat from the bones and set it aside for later. Remove the vegetables with a slotted spoon. Strain the broth first through a fine mesh strainer and then through cheesecloth for a clear result.

If you’d like to turn your broth into a clarified consommé, follow the next steps. If not, jump to the section “Simple Version.”

Consommé Version

  1. Let the broth cool slightly so it’s warm but not hot. In a bowl, whisk 4 egg whites just until frothy. Stir them into the broth. Let everything sit over medium heat for about 15–20 minutes, do not boil, or the egg whites will curdle.Over time, a layer of egg whites will form and trap any remaining fat or cloudiness. Gently remove this layer and strain the broth again: first through a fine mesh strainer, then through cheesecloth. The result: a crystal-clear consommé.
  2. Reheat the consommé and season with salt (about 5–7g per liter). Keep it hot.
  3. Slice the white part of the leek into rings and wash well. Slice the asparagus into chunks or thin rounds. Finely slice the green part of the scallions for topping.Optional extra step for curly scallion strips: Slice the tube lengthwise and open it up. Place the inside facing up and gently scrape off the slimy layer with a knife. Slice into thin strips and store in a bowl of ice water until serving.
  4. Boil two small pots of salted water. In one, cook the noodles al dente. In the other, blanch the leeks first, then asparagus, and finally the peas. Place each component in a small bowl and set aside.
  5. To serve, layer noodles, vegetables, and shredded chicken into serving bowls and pour hot consommé over. Top with freshly ground black pepper, fresh dill, chives, scallions, lemon slices, a squeeze of lemon juice, and a drizzle of chive oil.

Simple Version

  1. Reheat the broth and season with salt (5–7g per liter). Keep it hot.
  2. Slice the leek into rings and rinse thoroughly. Cut the asparagus into chunks or thin slices. Finely slice the green part of the scallions for topping.
  3. Bring a small pot of salted water to a boil and cook the noodles al dente.
  4. Add the leeks to the broth and simmer until soft. Then add asparagus and peas, cooking for another 5 minutes. Finally, stir in the shredded chicken and cooked noodles. Simmer everything for 1–2 minutes until heated through.
  5. Adjust seasoning with salt, pepper, and lemon juice. Serve hot in deep bowls, topped with fresh dill, chives, scallions, lemon slices, and chive oil.

Notes

  • This soup takes time, but it rewards you with depth and flavor.
  • This recipe yields about 2.5 liters of finished chicken stock. You’ll use 1 liter for the soup, the rest keeps for 2–3 days in the fridge or 2–3 months in the freezer for future recipes.
  • Prep Time: 15 min
  • Passive Time: 4 hrs
  • Cook Time: 30 min

CRAVING MORE?

Follow along here & don’t forget to subscribe to my substack!

Shichimi Togarashi (Japanese 7 Spice Blend)

Shichimi Togarashi (Japanese 7 Spice Blend)

Shichimi Togarashi (Japanese 7 Spice Blend)

Shichimi Togarashi (Japanese 7 Spice Blend)

April 10, 2025 by Kimberly

Making Shichimi Togarashi at home sounds more complicated than it actually is, because in reality, it comes together in no time. This Japanese seven-spice blend combines chili, sesame, nori, and orange peel into a flavor that’s not just spicy, but also fresh, nutty, and lightly citrusy. Just a pinch is enough to turn everyday dishes into something instantly more exciting. Sprinkle it over dumplings, avocado toast, or ramen, and suddenly it tastes like an evening at a Tokyo street market. That’s the magic of Shichimi Togarashi. A little adventure in your everyday cooking.

This website uses affiliate links which may earn commission for purchases made at no additional cost to you.

TOTAL TIME

10 min

SERVES

3 tbsp

DIET

vegan

EVERY RECIPE DESERVES

A Little Love Letter

It might sound fancy, but at the end of the day it’s really just a bold, citrusy-spicy topping with a whole lot of personality. Chili with character, toasted sesame, a hint of orange zest. Together they transform “tastes good” into “tastes special.” It’s that perfect balance of fiery, salty, and fresh that makes any dish feel instantly more alive. Almost like bringing street food vibes into your own kitchen, minus the effort and chaos.

I honestly use this spice blend all the time. In my Crispy Pork Gyoza, Miso Ginger Oil Glaze & Fried Seaweed, it pulls all the flavors together like the final brushstroke on a painting. And in my Kimchi Gyoza, it delivers just the right kick that makes my friends and family ask, “Wait, what’s in this?!” That’s my favorite moment when everyone thinks I’ve been fussing with some secret technique, but it was really just a tiny spoonful of this mix. The best part? There’s zero planning involved. A quick sprinkle and suddenly the whole dish feels elevated.

And of course, you’ll want to keep it fresh. I always store mine in a small airtight jar in the pantry. That way, it keeps its full flavor for about two to three months. It’s the kind of simple little habit that makes cooking so much more fun: one unassuming jar on the shelf that has the power to make your food taste ten times more interesting, without you having to lift a finger more than usual. And now, that so-called fancy flavor is just your everyday companion. A jar that started out sounding special and elaborate has quietly turned into the easiest little ritual in your kitchen.

Hi, I'm Kimberly!

Hi, I'm Kimberly.

A hopeless romantic when it comes to food. Every recipe I share is a love letter to food itself. I’m so glad you’re here. Make yourself at home and stay a while.

Love,
Kimberly

Kimberly the Zett Signature

If you want to get to know me better,
click here!


Shichimi Togarashi (Japanese 7 Spice Blend)

LET’S MAKE A PIECE OF HAPPINESS

Print
clock clock iconcutlery cutlery iconflag flag iconfolder folder iconinstagram instagram iconpinterest pinterest iconfacebook facebook iconprint print iconsquares squares iconheart heart iconheart solid heart solid icon
Shichimi Togarashi (Japanese 7 Spice Blend)

Shichimi Togarashi (Japanese 7 Spice Blend)


  • Author: Kimberly
  • Total Time: 10 min
  • Yield: 3 tbsp 1x

Description

Making Shichimi Togarashi at home sounds more complicated than it actually is, because in reality, it comes together in no time. This Japanese seven-spice blend combines chili, sesame, nori, and orange peel into a flavor that’s not just spicy, but also fresh, nutty, and lightly citrusy. Just a pinch is enough to turn everyday dishes into something instantly more exciting. Sprinkle it over dumplings, avocado toast, or ramen, and suddenly it tastes like an evening at a Tokyo street market. That’s the magic of Shichimi Togarashi. A little adventure in your everyday cooking.

GOOD TO HAVE ON HAND

  • mortar & pestle
  • sealable jar

Ingredients

Scale
  • 1 tbsp chili flakes
  • 1 tsp orange zest
  • 1/2 tsp Szechuan pepper corns
  • 1/2 tsp white sesame seeds
  • 1/2 tsp black sesame seeds
  • 1/4 nori sheet
  • 1/4 tsp ginger powder

Instructions

  1. Toast ½ tsp white sesame seeds and ½ tsp black sesame seeds in a dry pan over medium heat until golden and fragrant.
  2. Add ½ tsp Szechuan peppercorns and ¼ nori sheet (torn into small pieces) to a mortar and grind them finely, or use a spice grinder if you prefer.
  3. Combine the ground spices with 1 tbsp chili flakes, 1 tsp orange zest, and ¼ tsp ginger powder in a sealable jar. Give it a good shake to mix everything together.
  • Prep Time: 10 min

CRAVING MORE?

Follow along here & don’t forget to subscribe to my substack!