Virgin Passionfruit Margarita

Virgin Passionfruit Margarita

Virgin Passionfruit Margarita

Virgin Passionfruit Margarita

March 23, 2025 by Kimberly

Sip into a tropical escape with this zesty, alcohol-free passionfruit concoction. It’s like a mini-vacation in a glass. Tangy, refreshing, and effortlessly cool. Perfect for those sunny vibes without the buzz.

This website uses affiliate links which may earn commission for purchases made at no additional cost to you.

TOTAL TIME

10 min

SERVES

2 glasses

DIET

vegan

EVERY RECIPE DESERVES

A Little Love Letter

Craving a tropical getaway without leaving your backyard? This vibrant, alcohol-free drink blends the exotic taste of passionfruit with zesty lime and a hint of sweetness, delivering a refreshing experience that’s so indulgent.

The finishing touch? A juicy half of passionfruit floating on top—because why not go all in? A little spoon is optional but highly recommended, because scooping out those passionfruit seeds mid-sip just hits different.

While this drink is best enjoyed fresh, you can prepare the passionfruit and lime mixture in advance. Store it in an airtight container in the refrigerator for up to two days. When ready to serve, simply pour over ice, top with sparkling water, and garnish as desired.

Hi, I'm Kimberly!

Hi, I'm Kimberly.

A hopeless romantic when it comes to food. Every recipe I share is a love letter to food itself. I’m so glad you’re here. Make yourself at home and stay a while.

Love,
Kimberly

Kimberly the Zett Signature

If you want to get to know me better,
click here!


Virgin Passionfruit Margarita

LET’S MAKE A PIECE OF HAPPINESS

Print
clock clock iconcutlery cutlery iconflag flag iconfolder folder iconinstagram instagram iconpinterest pinterest iconfacebook facebook iconprint print iconsquares squares iconheart heart iconheart solid heart solid icon
Virgin Passionfruit Margarita

Virgin Passionfruit Margarita


5 Stars 4 Stars 3 Stars 2 Stars 1 Star

No reviews

  • Author: Kimberly
  • Total Time: 10 min
  • Yield: 2 1x

Description

RECOMMENDED EQUIPMENT

  • small plate
  • cocktail glasses
  • cocktail shaker

Ingredients

Scale
RIM SPICES
  • chili flakes
  • lime zest
  • salt
  • lime juice
DRINK
  • 4 tbsp passionfruit purée
  • 2 tsp agave syrup
  • juice of 2 limes
  • crushed ice

Instructions

  1. Prepare the rim spices on a flat plate by zesting a fresh lime and mixing it with dried chili and a pinch of salt.
  2. Prep the glasses by rubbing a lime wedge around the rim, then dipping the glass into the lime-chili-salt mixture to create a flavorful edge. Set the glasses aside.
  3. In a cocktail shaker, combine freshly squeezed lime juice, passionfruit purée, and agave syrup. Add a handful of ice cubes and shake well until chilled.
  4. Take a prepared glass and add a few ice cubes. Strain the shaken mixture into the glass, then top it off with sparkling water.
  5. Cut a passionfruit in half and place one half into each drink for that final tropical touch.
  6. Note: If you’d like to enjoy this drink with alcohol, simply add 1 shot of tequila while shaking. Just like that, your virgin margarita transforms into a classic passionfruit margarita!
  • Cook Time: 10 min

CRAVING MORE?

Follow along here & don’t forget to subscribe to my substack!

Brownie Batter Chocolate Hummus

Brownie Batter Chocolate Hummus

Brownie Batter Chocolate Hummus

Brownie Batter Chocolate Hummus

February 18, 2024 by Kimberly

This ultra-creamy, rich chocolate dip tastes like straight-up brownie batter but is secretly packed with good-for-you ingredients. Perfect for spreading, dipping, or just eating by the spoonful…no judgment here!!

This website uses affiliate links which may earn commission for purchases made at no additional cost to you.

TOTAL TIME

10 min

SERVES

4 portions

DIET

vegan

EVERY RECIPE DESERVES

A Little Love Letter

If you’ve never tried sweet hummus before, this one’s about to change your life. Imagine the rich, fudgy taste of brownie batter but in a smooth, creamy dip that also happens to be good for you. No refined sugar, no weird additives, just simple ingredients blending into pure chocolatey magic. Whether you’re dipping fruit, spreading it on toast, or eating it straight from the jar (I see you), this is your new go-to for a guilt-free chocolate fix.

Swipe it onto warm toast, pair it with strawberries, banana slices, or apple wedges, or go all in and dunk some pretzels for that sweet-salty combo. Feeling extra? Stir it into oatmeal, drizzle it over pancakes, or layer it in a yogurt parfait for a next-level treat.

Store your chocolate hummus in an airtight container in the fridge for up to 4 days, but let’s be real, it won’t last that long. If it thickens up, just stir in a splash of plant milk to bring back that creamy goodness. Freezing? Not recommended, it’s best fresh!

Hi, I'm Kimberly!

Hi, I'm Kimberly.

A hopeless romantic when it comes to food. Every recipe I share is a love letter to food itself. I’m so glad you’re here. Make yourself at home and stay a while.

Love,
Kimberly

Kimberly the Zett Signature

If you want to get to know me better,
click here!


Brownie Batter Chocolate Hummus

LET’S MAKE A PIECE OF HAPPINESS

Print
clock clock iconcutlery cutlery iconflag flag iconfolder folder iconinstagram instagram iconpinterest pinterest iconfacebook facebook iconprint print iconsquares squares iconheart heart iconheart solid heart solid icon
Brownie Batter Chocolate Hummus

Brownie Batter Chocolate Hummus


  • Author: Kimberly
  • Total Time: 10 min
  • Yield: 4 1x

Description

RECOMMENDED EQUIPMENT

  • food processor
  • sieve

Ingredients

Units Scale
  • 265 grams canned chickpeas, drained
  • 2 tbsp tahini
  • 60 grams unsweetened cocoa powder
  • 4 tbsp date syrup
  • 1 tsp vanilla extract
  • 1/4 tsp salt
  • 2 tbsp coconut oil
  • 2 tbsp milk of choice
  • 1/2 cup ice cubes
  • fruits of your choice for dipping - strawberries, bananas, apples...

Instructions

  • Drain the chickpeas and rinse them under cold water. Add them to a food processor.
  • Next, add tahini, vanilla, unsweetened cocoa powder, coconut oil, salt, date syrup, and milk. Blend on high speed until it forms a thick paste. Then, gradually add ice cubes. Just enough to make it super fluffy and creamy.
  • Transfer to a bowl and enjoy with your favorite fruits or cracker!!

CRAVING MORE?

Follow along here & don’t forget to subscribe to my substack!

Everything But The Bagel Seasoning

Everything But The Bagel Seasoning

Everything But The Bagel Seasoning

Everything But The Bagel Seasoning

February 10, 2024 by Kimberly

This crunchy, garlicky, toasty magic takes anything from basic to brilliant. Sprinkle it on eggs, avo toast, or even buttered bread, and suddenly, breakfast feels like a weekend brunch moment.

This website uses affiliate links which may earn commission for purchases made at no additional cost to you.

TOTAL TIME

5 min

SERVES

11 tbsp

DIET

vegan

EVERY RECIPE DESERVES

A Little Love Letter

If you’ve ever wished your food had that little extra something, this crunchy, garlicky, nutty magic – this is the answer. Inspired by the iconic everything bagel topping, this homemade blend is an absolute game-changer. Sprinkle it on avo toast, eggs, cottage cheese, or even a basic buttered bread slice – it instantly upgrades anything. And the best part? You can whip it up in minutes with pantry staples.

This seasoning is the ultimate finishing touch for pretty much everything. Stir it into cream cheese for an instant dip, sprinkle it over popcorn for a salty-savory snack, or coat roasted veggies in olive oil and this mix before baking for an unreal crunch. It’s also a next-level game-changer for grilled cheese, scrambled eggs, and even fried rice.

Keep your seasoning blend fresh by storing it in an airtight jar in a cool, dry spot. It stays crunchy and flavorful for up to six months (if you don’t use it all before then). A quick shake before each use keeps the flavors evenly distributed.

Hi, I'm Kimberly!

Hi, I'm Kimberly.

A hopeless romantic when it comes to food. Every recipe I share is a love letter to food itself. I’m so glad you’re here. Make yourself at home and stay a while.

Love,
Kimberly

Kimberly the Zett Signature

If you want to get to know me better,
click here!


Everything But The Bagel Seasoning

LET’S MAKE A PIECE OF HAPPINESS

Print
clock clock iconcutlery cutlery iconflag flag iconfolder folder iconinstagram instagram iconpinterest pinterest iconfacebook facebook iconprint print iconsquares squares iconheart heart iconheart solid heart solid icon
Everything But The Bagel Seasoning

Everything But The Bagel Seasoning


  • Author: Kimberly
  • Total Time: 5 min
  • Yield: 110g / 11 tbsp 1x

Description

Recommended Equipment

  • small bowl
  • airtight container

Ingredients

Scale
  • 6 tsp white sesame seeds
  • 5 tsp dried minced onion
  • 4 tsp black sesame seeds
  • 4 tsp dried minced garlic
  • 4 tsp sea salt
  • 3 tsp poppy seeds

Instructions

Add all spices to a bowl, mix well, and transfer to an airtight container.

  • Prep Time: 5 min

CRAVING MORE?

Follow along here & don’t forget to subscribe to my substack!

Baked Falafel

Baked Falafel

Baked Falafel

Baked Falafel

February 2, 2024 by Kimberly

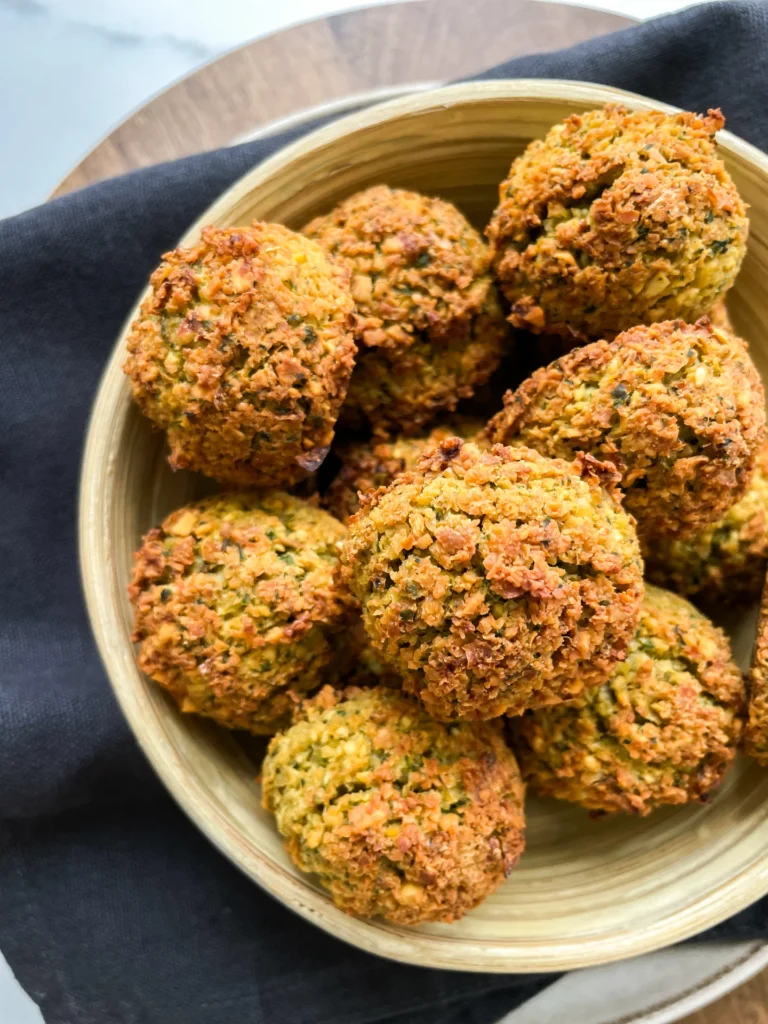
Crispy on the outside, soft and herby inside! These golden bites are the ultimate flavor bomb. Packed with chickpeas, garlic, and spices, they’re the kind of snack you’ll keep reaching for.

This website uses affiliate links which may earn commission for purchases made at no additional cost to you.

TOTAL TIME

40 min

SERVES

24 balls

DIET

vegan

EVERY RECIPE DESERVES

A Little Love Letter

Golden, crispy, and packed with bold flavors!! These herby chickpea bites are everything you want in a falafel, minus the frying. They’re light but satisfyingly crunchy, loaded with garlic, cumin, and fresh herbs for that perfect balance of flavor. Whether you stuff them in a warm pita, toss them over a fresh salad, or dip them in creamy tahini sauce, they’re the kind of meal that feels both nourishing and indulgent. And the best part? They’re baked, not fried, so you get all the crunch without the extra oil.

These little crispy gems are beyond versatile! Tuck them into warm pita with fresh veggies and a drizzle of tahini for a classic falafel wrap. Throw them over a big salad with cucumbers, tomatoes, and a lemony dressing for a light but filling meal. Or just dunk them straight into hummus (no judgment here). Want to level it up? Pair them with roasted veggies, herby yogurt sauce, or even a spicy harissa dip.

Got leftovers? Pop them in an airtight container in the fridge for up to 4 days. Reheat them in the oven or air fryer at 180°C (350°F) for about 5 minutes to keep that crispy magic alive. For long-term storage, freeze them on a baking sheet before transferring them to a bag – just bake straight from frozen when you’re ready!

Hi, I'm Kimberly!

Hi, I'm Kimberly.

A hopeless romantic when it comes to food. Every recipe I share is a love letter to food itself. I’m so glad you’re here. Make yourself at home and stay a while.

Love,
Kimberly

Kimberly the Zett Signature

If you want to get to know me better,
click here!


Baked Falafel
Baked Falafel
Baked Falafel
Baked Falafel

LET’S MAKE A PIECE OF HAPPINESS

Print
clock clock iconcutlery cutlery iconflag flag iconfolder folder iconinstagram instagram iconpinterest pinterest iconfacebook facebook iconprint print iconsquares squares iconheart heart iconheart solid heart solid icon
Baked Falafel

Baked Falafel


  • Author: Kimberly
  • Total Time: 12-24 hrs + 40 min
  • Yield: 24 falafel balls 1x

Description

Recommended Equipment

  • medium mixing bowl
  • food processor
  • small cookie scoop (or tablespoon)

Ingredients

Units Scale
  • 250 grams dry chickpeas
  • 2 tbsp olive oil
  • 2 tsp baking powder
  • 5 grams fresh parsley
  • 5 grams fresh cilantro
  • 5 leaves fresh mint
  • 1 yellow onion
  • 4 garlic cloves
  • 1 tsp salt
  • 1 tsp paprika
  • 1 tsp cumin
  • 1 tsp za'atar
  • 1/2 tsp white pepper

Instructions

  1. Soak the dried chickpeas in 750ml (3 cups) of cold water for about 12-24 hours and store them in the fridge. The next day, drain, rinse, and let them sit for a moment to remove excess water. Preheat the oven to 220°C / 428°F (fan-assisted).
  2. Add the chickpeas along with the other ingredients to a food processor and blend until you get a crumbly yet moldable mixture. Use a small cookie scoop to shape the mixture into 30g/1oz falafel balls and place them on a baking sheet lined with parchment paper. Bake for about 25-30 minutes until golden brown.
  • Passive Time: 12-24 hrs
  • Cook Time: 40 min

CRAVING MORE?

Follow along here & don’t forget to subscribe to my substack!

Chocolate Mint Oil

Chocolate Mint Oil

Chocolate Mint Oil

Chocolate Mint Oil

December 20, 2024 by Kimberly

This infused oil is minty-fresh and oh-so-delicious, even if the chocolate vibes didn’t show up. Perfect for drizzling on salads or desserts – it’s a happy accident you’ll love.

This website uses affiliate links which may earn commission for purchases made at no additional cost to you.

TOTAL TIME

40 min

SERVES

1 cup / 250 ml

DIET

vegan

EVERY RECIPE DESERVES

A Little Love Letter

Not every recipe turns out as expected, but sometimes the result is even better! This Chocolate Mint Oil was supposed to capture both chocolate and mint flavors, but only the fresh, vibrant mint transferred – and honestly? It’s absolutely delicious. The cocoa nibs didn’t quite make the impact I hoped for, but the minty finish is so versatile and refreshing. Perfect for sweet and savory dishes, this oil still deserves a spot in your kitchen.

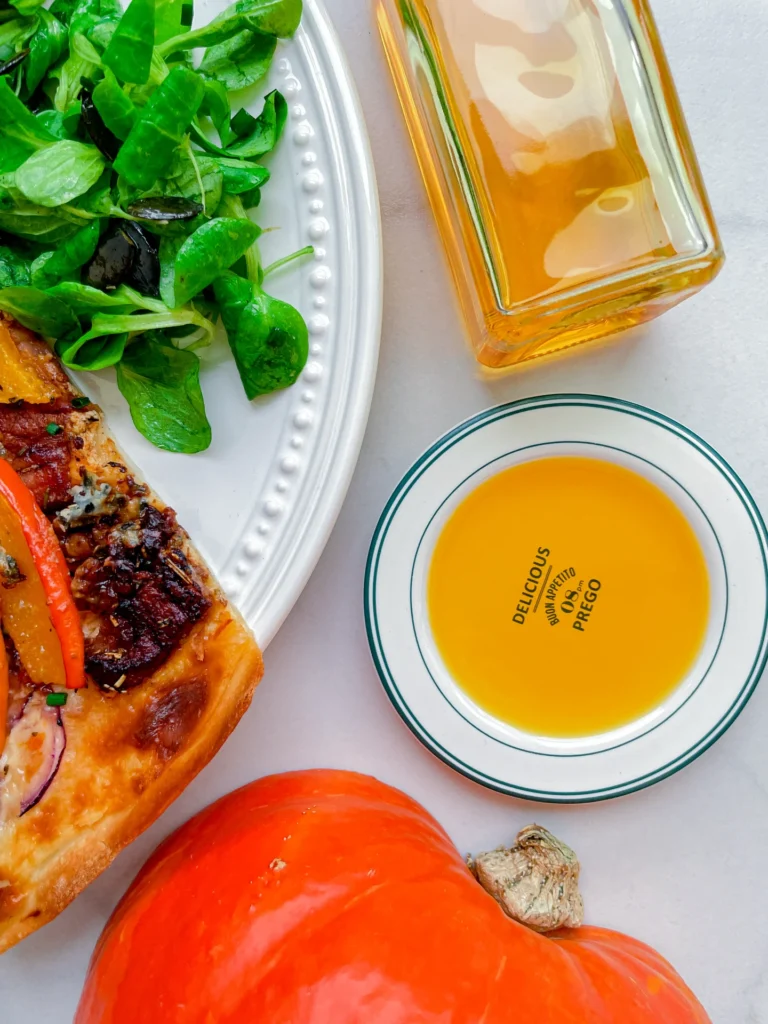
Drizzle this minty oil over fresh salads for a herby twist or use it to finish a dessert like brownies, ice cream, or fruit salads. It also works as a light drizzle over roasted vegetables, adding a subtle mint freshness to balance the flavors. For an unexpected yet delicious pairing, try it with lamb or feta cheese for a Mediterranean-inspired vibe. Versatile and fresh, it’s a little experiment gone right. For an extravagant dessert with a wow factor, you absolutely have to try this oil on my Vanilla Parfait with Chocolate Soil!

Store this infused oil in a clean, airtight bottle in the fridge for up to one week.

Hi, I'm Kimberly!

Hi, I'm Kimberly.

A hopeless romantic when it comes to food. Every recipe I share is a love letter to food itself. I’m so glad you’re here. Make yourself at home and stay a while.

Love,
Kimberly

Kimberly the Zett Signature

If you want to get to know me better,
click here!


Chocolate Mint Oil
Chocolate Mint Oil
Chocolate Mint Oil
Chocolate Mint Oil

LET’S MAKE A PIECE OF HAPPINESS

Print
clock clock iconcutlery cutlery iconflag flag iconfolder folder iconinstagram instagram iconpinterest pinterest iconfacebook facebook iconprint print iconsquares squares iconheart heart iconheart solid heart solid icon
Chocolate Mint Oil

Chocolate Mint Oil


  • Author: Kimberly
  • Total Time: 40 min
  • Yield: 1 cup / 250 ml 1x

Description

RECOMMENDED EQUIPMENT

  • blender
  • medium-sized saucepan
  • whisk
  • a bowl which the medium saucepan fits into
  • 2 medium-sized bowls
  • 2 fine mesh strainers
  • oil bottle
  • ice cubes
  • coffee filter

Ingredients

Units Scale
  • 15 grams cocoa nibs
  • 15 grams fresh mint
  • 250 milliliter rapeseed oil

Instructions

  1. Put cocoa nibs and leaves of the mint into the blender. Pour in the oil. Blend on the highest setting until it no coarse pieces are longer visible.
  2. Pour the mixture from the blender into a medium-sized pot and heat it over medium heat, constantly stirring, to a temperature of about 102°-103°C (215°-217°F). Then, let the oil simmer with the lid partially on for the next 10 minutes. Stir only occasionally, making sure the temperature remains steady and nothing gets burned.
  3. At the end of the cooking process, prepare a bowl large enough to fit the medium-sized pot, filled with cold water and a handful of ice cubes. Also, hang a fine mesh sieve strainer over a medium-sized bowl.
  4. Now, place the pot in the ice water and stir to stop the cooking process. Once the oil is almost cold, remove the pot from the water and pour the oil into the first fine mesh sieve to catch the coarse particle.
  5. Then, pour the oil into the second fine mesh sieve, which you before equipped with a coffee filter, to catch the remaining finer particles.
  6. Allow the oil to drip through for about 30 minutes or maybe less depending on how many remaining particles are in the coffee filter. Once all the oil has passed through the coffee filter, transfer the collected amount of oil into an oil bottle. Store in the refrigerator for up to 1 week.
  • Passive Time: 30 min
  • Cook Time: 10 min

CRAVING MORE?

Follow along here & don’t forget to subscribe to my substack!

Mulled Wine Oil

Mulled Wine Oil

Mulled Wine Oil

Mulled Wine Oil

December 17, 2024 by Kimberly

This spiced oil is like a hug in a drizzle. Think rich, warm, and aromatic vibes that make every dish feel festive and fancy. Perfect for cozy dinners and holiday magic.

This website uses affiliate links which may earn commission for purchases made at no additional cost to you.

TOTAL TIME

45 min

SERVES

1 cup / 250 ml

DIET

vegan

EVERY RECIPE DESERVES

A Little Love Letter

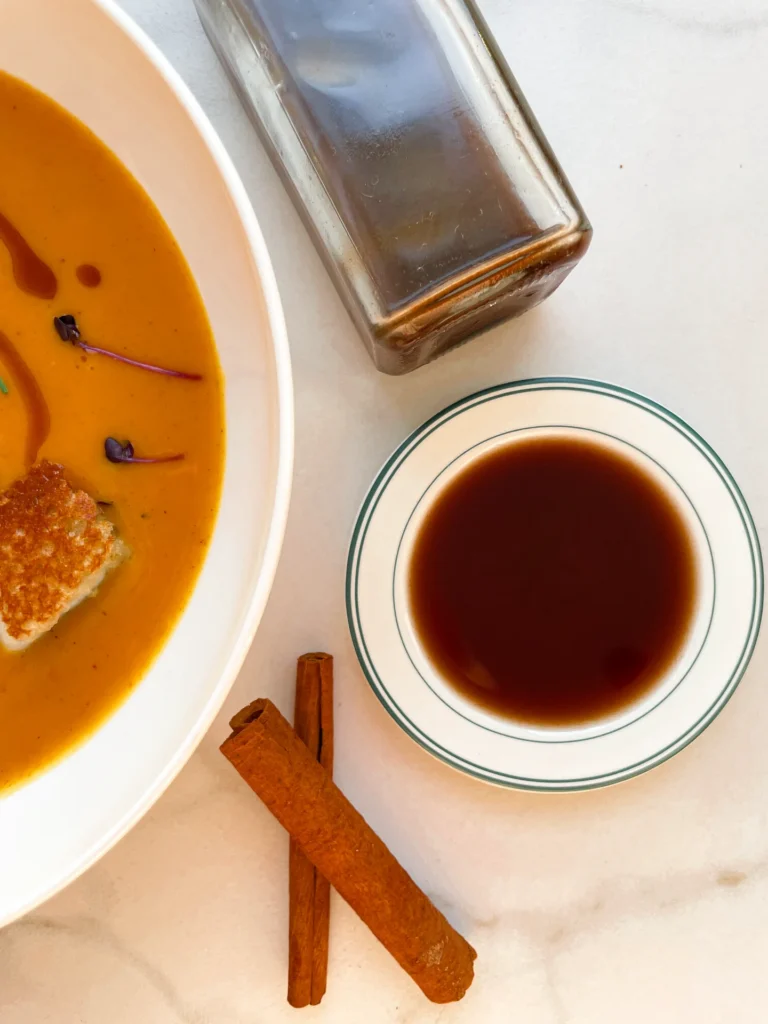
This cozy spiced oil brings holiday magic to your plate. Infused with citrusy orange, cinnamon, cloves, star anise, and cardamom, it’s a flavorful hug in every drizzle. Perfect for elevating roasted veggies, hearty salads, or even as a bread dip, this oil is simple yet sophisticated. Whether you’re hosting or gifting, it’s a warm, festive twist that feels like Christmas in a bottle. Easy to make and impossible not to love!

Drizzle this aromatic oil over roasted vegetables for a cozy finish, or mix it into salad dressings for a warm, festive twist. Pair it with fresh, crusty bread as a dip, or spoon it over warm risottos and soups to add a layer of spiced goodness. Feeling adventurous? Try it over roasted sweet potatoes or even desserts like baked pears for a gourmet touch. This oil fits wherever cozy, holiday vibes are needed. You absolutely have to try the oil with this Brussels Sprout Salad!

Store your infused oil in a sealed glass jar at room temperature for up to one week. Keep it in a cool, dark place to preserve its aromatic magic.

Hi, I'm Kimberly!

Hi, I'm Kimberly.

A hopeless romantic when it comes to food. Every recipe I share is a love letter to food itself. I’m so glad you’re here. Make yourself at home and stay a while.

Love,
Kimberly

Kimberly the Zett Signature

If you want to get to know me better,
click here!


Mulled Wine Oil
Mulled Wine Oil
Mulled Wine Oil
Mulled Wine Oil

LET’S MAKE A PIECE OF HAPPINESS

Print
clock clock iconcutlery cutlery iconflag flag iconfolder folder iconinstagram instagram iconpinterest pinterest iconfacebook facebook iconprint print iconsquares squares iconheart heart iconheart solid heart solid icon
Mulled Wine Oil

Mulled Wine Oil


  • Author: Kimberly
  • Total Time: 45 min

Description

RECOMMENDED EQUIPMENT

  • blender
  • medium-sized saucepan
  • whisk
  • a bowl which the medium saucepan fits into
  • 2 medium-sized bowls
  • 2 fine mesh strainers
  • oil bottle
  • ice cubes
  • coffee filter

Ingredients

Units Scale
  • 1 orange
  • 1/4 tsp cinnamon
  • 8 cloves
  • 1 star anise
  • 1/4 tsp ground cardamom
  • 250 milliliter rapeseed oil

Instructions

  1. Zest the orange and put it along with the cloves, cinnamon, cardamom and star anise into the blender. Pour in the oil. Blend on the highest setting until it no coarse pieces are longer visible.
  2. Pour the mixture from the blender into a medium-sized pot and heat it over medium heat, constantly stirring, to a temperature of about 102°-103°C (215°-217°F). Then, let the oil simmer with the lid partially on for the next 10 minutes. Stir only occasionally, making sure the temperature remains steady and nothing gets burned.
  3. At the end of the cooking process, prepare a bowl large enough to fit the medium-sized pot, filled with cold water and a handful of ice cubes. Also, hang a fine mesh sieve strainer over a medium-sized bowl.
  4. Now, place the pot in the ice water and stir to stop the cooking process. Once the oil is almost cold, remove the pot from the water and pour the oil into the first fine mesh sieve to catch the coarse particle.
  5. Then, pour the oil into the second fine mesh sieve, which you before equipped with a coffee filter, to catch the remaining finer particles.
  6. Allow the oil to drip through for about 30 minutes or maybe less depending on how many remaining particles are in the coffee filter. Once all the oil has passed through the coffee filter, transfer the collected amount of oil into an oil bottle. Store in the refrigerator for up to 1 week.
  • Prep Time: 5 min
  • Passive Time: 30 min
  • Cook Time: 10 min

CRAVING MORE?

Follow along here & don’t forget to subscribe to my substack!