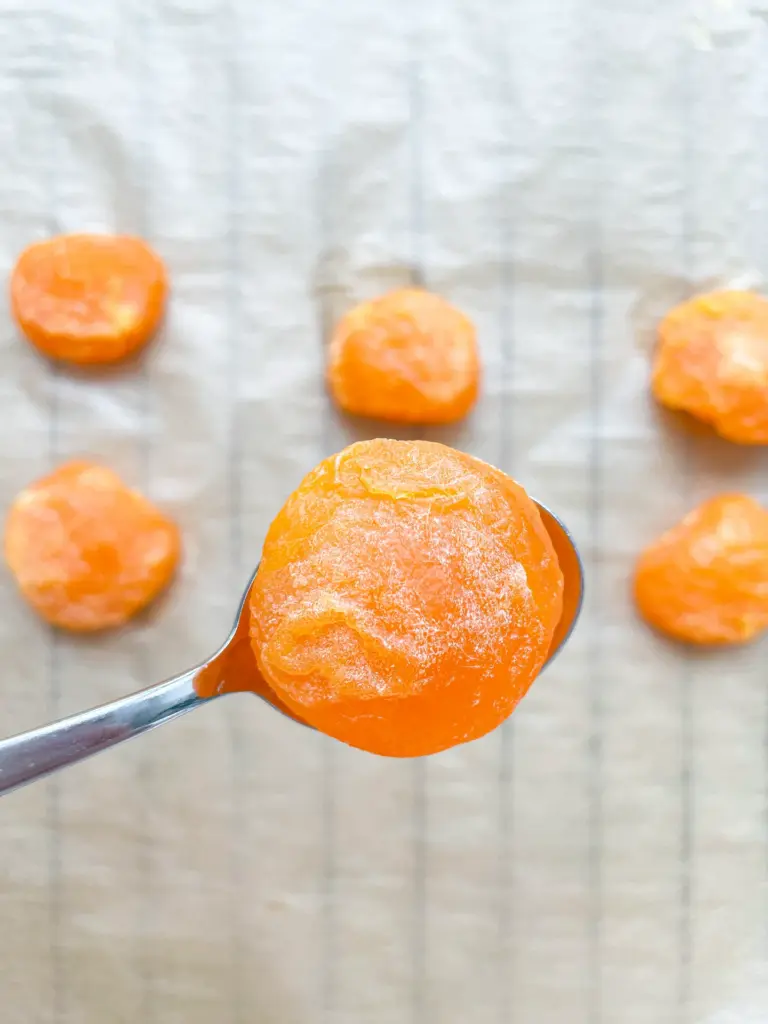
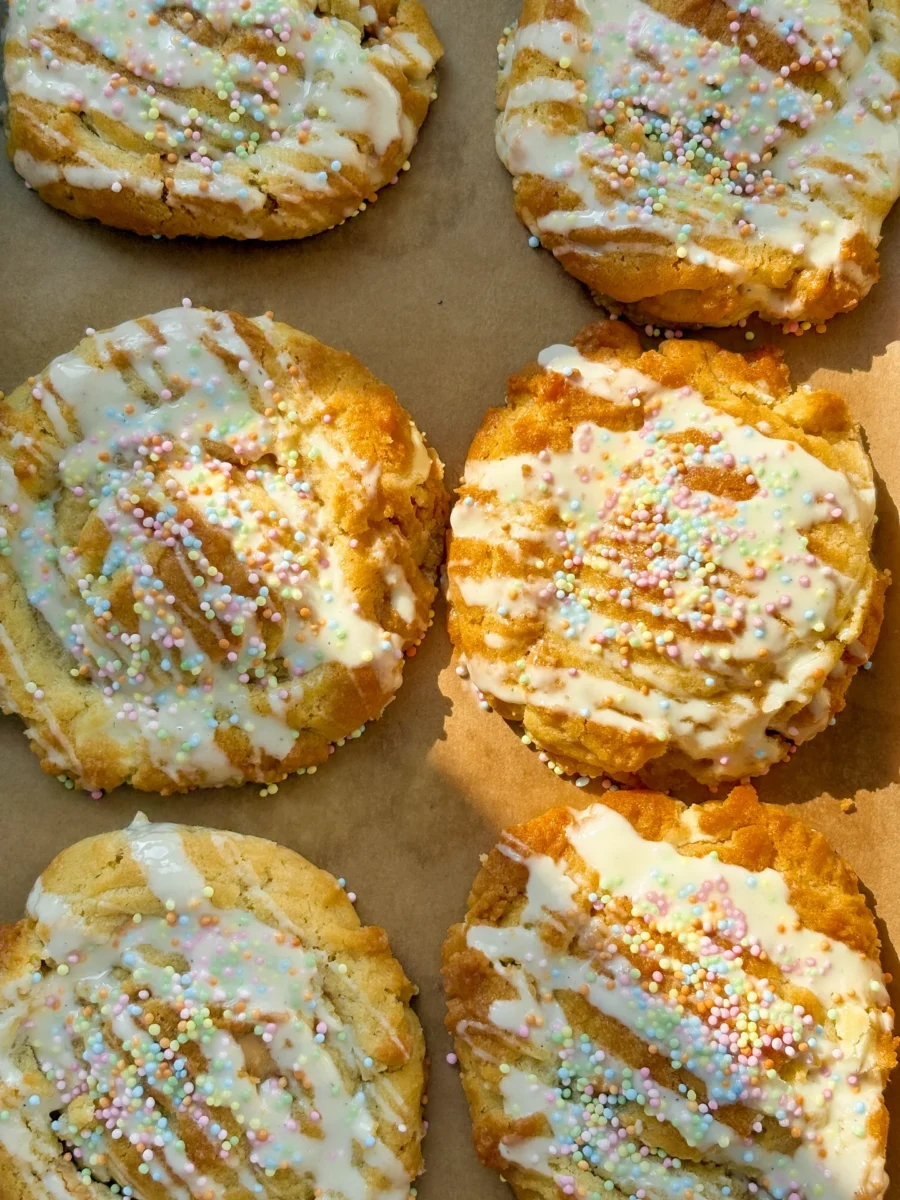
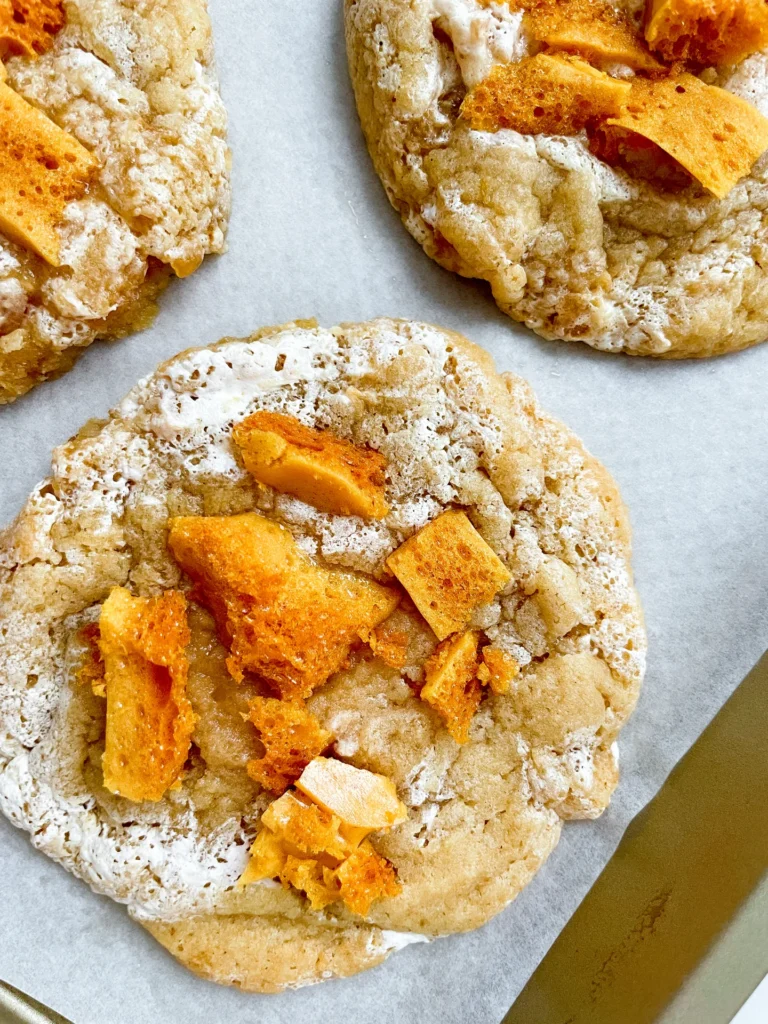
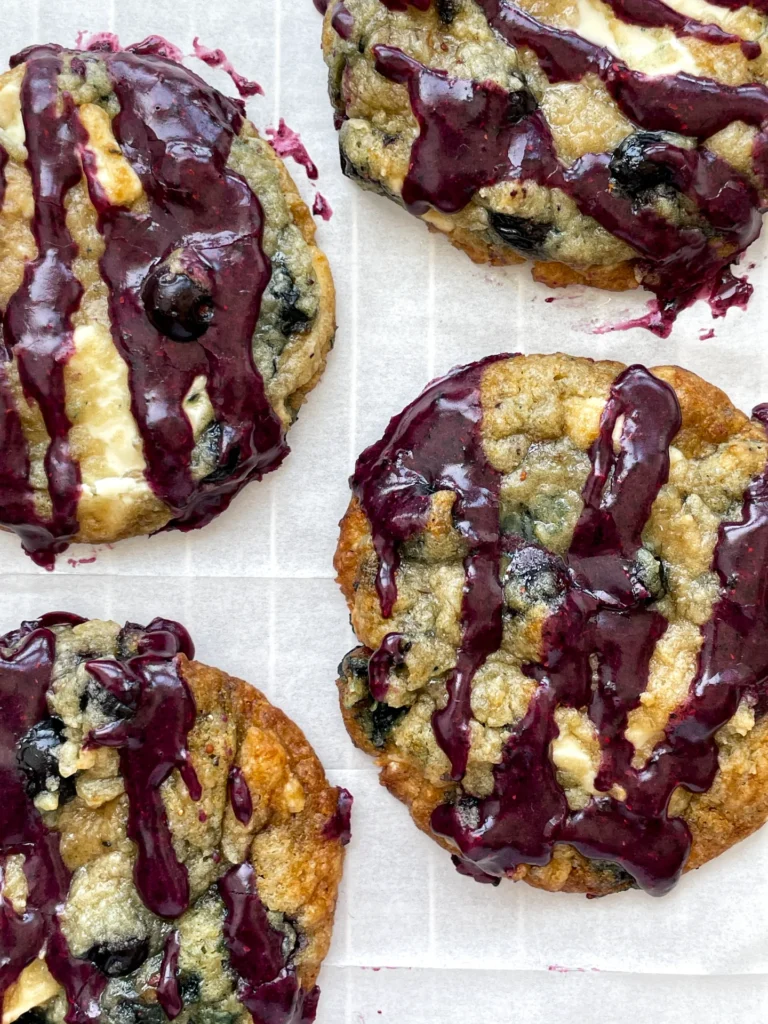
Honeycomb Apricot Marshmallow Fluff Cookies

Honeycomb Apricot Marshmallow Fluff Cookies

Honeycomb Apricot Marshmallow Fluff Cookies

Honeycomb Apricot Marshmallow Fluff Cookies

December 19, 2024 by Kimberly

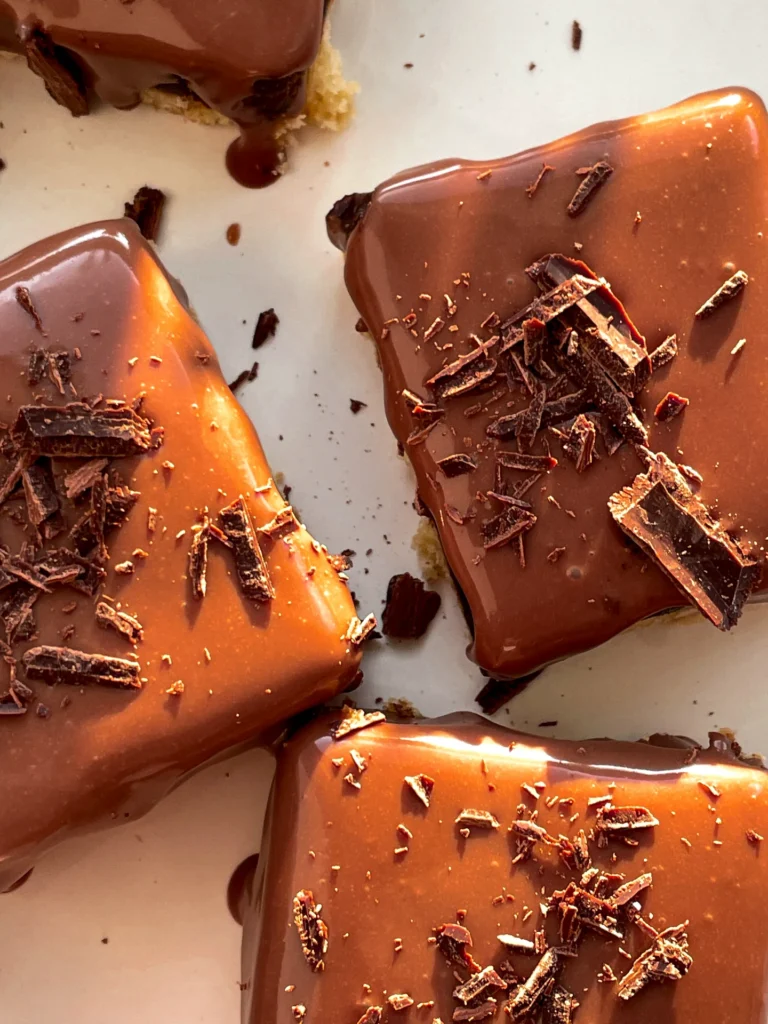
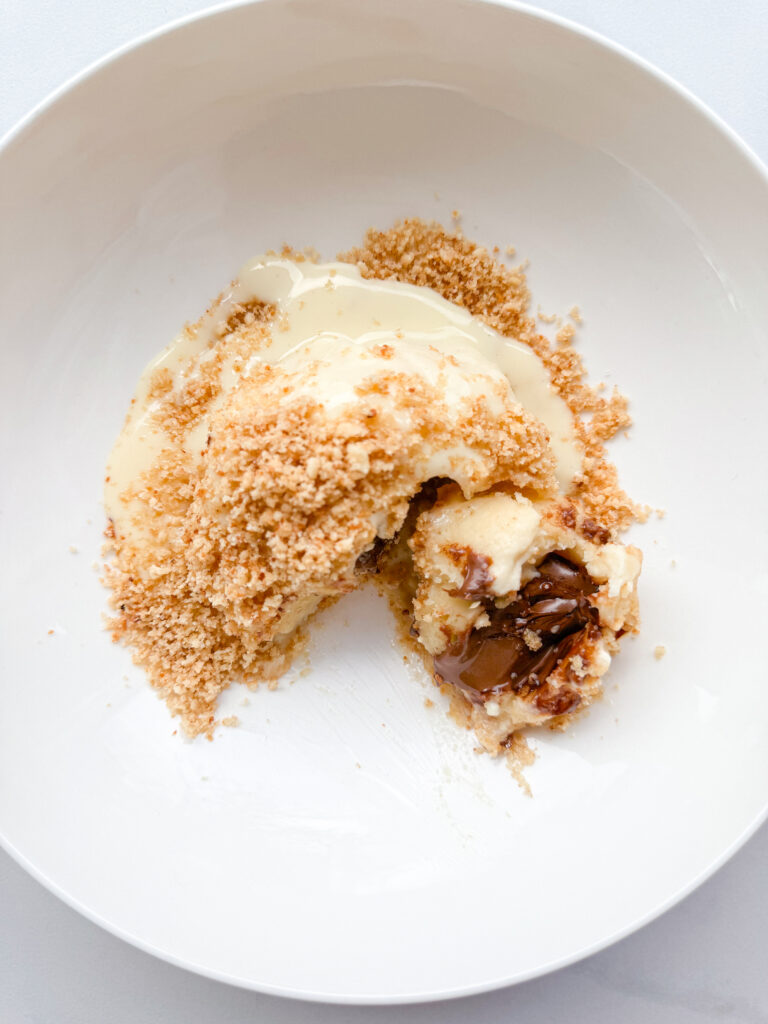
Soft, gooey cookie layers meet tangy apricot sauce, marshmallowy swirls, and honeycomb crunch. Every bite is an explosion of textures and flavors – sweet, sticky, and irresistibly cozy vibes in cookie form.

This website uses affiliate links which may earn commission for purchases made at no additional cost to you.

TOTAL TIME

2 hrs + 25 min

SERVES

12 cookies

DIET

vegetarian

EVERY RECIPE DESERVES

A Little Love Letter

Imagine sinking your teeth into layers of soft cookie dough, creamy marshmallow fluff, tangy apricot sauce, and crunchy honeycomb pieces. It’s not just a dessert – it’s a flavor-packed adventure! These cookies are a mash-up of textures and tastes that scream fun and indulgence. Whether it’s for a cozy night in or to impress your friends, they’re bound to disappear fast.

These cookies are best enjoyed slightly chilled for that perfect contrast of gooey and crunchy. Pair them with a cup of tea or coffee for a casual treat, or bring them out as the star of a dessert platter. Hosting a party? Stack them up on a pretty plate and watch them vanish in minutes.

Keep leftovers in an airtight container for up to 3 days. For extra freshness, separate layers with parchment paper to avoid sticking.

Hi, I'm Kimberly!

Hi, I'm Kimberly.

A hopeless romantic when it comes to food. Every recipe I share is a love letter to food itself. I’m so glad you’re here. Make yourself at home and stay a while.

Love,
Kimberly

Kimberly the Zett Signature

If you want to get to know me better,
click here!


Honeycomb Apricot Marshmallow Fluff Cookies

LET’S MAKE A PIECE OF HAPPINESS

Print
clock clock iconcutlery cutlery iconflag flag iconfolder folder iconinstagram instagram iconpinterest pinterest iconfacebook facebook iconprint print iconsquares squares iconheart heart iconheart solid heart solid icon
Honeycomb Apricot Marshmallow Fluff Cookies

Honeycomb Apricot Marshmallow Fluff Cookies


5 Stars 4 Stars 3 Stars 2 Stars 1 Star

5 from 1 review

  • Author: Kimberly
  • Total Time: 85 min
  • Yield: 12 cookies 1x

Description

Recommended Equipment

  • 2 small pots
  • 1 medium pot
  • baking dish (approx. 20×20 cm)
  • parchment paper
  • spatula
  • whisk
  • thermometer
  • electric mixer
  • sharp knife
  • cutting board
  • mixing bowl
  • cookie scoop

Ingredients

Units Scale
HONEYCOMB
  • 100 grams white sugar
  • 20 grams honey
  • 20 milliliter water
  • 1 tsp baking soda
MARSHMALLOW FLUFF
  • 60 grams white sugar
  • 60 grams water
  • 80 grams corn syrup
  • 1 egg white
APRICOT SAUCE
  • 100 grams dried apricots
  • 80 milliliter apricot juice
  • 10 grams powdered sugar
  • 1/2 tsp vanilla extract
  • 1 tsp lemon juice
  • 2 tsp cornstarch
COOKIE DOUGH
  • 120 grams butter, room temperature
  • 100 grams white sugar
  • 50 grams brown sugar
  • 1 egg
  • 1 tsp vanilla extract
  • 220 grams all-purpose flour
  • 1/2 tsp baking soda
  • 1/2 tsp salt

Instructions

  1. Honeycomb: First, line a heatproof baking dish with parchment paper. Combine sugar, honey, and water in a medium pot. Heat over medium until it boils, monitoring the temperature with a thermometer until it reaches 149°C (300°F). Remove from heat and quickly stir in the baking soda just until combined. Be careful—it will foam up a lot! Immediately pour the mixture into the prepared dish without stirring or spreading it, as this would break the air bubbles. Scrape any remaining mixture from the pot and add it on top. Let it cool completely (about 1–2 hours).
  2. Marshmallow Fluff: Heat water, sugar, and corn syrup in a small pot to 115°C (240°F). Meanwhile, beat egg whites in a clean bowl until stiff peaks form. Slowly pour the hot sugar syrup in a thin, steady stream into the egg whites, mixing continuously with an electric hand mixer. After adding all the syrup, beat on high for another 5 minutes until light and fluffy. Set aside.
  3. Apricot Sauce: Chop the dried apricots and combine them with apricot juice, powdered sugar, vanilla extract, and lemon juice in a small pot. Simmer for about 10 minutes until softened. Dissolve the cornstarch in a bit of cold water, stir it in, and bring everything to a boil until thickened. Set aside to cool.
  4. Cookie Dough: Cream butter with the white and brown sugar. Add the egg and vanilla extract, mixing well. Stir in the flour, baking soda, and salt until just combined—don’t overmix!
  5. In a deep dish, layer the components: a part of cookie dough, a tablespoon of marshmallow fluff, and a tablespoon of apricot sauce. Repeat until all ingredients are used. Tip: Store leftover fluff in a jar in the fridge for up to two weeks.
  6. Use a cookie scoop (or tablespoon) to form 12 evenly sized balls from the layered dough. Place them on the prepared baking tray. Chill the cookies in the fridge for 1 hour – don’t skip this step! Chilling ensures the cookies hold their shape and don’t spread too much when baked.
  7. Preheat the oven to 150°C (300°F) and bake the cookies for 13–15 minutes. While baking, carefully cut the honeycomb into small pieces. Remove the warm cookies from the oven, adjust their shape if necessary, and gently press the honeycomb pieces onto the tops. Let the cookies rest for about 10 minutes before enjoying.
  • Passive Time: 85 min
  • Cook Time: 60 min

CRAVING MORE?

Follow along here & don’t forget to subscribe to my substack!

Cranberry Orange Glazed Pork Roast

Cranberry Orange Glazed Pork Roast

Cranberry Orange Glazed Pork Roast

Cranberry Orange Glazed Pork Roast

December 18, 2024 by Kimberly

This juicy, tender pork roast with a sweet-tangy cranberry orange glaze tastes like the holidays on a plate. Perfectly crispy on the outside and bursting with bold, festive flavors inside.

This website uses affiliate links which may earn commission for purchases made at no additional cost to you.

TOTAL TIME

2 hrs + 40 min

SERVES

6 portions

DIET

omnivore

EVERY RECIPE DESERVES

A Little Love Letter

This roast is what holiday dreams are made of crispy crackling, juicy pork, and a sweet-tangy cranberry orange glaze that brings all the festive vibes. The glaze is inspired by a classic Cumberland sauce, with tart cranberries, bright orange zest, and a splash of Port wine for richness. Whether it’s for a holiday feast or a special family dinner, this roast is guaranteed to steal the show and have everyone asking for seconds.

Pair this roast with creamy mashed potatoes, roasted Brussels sprouts, or a crisp green salad to balance the richness. The cranberry orange glaze adds just the right amount of tang, so it shines with simple sides. For an extra festive touch, drizzle a bit of the warm glaze over the carved slices. The best part? This roast is just as amazing the next day! Slice it paper-thin and enjoy it as a snack, or layer it into a sandwich with some extra glaze for a seriously delicious leftover treat.

Wrap leftover pork in foil or store it in an airtight container in the fridge for up to three days. Enjoy it cold in a sandwich with a dollop of leftover glaze.

Hi, I'm Kimberly!

Hi, I'm Kimberly.

A hopeless romantic when it comes to food. Every recipe I share is a love letter to food itself. I’m so glad you’re here. Make yourself at home and stay a while.

Love,
Kimberly

Kimberly the Zett Signature

If you want to get to know me better,
click here!


Cranberry Orange Glazed Pork Roast

LET’S MAKE A PIECE OF HAPPINESS

Print
clock clock iconcutlery cutlery iconflag flag iconfolder folder iconinstagram instagram iconpinterest pinterest iconfacebook facebook iconprint print iconsquares squares iconheart heart iconheart solid heart solid icon
Cranberry Orange Glazed Pork Roast

Cranberry Orange Glazed Pork Roast


  • Author: Kimberly
  • Total Time: 2 hrs + 40 min
  • Yield: 6 - 8 1x

Description

RECOMMENDED EQUIPMENT

  • deep baking dish or roasting pan
  • aluminum foil
  • sharp knife
  • cutting board
  • kitchen brush for glazing
  • meat thermometer
  • vegetable peeler
  • small pot

Ingredients

Units Scale
PORK HAM
  • 1.8 kilogramm cured pork ham with rind
  • 2 tsp dijon mustard
  • salt & pepper
COOKING LIQUID
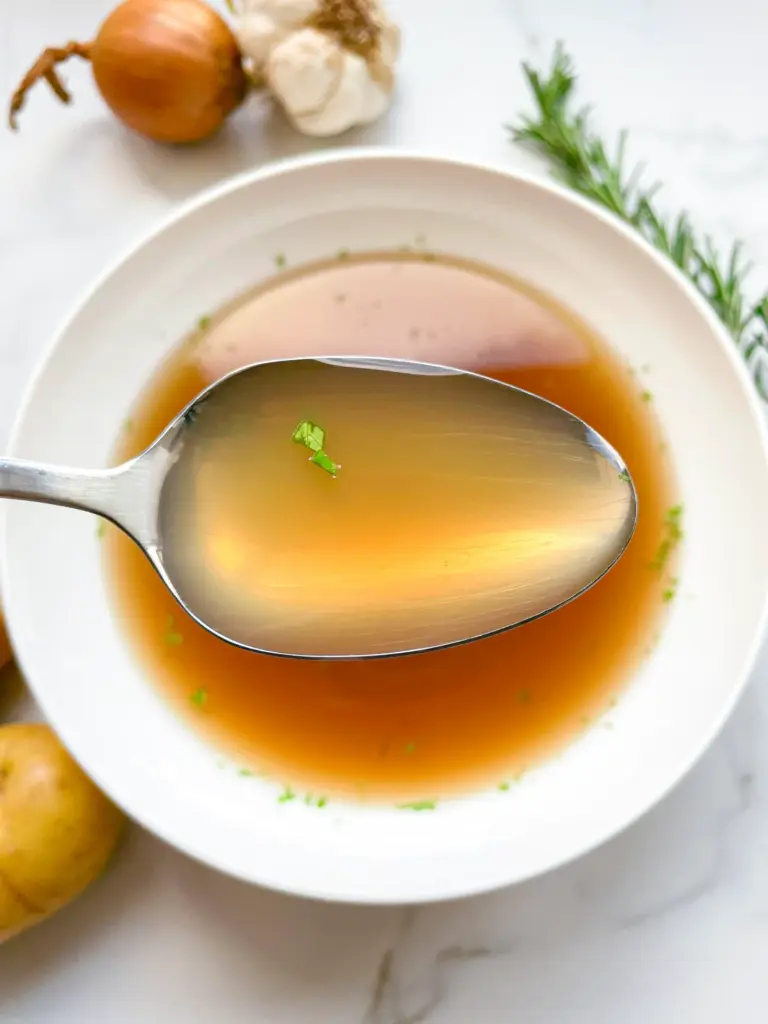
  • 750 milliliter vegetable stock
  • 1.5 white onions
  • 3 garlic cloves
  • 2 carrots
  • 2 bay leaves
  • 1 tbsp black pepper corns
CRANBERRY ORANGE GLAZE
  • 1 lemon
  • 1 orange
  • 200 milliliter port wine
  • 1 shallot
  • 3/4 tsp fresh ginger, grated
  • 1 tsp dijon mustard
  • 100 grams fresh cranberries
  • 200 grams redcurrant jelly
  • salt & black pepper

Instructions

  1. Take the meat out of the fridge and let it rest at room temperature for about 30 minutes to ensure even cooking later.
  2. In the meantime, prepare the glaze. You can find the recipe for the cranberry-orange sauce here, which we’ll use both as a glaze and a sauce later.
  3. Preheat the oven to 150°C/300°F (fan).
  4. Peel the onions, garlic, and carrots, then cut them into large chunks.
  5. Pour vegetable broth into a deep baking dish or roasting pan and place the meat in it, rind side down. Distribute the chopped vegetables, pepper, and bay leaves around it.
  6. Cover the dish with aluminum foil and place it in the oven for 40 minutes.
  7. Remove the dish from the oven and transfer the meat to a cutting board, placing it rind side up. You now have two options: either remove the rind completely, leaving the fat layer intact, and score the fat closely with a sharp knife without cutting into the meat. Or, leave the rind on and score it diagonally in a tight pattern, again without cutting into the meat. Return the meat to the oven uncovered and roast for an additional hour.
  8. After 30 minutes, brush the rind with the first layer of glaze. Repeat this every 10 minutes (a total of 3 times). Be sure to save some of the glaze, as it will be used as a sauce later. Once the meat reaches an internal temperature of 65°C/149°F, switch the oven to grill mode and roast the rind for about 10 minutes until it becomes perfectly crispy. The roast should now have an internal temperature of around 68-69°C/154-156°F.
  9. Remove the meat from the oven, cover it with aluminum foil, and let it rest for 10-15 minutes. During this time, the internal temperature will rise to about 72°C/162°F, and the juices will redistribute within the meat.
  10. Slice the meat against the grain into thick slices for serving as a main course or into thin slices for making sandwiches. Enjoy!
  • Passive Time: 2 hrs + 10 min
  • Cook Time: 30 min

CRAVING MORE?

Follow along here & don’t forget to subscribe to my substack!

Almond Milk

Almond Milk

Almond Milk

Almond Milk

November 23, 2024 by Kimberly

Start your day with a bottle of fresh, homemade almond milk waiting in the fridge. Smooth, creamy, and naturally nutty, this dairy-free milk alternative is made with just two simple ingredients: almonds and water and perhaps any flavor twist you’re in the mood for. Whether you’re blending up a smoothie, pouring it over your morning granola, or adding a splash to your iced coffee, this almond milk turns everyday moments into a little plant-based luxury.

This website uses affiliate links which may earn commission for purchases made at no additional cost to you.

TOTAL TIME

17 min + overnight

SERVES

1 liter / 4 cups

DIET

vegan

EVERY RECIPE DESERVES

A Little Love Letter

I honestly used to think making almond milk at home was some sort of witchcraft, like you’d need a shiny high-speed blender, nut milk bags, and basically a degree in food science. And what can I say? You really don’t. Haha. All it actually takes is almonds, water, and a little bit of patience. That’s it. And at the end, you’re rewarded with this fresh, creamy, silky-smooth plant-based milk that feels so much more real than anything you’ll find in a carton at the store. No additives, no gums, no ingredients you can’t even pronounce.

The fun part? You can make it your own in about a million ways. Cinnamon almond milk for cozy fall vibes? Absolutely. Vanilla almond milk that tastes like dessert in a glass? Always yes. A drizzle of maple syrup for that subtle sweetness? Yessss, please. Once you try customizing it, you’ll realize how versatile it really is. I use homemade almond milk especially in smoothies. One of my favorites is this Banana Bliss Smoothie with Poppy Seeds, Marzipan & Almond Butter. It makes everything so creamy without feeling heavy. But it’s also amazing poured over granola or blended into iced coffee.

And yes, I’ll admit, I’m also in it for the aesthetic. I always pour my almond milk into a classic glass bottle before popping it into the fridge. There’s just something about opening the door and seeing that little bottle waiting there. But it’s practical as well: in a clean bottle with a lid, it keeps fresh for three to four days. Just give it a good shake before using, since it tends to separate naturally.

So yeah, homemade almond milk might sound fancy, but really it’s one of the simplest little kitchen habits you can build. And once you’ve tried it, I promise you’ll wonder why you ever thought it was complicated.

Hi, I'm Kimberly!

Hi, I'm Kimberly.

A hopeless romantic when it comes to food. Every recipe I share is a love letter to food itself. I’m so glad you’re here. Make yourself at home and stay a while.

Love,
Kimberly

Kimberly the Zett Signature

If you want to get to know me better,
click here!


Almond Milk
Dreamy Homemade Almond Milk

LET’S MAKE A PIECE OF HAPPINESS

Print
clock clock iconcutlery cutlery iconflag flag iconfolder folder iconinstagram instagram iconpinterest pinterest iconfacebook facebook iconprint print iconsquares squares iconheart heart iconheart solid heart solid icon
Almond Milk

Almond Milk


  • Author: Kimberly
  • Total Time: 17 min + overnight
  • Yield: 1 liter / 4 cups 1x

Description

Start your day with a bottle of fresh, homemade almond milk waiting in the fridge. Smooth, creamy, and naturally nutty, this dairy-free milk alternative is made with just two simple ingredients: almonds and water and perhaps any flavor twist you’re in the mood for. Whether you’re blending up a smoothie, pouring it over your morning granola, or adding a splash to your iced coffee, this almond milk turns everyday moments into a little plant-based luxury.

GOOD TO HAVE ON HAND

  • medium-sized bowl
  • blender
  • fine mesh strainer
  • bottle

Ingredients

Units Scale
  • 200 grams raw almonds
  • 1000 milliliters cold, filtered water
OPTIONAL
  • 3 dates, pitted
  • 1 tsp vanilla extract
  • pinch of salt

Instructions

IN THE EVENING
Place the almonds (and dates) in a bowl and add enough water to fully cover them. Set the bowl in the fridge to soak overnight.

THE NEXT MORNING

  1. Drain the almonds (and dates) through a fine-mesh strainer and discard the soaking water.
    Transfer the almonds (and dates) to a blender and add 1 liter / 4 cups of fresh cold water.
  2. Blend on the highest setting for about 1 minute, until the liquid turns white and frothy. Now you can add flavoring to taste. I used a pinch of salt and 1 teaspoon of vanilla extract, but 1 teaspoon of cinnamon is also a super delicious option.
  3. Place a fine-mesh strainer over a bowl and pour the almond milk through it. Press the pulp firmly to extract as much liquid as possible. If you’d like, you can strain the milk again through a cheesecloth or nut milk bag. Alternatively, place the almond pulp in a clean kitchen towel and squeeze it out by hand — but honestly, that’s not really necessary.
  4. Pour the finished almond milk into a clean glass bottle. It will keep in the fridge for about three to four days. Be sure to shake well before using, as the solids naturally settle to the bottom over time.
  • Prep Time: 17 min
  • Passive Time: overnight
  • Cook Time: 0 min

CRAVING MORE?

Follow along here & don’t forget to subscribe to my substack!

Easy Same Day Basic Focaccia

Easy Same Day Basic Focaccia

Quick & Easy - The Best Focaccia Recipe

Easy Same Day Basic Focaccia

October 26, 2024 by Kimberly

Golden-crisp on the outside, airy and soft inside, this fresh focaccia is the ultimate comfort! Perfect for dipping, snacking, or as a side – it’s irresistible, warm, and baked-to-perfection bliss.

This website uses affiliate links which may earn commission for purchases made at no additional cost to you.

TOTAL TIME

3 hrs + 30 min

SERVES

1 tray

DIET

vegetarian

EVERY RECIPE DESERVES

A Little Love Letter

Craving something warm, cozy, and seriously easy to bake? This focaccia is your answer! It’s got that perfect golden crust that you can’t resist breaking into and a soft, fluffy center that just melts in your mouth. Whether you’re new to baking or a seasoned bread lover, this focaccia has that fresh-baked, olive-oil-kissed goodness that makes it the ultimate comfort food. Plus, it’s ready in just 3.5 hours – no need to wait around for endless rises. Just mix, bake, and enjoy some bakery-style vibes at home!

This focaccia is so versatile – it pairs perfectly with just about anything! Tear off pieces to dip in olive oil and balsamic vinegar for a classic Italian feel, or serve it alongside a warm soup or pasta for a cozy meal. It also makes a great base for an open-faced sandwich or as an appetizer with some herby olive oil and fresh tomatoes. However you serve it, the fluffy texture and crispy edges will make it an instant favorite for everyone around the table. For an in-depth guide with secret tips & tricks, check out my ‚How-To Guide‘ for the Best Focaccia Recipe!

To keep that bakery-fresh vibe, store your focaccia in an airtight container or plastic wrap at room temperature for up to 2 days. You can also freeze it – wrap it tightly, and it’ll last up to 2 months. Just warm it in the oven to bring back the freshness.

Hi, I'm Kimberly!

Hi, I'm Kimberly.

A hopeless romantic when it comes to food. Every recipe I share is a love letter to food itself. I’m so glad you’re here. Make yourself at home and stay a while.

Love,
Kimberly

Kimberly the Zett Signature

If you want to get to know me better,
click here!


Easy Same Day Basic Focaccia

LET’S MAKE A PIECE OF HAPPINESS

Print
clock clock iconcutlery cutlery iconflag flag iconfolder folder iconinstagram instagram iconpinterest pinterest iconfacebook facebook iconprint print iconsquares squares iconheart heart iconheart solid heart solid icon
Quick & Easy - The Best Focaccia Recipe

Easy Same Day Basic Focaccia


  • Author: Kimberly
  • Total Time: 3 hrs + 30 min

Description

Recommended Equipment

  • large bowl
  • kitchen scale
  • thermometer (even a medicine one works)
  • measuring cup
  • wooden spoon
  • cling film, beeswax wrap, or a shower cap
  • baking dish or tray (mine is 20x26cm / 8×10 inch)
  • oven


Ingredients

Units Scale
  • 500 grams pizza flour (type 00 in Germany)
  • 400 grams luke-warm water
  • 1.5 tsp active dry-yeast
  • 1 tbsp olive oil
  • 1 tsp honey
  • 1.5 tsp salt
  • 50 milliliters olive oil for greasing and dipping

Instructions

  1. Combine the active-dry yeast with warm water (between 34-38°C / 93-100°F), olive oil, and a teaspoon of honey to get things started. Let it sit for about 10 minutes until it becomes bubbly and the oil floats on top with the activated yeast. Meanwhile, in a large bowl, mix your flour with the salt.
  2. Pour the activated yeast mixture into the flour. Using a wooden spoon, mix everything together until it forms a dough and no dry flour is left. It might look a bit shaggy at first, but that’s totally fine! Scrape down any dough stuck to the sides and cover the bowl with cling film, a beeswax towel, or a shower cap. Let it sit for 20 minutes to allow the flour to hydrate and the dough to start developing elasticity.
  3. After 20 minutes, uncover the dough and prepare a small bowl of warm water to dip your hands in for the stretch & fold process. This technique helps develop the gluten without kneading. To do it, gently pull one side of the dough up, stretch it, and fold it over the center. Rotate the bowl a quarter turn and repeat on all four sides. You’ll do this about three times, letting the dough rest in between. This method strengthens the dough and helps create that light, airy texture! Follow these steps:
    • First stretch & fold, then let the dough rest for 20 minutes covered
    • Second stretch & fold, then rest another 20 minutes covered
    • Third stretch & fold, then let it rest for 60 minutes covered
  4. After the final 60-minute rest, grab your oven dish and drizzle 2-3 tablespoons of olive oil to coat it generously. Carefully transfer the dough to the dish, lifting it gently with both hands. Place it back in the dish, folding any hanging dough underneath itself to give it structure and elasticity.
  5. Cover the dish and let the dough rest for another 60 minutes. During this time, the dough will rise and settle into the dish, preparing for its final transformation.
  6. Preheat the oven to 220°C / 430°F. After the dough’s last rest, uncover it and drizzle a little extra olive oil over the top. Use your fingers to gently press into the dough, forming dimples. This will encourage those signature bubbles to form during baking.
  7. Bake the focaccia for 20-25 minutes, or until it’s golden and crisp. Enjoy your freshly baked focaccia! Let the focaccia cool to room temperature. If you cut it while it’s still hot, it might tear apart. But honestly, it tastes sooo good when it’s warm. Just tear it up and dip it into your favorite dips!

  • Passive Time: 3 hrs + 20 min
  • Cook Time: 10 min

CRAVING MORE?

Follow along here & don’t forget to subscribe to my substack!

White Chocolate Strawberry Macadamia Cookies

White Chocolate Strawberry Macadamia Cookies

White Chocolate Strawberry Macadamia Cookies

White Chocolate Strawberry Macadamia Cookies

September 10, 2024 by Kimberly

Imagine biting into buttery cookies with creamy white chocolate, crunchy macadamia nuts, and bursts of tangy-sweet freeze-dried strawberries. Every bite is a blissful moment of rich sweetness with a fruity twist.

This website uses affiliate links which may earn commission for purchases made at no additional cost to you.

TOTAL TIME

2 hrs + 20 min

SERVES

12 cookies

DIET

vegetarian

EVERY RECIPE DESERVES

A Little Love Letter

These cookies are the ultimate treat when you need a balance of sweetness and a little crunch. Picture soft, buttery bites with creamy white chocolate melting in your mouth, while macadamia nuts bring that irresistible crunch. And just when you think it couldn’t get better, you hit the tangy freeze-dried strawberry bursts. It’s like all your favorite things wrapped in one cozy, feel-good cookie. Trust me, these are going to be your new go-to sweet treat for every mood!

These cookies are perfect warm, straight out of the oven with the chocolate still gooey. Serve them with a glass of cold milk or alongside your favorite coffee or tea. They’re also a hit at parties or as an easy dessert for a laid-back weekend gathering. Want to take them up a notch? Try crumbling one over vanilla ice cream or serving them with a drizzle of strawberry sauce. You’re going to want to savor every bite!

To keep these cookies fresh, store them in an airtight container at room temperature for up to three days. If you want to make them last longer (if they aren’t devoured first!), freeze them for up to three months. Just bake them for 10 minutes at 150°C / 302°F in the oven before enjoying.

Hi, I'm Kimberly!

Hi, I'm Kimberly.

A hopeless romantic when it comes to food. Every recipe I share is a love letter to food itself. I’m so glad you’re here. Make yourself at home and stay a while.

Love,
Kimberly

Kimberly the Zett Signature

If you want to get to know me better,
click here!


White Chocolate Strawberry Macadamia Cookies

LET’S MAKE A PIECE OF HAPPINESS

Print
clock clock iconcutlery cutlery iconflag flag iconfolder folder iconinstagram instagram iconpinterest pinterest iconfacebook facebook iconprint print iconsquares squares iconheart heart iconheart solid heart solid icon
White Chocolate Strawberry Macadamia Cookies

White Chocolate Strawberry Macadamia Cookies


  • Author: Kimberly
  • Total Time: 2 hrs + 30 min
  • Yield: 12 cookies 1x

Description

Recommended Equipment

  • small pot
  • to medium bowls
  • whisk
  • sharp knife
  • cutting board
  • cookie scoop
  • parchment paper

Ingredients

Units Scale
  • 120 grams butter
  • 100 grams brown sugar
  • 100 grams white sugar
  • 1 tsp vanilla extract
  • 1 egg
  • 220 grams all-purpose flour
  • 1/2 tsp salt
  • 1/2 tsp baking soda
  • 150 grams white chocolate
  • 75 grams macadamia nuts
  • 25 grams freeze-dried strawberries

Instructions

  1. Melt the butter in a small pot or in the microwave. In a medium bowl, whisk the melted butter together with the brown and white sugar and vanilla extract for a few minutes. Then, add the egg and mix again. Set aside.
  2. In another bowl, mix the flour, baking soda, and salt. Set aside.
  3. Roughly chop or crumble the white chocolate, macadamia nuts, and freeze-dried strawberries. Set aside.
  4. Add everything to the butter-sugar-egg mixture and use a spatula to knead it all together until there’s no more loose flour.
  5. Use a medium cookie scoop to form the dough into 12 evenly sized balls and place them on parchment paper. Put the dough balls in the fridge for at least 2 hours.
  6. A few minutes before baking, preheat the oven to 150°C / 302°F. Place the cookie dough balls on a parchment-lined baking sheet, leaving enough space between them, and bake for 10 minutes. Take them out of the oven and let them cool for another 10 minutes. The cookies will be very soft at this point. If you prefer them firmer, leave them in the oven for a few more minutes.
  • Passive Time: 2 hrs + 20 min
  • Cook Time: 10 min

CRAVING MORE?

Follow along here & don’t forget to subscribe to my substack!

White Chocolate Blueberry Cookies & Blueberry Icing

White Chocolate Blueberry Cookies & Blueberry Icing

White Chocolate Blueberry Cookies & Blueberry Icing

White Chocolate Blueberry Cookies & Blueberry Icing

September 4, 2024 by Kimberly

Indulge in soft, melt-in-your-mouth cookies bursting with juicy blueberries and creamy sweetness of white chocolate, topped with a vibrant blueberry drizzle – perfect for cozy afternoons and sweet tooth cravings.

This website uses affiliate links which may earn commission for purchases made at no additional cost to you.

TOTAL TIME

2 hrs + 25 min

SERVES

12 cookies

DIET

vegetarian

EVERY RECIPE DESERVES

A Little Love Letter

Get ready to treat yourself to a batch of cookies that’s the perfect blend of creamy and fruity goodness. These soft-baked cookies are packed with juicy berries and creamy sweetness, offering a delightful twist on your classic cookie. The vibrant, tangy drizzle on top adds just the right amount of zing, making these cookies a perfect choice for cozy afternoons or when you’re just craving something sweet and satisfying. Whether you’re a seasoned baker or just starting out, this recipe is a must-try for anyone who loves experimenting in the kitchen.

These cookies are best enjoyed fresh out of the oven, with the soft, warm centers giving way to pockets of melted sweetness and bursts of berry flavor. For an extra touch, drizzle the tangy icing over the top while the cookies are still slightly warm, letting it melt into the crevices for a truly indulgent experience. Pair them with a hot cup of tea or coffee, or even a cold glass of milk, and you’ve got the perfect treat for any time of day.

To keep these cookies fresh and delicious, store them in an airtight container at room temperature. They’ll stay soft and flavorful for up to four days. If you need to keep them longer, you can freeze them in a sealed bag or container for up to two months. Just thaw at room temperature and enjoy as if they were freshly baked!

Hi, I'm Kimberly!

Hi, I'm Kimberly.

A hopeless romantic when it comes to food. Every recipe I share is a love letter to food itself. I’m so glad you’re here. Make yourself at home and stay a while.

Love,
Kimberly

Kimberly the Zett Signature

If you want to get to know me better,
click here!


White Chocolate Blueberry Cookies & Blueberry Icing

LET’S MAKE A PIECE OF HAPPINESS

Print
clock clock iconcutlery cutlery iconflag flag iconfolder folder iconinstagram instagram iconpinterest pinterest iconfacebook facebook iconprint print iconsquares squares iconheart heart iconheart solid heart solid icon
White Chocolate Blueberry Cookies & Blueberry Icing

White Chocolate Blueberry Cookies & Blueberry Icing


  • Author: Kimberly
  • Total Time: 2 hrs + 25 min
  • Yield: 12 cookies 1x

Description

Recommended Equipment

  • two medium-sized bowls
  • whisk
  • sharp knife
  • cutting board
  • spatula
  • cookie scoop
  • small bowl
  • mortar and pestle

Ingredients

Units Scale
COOKIE DOUGH
  • 120 grams butter
  • 100 grams brown sugar
  • 100 grams white sugar
  • 2 tsp vanilla extract
  • 1 egg
  • 220 grams all-purpose flour
  • 1/2 tsp salt
  • 1/2 tsp baking soda
  • 150 grams white chocolate
  • 200 grams fresh blueberries
ICING
  • 1 tbsp freeze-dried blueberries
  • 75 grams powdered sugar
  • 2 tbsp milk

Instructions

  1. Melt the butter in the microwave or in a small pot. In a medium-sized bowl, combine the melted butter, brown sugar, white sugar, and vanilla extract until the mixture is smooth and the sugar is almost dissolved. Next, add the egg and mix everything together. Set aside.
  2. In another medium-sized bowl, mix together the flour, baking soda, and salt, then set it aside.
  3. On a cutting board, chop the chocolate into pieces. Weigh the blueberries.
  4. Now, add the flour mixture to the butter-sugar mixture, along with the chocolate and blueberries. Mix until just combined, with no streaks of flour visible. Don’t overmix. Use a cookie scoop to form 12 equally sized dough balls and place them on a sheet of parchment paper. Chill the dough balls in the refrigerator for at least 2 hours. If you’re very patient, you can leave them in the fridge for 24 hours—they’ll taste even better!
  5. When you’re ready to bake the cookies, preheat the oven to 150°C (300°F). Once the oven is hot, place the cookie dough balls on a parchment-lined baking sheet with enough space between them, and bake for 13 minutes. If you prefer thicker cookies, you can use a bowl that’s wider than the cookie to circle around it, shaping the cookie and making it thicker. Let the cookies cool slightly.
  6. Meanwhile, you can prepare the icing. For this, crush the freeze-dried blueberries into a powder using a mortar and pestle. Then, mix 1 tablespoon of this powder with powdered sugar and milk. Drizzle the icing over the cookies in a zigzag pattern, let it set for a few minutes, and then enjoy the cookies.
  • Passive Time: 180 min
  • Cook Time: 25 min

CRAVING MORE?

Follow along here & don’t forget to subscribe to my substack!