Pistachio White Chocolate Cookies

Pistachio White Chocolate Cookies

Pistachio White Chocolate Cookies

Bakery Style Pistachio White Chocolate Cookies

June 14, 2026 by Kimberly

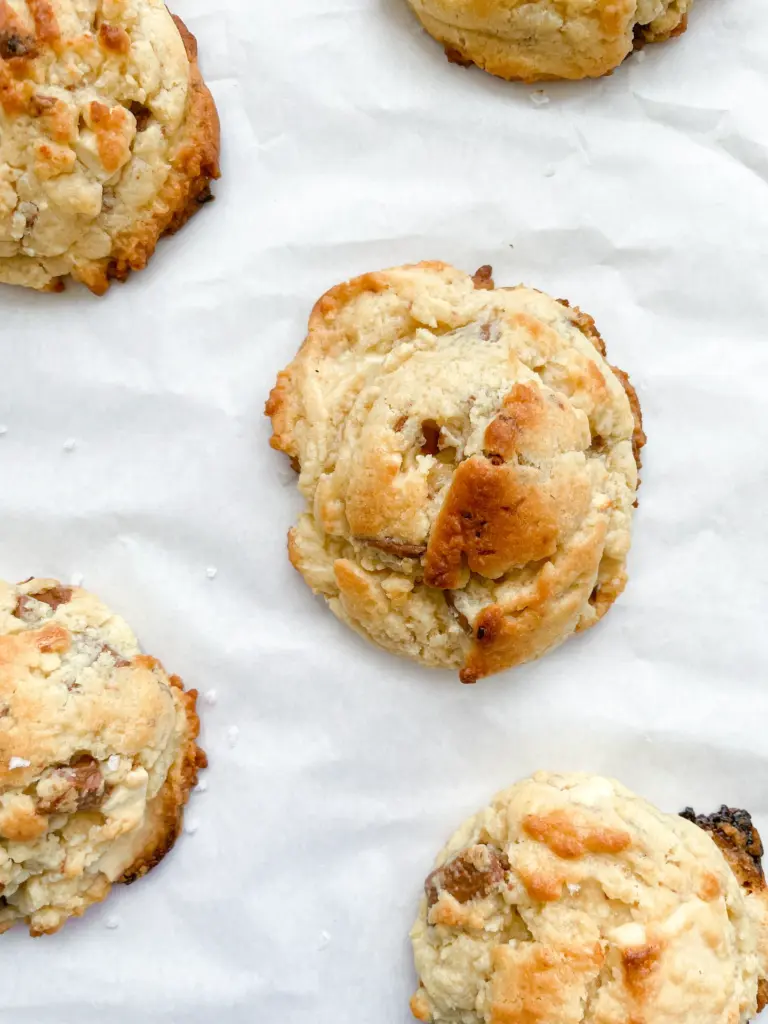
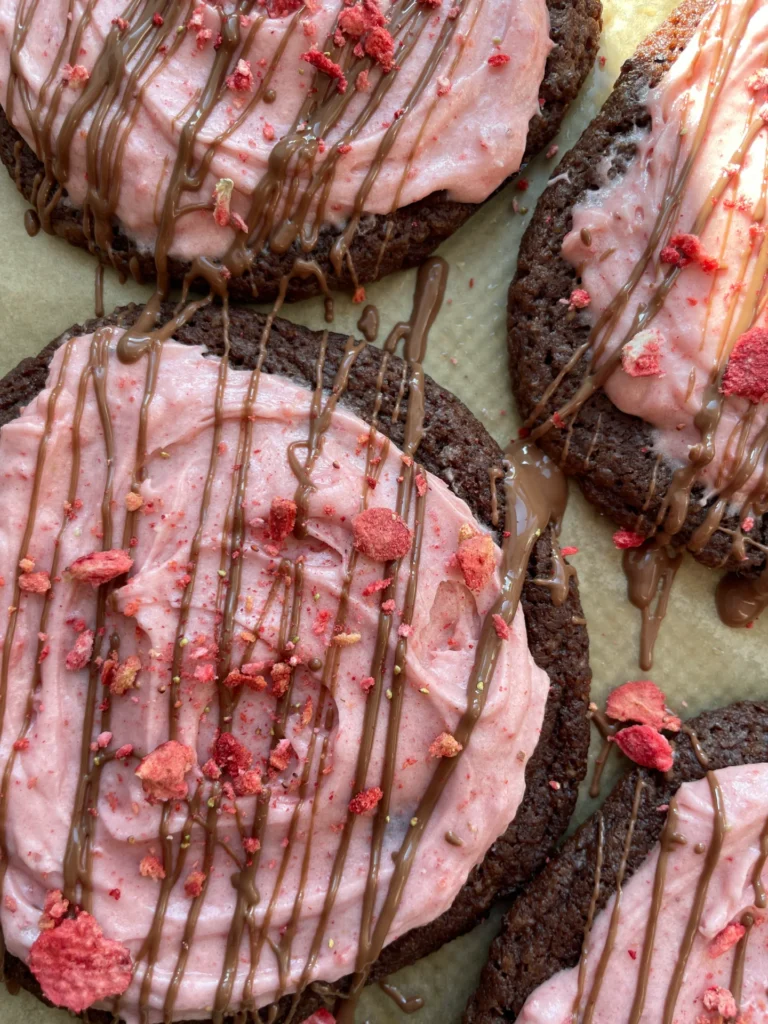
These cookies are soft, thick, chewy, and filled with creamy pistachio cream. They are based on my bakery style vanilla cookie dough, but made with sweet white chocolate and a little pistachio cream filling that melts into the middle while baking. The dough is shaped like a little cookie sandwich, chilled until firm, and baked straight from frozen for that perfect bakery-style texture: slightly crisp on the outside, soft in the middle, and beautifully rich without being complicated.

This website uses affiliate links which may earn commission for purchases made at no additional cost to you.

TOTAL TIME

30 min

SERVES

10 cookies

DIET

vegetarian

EVERY RECIPE DESERVES

A Little Love Letter

I already knew I loved this cookie. It is the kind of dough that makes you understand why bakery cookies always feel a little more special than regular homemade cookies. Thick, soft, slightly chewy, buttery in the best way, and honestly just dramatic enough to deserve its own little moment.

This recipe is based on my Bakery Style Vanilla Cookie dough, which has quickly become one of those recipes I want to use again and again. Once you have a good base cookie dough, it almost feels rude not to play around with it. And because I love pistachio cream this version had to happen.

These cookies are made with white chocolate and filled with a little spoonful of pistachio cream in the center. The dough is shaped almost like a tiny cookie sandwich: one small scoop of dough, a little press with a spoon, a spoonful of pistachio cream, and then another scoop of dough on top.

After baking, the cookies are slightly crisp on the outside, soft and chewy in the middle, with little pockets of white chocolate and that creamy pistachio center. They are rich, but not too much. Sweet, but balanced by the nutty pistachio. And honestly, they feel like the kind of cookie you would buy from a tiny bakery where everything is a little expensive, but somehow still completely worth it.

And the best part: you can freeze the shaped cookie dough balls and bake them straight from frozen whenever you want. Which means warm pistachio white chocolate cookies are never really that far away.

Hi, I'm Kimberly!

Hi, I'm Kimberly.

A hopeless romantic when it comes to food. Every recipe I share is a love letter to food itself. I’m so glad you’re here. Make yourself at home and stay a while.

Love,
Kimberly

Kimberly the Zett Signature

If you want to get to know me better,
click here!


Pistachio White Chocolate Cookies

LET’S MAKE A PIECE OF HAPPINESS

Print
clock clock iconcutlery cutlery iconflag flag iconfolder folder iconinstagram instagram iconpinterest pinterest iconfacebook facebook iconprint print iconsquares squares iconheart heart iconheart solid heart solid icon
Pistachio White Chocolate Cookies

Bakery Style Pistachio White Chocolate Cookies


5 Stars 4 Stars 3 Stars 2 Stars 1 Star

No reviews

  • Author: Kimberly
  • Total Time: 30 min
  • Yield: 10 cookies 1x

Description

These bakery style pistachio white chocolate cookies are soft, thick, chewy, and filled with creamy pistachio cream in the center. They are based on my bakery style vanilla cookie dough, but made with sweet white chocolate and a little pistachio cream filling that melts into the middle while baking. The dough is shaped like a little cookie sandwich, chilled until firm, and baked straight from frozen for that perfect bakery-style texture: slightly crisp on the outside, soft in the middle, and beautifully rich without being complicated.

GOOD TO HAVE ON HAND

  • electric mixer with bowl
  • scale
  • small cookie scoop
  • parchment paper
  • small spoon

Ingredients

Units Scale
  • 115 grams soft butter
  • 90 grams brown sugar
  • 40 grams white sugar
  • 1 egg
  • 1 tsp vanilla extract
  • 240 grams all-purpose flour
  • 1 tsp corn starch
  • 1/2 tsp baking soda
  • 1/2 tsp salt
  • 100 grams white chocolate
  • 60 grams pistachio cream (about 10 tsp)

Instructions

  1. Add the butter to a mixing bowl and beat for about 3 minutes, until pale and fluffy. Add the brown sugar and white sugar and beat for another 1–2 minutes, until creamy.
  2. Add the egg, vanilla extract, and butter flavoring, and mix just until everything is combined. Do not overmix.
  3. Add the flour, cornstarch, baking soda, and salt, and mix briefly until the dough has almost come together. Add the white chocolate and mix just until no streaks of flour remain and everything is evenly incorporated.
  4. Line a small baking sheet with parchment paper. Using a small cookie scoop, scoop 10 small balls of dough and place them onto the baking sheet. Gently press each dough ball down with a spoon to flatten it slightly.
  5. Add about 1 tsp of pistachio cream to the center of each flattened cookie dough ball.
  6. Scoop 10 more small balls of cookie dough and place one on top of each pistachio-filled cookie. Gently press down so the dough sticks together and forms a little sandwich.
  7. Place the shaped cookie dough balls in the freezer for at least 3 hours.
  8. Before baking, fully preheat the oven to 190°C / 375°F. Place the frozen cookie dough balls on a baking sheet with enough space between them so they do not spread into each other.
  9. Bake the cookies for about 12–14 minutes, depending on how browned you like them. Let them cool on the baking sheet for at least 30 minutes.
  10. The cookies can be eaten once they have cooled, but they are especially good if you let them rest in the fridge for a few hours after they have cooled completely. That is when they get that real bakery-style texture.

  • Prep Time: 15 min
  • Cook Time: 13 min

CRAVING MORE?

Follow along here & don’t forget to subscribe to my substack!

Bakery Style Vanilla Caramel Cookies

Bakery Style Vanilla Caramel Cookies

Bakery Style Vanilla Caramel Cookies

Bakery Style Vanilla Caramel Cookies

May 14, 2026 by Kimberly

These bakery style cookies with vanilla and caramel chocolate are slightly crisp on the outside, soft on the inside, and perfectly chewy. Thanks to a little trick with butter flavoring, they taste like they came fresh from a really good bakery, only homemade. The cookie dough is perfect for making ahead and can be frozen for up to 3 months, so you can enjoy warm, thick chocolate chip cookies straight from the oven whenever you like.

This website uses affiliate links which may earn commission for purchases made at no additional cost to you.

TOTAL TIME

30 minutes + chill time

SERVES

10 cookies

DIET

vegetarian

EVERY RECIPE DESERVES

A Little Love Letter

Out of a million cookie recipes, this is the one I would bake again and again. Truly. Some recipes are good, some are even really good, and then there are these cookies. These thick, soft, slightly chewy bakery style cookies that look like you did not simply bake them in your own kitchen, but like they came from a small, very good bakery where everything is a little too expensive, but you still fall for it every single time.

I have tried so many cookie recipes over the past few years. Some were beautifully crisp like these White Chocolate Coconut Lime Cookies and some wonderfully soft like these White Chocolate Blueberry Cookies & Blueberry Icing. But this recipe feels like another level to me. And the little trick that makes the flavor so special is almost too simple: butter flavoring. Just a few drops and suddenly the dough no longer tastes like regular homemade cookies, but like those really good bakery cookies where you wonder why they taste so much better.

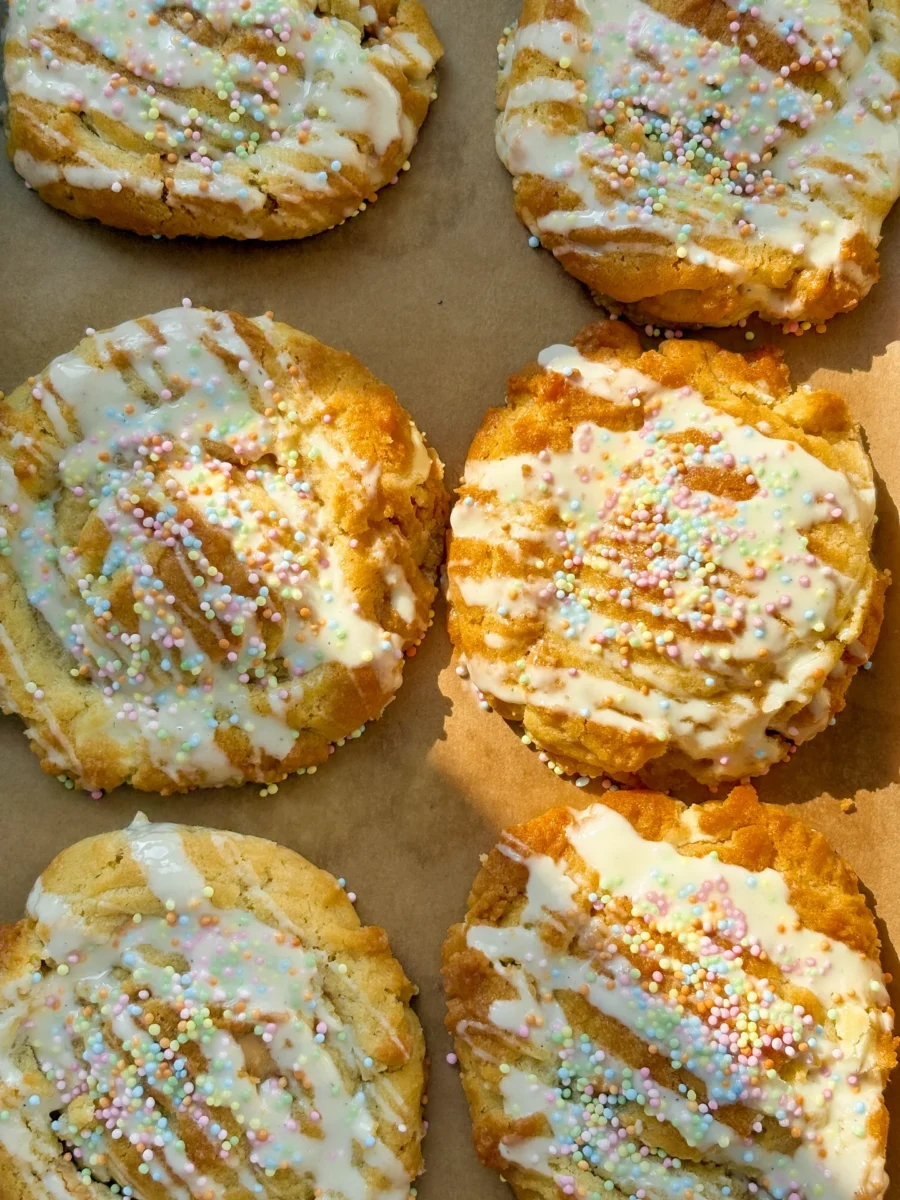
After baking, you can of course decorate the cookies however you like. I drizzled a little more vanilla chocolate on top and used colorful sprinkle pearls.

And the best part is: you can freeze the cookie dough balls for up to 3 months. That means you can have warm, freshly baked bakery style cookies at home whenever you like, almost instantly.

Hi, I'm Kimberly!

Hi, I'm Kimberly.

A hopeless romantic when it comes to food. Every recipe I share is a love letter to food itself. I’m so glad you’re here. Make yourself at home and stay a while.

Love,
Kimberly

Kimberly the Zett Signature

If you want to get to know me better,
click here!


Bakery Style Vanilla Caramel Cookies
LET’S MAKE A PIECE OF HAPPINESS
Print
clock clock iconcutlery cutlery iconflag flag iconfolder folder iconinstagram instagram iconpinterest pinterest iconfacebook facebook iconprint print iconsquares squares iconheart heart iconheart solid heart solid icon
Bakery Style Vanilla Caramel Cookies

Bakery Style Vanilla Caramel Cookies


  • Author: Kimberly
  • Total Time: 30 min
  • Yield: 10 cookies 1x

Description

These bakery style cookies with vanilla and caramel chocolate are slightly crisp on the outside, soft on the inside, and perfectly chewy. Thanks to a little trick with butter flavoring, they taste like they came fresh from a really good bakery, only homemade. The cookie dough is perfect for making ahead and can be frozen for up to 3 months, so you can enjoy warm, thick chocolate chip cookies straight from the oven whenever you like.

GOOD TO HAVE ON HAND


Ingredients

Units Scale
  • 115 grams soft butter
  • 90 grams brown sugar
  • 40 grams white sugar
  • 1 egg
  • 1 tsp vanilla extract
  • a few drops butter aroma
  • 240 grams all-purpose flour
  • 1 tsp corn starch
  • 1/2 tsp baking soda
  • 1/2 tsp salt
  • 100 grams caramel chocolate
  • 50 grams white vanilla chocolate
OPTIONAL TOPPINGS
  • 50 grams white vanilla chocolate for drizzle
  • sprinkles

Instructions

  1. Add the butter to a mixing bowl and beat for about 3 minutes, until pale and fluffy. Add the brown sugar and white sugar and beat for another 1–2 minutes, until creamy.
  2. Add the egg, vanilla extract, and butter flavoring, and mix just until everything is combined. Do not overmix.
  3. Add the flour, cornstarch, baking soda, and salt, and mix briefly until the dough has almost come together. Add the chocolate and mix just until no streaks of flour remain and everything is evenly incorporated.
  4. Line a small baking sheet with parchment paper. Using a small cookie scoop, scoop one ball of dough and place it onto the baking sheet. Then scoop a second ball of dough, place it on top of the first one, and press down firmly so the cookies form into little ice cream scoop shapes. Depending on the size, the dough should make about 9–10 cookies.
  5. Place the shaped cookie dough balls in the freezer for at least 3 hours.
  6. Before baking, fully preheat the oven to 190°C / 375°F. Place the frozen cookie dough balls on a baking sheet with enough space between them so they do not spread into each other. I bake 6 cookies per tray.
  7. Bake the cookies for about 12–14 minutes, depending on how browned you like them. Let them cool on the baking sheet for at least 30 minutes.
  8. The cookies can be eaten once they have cooled, but they are especially good if you let them rest in the fridge for a few hours after they have cooled completely. That is when they get that real bakery-style texture.
  • Prep Time: 15 min
  • Cook Time: 13 min
  • Category: Dessert
  • Method: Baking
  • Cuisine: American
CRAVING MORE?
Follow along here & don’t forget to subscribe to my substack!

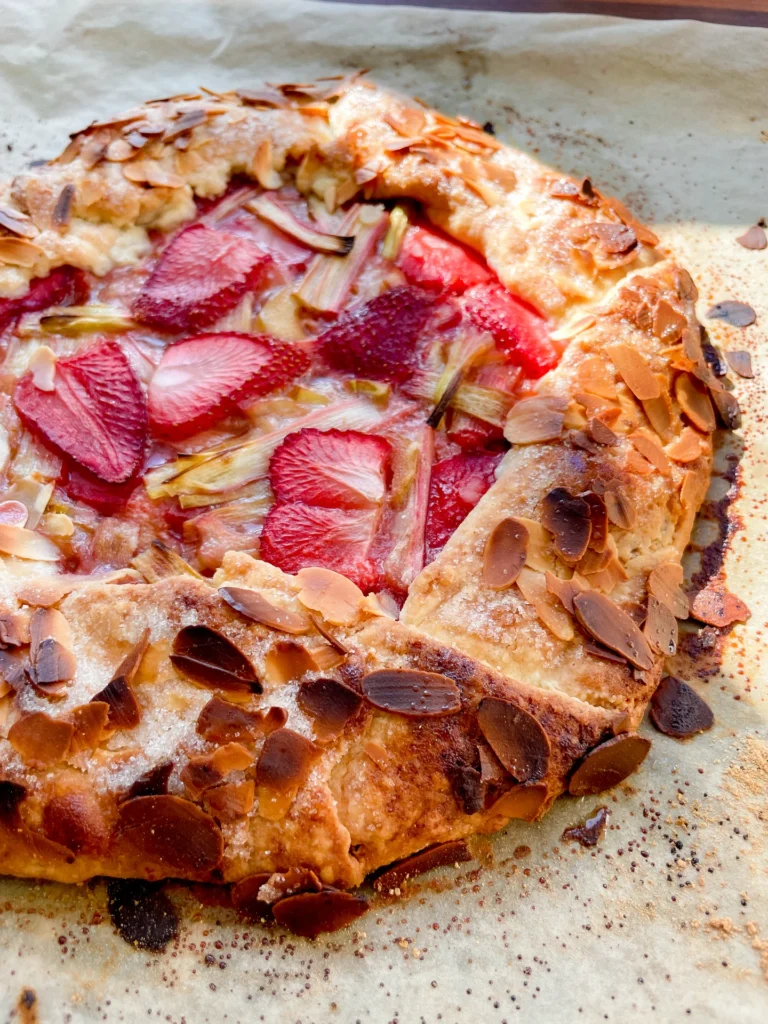
Rhubarb Strawberry Almond Galette

Rhubarb Strawberry Almond Galette

Rhubarb Strawberry Almond Galette

Rhubarb Strawberry Almond Galette

May 1, 2025 by Kimberly

It tastes like warm weekends and early summer light. Flaky pastry, buttery almond cream, jammy fruit on top. It’s rustic in the best way. Best served with friends or a spoon.

This website uses affiliate links which may earn commission for purchases made at no additional cost to you.

TOTAL TIME

2 hrs + 40 min

SERVES

8 pieces

DIET

vegetarian

EVERY RECIPE DESERVES

A Little Love Letter

You know those desserts that feel like you didn’t try too hard, but still look like a dream? This is one of them. A buttery, golden crust, soft-set fruit, and the kind of almond cream that makes you wonder why we ever stopped baking with frangipane in the first place. It’s the dessert you make when you’re trying to impress someone (including yourself) without sweating over it. Peak cozy elegance, especially in spring or early summer when berries and rhubarb are at their best.

This tart doesn’t need much, just something creamy on the side to balance the tang and crunch. A scoop of vanilla ice cream? Always. Lightly whipped cream? Also yes. A drizzle of vanilla sauce? Go for it. Serve it slightly warm or at room temp so the flavors can really come through. I like it best the day it’s made, shared at a table that’s maybe still messy from dinner and filled with good company.

Wrap up any leftovers and pop them in the fridge. It keeps well for up to two days, just reheat slightly before serving. And the best part: the crust stays crisp, which honestly feels like a little bit of magic

Hi, I'm Kimberly!

Hi, I'm Kimberly.

A hopeless romantic when it comes to food. Every recipe I share is a love letter to food itself. I’m so glad you’re here. Make yourself at home and stay a while.

Love,
Kimberly

Kimberly the Zett Signature

If you want to get to know me better,
click here!


Rhubarb Strawberry Almond Galette

LET’S MAKE A PIECE OF HAPPINESS

Print
clock clock iconcutlery cutlery iconflag flag iconfolder folder iconinstagram instagram iconpinterest pinterest iconfacebook facebook iconprint print iconsquares squares iconheart heart iconheart solid heart solid icon
Rhubarb Strawberry Almond Galette

Rhubarb Strawberry Almond Galette


  • Author: Kimberly
  • Total Time: 2 hrs + 40 min
  • Yield: 8 1x

Description

RECOMMENDED EQUIPMENT

  • mixing bowl
  • plastic wrap
  • sharp knife
  • cutting board
  • two small bowls
  • rolling pin

Ingredients

Units Scale
DOUGH
  • 200 grams all-purpose flour
  • 150 grams butter, cold & cubed
  • 1 tbsp brown sugar
  • 1/4 tsp salt
  • 60 milliliters cold water
  • 1 tbsp apple cider vinegar
  • 1 egg (for brushing the crust)
  • 2 tbsp white sugar (for topping the crust)
ALMOND CREAM
  • 50 grams butter, soft
  • 50 grams brown sugar
  • 70 grams grounded almonds
  • 1 egg
  • 1 tsp vanilla extract
FRUITS
  • 200 grams fresh rhubarb
  • 200 grams fresh strawberries
  • 1 tsp powdered sugar
  • 1 tbsp corn starch
TOPPINGS
  • sliced almonds
  • ice cream, whipped cream or vanilla sauce

Instructions

  1. For the dough, combine the flour, sugar, and salt in a large mixing bowl. Add the cold butter in small cubes and work it in quickly with your hands until the mixture resembles coarse crumbs with pea-sized bits of butter throughout. Add the cold water and apple cider vinegar, then bring everything together with your hands until a rough dough forms. Shape it into a rectangle on your work surface, cut it into four equal pieces, stack them on top of each other, gently press together, and wrap the stack in plastic wrap. Chill in the fridge for about 45 minutes.
  2. Meanwhile, wash the rhubarb thoroughly, peel if necessary, and cut it into finger-length pieces. Depending on your preference, slice them into thin strips or slightly thicker chunks. Toss the rhubarb in a bowl with cornstarch and powdered sugar, then set aside. Wash and hull the strawberries, then slice them as well.
  3. Next, prepare the almond cream. Cream the soft butter and sugar until light and fluffy, then add the egg, salt, vanilla extract, and ground almonds. Mix until smooth and set aside.
  4. Preheat the oven to 200 °C / 392 °F. Remove the chilled dough from the fridge, let it rest briefly on a floured surface, then roll or press it out into a large, rustic circle using short movements. Don’t worry if the dough tears slightly, this is typical for shortcrust pastry and can be patched with leftover scraps. Gently roll the dough around your rolling pin and transfer it to a baking sheet lined with parchment paper.
  5. Spread the almond cream evenly over the dough, leaving a border of about 8 cm (3 inches) all around. Distribute the prepared fruit over the almond cream, then fold the edges of the dough over the filling and press them down gently. Brush the crust with oil or a beaten egg, sprinkle with sliced almonds and a bit of sugar, and bake the galette for about 40 minutes, or until golden brown.
  6. Serve best while still slightly warm paired with a scoop of ice cream, whipped cream, or vanilla sauce. I used pistachio ice cream, which pairs beautifully with the almond cream and the tart rhubarb.
  • Passive Time: 1 hr + 40 min
  • Cook Time: 60 min

CRAVING MORE?

Follow along here & don’t forget to subscribe to my substack!

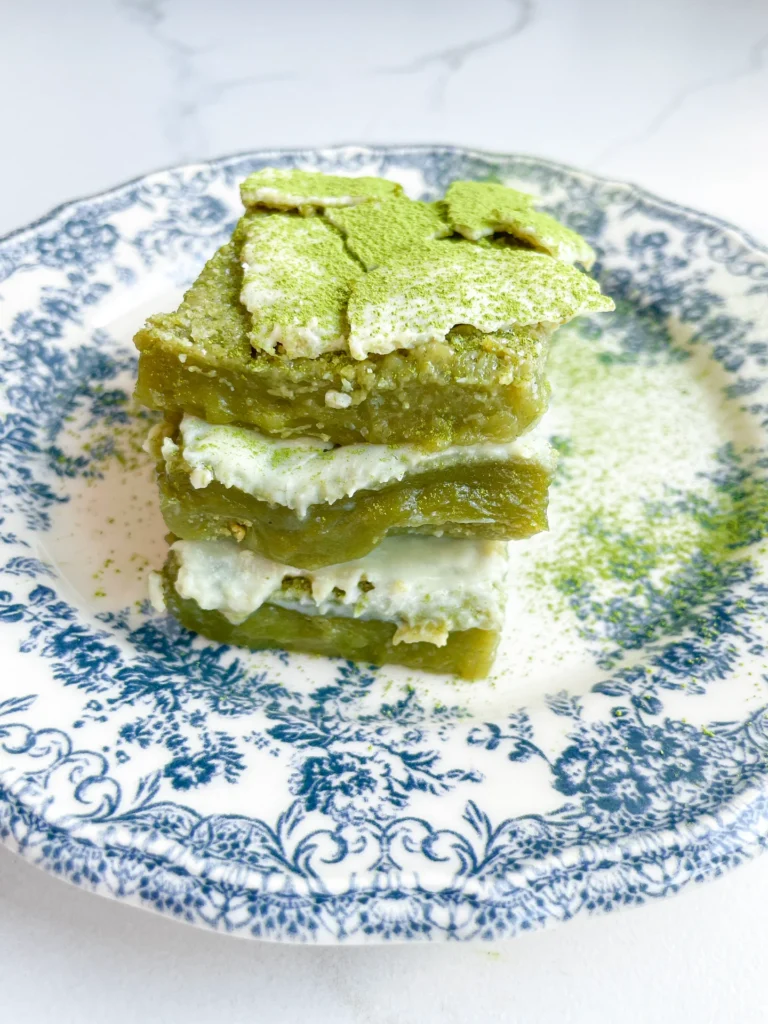
White Chocolate Shortbread Passionfruit Bars

White Chocolate Shortbread Passionfruit Bars

White Chocolate Shortbread Passionfruit Bars

White Chocolate Shortbread Passionfruit Bars

March 19, 2025 by Kimberly

Golden, buttery shortbread, silky passionfruit filling, and a crisp white chocolate shell with puffed quinoa. It’s sweet, tangy, crunchy, basically what I imagine luxury tastes like. A little indulgent, absolutely worth it.

This website uses affiliate links which may earn commission for purchases made at no additional cost to you.

TOTAL TIME

70 min

SERVES

16 bars

DIET

vegetarian

EVERY RECIPE DESERVES

A Little Love Letter

If you love desserts that are crispy, creamy, and have just the right amount of freshness, these bars are about to be your new obsession. A golden, melt-in-your-mouth base holds a smooth, tangy passionfruit filling, all wrapped in a crisp layer of white chocolate with puffed quinoa for that extra crunch. It’s sweet, tart, creamy, and light all at once. Basically, if tropical sunshine had a dessert form, this would be it. Perfect for when you want something a little extra but totally effortless.

These bars are best served straight from the fridge when the chocolate is still crisp and the filling is perfectly creamy. They’re great as a mid-afternoon pick-me-up, a stunning party dessert, or honestly, just something to have stashed away when your sweet tooth hits. Pro tip: Pair with an iced coffee.

Store these in an airtight container in the fridge for up to 5 days. The chocolate coating keeps everything fresh, and the flavors only get better with time.

Hi, I'm Kimberly!

Hi, I'm Kimberly.

A hopeless romantic when it comes to food. Every recipe I share is a love letter to food itself. I’m so glad you’re here. Make yourself at home and stay a while.

Love,
Kimberly

Kimberly the Zett Signature

If you want to get to know me better,
click here!


White Chocolate Shortbread Passionfruit Bars

LET’S MAKE A PIECE OF HAPPINESS

Print
clock clock iconcutlery cutlery iconflag flag iconfolder folder iconinstagram instagram iconpinterest pinterest iconfacebook facebook iconprint print iconsquares squares iconheart heart iconheart solid heart solid icon
White Chocolate Shortbread Passionfruit Bars

White Chocolate Shortbread Passionfruit Bars


  • Author: Kimberly
  • Total Time: 70 min
  • Yield: 8-16 1x

Description

This post may contain affiliate links, please see privacy policy for details.

RECOMMENDED EQUIPMENT

  • silicone molds in various sizes (I used these and trimmed the shortbread bars slightly)
  • small bowl
  • whisk
  • double boiler
  • sharp knife
  • cutting board
  • medium bowl


Ingredients

Units Scale
SHORTBREAD
  • 120 grams all-purpose flour
  • 115 grams butter, soft
  • 50 grams white sugar
  • 1 tsp vanilla extract
  • pinch of salt
PASSIONFRUIT FILLING
  • 150 grams passionfruit purée
  • 6 grams instant gelatine
CHOCOLATE SHELL
  • 350 grams white chocolate
  • 15 grams puffed quinoa

Instructions

  1. Preheat the oven to 175°C / 347°F.
  2. Make the shortbread dough. In a medium bowl, mix flour, butter, sugar, vanilla extract, and salt until the texture resembles firm sand. Refrigerate the dough for 10 minutes to allow the butter to firm up slightly.
  3. Prepare the passionfruit filling. While the dough chills, set aside the smallest silicone mold. Pour the passionfruit purée into a bowl and whisk in the instant gelatin until fully dissolved. (Make sure to use cold-soluble gelatin.) Transfer the mixture into the smallest silicone mold and freeze until completely solid.
  4. Bake the shortbread base. Remove the dough from the fridge and press it into the medium silicone mold. Bake for about 20 minutes until lightly golden. Let cool completely.
  5. Temper the white chocolate. Prepare a double boiler and melt only 200g of the 350g white chocolate, heating it carefully to 35°C / 95°F. Meanwhile, finely chop the remaining 150g of white chocolate. Once melted, remove from heat and stir in the chopped chocolate until fully melted.
  6. Keep the chocolate at a working temperature of 29-30°C / 84-86°F over the double boiler to ensure smooth assembly.
  7. Assemble the bars. Once the shortbread is fully cooled and the passionfruit filling is frozen, get the largest silicone mold ready.
  8. Coat the mold. Stir the puffed quinoa into the tempered white chocolate. Fill each mold cavity halfway with the mixture. Immediately press a frozen passionfruit strip and a shortbread piece into each cavity, ensuring they are surrounded by the chocolate.
  9. Seal the bars. Pour the remaining white chocolate over the top to fully encase the bars.
  10. Let the bars set. Thanks to the tempered chocolate and frozen passionfruit filling, they will firm up quickly. For extra security, chill them in the fridge for 10 minutes. After that, they’re ready to enjoy!
  • Passive Time: 30 min
  • Cook Time: 40 min

CRAVING MORE?

Follow along here & don’t forget to subscribe to my substack!

Brownie Batter Chocolate Hummus

Brownie Batter Chocolate Hummus

Brownie Batter Chocolate Hummus

Brownie Batter Chocolate Hummus

February 18, 2024 by Kimberly

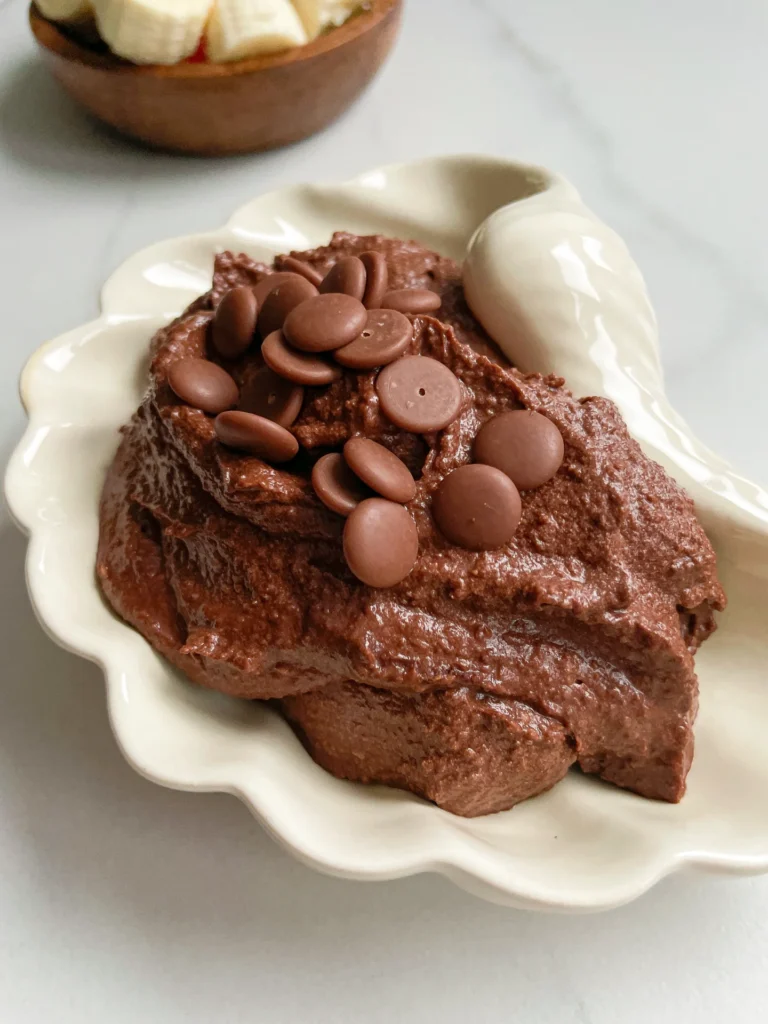
This ultra-creamy, rich chocolate dip tastes like straight-up brownie batter but is secretly packed with good-for-you ingredients. Perfect for spreading, dipping, or just eating by the spoonful…no judgment here!!

This website uses affiliate links which may earn commission for purchases made at no additional cost to you.

TOTAL TIME

10 min

SERVES

4 portions

DIET

vegan

EVERY RECIPE DESERVES

A Little Love Letter

If you’ve never tried sweet hummus before, this one’s about to change your life. Imagine the rich, fudgy taste of brownie batter but in a smooth, creamy dip that also happens to be good for you. No refined sugar, no weird additives, just simple ingredients blending into pure chocolatey magic. Whether you’re dipping fruit, spreading it on toast, or eating it straight from the jar (I see you), this is your new go-to for a guilt-free chocolate fix.

Swipe it onto warm toast, pair it with strawberries, banana slices, or apple wedges, or go all in and dunk some pretzels for that sweet-salty combo. Feeling extra? Stir it into oatmeal, drizzle it over pancakes, or layer it in a yogurt parfait for a next-level treat.

Store your chocolate hummus in an airtight container in the fridge for up to 4 days, but let’s be real, it won’t last that long. If it thickens up, just stir in a splash of plant milk to bring back that creamy goodness. Freezing? Not recommended, it’s best fresh!

Hi, I'm Kimberly!

Hi, I'm Kimberly.

A hopeless romantic when it comes to food. Every recipe I share is a love letter to food itself. I’m so glad you’re here. Make yourself at home and stay a while.

Love,
Kimberly

Kimberly the Zett Signature

If you want to get to know me better,
click here!


Brownie Batter Chocolate Hummus

LET’S MAKE A PIECE OF HAPPINESS

Print
clock clock iconcutlery cutlery iconflag flag iconfolder folder iconinstagram instagram iconpinterest pinterest iconfacebook facebook iconprint print iconsquares squares iconheart heart iconheart solid heart solid icon
Brownie Batter Chocolate Hummus

Brownie Batter Chocolate Hummus


  • Author: Kimberly
  • Total Time: 10 min
  • Yield: 4 1x

Description

RECOMMENDED EQUIPMENT

  • food processor
  • sieve

Ingredients

Units Scale
  • 265 grams canned chickpeas, drained
  • 2 tbsp tahini
  • 60 grams unsweetened cocoa powder
  • 4 tbsp date syrup
  • 1 tsp vanilla extract
  • 1/4 tsp salt
  • 2 tbsp coconut oil
  • 2 tbsp milk of choice
  • 1/2 cup ice cubes
  • fruits of your choice for dipping - strawberries, bananas, apples...

Instructions

  • Drain the chickpeas and rinse them under cold water. Add them to a food processor.
  • Next, add tahini, vanilla, unsweetened cocoa powder, coconut oil, salt, date syrup, and milk. Blend on high speed until it forms a thick paste. Then, gradually add ice cubes. Just enough to make it super fluffy and creamy.
  • Transfer to a bowl and enjoy with your favorite fruits or cracker!!

CRAVING MORE?

Follow along here & don’t forget to subscribe to my substack!

Cherry Almond Marzipan Oats

Cherry Almond Marzipan Oats

Cherry Almond Marzipan Oats

Cherry Almond Marzipan Oats

December 22, 2024 by Kimberly

Imagine creamy oats kissed with almond milk, layered with luscious cherry filling, and drizzled with silky marzipan sauce – finished with a candied cherry. It’s breakfast that tastes like dessert but feels indulgently cozy.

This website uses affiliate links which may earn commission for purchases made at no additional cost to you.

TOTAL TIME

30 min

SERVES

3 portions

DIET

vegetarian

EVERY RECIPE DESERVES

A Little Love Letter

This dreamy breakfast combines the best of dessert and comfort food! Creamy almond milk oats meet a tangy-sweet cherry filling, topped with a velvety marzipan drizzle and crowned with a candied cherry. It’s perfect for chilly mornings, special occasions, or whenever you’re craving something extra indulgent. With layers of flavor and texture, this dish is not just a breakfast – it’s a hug in a bowl.

Serve warm for the ultimate cozy vibes. To assemble, spoon the creamy almond oats into a bowl, add a layer of cherry filling, and drizzle generously with the marzipan sauce. Top it with a candied cherry for a stunning finish. Pair it with a hot cup of coffee or tea for a slow, luxurious morning or dress it up for a brunch centerpiece.

Store leftovers in an airtight container in the fridge for up to three days.

Hi, I'm Kimberly!

Hi, I'm Kimberly.

A hopeless romantic when it comes to food. Every recipe I share is a love letter to food itself. I’m so glad you’re here. Make yourself at home and stay a while.

Love,
Kimberly

Kimberly the Zett Signature

If you want to get to know me better,
click here!


Cherry Almond Marzipan Oats

LET’S MAKE A PIECE OF HAPPINESS

Print
clock clock iconcutlery cutlery iconflag flag iconfolder folder iconinstagram instagram iconpinterest pinterest iconfacebook facebook iconprint print iconsquares squares iconheart heart iconheart solid heart solid icon
Cherry Almond Marzipan Oats

Cherry Almond Marzipan Oats


  • Author: Kimberly
  • Total Time: 30 min
  • Yield: 3 1x

Description

Recommended Equipment

  • small pot
  • whisk
  • bowl
  • cheese grater

Ingredients

Units Scale
OATS BASE
  • 100 grams rolled oats
  • 250 milliliter almond milk
  • 1 tsp vanilla extract
  • pinch of salt
  • 1 tsp date syrup
MARZIPAN SAUCE
  • 1 egg yolk
  • 100 milliliter full-fat cow milk
  • 50 milliliter heavy cream
  • 50 grams marzipan
  • 40 grams white sugar
  • 0.5 tsp vanilla extract
CHERRY FILLING
  • 150 grams cherries
  • 50 milliliter cherry juice
  • 1 tsp lemon juice
  • 1 tsp cornstarch
  • 1 tbsp powdered sugar
TOPPING
  • candied cherries

Instructions

  1. Place the marzipan in the freezer for about 20–30 minutes, then grate it coarsely using a cheese grater.
  2. Warm the milk and cream in a pot without bringing it to a boil, then remove from heat.
  3. Mix the egg yolks, sugar, and vanilla extract thoroughly in a bowl. Add the grated marzipan and stir well.
  4. Gradually add the egg yolk mixture to the warm milk-cream mixture, one teaspoon at a time, stirring constantly until combined. Return the pot to medium heat and stir until the sauce thickens. For a firmer consistency, mix 1 tsp of cornstarch with a bit of water, add it to the sauce, and briefly bring it to a boil. Remove from heat.
  5. In another pot, mix cherries, cherry juice, lemon juice, powdered sugar, and cornstarch. Heat over medium heat until the mixture thickens and the cherries soften. Remove from heat.
  6. In a separate pot, combine oats, almond milk, vanilla extract, salt, and your choice of sweetener (e.g., date syrup). Bring to a boil, stirring until the oats are soft.
  7. Layering: Spread a portion of the oatmeal in a small bowl, then add a layer of cherry sauce. Cover with the remaining oatmeal, smooth the surface, and pour the marzipan sauce over the top.
  8. Garnish with a candied cherry. Serve immediately or prepare as overnight oats.

CRAVING MORE?

Follow along here & don’t forget to subscribe to my substack!