Vanilla Parfait with Chocolate Soil

Vanilla Parfait with Chocolate Soil

Vanilla Parfait with Chocolate Soil

Vanilla Parfait with Chocolate Soil

December 20, 2024 by Kimberly

This creamy vanilla parfait melts like a dream, paired with crunchy, bittersweet chocolate soil for a texture and flavor explosion. Dessert vibes: fancy enough to impress, cozy enough to devour solo.

This website uses affiliate links which may earn commission for purchases made at no additional cost to you.

TOTAL TIME

4 hrs + 40 min

SERVES

10 portions

DIET

vegetarian

EVERY RECIPE DESERVES

A Little Love Letter

If you’re looking for a dessert that feels both luxurious and approachable, this vanilla parfait with chocolate soil is it. The creamy, rich vanilla base perfectly contrasts the crunchy, bittersweet chocolate soil, creating a balance of flavors and textures. It’s the kind of dessert that wows at a dinner party but is easy enough to whip up for yourself when you need a little indulgence. Bonus: it’s no-bake and totally make-ahead friendly!

Serve your parfait chilled in elegant bowls or plates for the ultimate dessert presentation. Spoon the creamy vanilla layer first and top with a generous sprinkle of chocolate soil for that perfect crunch. Want to elevate it even more? Add fresh berries, a drizzle of caramel or even a few drops of this Mint Oil.

Keep the parfait in an airtight container in the freezer for up to one week. Store the chocolate soil separately in a dry container to maintain its crunch. Assemble right before serving.

Hi, I'm Kimberly!

Hi, I'm Kimberly.

A hopeless romantic when it comes to food. Every recipe I share is a love letter to food itself. I’m so glad you’re here. Make yourself at home and stay a while.

Love,
Kimberly

Kimberly the Zett Signature

If you want to get to know me better,
click here!


Vanilla Parfait with Chocolate Soil

LET’S MAKE A PIECE OF HAPPINESS

Print
clock clock iconcutlery cutlery iconflag flag iconfolder folder iconinstagram instagram iconpinterest pinterest iconfacebook facebook iconprint print iconsquares squares iconheart heart iconheart solid heart solid icon
Vanilla Parfait with Chocolate Soil

Vanilla Parfait with Chocolate Soil


5 Stars 4 Stars 3 Stars 2 Stars 1 Star

5 from 1 review

  • Author: Kimberly
  • Total Time: 4 hrs + 40 min
  • Yield: 10-12 1x

Description

Recommended Equipment

  • two glass or metal mixing bowls
  • two small bowls
  • baking tray
  • small pot
  • whisk
  • silicone spatula
  • fine mesh strainer
  • molds for the parfait

Ingredients

Units Scale
PARFAIT
  • 4 egg yolks
  • 100 grams powdered sugar
  • 400 grams heavy cream
  • 1 vanilla pod
CHOCOLATE SOIL
  • 60 grams powdered sugar
  • 100 grams all-purpose flour
  • 15 grams unsweetened cocoa powder
  • 1/4 tsp salt
  • 50 grams butter
  • 1 tsp ground coffee

Instructions

  1. Whip the cream until stiff peaks form, then place it in the fridge to keep cold.
  2. Separate the eggs, placing the yolks in a glass or metal bowl. Scrape the vanilla pod and add the seeds to the yolks.
  3. Sift the powdered sugar through a fine mesh strainer into the yolks. Mix well with the vanilla seeds.
  4. Place the bowl over a pot of simmering water (double boiler setup), ensuring only the steam touches the bowl. Whisk the mixture until it reaches 80 °C (176 °F).
  5. Prepare an ice bath (a bowl with cold water and ice cubes). Once the yolk mixture reaches 80 °C, place the bowl in the ice bath and whisk until the mixture cools and becomes thick, sticky, and creamy.
  6. Gently fold the chilled whipped cream into the cooled yolk mixture using a silicone spatula until fully combined.
  7. Pour the parfait mixture into molds and freeze for about 4 hours.
  8. For the chocolate soil, preheat the oven to 160 °C (320 °F).
  9. Combine sugar, flour, cocoa powder, salt, and ground coffee in a bowl.
  10. Melt the butter and add it to the dry ingredients. Mix with your hands until a crumbly texture forms.
  11. Spread the mixture evenly on a small baking tray and bake for about 10 minutes.
  12. Remove the tray from the oven, let the mixture cool, then crumble it into pieces. Store in an airtight container.
  13. To serve, unmold the parfaits, arrange them on plates, and decorate with the chocolate soil around them.
  14. Optional: Garnish with mint oil, berry compote, marzipan sauce, or chocolate sauce.
  • Passive Time: 4 hours
  • Cook Time: 40 min

CRAVING MORE?

Follow along here & don’t forget to subscribe to my substack!

Pumpkin Tarte Flambée with Bacon Walnuts Gorgonzola & Lamb’s Lettuce

Pumpkin Tarte Flambée with Bacon Walnuts Gorgonzola & Lamb’s Lettuce

Pumpkin Tarte Flambée with Bacon Walnuts Gorgonzola & Lamb's Lettuce

Pumpkin Tarte Flambée with Bacon Walnuts Gorgonzola & Lamb’s Lettuce

October 12, 2024 by Kimberly

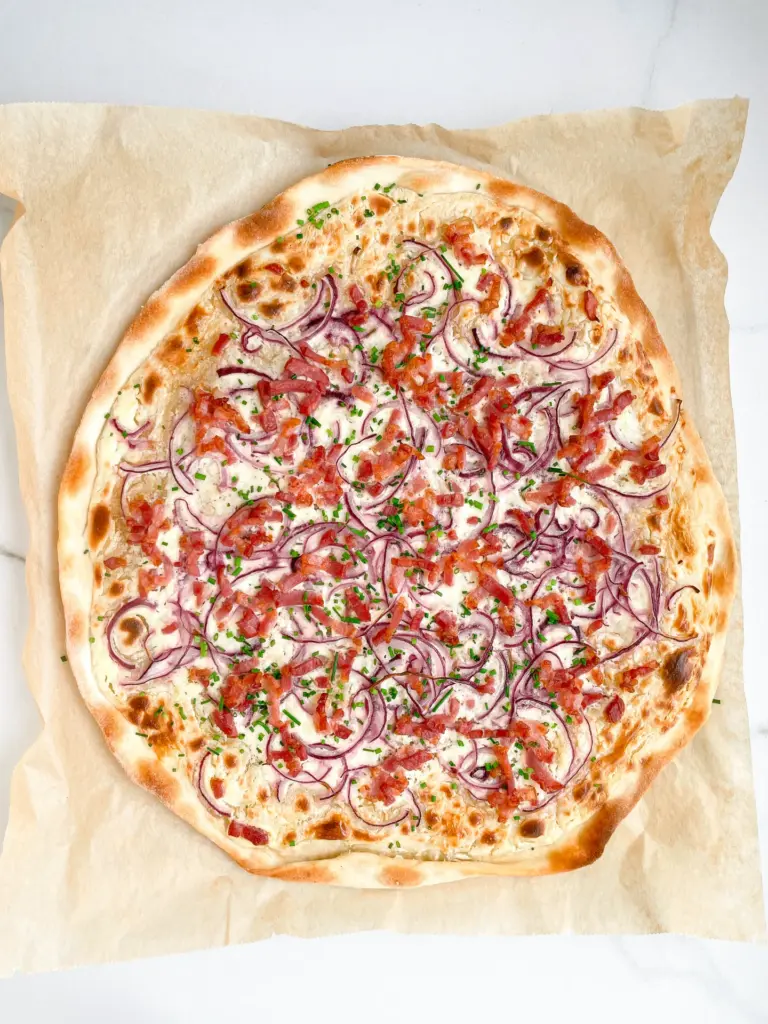
This cozy fall gem combines crispy bacon, rich Gorgonzola, crunchy walnuts, and and sweet pumpkin. The flavors are warm and savory, perfect for curling up on a chilly evening.

This website uses affiliate links which may earn commission for purchases made at no additional cost to you.

TOTAL TIME

45 min

SERVES

2 trays

DIET

omnivore

EVERY RECIPE DESERVES

A Little Love Letter

Nothing says cozy fall like this delicious pumpkin tarte flambée. It’s packed with crispy bacon, creamy Gorgonzola, sweet pumpkin and the crunch of walnuts. This simple yet sophisticated dish brings the perfect blend of salty, sweet, and nutty flavors that will make you feel like you’re indulging in something extra special. Perfect for a weekend night or when you want something quick and comforting without too much effort. Pair it with a fresh salad, and you’ve got the ultimate cozy meal!

Serve this flatbread hot and fresh, right from the oven! Slice it up into easy-to-grab pieces and drizzle with a bit of pumpkin oil for that extra touch of warmth. It’s ideal as a cozy dinner with a side of lamb’s lettuce tossed in a pumpkin oil dressing, or you can cut it into smaller squares for a party-ready appetizer. Pair it with a glass of white wine or a cold cider, and you’ve got the perfect fall feast. Pro tip: If you’re feeling fancy, swap the olive oil for some pumpkin infused oil.

If you have any leftovers, store the flatbread in an airtight container in the fridge for up to two days. To reheat, simply pop it in the oven or air fryer until it’s crispy again. Avoid the microwave as it can make the crust soggy.

Hi, I'm Kimberly!

Hi, I'm Kimberly.

A hopeless romantic when it comes to food. Every recipe I share is a love letter to food itself. I’m so glad you’re here. Make yourself at home and stay a while.

Love,
Kimberly

Kimberly the Zett Signature

If you want to get to know me better,
click here!


Pumpkin Tarte Flambée with Bacon Walnuts Gorgonzola & Lamb's Lettuce

LET’S MAKE A PIECE OF HAPPINESS

Print
clock clock iconcutlery cutlery iconflag flag iconfolder folder iconinstagram instagram iconpinterest pinterest iconfacebook facebook iconprint print iconsquares squares iconheart heart iconheart solid heart solid icon
Pumpkin Tarte Flambée with Bacon Walnuts Gorgonzola & Lamb's Lettuce

Pumpkin Tarte Flambée with Bacon Walnuts Gorgonzola & Lamb’s Lettuce


  • Author: Kimberly
  • Total Time: 45 minutes
  • Yield: 6 1x

Description

This recipe uses affiliate links which may earn commission for purchase made at no additional cost to you.

Recommended Equipment


Ingredients

Units Scale
DOUGH
  • 250 grams all-purpose flour
  • 125 milliliters cold water
  • 1 tbsp olive oil
  • 1 tsp salt
PUMPKIN TOPPING
  • 250 grams hokkaido pumpkin
  • 3 tbsp olive oil
  • 1/2 tsp dried thyme
BACON WALNUT TOPPING
  • 300 grams bacon
  • 30 grams walnuts
  • 2 tsp honey
  • 1/4 tsp dried rosemary
  • 1/4 tsp cayenne pepper
  • 70 milliliters dry white wine
  • salt & pepper to taste
OTHER TOPPINGS
  • 1 big red onion
  • 150 grams gorgonzola cheese
  • 200 grams creme fraiche
  • black pepper
SALAD
  • 200 grams lamb's lettuce
  • 2 tbsp fresh chives
  • 4 tbsp pumpkin seeds
DRESSING
  • 4 tbsp olive oil
  • 2 tbsp apple cider vinegar
  • 2 tsp honey
  • 2 tsp Dijon mustard
  • salt & pepper to taste

Instructions

  1. For the dough, add water, salt, olive oil, and flour into a bowl. Stir with a spoon until just combined. Transfer the dough to a clean surface and knead by hand for about 3 minutes until smooth. Wrap the dough in plastic wrap and let it rest at room temperature for about 30 minutes.
  2. Slice the pumpkin into thin pieces and place them in a shallow dish. Rub with oil and thyme, then set aside to marinate.
  3. Cut the bacon into chunks (or use pre-cut bacon) and place it in a cold pan. Fry over medium heat until golden brown without adding extra fat. Once you’ve got a nice crispy base, add walnuts, rosemary, and cayenne pepper. Deglaze with white wine and let it simmer until the wine has evaporated. Add honey at the end, season with salt and pepper, and stir well. Set aside.
  4. For the other toppings, cut the red onion into thin half-rings and set them aside. Have the Gorgonzola, crème fraîche, and pepper ready. Preheat the oven to 250°C (482°F) on the grill setting.
  5. Divide the dough into two equal pieces. On a lightly floured surface, roll them out as thin as possible. Place each dough on a baking sheet lined with parchment paper and spread an even layer of crème fraîche over the top. Sprinkle freshly ground black pepper. Then, layer the other toppings: first the bacon-walnut mixture, followed by the pumpkin slices and onion rings, and finally small dollops of Gorgonzola. Bake in the oven for about 8-11 minutes or until the cheese has melted and the crust is golden and crispy.
  6. While the dough is baking, prepare the salad and dressing. Wash the lamb’s lettuce thoroughly and place it in a large bowl. Sprinkle pumpkin seeds on top and slice the chives into rings. Set some of the chives aside to garnish the tarte flambée.
  7. For the dressing, mix oil, apple cider vinegar, honey, Dijon mustard, salt, and pepper well. Add the dressing to the salad right before serving to avoid sogginess.
  8. Remove the tarte flambée from the oven, slice it up, and serve with the salad.
  • Cook Time: 45 min

CRAVING MORE?

Follow along here & don’t forget to subscribe to my substack!

Crispy Sandwich with Egg Salad Spicy Bacon & Caramalized Onions

Crispy Sandwich with Egg Salad Spicy Bacon & Caramalized Onions

Crispy Sandwich with Egg Salad Spicy Bacon & Caramalized Onions

Crispy Sandwich with Egg Salad Spicy Bacon & Caramalized Onions

October 8, 2024 by Kimberly

Get ready for a crunchy, savory explosion in every bite! This sandwich layers rich flavors like creamy egg salad, crispy bacon, and caramelized onions with a tangy twist, leaving you totally satisfied.

This website uses affiliate links which may earn commission for purchases made at no additional cost to you.

TOTAL TIME

50 min

SERVES

2 sandwiches

DIET

omnivore

EVERY RECIPE DESERVES

A Little Love Letter

Looking for a sandwich that hits all the right notes? This crispy masterpiece combines rich egg salad, spicy bacon, and sweet caramelized onions with a punchy dill gremolata and creamy, tangy picklenaise (pickle-infused mayo). The balance of crunchy, creamy, spicy, and tangy in every bite will make this sandwich your new go-to for lunch or a snack. It’s a burst of flavor that’ll have you craving it again and again.

This sandwich is best served fresh and warm, right after toasting the bread to crispy perfection. Pair it with a side of fresh salad to make it a complete meal. The dill gremolata and picklenaise add an unexpected tangy touch, making it a great option for casual get-togethers or a solo lunch treat.

If you need to store this sandwich, keep the components separate – store the egg salad, bacon, and caramelized onions in airtight containers in the fridge for up to 2 days. Toast your bread fresh when ready to assemble for the best texture and taste!

Hi, I'm Kimberly!

Hi, I'm Kimberly.

A hopeless romantic when it comes to food. Every recipe I share is a love letter to food itself. I’m so glad you’re here. Make yourself at home and stay a while.

Love,
Kimberly

Kimberly the Zett Signature

If you want to get to know me better,
click here!


Crispy Sandwich with Egg Salad Spicy Bacon & Caramalized Onions

LET’S MAKE A PIECE OF HAPPINESS

Print
clock clock iconcutlery cutlery iconflag flag iconfolder folder iconinstagram instagram iconpinterest pinterest iconfacebook facebook iconprint print iconsquares squares iconheart heart iconheart solid heart solid icon
Crispy Sandwich with Egg Salad Spicy Bacon & Caramalized Onions

Crispy Sandwich with Egg Salad Spicy Bacon & Caramalized Onions


  • Author: Kimberly
  • Total Time: 50 minutes
  • Yield: 2 1x

Description

Recommended Equipment

  • small pot
  • medium bowl
  • deep dish
  • sharp knife
  • cutting board
  • small bowl
  • large pan
  • parchment paper

Ingredients

Units Scale
EGG SALAD
  • 4 eggs
  • 1 tsp Dijon mustard
  • 1 tsp white wine vinegar
  • 1 tbsp picklenaise (or regular mayonnaise)
  • chives
  • salt & pepper to taste
GREMOLATA
  • 10 grams fresh dill
  • 5 grams fresh chives
  • 3 tbsp pickle oil (or any other oil you like)
  • 2 garlic cloves
  • juice of 1/2 lemon
  • salt & pepper to taste
CARAMALIZED ONIONS
  • 6 small white onions
  • 2 tbsp balsamic vinegar
  • 1 tsp clarified butter
  • salt
CRISPY BACON
  • 8 slices bacon
  • 4 tsp brown sugar
  • 4 tsp cayennepepper
OTHER INGREDIENTS
  • 60 grams picklenaise (or regular mayonnaise)
  • 8 slices white bread of choice
  • 4 romaine lettuce leaves
  • 60 grams gouda cheese

Instructions

PREPARATIONS

  • Here’s the recipe for the picklenaise. You’ll need about 6-8 tablespoons.
  • Here’s the recipe for the pickle oil. You’ll need about 3 tablespoons.

INSTRUCTIONS

  1. For the egg salad, fill a pot with water and bring it to a boil. Carefully add the eggs and set a timer for 8 minutes. While they cook, prepare a bowl of ice water. After 8 minutes, transfer the eggs to the ice water to stop them from cooking further. Let them cool completely. Peel the eggs, separate the yolks from the whites, and place the yolks in a deep dish. Chop the egg whites into small pieces and set aside. To the yolks, add Dijon mustard, pickle-mayo, salt, pepper, white wine vinegar, and chopped chives. Mix everything together, mashing the yolks with a fork. Finally, fold in the chopped egg whites and mix again. Place the salad in the fridge until you’re ready to use it.
  2. For the gremolata, finely chop the dill and slice the chives into small rings. Mix both in a small bowl with lemon juice and pickle oil. Peel the garlic cloves and grate them into the bowl. Stir everything well and season with salt and pepper. Set aside.
  3. For the caramelized onions, peel the onions and slice them into thin half-rings. Heat a large pan over medium heat, melt 1 teaspoon of butter, then add the onions and a pinch of salt. Stir well and cook for 15-20 minutes, stirring occasionally, until the onions are golden and creamy. Add balsamic vinegar and stir again. Set the onions aside.
  4. Meanwhile, prepare the crispy bacon. Lay the slices on parchment paper and sprinkle them evenly with brown sugar and cayenne pepper. Bake at 200°C / 392°F for about 15 minutes or until the sugar has melted and the bacon is a deep pink.
  5. Butter the outside of the white bread slices and cut the Gouda into thin slices. Wash and dry the lettuce leaves, and get the picklenaise ready.
  6. Heat a pan over low to medium heat and place the buttered bread slices, butter-side down, in the pan. Add Gouda to half of the slices. Cover the pan so the cheese can melt. Remove the bread once the cheese is soft and the bottoms are golden and crispy.
  7. Spread mayo on the plain bread slices and gremolata on the cheesy ones.
  8. Now layer the sandwich in this order: lettuce on the mayo side, followed by egg salad, bacon, and caramelized onions. Top it off with the cheese-gremolata slice. Cut the sandwich in half and enjoy!
  • Cook Time: 50 min

CRAVING MORE?

Follow along here & don’t forget to subscribe to my substack!

Tropical Granola – Coconut Mango Pineapple & Banana

Tropical Granola – Coconut Mango Pineapple & Banana

Tropical Granola (Coconut Mango Pineapple & Banana)

Tropical Granola (Coconut Mango Pineapple & Banana)

September 8, 2024 by Kimberly

Get a taste of paradise in every bite! This crunchy tropical mix is loaded with coconut, mango, banana, and pineapple instantly taking you to a beachside escape with every spoonful.

This website uses affiliate links which may earn commission for purchases made at no additional cost to you.

TOTAL TIME

40 min

SERVES

4 cups / 300g

DIET

vegan

EVERY RECIPE DESERVES

A Little Love Letter

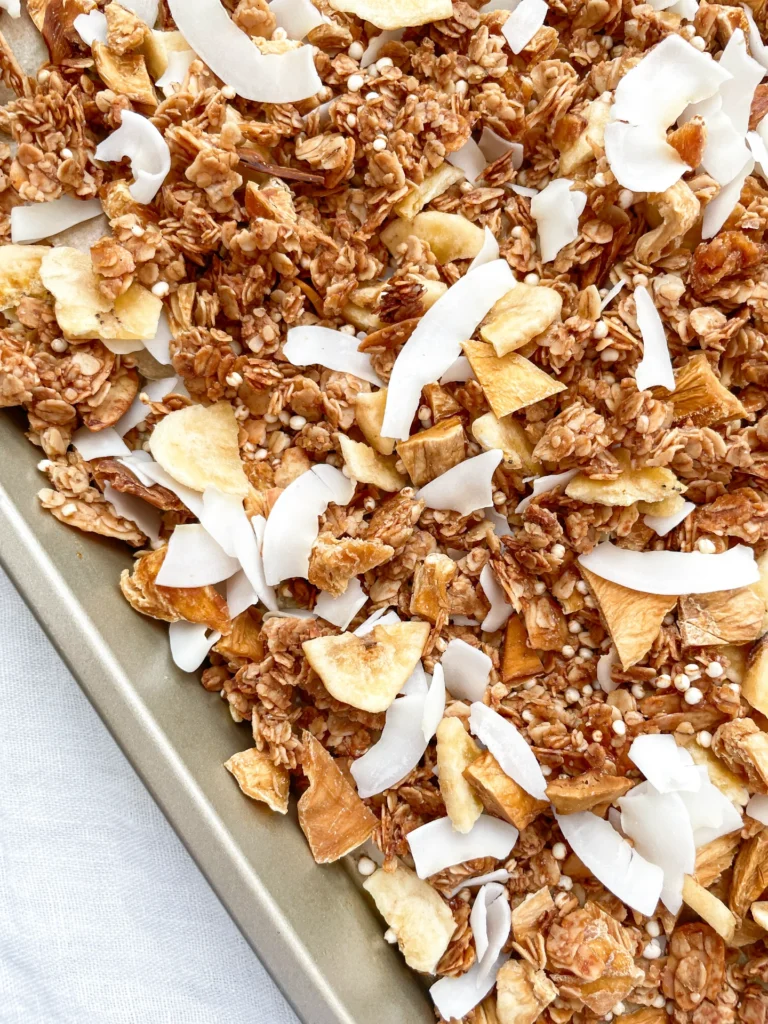
If you’re craving something that transports you straight to a sunny beach, this tropical-inspired granola is just what you need. Packed with crunchy coconut chips, sweet dried mango, freeze-dried banana, and tangy pineapple, it’s the ultimate blend of tropical goodness. Whether you sprinkle it over yogurt, enjoy it with milk, or just munch it by the handful, each bite brings a little sunshine to your day. Plus, it’s super easy to make and perfect for anyone looking for a healthier snack option!

There are so many ways to enjoy this tropical mix! Serve it over some creamy Greek yogurt with a drizzle of honey, or go for a classic bowl with your favorite milk. If you’re feeling fancy, use it to top smoothie bowls for that perfect Instagram-worthy breakfast. It’s also an amazing snack to pack on-the-go, giving you a burst of tropical flavors any time of day.

Store this tropical blend in an airtight container to keep it fresh and crunchy. It’ll stay delicious for up to 3-4 weeks if stored in a cool, dry place – although, let’s be real, it probably won’t last that long because it’s too good!

Hi, I'm Kimberly!

Hi, I'm Kimberly.

A hopeless romantic when it comes to food. Every recipe I share is a love letter to food itself. I’m so glad you’re here. Make yourself at home and stay a while.

Love,
Kimberly

Kimberly the Zett Signature

If you want to get to know me better,
click here!


Tropical Granola (Coconut Mango Pineapple & Banana)

LET’S MAKE A PIECE OF HAPPINESS

Print
clock clock iconcutlery cutlery iconflag flag iconfolder folder iconinstagram instagram iconpinterest pinterest iconfacebook facebook iconprint print iconsquares squares iconheart heart iconheart solid heart solid icon
Tropical Granola - Coconut Mango Pineapple & Banana

Tropical Granola – Coconut Mango Pineapple & Banana


5 from 1 review

  • Author: Kimberly
  • Total Time: 40 min
  • Yield: 300 g / 4 cups 1x

Description

Recommended Equipment

  • oven
  • parchment paper
  • medium-sized bowl
  • small saucepan
  • sharp knife
  • cutting board
  • airtight container

Ingredients

Units Scale
  • 100 grams rolled oats
  • 15 grams almonds
  • 30 grams dried mango
  • 30 grams freeze-dried banana
  • 30 grams dried pineapple
  • 20 grams coconut chips
  • 15 grams puffed quinoa
  • 30 grams cold-pressed coconut oil
  • 10 grams brown sugar
  • 25 grams agave syrup
  • 1/2 tsp vanilla extract
  • 1/8 tsp salt

Instructions

PREPARATIONS

  • Here’s the recipe for the Pineapple Coconut Oil. You’ll need about 30g of it.

INSTRUCTIONS

  1. Preheat the oven to 160°C / 320°F. Line a baking sheet with parchment paper and set it aside.
  2. In a medium-sized bowl, mix together the oats and almonds. Set aside.
  3. In a small saucepan, stir together sugar, agave syrup, vanilla extract, and coconut oil. Heat on low until the sugar melts. Pour this mixture over the oat-almond mix and stir well.
  4. Spread the mixture evenly onto the baking sheet. Bake for about 20 minutes.
  5. While the granola is baking, chop the freeze-dried bananas, pineapple, mango, and coconut chips to your desired size, and measure out the quinoa. Set everything aside.
  6. Once the granola is done baking, take it out of the oven and add the other ingredients. Mix everything well and let it cool.
  7. Once it’s completely cooled, crumble the granola and store it in an airtight container.
  • Passive Time: 20 min
  • Cook Time: 20 min

CRAVING MORE?

Follow along here & don’t forget to subscribe to my substack!

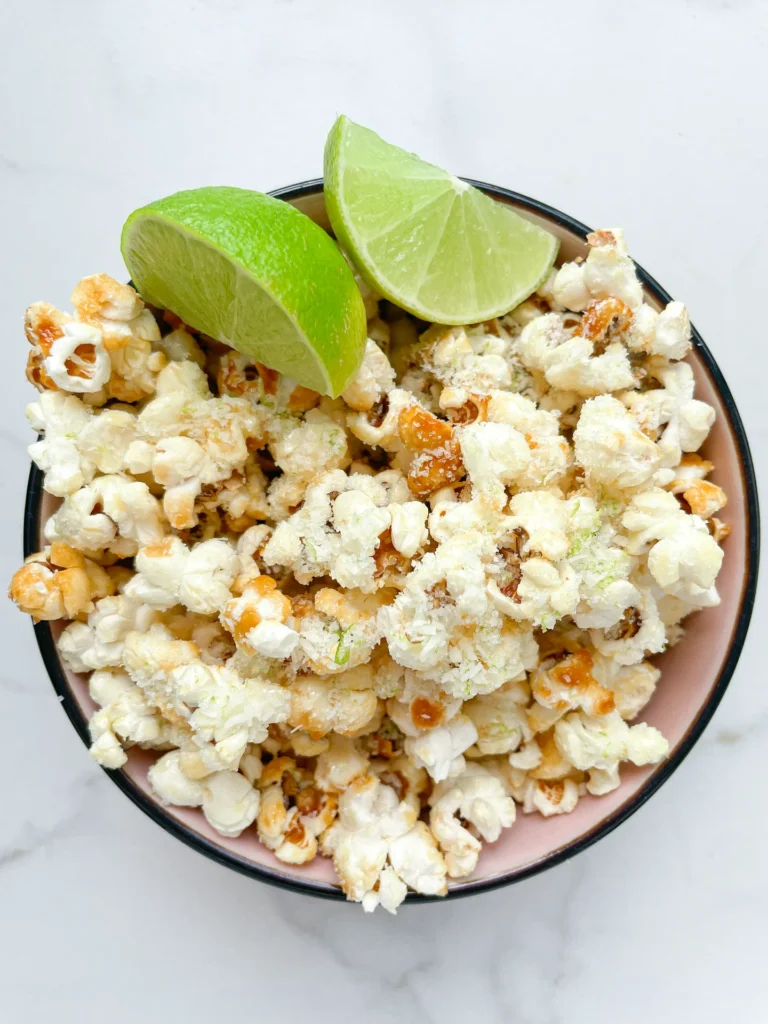
Coconut Lime Popcorn

Coconut Lime Popcorn

Coconut Lime Popcorn

Coconut Lime Popcorn

August 28, 2024 by Kimberly

Indulge in this tropical popcorn treat! The refreshing burst of lime and the rich coconut flavor make every bite a mini vacation. Perfect for cozy movie nights or fun gatherings.

This website uses affiliate links which may earn commission for purchases made at no additional cost to you.

TOTAL TIME

20 min

SERVES

2 portions

DIET

vegan

EVERY RECIPE DESERVES

A Little Love Letter

Ready to take your snack game to the next level? This coconut and lime flavored popcorn is a game-changer. Imagine the zingy taste of lime combined with the rich, creamy flavor of coconut. It’s a tropical twist on your favorite snack that’s perfect for movie nights, parties, or just because. Quick to make and absolutely delicious, this popcorn will become your go-to treat for every occasion!

It’s perfect for a cozy movie night at home, adding a tropical vibe to your entertainment. For a party, place it in colorful bowls for a festive touch. You can also pack it into little snack bags for a sweet and tangy treat on the go. This popcorn pairs wonderfully with a cold drink, making it an ideal companion for both casual and special moments.

Simply let it cool completely before placing it in an airtight container. It stays fresh and crunchy for up to three days.

Hi, I'm Kimberly!

Hi, I'm Kimberly.

A hopeless romantic when it comes to food. Every recipe I share is a love letter to food itself. I’m so glad you’re here. Make yourself at home and stay a while.

Love,
Kimberly

Kimberly the Zett Signature

If you want to get to know me better,
click here!


Coconut Lime Popcorn

LET’S MAKE A PIECE OF HAPPINESS

Print
clock clock iconcutlery cutlery iconflag flag iconfolder folder iconinstagram instagram iconpinterest pinterest iconfacebook facebook iconprint print iconsquares squares iconheart heart iconheart solid heart solid icon
Coconut Lime Popcorn

Coconut Lime Popcorn


  • Author: Kimberly
  • Total Time: 20 min
  • Yield: 2 1x

Description

RECOMMENDED EQUIPMENT

  • medium pot with lid
  • grater
  • food processor
  • large bowl

Ingredients

Units Scale
  • 60 grams popcorn kernels
  • 30 grams lime coconut oil
  • 60 grams white sugar
TOPPING
  • zest from one lime
  • 1 tbsp shredded coconut
  • 1 tbsp white sugar

Instructions

PREPARATIONS

  • Here you can find the recipe for the lime coconut oil. You need 30g / 1 oz of the oil.
  1. In a medium pot, combine lime-coconut oil, sugar, and popcorn kernels, ensuring all kernels are coated with sugar and oil.
  2. Place the pot on the stove with the lid on and set to medium heat. Wait until the first kernel pops.
  3. While waiting, zest a lime and place the zest in a food processor. Add 1 tablespoon of sugar and 1 tablespoon of shredded coconut. Pulse a few times until the mixture is fragrant. Set aside.
  4. As the kernels start to pop, occasionally shake and gently swirl the pot to ensure even heating. After about 3-5 minutes, all kernels should be popped, and the sugar should have turned a light amber color.
  5. Carefully open the lid and pour the popcorn into a large bowl.
  6. Immediately sprinkle the topping over the popcorn and mix well to coat the popcorn evenly. Divide the popcorn into two bowls and enjoy!
  • Passive Time: 10 min
  • Cook Time: 10 min

CRAVING MORE?

Follow along here & don’t forget to subscribe to my substack!

Mint Yogurt & Cucumber Dill Salad (Cacik inspired)

Mint Yogurt & Cucumber Dill Salad (Cacik inspired)

Mint Yogurt & Cucumber Dill Salad (Cacik inspired)

Mint Yogurt & Cucumber Dill Salad (Cacik inspired)

August 20, 2024 by Kimberly

Refresh your taste buds with this creamy & crunchy yogurt cucumber salad. The blend of mint and dill brings a burst of summer flavors that’s perfect for any occasion. Light, tangy, and irresistible!

This website uses affiliate links which may earn commission for purchases made at no additional cost to you.

TOTAL TIME

15 min

SERVES

4 portions

DIET

vegetarian

EVERY RECIPE DESERVES

A Little Love Letter

If you’re craving something light, refreshing, and bursting with flavor, you’re going to adore this Cacik-inspired dip-salad situation. It’s a delightful mix of creamy yogurt, fresh cucumbers, and aromatic herbs like mint and dill. Perfect for hot summer days or when you need a quick, healthy snack, this dip-salad is a breeze to whip up and incredibly satisfying. Trust me, once you try it, you’ll be hooked on its cool and tangy goodness!

Enjoy it as a refreshing side dish with your grilled meats or fish, or as a cool appetizer to start your meal. It’s also perfect as a dip with some warm pita bread or crispy veggies. For a more substantial meal, pair it with a quinoa or grain bowl. This salad’s creamy, tangy flavor profile complements a wide range of dishes, making it a fantastic addition to any menu. I like to serve it with this Turkish Flatbread (Bazlama) and Spicy Turkish Vegetable Spread (Ezme) as a Meze variation.

Transfer it to an airtight container and keep it in the fridge. It stays fresh for up to three days, but it’s best enjoyed within the first day or two to maintain its crisp texture. Keep it chilled, and you’ll have a delicious, refreshing dip-salad ready whenever you need it.

Hi, I'm Kimberly!

Hi, I'm Kimberly.

A hopeless romantic when it comes to food. Every recipe I share is a love letter to food itself. I’m so glad you’re here. Make yourself at home and stay a while.

Love,
Kimberly

Kimberly the Zett Signature

If you want to get to know me better,
click here!


Mint Yogurt & Cucumber Dill Salad (Cacik inspired)

LET’S MAKE A PIECE OF HAPPINESS

Print
clock clock iconcutlery cutlery iconflag flag iconfolder folder iconinstagram instagram iconpinterest pinterest iconfacebook facebook iconprint print iconsquares squares iconheart heart iconheart solid heart solid icon
Mint Yogurt & Cucumber Dill Salad (Cacik inspired)

Mint Yogurt & Cucumber Dill Salad (Cacik inspired)


  • Author: Kimberly
  • Total Time: 15 min
  • Yield: 4-6 1x

Description

RECOMMENDED EQUIPMENT

  • sharp knife
  • cutting board
  • small bowl
  • medium bowl

Ingredients

Units Scale
SALAD
  • 1 cucumber
  • 2 tbsp extra virgin olive oil
  • 1 tbsp lemon juice
  • 1 tbsp dill
  • salt & pepper to taste
YOGURT
  • 300 grams 10% fat yogurt
  • 2 garlic cloves
  • 1 tbsp fresh mint, chopped
  • pinch of salt
TOPPING
  • pistachios
  • dill
  • mint

Instructions

  1. Peel the garlic and grate it into a small bowl. Wash and dry the mint thoroughly. Pluck the leaves from the stems, finely chop them, and add them to the garlic. Then add the yogurt and salt. Mix everything well.
  2. Next, wash and dry the cucumber. Halve it lengthwise, then halve each piece again lengthwise and remove the seeds. Quarter the cucumber again lengthwise and cut into large chunks. Place the cucumber pieces in a medium bowl and season with salt, olive oil, lemon juice, and pepper. Wash, dry, and roughly chop the dill, then add it to the cucumbers. Mix everything well.
  3. Shell and finely chop the pistachios. Set aside.
  4. Spread the yogurt on a deep plate and top with the cucumber salad. Sprinkle with pistachios. Optionally, garnish with a few mint leaves and dill, and drizzle with a bit of olive oil.
  • Cook Time: 15 min

CRAVING MORE?

Follow along here & don’t forget to subscribe to my substack!