Vanilla Parfait with Chocolate Soil

Vanilla Parfait with Chocolate Soil

Vanilla Parfait with Chocolate Soil

Vanilla Parfait with Chocolate Soil

December 20, 2024 by Kimberly

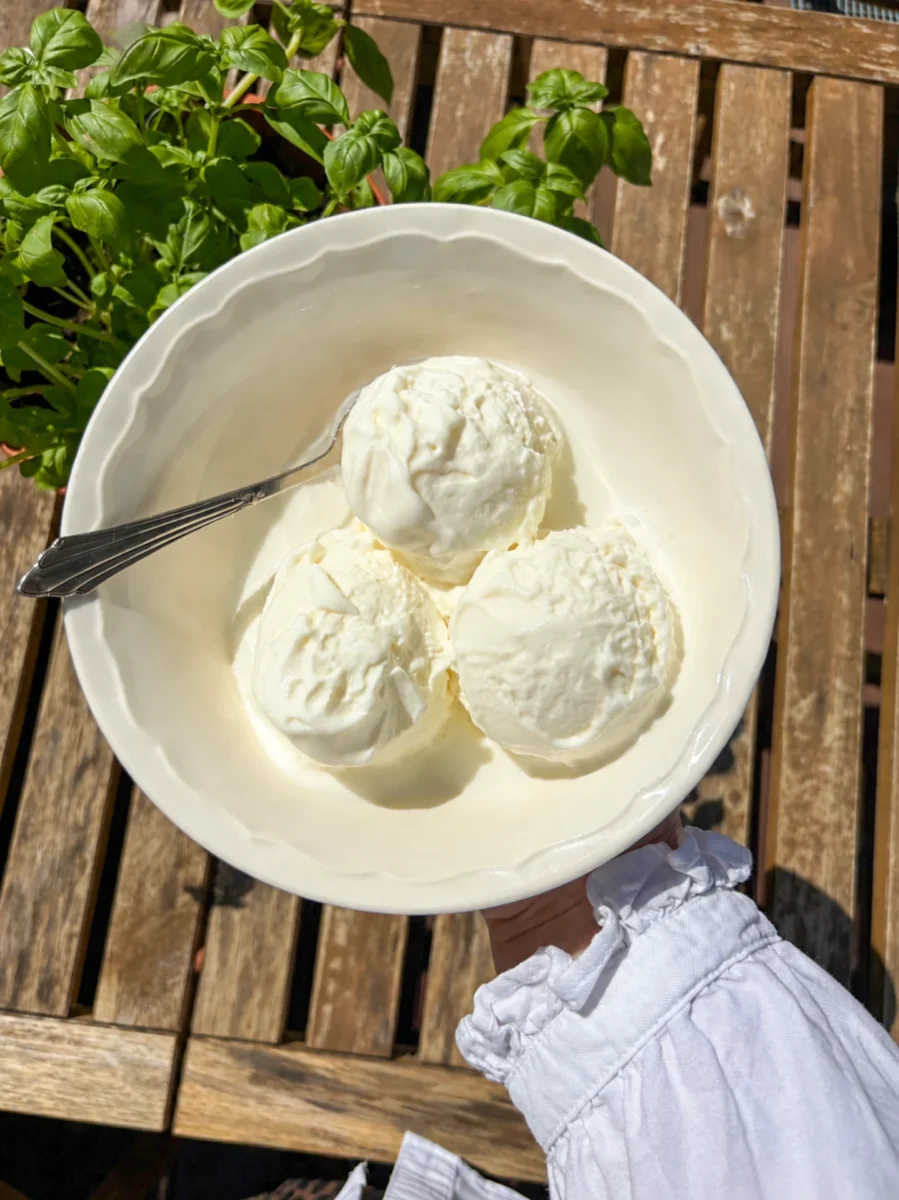
This creamy vanilla parfait melts like a dream, paired with crunchy, bittersweet chocolate soil for a texture and flavor explosion. Dessert vibes: fancy enough to impress, cozy enough to devour solo.

This website uses affiliate links which may earn commission for purchases made at no additional cost to you.

TOTAL TIME

4 hrs + 40 min

SERVES

10 portions

DIET

vegetarian

EVERY RECIPE DESERVES

A Little Love Letter

If you’re looking for a dessert that feels both luxurious and approachable, this vanilla parfait with chocolate soil is it. The creamy, rich vanilla base perfectly contrasts the crunchy, bittersweet chocolate soil, creating a balance of flavors and textures. It’s the kind of dessert that wows at a dinner party but is easy enough to whip up for yourself when you need a little indulgence. Bonus: it’s no-bake and totally make-ahead friendly!

Serve your parfait chilled in elegant bowls or plates for the ultimate dessert presentation. Spoon the creamy vanilla layer first and top with a generous sprinkle of chocolate soil for that perfect crunch. Want to elevate it even more? Add fresh berries, a drizzle of caramel or even a few drops of this Mint Oil.

Keep the parfait in an airtight container in the freezer for up to one week. Store the chocolate soil separately in a dry container to maintain its crunch. Assemble right before serving.

Hi, I'm Kimberly!

Hi, I'm Kimberly.

A hopeless romantic when it comes to food. Every recipe I share is a love letter to food itself. I’m so glad you’re here. Make yourself at home and stay a while.

Love,
Kimberly

Kimberly the Zett Signature

If you want to get to know me better,
click here!


Vanilla Parfait with Chocolate Soil

LET’S MAKE A PIECE OF HAPPINESS

Print
clock clock iconcutlery cutlery iconflag flag iconfolder folder iconinstagram instagram iconpinterest pinterest iconfacebook facebook iconprint print iconsquares squares iconheart heart iconheart solid heart solid icon
Vanilla Parfait with Chocolate Soil

Vanilla Parfait with Chocolate Soil


5 Stars 4 Stars 3 Stars 2 Stars 1 Star

5 from 1 review

  • Author: Kimberly
  • Total Time: 4 hrs + 40 min
  • Yield: 10-12 1x

Description

Recommended Equipment

  • two glass or metal mixing bowls
  • two small bowls
  • baking tray
  • small pot
  • whisk
  • silicone spatula
  • fine mesh strainer
  • molds for the parfait

Ingredients

Units Scale
PARFAIT
  • 4 egg yolks
  • 100 grams powdered sugar
  • 400 grams heavy cream
  • 1 vanilla pod
CHOCOLATE SOIL
  • 60 grams powdered sugar
  • 100 grams all-purpose flour
  • 15 grams unsweetened cocoa powder
  • 1/4 tsp salt
  • 50 grams butter
  • 1 tsp ground coffee

Instructions

  1. Whip the cream until stiff peaks form, then place it in the fridge to keep cold.
  2. Separate the eggs, placing the yolks in a glass or metal bowl. Scrape the vanilla pod and add the seeds to the yolks.
  3. Sift the powdered sugar through a fine mesh strainer into the yolks. Mix well with the vanilla seeds.
  4. Place the bowl over a pot of simmering water (double boiler setup), ensuring only the steam touches the bowl. Whisk the mixture until it reaches 80 °C (176 °F).
  5. Prepare an ice bath (a bowl with cold water and ice cubes). Once the yolk mixture reaches 80 °C, place the bowl in the ice bath and whisk until the mixture cools and becomes thick, sticky, and creamy.
  6. Gently fold the chilled whipped cream into the cooled yolk mixture using a silicone spatula until fully combined.
  7. Pour the parfait mixture into molds and freeze for about 4 hours.
  8. For the chocolate soil, preheat the oven to 160 °C (320 °F).
  9. Combine sugar, flour, cocoa powder, salt, and ground coffee in a bowl.
  10. Melt the butter and add it to the dry ingredients. Mix with your hands until a crumbly texture forms.
  11. Spread the mixture evenly on a small baking tray and bake for about 10 minutes.
  12. Remove the tray from the oven, let the mixture cool, then crumble it into pieces. Store in an airtight container.
  13. To serve, unmold the parfaits, arrange them on plates, and decorate with the chocolate soil around them.
  14. Optional: Garnish with mint oil, berry compote, marzipan sauce, or chocolate sauce.
  • Passive Time: 4 hours
  • Cook Time: 40 min

CRAVING MORE?

Follow along here & don’t forget to subscribe to my substack!

Honeycomb Apricot Marshmallow Fluff Cookies

Honeycomb Apricot Marshmallow Fluff Cookies

Honeycomb Apricot Marshmallow Fluff Cookies

Honeycomb Apricot Marshmallow Fluff Cookies

December 19, 2024 by Kimberly

Soft, gooey cookie layers meet tangy apricot sauce, marshmallowy swirls, and honeycomb crunch. Every bite is an explosion of textures and flavors – sweet, sticky, and irresistibly cozy vibes in cookie form.

This website uses affiliate links which may earn commission for purchases made at no additional cost to you.

TOTAL TIME

2 hrs + 25 min

SERVES

12 cookies

DIET

vegetarian

EVERY RECIPE DESERVES

A Little Love Letter

Imagine sinking your teeth into layers of soft cookie dough, creamy marshmallow fluff, tangy apricot sauce, and crunchy honeycomb pieces. It’s not just a dessert – it’s a flavor-packed adventure! These cookies are a mash-up of textures and tastes that scream fun and indulgence. Whether it’s for a cozy night in or to impress your friends, they’re bound to disappear fast.

These cookies are best enjoyed slightly chilled for that perfect contrast of gooey and crunchy. Pair them with a cup of tea or coffee for a casual treat, or bring them out as the star of a dessert platter. Hosting a party? Stack them up on a pretty plate and watch them vanish in minutes.

Keep leftovers in an airtight container for up to 3 days. For extra freshness, separate layers with parchment paper to avoid sticking.

Hi, I'm Kimberly!

Hi, I'm Kimberly.

A hopeless romantic when it comes to food. Every recipe I share is a love letter to food itself. I’m so glad you’re here. Make yourself at home and stay a while.

Love,
Kimberly

Kimberly the Zett Signature

If you want to get to know me better,
click here!


Honeycomb Apricot Marshmallow Fluff Cookies

LET’S MAKE A PIECE OF HAPPINESS

Print
clock clock iconcutlery cutlery iconflag flag iconfolder folder iconinstagram instagram iconpinterest pinterest iconfacebook facebook iconprint print iconsquares squares iconheart heart iconheart solid heart solid icon
Honeycomb Apricot Marshmallow Fluff Cookies

Honeycomb Apricot Marshmallow Fluff Cookies


5 from 1 review

  • Author: Kimberly
  • Total Time: 85 min
  • Yield: 12 cookies 1x

Description

Recommended Equipment

  • 2 small pots
  • 1 medium pot
  • baking dish (approx. 20×20 cm)
  • parchment paper
  • spatula
  • whisk
  • thermometer
  • electric mixer
  • sharp knife
  • cutting board
  • mixing bowl
  • cookie scoop

Ingredients

Units Scale
HONEYCOMB
  • 100 grams white sugar
  • 20 grams honey
  • 20 milliliter water
  • 1 tsp baking soda
MARSHMALLOW FLUFF
  • 60 grams white sugar
  • 60 grams water
  • 80 grams corn syrup
  • 1 egg white
APRICOT SAUCE
  • 100 grams dried apricots
  • 80 milliliter apricot juice
  • 10 grams powdered sugar
  • 1/2 tsp vanilla extract
  • 1 tsp lemon juice
  • 2 tsp cornstarch
COOKIE DOUGH
  • 120 grams butter, room temperature
  • 100 grams white sugar
  • 50 grams brown sugar
  • 1 egg
  • 1 tsp vanilla extract
  • 220 grams all-purpose flour
  • 1/2 tsp baking soda
  • 1/2 tsp salt

Instructions

  1. Honeycomb: First, line a heatproof baking dish with parchment paper. Combine sugar, honey, and water in a medium pot. Heat over medium until it boils, monitoring the temperature with a thermometer until it reaches 149°C (300°F). Remove from heat and quickly stir in the baking soda just until combined. Be careful—it will foam up a lot! Immediately pour the mixture into the prepared dish without stirring or spreading it, as this would break the air bubbles. Scrape any remaining mixture from the pot and add it on top. Let it cool completely (about 1–2 hours).
  2. Marshmallow Fluff: Heat water, sugar, and corn syrup in a small pot to 115°C (240°F). Meanwhile, beat egg whites in a clean bowl until stiff peaks form. Slowly pour the hot sugar syrup in a thin, steady stream into the egg whites, mixing continuously with an electric hand mixer. After adding all the syrup, beat on high for another 5 minutes until light and fluffy. Set aside.
  3. Apricot Sauce: Chop the dried apricots and combine them with apricot juice, powdered sugar, vanilla extract, and lemon juice in a small pot. Simmer for about 10 minutes until softened. Dissolve the cornstarch in a bit of cold water, stir it in, and bring everything to a boil until thickened. Set aside to cool.
  4. Cookie Dough: Cream butter with the white and brown sugar. Add the egg and vanilla extract, mixing well. Stir in the flour, baking soda, and salt until just combined—don’t overmix!
  5. In a deep dish, layer the components: a part of cookie dough, a tablespoon of marshmallow fluff, and a tablespoon of apricot sauce. Repeat until all ingredients are used. Tip: Store leftover fluff in a jar in the fridge for up to two weeks.
  6. Use a cookie scoop (or tablespoon) to form 12 evenly sized balls from the layered dough. Place them on the prepared baking tray. Chill the cookies in the fridge for 1 hour – don’t skip this step! Chilling ensures the cookies hold their shape and don’t spread too much when baked.
  7. Preheat the oven to 150°C (300°F) and bake the cookies for 13–15 minutes. While baking, carefully cut the honeycomb into small pieces. Remove the warm cookies from the oven, adjust their shape if necessary, and gently press the honeycomb pieces onto the tops. Let the cookies rest for about 10 minutes before enjoying.
  • Passive Time: 85 min
  • Cook Time: 60 min

CRAVING MORE?

Follow along here & don’t forget to subscribe to my substack!

Milk Buns with Gingerbread Filling

Milk Buns with Gingerbread Filling

Milk Buns with Gingerbread Filling

Milk Buns with Gingerbread Filling

December 16, 2024 by Kimberly

Soft, fluffy buns filled with a creamy spiced mascarpone chocolate magic that tastes like a cozy holiday hug. Perfectly baked for that melt-in-your-mouth festive treat you didn’t know you needed.

This website uses affiliate links which may earn commission for purchases made at no additional cost to you.

TOTAL TIME

2 hrs

SERVES

10 buns

DIET

vegetarian

EVERY RECIPE DESERVES

A Little Love Letter

Imagine biting into a soft, cloud-like bun filled with a creamy mix of spiced mascarpone, chocolate, and gingerbread vibes. That’s this recipe – an edible holiday dream! These buns are everything cozy wrapped up in one delicious bite. Whether you’re serving them at a festive brunch or enjoying one with your afternoon coffee, they’re the ultimate way to make your kitchen smell like Christmas and your taste buds very, very happy.

Serve these buns warm for the best experience! They’re perfect as they are, but you can glaze them with a spiced sugar syrup or a light gingerbread oil drizzle for an extra festive touch. Pair them with a steaming cup of hot chocolate, a chai latte, or even mulled wine for maximum holiday vibes. Pro tip: Sprinkle a little powdered sugar on top for that snow-dusted look – it’s giving cozy holiday bakery.

Keep your buns soft and fresh by storing them in an airtight container at room temperature for up to 2 days. To enjoy them later, reheat gently in the oven or microwave for that just-baked taste. You can also freeze them and defrost as needed!

Hi, I'm Kimberly!

Hi, I'm Kimberly.

A hopeless romantic when it comes to food. Every recipe I share is a love letter to food itself. I’m so glad you’re here. Make yourself at home and stay a while.

Love,
Kimberly

Kimberly the Zett Signature

If you want to get to know me better,
click here!


Milk Buns with Gingerbread Filling

LET’S MAKE A PIECE OF HAPPINESS

Print
clock clock iconcutlery cutlery iconflag flag iconfolder folder iconinstagram instagram iconpinterest pinterest iconfacebook facebook iconprint print iconsquares squares iconheart heart iconheart solid heart solid icon
Milk Buns with Gingerbread Filling

Milk Buns with Gingerbread Filling


  • Author: Kimberly
  • Total Time: 2 hours
  • Yield: 10-12 1x

Description

Recommended Equipment

  • large mixing bowl
  • medium bowl
  • plastic wrap
  • rolling pin

Ingredients

Units Scale
MILK BUNS
  • 500 grams all-purpose flour (type 550 in Germany)
  • 1 tsp salt
  • 1 egg
  • 50 grams white sugar
  • 7 grams dry active yeast
  • 200 milliliter full-fat cow milk
  • 100 grams butter
GINGERBREAD FILLING
  • 125 grams mascarpone
  • 50 grams milk chocolate
  • 15 grams powdered sugar
  • pinch of salt
  • 1 tsp cinnamon
  • 1/2 tsp clove, ground
  • 1/4 tsp ginger, ground
  • 1/4 tsp allspice, ground
  • 1/8 tsp cardamom, ground
  • 1/8 tsp nutmeg, ground
  • 25 grams candied oranges
  • 25 grams hazelnuts, chopped & roasted
GLAZE
  • 2 tbsp butter
  • 2 tbsp heavy cream

Instructions

  1. For the yeast dough, heat milk, butter until melted in a small saucepan to 35°C (95°F). Add 1 tsp of the sugar and the yeast and stir until dissolved. Let sit for about 3-4 minutes until bubbles form.
  2. Meanwhile, in a large mixing bowl, whisk together the egg, sugar, and salt. Add the yeast-butter-milk mixture and the flour, then knead into a smooth dough. Cover the bowl with plastic wrap and let it rest for about 40 minutes, until the dough has doubled in size.
  3. In the meantime, prepare the gingerbread cream. In a bowl, mix mascarpone, powdered sugar, cinnamon, cardamom, cloves, allspice, nutmeg, and ginger. Melt the chocolate and stir it into the mascarpone mixture. Finally, fold in chopped hazelnuts and candied orange pieces, mix well, and set aside.
  4. Once the dough has doubled in size, transfer it to a lightly floured surface. Knead it briefly and shape it into a long roll. Divide the roll into 10-12 equal pieces. Flatten each piece and spread 1 tablespoon of gingerbread cream on top, leaving a 1 cm border. Roll them up from the bottom. Pinch the ends tightly to prevent the filling from leaking while baking.
  5. Place the rolls into a baking dish, cover again with plastic wrap, and let them rise for another 40 minutes.
  6. Preheat the oven to 190°C (375°F) during the second rise.
  7. Just before baking, brush the rolls with a mixture of cream and melted butter.
  8. Bake the rolls for about 20-25 minutes until golden brown.
  • Passive Time: 100 min
  • Cook Time: 20 min

CRAVING MORE?

Follow along here & don’t forget to subscribe to my substack!

Apple Pie Rolls with Vanilla & Caramel Sauce & Milk Crumble

Apple Pie Rolls with Vanilla & Caramel Sauce & Milk Crumble

Apple Pie Rolls with Vanilla & Caramel Sauce & Milk Crumble

Apple Pie Rolls with Vanilla & Caramel Sauce & Milk Crumble

December 14, 2024 by Kimberly

Golden rolls packed with spiced apples, drizzled with caramel, and topped with crunchy milk crumble – this dessert is a little masterpiece that’ll make your kitchen smell like pure magic.

This website uses affiliate links which may earn commission for purchases made at no additional cost to you.

TOTAL TIME

1 hr + 15 min

SERVES

4 portions

DIET

vegetarian

EVERY RECIPE DESERVES

A Little Love Letter

These crispy golden rolls, filled with spiced apples and topped with caramel & vanilla sauce and milk crumble, are everything you love about desserts. They’re the perfect blend of sweet, buttery, and crunchy, delivering big seasonal vibes in every bite. Whether you’re making them for a dinner party or just for yourself, this dessert promises to steal the show and leave everyone asking for seconds.

Lay the rolls on a warm puddle of vanilla sauce, drizzle generously with caramel, and finish with a sprinkle of milk crumble for that perfect texture. Serve them while they’re still warm to keep the filo dough crisp and the apple filling gooey.

Store leftover rolls in an airtight container in the fridge for up to 3 days. Reheat them in the oven at 180°C (350°F) for about 10 minutes to bring back their crisp texture.

Hi, I'm Kimberly!

Hi, I'm Kimberly.

A hopeless romantic when it comes to food. Every recipe I share is a love letter to food itself. I’m so glad you’re here. Make yourself at home and stay a while.

Love,
Kimberly

Kimberly the Zett Signature

If you want to get to know me better,
click here!


Apple Pie Rolls with Vanilla & Caramel Sauce & Milk Crumble

LET’S MAKE A PIECE OF HAPPINESS

Print
clock clock iconcutlery cutlery iconflag flag iconfolder folder iconinstagram instagram iconpinterest pinterest iconfacebook facebook iconprint print iconsquares squares iconheart heart iconheart solid heart solid icon
Apple Pie Rolls with Vanilla & Caramel Sauce & Milk Crumble

Apple Pie Rolls with Vanilla & Caramel Sauce & Milk Crumble


  • Author: Kimberly
  • Total Time: 75 min
  • Yield: 4-6 1x

Description

Recommended Equipment

  • sharp knife
  • cutting board
  • two small pots
  • two small bowls
  • oven

Ingredients

Units Scale
APPLE PIE ROLLS
  • 8 filo pastry sheets
  • 1 apple
  • 150 milliliter apple juice
  • 2 tsp cornstarch
  • 15 grams white sugar
  • 1 tsp vanilla extract
  • 1 tsp lemon juice
  • 1/2 tsp cinnamon
  • 1/8 tsp nutmeg
  • pinch of salt
CARAMEL CINNAMON SAUCE
  • 75g white sugar
  • 2 tbsp water
  • 20 grams butter
  • 75 grams heavy cream
  • 1/2 tsp cinnamon
  • 1/4 tsp vanilla extract
  • pinch of salt
VANILLA SAUCE
  • 150 grams heavy cream
  • 150 milliliter full-fat milk
  • 3 egg yolks
  • 1 vanilla bean
  • 50 grams brown sugar
  • pinch of salt
MILK CRUMBLE
  • 30 grams full-fat milk powder
  • 50 grams all-purpose flour
  • 30 grams powdered sugar
  • 1/8 tsp salt
  • 25 grams butter
  • 45 grams white chocolate

Instructions

  1. For the apple filling, dice the apples and add them to a pot with apple juice, sugar, cinnamon, nutmeg, salt, vanilla extract, and lemon juice. Simmer over medium heat for about 10 minutes until the apples are soft. Mix cornstarch with 2 tbsp of cold water, then stir it into the apple mixture. Bring to a quick boil until it thickens, then remove from heat and let cool.
  2. For the caramel-cinnamon sauce, heat sugar and water in a pot until it reaches 170°C (340°F) and turns a light golden caramel (about 10–15 minutes). Remove from heat and carefully stir in butter and cream – it may clump, but just keep stirring. Add a pinch of salt, vanilla extract, and cinnamon, mix well, and let it cool.
  3. For the milk crumble, combine milk powder, flour, powdered sugar, and salt in a bowl. Add melted butter and mix with your hands until crumbly. Spread the mixture onto a baking sheet and bake at 140°C (285°F) for about 10 minutes. While it bakes, melt the white chocolate. Once the crumble is baked, transfer it to a bowl, drizzle the melted chocolate over it, and stir until it forms larger clusters. Set aside.
  4. Next, prepare the vanilla sauce. You can find the recipe here.
  5. For the filo rolls, place a heaping tablespoon of the apple filling on each sheet of filo dough. Fold in the sides, roll them up, and seal the ends with a bit of water. Arrange the rolls on a baking sheet lined with parchment paper, brush them with melted butter, and bake at 180°C (355°F) for about 15 minutes until golden brown.
  6. To serve, pour the vanilla sauce onto plates or bowls, cut the filo rolls into three pieces each, and arrange them on top of the sauce. Drizzle with the caramel-cinnamon sauce and finish with milk crumbles. Enjoy!
  • Passive Time: 15 min
  • Cook Time: 60 min

CRAVING MORE?

Follow along here & don’t forget to subscribe to my substack!

Cranberry Pistachio Biscotti

Cranberry Pistachio Biscotti

Cranberry Pistachio Biscotti

Cranberry Pistachio Biscotti

December 9, 2024 by Kimberly

These crispy, nutty biscotti are bursting with tart cranberries and crunchy pistachios, dipped in a silky layer of white chocolate. They’re festive, cozy, and perfect for coffee-dunking or gifting.

This website uses affiliate links which may earn commission for purchases made at no additional cost to you.

TOTAL TIME

60 min

SERVES

18 biscotti

DIET

vegetarian

EVERY RECIPE DESERVES

A Little Love Letter

These biscotti are everything you want in a cozy snack. Crunchy, nutty, and perfectly sweet, they combine tart cranberries, rich pistachios, and a touch of indulgence with a white chocolate coating. They’re ideal for holiday gifting, pairing with your coffee, or treating yourself to something a little special. The mix of textures and flavors makes them irresistible, and they look as beautiful as they taste.

Serve these biscotti alongside a hot cup of coffee, tea, or even hot cocoa for the ultimate cozy vibe. They’re also fantastic as part of a dessert spread, paired with fresh fruit or a creamy mousse. And don’t forget – they make the perfect holiday gift, wrapped up in cute little bags or boxes.

Store the biscotti in an airtight container at room temperature for up to three weeks. If they’re coated in chocolate, keep them in a cool place to avoid melting. Perfect for make-ahead treats!

Hi, I'm Kimberly!

Hi, I'm Kimberly.

A hopeless romantic when it comes to food. Every recipe I share is a love letter to food itself. I’m so glad you’re here. Make yourself at home and stay a while.

Love,
Kimberly

Kimberly the Zett Signature

If you want to get to know me better,
click here!


Cranberry Pistachio Biscotti

LET’S MAKE A PIECE OF HAPPINESS

Print
clock clock iconcutlery cutlery iconflag flag iconfolder folder iconinstagram instagram iconpinterest pinterest iconfacebook facebook iconprint print iconsquares squares iconheart heart iconheart solid heart solid icon
Cranberry Pistachio Biscotti

Cranberry Pistachio Biscotti


  • Author: Kimberly
  • Total Time: 60 min
  • Yield: 14-18 pieces 1x

Description

Recommended Equipment

  • 2 bowls
  • electric mixer
  • whisk
  • baking tray
  • parchment paper
  • sharp knife
  • spoon or spatula
  • food processor (optional, for chopping cranberries)

Ingredients

Units Scale
  • 125 grams all-purpose flour
  • 1/2 tsp baking powder
  • 1/4 tsp salt
  • 30 grams butter, room-temperature
  • 75 grams white sugar
  • 1 egg
  • 1 tsp vanilla extract
  • 50 grams pistachios
  • 50 grams fresh cranberries
  • 100 grams white chocolate

Instructions

  1. Roughly chop the cranberries and pistachios with a knife or a food processor, then set aside. Preheat the oven to 175°C/347°F.
  2. In one bowl, thoroughly mix the flour, baking powder, and salt.
  3. In another bowl, use an electric mixer to cream the soft butter and sugar until fluffy.
  4. Add the egg and vanilla extract to the butter-sugar mixture and mix well.
  5. Add the dry ingredients to the butter-egg mixture, along with the chopped pistachios and cranberries. Mix everything until you get a smooth dough. Only stir until no flour streaks remain.
  6. Place the dough onto a baking tray lined with parchment paper. Lightly dust your hands with flour and shape the dough into a flat, long rectangle (about 20-25 cm long and 6 cm wide).
  7. Bake the dough piece for about 30 minutes. Remove it from the oven and let it cool slightly.
  8. Use a bread knife or sharp knife to slice the baked dough into pieces (about 1.5–2 cm thick).
  9. Place the biscotti slices cut side down back onto the baking tray.
    • For a softer version: Bake each side for 5 minutes.
    • For a crunchier version: Bake each side for 10 minutes.
  10. Dip half of the biscotti in melted white chocolate and sprinkle with chopped pistachios. Let them cool on a wire rack until the chocolate hardens.
  • Passive Time: 40 min
  • Cook Time: 20 min

CRAVING MORE?

Follow along here & don’t forget to subscribe to my substack!

Pecan Caramel Pie Cobbler

Pecan Caramel Pie Cobbler

Pecan Caramel Pie Cobbler

Pecan Caramel Pie Cobbler

November 27, 2024 by Kimberly

This warm, gooey cobbler is the ultimate comfort dessert – melty caramel candies, crunchy pecans, and buttery dough baked into golden perfection. A cozy, sweet treat for every dessert lover out there!

This website uses affiliate links which may earn commission for purchases made at no additional cost to you.

TOTAL TIME

1 hr + 15 min

SERVES

8 portions

DIET

vegetarian

EVERY RECIPE DESERVES

A Little Love Letter

There’s something magical about desserts that feel like a warm hug, and this cobbler delivers just that. Melty caramel candies and crunchy pecans create a gooey filling, while the buttery dough bakes into a golden, rustic crust. It’s the perfect dessert for chilly evenings or holiday gatherings, combining the cozy flavors of caramel and pecans into one irresistible dish. Trust me, once you try this cobbler, it’ll quickly become a go-to comfort dessert for every season.

This cobbler is best served warm, straight out of the oven, with a scoop of vanilla ice cream or a dollop of whipped cream on top. The cold creaminess of the topping perfectly balances the gooey caramel and crunchy pecans. Sprinkle a few extra pecans over the top for added texture. It’s perfect for family gatherings, dinner parties, or just a cozy night in.

Store any leftovers in an airtight container at room temperature for up to one day, or in the fridge for up to four days. Reheat individual portions in the microwave for 20-30 seconds to bring back the gooey, warm goodness.

Hi, I'm Kimberly!

Hi, I'm Kimberly.

A hopeless romantic when it comes to food. Every recipe I share is a love letter to food itself. I’m so glad you’re here. Make yourself at home and stay a while.

Love,
Kimberly

Kimberly the Zett Signature

If you want to get to know me better,
click here!


Pecan Caramel Pie Cobbler

LET’S MAKE A PIECE OF HAPPINESS

Print
clock clock iconcutlery cutlery iconflag flag iconfolder folder iconinstagram instagram iconpinterest pinterest iconfacebook facebook iconprint print iconsquares squares iconheart heart iconheart solid heart solid icon
Pecan Caramel Pie Cobbler

Pecan Caramel Pie Cobbler


4.3 from 3 reviews

  • Author: Kimberly
  • Total Time: 75 min
  • Yield: 8 1x

Description

RECOMMENDED EQUIPMENT

  • baking dish (approx. 20×30 cm or similar)
  • mixing bowl
  • whisk or hand mixer
  • kettle (for boiling water)


Ingredients

Units Scale
  • 120 grams butter
  • 125 grams all-purpose flour
  • 125 grams white sugar
  • 3 tsp baking powder
  • 1/4 tsp salt
  • 170 milliliter full-fat cow milk
  • 1 tsp vanilla extract
  • 100 grams pecans
  • 50 grams brown sugar
  • 125 grams caramel candies
  • 250 milliliter boiling water
  • vanilla ice cream

Instructions

  1. Preheat the oven to 175°C / 350°F. Grab a baking dish, drop in the butter, and pop it into the oven for a few minutes and let it melt.
  2. In a bowl, combine flour, sugar, baking powder, and a pinch of salt. Stir in milk and a splash of vanilla extract until it’s all smooth, creamy, and totally lump-free.
  3. Carefully pull the now-buttery baking dish out of the oven. Pour the batter right over that melted butter. Trust the process – it looks weird now, but it’s all part of trust the process. Sprinkle pecans on top and follow up with a layer of brown sugar. Finally, add the caramel candies. Whole or crushed? Dealer’s choice.
  4. Next, get that kettle boiling and slowly pour the hot water over everything in the dish. Yes, everything. No stirring allowed! Just trust me on this one.
  5. Bake uncovered for 30–35 minutes or until the top is golden brown and smells like a caramel dream.
  6. Take it out and let it cool for about 30 minutes. Patience is key – the caramel sauce underneath thickens and gets all creamy during this time.
  7. Scoop it into bowls, drizzle with that caramel sauce hiding underneath, and top with a big ol’ scoop of vanilla ice cream.

  • Passive Time: 60 min
  • Cook Time: 15 min

CRAVING MORE?

Follow along here & don’t forget to subscribe to my substack!