


Description
Recommended Equipment
- two small pots
- vegetable peeler
- medium-sized bowl
- whisk
- two mixing bowls
- electric mixer
- mortar & pestle
- spatula
- small frying pan
- spatula
Ingredients
Units Scale
BATTER
- 90 milliliters full-fat milk
- 60 milliliters water
- 1 egg
- 1 tbsp melted butter
- 1 tbsp poppyseeds
- zest of 1/2 lemon
- 60 grams all-purpose flour
- 1/8 tsp salz
- 90 milliliters full-fat milk
- 90 milliliters heavy cream
- 2 egg yolks
- 50 grams white sugar
- 1 tsp vanilla extract
- 1 tbsp flour
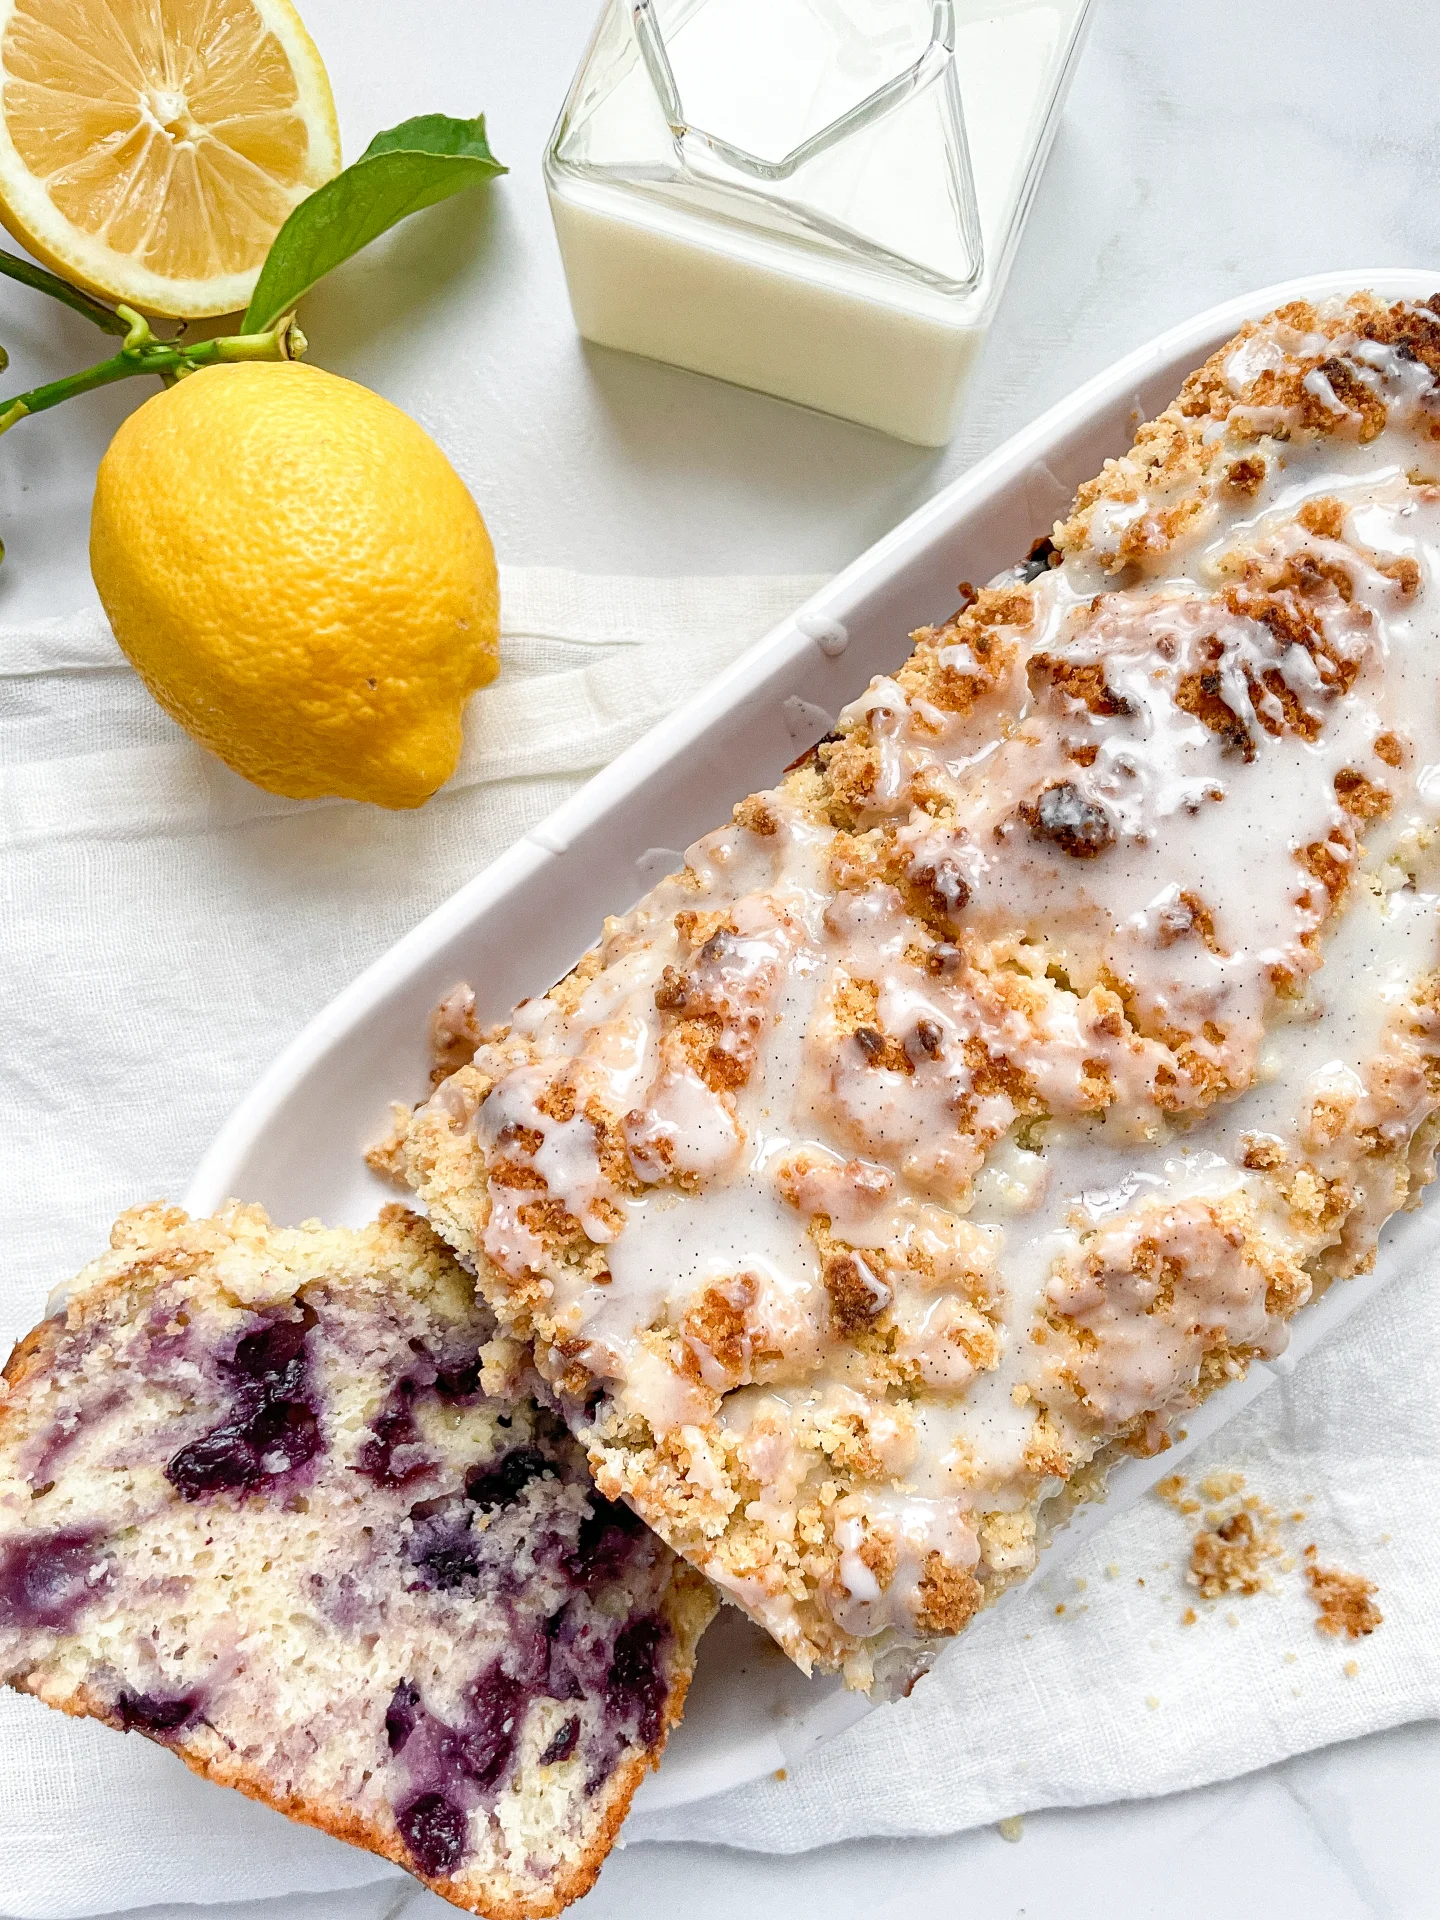
- zest of 1 lemon
- 2 egg whites
- 100 grams white sugar
- pinch of salt
- 1/8 tsp cream of tartar
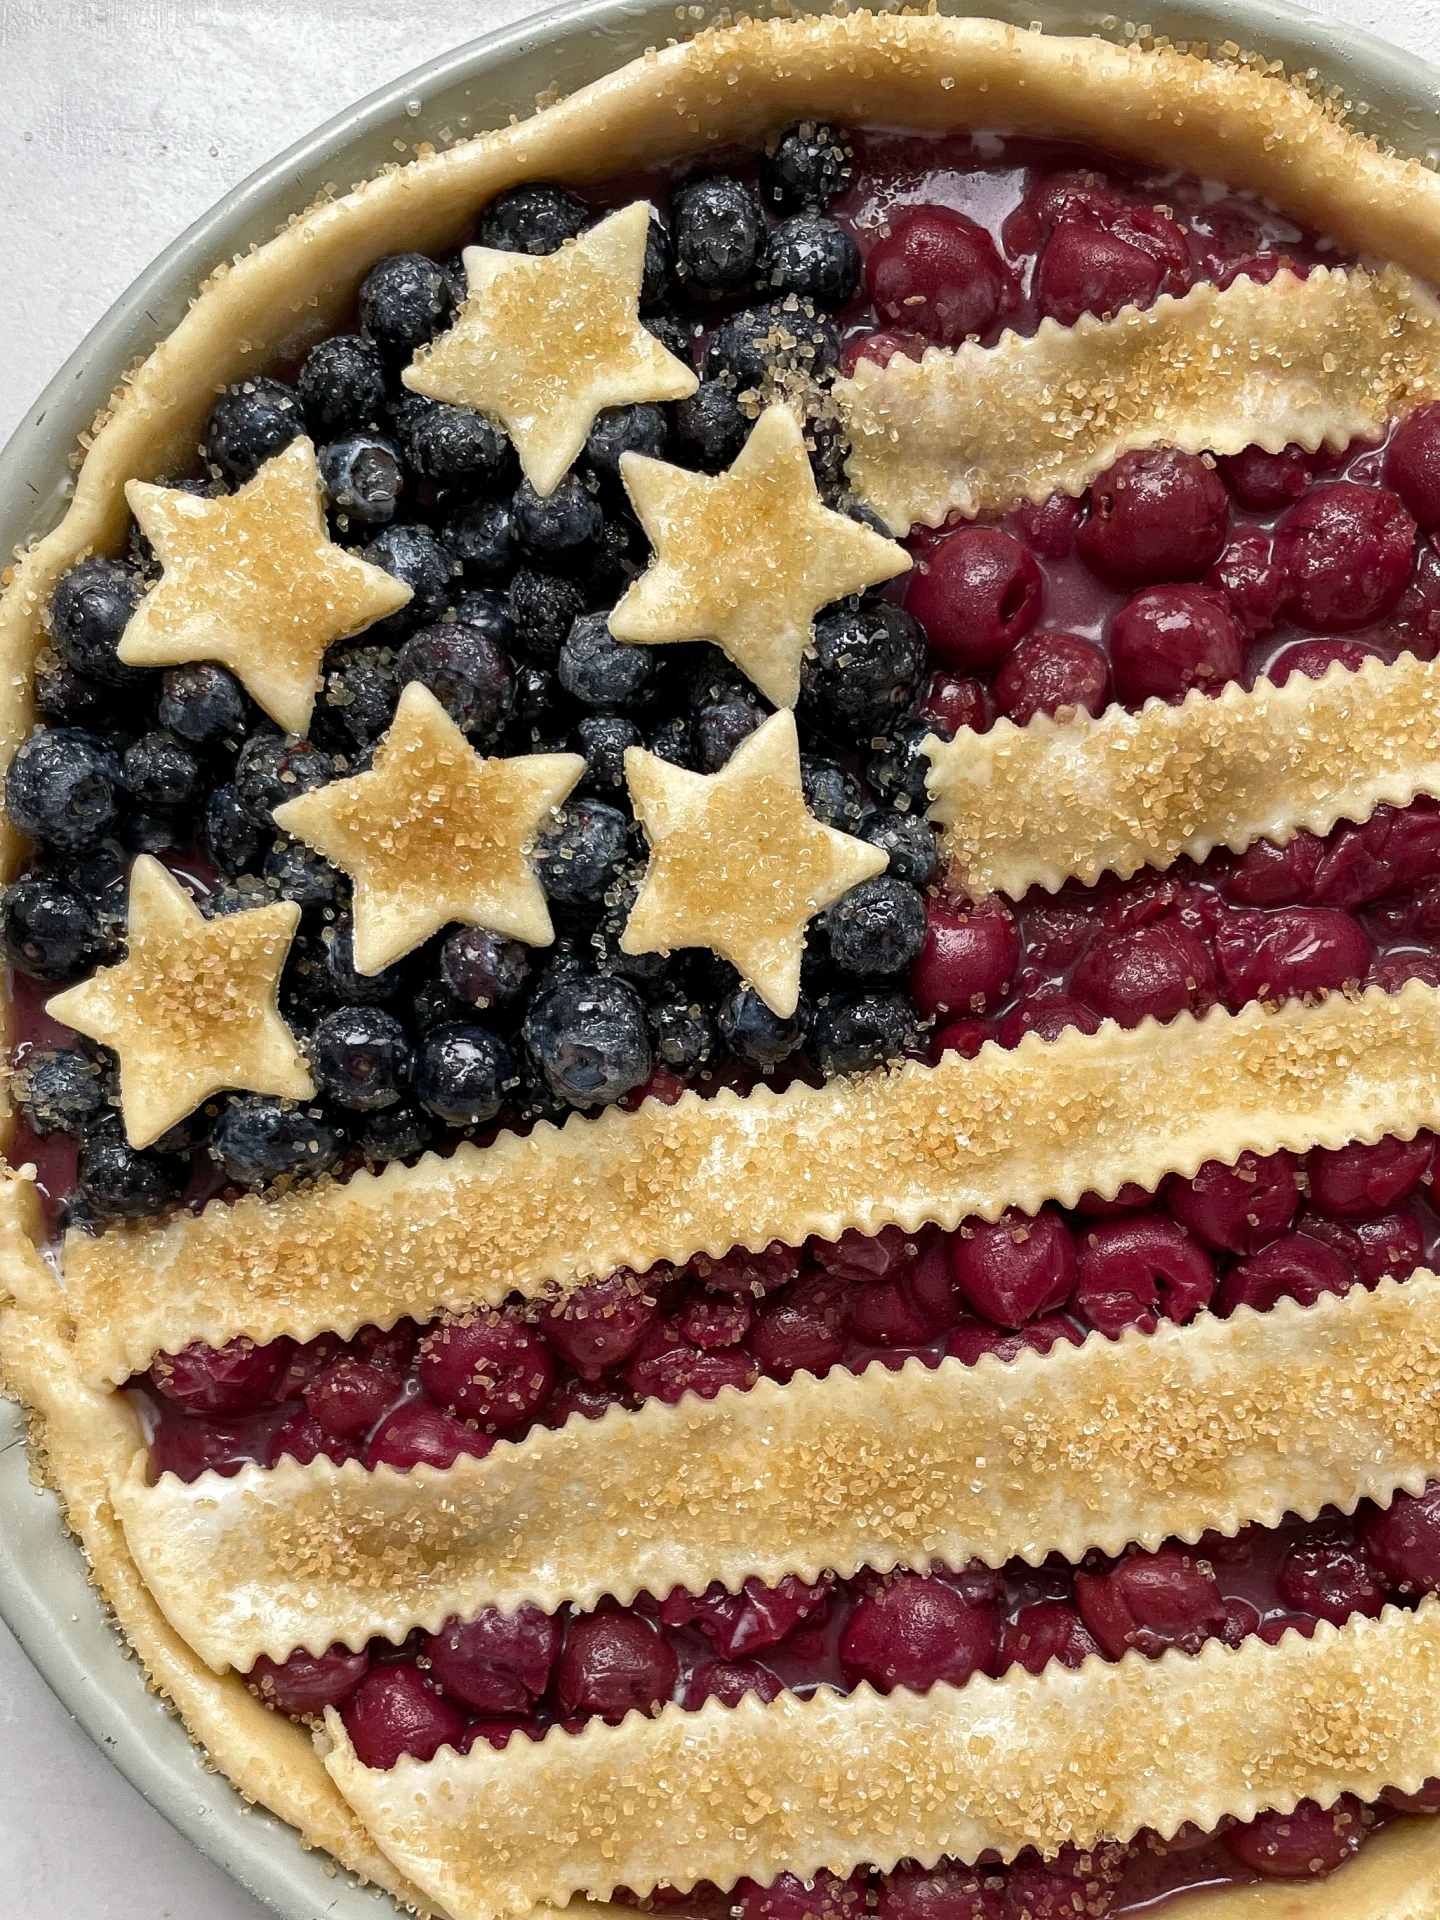
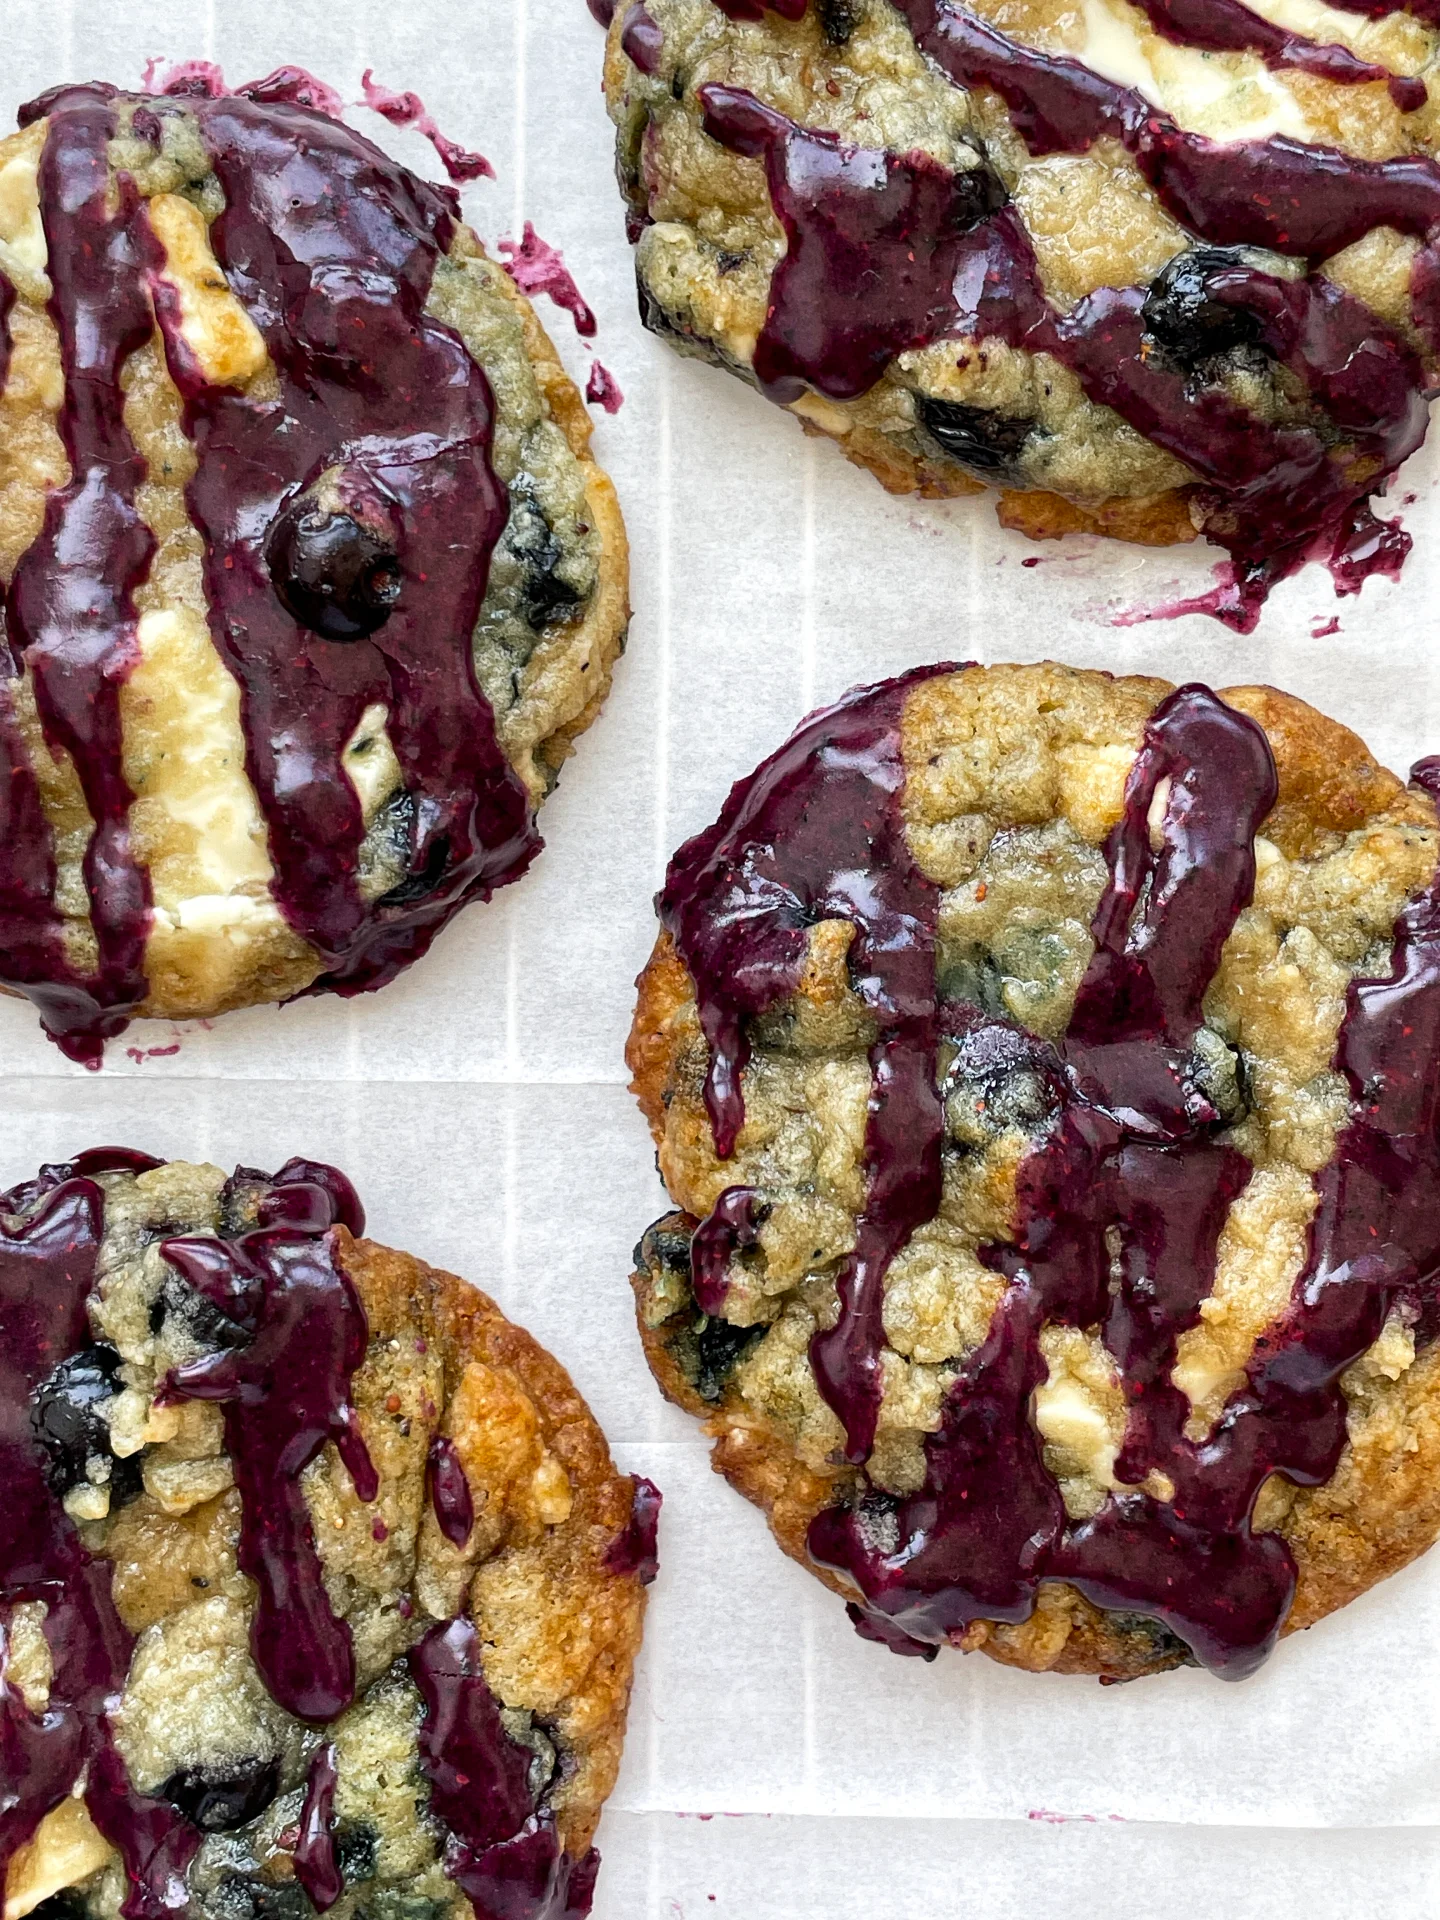
- 1.5 tbsp freeze-dried blueberries
- 100 grams frozen blueberries
- juice of 1/2 lemon
- 1 tsp white sugar
- pinch of salt
- fresh blueberries
- honey
Instructions
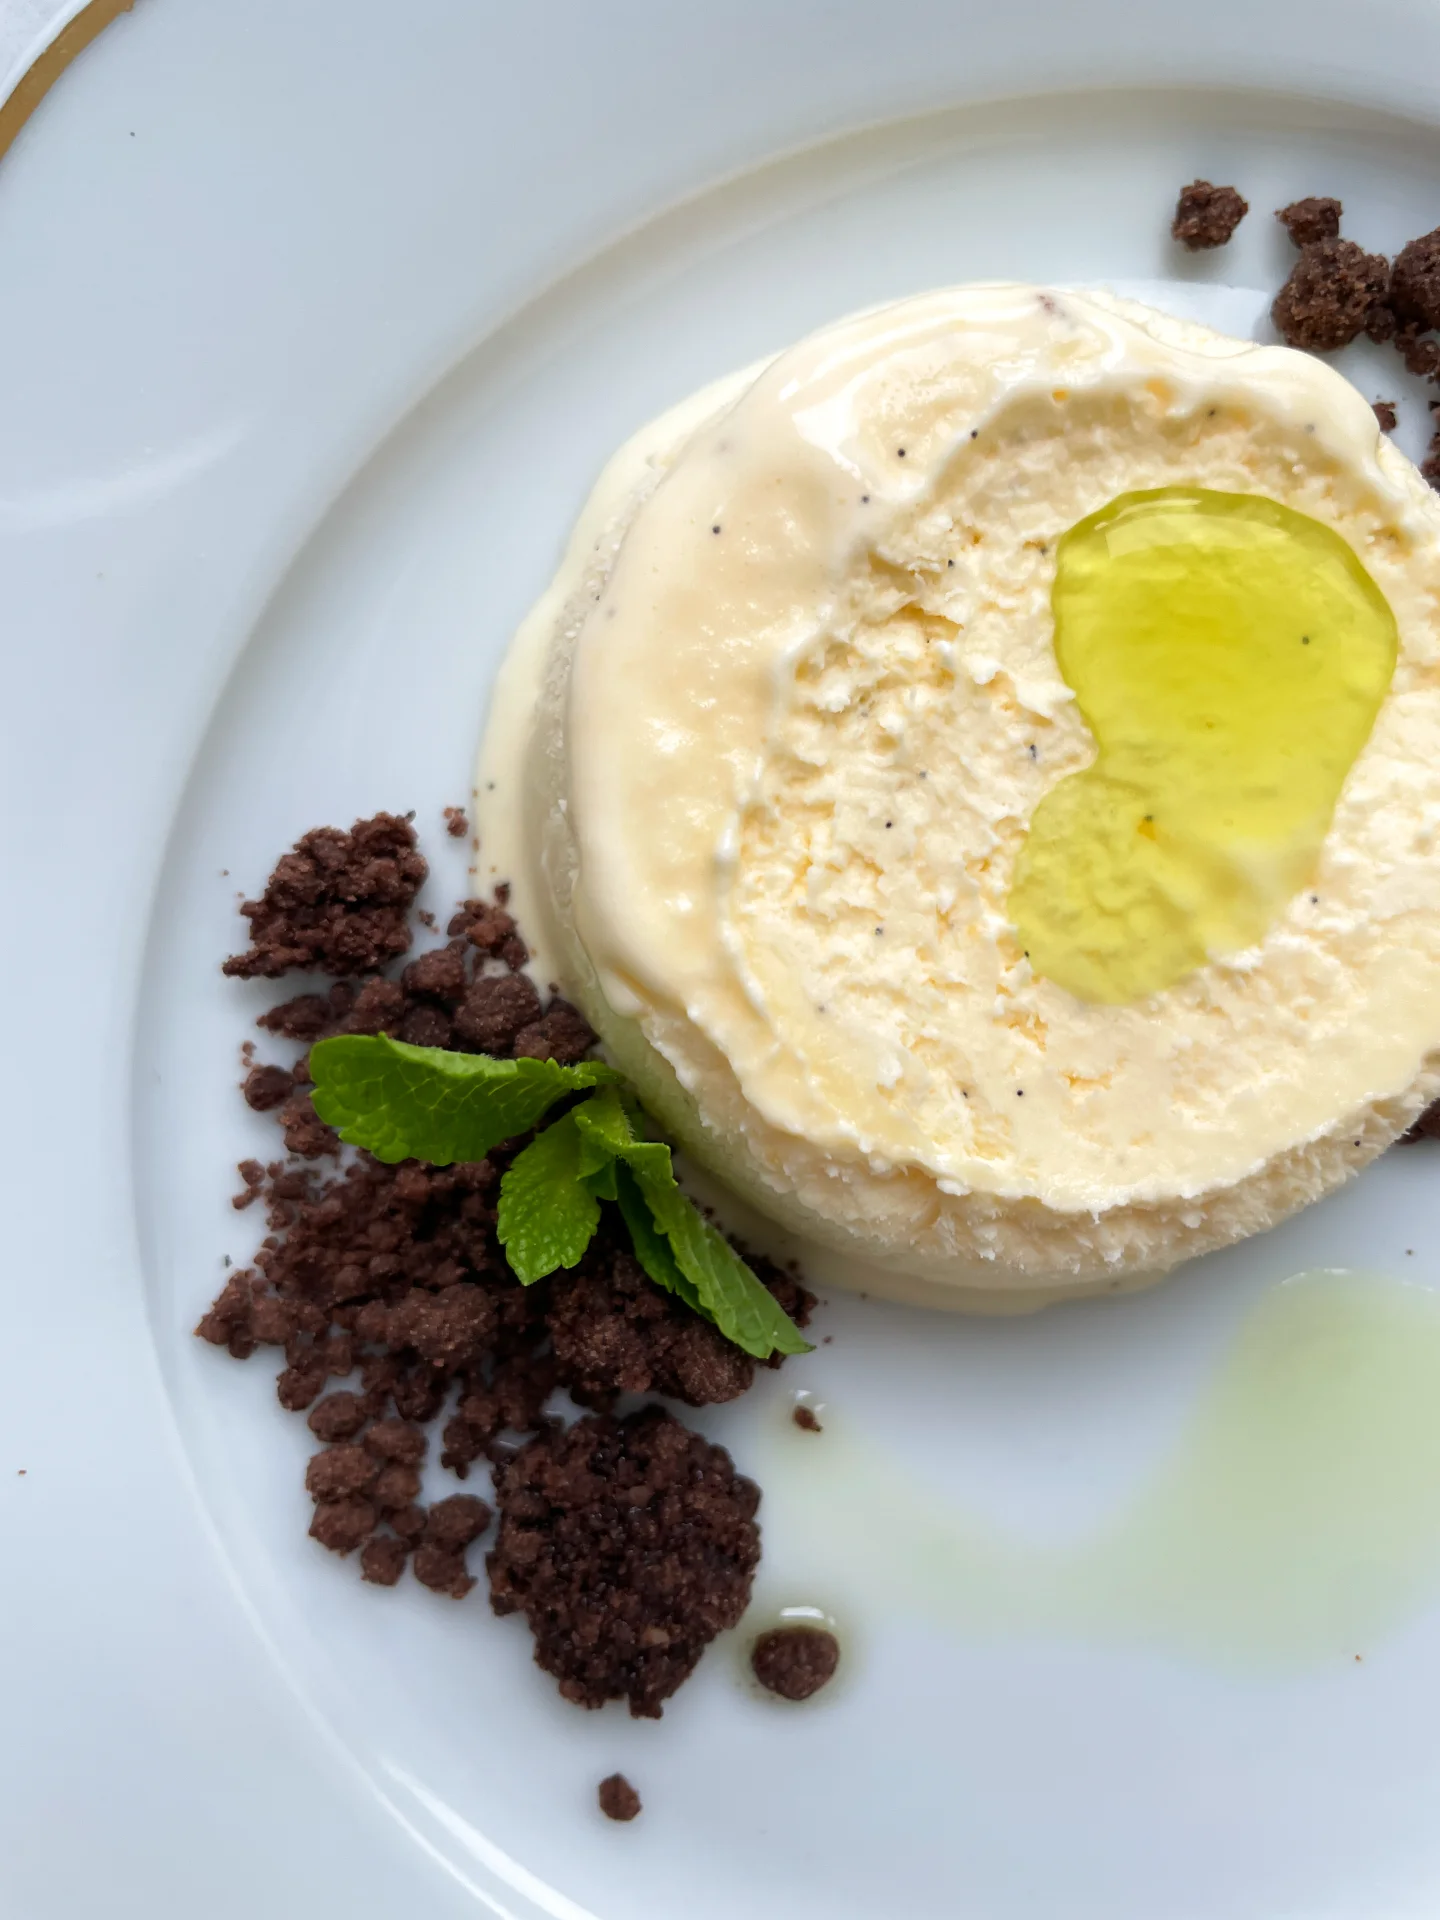
- Start by preparing the blueberry meringue. Preheat the oven to 100°C (212°F) with the fan on. Separate two eggs and place the egg whites into a bowl. Save the yolks for later, as you’ll use them to make the lemon pastry cream. Add a pinch of salt and the cream of tartar to the egg whites. Measure out the sugar and set it aside in a small bowl. Using an electric hand mixer, beat the egg whites on medium to high speed until they start to stiffen. Gradually add the sugar while continuing to beat the mixture until the egg whites are creamy, firm, glossy, and snow-white.
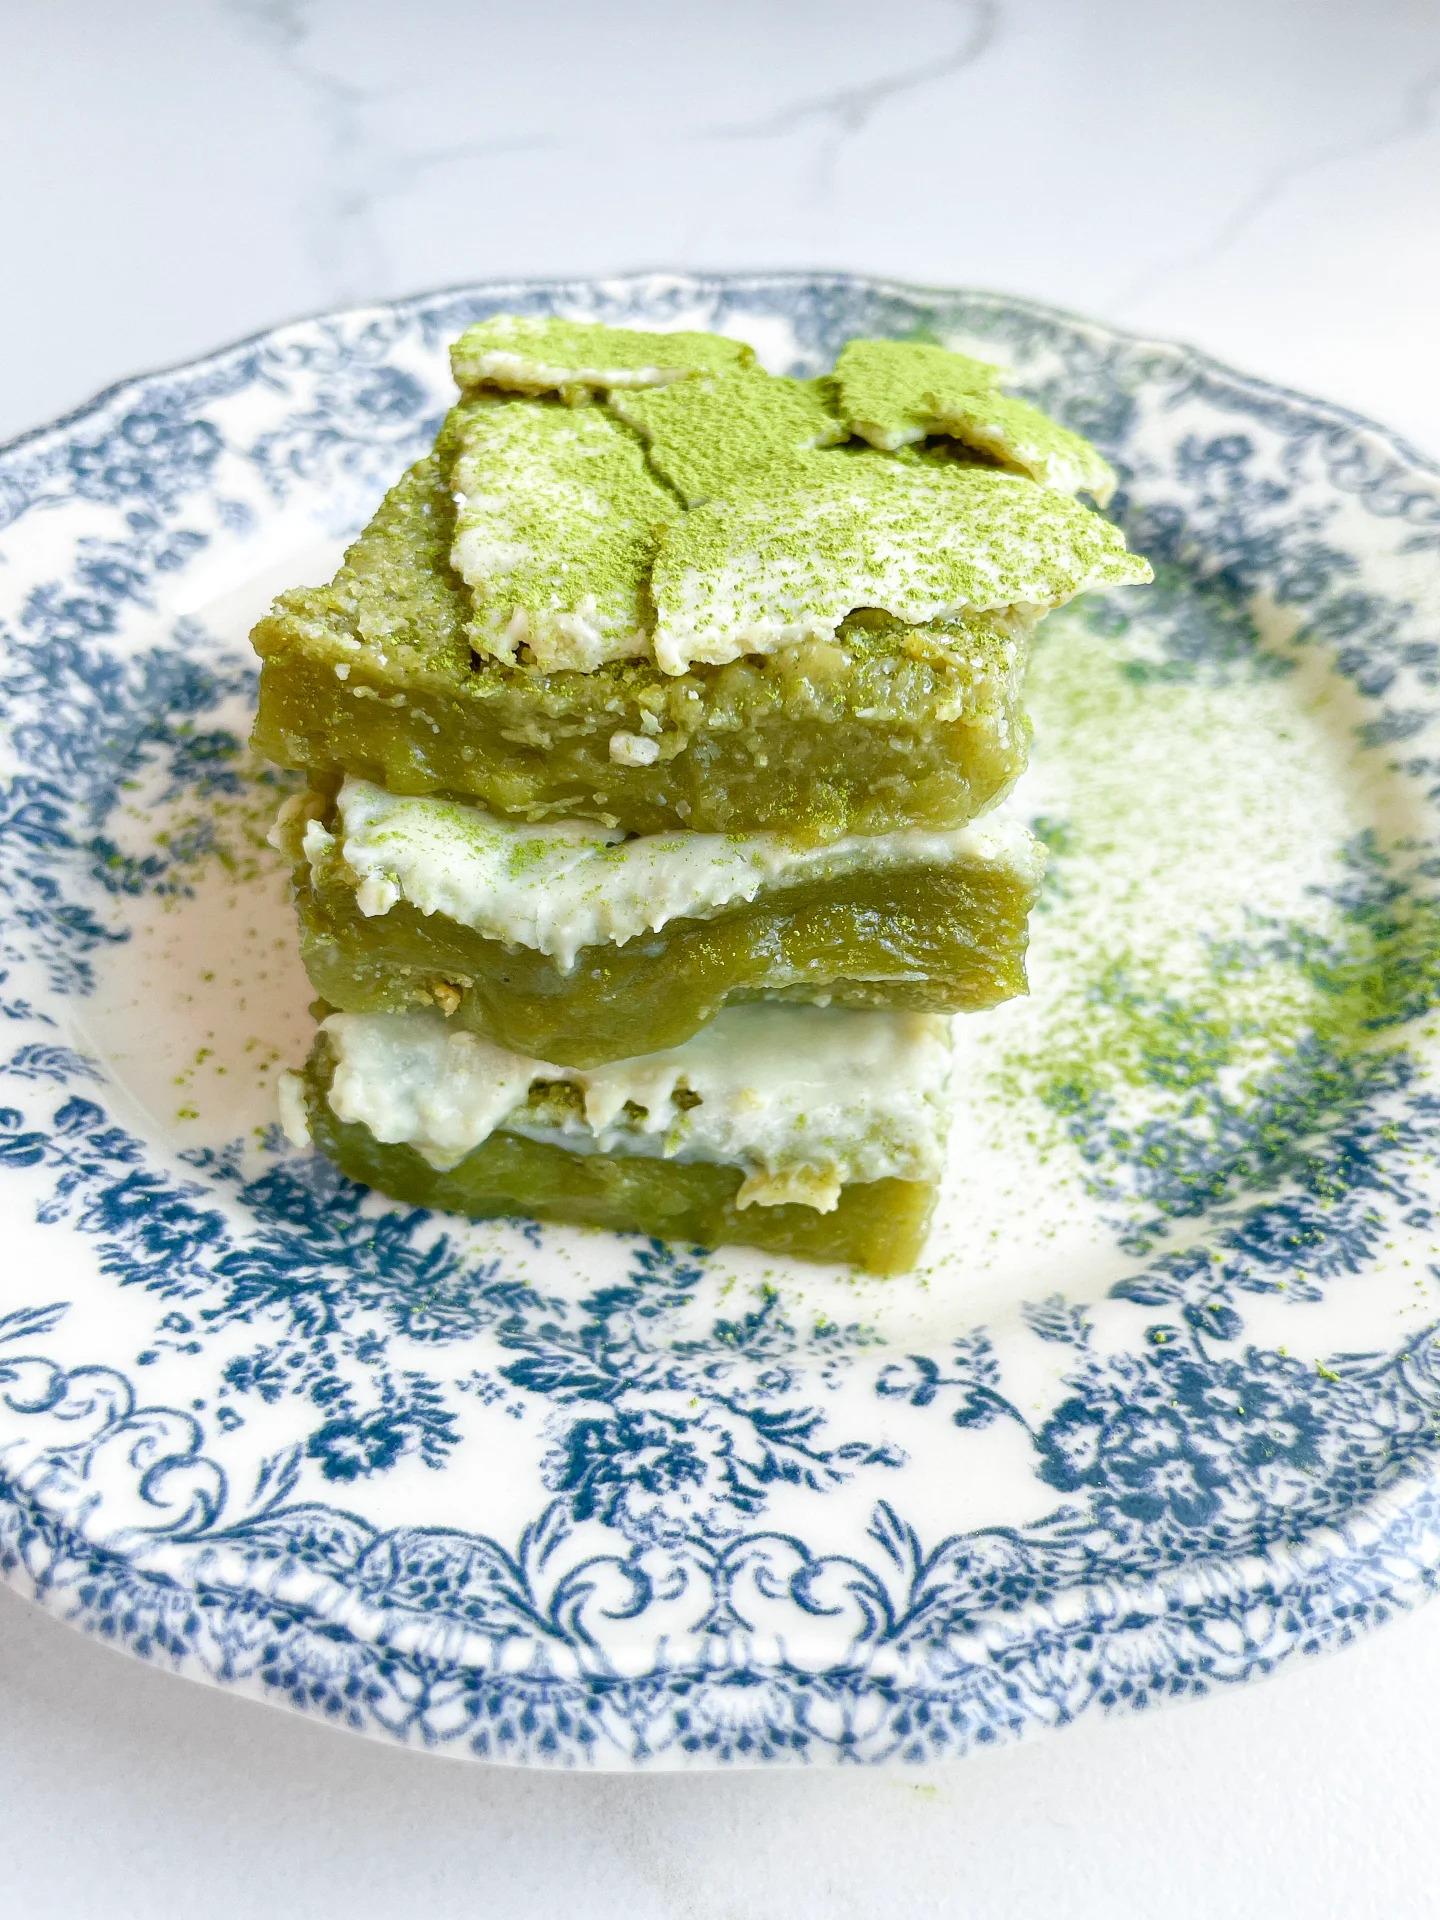
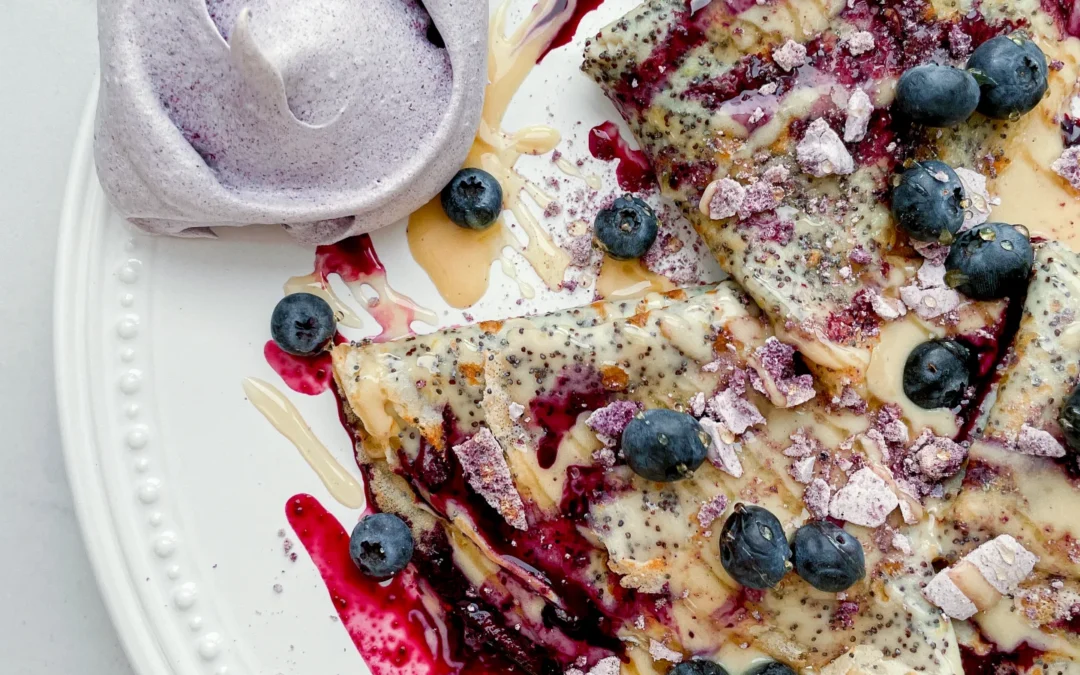
- Prepare the blueberry powder. Use a mortar and pestle to grind the freeze-dried blueberries into a fine powder. Gently fold the powder into the egg white mixture using a spatula until the mixture turns a light lavender color.
- Shape the meringues. Line a baking sheet with parchment paper. Using two tablespoons, spoon the egg white mixture onto the parchment, forming six individual mounds. Place the baking sheet in the oven for about 2 hours.
- Make the crepe batter. In a mixing bowl, combine flour, salt, milk, water, egg, melted butter, lemon zest, and poppy seeds. Stir until smooth, then refrigerate the batter for about 30 minutes.
- Prepare the lemon cream. In a small pot, combine milk and cream. Use a peeler to remove large strips of zest from a lemon, ensuring they are big enough to remove later. Heat the pot over medium heat, stirring occasionally to prevent a skin from forming. Heat until it begins to steam. Remove from the heat and set aside.
- Mix the lemon pastry cream. In a heatproof glass or metal bowl, combine the reserved egg yolks with flour, sugar, and vanilla extract. Stir until you have a smooth, creamy mixture.
- Combine and cook the cream. Gradually pour the warm milk and cream mixture into the egg yolk mixture, stirring constantly. Rinse the pot and fill it halfway with water. Bring the water to a simmer over medium heat, then place the bowl with the cream mixture over the pot, creating a double boiler. Heat the mixture to about 78°C (172°F) while stirring continuously, until it thickens to a creamy consistency. Once thickened, remove the bowl from the heat. Cover the cream with plastic wrap, pressing it directly onto the surface to prevent a skin from forming, and refrigerate.
- Prepare the blueberry sauce. In a small pot, combine the frozen blueberries with lemon juice, sugar, and a pinch of salt. Simmer over medium heat until the blueberries release their juices. Set aside.
- Cool the meringues. Once the meringues have finished baking, remove them from the oven and allow them to cool slightly.
- Cook the crepes. Heat a 20cm (8-inch) frying pan over medium heat. Add a small amount of butter, then wipe out the excess with a paper towel, leaving only a thin film. Pour about 4 tablespoons of batter into the pan, swirling quickly to spread it evenly. Cook for 1-2 minutes on one side, then flip and cook for another 30 seconds to 1 minute. Repeat with the remaining batter.
- Assemble the dish. Spread lemon pastry cream over each crepe, fold in half, then fold again to form a triangle. Drizzle the blueberry sauce over the crepes, crumble one meringue over each serving, and garnish with fresh blueberries and a drizzle of honey. Enjoy immediately!
- Passive Time: 1 hr 30 min
- Cook Time: 60 min