Vanilla Ice Cream Espresso Martini

Vanilla Ice Cream Espresso Martini

Vanilla Ice Cream Espresso Martini

Vanilla Ice Cream Espresso Martini

July 20, 20246 by Kimberly

This Vanilla Ice Cream Espresso Martini is both a cocktail and a dessert: bold espresso, coffee liqueur, and tequila meet a scoop of creamy vanilla ice cream that slowly melts into the drink. It makes the Espresso Martini smooth, cold, and almost like an affogato served in a cocktail glass. Perfect as an after-dinner dessert drink or as a special ending to an evening when coffee alone simply will not do.

This website uses affiliate links which may earn commission for purchases made at no additional cost to you.

TOTAL TIME

10 min

SERVES

2 cocktails

DIET

vegetarian

EVERY RECIPE DESERVES

A Little Love Letter

Sometimes, Classic Vanilla Ice Cream simply ends up in an Espresso Martini. This version is made for those evenings when you do not want to choose between a cocktail, coffee, and dessert.

To me, an Espresso Martini is one of those drinks that gets to be a little bit of everything at once. It is cold, bold, slightly sweet, and usually arrives at exactly the point when the evening has already been very good, but does not quite feel over yet.

For my version, I used tequila instead of vodka. It is joined by Kahlúa, a little sugar syrup if needed, a scoop of vanilla ice cream, ice cubes, and a fresh shot of espresso. The drink stays strong and slightly bitter, while the coffee liqueur adds just enough sweetness.

And then comes the part that turns the cocktail into a proper dessert: an extra scoop of vanilla ice cream placed directly into the martini glass.

The ice cream slowly melts into the Espresso Martini and changes it a little with every sip. At first, the coffee and tequila are still quite pronounced, but later the drink becomes softer, creamier, and almost reminiscent of an ice-cold affogato with coffee liqueur. That is why I skipped the classic coffee bean garnish altogether. The scoop of vanilla ice cream is already the main event.

Hi, I'm Kimberly!

Hi, I'm Kimberly.

A hopeless romantic when it comes to food. Every recipe I share is a love letter to food itself. I’m so glad you’re here. Make yourself at home and stay a while.

Love,
Kimberly

Kimberly the Zett Signature

If you want to get to know me better,
click here!


Vanilla Ice Cream Espresso Martini

LET’S MAKE A PIECE OF HAPPINESS

Print
clock clock iconcutlery cutlery iconflag flag iconfolder folder iconinstagram instagram iconpinterest pinterest iconfacebook facebook iconprint print iconsquares squares iconheart heart iconheart solid heart solid icon
Vanilla Ice Cream Espresso Martini

Vanilla Ice Cream Espresso Martini


5 Stars 4 Stars 3 Stars 2 Stars 1 Star

No reviews

  • Author: Kimberly
  • Total Time: 10 min
  • Yield: 2 1x

Description

This Vanilla Ice Cream Espresso Martini is both a cocktail and a dessert: bold espresso, coffee liqueur, and tequila meet a scoop of creamy vanilla ice cream that slowly melts into the drink. It makes the Espresso Martini smooth, cold, and almost like an affogato served in a cocktail glass. Perfect as an after-dinner dessert drink or as a special ending to an evening when coffee alone simply will not do.

GOOD TO HAVE ON HAND

  • cocktail shaker
  • cocktail measuring cup
  • martini glass

Ingredients

Units Scale
ICED ESPRESSO MARTINI
  • 2 scoops of classic vanilla ice cream
  • 40 milliliters tequila blanco
  • 20 milliliters coffee liquor
  • 2 shots of espresso
  • 4 tbsp crushed ice cubes
ASSEMBLY
  • 2 scoops of classic vanilla ice cream

Instructions

  1. Pull a shot of espresso and allow it to cool slightly.
  2. Add all the ingredients to a cocktail shaker and shake vigorously.
  3. Place one scoop of vanilla ice cream in each martini glass and pour the cocktail over it.
  • Prep Time: 10 min

CRAVING MORE?

Follow along here & don’t forget to subscribe to my substack!

Bruleed Salted Caramel Ice Cream

Bruleed Salted Caramel Ice Cream

Bruleed Salted Caramel Ice Cream

Bruleed Salted Caramel Ice Cream

July 19, 2026 by Kimberly

Imagine tapping your spoon through a thin, crisp caramel shell to find ice-cold, creamy salted caramel ice cream underneath. That is exactly what this crème brûlée ice cream is: warm and caramelized on top, soft, cold, and slightly salty underneath. Every spoonful brings together shards of caramel and melting ice cream – and that contrast is exactly what makes this dessert so good.

This website uses affiliate links which may earn commission for purchases made at no additional cost to you.

TOTAL TIME

10 min

SERVES

2 ramekins

DIET

vegetarian

EVERY RECIPE DESERVES

A Little Love Letter

You probably know by now that I like things to be a little special. Not necessarily complicated, but whenever a small idea can turn a good dessert into something even better, I have to try it. That is exactly how this Salted Caramel Crème Brûlée Ice Cream came to be.

It started with my Salted Caramel Ice Cream, which is already perfectly good on its own. But then I started thinking about crème brûlée – more specifically, that moment when the spoon breaks through the thin, firm sugar crust. Probably one of the best sounds a dessert can make. Naturally, the question followed: why shouldn’t that work on ice cream too? It does. Surprisingly well, in fact.

Underneath the caramel layer, the ice cream stays cold and creamy. With the first spoonful, the crust breaks into small pieces that mix with the soft salted caramel ice cream. Sweet caramel, a little salt, and that contrast between crisp and creamy.

For the crust, I did not simply use regular sugar this time. I first melted it into a dark caramel, let it cool and harden completely, and then ground it into a fine powder. This allows the caramel powder to melt especially quickly under the blowtorch while adding even more depth and toasted flavour. It does not just taste like caramelized sugar, but intensely of caramel, which is of course perfect with the ice cream.

You can still skip that extra step and use regular sugar instead. The dessert works very well that way too. The caramel version is more for those days when you feel like a small kitchen experiment and a little extra effort suddenly seems entirely reasonable.

Hi, I'm Kimberly!

Hi, I'm Kimberly.

A hopeless romantic when it comes to food. Every recipe I share is a love letter to food itself. I’m so glad you’re here. Make yourself at home and stay a while.

Love,
Kimberly

Kimberly the Zett Signature

If you want to get to know me better,
click here!


Bruleed Salted Caramel Ice Cream

LET’S MAKE A PIECE OF HAPPINESS

Print
clock clock iconcutlery cutlery iconflag flag iconfolder folder iconinstagram instagram iconpinterest pinterest iconfacebook facebook iconprint print iconsquares squares iconheart heart iconheart solid heart solid icon
Bruleed Salted Caramel Ice Cream

Bruleed Salted Caramel Ice Cream


  • Author: Kimberly
  • Total Time: 10 min
  • Yield: 2 ramekins 1x

Description

Imagine tapping your spoon through a thin, crisp caramel shell to find ice-cold, creamy salted caramel ice cream underneath. That is exactly what this crème brûlée ice cream is: warm and caramelized on top, soft, cold, and slightly salty underneath. Every spoonful brings together shards of caramel and melting ice cream – and that contrast is exactly what makes this dessert so good.

GOOD TO HAVE ON HAND

  • kitchen torch
  • small saucepan
  • parchment paper
  • heatproof ramekins
  • small sieve

Ingredients

Units Scale

Instructions

  1. Optional: Caramelize the sugar in a small saucepan, then pour it onto a sheet of parchment paper. Leave it to cool completely and harden. Once set, transfer the caramel to a food processor and blend it into a fine powder. You can skip this step and use regular white sugar instead.
  2. Spoon the ice cream into the ramekins and smooth the surface, leaving a little room at the top. Sift the caramel powder or regular white sugar evenly over the ice cream using a small sieve. Briefly torch the surface until the sugar melts and forms a firm caramel shell.
  3. Serve immediately or return the ramekins to the freezer until ready to serve.
  • Prep Time: 10 min

CRAVING MORE?

Follow along here & don’t forget to subscribe to my substack!

Pistachio White Chocolate Cookies

Pistachio White Chocolate Cookies

Pistachio White Chocolate Cookies

Bakery Style Pistachio White Chocolate Cookies

June 14, 2026 by Kimberly

These cookies are soft, thick, chewy, and filled with creamy pistachio cream. They are based on my bakery style vanilla cookie dough, but made with sweet white chocolate and a little pistachio cream filling that melts into the middle while baking. The dough is shaped like a little cookie sandwich, chilled until firm, and baked straight from frozen for that perfect bakery-style texture: slightly crisp on the outside, soft in the middle, and beautifully rich without being complicated.

This website uses affiliate links which may earn commission for purchases made at no additional cost to you.

TOTAL TIME

30 min

SERVES

10 cookies

DIET

vegetarian

EVERY RECIPE DESERVES

A Little Love Letter

I already knew I loved this cookie. It is the kind of dough that makes you understand why bakery cookies always feel a little more special than regular homemade cookies. Thick, soft, slightly chewy, buttery in the best way, and honestly just dramatic enough to deserve its own little moment.

This recipe is based on my Bakery Style Vanilla Cookie dough, which has quickly become one of those recipes I want to use again and again. Once you have a good base cookie dough, it almost feels rude not to play around with it. And because I love pistachio cream this version had to happen.

These cookies are made with white chocolate and filled with a little spoonful of pistachio cream in the center. The dough is shaped almost like a tiny cookie sandwich: one small scoop of dough, a little press with a spoon, a spoonful of pistachio cream, and then another scoop of dough on top.

After baking, the cookies are slightly crisp on the outside, soft and chewy in the middle, with little pockets of white chocolate and that creamy pistachio center. They are rich, but not too much. Sweet, but balanced by the nutty pistachio. And honestly, they feel like the kind of cookie you would buy from a tiny bakery where everything is a little expensive, but somehow still completely worth it.

And the best part: you can freeze the shaped cookie dough balls and bake them straight from frozen whenever you want. Which means warm pistachio white chocolate cookies are never really that far away.

Hi, I'm Kimberly!

Hi, I'm Kimberly.

A hopeless romantic when it comes to food. Every recipe I share is a love letter to food itself. I’m so glad you’re here. Make yourself at home and stay a while.

Love,
Kimberly

Kimberly the Zett Signature

If you want to get to know me better,
click here!


Pistachio White Chocolate Cookies

LET’S MAKE A PIECE OF HAPPINESS

Print
clock clock iconcutlery cutlery iconflag flag iconfolder folder iconinstagram instagram iconpinterest pinterest iconfacebook facebook iconprint print iconsquares squares iconheart heart iconheart solid heart solid icon
Pistachio White Chocolate Cookies

Bakery Style Pistachio White Chocolate Cookies


  • Author: Kimberly
  • Total Time: 30 min
  • Yield: 10 cookies 1x

Description

These bakery style pistachio white chocolate cookies are soft, thick, chewy, and filled with creamy pistachio cream in the center. They are based on my bakery style vanilla cookie dough, but made with sweet white chocolate and a little pistachio cream filling that melts into the middle while baking. The dough is shaped like a little cookie sandwich, chilled until firm, and baked straight from frozen for that perfect bakery-style texture: slightly crisp on the outside, soft in the middle, and beautifully rich without being complicated.

GOOD TO HAVE ON HAND

  • electric mixer with bowl
  • scale
  • small cookie scoop
  • parchment paper
  • small spoon

Ingredients

Units Scale
  • 115 grams soft butter
  • 90 grams brown sugar
  • 40 grams white sugar
  • 1 egg
  • 1 tsp vanilla extract
  • 240 grams all-purpose flour
  • 1 tsp corn starch
  • 1/2 tsp baking soda
  • 1/2 tsp salt
  • 100 grams white chocolate
  • 60 grams pistachio cream (about 10 tsp)

Instructions

  1. Add the butter to a mixing bowl and beat for about 3 minutes, until pale and fluffy. Add the brown sugar and white sugar and beat for another 1–2 minutes, until creamy.
  2. Add the egg, vanilla extract, and butter flavoring, and mix just until everything is combined. Do not overmix.
  3. Add the flour, cornstarch, baking soda, and salt, and mix briefly until the dough has almost come together. Add the white chocolate and mix just until no streaks of flour remain and everything is evenly incorporated.
  4. Line a small baking sheet with parchment paper. Using a small cookie scoop, scoop 10 small balls of dough and place them onto the baking sheet. Gently press each dough ball down with a spoon to flatten it slightly.
  5. Add about 1 tsp of pistachio cream to the center of each flattened cookie dough ball.
  6. Scoop 10 more small balls of cookie dough and place one on top of each pistachio-filled cookie. Gently press down so the dough sticks together and forms a little sandwich.
  7. Place the shaped cookie dough balls in the freezer for at least 3 hours.
  8. Before baking, fully preheat the oven to 190°C / 375°F. Place the frozen cookie dough balls on a baking sheet with enough space between them so they do not spread into each other.
  9. Bake the cookies for about 12–14 minutes, depending on how browned you like them. Let them cool on the baking sheet for at least 30 minutes.
  10. The cookies can be eaten once they have cooled, but they are especially good if you let them rest in the fridge for a few hours after they have cooled completely. That is when they get that real bakery-style texture.

  • Prep Time: 15 min
  • Cook Time: 13 min

CRAVING MORE?

Follow along here & don’t forget to subscribe to my substack!

Yogurt Ice Cream

Yogurt Ice Cream

Yoghurt Ice Cream

Yogurt Ice Cream

May 26, 2026 by Kimberly

This extra creamy homemade frozen yogurt tastes like summer from your favorite little ice cream shop, only made in your own kitchen and in exactly the amount you want. With just five ingredients, it turns into a fresh, slightly tangy, beautifully creamy frozen yogurt in only 20 minutes. It gets even better with strawberry sauce and white chocolate shavings for homemade spaghetti ice cream.

This website uses affiliate links which may earn commission for purchases made at no additional cost to you.

TOTAL TIME

20 min

SERVES

6 big scoops

DIET

vegetarian

EVERY RECIPE DESERVES

A Little Love Letter

My mom and I were on the phone and somehow we ended up talking about making ice cream at home. And not just any ice cream, but frozen yogurt. The really good kind: creamy, slightly tangy, fresh, and so delicious that you kind of want to order ten scoops of it. Our love for frozen yogurt goes so far that we even order spaghetti ice cream with frozen yogurt instead of vanilla ice cream. I know. Maybe not classic. But very correct.

And while we were talking about how dreamy it would be to make that exact kind of ice cream at home, I suddenly had one of those moments where I thought: why not? I had been eyeing an ice cream machine for ages. So I finally just ordered it, and I can say with full confidence: best decision of my life. At least in the category of kitchen appliances.

For my perfect homemade frozen yogurt, I only need five ingredients: yogurt, cream, milk, sugar, and a little lemon juice. That’s it. This exact combination makes the ice cream beautifully creamy, fresh, and not too heavy. It tastes like summer, like an ice cream shop, like “I only wanted one little scoop, but now the bowl is empty.”

When the frozen yogurt came out of the ice cream machine after only 15 minutes, I was honestly speechless for a second. It was truly perfect. So, naturally, I called my mom again right away and simply said: “It turned out perfect.” No further convincing was needed. My parents ordered the ice cream machine immediately after. And now? Now the whole family is basically just producing ice cream.

Hi, I'm Kimberly!

Hi, I'm Kimberly.

A hopeless romantic when it comes to food. Every recipe I share is a love letter to food itself. I’m so glad you’re here. Make yourself at home and stay a while.

Love,
Kimberly

Kimberly the Zett Signature

If you want to get to know me better,
click here!


LET’S MAKE A PIECE OF HAPPINESS

Print
clock clock iconcutlery cutlery iconflag flag iconfolder folder iconinstagram instagram iconpinterest pinterest iconfacebook facebook iconprint print iconsquares squares iconheart heart iconheart solid heart solid icon
Yogurt Ice Cream

Yogurt Ice Cream


  • Author: Kimberly
  • Total Time: 20 min
  • Yield: 2-3 portions 1x

Description

This extra creamy homemade frozen yogurt tastes like summer from your favorite little ice cream shop, only made in your own kitchen and in exactly the amount you want. With just five ingredients, it turns into a fresh, slightly tangy, beautifully creamy frozen yogurt in only 15 minutes. It gets even better with strawberry sauce and white chocolate shavings for homemade spaghetti ice cream.

GOOD TO HAVE ON HAND

  • ice cream maker
  • big bowl
  • whisk

Ingredients

Units Scale
  • 500 grams full-fat yogurt (10% fat)
  • 100 grams full-fat cow milk (3,5% fat)
  • 100 grams heavy cream
  • 100 grams white sugar
  • 1/2 lemon

Instructions

  1. Depending on your ice cream machine, place the cooling bowl in the freezer at least 24 hours in advance.
  2. For the ice cream mixture, add the yogurt, milk, cream, sugar, and a little lemon juice to a large bowl. Whisk everything thoroughly until the sugar has dissolved and the mixture is smooth.
  3. Turn on the ice cream machine and pour in the entire yogurt mixture. Let the ice cream churn for about 15 minutes, until it has a creamy frozen yogurt consistency.
  4. If you want to enjoy the frozen yogurt soft and creamy, you can serve it right away. For firm scoops of ice cream, transfer the mixture to a container and place it in the freezer for another 3–4 hours.
  • Prep Time: 5 min
  • Passive Time: 15

CRAVING MORE?

Follow along here & don’t forget to subscribe to my substack!

Shichimi Togarashi (Japanese 7 Spice Blend)

Shichimi Togarashi (Japanese 7 Spice Blend)

Shichimi Togarashi (Japanese 7 Spice Blend)

Shichimi Togarashi (Japanese 7 Spice Blend)

April 10, 2025 by Kimberly

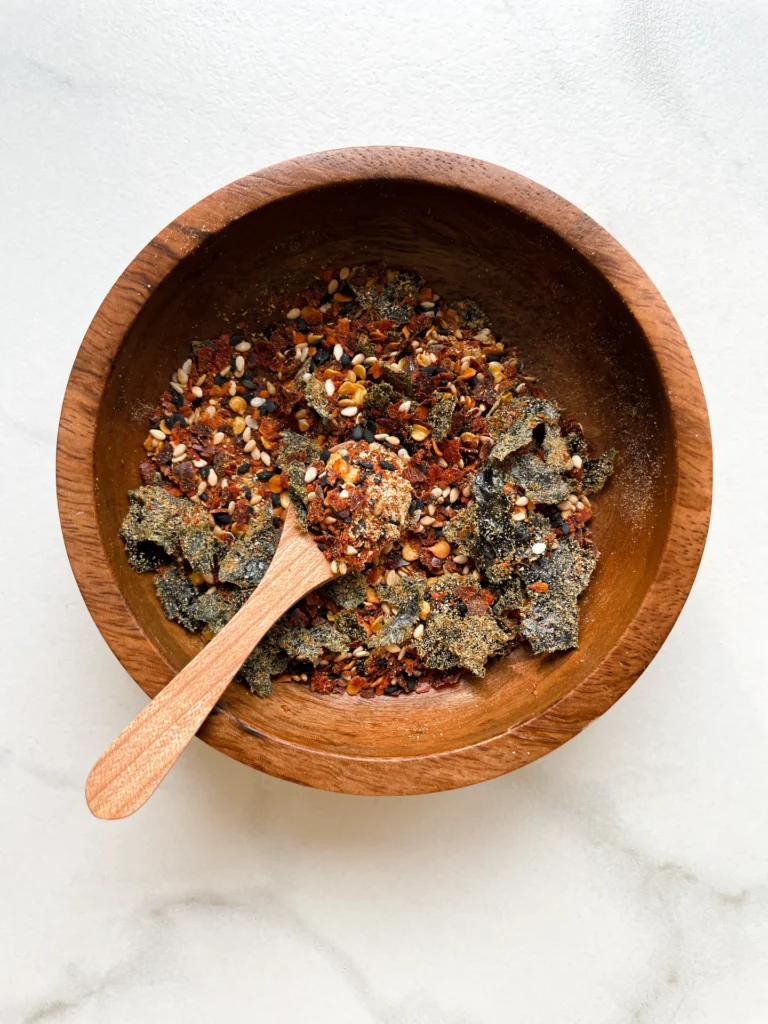
Making Shichimi Togarashi at home sounds more complicated than it actually is, because in reality, it comes together in no time. This Japanese seven-spice blend combines chili, sesame, nori, and orange peel into a flavor that’s not just spicy, but also fresh, nutty, and lightly citrusy. Just a pinch is enough to turn everyday dishes into something instantly more exciting. Sprinkle it over dumplings, avocado toast, or ramen, and suddenly it tastes like an evening at a Tokyo street market. That’s the magic of Shichimi Togarashi. A little adventure in your everyday cooking.

This website uses affiliate links which may earn commission for purchases made at no additional cost to you.

TOTAL TIME

10 min

SERVES

3 tbsp

DIET

vegan

EVERY RECIPE DESERVES

A Little Love Letter

It might sound fancy, but at the end of the day it’s really just a bold, citrusy-spicy topping with a whole lot of personality. Chili with character, toasted sesame, a hint of orange zest. Together they transform “tastes good” into “tastes special.” It’s that perfect balance of fiery, salty, and fresh that makes any dish feel instantly more alive. Almost like bringing street food vibes into your own kitchen, minus the effort and chaos.

I honestly use this spice blend all the time. In my Crispy Pork Gyoza, Miso Ginger Oil Glaze & Fried Seaweed, it pulls all the flavors together like the final brushstroke on a painting. And in my Kimchi Gyoza, it delivers just the right kick that makes my friends and family ask, “Wait, what’s in this?!” That’s my favorite moment when everyone thinks I’ve been fussing with some secret technique, but it was really just a tiny spoonful of this mix. The best part? There’s zero planning involved. A quick sprinkle and suddenly the whole dish feels elevated.

And of course, you’ll want to keep it fresh. I always store mine in a small airtight jar in the pantry. That way, it keeps its full flavor for about two to three months. It’s the kind of simple little habit that makes cooking so much more fun: one unassuming jar on the shelf that has the power to make your food taste ten times more interesting, without you having to lift a finger more than usual. And now, that so-called fancy flavor is just your everyday companion. A jar that started out sounding special and elaborate has quietly turned into the easiest little ritual in your kitchen.

Hi, I'm Kimberly!

Hi, I'm Kimberly.

A hopeless romantic when it comes to food. Every recipe I share is a love letter to food itself. I’m so glad you’re here. Make yourself at home and stay a while.

Love,
Kimberly

Kimberly the Zett Signature

If you want to get to know me better,
click here!


Shichimi Togarashi (Japanese 7 Spice Blend)

LET’S MAKE A PIECE OF HAPPINESS

Print
clock clock iconcutlery cutlery iconflag flag iconfolder folder iconinstagram instagram iconpinterest pinterest iconfacebook facebook iconprint print iconsquares squares iconheart heart iconheart solid heart solid icon
Shichimi Togarashi (Japanese 7 Spice Blend)

Shichimi Togarashi (Japanese 7 Spice Blend)


  • Author: Kimberly
  • Total Time: 10 min
  • Yield: 3 tbsp 1x

Description

Making Shichimi Togarashi at home sounds more complicated than it actually is, because in reality, it comes together in no time. This Japanese seven-spice blend combines chili, sesame, nori, and orange peel into a flavor that’s not just spicy, but also fresh, nutty, and lightly citrusy. Just a pinch is enough to turn everyday dishes into something instantly more exciting. Sprinkle it over dumplings, avocado toast, or ramen, and suddenly it tastes like an evening at a Tokyo street market. That’s the magic of Shichimi Togarashi. A little adventure in your everyday cooking.

GOOD TO HAVE ON HAND

  • mortar & pestle
  • sealable jar

Ingredients

Scale
  • 1 tbsp chili flakes
  • 1 tsp orange zest
  • 1/2 tsp Szechuan pepper corns
  • 1/2 tsp white sesame seeds
  • 1/2 tsp black sesame seeds
  • 1/4 nori sheet
  • 1/4 tsp ginger powder

Instructions

  1. Toast ½ tsp white sesame seeds and ½ tsp black sesame seeds in a dry pan over medium heat until golden and fragrant.
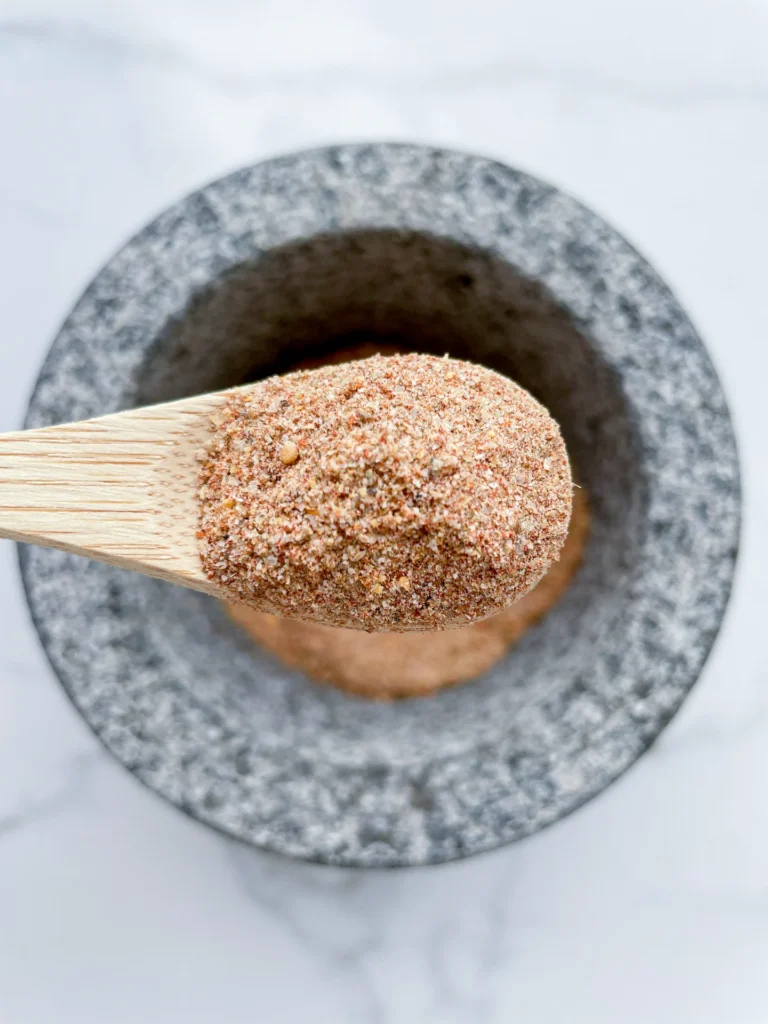
  2. Add ½ tsp Szechuan peppercorns and ¼ nori sheet (torn into small pieces) to a mortar and grind them finely, or use a spice grinder if you prefer.
  3. Combine the ground spices with 1 tbsp chili flakes, 1 tsp orange zest, and ¼ tsp ginger powder in a sealable jar. Give it a good shake to mix everything together.
  • Prep Time: 10 min

CRAVING MORE?

Follow along here & don’t forget to subscribe to my substack!

Kimchi Gyoza

Kimchi Gyoza

Kimchi Gyoza

Kimchi Gyoza

April 10, 2025 by Kimberly

Crispy, spicy, a little funky in the best way. These little pan-fried dumplings pack serious flavor. Perfect for when you’re craving something cozy but still want to feel mildly impressive.

This website uses affiliate links which may earn commission for purchases made at no additional cost to you.

TOTAL TIME

30 min

SERVES

20 gyoza

DIET

vegan

EVERY RECIPE DESERVES

A Little Love Letter

There’s something weirdly comforting about standing over a hot pan, crisping up dumplings that smell like spice, garlic, and pure satisfaction. I used my homemade version (linked here if you want to try it), but honestly, store-bought kimchi will do just fine. No judgment.

Serve these right out of the pan while they’re still sizzling, with this dipping sauce. They work perfectly as an appetizer, a dinner for one (or two if you’re sharing), or even as a party snack that disappears suspiciously fast.

Leftovers? Rare, but if you do have a few, pop them into an airtight container and keep them in the fridge for up to 2 days. Reheat in a pan to keep that crispiness alive. They also freeze like a dream just pan-fry straight from frozen.

Hi, I'm Kimberly!

Hi, I'm Kimberly.

A hopeless romantic when it comes to food. Every recipe I share is a love letter to food itself. I’m so glad you’re here. Make yourself at home and stay a while.

Love,
Kimberly

Kimberly the Zett Signature

If you want to get to know me better,
click here!


Homemade Kimchi
Kimchi Gyoza
Kimchi Gyoza
Homemade Kimchi

LET’S MAKE A PIECE OF HAPPINESS

Print
clock clock iconcutlery cutlery iconflag flag iconfolder folder iconinstagram instagram iconpinterest pinterest iconfacebook facebook iconprint print iconsquares squares iconheart heart iconheart solid heart solid icon
Kimchi Gyoza

Kimchi Gyoza


  • Author: Kimberly
  • Total Time: 30 min
  • Yield: 20 gyoza 1x

Description

RECOMMENDED EQUIPMENT

  • large pan with a lid
  • small bowl

Ingredients

Units Scale

Instructions

  1. If you’re making your own kimchi and gyoza wrappers: amazing. If not, no worries! Just use store-bought and make sure to thaw the wrappers before using.
  2. Set up your kimchi, the gyoza wrappers, and a small bowl of cold water. Also, prep a large plate dusted with a bit of flour to place your finished dumplings. Now put on your favorite series or podcast and get into your folding zone.
  3. Take one wrapper and place about 1–1.5 teaspoons of kimchi filling in the center. Dip your finger in the water and moisten the edge of the top half of the wrapper. Fold it up like a taco and press the left tip with your left hand. Then, using your right thumb and index finger, create small pleats along the top edge, pressing each one firmly into the back side of the wrapper. Continue pleating until it’s sealed and you’re holding your first little dumpling. Place it on the floured plate. Don’t stress if it’s not perfect, this takes a bit of practice. Scroll down for the video tutorial at the end of the recipe if you need a visual! Repeat until all the wrappers and filling are used up.
  4. Once all your gyoza are ready, heat a large pan over medium heat. Add 1 tablespoon of oil and place as many gyoza as will fit flat-side down in the pan. Let them fry for a few minutes until the bottoms are golden and crispy. Lower the heat, carefully pour in a splash of water, and immediately cover with the lid. Be careful, the oil shouldn’t be too hot or it might splatter! The gyoza will now steam. Keep the lid on until the wrappers turn translucent, about 10–15 minutes. If the water evaporates before they’re done, just add a little more.
  5. Once translucent, remove the lid, turn the heat back up to medium, and let them crisp up again for 5 more minutes. Remove and repeat with the next batch.
  6. Serve all your gyoza hot with this easy dipping sauce and a sprinkle of shichimi spice. Oh, and this cucumber salad goes so good with it.
  • Cook Time: 30 min

CRAVING MORE?

Follow along here & don’t forget to subscribe to my substack!