Cinnamon Oil

Cinnamon Oil

Cinnamon Oil

Cinnamon Oil

September 30, 2024 by Kimberly

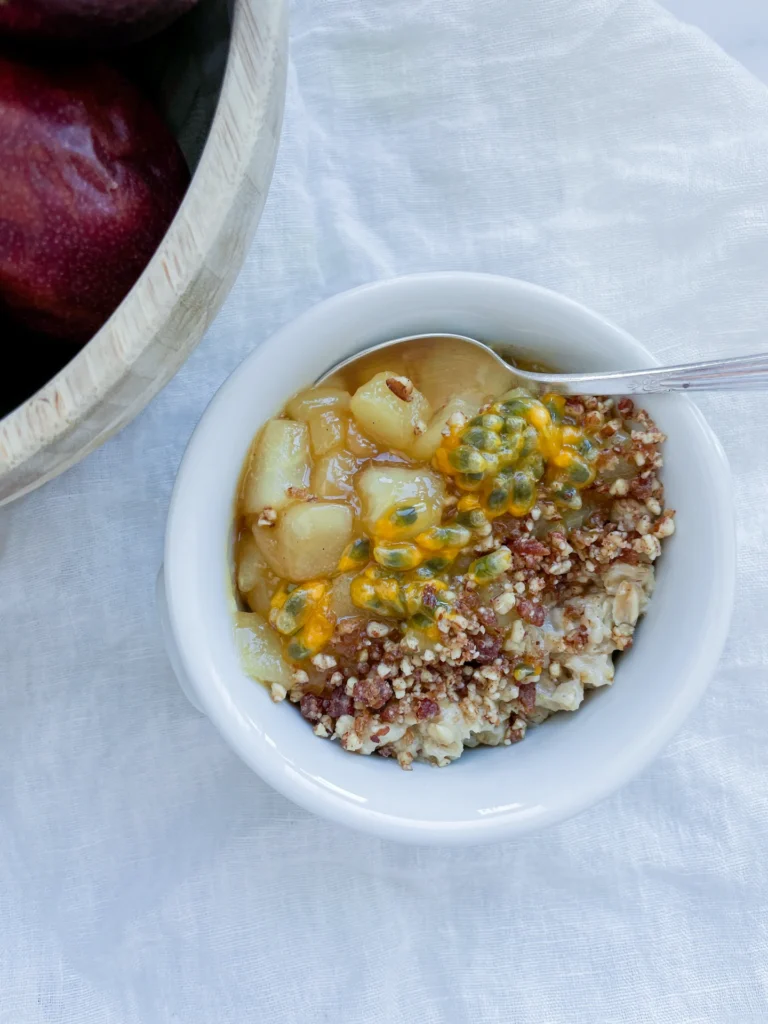
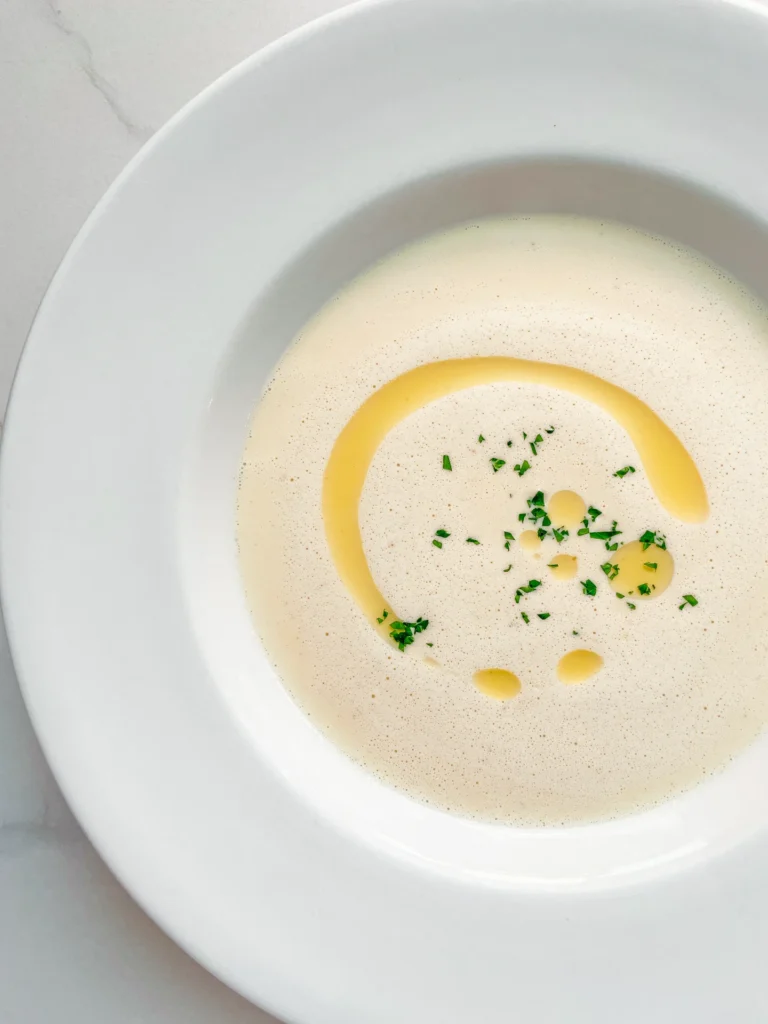
A drizzle of warm, cinnamon-infused oil adds a touch of magic to any dish. It’s like a hug in flavor form, perfect for elevating cozy meals and making everything taste special.

This website uses affiliate links which may earn commission for purchases made at no additional cost to you.

TOTAL TIME

10 min

SERVES

1 cup / 250 ml

DIET

vegan

EVERY RECIPE DESERVES

A Little Love Letter

Imagine adding a little warmth and spice to your everyday dishes with a simple drizzle of cinnamon-infused oil. It’s the easiest way to elevate everything from roasted veggies to desserts! Whether you’re a fall flavor lover or just want to try something new in the kitchen, this infused oil brings cozy, aromatic vibes that make every meal feel a bit more special.

Cinnamon oil works wonders drizzled over sweet and savory dishes alike. Try it on roasted squash, stirred into oatmeal, or even over pancakes for an unexpected pop of flavor. It’s also perfect for dipping with warm bread or adding to salad dressings for a little spice. Play around with it – this oil’s versatility is what makes it such a kitchen staple. You should try a drizzle of it in my Pumpkin Coconut Soup with Walnut Sage Grilled Cheese. It’s life changing! Or if you want to take it up a notch, try it in my Cinnamon Rolls.

Store your cinnamon oil in a clean, airtight container in your fridge for up to two weeks.

Hi, I'm Kimberly!

Hi, I'm Kimberly.

A hopeless romantic when it comes to food. Every recipe I share is a love letter to food itself. I’m so glad you’re here. Make yourself at home and stay a while.

Love,
Kimberly

Kimberly the Zett Signature

If you want to get to know me better,
click here!


Cinnamon Oil
Cinnamon Oil
Pumpkin Soup with Cinnamon Oil & Walnut Sage Grilled Cheese
Cinnamon Oil

LET’S MAKE A PIECE OF HAPPINESS

Print
clock clock iconcutlery cutlery iconflag flag iconfolder folder iconinstagram instagram iconpinterest pinterest iconfacebook facebook iconprint print iconsquares squares iconheart heart iconheart solid heart solid icon
Cinnamon Oil

Cinnamon Oil


5 Stars 4 Stars 3 Stars 2 Stars 1 Star

No reviews

  • Author: Kimberly
  • Total Time: 10 min
  • Yield: 1 cup / 250 ml 1x

Description

RECOMMENDED EQUIPMENT

  • medium-sized saucepan
  • whisk
  • a bowl which the medium saucepan fits into
  • medium-sized bowl
  • fine sieve
  • sealable container (oil bottle)
  • ice cubes

Ingredients

Units Scale
  • 1.5 tbsp ground cinnamon
  • 2 cinnamon sticks
  • 250 milliliters oil of your choice

Instructions

  1. Put the cinnamon into the pot as well as the cinnamon sticks. Pour in the oil and mix well with a whisk.
  2. Heat it over medium heat to a temperature of about 70-80°C (160-175°F), and maintain this temperature for the next 5 minutes. Stir occasionally, making sure the temperature remains steady and nothing gets burned.
  3. Prepare a bowl large enough to fit a medium-sized pot, and fill it with cold water and a handful of ice cubes. Also, hang a fine sieve strainer over a medium-sized bowl.
  4. Now, place the pot in the ice water and stir to cool the oil quickly. Once the oil is almost cold, remove the pot from the water and pour the oil into the prepared fine sieve to catch the coarse particles.
  5. Once all the oil has passed through the sieve, transfer the collected amount of oil into a sealable container or directly into an oil bottle. Store in the refrigerator for up to one to two weeks. As it sits it’s normal for the cinnamon powder to settle at the bottom, so just give it a quick shake before using it.
  • Cook Time: 10 min

CRAVING MORE?

Follow along here & don’t forget to subscribe to my substack!

Crispy Chicken with Peanut Coconut Sauce & Edamame Slaw

Crispy Chicken with Peanut Coconut Sauce & Edamame Slaw

Crispy Chicken with Peanut Coconut Sauce & Edamame Slaw

Crispy Chicken with Peanut Coconut Sauce & Edamame Slaw

September 12, 2024 by Kimberly

Crunchy, juicy chicken strips paired with a creamy, nutty peanut coconut sauce and a fresh, zesty edamame slaw. It’s comfort food with a twist – bold, fresh, and absolutely irresistible!

This website uses affiliate links which may earn commission for purchases made at no additional cost to you.

TOTAL TIME

30 min

SERVES

3 bowls

DIET

omnivore

EVERY RECIPE DESERVES

A Little Love Letter

This dish is the perfect mix of comfort and fresh, bold flavors. Juicy chicken strips with a golden, crispy coating are served alongside a creamy, dreamy peanut coconut sauce that has just the right balance of nuttiness and sweetness. Paired with a zesty edamame slaw, this combo is perfect for when you want something that feels indulgent but light and fresh at the same time. It’s all about that crunch, that sauce, and that fresh bite!

These crispy chicken strips are best served hot and fresh out of the pan with the sauce on the side or drizzled on top – your call! The peanut coconut sauce adds that creamy richness, and the fresh edamame slaw balances everything with its light crunch. Perfect for a casual weeknight dinner, a weekend lunch, or even a fun appetizer for a gathering. Pair it with some steamed rice or fresh greens for an extra touch.

Store any leftover chicken and slaw separately in airtight containers in the fridge for up to 2 days. To keep the chicken crispy, reheat it in the oven instead of the microwave. The peanut coconut sauce can be kept for 3 days in the fridge.

Hi, I'm Kimberly!

Hi, I'm Kimberly.

A hopeless romantic when it comes to food. Every recipe I share is a love letter to food itself. I’m so glad you’re here. Make yourself at home and stay a while.

Love,
Kimberly

Kimberly the Zett Signature

If you want to get to know me better,
click here!


Crispy Chicken with Peanut Coconut Sauce & Edamame Slaw

LET’S MAKE A PIECE OF HAPPINESS

Print
clock clock iconcutlery cutlery iconflag flag iconfolder folder iconinstagram instagram iconpinterest pinterest iconfacebook facebook iconprint print iconsquares squares iconheart heart iconheart solid heart solid icon
Crispy Chicken with Peanut Coconut Sauce & Edamame Slaw

Crispy Chicken with Peanut Coconut Sauce & Edamame Slaw


  • Author: Kimberly
  • Total Time: 30 min
  • Yield: 3 1x

Description

Recommended Equipment

  • sharp knife
  • cutting board
  • salad bowl
  • two small bowls
  • sieve
  • small pot with lid
  • three shallow bowls for breading
  • large pan

Ingredients

Units Scale
CRISPY CHICKEN
  • 400 grams chicken breast
  • 2 tbsp all-purpose flour
  • 1 egg
  • 4 tbsp panko
  • 4 tbsp bread crumbs
  • clarified butter for frying
PEANUT COCONUT SAUCE
  • 3 tbsp peanut butter
  • 1 tbsp soy sauce
  • 1/2 tbsp rice vinegar
  • 1 tsp sesame oil
  • 1 tbsp honey
  • juice of 1/2 a lemon
  • 1 garlic clove
  • 1 piece of ginger as the same size as the garlic clove
  • 1 tsp fish sauce
  • 1 tbsp sweet & sour sauce
  • 100 milliliters coconut milk
  • 1/2 tsp chili flakes
SLAW
  • 150 grams red cabbage
  • 150 grams white cabbage
  • 100 grams edamame
  • 1 spring onion
  • 2 tbsp cilantro
SLAW DRESSING
  • 1/2 tbsp sesame seeds
  • 1/2 tbsp rice vinegar
  • 1 tbsp honey
  • 2 tbsp soy sauce
  • 1/4 tsp ginger powder
  • 1/4 tsp garlic powder
  • juice of 1/2 a lemon

Instructions

  1. First, we’ll prepare the slaw. Slice the red and white cabbage into thin strips, wash them thoroughly, dry them, and put them in a salad bowl. Place the frozen edamame in a heatproof bowl and pour boiling water over them. Let them sit for 5 minutes. In the meantime, slice the spring onions into thin rings and pick the cilantro leaves off the stems, chopping them finely. Add both to the cabbage. Drain the edamame and add them to the slaw as well. Mix everything well and set it aside.
  2. Next, grab a small bowl to prepare the dressing for the salad. Mix rice vinegar, honey, soy sauce, lime juice, sesame seeds, garlic powder, and ginger powder. Don’t pour the dressing over the slaw just yet—set it aside for now.
  3. Now, let’s make the peanut coconut sauce. Peel and grate the garlic and ginger, then sauté them in some sesame oil in a small pot. Add the following ingredients: soy sauce, rice vinegar, honey, sweet & sour sauce, lime juice, fish sauce, chili, and coconut milk. Stir everything well. If the sauce is too thick, just thin it out with a little water. Keep it warm on very low heat with the lid on.
  4. Set up a breading station with flour, egg, and a mix of panko and breadcrumbs. Coat the chicken in flour, shake off the excess, then dip it in the egg, making sure it’s well-covered. Finally, press it into the panko and breadcrumb mixture, ensuring the breading sticks well on all sides. Fry the chicken in a large pan with a bit of clarified butter over medium heat until crispy and cooked through. Slice the chicken into strips.
  5. Pour the dressing over the slaw and mix everything well. Distribute the salad onto deep plates, then drizzle the peanut coconut sauce over it. Finally, place the crispy chicken strips on top of the sauce. Optionally, garnish with sesame seeds and spring onions.
  • Cook Time: 30 min

CRAVING MORE?

Follow along here & don’t forget to subscribe to my substack!

Apple Fritters with Lemon Vanilla Glaze

Apple Fritters with Lemon Vanilla Glaze

Apple Fritters with Lemon Vanilla Glaze

Apple Fritters with Lemon Vanilla Glaze

August 25, 2024 by Kimberly

Imagine biting into warm, fluffy fritters bursting with juicy apples, drizzled with a sweet, tangy glaze. It’s like a cozy hug on a chilly morning – a little piece of homemade heaven!

This website uses affiliate links which may earn commission for purchases made at no additional cost to you.

TOTAL TIME

30 min

SERVES

12 fritters

DIET

vegetarian

EVERY RECIPE DESERVES

A Little Love Letter

Ever feel like treating yourself to something that’s a mix of comfort and a touch of fancy? These fluffy apple fritters are just that! They’re packed with juicy apple chunks, fried to golden perfection, and then topped with a mouthwatering lemon vanilla glaze. It’s the kind of snack that feels like a warm hug, perfect for cozy mornings or as a delightful dessert to share with friends. Trust me, once you try these, they’ll become your go-to treat!

They’re best enjoyed fresh and warm, right out of the frying pan, with the glaze still slightly gooey and dripping down the sides. Pair them with a hot cup of coffee or tea for a perfect morning pick-me-up. If you’re feeling extra indulgent, a scoop of vanilla ice cream on the side turns these fritters into an irresistible dessert.

If you have leftovers (which I doubt!), store these fritters in an airtight container at room temperature for up to two days. For the best experience, reheat them in the oven at a low temperature.

Hi, I'm Kimberly!

Hi, I'm Kimberly.

A hopeless romantic when it comes to food. Every recipe I share is a love letter to food itself. I’m so glad you’re here. Make yourself at home and stay a while.

Love,
Kimberly

Kimberly the Zett Signature

If you want to get to know me better,
click here!


Apple Fritters with Lemon Vanilla Glaze

LET’S MAKE A PIECE OF HAPPINESS

Print
clock clock iconcutlery cutlery iconflag flag iconfolder folder iconinstagram instagram iconpinterest pinterest iconfacebook facebook iconprint print iconsquares squares iconheart heart iconheart solid heart solid icon
Apple Fritters with Lemon Vanilla Glaze

Apple Fritters with Lemon Vanilla Glaze


  • Author: Kimberly
  • Total Time: 30 min
  • Yield: 12 fritters 1x

Description

Recommended Equipment

  • small pot
  • cooling rack
  • two bowls
  • whisk
  • sharp knife
  • cutting board
  • small bowl

Ingredients

Units Scale
BATTER
  • 100 grams all-purpose flour
  • 50 grams brown sugar
  • 1 tsp baking powder
  • 1/4 tsp salt
  • 1/3 cup milk
  • 1 egg
  • 1 tbsp butter, melted
  • 1/2 tsp vanilla extract
  • 2 apples
  • fat for frying
GLAZE
  • 65 grams powdered sugar
  • 1 tbsp milk
  • 1 tbsp lemon juice
  • 1/2 tsp vanilla extract

Instructions

  1. Heat frying fat in a small pot to around 175°C / 350°F. Prepare a cooling rack with some paper towels underneath to catch any excess oil when the fritters are done.
  2. Meanwhile, in a mixing bowl, combine the flour, brown sugar, baking powder, and salt. Set aside.
  3. In another mixing bowl, crack the egg and whisk it together with milk, vanilla extract, and melted butter. Set aside.
  4. Peel, core, and dice the apples into small pieces. Set aside.
  5. Pour the wet ingredients into the dry ingredients and stir until a thick batter forms. Then, add the apple pieces and mix everything together again.
  6. Drop spoonfuls of the batter into the hot oil, frying each side for about 2-3 minutes, depending on thickness. I used about 1 heaping tablespoon of batter per fritter. Place the fritters on the cooling rack to drain any excess oil.
  7. While the fritters are frying, mix powdered sugar, lemon juice, and vanilla extract in a small bowl to create a thick glaze. Drizzle the glaze over the fritters. I think they taste best when warm, so feel free to enjoy them right away 🙂
  • Cook Time: 30 min

CRAVING MORE?

Follow along here & don’t forget to subscribe to my substack!

Coconut Lime Popcorn

Coconut Lime Popcorn

Coconut Lime Popcorn

Coconut Lime Popcorn

August 28, 2024 by Kimberly

Indulge in this tropical popcorn treat! The refreshing burst of lime and the rich coconut flavor make every bite a mini vacation. Perfect for cozy movie nights or fun gatherings.

This website uses affiliate links which may earn commission for purchases made at no additional cost to you.

TOTAL TIME

20 min

SERVES

2 portions

DIET

vegan

EVERY RECIPE DESERVES

A Little Love Letter

Ready to take your snack game to the next level? This coconut and lime flavored popcorn is a game-changer. Imagine the zingy taste of lime combined with the rich, creamy flavor of coconut. It’s a tropical twist on your favorite snack that’s perfect for movie nights, parties, or just because. Quick to make and absolutely delicious, this popcorn will become your go-to treat for every occasion!

It’s perfect for a cozy movie night at home, adding a tropical vibe to your entertainment. For a party, place it in colorful bowls for a festive touch. You can also pack it into little snack bags for a sweet and tangy treat on the go. This popcorn pairs wonderfully with a cold drink, making it an ideal companion for both casual and special moments.

Simply let it cool completely before placing it in an airtight container. It stays fresh and crunchy for up to three days.

Hi, I'm Kimberly!

Hi, I'm Kimberly.

A hopeless romantic when it comes to food. Every recipe I share is a love letter to food itself. I’m so glad you’re here. Make yourself at home and stay a while.

Love,
Kimberly

Kimberly the Zett Signature

If you want to get to know me better,
click here!


Coconut Lime Popcorn

LET’S MAKE A PIECE OF HAPPINESS

Print
clock clock iconcutlery cutlery iconflag flag iconfolder folder iconinstagram instagram iconpinterest pinterest iconfacebook facebook iconprint print iconsquares squares iconheart heart iconheart solid heart solid icon
Coconut Lime Popcorn

Coconut Lime Popcorn


  • Author: Kimberly
  • Total Time: 20 min
  • Yield: 2 1x

Description

RECOMMENDED EQUIPMENT

  • medium pot with lid
  • grater
  • food processor
  • large bowl

Ingredients

Units Scale
  • 60 grams popcorn kernels
  • 30 grams lime coconut oil
  • 60 grams white sugar
TOPPING
  • zest from one lime
  • 1 tbsp shredded coconut
  • 1 tbsp white sugar

Instructions

PREPARATIONS

  • Here you can find the recipe for the lime coconut oil. You need 30g / 1 oz of the oil.
  1. In a medium pot, combine lime-coconut oil, sugar, and popcorn kernels, ensuring all kernels are coated with sugar and oil.
  2. Place the pot on the stove with the lid on and set to medium heat. Wait until the first kernel pops.
  3. While waiting, zest a lime and place the zest in a food processor. Add 1 tablespoon of sugar and 1 tablespoon of shredded coconut. Pulse a few times until the mixture is fragrant. Set aside.
  4. As the kernels start to pop, occasionally shake and gently swirl the pot to ensure even heating. After about 3-5 minutes, all kernels should be popped, and the sugar should have turned a light amber color.
  5. Carefully open the lid and pour the popcorn into a large bowl.
  6. Immediately sprinkle the topping over the popcorn and mix well to coat the popcorn evenly. Divide the popcorn into two bowls and enjoy!
  • Passive Time: 10 min
  • Cook Time: 10 min

CRAVING MORE?

Follow along here & don’t forget to subscribe to my substack!

Spicy Turkish Vegetable Spread (Ezme)

Spicy Turkish Vegetable Spread (Ezme)

Spicy Turkish Vegetable Spread (Ezme)

Spicy Turkish Vegetable Spread (Ezme)

August 20, 2024 by Kimberly

Experience a burst of flavors with this spicy Turkish veggie spread! Fresh, zesty, and vibrant – it’s the perfect addition to your meals, bringing a touch of excitement and warmth.

This website uses affiliate links which may earn commission for purchases made at no additional cost to you.

TOTAL TIME

20 min

SERVES

4 portions

DIET

vegan

EVERY RECIPE DESERVES

A Little Love Letter

Ready to spice up your snack game? Meet Ezme, a fiery and flavorful Turkish vegetable spread that’s about to become your new favorite. Packed with fresh ingredients and a spicy kick, this spread is perfect for those who love a bit of heat in their meals. Easy to make and bursting with vibrant flavors, Ezme is not just a dish – it’s an experience. Let’s dive into this exciting world of Turkish cuisine together!

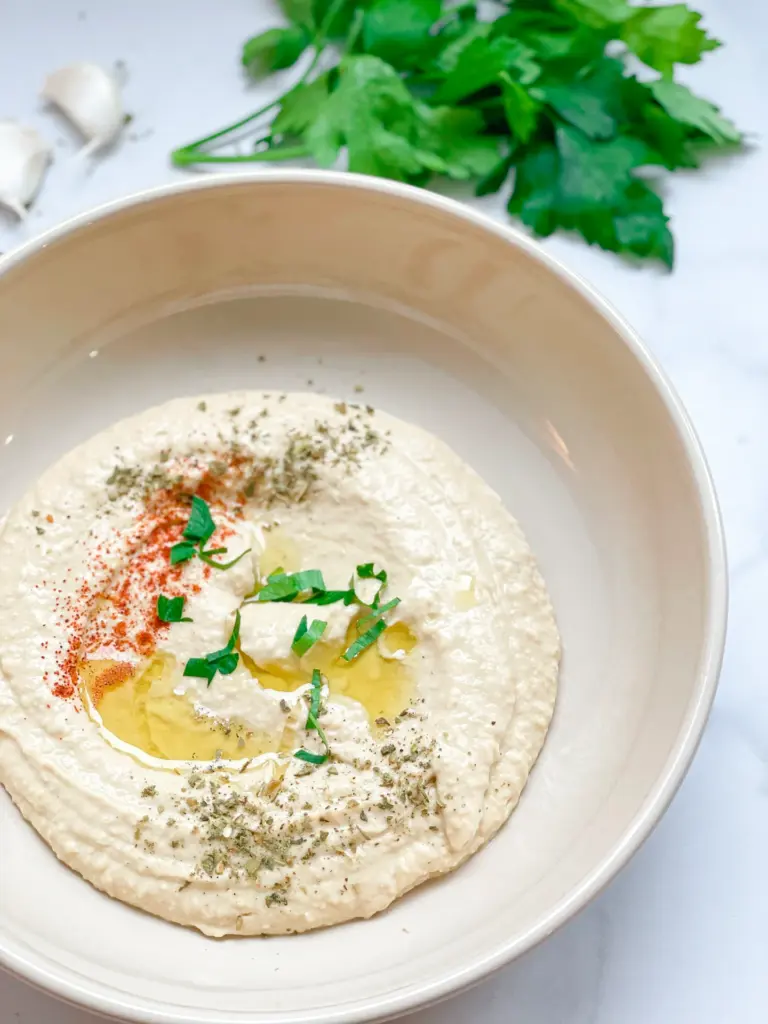
It’s an excellent companion to warm, crusty bread or pita. For a traditional touch, pair it with other mezze like hummus, baba ganoush, or tzatziki. It also makes a fantastic topping for grilled meats or veggies, adding a zesty punch to your meals. For a quick snack, spread it on toast or use it as a dip for fresh veggies. The spicy, tangy flavors will elevate any dish you serve it with. I like to serve it with this Turkish Flatbread (Bazlama) and Mint Yogurt & Cucumber Dill Salad (Cacik inspired) as a Meze variation.

Place it in an airtight container and keep it in the fridge. It stays fresh for up to 5 days, allowing you to enjoy its spicy goodness throughout the week. If you’re planning to make a big batch, you can freeze portions for up to a month. Just thaw it in the fridge overnight, and it’s ready to bring that burst of flavor back to your table.

Hi, I'm Kimberly!

Hi, I'm Kimberly.

A hopeless romantic when it comes to food. Every recipe I share is a love letter to food itself. I’m so glad you’re here. Make yourself at home and stay a while.

Love,
Kimberly

Kimberly the Zett Signature

If you want to get to know me better,
click here!


Spicy Turkish Vegetable Spread (Ezme)

LET’S MAKE A PIECE OF HAPPINESS

Print
clock clock iconcutlery cutlery iconflag flag iconfolder folder iconinstagram instagram iconpinterest pinterest iconfacebook facebook iconprint print iconsquares squares iconheart heart iconheart solid heart solid icon
Spicy Turkish Vegetable Spread (Ezme)

Spicy Turkish Vegetable Spread (Ezme)


  • Author: Kimberly
  • Total Time: 20 min
  • Yield: 4-6 1x

Description

Recommended Equipment

  • sharp knife
  • cutting board
  • food processor
  • sieve
  • bowl
  • medium bowl

Ingredients

Units Scale
SALAD
  • 2 tomatoes
  • 1 red onion
  • 1 green bell pepper
  • 2 garlic cloves
  • 15 grams parsley
DRESSING
  • 2 tbsp pepper paste
  • 1 tbsp tomato paste
  • 2 tbsp pomegranate molasses
  • 1 tbsp lemon juice
  • 1 tbsp olive oil
  • 1 tsp sumach
  • 1 tsp dried mint
  • 1/2 tsp salt
  • 1/2 tsp paprika powder

Instructions

  1. Wash and thoroughly dry the tomatoes, bell pepper, and parsley. Quarter the tomatoes, deseed the bell pepper and cut into large pieces. Peel and quarter the red onion, peel the garlic cloves, and roughly remove the thick stems from the parsley. Place everything in a food processor and pulse until everything is finely chopped but still recognizable. We don’t want a paste!
  2. Transfer the mixture to a fine sieve over a bowl and press it with a spoon to extract as much liquid as possible. Let the mixture continue to drain in the sieve and set aside.
  3. In a bowl, mix the dressing ingredients: hot paprika paste, tomato paste, olive oil, sumac, dried mint, salt, pomegranate syrup, and lemon juice until it forms a creamy consistency.
  4. Place the vegetable mixture into a larger bowl and add the dressing. Stir well until it becomes a creamy, firm, dark red mixture. Taste and adjust seasoning if needed. You can serve it immediately or refrigerate it for a few hours to enhance the flavors.
  • Cook Time: 20 min

CRAVING MORE?

Follow along here & don’t forget to subscribe to my substack!

Mint Yogurt & Cucumber Dill Salad (Cacik inspired)

Mint Yogurt & Cucumber Dill Salad (Cacik inspired)

Mint Yogurt & Cucumber Dill Salad (Cacik inspired)

Mint Yogurt & Cucumber Dill Salad (Cacik inspired)

August 20, 2024 by Kimberly

Refresh your taste buds with this creamy & crunchy yogurt cucumber salad. The blend of mint and dill brings a burst of summer flavors that’s perfect for any occasion. Light, tangy, and irresistible!

This website uses affiliate links which may earn commission for purchases made at no additional cost to you.

TOTAL TIME

15 min

SERVES

4 portions

DIET

vegetarian

EVERY RECIPE DESERVES

A Little Love Letter

If you’re craving something light, refreshing, and bursting with flavor, you’re going to adore this Cacik-inspired dip-salad situation. It’s a delightful mix of creamy yogurt, fresh cucumbers, and aromatic herbs like mint and dill. Perfect for hot summer days or when you need a quick, healthy snack, this dip-salad is a breeze to whip up and incredibly satisfying. Trust me, once you try it, you’ll be hooked on its cool and tangy goodness!

Enjoy it as a refreshing side dish with your grilled meats or fish, or as a cool appetizer to start your meal. It’s also perfect as a dip with some warm pita bread or crispy veggies. For a more substantial meal, pair it with a quinoa or grain bowl. This salad’s creamy, tangy flavor profile complements a wide range of dishes, making it a fantastic addition to any menu. I like to serve it with this Turkish Flatbread (Bazlama) and Spicy Turkish Vegetable Spread (Ezme) as a Meze variation.

Transfer it to an airtight container and keep it in the fridge. It stays fresh for up to three days, but it’s best enjoyed within the first day or two to maintain its crisp texture. Keep it chilled, and you’ll have a delicious, refreshing dip-salad ready whenever you need it.

Hi, I'm Kimberly!

Hi, I'm Kimberly.

A hopeless romantic when it comes to food. Every recipe I share is a love letter to food itself. I’m so glad you’re here. Make yourself at home and stay a while.

Love,
Kimberly

Kimberly the Zett Signature

If you want to get to know me better,
click here!


Mint Yogurt & Cucumber Dill Salad (Cacik inspired)

LET’S MAKE A PIECE OF HAPPINESS

Print
clock clock iconcutlery cutlery iconflag flag iconfolder folder iconinstagram instagram iconpinterest pinterest iconfacebook facebook iconprint print iconsquares squares iconheart heart iconheart solid heart solid icon
Mint Yogurt & Cucumber Dill Salad (Cacik inspired)

Mint Yogurt & Cucumber Dill Salad (Cacik inspired)


  • Author: Kimberly
  • Total Time: 15 min
  • Yield: 4-6 1x

Description

RECOMMENDED EQUIPMENT

  • sharp knife
  • cutting board
  • small bowl
  • medium bowl

Ingredients

Units Scale
SALAD
  • 1 cucumber
  • 2 tbsp extra virgin olive oil
  • 1 tbsp lemon juice
  • 1 tbsp dill
  • salt & pepper to taste
YOGURT
  • 300 grams 10% fat yogurt
  • 2 garlic cloves
  • 1 tbsp fresh mint, chopped
  • pinch of salt
TOPPING
  • pistachios
  • dill
  • mint

Instructions

  1. Peel the garlic and grate it into a small bowl. Wash and dry the mint thoroughly. Pluck the leaves from the stems, finely chop them, and add them to the garlic. Then add the yogurt and salt. Mix everything well.
  2. Next, wash and dry the cucumber. Halve it lengthwise, then halve each piece again lengthwise and remove the seeds. Quarter the cucumber again lengthwise and cut into large chunks. Place the cucumber pieces in a medium bowl and season with salt, olive oil, lemon juice, and pepper. Wash, dry, and roughly chop the dill, then add it to the cucumbers. Mix everything well.
  3. Shell and finely chop the pistachios. Set aside.
  4. Spread the yogurt on a deep plate and top with the cucumber salad. Sprinkle with pistachios. Optionally, garnish with a few mint leaves and dill, and drizzle with a bit of olive oil.
  • Cook Time: 15 min

CRAVING MORE?

Follow along here & don’t forget to subscribe to my substack!