Cherry Almond Marzipan Oats

Cherry Almond Marzipan Oats

Cherry Almond Marzipan Oats

Cherry Almond Marzipan Oats

December 22, 2024 by Kimberly

Imagine creamy oats kissed with almond milk, layered with luscious cherry filling, and drizzled with silky marzipan sauce – finished with a candied cherry. It’s breakfast that tastes like dessert but feels indulgently cozy.

This website uses affiliate links which may earn commission for purchases made at no additional cost to you.

TOTAL TIME

30 min

SERVES

3 portions

DIET

vegetarian

EVERY RECIPE DESERVES

A Little Love Letter

This dreamy breakfast combines the best of dessert and comfort food! Creamy almond milk oats meet a tangy-sweet cherry filling, topped with a velvety marzipan drizzle and crowned with a candied cherry. It’s perfect for chilly mornings, special occasions, or whenever you’re craving something extra indulgent. With layers of flavor and texture, this dish is not just a breakfast – it’s a hug in a bowl.

Serve warm for the ultimate cozy vibes. To assemble, spoon the creamy almond oats into a bowl, add a layer of cherry filling, and drizzle generously with the marzipan sauce. Top it with a candied cherry for a stunning finish. Pair it with a hot cup of coffee or tea for a slow, luxurious morning or dress it up for a brunch centerpiece.

Store leftovers in an airtight container in the fridge for up to three days.

Hi, I'm Kimberly!

Hi, I'm Kimberly.

A hopeless romantic when it comes to food. Every recipe I share is a love letter to food itself. I’m so glad you’re here. Make yourself at home and stay a while.

Love,
Kimberly

Kimberly the Zett Signature

If you want to get to know me better,
click here!


Cherry Almond Marzipan Oats

LET’S MAKE A PIECE OF HAPPINESS

Print
clock clock iconcutlery cutlery iconflag flag iconfolder folder iconinstagram instagram iconpinterest pinterest iconfacebook facebook iconprint print iconsquares squares iconheart heart iconheart solid heart solid icon
Cherry Almond Marzipan Oats

Cherry Almond Marzipan Oats


5 Stars 4 Stars 3 Stars 2 Stars 1 Star

No reviews

  • Author: Kimberly
  • Total Time: 30 min
  • Yield: 3 1x

Description

Recommended Equipment

  • small pot
  • whisk
  • bowl
  • cheese grater

Ingredients

Units Scale
OATS BASE
  • 100 grams rolled oats
  • 250 milliliter almond milk
  • 1 tsp vanilla extract
  • pinch of salt
  • 1 tsp date syrup
MARZIPAN SAUCE
  • 1 egg yolk
  • 100 milliliter full-fat cow milk
  • 50 milliliter heavy cream
  • 50 grams marzipan
  • 40 grams white sugar
  • 0.5 tsp vanilla extract
CHERRY FILLING
  • 150 grams cherries
  • 50 milliliter cherry juice
  • 1 tsp lemon juice
  • 1 tsp cornstarch
  • 1 tbsp powdered sugar
TOPPING
  • candied cherries

Instructions

  1. Place the marzipan in the freezer for about 20–30 minutes, then grate it coarsely using a cheese grater.
  2. Warm the milk and cream in a pot without bringing it to a boil, then remove from heat.
  3. Mix the egg yolks, sugar, and vanilla extract thoroughly in a bowl. Add the grated marzipan and stir well.
  4. Gradually add the egg yolk mixture to the warm milk-cream mixture, one teaspoon at a time, stirring constantly until combined. Return the pot to medium heat and stir until the sauce thickens. For a firmer consistency, mix 1 tsp of cornstarch with a bit of water, add it to the sauce, and briefly bring it to a boil. Remove from heat.
  5. In another pot, mix cherries, cherry juice, lemon juice, powdered sugar, and cornstarch. Heat over medium heat until the mixture thickens and the cherries soften. Remove from heat.
  6. In a separate pot, combine oats, almond milk, vanilla extract, salt, and your choice of sweetener (e.g., date syrup). Bring to a boil, stirring until the oats are soft.
  7. Layering: Spread a portion of the oatmeal in a small bowl, then add a layer of cherry sauce. Cover with the remaining oatmeal, smooth the surface, and pour the marzipan sauce over the top.
  8. Garnish with a candied cherry. Serve immediately or prepare as overnight oats.

CRAVING MORE?

Follow along here & don’t forget to subscribe to my substack!

German Eggnog

German Eggnog

German Eggnog

German Eggnog

December 21, 2024 by Kimberly

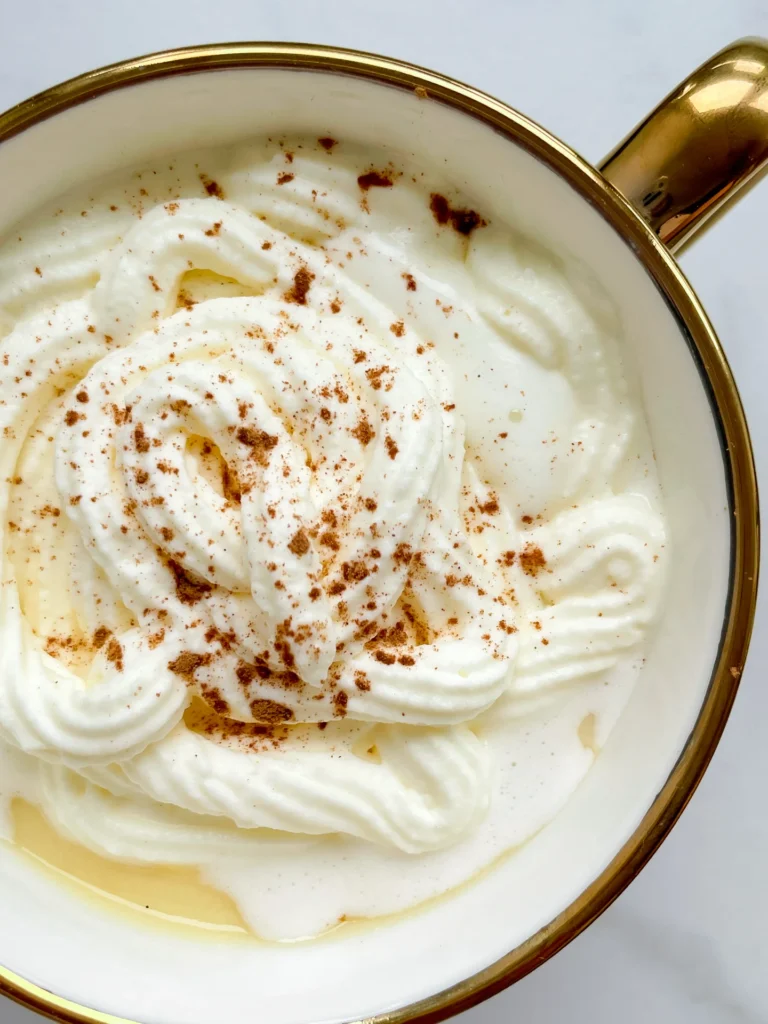
Creamy, spiced, and a hint of orange, this festive drink feels like a warm blanket with a zesty twist. Perfect for cozy nights, it’s sweet nostalgia with a touch of magic.

This website uses affiliate links which may earn commission for purchases made at no additional cost to you.

TOTAL TIME

10 min

SERVES

2 mugs

DIET

vegetarian

EVERY RECIPE DESERVES

A Little Love Letter

This creamy, spiced drink is your ultimate holiday treat, blending warm vanilla notes with a zesty orange kick. It’s the perfect balance of cozy and refreshing, bringing all the festive feels to your cup. Whether you’re cuddled up on the couch or hosting a holiday party, this drink will steal the show. Whipped cream and a sprinkle of cinnamon take it to the next level. Trust me, you’re about to sip your way to holiday bliss.

Serve this festive drink warm for an extra cozy vibe or chilled for a refreshing twist. Top it with a generous dollop of whipped cream and a dash of cinnamon for that picture-perfect look. Pair it with a plate of Christmas cookies or a slice of fruitcake to complete the holiday mood. Pro tip: Add a splash of your favorite spirit if you want to elevate it for the grown-ups at your table.

Store the drink in an airtight container in the fridge for up to one day. Stir it well before reheating or serving cold. Keep the whipped cream and cinnamon topping separate and add them fresh just before serving.

Hi, I'm Kimberly!

Hi, I'm Kimberly.

A hopeless romantic when it comes to food. Every recipe I share is a love letter to food itself. I’m so glad you’re here. Make yourself at home and stay a while.

Love,
Kimberly

Kimberly the Zett Signature

If you want to get to know me better,
click here!


German Eggnog
German Eggnog

LET’S MAKE A PIECE OF HAPPINESS

Print
clock clock iconcutlery cutlery iconflag flag iconfolder folder iconinstagram instagram iconpinterest pinterest iconfacebook facebook iconprint print iconsquares squares iconheart heart iconheart solid heart solid icon
German Eggnog

German Eggnog


  • Author: Kimberly
  • Total Time: 10 min
  • Yield: 2 1x

Description

Recommended Equipment

  • small saucepan
  • whisk
  • electric hand mixer
  • tall container
  • piping bag

Ingredients

Units Scale
EGGNOG
  • 250 milliliter full-fat cow milk
  • 150 milliliter advocaat
  • 100 milliliter orange juice
  • 14 grams vanilla sugar
  • 15 grams vanilla pudding instant powder
  • pinch of salt
WHIPPED CREAM
  • 200 milliliter heavy cream
  • pinch of cinnamon

Instructions

  1. In a small saucepan, whisk together milk, orange juice, eggnog, vanilla sugar, and vanilla pudding powder. Heat over medium heat until the mixture starts to thicken. Remove from heat and keep warm with a lid. Season with a pinch of salt.
  2. Whip the cream until stiff using an electric mixer and transfer it into a piping bag.
  3. Pour the eggnog mixture into a cup, top with whipped cream, and sprinkle with a bit of cinnamon for a finishing touch. Enjoy!
  4. The vanilla pudding powder can be replaced with milk powder and cornstarch for an even creamier taste.
  • Cook Time: 10 min

CRAVING MORE?

Follow along here & don’t forget to subscribe to my substack!

Gingerbread Oil

Gingerbread Oil

Gingerbread Oil

Gingerbread Oil

December 16, 2024 by Kimberly

Cozy up your cooking with this aromatic oil infused with warm spices like cinnamon and cardamom. It’s like bottling the holidays – perfect for drizzling, baking, or elevating savory dishes.

This website uses affiliate links which may earn commission for purchases made at no additional cost to you.

TOTAL TIME

5 min

SERVES

1 cup / 250 ml

DIET

vegan

EVERY RECIPE DESERVES

A Little Love Letter

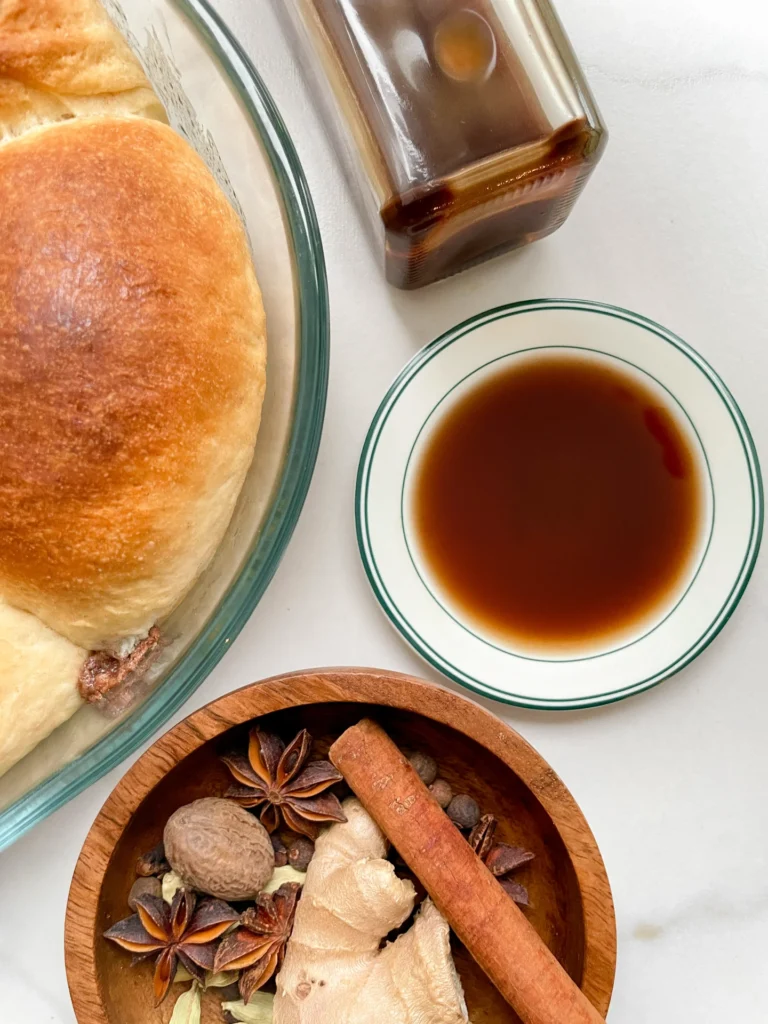
Step into holiday magic with this incredible spiced oil. Infused with cinnamon, cardamom, cloves, and more, it’s the ultimate flavor hack to elevate your cooking. Whether drizzled over roasted veggies, swirled into yogurt, or used for baking, it brings cozy gingerbread vibes to everything. Perfect for adding that warm, nostalgic touch to your festive meals, and hey, it also makes a pretty epic edible gift. Get ready to impress yourself and everyone you share it with!

For sweet treats, drizzle it over pancakes, waffles, or even vanilla ice cream. Feeling savory? Use it to dress roasted carrots, drizzle on warm bread, or even toss it into a simple salad dressing. Pro tip: Swirl a little into your hot chocolate or latte for the coziest vibes ever. It’s your new go-to secret weapon for holiday magic in every dish. I used this oil to glaze my milk buns with gingerbread filling – give it a try, you’re gonna love it!

Keep your spiced oil in a tightly sealed glass bottle in a cool, dark spot. It stays fresh and aromatic for up to a week. Shake gently before using.

Hi, I'm Kimberly!

Hi, I'm Kimberly.

A hopeless romantic when it comes to food. Every recipe I share is a love letter to food itself. I’m so glad you’re here. Make yourself at home and stay a while.

Love,
Kimberly

Kimberly the Zett Signature

If you want to get to know me better,
click here!


Gingerbread Oil
Gingerbread Oil
Gingerbread Oil
Gingerbread Oil

LET’S MAKE A PIECE OF HAPPINESS

Print
clock clock iconcutlery cutlery iconflag flag iconfolder folder iconinstagram instagram iconpinterest pinterest iconfacebook facebook iconprint print iconsquares squares iconheart heart iconheart solid heart solid icon
Gingerbread Oil

Gingerbread Oil


  • Author: Kimberly
  • Total Time: 5 min
  • Yield: 1 cup / 250 ml 1x

Description

RECOMMENDED EQUIPMENT

  • medium-sized saucepan
  • whisk
  • a bowl which the medium saucepan fits into
  • medium-sized bowl
  • fine sieve
  • sealable container (oil bottle)
  • ice cubes

Ingredients

Units Scale
  • 2 tsp cinnamon
  • 1/2 tsp cloves
  • 1/2 tsp allspice
  • 1/2 tsp cardamom
  • 1/8 tsp nutmeg
  • 3 anise stars
  • 1 piece of fresh ginger
  • 250 milliliter oil

Instructions

  1. Toss everything into the blender.
  2. Pour the mixture from the blender into a medium-sized pot and heat it over medium heat to a temperature of about 100°C (212°F), and maintain this temperature for the next 5 minutes. Stir occasionally, making sure the temperature remains steady and nothing gets burned.
  3. Prepare a bowl large enough to fit a medium-sized pot, and fill it with cold water and a handful of ice cubes. Also, hang a fine sieve strainer over one medium-sized bowl.
  4. Now, place the pot in the ice water and stir to cool the oil quickly. Once the oil is almost cold, remove the pot from the water and pour the oil into the prepared fine sieve to catch the coarse particles.
  5. Once all the oil has passed through the fine mesh strainer, transfer the collected amount of oil into a sealable container or directly into an oil bottle. Store in the refrigerator for up to one week.
  • Passive Time:
  • Cook Time: 5 min

CRAVING MORE?

Follow along here & don’t forget to subscribe to my substack!

Egg Salad

Egg Salad

Egg Salad

Egg Salad

November 17, 2024 by Kimberly

Creamy, tangy, and absolutely crave-worthy! This rich egg salad hits all the comfort notes with just the right balance of freshness and zing. Perfect on toast or as a party favorite.

This website uses affiliate links which may earn commission for purchases made at no additional cost to you.

TOTAL TIME

15 min

SERVES

2 portions

DIET

vegetarian

EVERY RECIPE DESERVES

A Little Love Letter

This creamy egg salad is a cozy twist on a classic, with layers of rich flavor from a touch of Dijon and a sprinkle of fresh chives. It’s a go-to recipe for those moments when you need a quick, delicious meal with a bit of a zing. With its velvety texture and perfectly balanced tang, this salad makes you wonder why you’d ever buy pre-made again. One bite, and you’ll see why it’s so easy to fall in love with! If you’re not so confident with boiling eggs yet, read on for a full guide and get the best tips for achieving The Perfect Boiled Egg.

This egg salad is endlessly versatile, perfect as a sandwich filling or spooned over crunchy toast for an easy lunch. It also makes a great dip for crackers or veggies when served at a gathering. Feeling fancy? Add it to a croissant or as a topping for a crisp salad. This dish is all about the comfort factor, so serve it however makes you feel the coziest – it’s that kind of meal.

To keep this egg salad fresh and tasty, store it in an airtight container in the fridge for up to 2 days. Just give it a stir before serving to freshen up the texture, and enjoy chilled. Perfect for make-ahead lunches or snack prep!

Hi, I'm Kimberly!

Hi, I'm Kimberly.

A hopeless romantic when it comes to food. Every recipe I share is a love letter to food itself. I’m so glad you’re here. Make yourself at home and stay a while.

Love,
Kimberly

Kimberly the Zett Signature

If you want to get to know me better,
click here!


Egg Salad
Egg Salad
Egg Salad
Egg Salad

LET’S MAKE A PIECE OF HAPPINESS

Print
clock clock iconcutlery cutlery iconflag flag iconfolder folder iconinstagram instagram iconpinterest pinterest iconfacebook facebook iconprint print iconsquares squares iconheart heart iconheart solid heart solid icon
Egg Salad

Egg Salad


  • Author: Kimberly
  • Total Time: 15 min
  • Yield: 2 1x

Description

Recommended Equipment

  • small saucepan
  • medium-sized bowl
  • sharp knife
  • cutting board

Ingredients

Units Scale
  • 4 eggs
  • 50 grams mayonnaise
  • 1-2 tsp white wine vinegar
  • 1/2-1 tsp Dijon mustard
  • chives
  • salt & pepper to taste

Instructions

  1. Boil the eggs for about 7-8 minutes until hard-boiled. If you’re not so confident with cooking eggs yet, read on for a full guide and get the best tips for achieving the perfect boiled egg.
  2. Meanwhile, finely chop the chives and place them in a bowl. Add the mayonnaise, white wine vinegar, Dijon mustard, salt, and pepper, and set aside for now.
  3. Once the eggs are cooked, place them in a bowl with cold water to cool for about 5 minutes. Peel the eggs, carefully score the egg whites, and gently separate them so the yolks remain whole. Separate all the eggs into whites and yolks, adding the yolks to the other ingredients in the bowl.
  4. Mash the yolks with the other ingredients until you get a smooth, light orange mixture.
  5. Cut the egg whites into small pieces and add them to the bowl with the other ingredients. Mix everything well and serve.
  • Passive Time: 5 min
  • Cook Time: 10 min

CRAVING MORE?

Follow along here & don’t forget to subscribe to my substack!

Pasta al Pomodoro

Pasta al Pomodoro

Pasta al Pomodoro

Pasta al Pomodoro

November 5, 2024 by Kimberly

Imagine al dente pasta coated in a fresh, rich garlic basil tomato sauce – each bite bursting with Mediterranean sunshine, cozy comfort, and pure bliss. This dish tastes like home, every single time.

This website uses affiliate links which may earn commission for purchases made at no additional cost to you.

TOTAL TIME

20 min

SERVES

4 portions

DIET

vegan

EVERY RECIPE DESERVES

A Little Love Letter

Get ready to taste sunshine on a plate! This recipe brings you straight to an Italian summer with every bite – simple, cozy, and irresistibly delicious. This dish is all about fresh tomatoes simmered into a rich, velvety sauce that clings to each pasta strand, making it the ultimate comfort food. Perfect for weeknight dinners or when you crave a warm, feel-good meal, it’s easy to make but feels like pure indulgence.

To make it unforgettable, serve this pasta with fresh basil and a dusting of Parmesan. A side of crusty garlic bread or a light salad with arugula and lemon vinaigrette balances the richness, adding that final touch. For a real treat, drizzle a bit of high-quality olive oil over the top just before serving. It’s simple but adds incredible depth and brings the dish to life, making it feel like a restaurant meal in the comfort of your home.

Store any leftovers in an airtight container in the fridge for up to 3 days. Reheat gently on the stovetop, adding a splash of water or olive oil to keep the sauce creamy. This way, you can enjoy it as good as fresh!

Hi, I'm Kimberly!

Hi, I'm Kimberly.

A hopeless romantic when it comes to food. Every recipe I share is a love letter to food itself. I’m so glad you’re here. Make yourself at home and stay a while.

Love,
Kimberly

Kimberly the Zett Signature

If you want to get to know me better,
click here!


Pasta al Pomodoro
Pasta al Pomodoro
Pasta al Pomodoro
Pasta al Pomodoro

LET’S MAKE A PIECE OF HAPPINESS

Print
clock clock iconcutlery cutlery iconflag flag iconfolder folder iconinstagram instagram iconpinterest pinterest iconfacebook facebook iconprint print iconsquares squares iconheart heart iconheart solid heart solid icon
Pasta al Pomodoro

Pasta al Pomodoro


  • Author: Kimberly
  • Total Time: 20 min
  • Yield: 4 1x

Description

Recommended Equipment

  • large frying pan
  • sharp knife
  • cutting board
  • large pot

Ingredients

Units Scale
  • 4 tbsp olive oil
  • 4 garlic cloves
  • 1 fresh chili
  • 500 grams strained tomatoes
  • 10 grams fresh basil
  • 500 grams pasta of your choice (I used Rigatoni)
  • Parmesan
  • Salt & pepper to taste

Instructions

  1. Warm up 4 tbsp of olive oil over medium heat in a large frying pan. Meanwhile, peel the garlic cloves but leave them whole. Once the oil is warm, add the garlic cloves and let them roast until golden brown. It helps to tilt the pan so the oil pools in one spot, letting the garlic cloves fully submerge.
  2. When the garlic is golden brown, remove it from the pan and set it aside on a cutting board to cool slightly. Meanwhile, get a large pot of water ready for cooking your pasta, place it on the stove, and bring it to a rolling boil.
  3. Now mash the garlic into a paste with a bit of salt using the flat side of your knife on the cutting board – the salt helps break it down. Add this garlic paste back into the olive oil in the pan. Finely chop a fresh chili and add it to the pan as well. Warm everything over medium heat. Meanwhile, wash, dry, and thinly slice the basil leaves. Add the strained tomatoes and basil to the pan, stirring everything well, and let it simmer on low heat.
  4. Add the pasta and a bit of salt to the boiling water, cooking it until al dente. Season the tomato sauce with salt and pepper to taste.
  5. Transfer the pasta to the tomato sauce, add a bit of the pasta water, and stir until the noodles are fully coated in the sauce. Serve the pasta on deep plates, topped with freshly grated Parmesan and a sprinkle of pepper.
  • Cook Time: 20 min

CRAVING MORE?

Follow along here & don’t forget to subscribe to my substack!

Picklenaise (Mayonnaise made from Pickle-Infused Oil)

Picklenaise (Mayonnaise made from Pickle-Infused Oil)

Picklenaise (Mayonnaise made from Pickle-Infused Oil)

Picklenaise (Mayonnaise made from Pickle-Infused Oil)

October 8, 2024 by Kimberly

Okay, prepare yourself – this is not your average mayo! I’ve taken the classic, creamy goodness you love and infused it with the bold, tangy flavor of pickles. You’ll find yourself sneaking spoonfuls because, honestly, it’s that addictive.

This website uses affiliate links which may earn commission for purchases made at no additional cost to you.

TOTAL TIME

5 min

SERVES

1 cup / 250g

DIET

vegetarian

EVERY RECIPE DESERVES

A Little Love Letter

This tangy, creamy spread is about to be your new favorite kitchen hack! Infusing the oil with pickles adds an unexpected twist to your classic mayo, giving it a punch of flavor that’ll level up any sandwich, dip, or burger. Whether you’re making a simple snack or crafting a gourmet meal, this mayo brings a fresh, vibrant vibe to whatever it touches.

Serve this pickle-infused mayo on your favorite sandwiches, drizzle it over a loaded burger, or pair it with fries as a dipping sauce. It’s also amazing in salads or wraps, giving them that extra tangy edge. Feeling adventurous? Add it to your egg salad or potato salad for a zesty upgrade. You should definitely try it on this Sandwich with Egg Salad Spicy Bacon & Caramalized Onions or in this delectable Potato Salad with Eggs Bacon Pickles & Caramalized Onions. Chef’s kiss!

Store this mayo in a sealed jar in the fridge for up to 2 days. Make sure the container is airtight to keep it fresh and maintain its creamy texture. Just give it a stir before each use, and you’re good to go!

Hi, I'm Kimberly!

Hi, I'm Kimberly.

A hopeless romantic when it comes to food. Every recipe I share is a love letter to food itself. I’m so glad you’re here. Make yourself at home and stay a while.

Love,
Kimberly

Kimberly the Zett Signature

If you want to get to know me better,
click here!


Picklenaise (Mayonnaise made from Pickle-Infused Oil)

LET’S MAKE A PIECE OF HAPPINESS

Print
clock clock iconcutlery cutlery iconflag flag iconfolder folder iconinstagram instagram iconpinterest pinterest iconfacebook facebook iconprint print iconsquares squares iconheart heart iconheart solid heart solid icon
Picklenaise - Mayonnaise made from Pickle-Infused Oil

Picklenaise (Mayonnaise made from Pickle-Infused Oil)


  • Author: Kimberly
  • Total Time: 5 minutes

Description

Recommended Equipment

  • tall, narrow container
  • hand blender

Ingredients

Scale
  • 200 milliliters pickle oil
  • 1 egg
  • 3/4 tsp Dijon Mustard
  • 1/2 tsp lemon juice
  • 1/2 tsp white wine vinegar
  • salt & pepper to taste

Instructions

PREPARATIONS

  • Here’s the recipe for the pickle oil. You’ll need 200ml / 1 cup of it.
  • All ingredients must be at room temperature – otherwise, the emulsion won’t work.

INSTRUCTIONS

  1. Crack the egg into a tall, narrow container. Then add the Dijon mustard, lemon juice, white wine vinegar, and salt. Pour in the oil and let everything „settle“ for a moment.
  2. Now, place the hand blender into the container, making sure the attachment fully covers the egg yolk. Turn it on and keep it in place for about 15-20 seconds. During this time, the mixture should start to thicken and creamy white streaks should rise through the oil. Once that happens, you can move the blender up and down to mix in the rest of the ingredients.
  3. Your Picklenaise is now ready! You can adjust the flavor to taste with salt, pepper, or more lemon juice if you like.
  • Cook Time: 5 min

CRAVING MORE?

Follow along here & don’t forget to subscribe to my substack!