


Description
GOOD TO HAVE ON HAND
- sharp knife
- cutting board
- two medium-sized bowls
- small pan
- large pan
Ingredients
Units Scale
SLAW
- 250 grams white cabbage
- 250 grams red cabbage
- 1 cup cilantro
- 1 red onion
- 200 grams low fat yogurt
- salt & pepper to taste
- 550 grams black tiger shrimps (26/30 p. lb. frozen count)
- 2 tbsp olive oil for marinade
- 2 tbsp olive oil for frying
- 3 garlic cloves
- 1 tsp cumin
- 1 tsp smoked paprik
- 1/2 tsp oregano
- 1/2 tsp onion powder
- 1/2 tsp garlic powder
- 1/2 tsp salt
- 1/4 tsp chili flakes
- 12 corn tortillas
- 2 limes
- 3 tbsp yogurt
- 2 spring onions
- cilantro
Instructions
- If you’re using frozen shrimp, let them thaw in a strainer with a drip tray in the fridge a day before you need them. Then wash them thoroughly and pat them dry before further use.
- Rinse fresh shrimp with cold water and pat dry.
- Cut the green part of the spring onions into fine strips lengthwise.
- Quarter the limes.
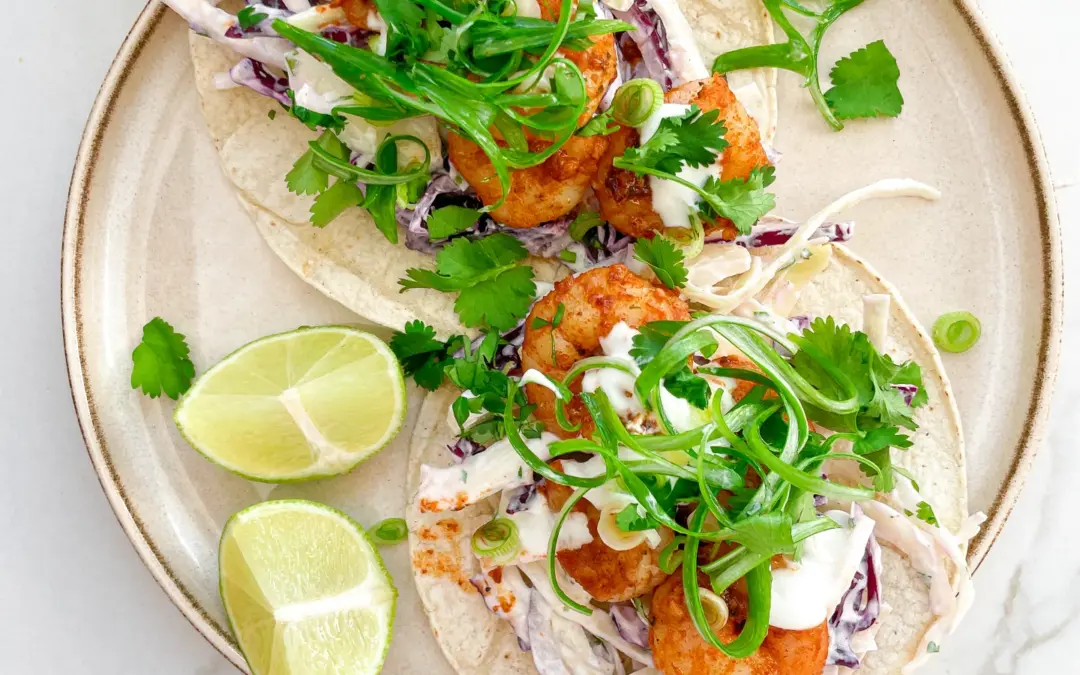
- Slice the red cabbage, white cabbage, and red onion into thin strips and put them in a medium-sized bowl. Pluck the coriander leaves from the stems, roughly chop them, and add to the bowl with the cabbage. Add yogurt, salt, and pepper as well, and stir everything well. Set aside.
- Next, peel and finely chop or press the garlic cloves and mix them with olive oil, chili, cumin, salt, garlic powder, onion powder, smoked paprika, and oregano to create a paste. Coat the shrimp in the paste, ensuring they’re evenly covered. Let marinate for 15 minutes.
- Meanwhile, in a small pan, lightly toast the corn tortillas on both sides without adding fat, so they’re warm but still bendable. Alternatively, you can warm them in the oven for a few minutes.
- Heat 1-2 tablespoons of olive oil in a large pan and fry the shrimp on each side for about 1-2 minutes until they’re no longer transparent and have curled up.
- Spread the tortillas on plates, top with the slaw, distribute 4 shrimps on each, and garnish with yogurt, coriander, spring onion, and lime juice.
- Cook Time: 35 min