Basil Oil

Basil Oil

Basil Oil

Basil Oil

April 16, 2024 by Kimberly

Experience the vibrant, fresh flavors of homemade basil oil! Perfect for drizzling over pasta or enhancing salads and many more dished with its aromatic touch.

75 MINUTES

ADVANCED

VEGAN

ITALIAN

40 PER TSP

HERBACEOUS

MICHELIN

OIL

ALL YEAR

INTRODUCTION

ABOUT THE RECIPE

Discover the simplicity and elegance of homemade basil oil. This delightful infusion captures the essence of fresh basil, offering a quick way to add gourmet flair to your meals. Its vibrant color and fragrance enhance any dish effortlessly.

How to serve:
Drizzle basil oil over fresh pasta, salads, or toasted bread for an instant flavor boost. It’s also perfect as a finishing oil for pizzas and soups, adding a touch of sophistication. For a refreshing twist, mix it into your favorite vinaigrettes.

How to store:
Keep your basil oil refrigerated in an airtight container. It stays fresh for up to a week, ensuring you can savor its herbal freshness in various dishes.

Hi, I'm Kimberly!

Hi, I'm Kimberly.

A passionate food lover who believes in the magic of homemade deliciousness that spreads love and warmth. Join me on this culinary adventure as I prepare wonderful dishes and let’s spread some happiness together!

Kimberly the Zett Signature

If you want to get to know me better, click here!


Basil Oil
Basil Oil
Basil Oil
„Let’s make a piece of happiness“

INGREDIENTS

FOR 250ml (1 CUP)

BASIL OIL

  • 75g fresh basil leaves (1.7 oz)
  • 250ml neutral cooking oil (1 cup)
Basil Oil
}

ACTIVE: –

PASSIVE: –

PREPARATIONS

Recommended Equipment
  • blender
  • medium-sized saucepan
  • whisk
  • a bowl into which the medium saucepan fits
  • 2 medium-sized bowls
  • fine sieve
  • sealable container
  • ice cubes
  • coffee filter
  • none
}

ACTIVE: 15 min

PASSIVE: 60 min

COOKING

1. Separate the leaves from the stems and put the leaves into the blender. Pour in the oil. Blend on the highest setting until it becomes bright green and no pieces of basil are longer visible.

2. Pour the mixture from the blender into a medium-sized pot and heat it over medium heat, constantly stirring, to a temperature of about 102°-103°C (215°-217°F). Then, let the oil simmer with the lid partially on for the next 10 minutes. Stir only occasionally, making sure the temperature remains steady. This cooking time is essential for all the water to evaporate, allowing the perishable solids to settle at the bottom and the dark green oil to float on top. You’ll know all the water has evaporated when the oil in the pot barely bubbles anymore – so if it’s still bubbling vigorously, keep it simmering.

3. Meanwhile, prepare a bowl large enough to fit the medium-sized pot, filled with cold water and a handful of ice cubes. Also, hang a fine sieve strainer over a medium-sized bowl.

4. Now, place the pot in the ice water and stir to stop the cooking process. Once the oil is no longer boiling and is almost cold, remove the pot from the water and pour the oil into the fine sieve to catch the coarse particles.

5. Then, rinse the strainer and hang it over the second medium-sized bowl. Press a coffee filter into the strainer and pour the captured oil into the coffee filter, so that the remaining perishable and coarser particles are caught.

6. Allow the oil to drip through for about 1 hour or maybe more depending on how many remaining particles are in there. Once all the oil has passed through the coffee filter, transfer the collected amount into a sealable container or directly into an oil bottle. Store in the refrigerator for up to one week.

NOTE: The calorie information may vary depending on the product used, country and region.

Asparagus Caramalized Leeks Pizza with Parmesan & Ricotta

Asparagus Caramalized Leeks Pizza with Parmesan & Ricotta

Asparagus Caramalized Leeks Pizza with Parmesan & Ricotta

Asparagus Caramalized Leeks Pizza with Parmesan & Ricotta

April 12, 2024 by Kimberly

Elevate your pizza night with this Asparagus Caramelized Leeks Pizza – it’s a gourmet twist that’s simply irresistible.

3 HOURS

INTERMEDIATE

VEGETARIAN

INT.

855 PER PIZZA

CRISPY

DINNER PARTY

DINNER

SPRING
SUMMER

INTRODUCTION

ABOUT THE RECIPE

Ready to transform your pizza night? This Asparagus Caramelized Leeks Pizza with Parmesan & Ricotta is a game-changer! It combines the earthy sweetness of caramelized leeks with the fresh, green crunch of asparagus, all beautifully balanced with the richness of Ricotta and Parmesan. Perfect for those who love adding a sophisticated twist to their homemade pizzas, this recipe is sure to impress your taste buds and guests alike.

How to serve:
This pizza shines brightest when served fresh out of the oven. Slice it up for a cozy family dinner, or cut it into smaller pieces for a classy appetizer at your next gathering. Pair it with a crisp white wine or a light beer to complement its gourmet toppings. Don’t forget to garnish with some fresh micro greens or arugula for that extra pop of flavor and color!

How to store:
Leftover pizza can be stored in the refrigerator for up to three days. Reheat in a preheated oven at 375°F for about 10 minutes or until heated through. This method helps maintain the crust’s crispiness and the toppings‘ flavor.

Hi, I'm Kimberly!

Hi, I'm Kimberly.

A passionate food lover who believes in the magic of homemade deliciousness that spreads love and warmth. Join me on this culinary adventure as I prepare wonderful dishes and let’s spread some happiness together!

Kimberly the Zett Signature

If you want to get to know me better, click here!


Asparagus Caramalized Leeks Pizza with Parmesan & Ricotta
„Let’s make a piece of happiness“

INGREDIENTS

FOR 4 PIZZAS

PIZZA DOUGH

  • 600g flour type 00 (1.3 lbs)
  • 400ml lukewarm water (1 + 2/3 cups)
  • 2 tsp salt
  • 7g instant dry yeast

BAKED GARLIC

  • 1 garlic bulb
  • 1/4 tsp chili flakes
  • 1/4 tsp salt
  • 3 tbsp olive oil

CARAMALIZED LEEKS

  • 1 leek
  • 2 tsp butter
  • pinch of salt

BAKED TOPPINGS

  • 500g green asparagus (1.1 lbs)
  • 80g parmesan (3 oz)
  • 2 tsp fresh thyme

OTHER TOPPINGS

  • 100g ricotta cheese (3.5 oz)
  • cress
  • black pepper
  • pine nuts
  • fresh lemon juice
  • olive oil
Asparagus Caramalized Leeks Pizza with Parmesan & Ricotta
}

ACTIVE: 20 min

PASSIVE: 60 min

PREPARATIONS

Recommended Equipment
  • sharp knife
  • cutting board
  • peeler
  • cheese grater
  • big bowl
  • oven-safe dish with a lid (or aluminum foil)
  • small pan
  • oven
  • cling film
  • To prepare the dough: mix 600g (1.3 lbs) of flour, 2 tsp of salt, and 7g of dry yeast in a big bowl. Then, make a well in the center of the flour mixture and pour in 400ml (1 + 2/3 cups) of lukewarm water. Now, for about 5-10 minutes, knead everything with your hands into a sticky dough until it all comes together. Stretch some cling film over the bowl and let the dough rest for 10 minutes. After the 10 minutes, remove the cling film and, one by one, from all four directions, grab the dough, lift and fold into the center. Wet your hand with lukewarm water for each side – this keeps the dough from sticking and makes it easier to pull. Cover the bowl again with the cling film, let the dough rest for another 10 minutes, and then give it another round of lifting and folding from the cardinal directions. Cover the bowl again with cling film stretched tight and let it rise for 1 hour at 20°-23°C (68°-73°F) room temperature. After this hour, remove the cling film for the last time, pull and fold the dough into the center from each direction again. Stretch the cling film over the bowl once more and let it rest for a final hour.
  • In the meantime, wash the asparagus, dry it, snap off the woody end, and shave thin slices below the head with a peeler. Set the shavings and asparagus heads aside.
  • Wash the leek and cut it into about 1.5 cm (1/2″) thick slices. Make sure the rings stay together. Set aside.
  • Grate the Parmesan into coarse pieces.
  • Wash and finely chop the thyme.
  • Halve the lemon.
}

ACTIVE: 40 min

PASSIVE: 60 min

COOKING

1. After the prep work, while the dough is rising, you can get started on making the baked garlic, toasted pine nuts, and caramelized leeks.

2. For the garlic, cut off about 1 cm (1/2″) from the top of the bulb to expose the individual cloves. Place the bulb in an oven-safe dish. Drizzle with 3 tablespoons of olive oil, then sprinkle with 1/4 teaspoon of chili flakes and 1/4 teaspoon of salt. Cover with a lid and bake at 250°C (482°F) for about 45 minutes.

3. Heat a small frying pan over medium heat. Toast the pine nuts without adding any fat until they are golden brown, which should take a few minutes. Transfer the pine nuts to a small bowl and set aside. Wipe out the pan and place it back on the stove.

4. To caramelize the leeks, heat the small frying pan over low to medium heat and add 2 teaspoons of butter. Once melted, lay the leek rings in the pan and cook for 10-15 minutes until the bottom is golden brown and the leeks are soft. Then carefully flip each piece over, making sure the leek rings stay intact and don’t fall apart. Cook for another 5 minutes on the other side. Set the pan with the leeks aside.

5. Carefully remove the garlic from the oven and let it cool. Once it’s cool enough to handle, squeeze each clove out of its skin into the oil in the dish in which the bulb was baked. Mash the cloves well into the oil to create a garlic paste. Set aside. Now preheat the oven to 230°C (446°F) with fan.

6. Prepare a piece of parchment paper and lightly dust it with flour. Once the dough has risen, divide it into 4 equal pieces. Take one piece and place it on the floured parchment paper. Also, dust the top of the dough with a bit of flour. Gently press the dough outwards with your fingers until it can’t stretch any further, which you’ll notice when it starts to spring back quickly. The dough should be about 1.5 (1/2″) cm thick.

7. Next, spread some olive oil over the dough, followed by grated Parmesan, a bit of the garlic oil paste, then shaved asparagus slices and a few asparagus heads, and finally the leek rings. Sprinkle a little thyme over everything and bake for 20 minutes.

8. Get the pizza out of the oven and top with dollops of ricotta cheese, toasted pine nuts, microgreens, freshly ground pepper, freshly squeezed lemon juice, and optional a little more olive oil. Cut the pizza into pieces and serve.

NOTE: The calorie information may vary depending on the product used, country and region.

Yellow Bell Pepper Oil

Yellow Bell Pepper Oil

Yellow Bell Pepper Oil

Yellow Bell Pepper Oil

April 9, 2024 by Kimberly

Unlock the vibrant taste of summer with this yellow bell pepper infused oil! Perfect for drizzling over salads or enhancing your favorite dishes. A kitchen must-have!

2 HOURS

ADVANCED

VEGAN

INT.

40 PER TSP

UMAMI
TANGY
REFRESHING

MICHELIN

OIL

ALL YEAR

INTRODUCTION

ABOUT THE RECIPE

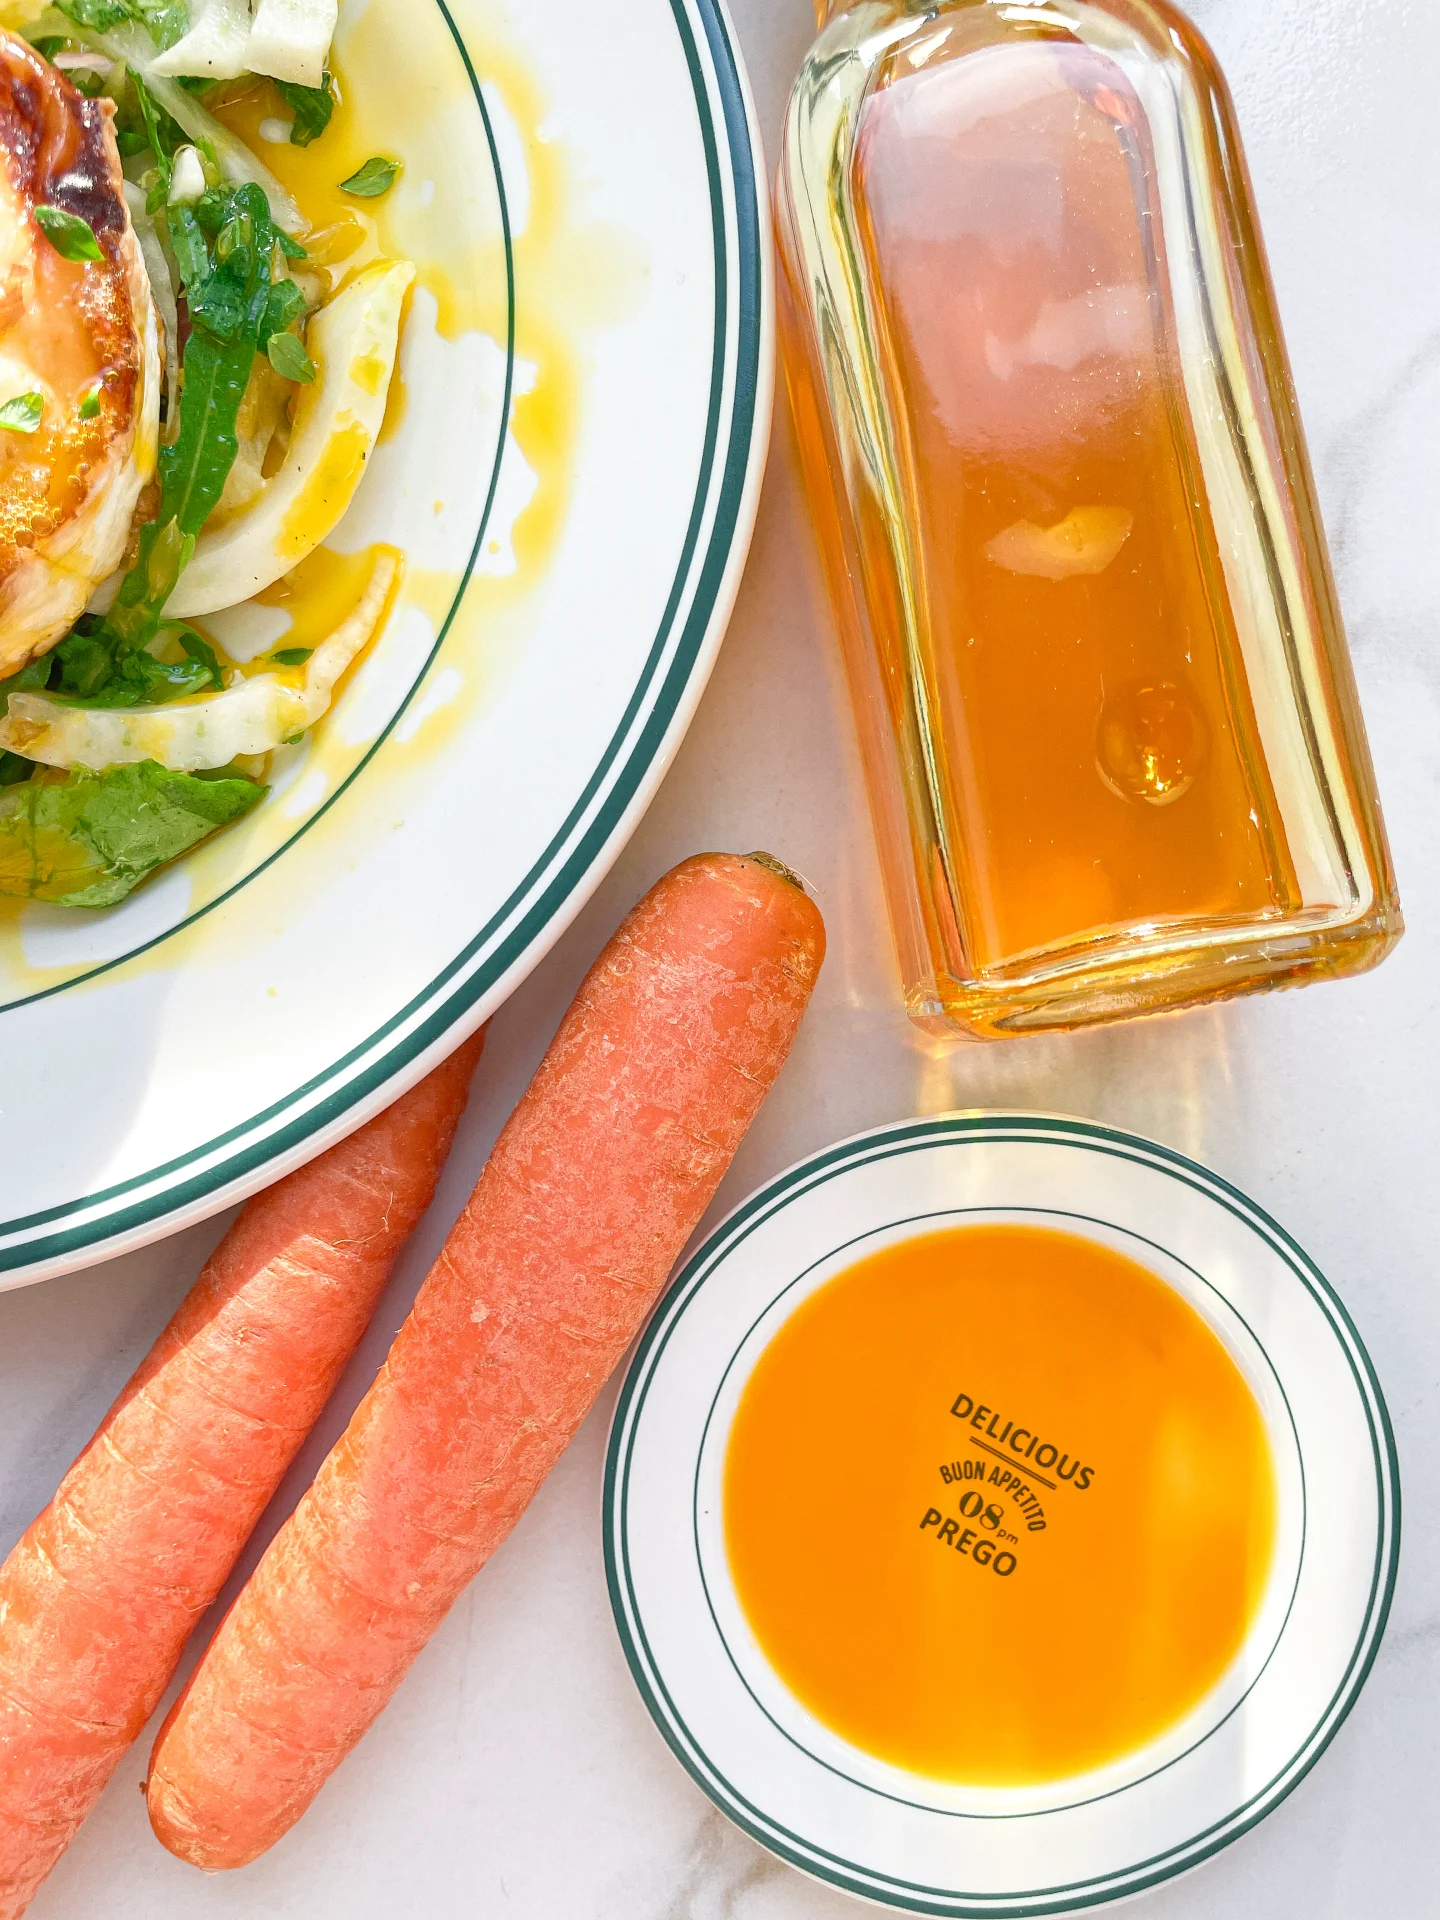
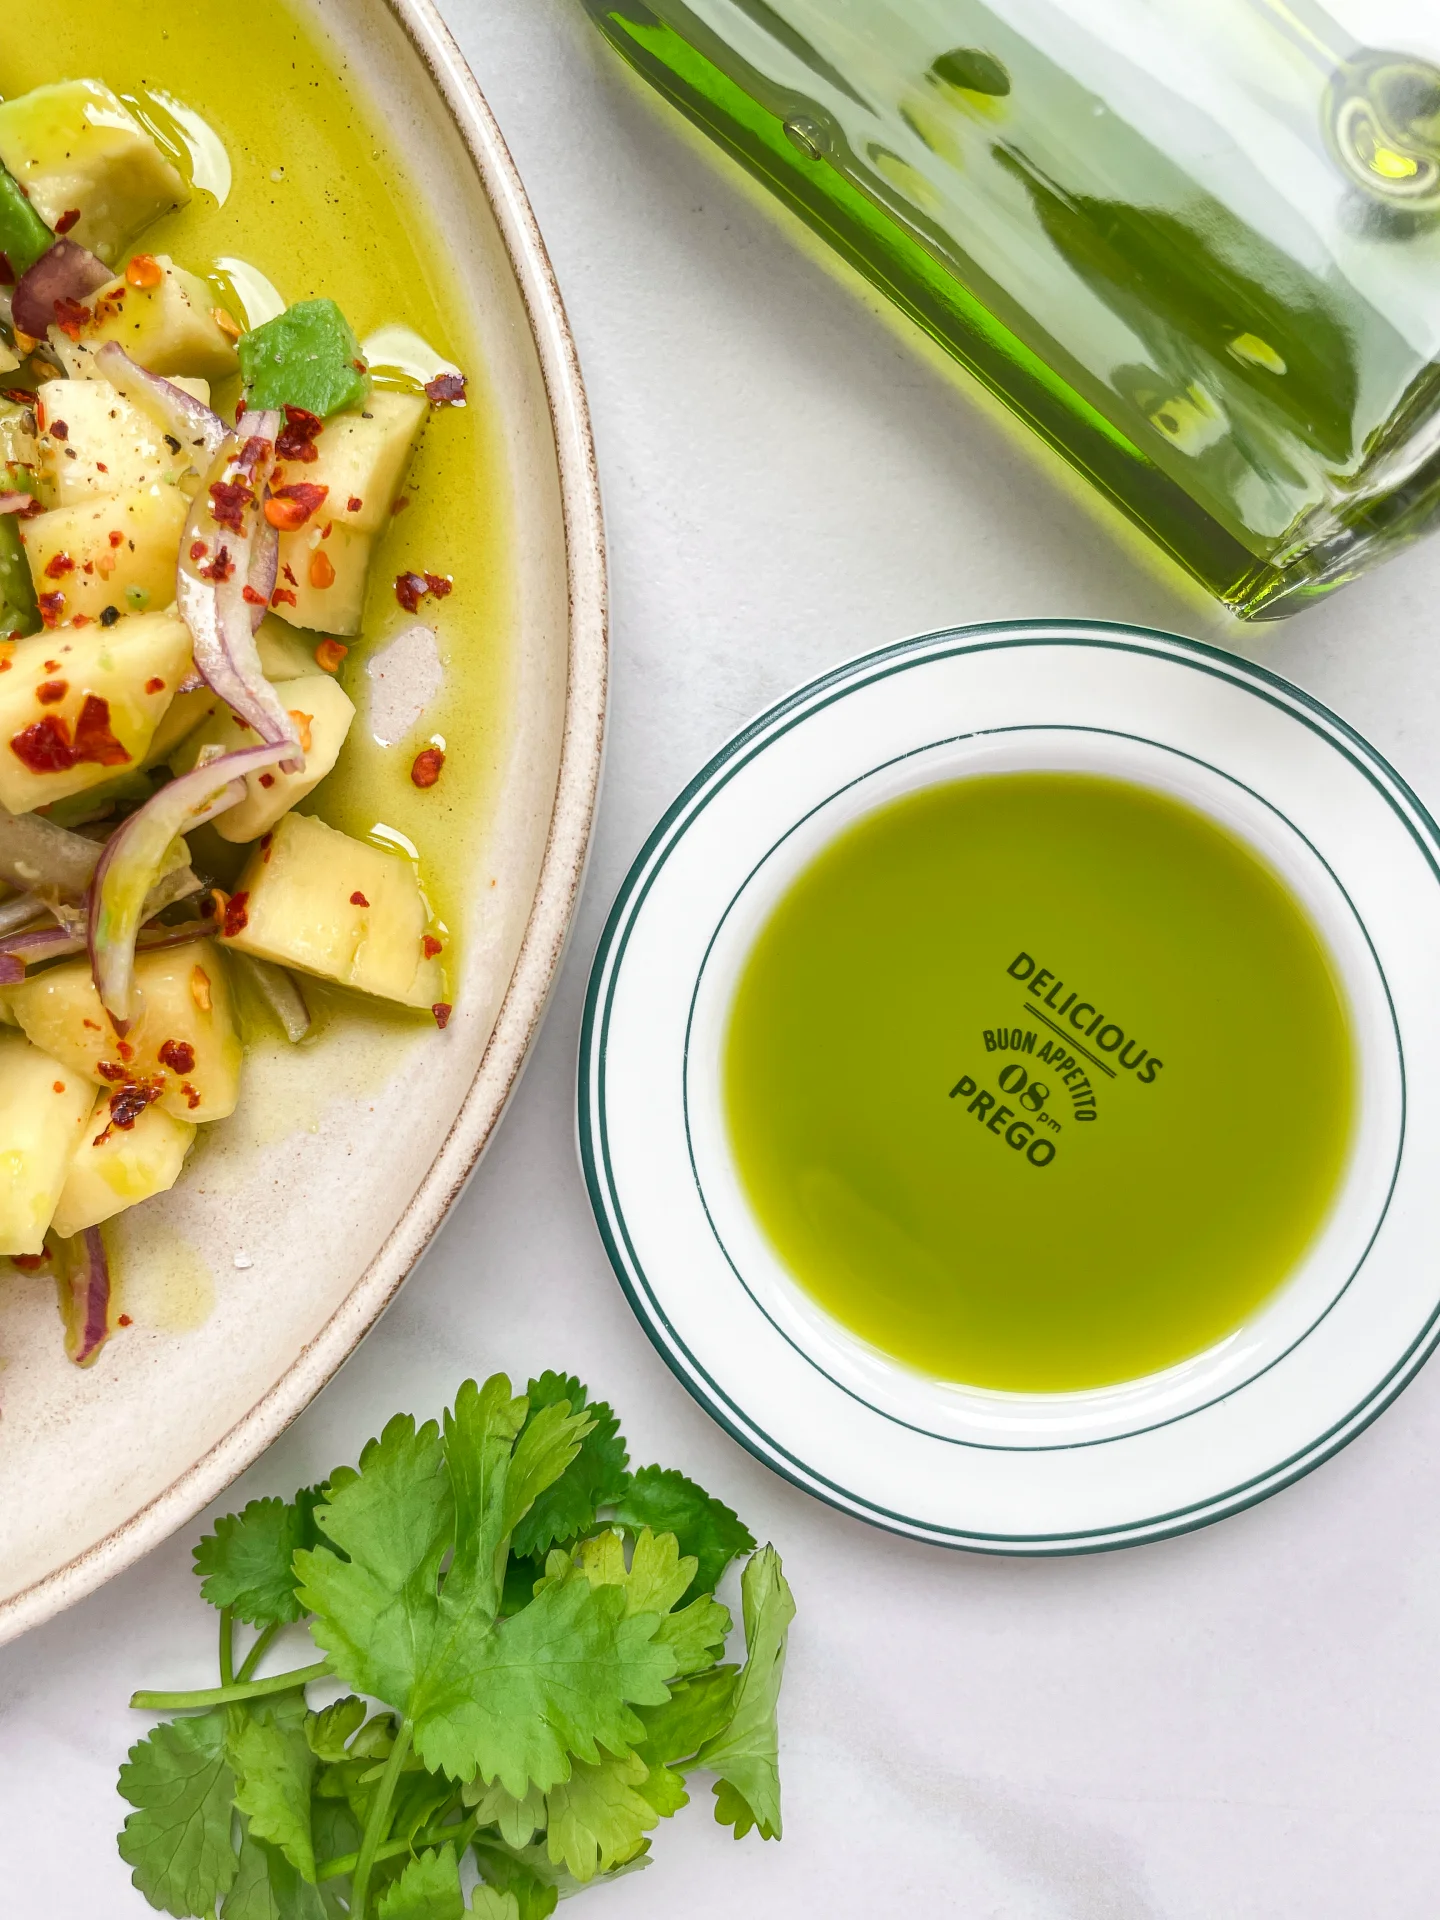
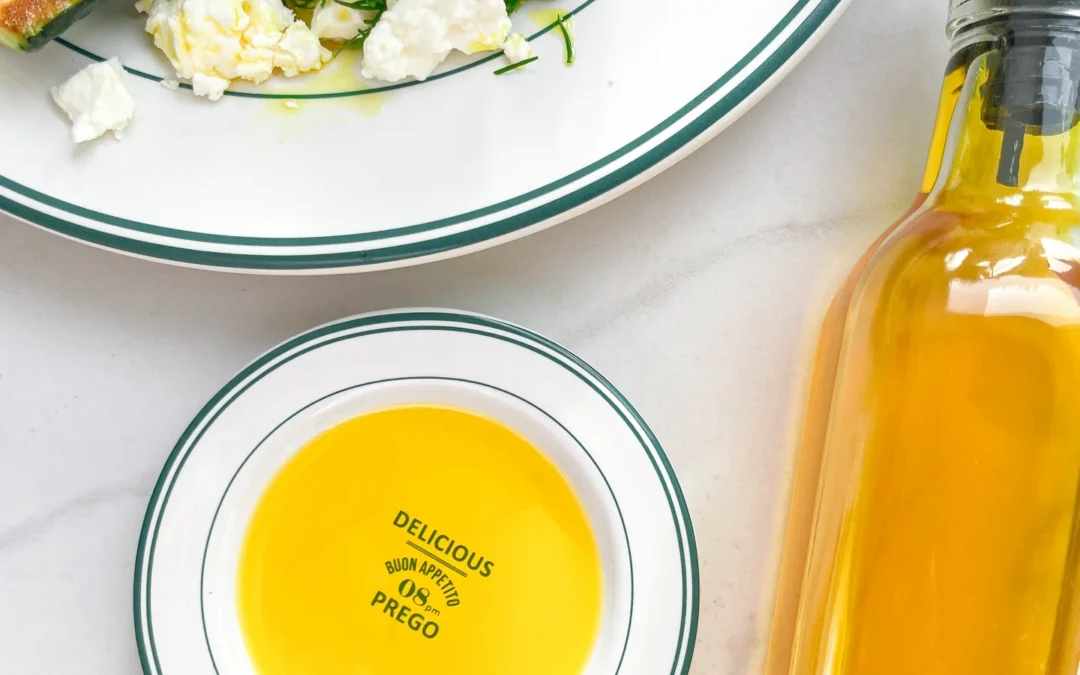
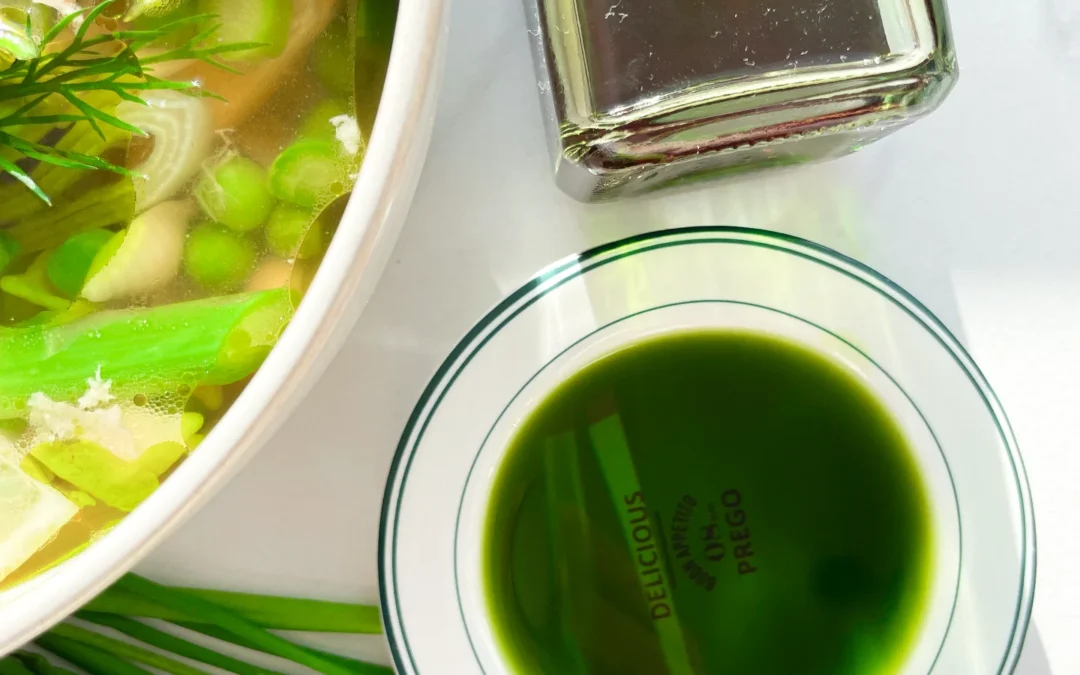
Dive into the essence of culinary creativity with this yellow Bell Pepper Infused Oil! This simple yet transformative recipe brings a splash of color and a burst of flavor to any dish, making it an indispensable addition to your kitchen repertoire. It’s a gourmet twist suitable for drizzling over salads, pastas, and even for giving your bread dips an upgrade.

How to serve:
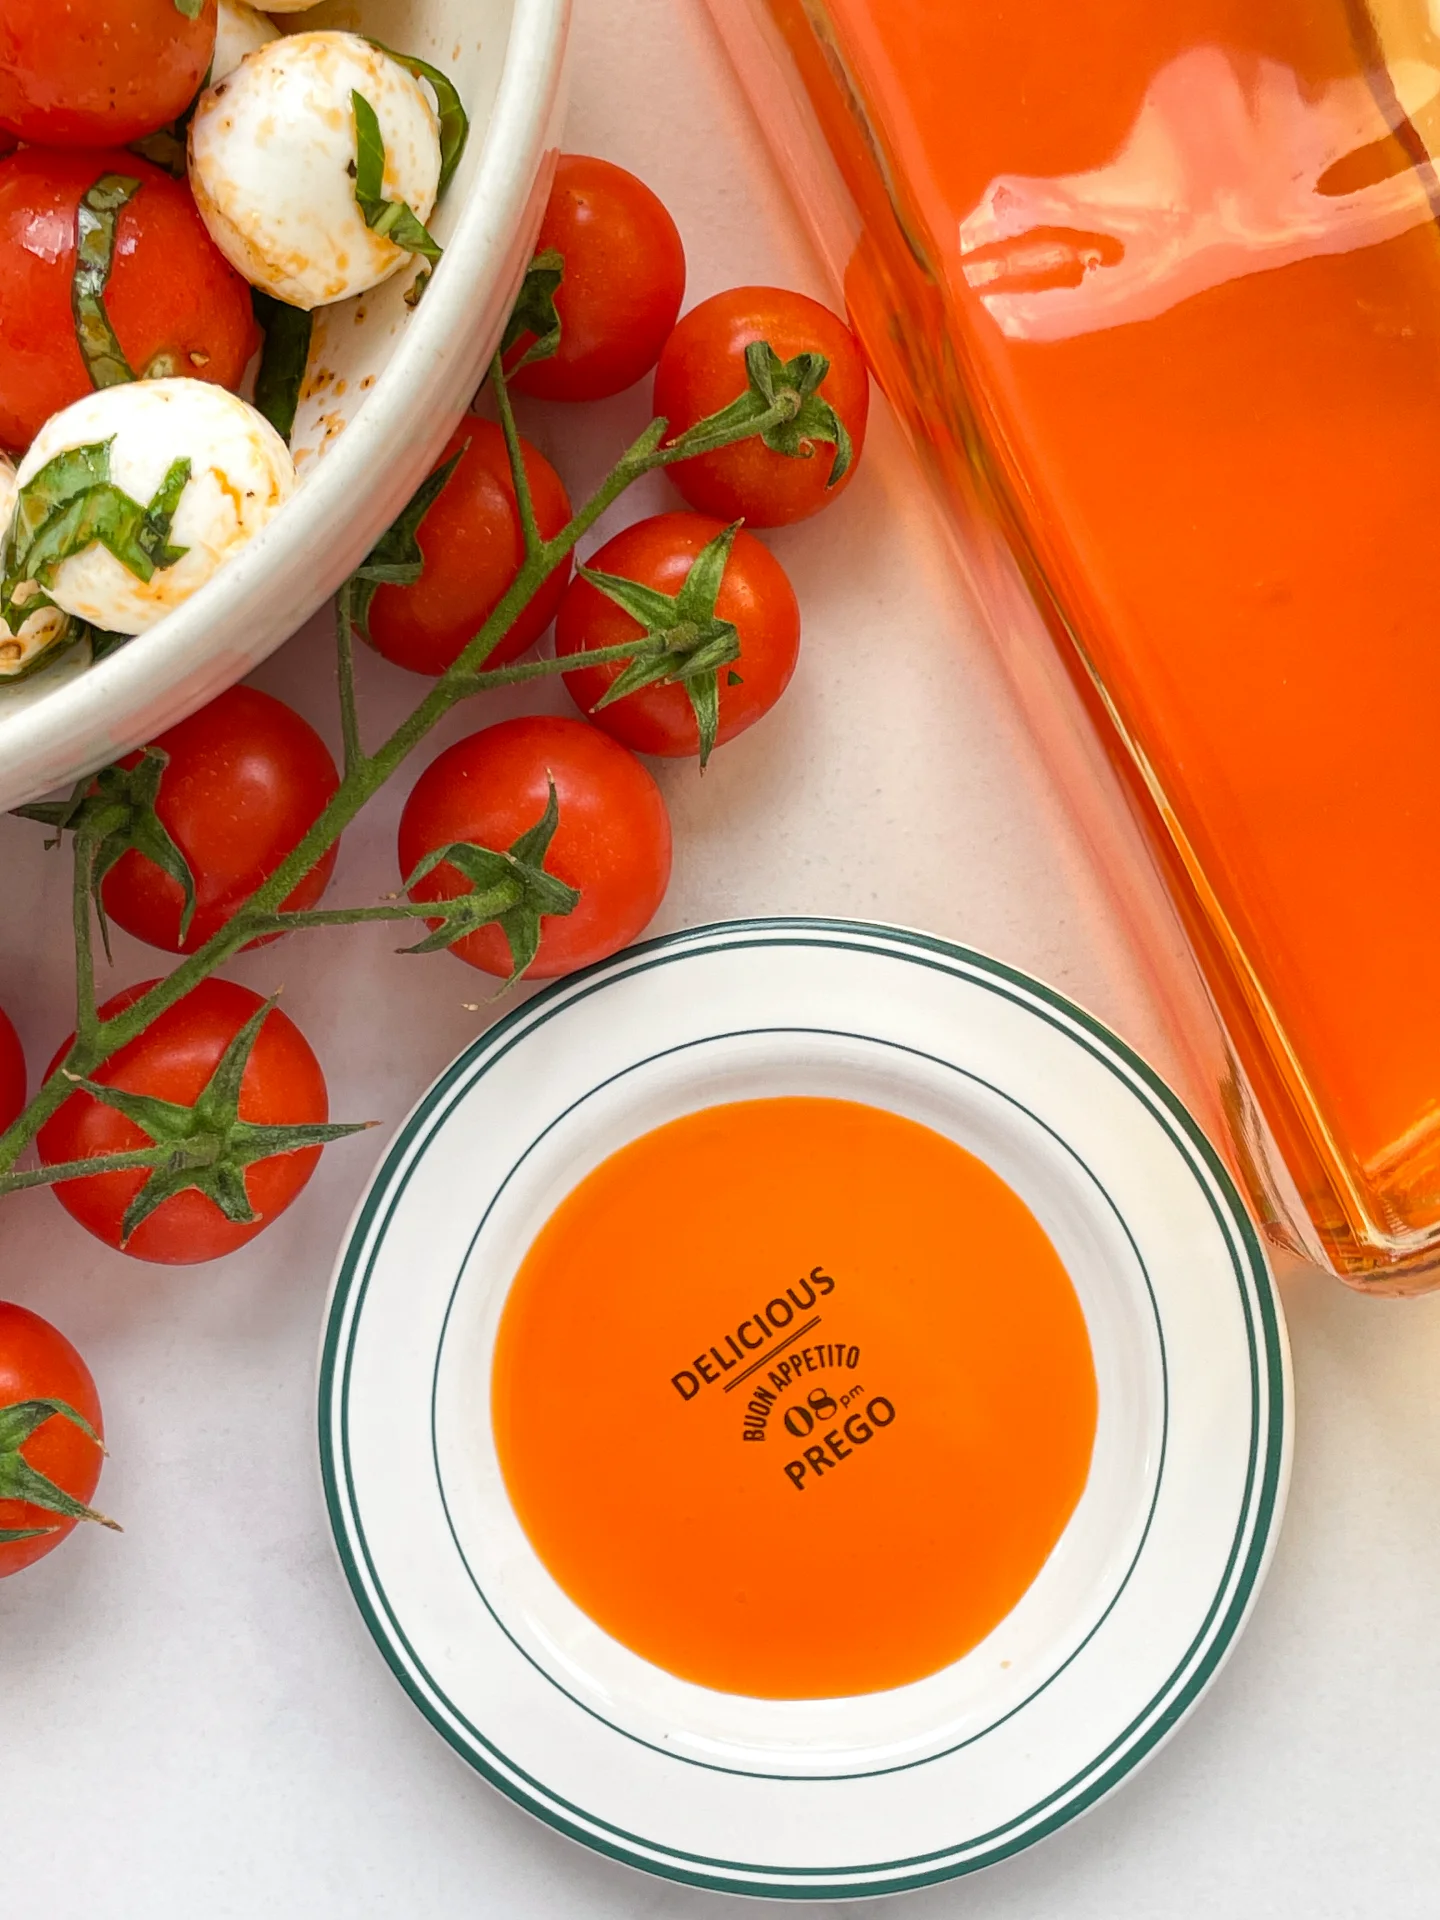
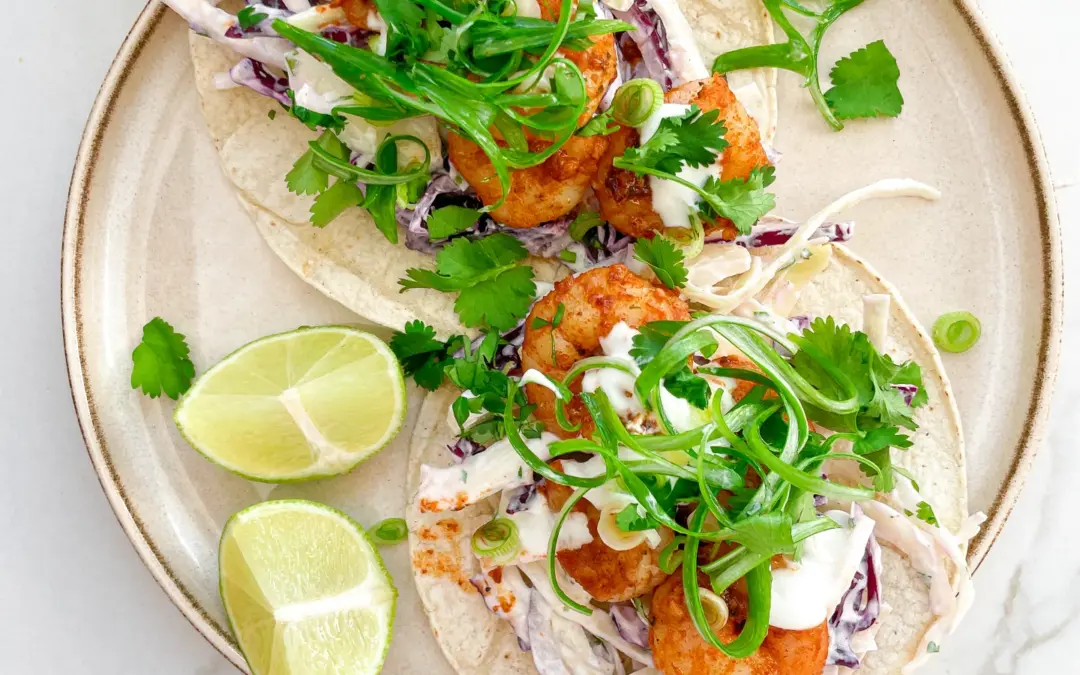
Drizzle it over a crisp, green salad to add a hint of sweetness and depth, or blend it into homemade mayonnaise for a unique twist on a classic condiment. It’s also perfect for finishing off grilled vegetables or pizzas, adding a layer of flavor that’s both nuanced and refreshing. The possibilities are endless, and this oil guarantees to turn even the simplest of dishes into a gourmet experience.

How to store:
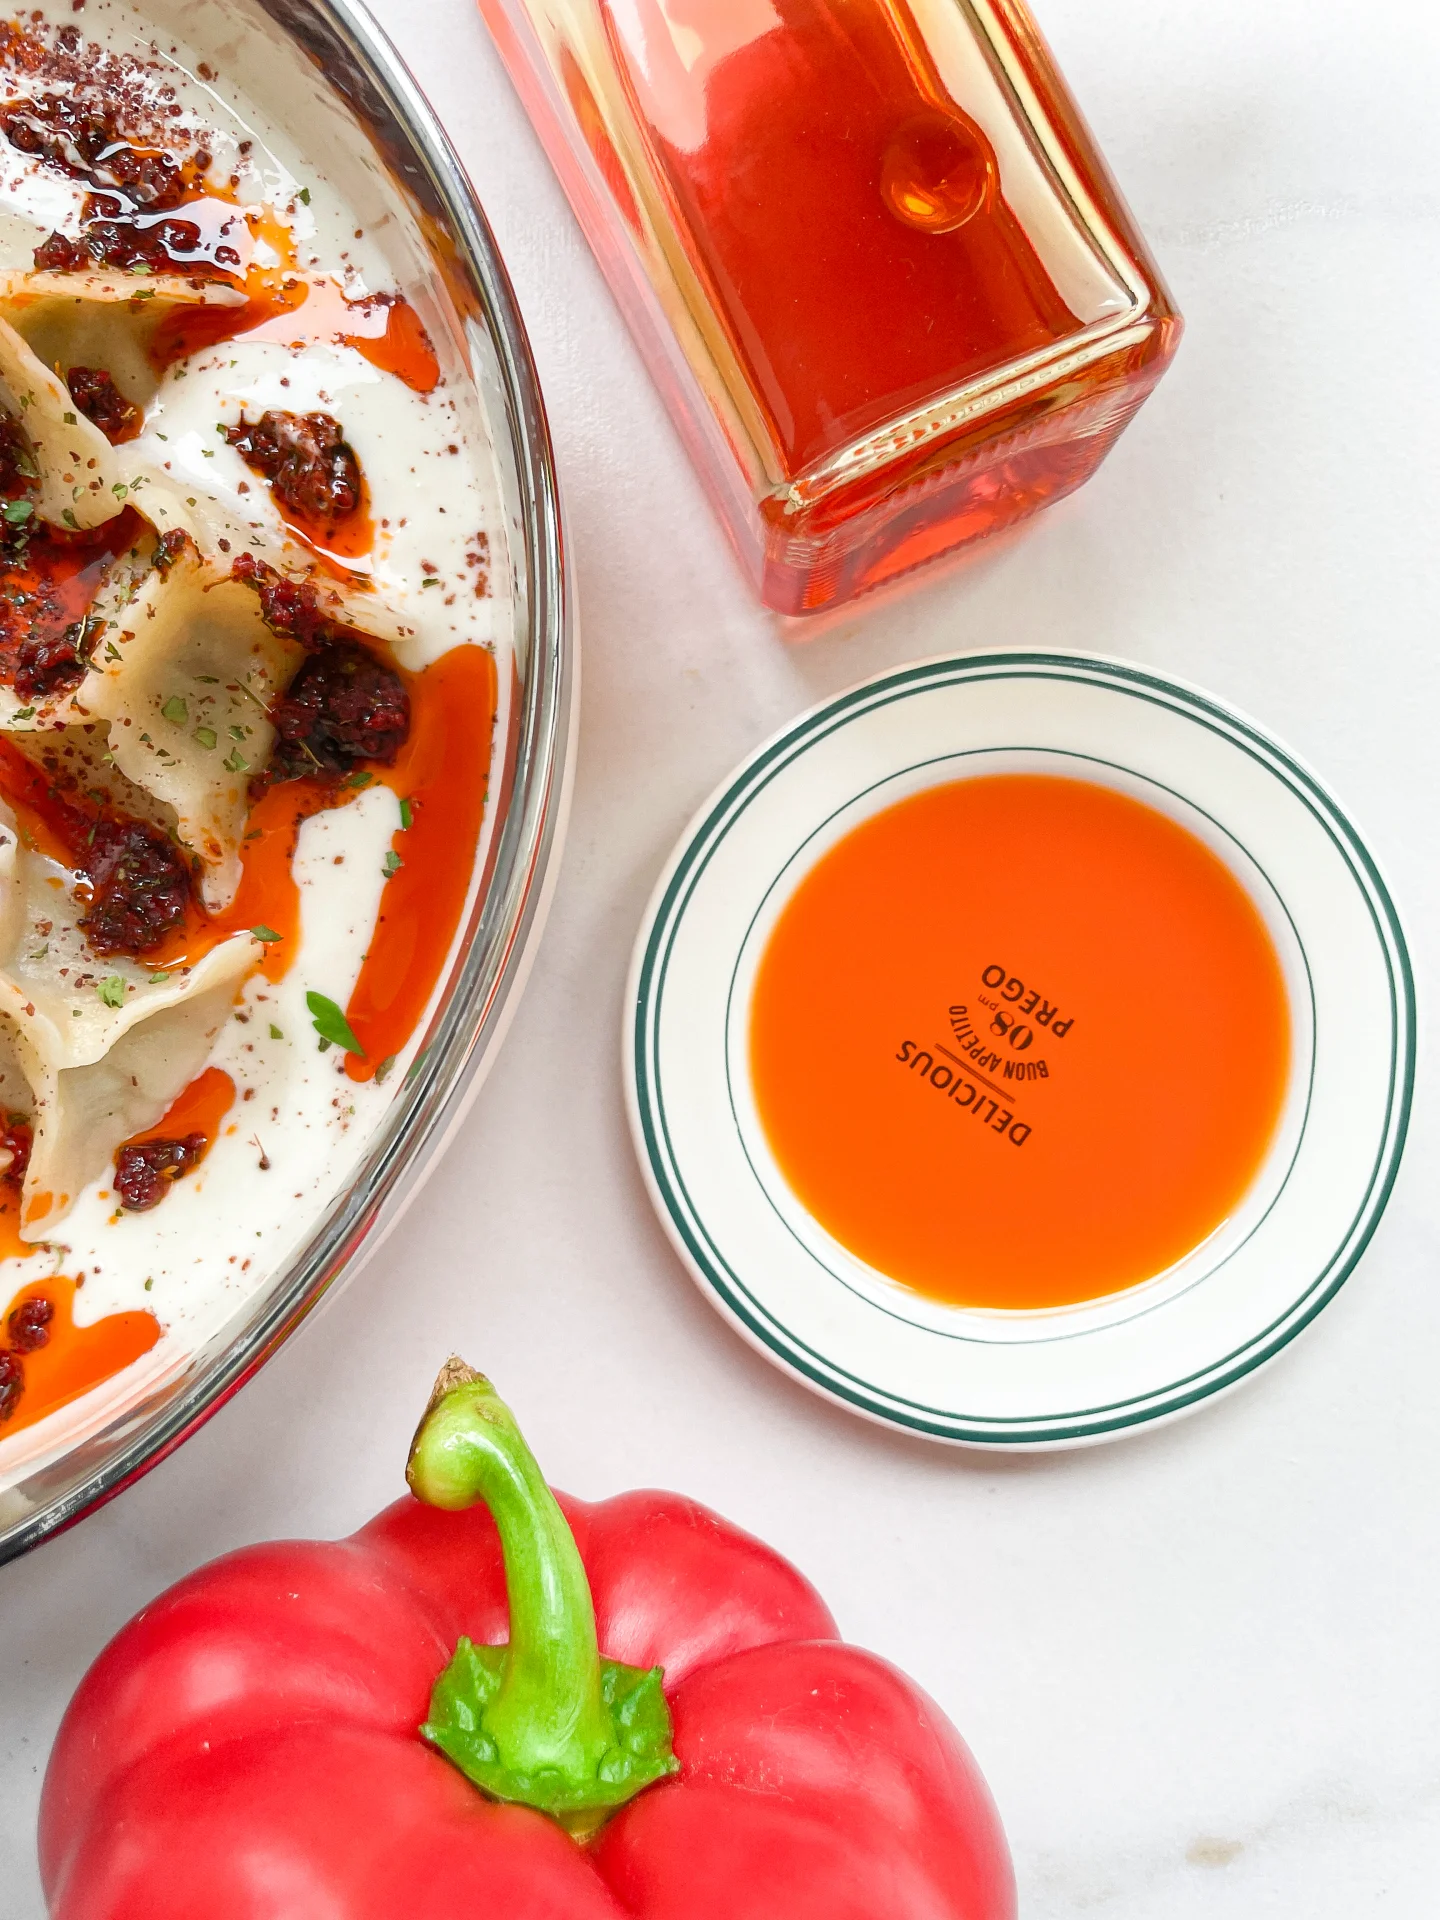
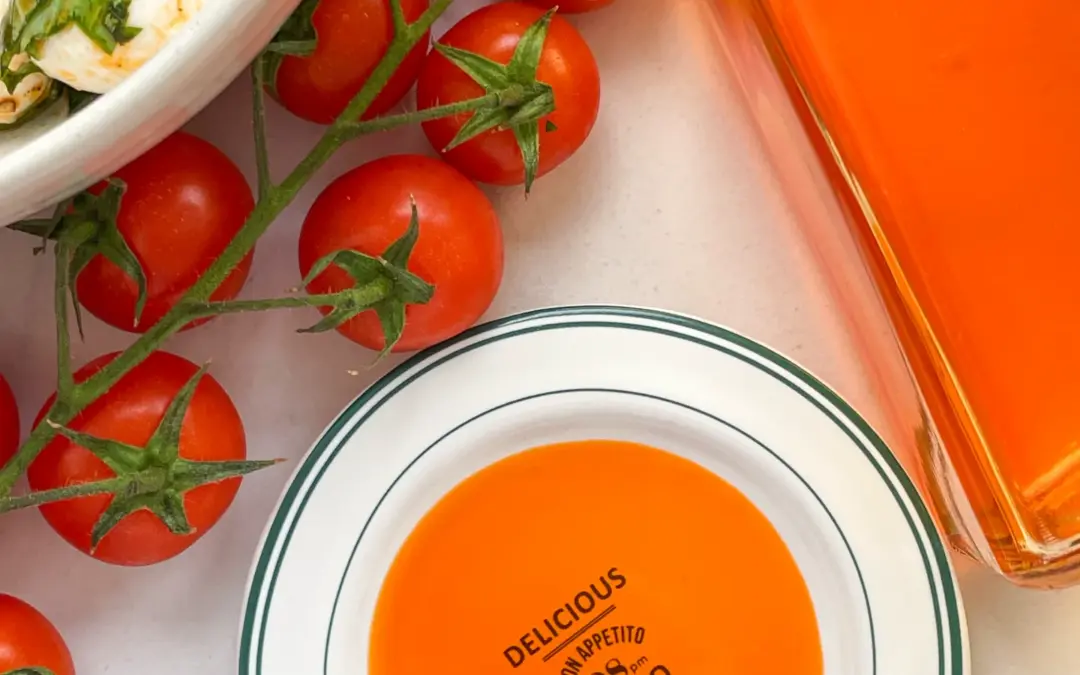
To preserve the fresh flavors of your Yellow Bell Pepper Infused Oil, store it in a cool, dark place. A glass bottle with a tight seal is ideal, ensuring your oil stays fresh for up to a month. This way, you always have a splash of summer ready at your fingertips!

Hi, I'm Kimberly!

Hi, I'm Kimberly.

A passionate food lover who believes in the magic of homemade deliciousness that spreads love and warmth. Join me on this culinary adventure as I prepare wonderful dishes and let’s spread some happiness together!

Kimberly the Zett Signature

If you want to get to know me better, click here!


Yellow Bell Pepper Oil
„Let’s make a piece of happiness“

INGREDIENTS

FOR 350ml (1.5 CUPS)

YELLOW BELL PEPPER OIL

  • 450g fresh yellow bell peppers (1 lbs)
  • 350ml neutral cooking oil (1.5 cups)
Yellow Bell Pepper Oil
}

ACTIVE: 3 min

PASSIVE: –

PREPARATIONS

Recommended Equipment
  • blender
  • medium-sized saucepan
  • whisk
  • a bowl into which the medium saucepan fits
  • 2 medium-sized bowls
  • fine sieve
  • sealable container
  • ice cubes
  • coffee filter
  • Wash the peppers and remove both the stem and the core.
}

ACTIVE: 60 min

PASSIVE: 60 min

COOKING

1. Put the bell pepper pieces into the blender. Pour in the oil. Blend on the highest setting until it becomes a thick consistency and no pieces of bell pepper are longer visible.

2. Pour the mixture from the blender into a medium-sized pot and heat it over medium heat, constantly stirring, to a temperature of about 102°-103°C (215°-217°F). Then, let the oil simmer with the lid partially on for the next 40-45 minutes. Stir only occasionally, making sure the temperature remains steady. This long cooking time is essential for all the water to evaporate, allowing the perishable solids to settle at the bottom and the bright yellow oil to float on top. You’ll know all the water has evaporated when the oil in the pot barely bubbles anymore – so if it’s still bubbling vigorously, keep it simmering.

3. At the end of the cooking process, prepare a bowl large enough to fit the medium-sized pot, filled with cold water and a handful of ice cubes. Also, hang a fine sieve strainer over a medium-sized bowl.

4. Now, place the pot in the ice water and stir to stop the cooking process. Once the oil is no longer boiling and is almost cold, remove the pot from the water and pour the oil into the fine sieve to catch the coarse particles.

5. Then, rinse the strainer and dry it off well and hang it over the second medium-sized bowl. Press a coffee filter into the strainer and pour the captured oil into the coffee filter, so that the remaining perishable and coarser particles are caught.

6. Allow the oil to drip through for about 1 to 2 hours. Once all the oil has passed through the coffee filter, transfer the collected amount into a sealable container or directly into an oil bottle. Store in the refrigerator.

NOTE: The calorie information may vary depending on the product used, country and region.

Fresh Prawn Tacos & Coleslaw

Fresh Prawn Tacos & Coleslaw

Fresh Prawn Tacos & Slaw

Fresh Prawn Tacos & Slaw

April 9, 2024 by Kimberly

Discover the joy of Fresh Prawn Tacos & Slaw – a zesty, mouth-watering feast that’s perfect for any day. Easy, delicious, and absolutely unforgettable!

40 MINUTES

EASY

OMNIVORE

MEXICAN

147 PER TACO

REFRESHINGEVERYDAY

LUNCH 
DINNER

SPRING 
SUMMER

INTRODUCTION

ABOUT THE RECIPE

Dive into the delightful world of Fresh Prawn Tacos & Slaw, your new go-to recipe for a quick, healthy, and utterly delicious meal. This dish combines the juicy, succulent flavors of fresh prawns with the crisp, refreshing taste of homemade slaw, all wrapped up in a soft taco shell. It’s the perfect balance of textures and tastes, sure to tantalize your taste buds!

How to serve:
Serve these tacos fresh off the skillet for the best experience. Pair them with a side of lime wedges & extra slaw. Don’t forget a cold, refreshing drink to wash down the flavors. These prawn tacos are not just food – they’re a vibrant, interactive dining experience that everyone can get excited about.

How to store:
Leftover prawn fillings and slaw can be stored separately in airtight containers in the fridge. They’ll keep well for up to two days, making for an easy, delicious lunch or dinner option whenever you’re short on time.

Hi, I'm Kimberly!

Hi, I'm Kimberly.

A passionate food lover who believes in the magic of homemade deliciousness that spreads love and warmth. Join me on this culinary adventure as I prepare wonderful dishes and let’s spread some happiness together!

Kimberly the Zett Signature

If you want to get to know me better, click here!


Fresh Prawn Tacos & Slaw
„Let’s make a piece of happiness“

INGREDIENTS

FOR 12 TACOS

SLAW

  • 250g white cabbage (9 oz)
  • 250g red cabbage (9 oz)
  • 1 cup cilantro
  • 1 red onion
  • 200g low fat yogurt (7 oz)
  • salt & pepper to taste

PRAWNS

  • 550g black tiger prawns – 26/30 p. lb. frozen count (1.2 lb)
  • 2 tbsp olive oil for marinade
  • 2 tbsp olive oil for frying
  • 3 garlic cloves
  • 1 tsp cumin
  • 1 tsp smoked paprik
  • 1/2 tsp oregano
  • 1/2 tsp onion powder
  • 1/2 tsp garlic powder
  • 1/2 tsp salt
  • 1/4 tsp chili flakes

TOPPINGS & TACOS

  • 12 corn tortillas
  • 2 limes
  • 3 tbsp yogurt
  • 2 spring onions
  • cilantro
Fresh Prawn Tacos & Slaw
}

ACTIVE: 10 min

PASSIVE: –

PREPARATIONS

Recommended Equipment
  • sharp knife
  • cutting board
  • two medium-sized bowls
  • small pan
  • large pan
  • If you’re using frozen shrimp, let them thaw in a strainer with a drip tray in the fridge a day before you need them. Then wash them thoroughly and pat them dry before further use.
  • Rinse fresh shrimp with cold water and pat dry.
  • Cut the green part of the spring onions into fine strips lengthwise.
  • Quarter the limes.
}

ACTIVE: 25 min

PASSIVE: –

COOKING

1. Slice the red cabbage, white cabbage, and red onion into thin strips and put them in a medium-sized bowl. Pluck the coriander leaves from the stems, roughly chop them, and add to the bowl with the cabbage. Add yogurt, salt, and pepper as well, and stir everything well. Set aside.

2. Next, peel and finely chop or press the garlic cloves and mix them with olive oil, chili, cumin, salt, garlic powder, onion powder, smoked paprika, and oregano to create a paste. Coat the shrimp in the paste, ensuring they’re evenly covered. Let marinate for 15 minutes.

3. Meanwhile, in a small pan, lightly toast the corn tortillas on both sides without adding fat, so they’re warm but still bendable. Alternatively, you can warm them in the oven for a few minutes.

4. Heat 1-2 tablespoons of olive oil in a large pan and fry the shrimp on each side for about 1-2 minutes until they’re no longer transparent and have curled up.

5. Spread the tortillas on plates, top with the slaw, distribute 4 shrimps on each, and garnish with yogurt, coriander, spring onion, and lime juice.

NOTE: The calorie information may vary depending on the product used, country and region.

Tomato Oil

Tomato Oil

Tomato Oil

Tomato Oil

April 2, 2024 by Kimberly

Discover the vibrant burst of flavor with homemade tomato oil! This easy-to-make oil adds a gourmet touch to any meal.

2 HOURS

ADVANCED

VEGAN

INT.

40 PER TSP

UMAMIMICHELIN

OIL

ALL YEAR

INTRODUCTION

ABOUT THE RECIPE

Dive into the world of gourmet flavors with my homemade tomato oil! Made from the freshest tomatoes, this oil is a game-changer for any kitchen. Its rich, tomato-infused taste transforms simple dishes into culinary masterpieces. Perfect for chefs of all levels, this easy recipe is your secret ingredient for that extra flavor kick.

How to serve:
Tomato oil is incredibly versatile, adding depth and aroma to any dish. Drizzle it over fresh salads for a summery vibe or blend it into your pasta for an instant flavor upgrade. It’s also perfect as a finishing oil on grilled vegetables, pizzas, and even soups. Elevate your bread dipping game by serving this rich oil alongside your favorite bread.

How to store:
For longevity, store your tomato oil in a clean, airtight container in the refrigerator. It keeps well for up to two weeks, ensuring you have this delightful flavor enhancer at hand whenever your dishes need a burst of tomato magic.

Hi, I'm Kimberly!

Hi, I'm Kimberly.

A passionate food lover who believes in the magic of homemade deliciousness that spreads love and warmth. Join me on this culinary adventure as I prepare wonderful dishes and let’s spread some happiness together!

Kimberly the Zett Signature

If you want to get to know me better, click here!


Tomato Oil
Tomato Oil
Tomato Oil
„Let’s make a piece of happiness“

INGREDIENTS

FOR 250ml (1 CUP)

TOMATO OIL

  • 400g fresh tomatoes (14 oz)
  • 250ml neutral cooking oil (1 cup)
Tomato Oil
}

ACTIVE: 2 min

PASSIVE: –

PREPARATIONS

Recommended Equipment
  • blender
  • medium-sized saucepan
  • whisk
  • a bowl into which the medium saucepan fits
  • 2 medium-sized bowls
  • fine sieve
  • sealable container
  • ice cubes
  • coffee filter
  • Wash the tomatoes and remove the greens.
}

ACTIVE: 60 min

PASSIVE: 60 min

COOKING

1. Put the tomatoes into the blender. Pour in the oil. Blend on the highest setting until it becomes a thick bright orange consistency and no pieces of tomatoes are longer visible.

2. Pour the mixture from the blender into a medium-sized pot and heat it over medium heat, constantly stirring, to a temperature of about 102°-103°C (215°-217°F). Then, let the oil simmer with the lid partially on for the next 30-40 minutes. Stir only occasionally, making sure the temperature remains steady. This long cooking time is essential for all the water to evaporate, allowing the perishable solids to settle at the bottom and the dark red oil to float on top. You’ll know all the water has evaporated when the oil in the pot barely bubbles anymore – so if it’s still bubbling vigorously, keep it simmering.

3. At the end of the cooking process, prepare a bowl large enough to fit the medium-sized pot, filled with cold water and a handful of ice cubes. Also, hang a fine sieve strainer over a medium-sized bowl.

4. Now, place the pot in the ice water and stir to stop the cooking process. Once the oil is no longer boiling and is almost cold, remove the pot from the water and pour the oil into the fine sieve to catch the coarse particles.

5. Then, rinse the strainer, dry it off well and hang it over the second medium-sized bowl. Press a coffee filter into the strainer and pour the captured oil into the coffee filter, so that the remaining perishable and coarser particles are caught.

6. Allow the oil to drip through for about 1 to 2 hours. Once all the oil has passed through the coffee filter, transfer the collected amount into a sealable container or directly into an oil bottle. Store in the refrigerator.

NOTE: The calorie information may vary depending on the product used, country and region.

Lemon Blueberry Coffee Cake

Lemon Blueberry Coffee Cake

Lemon Blueberry Coffee Cake

Lemon Blueberry Coffee Cake

March 30, 2024 by Kimberly

Indulge in the cozy comfort of this Lemon Blueberry Coffee Cake, where every slice is a celebration of flavors, love, and homemade happiness.

80 MINUTES

EASY

VEGETARIAN

INT.

340 PER PORTION

SWEET

EASTER

CAKE

SPRING
SUMMER

INTRODUCTION

ABOUT THE RECIPE

Indulge in the perfect blend of tangy and sweet with this Lemon Blueberry Coffee Cake! This easy-to-make recipe brings you the moistness of coffee cake, bursting with fresh blueberries and a zesty lemon flavor. Ideal for breakfast, brunch, or a delightful afternoon treat, it’s a guaranteed crowd-pleaser.

How to serve:
Serve this Lemon Blueberry Coffee Cake freshly baked, with a dusting of powdered sugar or a drizzle of my lemon glaze for an extra touch of sweetness. It pairs wonderfully with your morning coffee or a cold glass of milk. Planning a brunch or a garden party? This cake makes an elegant addition to your menu, offering a refreshing burst of flavors that perfectly complement the summer vibe.

How to store:
Keep leftovers in an airtight container or wrapped up in cling film at room temperature for up to two days or refrigerate for longer freshness. Enjoy it chilled or briefly warmed up in the microwave for a just-baked experience any time!

Hi, I'm Kimberly!

Hi, I'm Kimberly.

A passionate food lover who believes in the magic of homemade deliciousness that spreads love and warmth. Join me on this culinary adventure as I prepare wonderful dishes and let’s spread some happiness together!

Kimberly the Zett Signature

If you want to get to know me better, click here!


Lemon Blueberry Coffee Cake
„Let’s make a piece of happiness“

INGREDIENTS

FOR 10 PORTIONS

CAKE BATTER

  • 240g all-purpose flour (1.5 cups)
  • 1 tsp backing powder
  • 1/2 tsp salt
  • 80g butter (1/3 cup)
  • 110g white sugar (1/2 cup)
  • 2 eggs
  • 1/2 tsp vanilla extract
  • 1 tbsp lemon zest
  • juice of half a lemon
  • 120g yoghurt (1/2 cup)
  • 180g blueberries (1 cup)
  • 1 tbsp all-purpose flour

CRUMBLE

  • 100g all-purpose flour (1/2 cup)
  • 50g white sugar (1/4 cup)
  • 50g soft butter (1/4 cup)

GLAZE

  • 60g powdered sugar (1/2 cup)
  • juice of half a lemon
  • 1/2 tsp vanilla extract
Lemon Blueberry Coffee Cake
}

ACTIVE: 10 min

PASSIVE: –

PREPARATIONS

Recommended Equipment
  • sharp knife
  • cutting board
  • baking dish – my measures 25×11 cm (10”x4”)
  • grater
  • two small bowls
  • two medium-sized bowls
  • large bowl
  • spatula
  • whisk
  • microwave (or small pot)
  • Preheat the oven to 175°C (350°F)
  • Line a rectangular baking dish with parchment paper.
  • Melt 80g (1/3 cup) butter in the microwave or in a small saucepan.
  • Toss the blueberries in a small bowl with 1 tablespoon of flour until all the blueberries are coated with flour.
  • For the crumble, mix together in a medium-sized bowl 50g (1/4 cup) white sugar, 50g (1/4 cup) softened butter, and 100g (1/2 cup) flour until small crumbs and larger clumps form. Set aside.
  • Zest the lemon and then halve the lemon.
}

ACTIVE: 10 min

PASSIVE: 60 min

COOKING

1. In a medium-sized bowl, mix together flour, baking powder, and salt and set it aside.

2. In a large bowl, whisk together melted butter, 2 eggs, sugar, vanilla extract, juice from half a lemon, and 1 tablespoon of lemon zest.

3. Add the flour mixture and yogurt to the butter-egg mixture and mix just until they start to come together. Now add the blueberries and stir only until no flour is visible.

4. Pour the batter into the baking pan, sprinkle the crumble over the top, and bake for 55 minutes. You can check if it’s done by inserting a clean knife or a skewer into the cake – if it comes out clean, the cake is ready. Let the cake cool on a wire rack.

5. Once the cake has cooled, in a small bowl, prepare the glaze. For this, mix 60g (0.5 cup) of powdered sugar, juice from the other half of the lemon, and 1/2 teaspoon of vanilla extract. The glaze should be creamy. You can thicken it by adding more powdered sugar or thin it by adding more lemon juice or milk. Spread the glaze over the cake and let it set for a few minutes.

NOTE: The calorie information may vary depending on the product used, country and region.