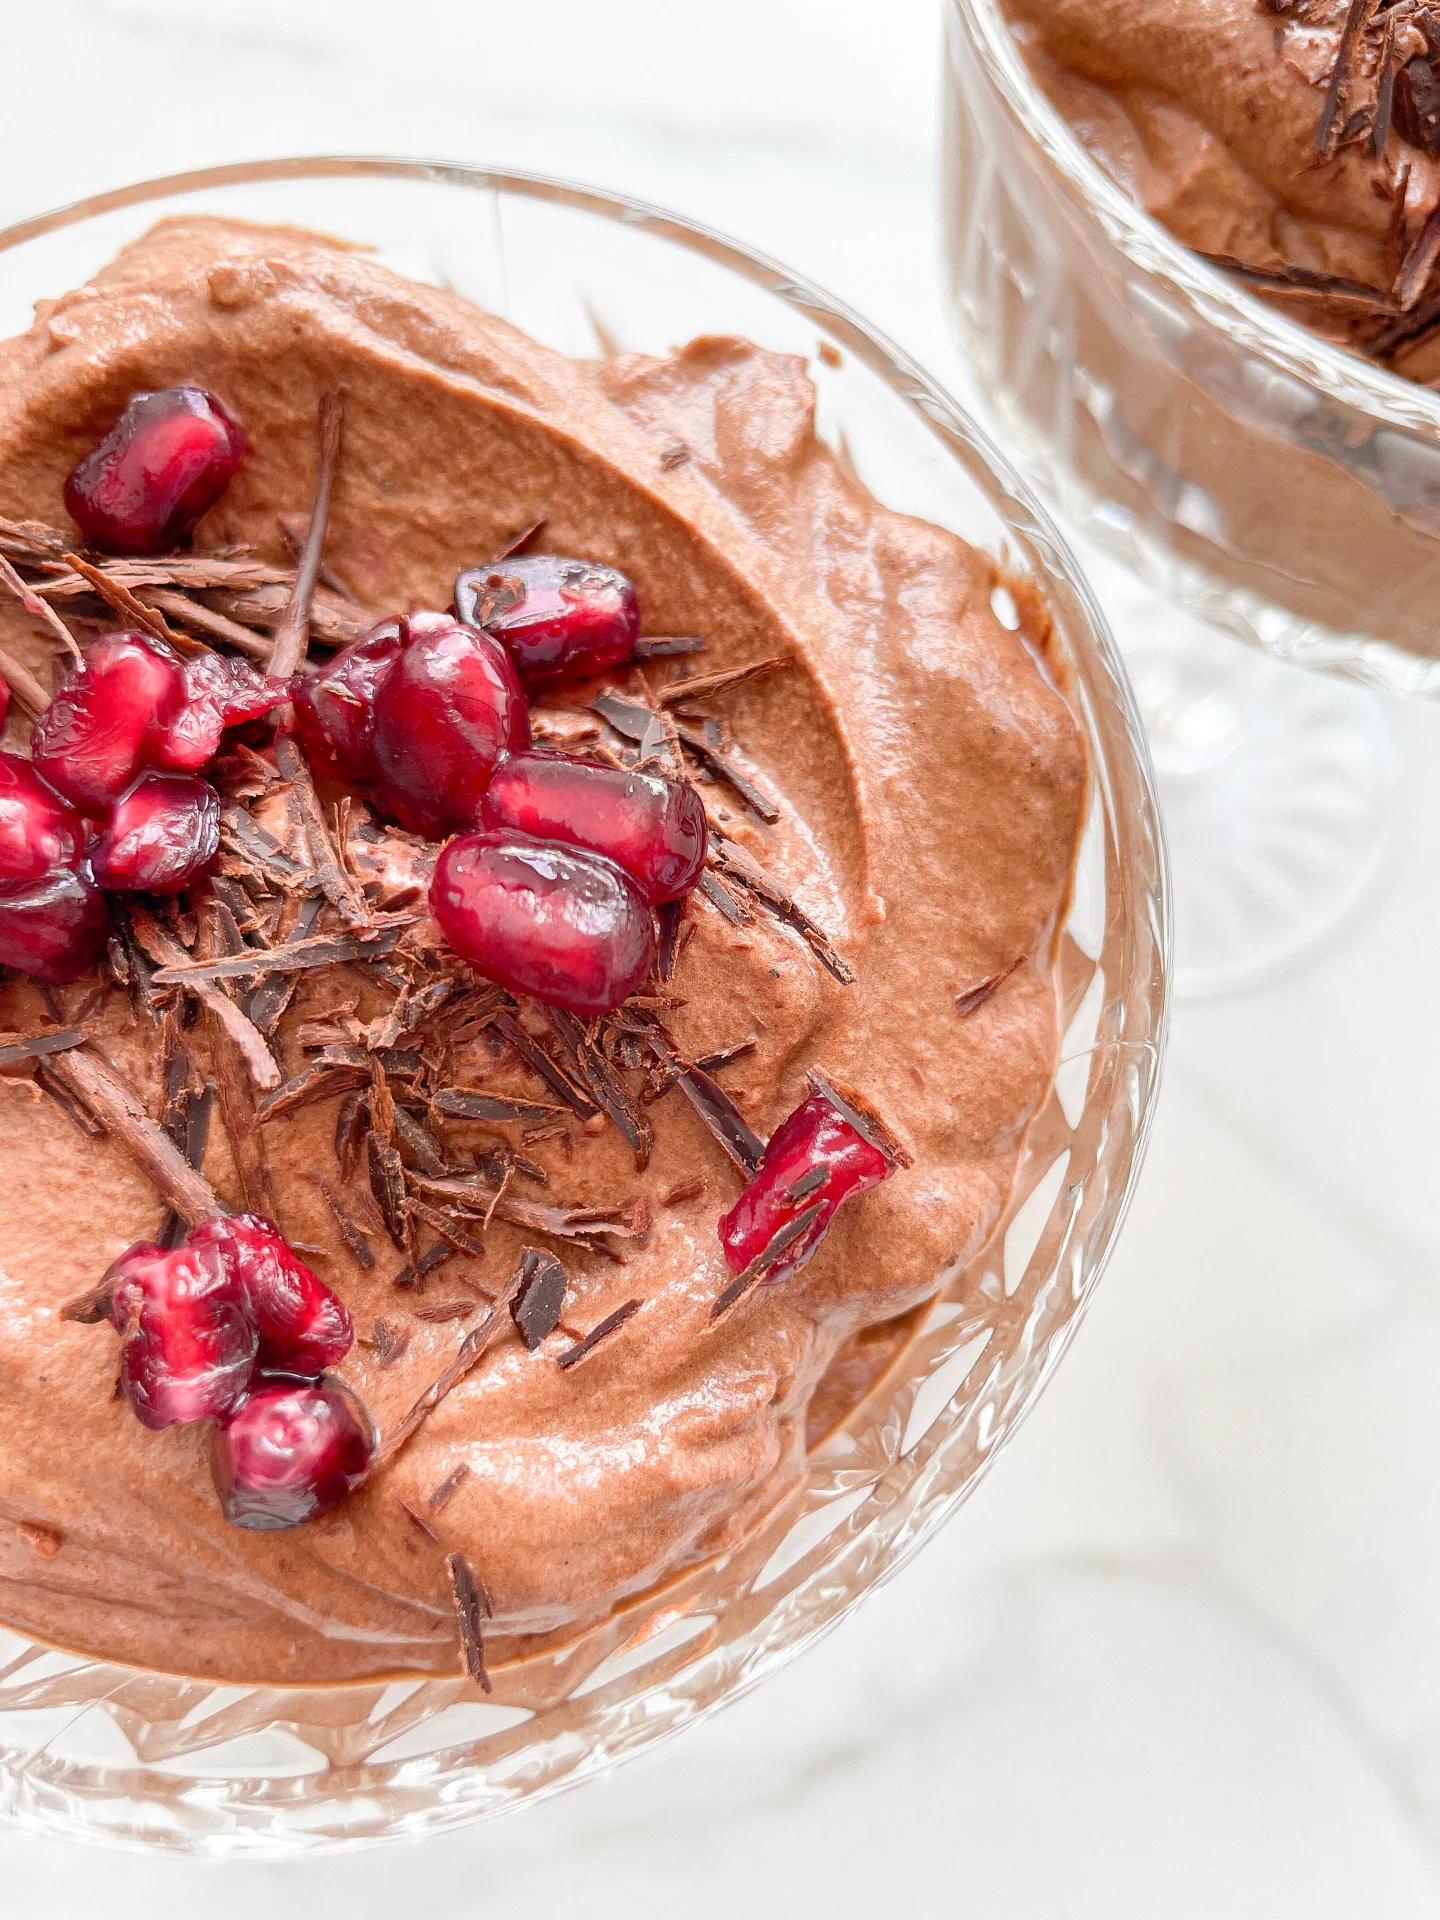
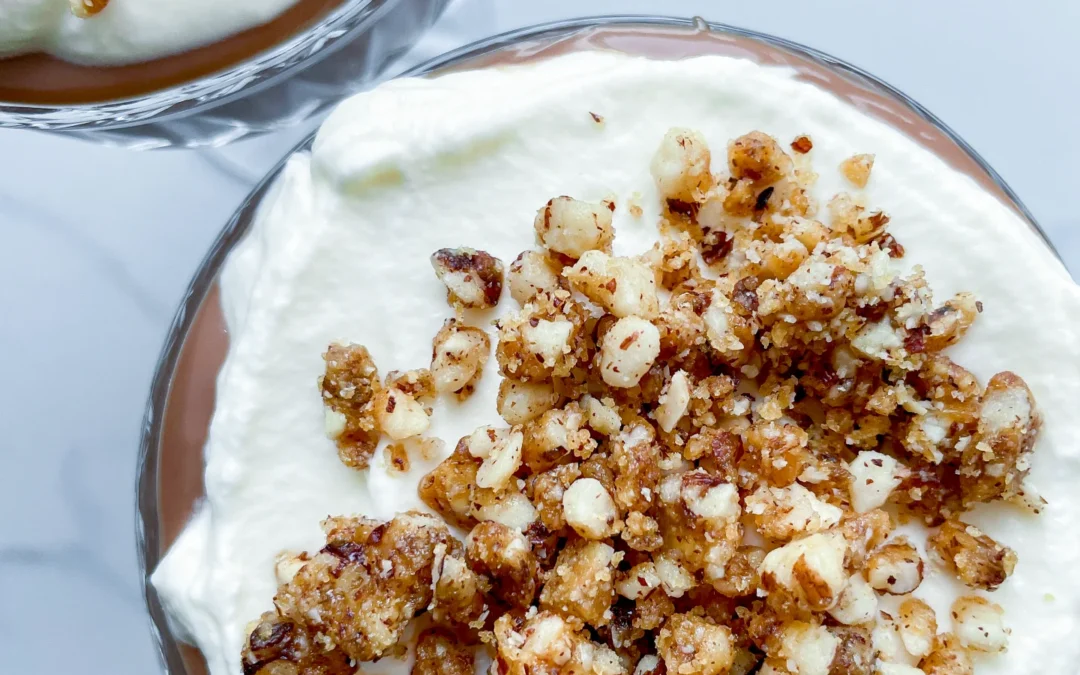
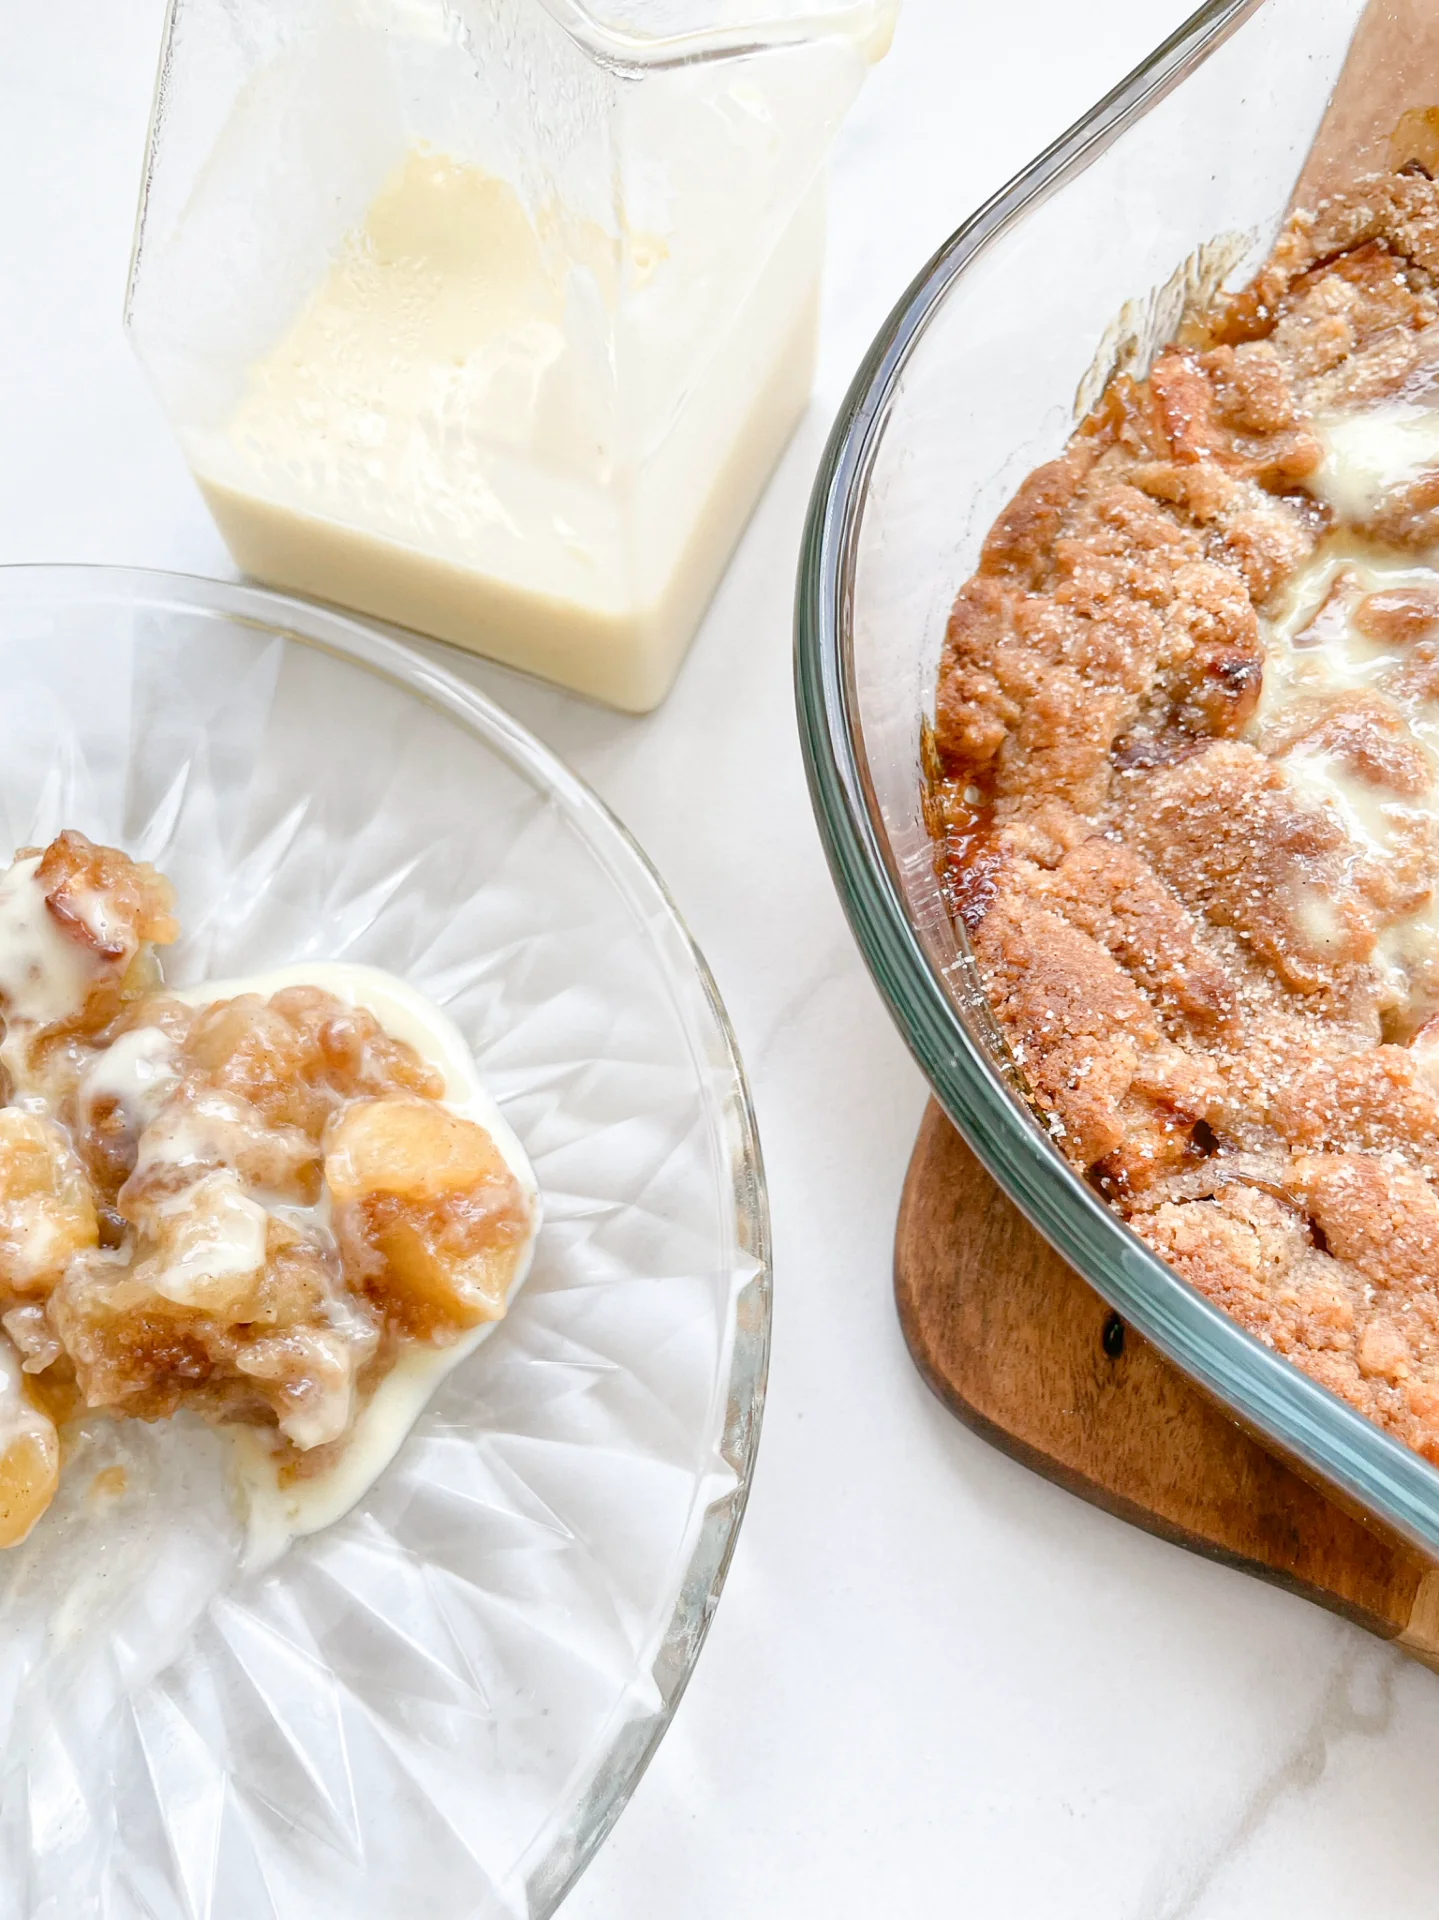
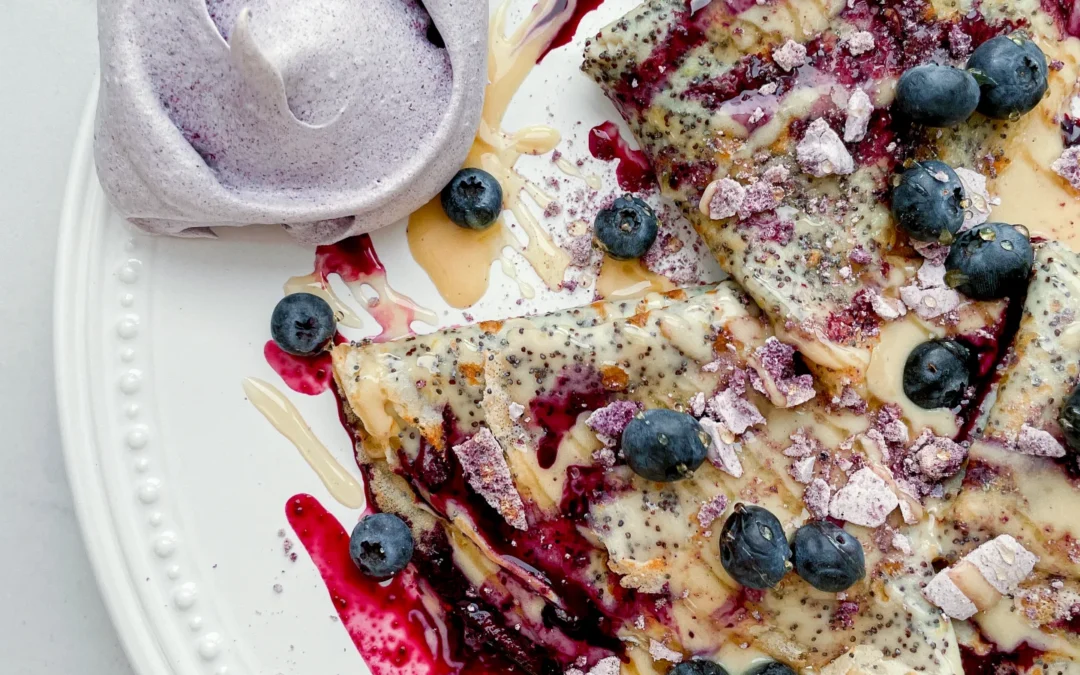
Vanilla Parfait with Chocolate Soil

Vanilla Parfait with Chocolate Soil

Vanilla Parfait with Chocolate Soil

Vanilla Parfait with Chocolate Soil

December 20, 2024 by Kimberly

This creamy vanilla parfait melts like a dream, paired with crunchy, bittersweet chocolate soil for a texture and flavor explosion. Dessert vibes: fancy enough to impress, cozy enough to devour solo.

4 HOURS
40 MINUTES

INTERMEDIATE

VEGETARIAN

FRENCH

245 PER PORTION

CREAMY
CRUNCHY

CHRISTMAS

DESSERT

ALL YEAR

INTRODUCTION

ABOUT THE RECIPE

If you’re looking for a dessert that feels both luxurious and approachable, this vanilla parfait with chocolate soil is it. The creamy, rich vanilla base perfectly contrasts the crunchy, bittersweet chocolate soil, creating a balance of flavors and textures. It’s the kind of dessert that wows at a dinner party but is easy enough to whip up for yourself when you need a little indulgence. Bonus: it’s no-bake and totally make-ahead friendly!

How to serve
Serve your parfait chilled in elegant bowls or plates for the ultimate dessert presentation. Spoon the creamy vanilla layer first and top with a generous sprinkle of chocolate soil for that perfect crunch. Want to elevate it even more? Add fresh berries, a drizzle of caramel or even a few drops of this Mint Oil.

How to store
Keep the parfait in an airtight container in the freezer for up to one week. Store the chocolate soil separately in a dry container to maintain its crunch. Assemble right before serving.

Hi, I'm Kimberly!

Hi, I'm Kimberly.

A passionate food lover who believes in the magic of homemade deliciousness that spreads love and warmth. Join me on this culinary adventure as I prepare wonderful dishes and let’s spread some happiness together!

Kimberly the Zett Signature

If you want to get to know me better, click here!


Vanilla Parfait with Chocolate Soil
„Let’s make a piece of happiness“
Print
clock clock iconcutlery cutlery iconflag flag iconfolder folder iconinstagram instagram iconpinterest pinterest iconfacebook facebook iconprint print iconsquares squares iconheart heart iconheart solid heart solid icon
Vanilla Parfait with Chocolate Soil

Vanilla Parfait with Chocolate Soil


5 Stars 4 Stars 3 Stars 2 Stars 1 Star

No reviews

  • Author: Kimberly
  • Total Time: 4 hrs + 40 min
  • Yield: 10-12 1x

Description

Recommended Equipment

  • two glass or metal mixing bowls
  • two small bowls
  • baking tray
  • small pot
  • whisk
  • silicone spatula
  • fine mesh strainer
  • molds for the parfait

Ingredients

Units Scale

PARFAIT

  • 4 egg yolks
  • 100 grams powdered sugar
  • 400 grams heavy cream
  • 1 vanilla pod

CHOCOLATE SOIL

  • 60 grams powdered sugar
  • 100 grams all-purpose flour
  • 15 grams unsweetened cocoa powder
  • 1/4 tsp salt
  • 50 grams butter
  • 1 tsp ground coffee

Instructions

  1. Whip the cream until stiff peaks form, then place it in the fridge to keep cold.
  2. Separate the eggs, placing the yolks in a glass or metal bowl. Scrape the vanilla pod and add the seeds to the yolks.
  3. Sift the powdered sugar through a fine mesh strainer into the yolks. Mix well with the vanilla seeds.
  4. Place the bowl over a pot of simmering water (double boiler setup), ensuring only the steam touches the bowl. Whisk the mixture until it reaches 80 °C (176 °F).
  5. Prepare an ice bath (a bowl with cold water and ice cubes). Once the yolk mixture reaches 80 °C, place the bowl in the ice bath and whisk until the mixture cools and becomes thick, sticky, and creamy.
  6. Gently fold the chilled whipped cream into the cooled yolk mixture using a silicone spatula until fully combined.
  7. Pour the parfait mixture into molds and freeze for about 4 hours.
  8. For the chocolate soil, preheat the oven to 160 °C (320 °F).
  9. Combine sugar, flour, cocoa powder, salt, and ground coffee in a bowl.
  10. Melt the butter and add it to the dry ingredients. Mix with your hands until a crumbly texture forms.
  11. Spread the mixture evenly on a small baking tray and bake for about 10 minutes.
  12. Remove the tray from the oven, let the mixture cool, then crumble it into pieces. Store in an airtight container.
  13. To serve, unmold the parfaits, arrange them on plates, and decorate with the chocolate soil around them.
  14. Optional: Garnish with mint oil, berry compote, marzipan sauce, or chocolate sauce.
  • Passive Time: 4 hours
  • Cook Time: 40 min

Milk Chocolate Pudding with Chantilly Cream & Hazelnut Brittle

Milk Chocolate Pudding with Chantilly Cream & Hazelnut Brittle

Milk Chocolate Pudding with Chantilly Cream & Hazelnut Brittle

Milk Chocolate Pudding with Chantilly Cream & Hazelnut Brittle

August 29, 2024 by Kimberly

Indulge in a silky, luscious delight that melts in your mouth, combining rich chocolate bliss with fluffy cream and a satisfying crunchy surprise. Pure dessert heaven!

35 MINUTES

EASY

VEGETARIAN

INT.

424 PER PORTION

CREAMY

DATE NIGHT

DESSERT

ALL YEAR

INTRODUCTION

ABOUT THE RECIPE

Get ready to dive into a world of creamy chocolate bliss with this decadent sweet treat that’s sure to satisfy your sweet tooth. This velvety chocolate delight is the perfect combination of smooth indulgence and a delightful crunch, making it an elegant dessert that’s unbelievably easy to whip up at home. Whether you’re hosting a festive gathering or simply craving some classic comfort food, this homemade pudding will surely become your new favorite dessert inspiration.

How to serve
To elevate this gourmet treat, serve it chilled in elegant glassware topped with a dollop of fluffy whipped cream (chantilly) and a sprinkle of crunchy goodness for that extra touch of texture. You can also get creative by adding fresh berries or a drizzle of caramel sauce to enhance the rich chocolate flavor. This crowd-pleasing treat pairs wonderfully with a hot cup of coffee or a glass of dessert wine, making every bite a true sweet culinary adventure.

How to store
Keep any leftovers of this indulgent dessert refrigerated in an airtight container to maintain its creamy texture and fresh taste. It stays delicious for up to three days, ensuring you can enjoy this simple homemade sweet whenever the craving strikes. Just remember to add the crunchy topping right before serving to keep it perfectly crisp!

Hi, I'm Kimberly!

Hi, I'm Kimberly.

A passionate food lover who believes in the magic of homemade deliciousness that spreads love and warmth. Join me on this culinary adventure as I prepare wonderful dishes and let’s spread some happiness together!

Kimberly the Zett Signature

If you want to get to know me better, click here!


Milk Chocolate Pudding with Chantilly Cream & Hazelnut Brittle
„Let’s make a piece of happiness“
Print
clock clock iconcutlery cutlery iconflag flag iconfolder folder iconinstagram instagram iconpinterest pinterest iconfacebook facebook iconprint print iconsquares squares iconheart heart iconheart solid heart solid icon
Milk Chocolate Pudding with Chantilly Cream & Hazelnut Brittle

Milk Chocolate Pudding with Chantilly Cream & Hazelnut Brittle


  • Author: Kimberly
  • Total Time: 35 min
  • Yield: 6 1x

Description

Recommended Equipment

  • sharp knife
  • cutting board
  • small pan
  • parchment paper
  • rolling pin
  • tall container
  • electric mixer
  • small pot
  • small glass
  • medium-sized bowl

Ingredients

Units Scale

HAZELNUT BRITTLE

  • 75 grams hazelnuts
  • 50 grams white sugar
  • 1 tbsp butter
  • pinch of salt

CHANTILLY CREAM

  • 100 milliliters heavy cream, cold
  • 25 grams powdered sugar

CHOCOLADE PUDDING

  • 300 milliliters whole-fat milk
  • 200 grams milk chocolate
  • 100 milliliters heavy cream
  • 30 grams white sugar
  • 15 grams cornstarch
  • 1 tsp vanilla extract

Instructions

  1. Hazelnut Brittle: First, finely chop the hazelnuts and set them aside. Next, prepare two sheets of parchment paper. Then, add the sugar and a pinch of salt to a small pan and heat it over medium heat until the sugar starts to become transparent. Once most of the sugar has melted, slowly stir with a spoon until the sugar turns amber. Quickly add 1 tablespoon of butter and stir well. Then, mix in the chopped hazelnuts and pour the entire mixture onto one of the sheets of parchment paper. Place the other sheet of parchment paper on top and roll it flat with a rolling pin. Set it aside to cool. Once the brittle has cooled, you can chop it into small crumbs with a knife or break it down in a food processor. Store it in a bag until ready to use.
  2. Chantilly Cream: In a tall container, whip the cold cream at low speed while gradually adding the powdered sugar. Once the cream starts to thicken, increase the speed to medium and continue whipping until the cream is creamy and stiff. Keep it in the fridge until ready to use.
  3. Chocolate Pudding: In a small pot, combine 2/3 of the milk, cream, sugar (you can skip the sugar if you don’t like it too sweet), and vanilla extract, and heat over medium heat. Meanwhile, finely grate the chocolate. Remove the pot from the heat and stir in the chocolate until it melts. In a small glass, mix the remaining 1/3 of the milk with the cornstarch until smooth, then pour it into the chocolate pudding and bring it to a boil while stirring. The pudding will thicken as it cooks. You can either serve the pudding warm or pour it into a bowl and cover the surface with plastic wrap to prevent a skin from forming. Let the bowl cool to room temperature, then refrigerate until ready to serve.
  4. To serve, spoon the pudding into glasses or bowls, top with 1-1.5 tablespoons of the Chantilly cream, and finish with a tablespoon of the hazelnut brittle.
  • Cook Time: 35 min

Poppyseed Crepe with Lemon Pastry Cream & Blueberry Meringue

Poppyseed Crepe with Lemon Pastry Cream & Blueberry Meringue

Poppyseed Crepe with Lemon Pastry Cream & Blueberry Meringue

Poppyseed Crepe with Lemon Pastry Cream & Blueberry Meringue

August 11, 2024 by Kimberly

Delight in every bite with these poppyseed crepes! Filled with zesty lemon cream and topped with crunchy blueberry meringue, it’s like a sunny day wrapped up just for you.

2 HOURS
30 MINUTES

INTERMEDIATE

VEGETARIAN

INT.

329 PER PORTION

CREAMY
FRUITY

EVERYDAY

DESSERT

SPRING
SUMMER

INTRODUCTION

ABOUT THE RECIPE

Get ready to elevate your dessert game with these fabulous poppyseed crepes. Imagine the nutty crunch of poppyseeds paired with a tangy soft lemon pastry cream and a crunchy blueberry meringue on top. It’s a treat that’s perfect for a special Sunday dessert or impressing friends at brunch. Each bite is a delightful mix of flavors and textures that will make you feel like you’re dining at a chic café.

How to serve
For a picture-perfect breakfast, fold the crepes elegantly and fill them with a generous dollop of lemon pastry cream and a swirl of blueberry sauce. Sprinkle some crunched blueberry meringue on top. A drizzle of honey and a few fresh blueberries will add the final touch.

How to store
To keep your poppyseed crepes fresh, store any leftovers in an airtight container in the fridge. They’ll stay good for about a day. You can also prepare everything in advance and enjoy them when you’re ready.

Hi, I'm Kimberly!

Hi, I'm Kimberly.

A passionate food lover who believes in the magic of homemade deliciousness that spreads love and warmth. Join me on this culinary adventure as I prepare wonderful dishes and let’s spread some happiness together!

Kimberly the Zett Signature

If you want to get to know me better, click here!


Poppyseed Crepe with Lemon Pastry Cream & Blueberry Meringue
„Let’s make a piece of happiness“
Print
clock clock iconcutlery cutlery iconflag flag iconfolder folder iconinstagram instagram iconpinterest pinterest iconfacebook facebook iconprint print iconsquares squares iconheart heart iconheart solid heart solid icon
Poppyseed Crepe with Lemon Pastry Cream & Blueberry Meringue

Poppyseed Crepe with Lemon Pastry Cream & Blueberry Meringue


  • Author: Kimberly
  • Total Time: 2 hr + 30 min
  • Yield: 6 1x

Description

Recommended Equipment

  • two small pots
  • vegetable peeler
  • medium-sized bowl
  • whisk
  • two mixing bowls
  • electric mixer
  • mortar & pestle
  • spatula
  • small frying pan
  • spatula

Ingredients

Units Scale

BATTER

  • 90 milliliters full-fat milk
  • 60 milliliters water
  • 1 egg
  • 1 tbsp melted butter
  • 1 tbsp poppyseeds
  • zest of 1/2 lemon
  • 60 grams all-purpose flour
  • 1/8 tsp salz

LEMON PASTRY CREAM

  • 90 milliliters full-fat milk
  • 90 milliliters heavy cream
  • 2 egg yolks
  • 50 grams white sugar
  • 1 tsp vanilla extract
  • 1 tbsp flour
  • zest of 1 lemon

BLUEBERRY MERINGUE

  • 2 egg whites
  • 100 grams white sugar
  • pinch of salt
  • 1/8 tsp cream of tartar
  • 1.5 tbsp freeze-dried blueberries

BLUEBERRY SAUCE

  • 100 grams frozen blueberries
  • juice of 1/2 lemon
  • 1 tsp white sugar
  • pinch of salt

TOPPINGS

  • fresh blueberries
  • honey

Instructions

  1. Start by preparing the blueberry meringue. Preheat the oven to 100°C (212°F) with the fan on. Separate two eggs and place the egg whites into a bowl. Save the yolks for later, as you’ll use them to make the lemon pastry cream. Add a pinch of salt and the cream of tartar to the egg whites. Measure out the sugar and set it aside in a small bowl. Using an electric hand mixer, beat the egg whites on medium to high speed until they start to stiffen. Gradually add the sugar while continuing to beat the mixture until the egg whites are creamy, firm, glossy, and snow-white.
  2. Prepare the blueberry powder. Use a mortar and pestle to grind the freeze-dried blueberries into a fine powder. Gently fold the powder into the egg white mixture using a spatula until the mixture turns a light lavender color.
  3. Shape the meringues. Line a baking sheet with parchment paper. Using two tablespoons, spoon the egg white mixture onto the parchment, forming six individual mounds. Place the baking sheet in the oven for about 2 hours.
  4. Make the crepe batter. In a mixing bowl, combine flour, salt, milk, water, egg, melted butter, lemon zest, and poppy seeds. Stir until smooth, then refrigerate the batter for about 30 minutes.
  5. Prepare the lemon cream. In a small pot, combine milk and cream. Use a peeler to remove large strips of zest from a lemon, ensuring they are big enough to remove later. Heat the pot over medium heat, stirring occasionally to prevent a skin from forming. Heat until it begins to steam. Remove from the heat and set aside.
  6. Mix the lemon pastry cream. In a heatproof glass or metal bowl, combine the reserved egg yolks with flour, sugar, and vanilla extract. Stir until you have a smooth, creamy mixture.
  7. Combine and cook the cream. Gradually pour the warm milk and cream mixture into the egg yolk mixture, stirring constantly. Rinse the pot and fill it halfway with water. Bring the water to a simmer over medium heat, then place the bowl with the cream mixture over the pot, creating a double boiler. Heat the mixture to about 78°C (172°F) while stirring continuously, until it thickens to a creamy consistency. Once thickened, remove the bowl from the heat. Cover the cream with plastic wrap, pressing it directly onto the surface to prevent a skin from forming, and refrigerate.
  8. Prepare the blueberry sauce. In a small pot, combine the frozen blueberries with lemon juice, sugar, and a pinch of salt. Simmer over medium heat until the blueberries release their juices. Set aside.
  9. Cool the meringues. Once the meringues have finished baking, remove them from the oven and allow them to cool slightly.
  10. Cook the crepes. Heat a 20cm (8-inch) frying pan over medium heat. Add a small amount of butter, then wipe out the excess with a paper towel, leaving only a thin film. Pour about 4 tablespoons of batter into the pan, swirling quickly to spread it evenly. Cook for 1-2 minutes on one side, then flip and cook for another 30 seconds to 1 minute. Repeat with the remaining batter.
  11. Assemble the dish. Spread lemon pastry cream over each crepe, fold in half, then fold again to form a triangle. Drizzle the blueberry sauce over the crepes, crumble one meringue over each serving, and garnish with fresh blueberries and a drizzle of honey. Enjoy immediately!
  • Passive Time: 1 hr 30 min
  • Cook Time: 60 min

Pork Tenderloin with Parmesan Herb Crust Potato Puree & Gremolata

Pork Tenderloin with Parmesan Herb Crust Potato Puree & Gremolata

Pork Tenderloin with Parmesan Herb Crust Potato Puree & Gremolata

Pork Tenderloin with Parmesan Herb Crust Potato Puree & Gremolata

August 4, 2024 by Kimberly

Imagine savoring tender pork fillet with a crispy, cheesy herb crust, paired with velvety potato puree and a zesty gremolata. It’s comfort food with a gourmet twist, perfect for any occasion!

60 MINUTES

INTERMEDIATE

OMNIVORE

INT.

614 PER PORTION

COMFORT FOOD

DINNER PARTY

DINNER

ALL YEAR

INTRODUCTION

ABOUT THE RECIPE

Today, I’m sharing one of my all-time favorite recipes: tender pork fillet with a crispy Parmesan herb crust, served alongside a silky potato puree and topped with a vibrant gremolata. This dish is a delightful blend of comforting flavors and elegant presentation, perfect for impressing guests or treating yourself to something special. Let’s dive into this tasty adventure!

How to serve
Start by slicing the pork tenderloin into medallions, ensuring each piece showcases that beautiful herb crust. Arrange them neatly on a bed of creamy potato puree, then generously sprinkle the gremolata on top for a burst of fresh flavor. Pair it with a side of roasted vegetables or a simple green salad to complete this gourmet experience. Trust me, your dinner table has never looked this good!

How to store
If you have leftovers (which is rare because it’s so delicious!), store the pork and potato puree separately in airtight containers. They’ll stay fresh in the fridge for up to three days. When you’re ready to enjoy them again, reheat gently in the oven or microwave, and don’t forget to add a fresh sprinkle of gremolata before serving.

Hi, I'm Kimberly!

Hi, I'm Kimberly.

A passionate food lover who believes in the magic of homemade deliciousness that spreads love and warmth. Join me on this culinary adventure as I prepare wonderful dishes and let’s spread some happiness together!

Kimberly the Zett Signature

If you want to get to know me better, click here!


Pork Tenderloin with Parmesan Herb Crust Potato Puree & Gremolata
„Let’s make a piece of happiness“
Print
clock clock iconcutlery cutlery iconflag flag iconfolder folder iconinstagram instagram iconpinterest pinterest iconfacebook facebook iconprint print iconsquares squares iconheart heart iconheart solid heart solid icon
Pork Tenderloin with Parmesan Herb Crust Potato Puree & Gremolata

Pork Fillet with Parmesan Herb Crust Potato Puree & Gremolata


  • Author: Kimberly
  • Total Time: 1 hour
  • Yield: 4 1x

Description

Recommended Equipment

  • sharp knife
  • cutting board
  • medium-sized bowl
  • small bowl
  • grater
  • medium-sized pot
  • oven
  • large pan
  • thermometer
  • small pot (or microwave)
  • potato masher
  • fine sieve

Ingredients

Units Scale

PORK TENDERLOIN

  • 500 grams pork tenderloin
  • 1 tbsp clarified butter
  • salt

PARMESAN HERB CRUST

  • 10 grams fresh parsley
  • 5 grams fresh chives
  • 2.5 grams fresh rosemary
  • 2.5 grams fresh thyme
  • 20 grams parmesan
  • 20 grams panko bread crumbs
  • 1/2 tsp Dijon mustard
  • 1 tbsp butter
  • 10 grams walnuts

POTATO PUREE

  • 1 kilogramm potatoes
  • 150 milliliters full-fat milk
  • 30 grams butter
  • salt, pepper & nutmeg to taste

GREMOLATA

  • 10 grams fresh parsley
  • 1 garlic clove
  • 4 tbsp Green Apple Oil
  • juice of half a lemon
  • salt & pepper to taste

Instructions

PREPARATIONS

  • The pork tenderloin should be at room temperature, so take it out of the fridge about 1 hour before cooking.
  • Here is the recipe for the Green Apple Oil. You’ll need about 4-5 tablespoons of it.

INSTRUCTIONS

  1. First, prepare the Parmesan herb crust. Finely chop parsley, chives, rosemary, thyme, and walnuts. Grate the Parmesan finely. Mix everything together with panko, Dijon mustard, and melted butter in a medium-sized bowl until you get a crumbly mixture. Set aside.
  2. Finely chop the parsley and place it in a small bowl. Peel the garlic clove, grate it finely, and add it to the parsley. Halve the lemon and add the juice of one half. Now add the Green Apple Oil and mix everything well. Season with salt and pepper. Set aside.
  3. Next, fill a medium-sized pot with cold water. Peel the potatoes, cut them into large pieces, and place them in the water. Boil the potatoes for about 20 minutes.
  4. Meanwhile, preheat the oven to 150°C / 300°F. Wash the pork tenderloin and dry it well. Trim the meat, removing the silver skin and any white fat with a sharp knife. Rub a little salt all over the meat and set aside.
  5. Heat some clarified butter in a pan and sear the meat on all sides. Remove the meat from the pan and place it on a baking sheet. Spread the herb crust evenly over the entire meat and press it down well. Place the meat in the oven and cook for about 20 minutes until the internal temperature reaches about 55°C / 131°F.
  6. In a small pot or microwave, warm the milk and butter until the butter has melted. Set aside. Once the potatoes are soft, drain the water and pour the warm milk and melted butter over the potatoes. Mash the mixture with a potato masher. Season with salt, white pepper, and grated nutmeg. If you want the mash to be even finer, you can push the potato mixture through a fine sieve. Keep the mashed potatoes warm.
  7. When the meat has reached its internal temperature, take it out of the oven and let it rest for 3-5 minutes. During this time, the internal temperature will rise to about 60/61°C /140/142°F, making it tender and slightly pink inside.
  8. While the meat is resting, divide the mashed potatoes among the plates. After the resting time, cut the meat into thick slices with a sharp knife and place them upright next to the mashed potatoes. Spread the gremolata over the mashed potatoes. Finally, drizzle a little Green Apple Oil on the plate for garnish.


  • Cook Time: 60 min

Dark Chocolate Mousse

Dark Chocolate Mousse

Dark Chocolate Mousse

Dark Chocolate Mousse

August 3, 2024 by Kimberly

Indulge in a silky, rich dessert that melts in your mouth, delivering an intense cocoa experience. It’s like a cozy, chocolatey hug that’s perfect for any occasion!

20 MINUTES

INTERMEDIATE

VEGETARIAN

FRENCH

489 PER PORTION

COMFORT FOOD
CREAMY

EVERYDAY

DESSERT

ALL YEAR

INTRODUCTION

ABOUT THE RECIPE

Let’s dive into something irresistibly decadent: a rich, dark chocolate mousse that’s pure indulgence. With at least 70% cocoa, this mousse is a dessert dream come true, offering an intense chocolate experience that’s both luxurious and simple to make. Perfect for a cozy night in or a fancy dinner party, this recipe is all about enjoying the finer things in life without spending hours in the kitchen.

How to serve
Spoon the silky mousse into elegant dessert glasses or ramekins, and let it chill until perfectly set. For a touch of elegance, top it with a dollop of whipped cream, a sprinkle of cocoa powder, or some fresh berries. This dessert is best served chilled, making it a refreshing yet indulgent end to any meal. Whether it’s a casual family dinner or a sophisticated soirée, this mousse always steals the show.

How to store
Store any leftover mousse in the refrigerator, covered with plastic wrap or in airtight containers. It will stay fresh and delicious for up to two days.

Hi, I'm Kimberly!

Hi, I'm Kimberly.

A passionate food lover who believes in the magic of homemade deliciousness that spreads love and warmth. Join me on this culinary adventure as I prepare wonderful dishes and let’s spread some happiness together!

Kimberly the Zett Signature

If you want to get to know me better, click here!


Dark Chocolate Mousse
„Let’s make a piece of happiness“
Print
clock clock iconcutlery cutlery iconflag flag iconfolder folder iconinstagram instagram iconpinterest pinterest iconfacebook facebook iconprint print iconsquares squares iconheart heart iconheart solid heart solid icon
Dark Chocolate Mousse

Dark Chocolate Mousse


  • Author: Kimberly
  • Total Time: 20 min
  • Yield: 4 1x

Description

Recommended Equipment

  • sharp knife
  • cutting board
  • medium-sized bowl
  • small pot
  • electric mixer
  • small bowl
  • tall container
  • spatula

Ingredients

Units Scale

WHIPPED CREAM

  • 250 grams heavy cream
  • 75 grams powdered sugar

GANACHE

  • 100 grams heavy cream
  • 100 grams dark chocolate at least 70% cocoa

Instructions

  1. For the ganache, finely grate or chop the chocolate and place it in a medium-sized bowl. Set aside. Heat the cream in a small pot until it starts to steam slightly, but do not let it boil. Pour the cream over the grated chocolate and let it sit for 1-2 minutes. Then, start stirring slowly until the chocolate is fully combined with the cream and the mixture becomes noticeably thicker. Set aside and let it cool a bit.
  2. Meanwhile, prepare the whipped cream. Measure the powdered sugar into a small bowl. In a tall container, whip the cream until stiff peaks form, gradually adding the powdered sugar as you go. Set the whipped cream aside.
  3. Add the ganache to the whipped cream and gently fold everything together with a spatula until you have a medium-brown mousse.
  4. Spoon the mousse into dessert glasses and chill until ready to serve or enjoy immediately 🙂
  • Cook Time: 20 min

Pollo Tonnato

Pollo Tonnato

Pollo Tonnato

Pollo Tonnato

June 22, 2024 by Kimberly

Unleash the flavors with this delightful twist on the classic Vitello Tonnato! Tender chicken meets a creamy, tangy sauce for a dish that’s both satisfying and refreshingly different.

10 MINUTES

EASY

OMNIVORE

ITALIAN

439 PER PORTION

UMAMI
CREAMY

EVERDAY

LUNCH

ALL YEAR

INTRODUCTION

ABOUT THE RECIPE

Bring a slice of Italian flair to your table with Pollo Tonnato, a dish where simplicity and sophistication meet. This unique combination of tender chicken and a creamy tuna-based sauce offers a refreshing change from the usual veal recipe.

How to serve
Slice the chicken and drizzle with the rich tuna sauce, garnish with capers or lemon slices, and serve alongside a crisp green salad or fresh bread for a complete meal.

How to store
Store leftovers in an airtight container in the refrigerator. Enjoy within one day for the best freshness and taste.

Hi, I'm Kimberly!

Hi, I'm Kimberly.

A passionate food lover who believes in the magic of homemade deliciousness that spreads love and warmth. Join me on this culinary adventure as I prepare wonderful dishes and let’s spread some happiness together!

Kimberly the Zett Signature

If you want to get to know me better, click here!


Pollo Tonnato
Pollo Tonnato
Pollo Tonnato
„Let’s make a piece of happiness“
Print
clock clock iconcutlery cutlery iconflag flag iconfolder folder iconinstagram instagram iconpinterest pinterest iconfacebook facebook iconprint print iconsquares squares iconheart heart iconheart solid heart solid icon
Pollo Tonnato

Pollo Tonnato


  • Author: Kimberly
  • Total Time: 10 minutes
  • Yield: 2 as main 1x

Description

Recommended Equipment

  • glass jar
  • measuring spoons
  • immersion blender
  • large plate

Ingredients

Units Scale
  • 150 grams grilled chicken breast
  • 1 tsp capers
  • a hand full of arugula salad

SAUCE

  • 125 grams canned tuna in water, drained
  • 1 tbsp capers
  • 2 anchovies
  • 3 tbsp mayonnaise
  • juice of half a lemon
  • 4 tbsp extra-virgin olive oil
  • 1 tsp dijon mustard
  • salt to taste

Instructions

  • In a tall glass jar, add drained tuna and the following ingredients: 1 tbsp capers, 2 anchovies, 3 tbsp mayonnaise, the juice of half a lemon, 4 tbsp olive oil, and 1 tsp Dijon mustard. Then, use an immersion blender to puree everything into a creamy mixture. Season with salt to taste.
  • On a large plate, arrange the grilled chicken breast slices overlapping. Spread the tuna cream over the chicken slices, making sure some of the meat is still visible at the edges. Top with 1 tsp capers, grind fresh pepper over it, and place a handful of washed arugula in the center. Best served immediately or stored in the refrigerator until ready to eat.

Notes

The calorie information may vary depending on the product used, country and region.

  • Cook Time: 10 min