Bruleed Salted Caramel Ice Cream

Bruleed Salted Caramel Ice Cream

Bruleed Salted Caramel Ice Cream

Bruleed Salted Caramel Ice Cream

July 19, 2026 by Kimberly

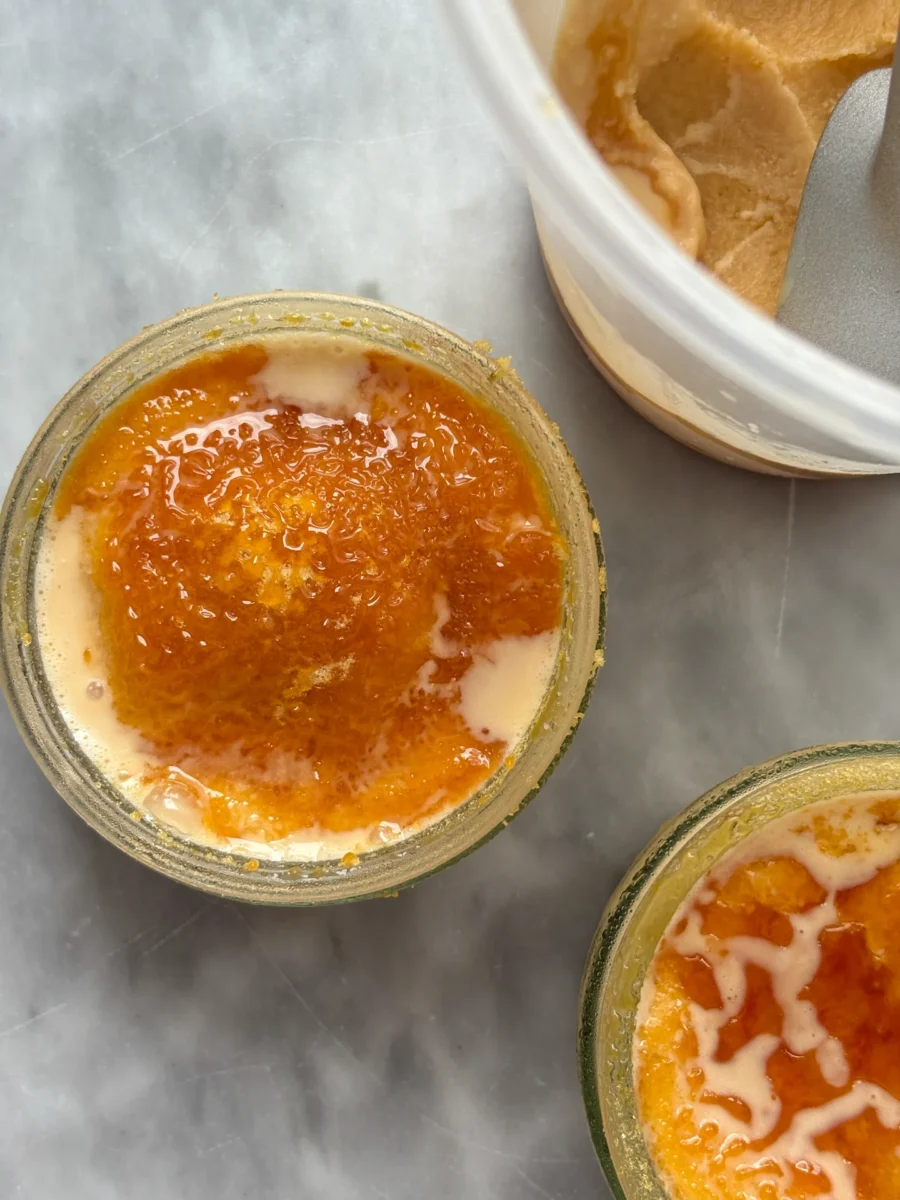
Imagine tapping your spoon through a thin, crisp caramel shell to find ice-cold, creamy salted caramel ice cream underneath. That is exactly what this crème brûlée ice cream is: warm and caramelized on top, soft, cold, and slightly salty underneath. Every spoonful brings together shards of caramel and melting ice cream – and that contrast is exactly what makes this dessert so good.

This website uses affiliate links which may earn commission for purchases made at no additional cost to you.

TOTAL TIME

10 min

SERVES

2 ramekins

DIET

vegetarian

EVERY RECIPE DESERVES

A Little Love Letter

You probably know by now that I like things to be a little special. Not necessarily complicated, but whenever a small idea can turn a good dessert into something even better, I have to try it. That is exactly how this Salted Caramel Crème Brûlée Ice Cream came to be.

It started with my Salted Caramel Ice Cream, which is already perfectly good on its own. But then I started thinking about crème brûlée – more specifically, that moment when the spoon breaks through the thin, firm sugar crust. Probably one of the best sounds a dessert can make. Naturally, the question followed: why shouldn’t that work on ice cream too? It does. Surprisingly well, in fact.

Underneath the caramel layer, the ice cream stays cold and creamy. With the first spoonful, the crust breaks into small pieces that mix with the soft salted caramel ice cream. Sweet caramel, a little salt, and that contrast between crisp and creamy.

For the crust, I did not simply use regular sugar this time. I first melted it into a dark caramel, let it cool and harden completely, and then ground it into a fine powder. This allows the caramel powder to melt especially quickly under the blowtorch while adding even more depth and toasted flavour. It does not just taste like caramelized sugar, but intensely of caramel, which is of course perfect with the ice cream.

You can still skip that extra step and use regular sugar instead. The dessert works very well that way too. The caramel version is more for those days when you feel like a small kitchen experiment and a little extra effort suddenly seems entirely reasonable.

Hi, I'm Kimberly!

Hi, I'm Kimberly.

A hopeless romantic when it comes to food. Every recipe I share is a love letter to food itself. I’m so glad you’re here. Make yourself at home and stay a while.

Love,
Kimberly

Kimberly the Zett Signature

If you want to get to know me better,
click here!


Bruleed Salted Caramel Ice Cream

LET’S MAKE A PIECE OF HAPPINESS

Print
clock clock iconcutlery cutlery iconflag flag iconfolder folder iconinstagram instagram iconpinterest pinterest iconfacebook facebook iconprint print iconsquares squares iconheart heart iconheart solid heart solid icon
Bruleed Salted Caramel Ice Cream

Bruleed Salted Caramel Ice Cream


5 Stars 4 Stars 3 Stars 2 Stars 1 Star

No reviews

  • Author: Kimberly
  • Total Time: 10 min
  • Yield: 2 ramekins 1x

Description

Imagine tapping your spoon through a thin, crisp caramel shell to find ice-cold, creamy salted caramel ice cream underneath. That is exactly what this crème brûlée ice cream is: warm and caramelized on top, soft, cold, and slightly salty underneath. Every spoonful brings together shards of caramel and melting ice cream – and that contrast is exactly what makes this dessert so good.

GOOD TO HAVE ON HAND

  • kitchen torch
  • small saucepan
  • parchment paper
  • heatproof ramekins
  • small sieve

Ingredients

Units Scale

Instructions

  1. Optional: Caramelize the sugar in a small saucepan, then pour it onto a sheet of parchment paper. Leave it to cool completely and harden. Once set, transfer the caramel to a food processor and blend it into a fine powder. You can skip this step and use regular white sugar instead.
  2. Spoon the ice cream into the ramekins and smooth the surface, leaving a little room at the top. Sift the caramel powder or regular white sugar evenly over the ice cream using a small sieve. Briefly torch the surface until the sugar melts and forms a firm caramel shell.
  3. Serve immediately or return the ramekins to the freezer until ready to serve.
  • Prep Time: 10 min

CRAVING MORE?

Follow along here & don’t forget to subscribe to my substack!

Mini Turkish Lahmacun Flatbreads with Herb Garlic Sauce

Mini Turkish Lahmacun Flatbreads with Herb Garlic Sauce

Mini Turkish Lahmacun Flatbreads with Herb Garlic Sauce

Mini Turkish Lahmacun Flatbreads with Herb Garlic Sauce

June 21, 2026 by Kimberly

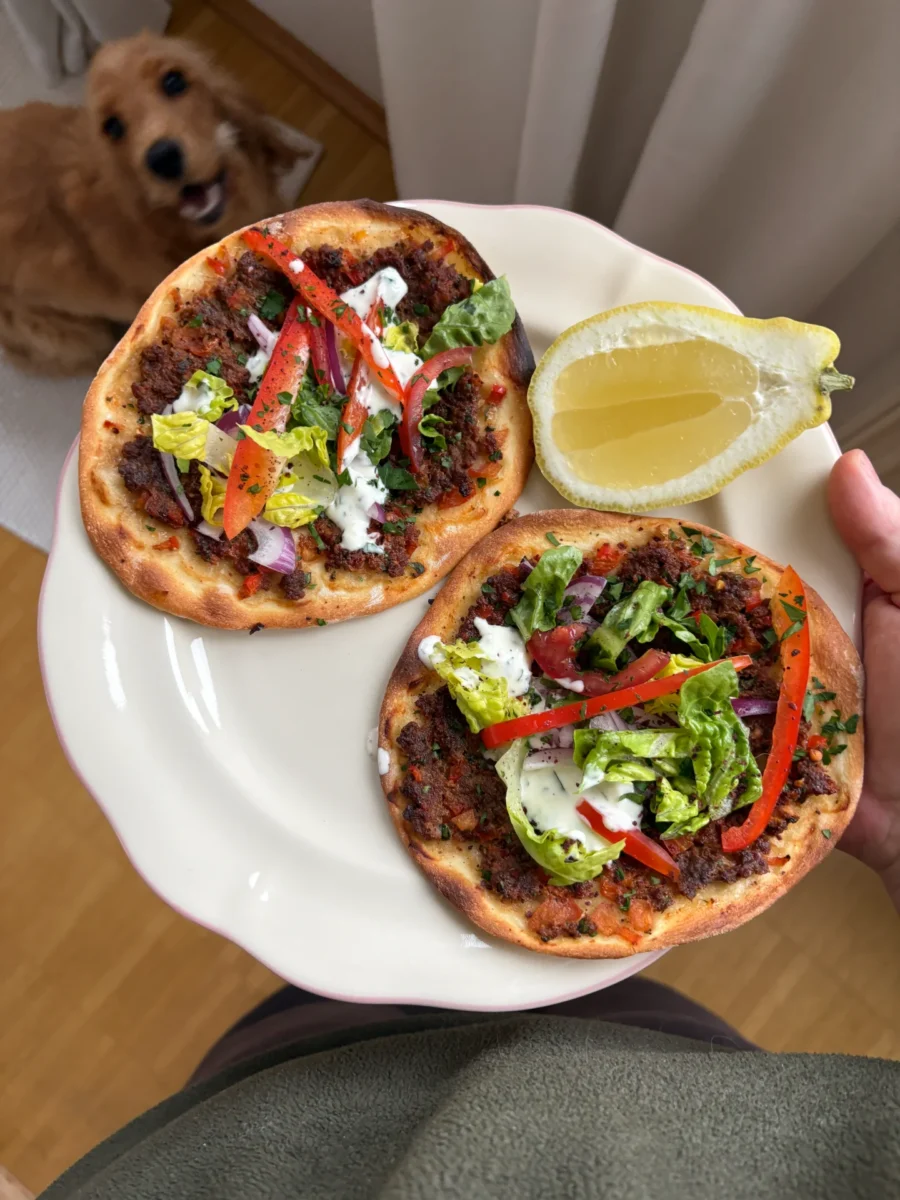
These Mini Turkish Lahmacun Flatbreads are my little special version of Turkish pizza: thin, crispy dough, a flavorful beef filling with pomegranate molasses, and fresh toppings like romaine lettuce, bell peppers, tomatoes, red onions, sumac, and parsley. This recipe is perfect if you want to make something special at home, but are looking for a modern, easy, and shareable version. It’s ideal for serving, mixing up the toppings, and using up leftover vegetables.

This website uses affiliate links which may earn commission for purchases made at no additional cost to you.

TOTAL TIME

90 minutes

SERVES

10 flatbreads

DIET

omnivore

EVERY RECIPE DESERVES

A Little Love Letter

We’re not just having Turkish pizza today, we’re having Mini Turkish Lahmacun Flatbreads. Small, crispy, savory, topped with sauce, fresh vegetables, and exactly the kind of “I’ll just have one more” energy that, of course, is never actually true.

Making Turkish pizza from scratch had been on my to-do list for ages. Not because you can’t buy it on almost every corner, but because I simply love being able to make these kinds of things myself. Also, lahmacun is genuinely one of the best ways to use up leftover vegetables. A little bell pepper, tomato, lettuce, onion, a few herbs, and suddenly fridge leftovers turn into a special dinner.

The thing I was most curious about was the dough, because this dish really stands or falls with it. And what can I say: it turned out perfect. Super easy to work with. After baking, it gets beautifully crispy on the outside while still staying soft on the inside. Exactly how you want it. And the beef filling? A 10 out of 10. I added pomegranate molasses, which makes the savory, spiced mixture a little fruitier and more rounded.

The best part about the mini version is: you will definitely eat more than one. And that is very much part of the concept here. Each flatbread can be topped a little differently: a little more herb garlic sauce, more sumac, extra tomato, or a little more lettuce. I love dishes that let you try a bit of everything.

And honestly, every now and then I just love a recipe that happens in the oven. The beef mixture is spread onto the thin flatbreads, baked for a few minutes, and then all that’s left to do is top them with sauce, romaine, bell peppers, tomatoes, red onions, sumac, and fresh parsley.

Hi, I'm Kimberly!

Hi, I'm Kimberly.

A hopeless romantic when it comes to food. Every recipe I share is a love letter to food itself. I’m so glad you’re here. Make yourself at home and stay a while.

Love,
Kimberly

Kimberly the Zett Signature

If you want to get to know me better,
click here!


Mini Turkish Lahmacun Flatbreads with Herb Garlic Sauce

LET’S MAKE A PIECE OF HAPPINESS

Print
clock clock iconcutlery cutlery iconflag flag iconfolder folder iconinstagram instagram iconpinterest pinterest iconfacebook facebook iconprint print iconsquares squares iconheart heart iconheart solid heart solid icon
Mini Turkish Lahmacun Flatbreads with Herb Garlic Sauce

Mini Turkish Lahmacun Flatbreads with Herb Garlic Sauce


  • Author: Kimberly
  • Total Time: 0 hours
  • Yield: 10 flatbreads 1x

Description

These Mini Turkish Lahmacun Flatbreads are my little special version of Turkish pizza: thin, crispy dough, a flavorful beef filling with pomegranate molasses, and fresh toppings like romaine lettuce, bell peppers, tomatoes, red onions, sumac, and parsley. This recipe is perfect if you want to make something special at home, but are looking for a modern, easy, and shareable version. It’s ideal for serving, mixing up the toppings, and using up leftover vegetables.

GOOD TO HAVE ON HAND

  • electric mixer
  • rolling pin
  • oven
  • large bowl
  • medium bowl
  • sharp knife
  • cutting board

Ingredients

Units Scale
DOUGH
  • 250 grams all-purpose flour
  • 1 tsp salt
  • 1 tsp instant yeast
  • 125 milliliters lukewarm water
  • 1 tsp sugar
  • 1 tbsp olive oil
  • 1 tbsp yogurt
BEEF FILLING
  • 250 grams ground beef
  • 1/2 red bell pepper
  • 1 tomato
  • 4 garlic cloves
  • 1 tbsp parsley
  • 1 tbsp spicy red pepper paste
  • 1 tbsp tomato paste
  • 1 tbsp pomegranate molasses
  • 1 tsp chili powder
  • 1/2 tsp cumin
  • 1/2 tsp coriander
  • 1/2 tsp salt
  • 1/4 tsp black pepper
  • 1/4 tsp onion powder
HERB GARLIC SAUCE
  • 100 grams yogurt
  • 100 grams mayonnaise
  • 2-3 tbsp water
  • 2 tbsp parsley
  • 1 tbsp white wine vinegar
  • 1 tbsp lemon juice
  • Pinch of sugar
  • Salt & pepper to taste
OTHER INGREDIENTS
  • Milk for brushing
  • All-purpose flour for rolling out
  • Sumac for topping
  • Lemon juice for topping

Instructions

MAKE THE DOUGH

  1. Add the instant yeast, sugar, and olive oil to the lukewarm water and let it bloom briefly. Combine the flour and salt in a bowl and set aside. Then add the yeast mixture together with the yogurt to a large mixing bowl. Add the flour-salt mixture and knead everything for 15 minutes. If the dough is too sticky, add a little flour by the tablespoon as needed.
  2. Cover the dough in the bowl and let it rise in a warm place for about 1 hour.

MAKE THE MEAT FILLING

  1. In a large bowl, add the ground beef, red bell pepper, tomatoes, parsley, garlic, chili powder, cumin, coriander, salt, black pepper, onion powder, tomato paste, spicy red pepper paste, and pomegranate molasses. Mix everything well and set aside.

ASSEMBLY & BAKING

  1. Preheat the oven to 250°C/480°F.
  2. Meanwhile, prepare the herb garlic sauce. To do this, mix all the ingredients in a bowl and set aside.
  3. Take the dough out of the bowl and divide it into 10 equal portions. Shape each piece into a tight ball. Using enough extra flour, roll each piece of dough into a very thin circle. Place the flatbreads on a baking sheet lined with parchment paper. Spread about 2 tablespoons of the meat filling onto each flatbread and press it down well so the meat sticks to the dough. Brush the edges with milk. Bake for about 10 to 12 minutes, until the edges are golden brown.
  4. Meanwhile, cut additional bell peppers, tomatoes, romaine lettuce, parsley, and red onions for filling the flatbreads and set aside.
  5. Finally, spread the herb garlic sauce over the flatbreads and top with the vegetables. Finish with sumac, lemon juice and fresh parsley, then enjoy.

  • Prep Time: 1 hr
  • Cook Time: 30 min

CRAVING MORE?

Follow along here & don’t forget to subscribe to my substack!

Steak Salad with Passionfruit Jalapeno Dressing & Oven-Roasted Corn on the Cob

Steak Salad with Passionfruit Jalapeno Dressing & Oven-Roasted Corn on the Cob

Steak Salad with Passionfruit Jalapeno Dressing & Oven-Roasted Corn on the Cob

Steak Salad with Passionfruit Jalapeno Dressing & Oven-Roasted Corn on the Cob

March 27, 2025 by Kimberly

Crispy, juicy, buttery goodness. A fresh, herby salad meets perfectly seared steak and sweet, caramelized corn, all tied together with a tangy-spicy dressing that low-key makes you feel like a genius for making it.

This website uses affiliate links which may earn commission for purchases made at no additional cost to you.

TOTAL TIME

40 min

SERVES

2 portions

DIET

omnivore

EVERY RECIPE DESERVES

A Little Love Letter

You know those meals that feel fancy but require zero effort? This is one of them. A buttery, perfectly seared steak, a fresh, vibrant salad, and some oven-roasted corn that’s so sweet and caramelized it might make you question why you don’t eat it every day. And the dressing? Oh, just a bright, tangy, slightly spicy little number that takes everything up a notch.

Best enjoyed immediately, preferably with a glass of something cold and a playlist that makes you feel effortlessly cool. Plate up the salad, top with juicy steak slices, and drizzle that fire dressing over everything. The roasted corn? Either cut it into smaller chunks for easy eating or go all in and enjoy it straight off the cob. Maybe add some extra fresh herbs if you’re feeling fancy, but honestly, this dish is already stealing the show.

If you somehow have leftovers (unlikely, but okay), store the salad and dressing separately in airtight containers. Steak keeps well in the fridge for up to 2 days. The corn? Wrap it up and reheat in the oven or slice it off the cob for quick salads or tacos.

Hi, I'm Kimberly!

Hi, I'm Kimberly.

A hopeless romantic when it comes to food. Every recipe I share is a love letter to food itself. I’m so glad you’re here. Make yourself at home and stay a while.

Love,
Kimberly

Kimberly the Zett Signature

If you want to get to know me better,
click here!


Steak Salad with Passionfruit Jalapeno Dressing & Oven-Roasted Corn on the Cob

LET’S MAKE A PIECE OF HAPPINESS

Print
clock clock iconcutlery cutlery iconflag flag iconfolder folder iconinstagram instagram iconpinterest pinterest iconfacebook facebook iconprint print iconsquares squares iconheart heart iconheart solid heart solid icon
Steak Salad with Passionfruit Jalapeno Dressing & Oven-Roasted Corn on the Cob

Steak Salad with Passionfruit Jalapeno Dressing & Oven-Roasted Corn on the Cob


  • Author: Kimberly
  • Total Time: 40 min
  • Yield: 2 1x

Description

RECOMMENDED EQUIPMENT

  • oven
  • large pan
  • sharp knife
  • cutting board
  • salad bowl
  • small bowl
  • kitchen brush
  • immersion blender

Ingredients

Units Scale
SALAD
  • 2 romaine lettuce
  • 250 grams tomatoes
  • 2 corns on the cob
  • 1 avocado
  • 1 red onion
DRESSING
  • 4 tbsp olive oil
  • 1 tbsp white wine vinegar
  • 5 grams fresh basil
  • 2 garlic cloves
  • 2 tbsp passionfruit purée
  • 1 jalapeno
  • salt & pepper to taste
STEAK
  • 2 beef filet steaks
  • 2 tbsp avocado oil
  • salt
CAFE DE PARIS BUTTER
  • 150 grams butter, soft
  • 1 tbsp dried parsley
  • 1/2 tsp curry powder
  • 1/2 tsp dried garlic powder
  • 1/4 tsp salt
  • 1/4 tsp dried majoram
  • 1/4 tsp paprika powder
  • 1/4 tsp dried dill
  • 1/8 tsp dried thyme
  • 1/8 tsp dried rosemary
  • 1/8 tsp white pepper

Instructions

  1. Preheat the oven to 200°C / 400°F.
  2. Prepare the Café de Paris butter by mixing the softened butter with all the listed spices. Stir well and set aside at room temperature.
  3. Brush the corn cobs with about a teaspoon of the prepared butter each, place them on a baking sheet, and roast in the preheated oven for about 20–30 minutes until golden brown and fragrant.
  4. Meanwhile cut the tomatoes and avocado into chunks, and slice the romaine lettuce and red onion into thin strips. Toss everything together in a large salad bowl.
  5. In a tall container, blend olive oil, white wine vinegar, fresh basil, salt, garlic cloves, jalapeños, and passionfruit purée using an immersion blender. Set aside.
  6. Heat a large pan with avocado oil and sear the steaks on all sides over high heat. Reduce the heat and add a generous tablespoon of Café de Paris butter to the pan. Continuously spoon the melted butter over the steak to keep it juicy. Once the desired doneness is reached, remove the steak from the pan and let it rest for a few minutes.
  7. Drizzle the dressing over the salad and toss well. Slice the steak into thin strips and arrange it on top.
  8. Either place the salad in the center of the table with the roasted corn on the side or serve it individually on plates.
  • Cook Time: 40 min

CRAVING MORE?

Follow along here & don’t forget to subscribe to my substack!

Crispy Sweet & Sour Chicken Brioche Sandwich with Yogurt Lime Slaw

Crispy Sweet & Sour Chicken Brioche Sandwich with Yogurt Lime Slaw

Crispy Sweet & Sour Chicken Brioche Sandwich with Yogurt Lime Slaw

Crispy Sweet & Sour Chicken Brioche Sandwich with Yogurt Lime Slaw

March 16, 2025 by Kimberly

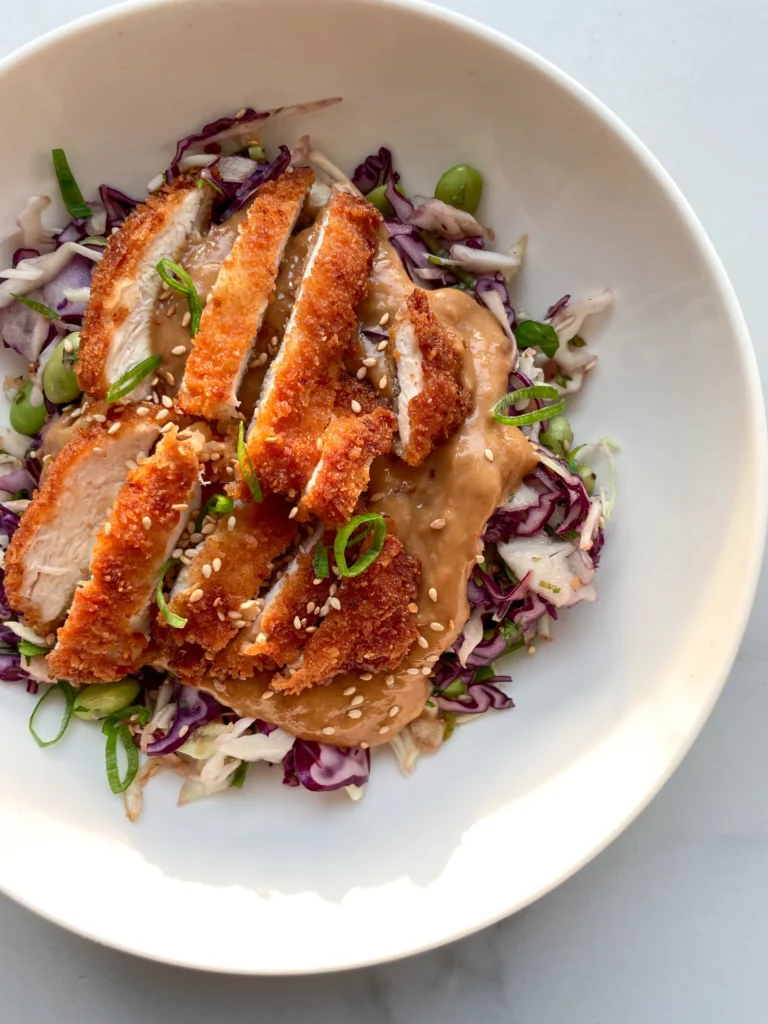
Golden, crispy chicken coated in a sticky sweet & sour glaze, stacked on creamy, crunchy slaw, all between two buttery brioche slices. This sandwich is a power move, crunchy, juicy, tangy, and just the right amount of messy.

This website uses affiliate links which may earn commission for purchases made at no additional cost to you.

TOTAL TIME

30 min

SERVES

2 sandwiches

DIET

omnivore

EVERY RECIPE DESERVES

A Little Love Letter

If you think you’ve had a good chicken sandwich before, think again. This one brings it all: crispy, golden-fried chicken dunked in a sticky, sweet & sour glaze, creamy yogurt slaw for crunch, and buttery brioche slices crisped to perfection. It’s rich, tangy, crunchy, and honestly, slightly addictive. Perfect for those days when a basic sandwich just won’t cut it. This is bold, messy, and worth every bite. Exactly how a sandwich should be.

This sandwich is a moment, so let it shine. Serve it hot, straight from the pan, while the chicken is crispy and the glaze is still warm. Pair it with fries, a simple side salad, or even just some extra pickles for a sharp contrast. Feeling fancy? A side of homemade sweet potato fries with a little lime zest would be elite. And if you really want to take things up a notch, a cold beer or a passionfruit lemonade? Unreal.

This is best eaten fresh, but if you must store it, keep the components separate. Store the fried chicken in an airtight container in the fridge for up to two days, and reheat in the oven for crispiness. The slaw can be stored for a day but will soften over time.

Hi, I'm Kimberly!

Hi, I'm Kimberly.

A hopeless romantic when it comes to food. Every recipe I share is a love letter to food itself. I’m so glad you’re here. Make yourself at home and stay a while.

Love,
Kimberly

Kimberly the Zett Signature

If you want to get to know me better,
click here!


Crispy Sweet & Sour Chicken Brioche Sandwich with Yogurt Lime Slaw

LET’S MAKE A PIECE OF HAPPINESS

Print
clock clock iconcutlery cutlery iconflag flag iconfolder folder iconinstagram instagram iconpinterest pinterest iconfacebook facebook iconprint print iconsquares squares iconheart heart iconheart solid heart solid icon
Crispy Sweet & Sour Chicken Brioche Sandwich with Yogurt Lime Slaw

Crispy Sweet & Sour Chicken Brioche Sandwich with Yogurt Lime Slaw


  • Author: Kimberly
  • Total Time: 30 min
  • Yield: 2 1x

Description

RECOMMENDED EQUIPMENT

  • large pan
  • sharp knife
  • cutting board
  • small pot
  • plastic wrap
  • meat mallet
  • three shallow bowls

Ingredients

Units Scale
CHICKEN
  • 200 grams chicken breast
  • 1 tbsp all-purpose flour
  • 1 egg
  • 4 tbsp panko bread crumbs
  • salt & pepper
  • avocado oil, for frying
SWEET & SOUR GLAZE
  • 40 grams passionfruit purée
  • juice from half a lemon
  • 2 garlic cloves
  • 1 tbsp olive oil
  • 1 small yellow onion
  • 1 tsp ginger
  • 45 grams white sugar
  • 1/2 fresh chili
  • 1/4 tsp salt
  • 1/8 tsp sesame oil
YOGURT CILANTRO SLAW
  • 75 grams white cabbage
  • 1 scallion
  • a few leaves fresh parsley
  • juice from half a lemon
  • salt & pepper
OTHER INGREDIENTS
  • 4 slices brioche bread
  • 1 tbsp butter

Instructions

  1. Prepare the passionfruit chutney first. Add passionfruit purée, lime juice, two pressed garlic cloves, olive oil, half a finely chopped onion, finely chopped ginger, white sugar, half a chopped fresh chili, salt, and sesame oil to a small pot. Stir well and let it simmer over medium heat for about 10-15 minutes, until thickened.
  2. While the chutney simmers, make the slaw. Thinly slice the white cabbage, slice the scallions, and finely chop the parsley. Add everything to a large salad bowl and mix with yogurt, lime juice, salt, and pepper.
  3. Prepare the coating for the chicken. Set up three shallow bowls: Fill one with flour, crack an egg into the second and whisk with some ground pepper, and mix breadcrumbs, panko, and salt in the third. Place the chicken breasts between two layers of plastic wrap and pound them thin. Dredge each piece in flour, dip in the egg, and coat well with the panko mixture, pressing firmly so the breading sticks. Set aside on a plate.
  4. Before frying the chicken, toast the brioche. Spread a thin layer of butter on one side of each brioche slice and toast in a pan until golden and crispy on both sides. Remove from the pan and set aside.
  5. Heat about a finger’s depth of oil in the same pan to 180°C / 356°F. Fry the breaded chicken fillets for 3-4 minutes per side until golden brown and crispy. Transfer to a wire rack to drain excess oil.
  6. Assemble the sandwiches. Spread the prepared slaw onto two slices of toasted brioche.
  7. Pour the passionfruit chutney into a shallow bowl. Dip the crispy fried chicken fillets in the chutney, coating both sides completely, then place them on top of the slaw. Finish with the second slice of brioche. Cut the sandwiches in half and enjoy!
  • Cook Time: 30 min

CRAVING MORE?

Follow along here & don’t forget to subscribe to my substack!

Everything But The Bagel Seasoning

Everything But The Bagel Seasoning

Everything But The Bagel Seasoning

Everything But The Bagel Seasoning

February 10, 2024 by Kimberly

This crunchy, garlicky, toasty magic takes anything from basic to brilliant. Sprinkle it on eggs, avo toast, or even buttered bread, and suddenly, breakfast feels like a weekend brunch moment.

This website uses affiliate links which may earn commission for purchases made at no additional cost to you.

TOTAL TIME

5 min

SERVES

11 tbsp

DIET

vegan

EVERY RECIPE DESERVES

A Little Love Letter

If you’ve ever wished your food had that little extra something, this crunchy, garlicky, nutty magic – this is the answer. Inspired by the iconic everything bagel topping, this homemade blend is an absolute game-changer. Sprinkle it on avo toast, eggs, cottage cheese, or even a basic buttered bread slice – it instantly upgrades anything. And the best part? You can whip it up in minutes with pantry staples.

This seasoning is the ultimate finishing touch for pretty much everything. Stir it into cream cheese for an instant dip, sprinkle it over popcorn for a salty-savory snack, or coat roasted veggies in olive oil and this mix before baking for an unreal crunch. It’s also a next-level game-changer for grilled cheese, scrambled eggs, and even fried rice.

Keep your seasoning blend fresh by storing it in an airtight jar in a cool, dry spot. It stays crunchy and flavorful for up to six months (if you don’t use it all before then). A quick shake before each use keeps the flavors evenly distributed.

Hi, I'm Kimberly!

Hi, I'm Kimberly.

A hopeless romantic when it comes to food. Every recipe I share is a love letter to food itself. I’m so glad you’re here. Make yourself at home and stay a while.

Love,
Kimberly

Kimberly the Zett Signature

If you want to get to know me better,
click here!


Everything But The Bagel Seasoning

LET’S MAKE A PIECE OF HAPPINESS

Print
clock clock iconcutlery cutlery iconflag flag iconfolder folder iconinstagram instagram iconpinterest pinterest iconfacebook facebook iconprint print iconsquares squares iconheart heart iconheart solid heart solid icon
Everything But The Bagel Seasoning

Everything But The Bagel Seasoning


  • Author: Kimberly
  • Total Time: 5 min
  • Yield: 110g / 11 tbsp 1x

Description

Recommended Equipment

  • small bowl
  • airtight container

Ingredients

Scale
  • 6 tsp white sesame seeds
  • 5 tsp dried minced onion
  • 4 tsp black sesame seeds
  • 4 tsp dried minced garlic
  • 4 tsp sea salt
  • 3 tsp poppy seeds

Instructions

Add all spices to a bowl, mix well, and transfer to an airtight container.

  • Prep Time: 5 min

CRAVING MORE?

Follow along here & don’t forget to subscribe to my substack!

Baked Falafel

Baked Falafel

Baked Falafel

Baked Falafel

February 2, 2024 by Kimberly

Crispy on the outside, soft and herby inside! These golden bites are the ultimate flavor bomb. Packed with chickpeas, garlic, and spices, they’re the kind of snack you’ll keep reaching for.

This website uses affiliate links which may earn commission for purchases made at no additional cost to you.

TOTAL TIME

40 min

SERVES

24 balls

DIET

vegan

EVERY RECIPE DESERVES

A Little Love Letter

Golden, crispy, and packed with bold flavors!! These herby chickpea bites are everything you want in a falafel, minus the frying. They’re light but satisfyingly crunchy, loaded with garlic, cumin, and fresh herbs for that perfect balance of flavor. Whether you stuff them in a warm pita, toss them over a fresh salad, or dip them in creamy tahini sauce, they’re the kind of meal that feels both nourishing and indulgent. And the best part? They’re baked, not fried, so you get all the crunch without the extra oil.

These little crispy gems are beyond versatile! Tuck them into warm pita with fresh veggies and a drizzle of tahini for a classic falafel wrap. Throw them over a big salad with cucumbers, tomatoes, and a lemony dressing for a light but filling meal. Or just dunk them straight into hummus (no judgment here). Want to level it up? Pair them with roasted veggies, herby yogurt sauce, or even a spicy harissa dip.

Got leftovers? Pop them in an airtight container in the fridge for up to 4 days. Reheat them in the oven or air fryer at 180°C (350°F) for about 5 minutes to keep that crispy magic alive. For long-term storage, freeze them on a baking sheet before transferring them to a bag – just bake straight from frozen when you’re ready!

Hi, I'm Kimberly!

Hi, I'm Kimberly.

A hopeless romantic when it comes to food. Every recipe I share is a love letter to food itself. I’m so glad you’re here. Make yourself at home and stay a while.

Love,
Kimberly

Kimberly the Zett Signature

If you want to get to know me better,
click here!


Baked Falafel
Baked Falafel
Baked Falafel
Baked Falafel

LET’S MAKE A PIECE OF HAPPINESS

Print
clock clock iconcutlery cutlery iconflag flag iconfolder folder iconinstagram instagram iconpinterest pinterest iconfacebook facebook iconprint print iconsquares squares iconheart heart iconheart solid heart solid icon
Baked Falafel

Baked Falafel


  • Author: Kimberly
  • Total Time: 12-24 hrs + 40 min
  • Yield: 24 falafel balls 1x

Description

Recommended Equipment

  • medium mixing bowl
  • food processor
  • small cookie scoop (or tablespoon)

Ingredients

Units Scale
  • 250 grams dry chickpeas
  • 2 tbsp olive oil
  • 2 tsp baking powder
  • 5 grams fresh parsley
  • 5 grams fresh cilantro
  • 5 leaves fresh mint
  • 1 yellow onion
  • 4 garlic cloves
  • 1 tsp salt
  • 1 tsp paprika
  • 1 tsp cumin
  • 1 tsp za'atar
  • 1/2 tsp white pepper

Instructions

  1. Soak the dried chickpeas in 750ml (3 cups) of cold water for about 12-24 hours and store them in the fridge. The next day, drain, rinse, and let them sit for a moment to remove excess water. Preheat the oven to 220°C / 428°F (fan-assisted).
  2. Add the chickpeas along with the other ingredients to a food processor and blend until you get a crumbly yet moldable mixture. Use a small cookie scoop to shape the mixture into 30g/1oz falafel balls and place them on a baking sheet lined with parchment paper. Bake for about 25-30 minutes until golden brown.
  • Passive Time: 12-24 hrs
  • Cook Time: 40 min

CRAVING MORE?

Follow along here & don’t forget to subscribe to my substack!