


Description
GOOD TO HAVE ON HAND
- oven
- spring form pan 28 cm / 11″
- deep baking tray that fits the spring form pan
- food processor
- microwave (or small saucepan)
- large mixing bowl
- whisk
- aluminum foil
- small saucepan
- zest grater
Ingredients
Units Scale
CRUST
- 200 grams golden Oreo cookies (without cream filling)
- 100 grams butter
- 600 grams cream cheese
- 130 grams white sugar
- 160 grams creme fraiche
- 1 tsp vanilla extract
- 2 eggs
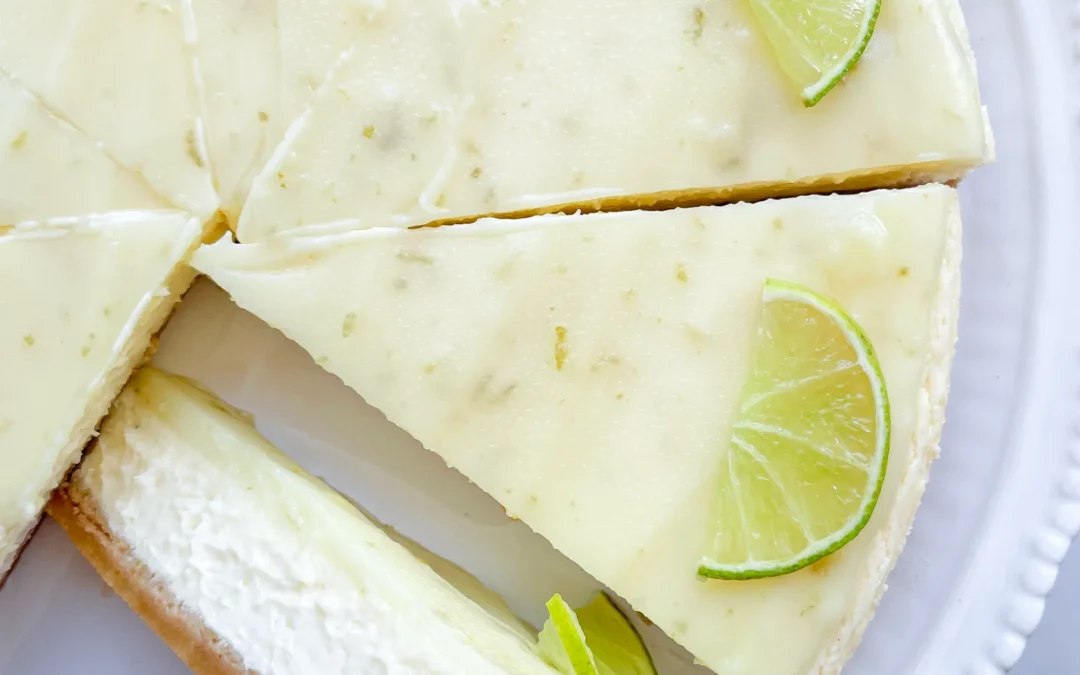
- 2 limes
- 85 grams white sugar
- 40 grams butter
- 50 grams heavy cream
- 1 tbsp cornstarch
- cold water
Instructions
- Preheat your oven to 175°C / 350°F fan-assisted. Fill a deep baking tray or baking dish, large enough to fit your springform, with water. The water should come about halfway up the sides of the springform pan. Set aside.
- Carefully twist apart the Oreo cookies and remove the cream filling. Place the cookies in a food processor and pulse until crumbly. Melt the butter in the microwave or in a small saucepan and add it to the cookie crumbs. Mix for about 20 seconds until combined and crumbly. Press this mixture into the bottom of the springform and set aside.
- In a large mixing bowl, whisk the cream cheese until smooth. Add the sugar and beat until well combined. Mix in the crème fraîche and vanilla extract. Beat in one egg until just combined, then add the second egg and mix until just incorporated. Avoid overmixing to prevent adding too much air to the batter.
- Pour the cream cheese filling over the cookie crust in the springform and spread evenly. Place two sheets of aluminum foil on a flat surface and put the springform pan in the center. Fold the foil up around the edges of the pan to prevent water from getting in during the water bath. Place the pan in the water bath and bake on the middle rack of the oven for about 40 minutes. The cheesecake should be set at the edges and slightly wobbly in the center, with no cracks on top.
- While the cheesecake bakes, prepare the lime curd. Zest the limes and place the zest in a small saucepan. Juice the limes and add the juice, along with the sugar, to the pot. Bring to a simmer over medium heat, then gradually add the butter, stirring until melted. Finally, stir in the cream and bring to a boil. Remove from heat. In a small bowl, mix cornstarch and 1.5 tablespoons of water until smooth, then add to the lime mixture. Bring to a boil while stirring, set aside and then let it cool for a bit.
- After 40 minutes, turn off the oven and open the door completely. Leave the cheesecake in the cooling oven for 20 minutes to prevent cracking from temperature shock.
- The lime curd should be quite firm by now. Stir in about 4-5 tablespoons of cold water until creamy but not too runny. Add more water if needed. Set aside to cool completely.
- After 20 minutes, remove the cheesecake from the water bath, discard the foil, and run a sharp knife around the edge to loosen it from the springform. Leave the springform ring on and let the cheesecake cool to room temperature.
- Once the cheesecake has cooled, gently spread the lime curd on top. Refrigerate for at least 6 hours or overnight. I know it’s a long wait, but it’ll be worth it 😉 Enjoy your cheesecake!
- Passive Time: 3 hours + overnight
- Cook Time: 40 min