Chinese Five Spice

Chinese Five Spice

Chinese Five Spice

Chinese Five Spice

July 29, 2024 by Kimberly

Discover the magic of Chinese Five Spice! This aromatic blend brings an irresistible burst of flavor to your dishes. Perfect for transforming everyday meals into gourmet experiences.

This website uses affiliate links which may earn commission for purchases made at no additional cost to you.

TOTAL TIME

5 min

SERVES

3 tbsp

DIET

vegan

EVERY RECIPE DESERVES

A Little Love Letter

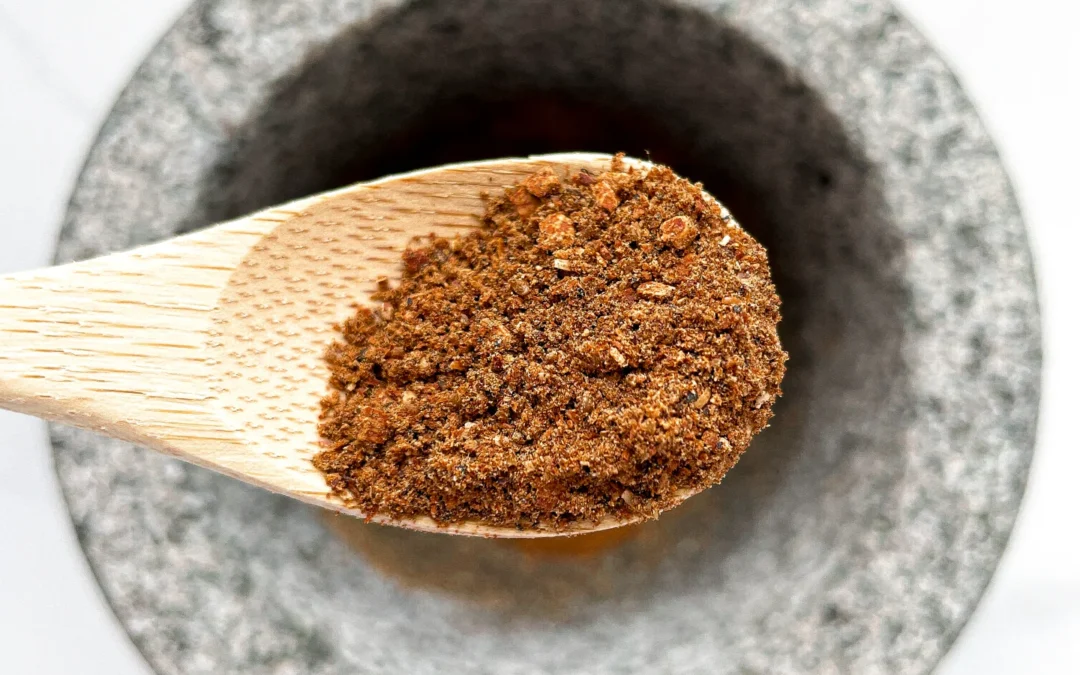
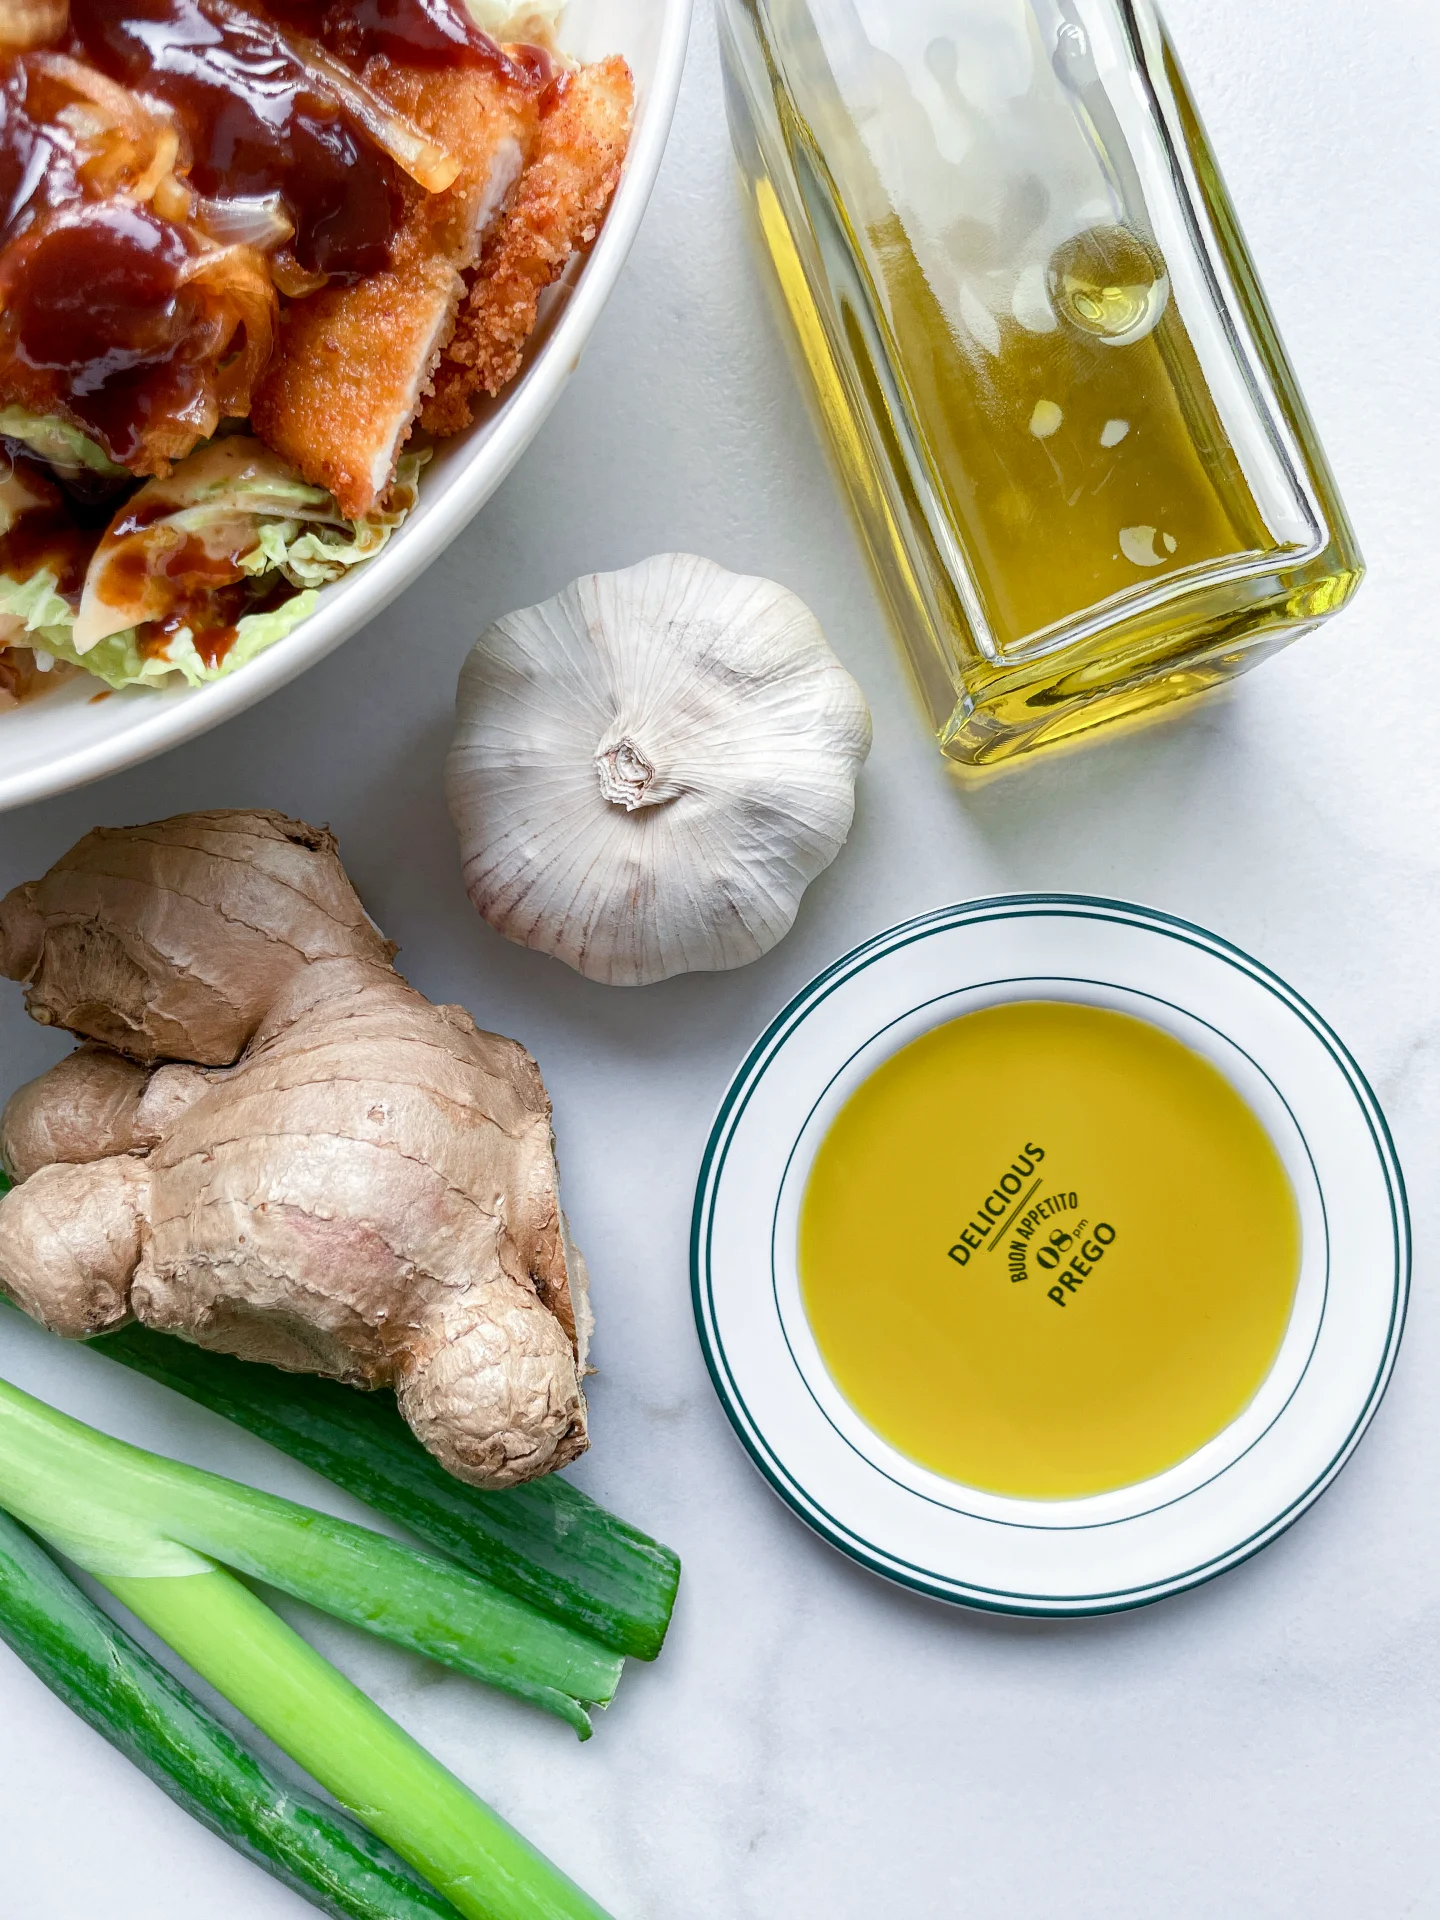
Looking to add a punch of flavor to your cooking? Chinese Five Spice is your new kitchen hero! This magical blend of star anise, cloves, cinnamon, peppercorns, and cilantro seeds brings a delightful balance of sweet, savory, and spicy notes to any dish. Whether you’re a culinary newbie or a seasoned chef, this spice mix will elevate your meals effortlessly.

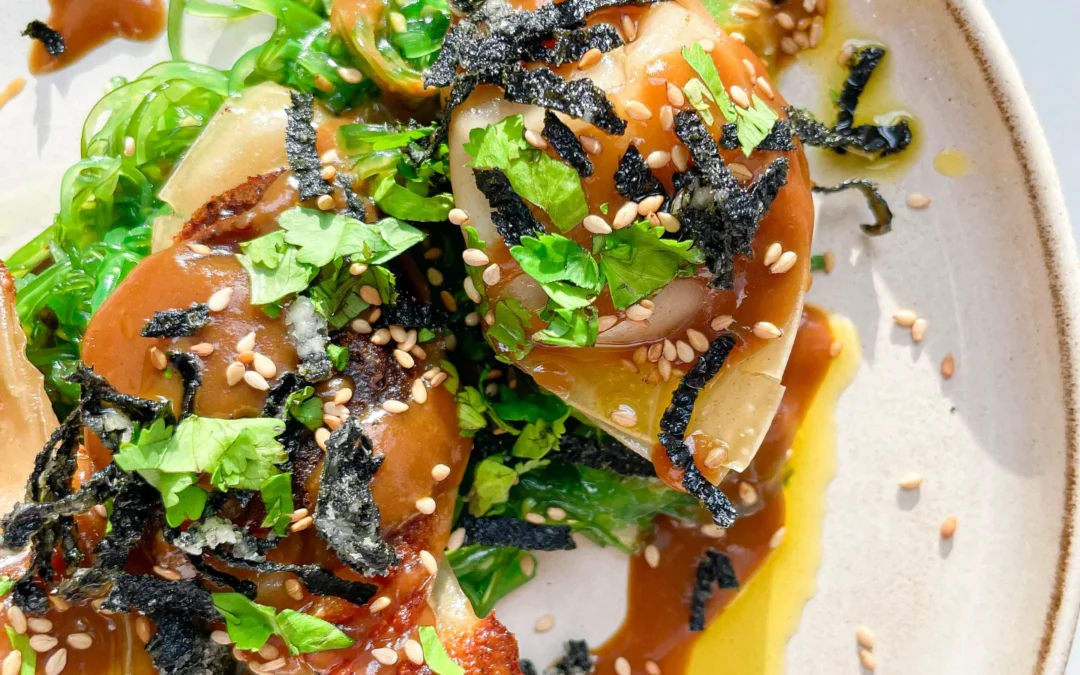
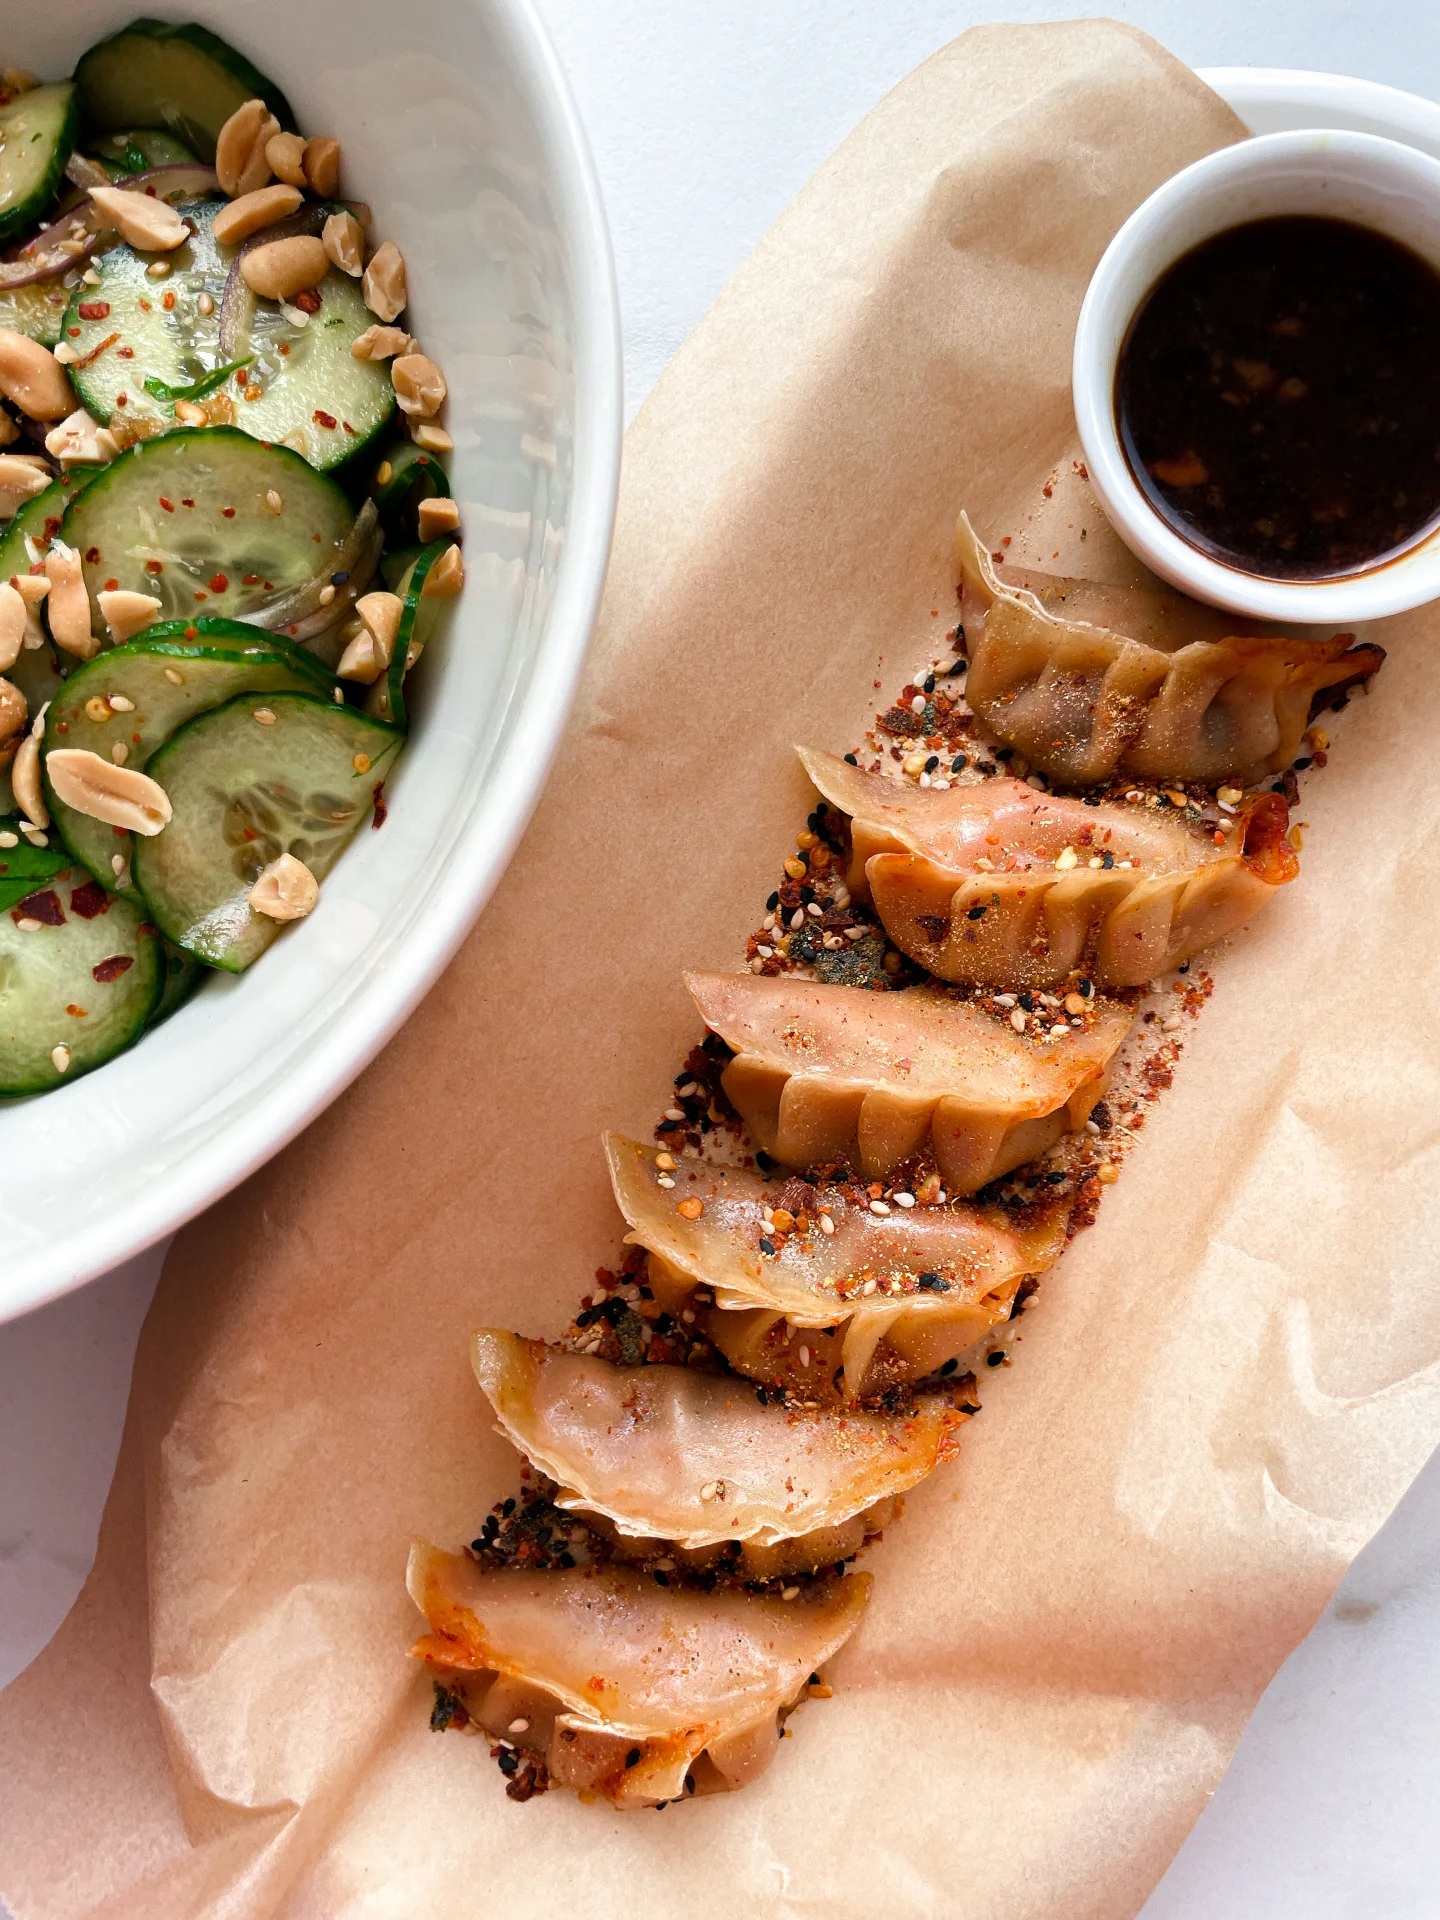
Chinese Five Spice works wonders with a variety of dishes. Use it as a dry rub for chicken, pork, or beef before grilling or roasting. It’s also fantastic in stir-fries, adding depth and complexity to your veggies and proteins. For a quick flavor boost, sprinkle some over roasted nuts or popcorn. And don’t forget to mix it into marinades or sauces for an extra zing!

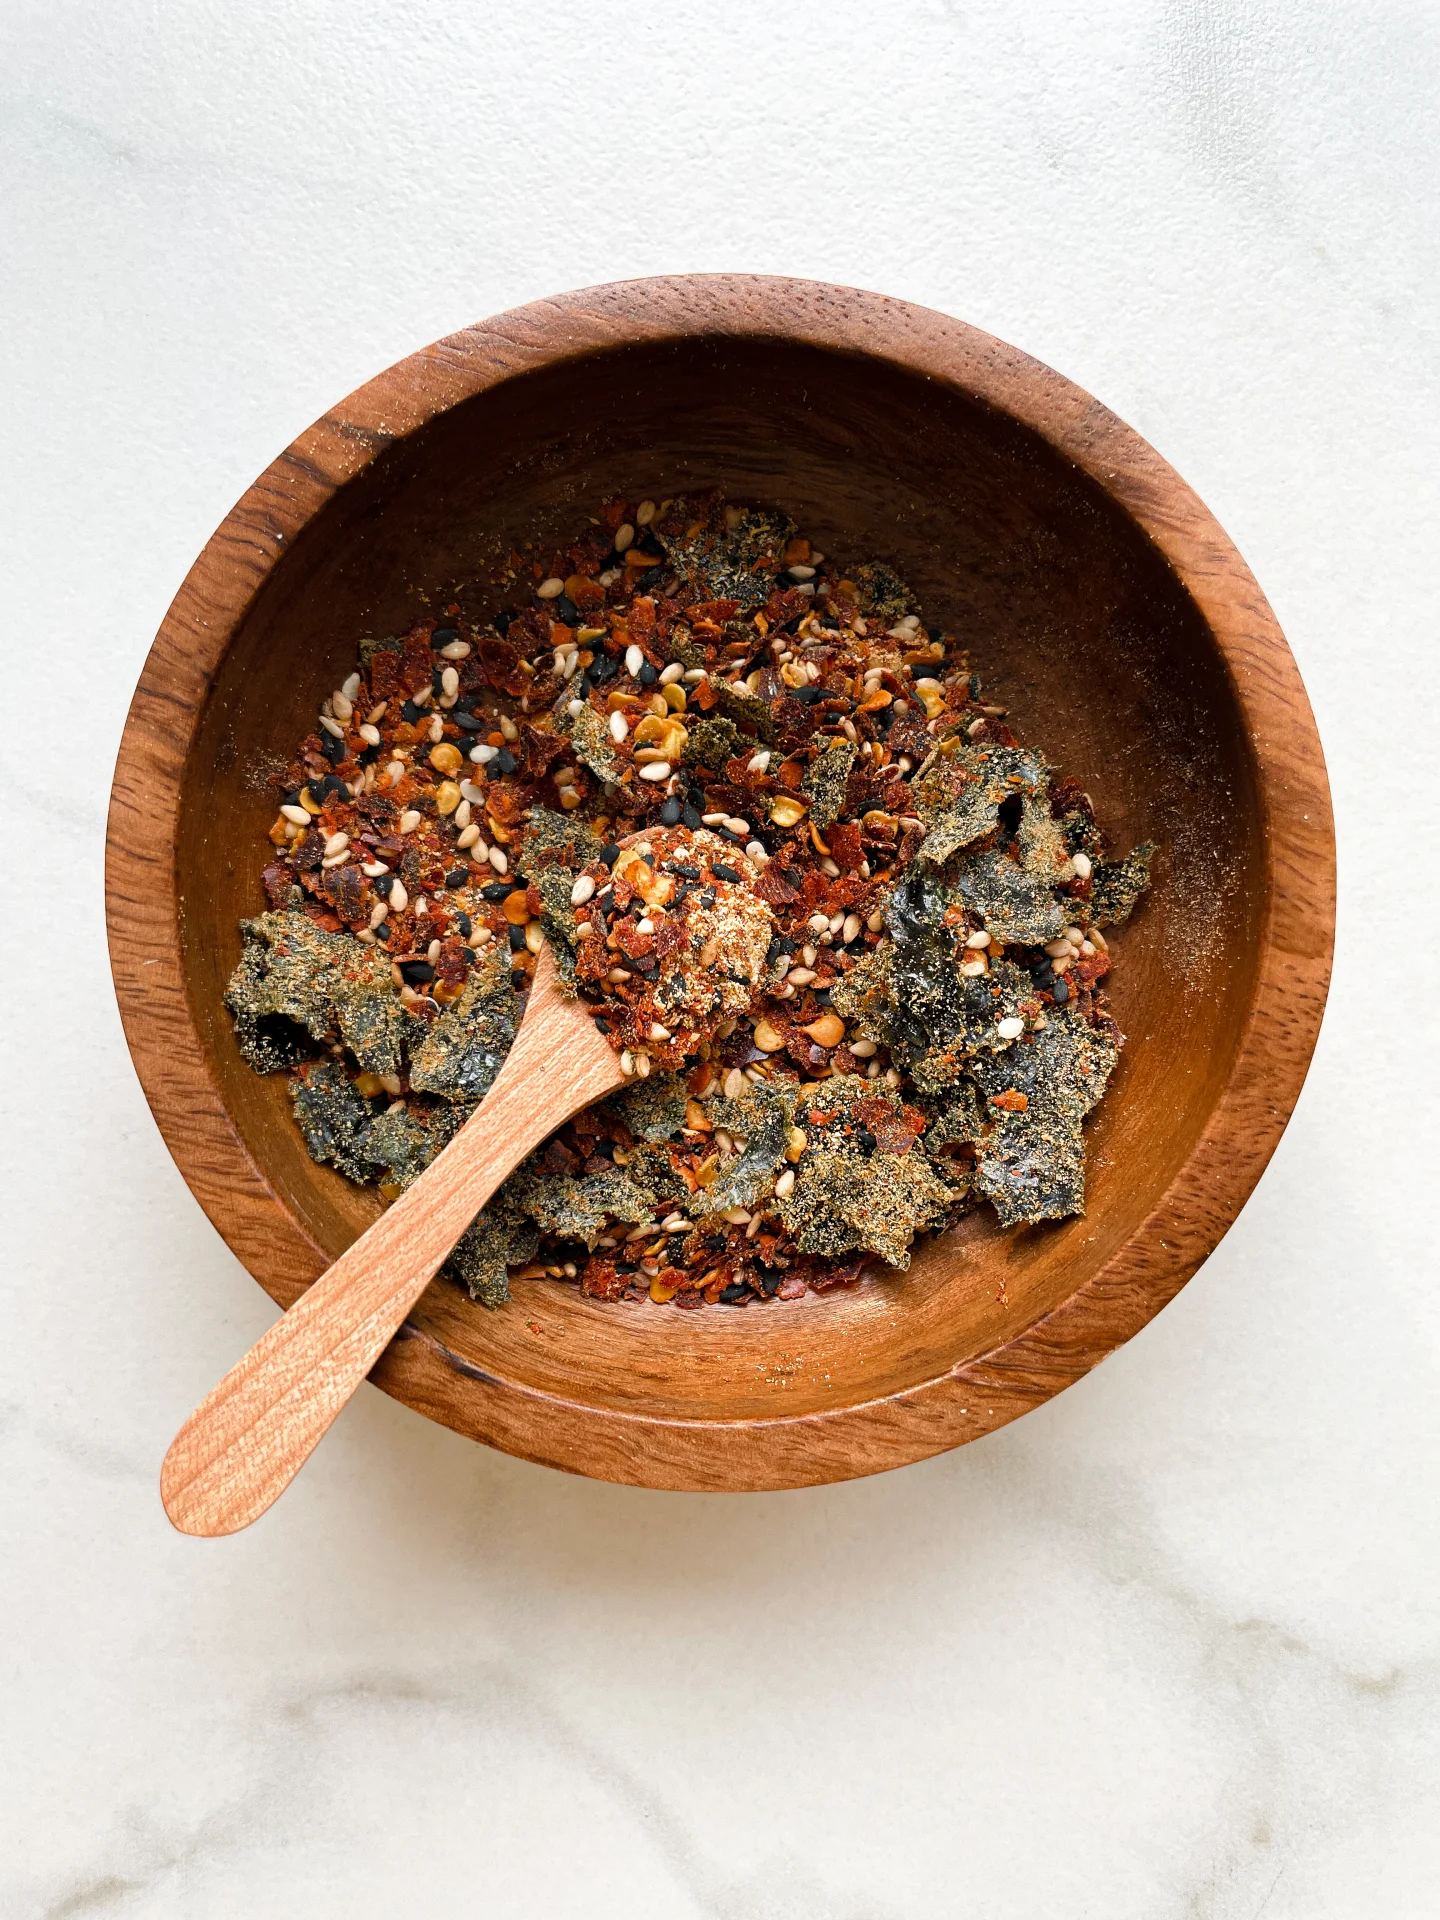
Store your Five Spice Seasoning in an airtight container, away from light and heat. This will help preserve its aromatic qualities and keep it fresh for up to six months. Always use a dry spoon to prevent moisture from affecting the blend.

Hi, I'm Kimberly!

Hi, I'm Kimberly.

A hopeless romantic when it comes to food. Every recipe I share is a love letter to food itself. I’m so glad you’re here. Make yourself at home and stay a while.

Love,
Kimberly

Kimberly the Zett Signature

If you want to get to know me better,
click here!


Chinese Five Spice
Chinese Five Spice

LET’S MAKE A PIECE OF HAPPINESS

Print
clock clock iconcutlery cutlery iconflag flag iconfolder folder iconinstagram instagram iconpinterest pinterest iconfacebook facebook iconprint print iconsquares squares iconheart heart iconheart solid heart solid icon
Chinese Five Spice

Chinese Five Spice


5 Stars 4 Stars 3 Stars 2 Stars 1 Star

No reviews

  • Author: Kimberly
  • Total Time: 5 min
  • Yield: 3 tsp

Description

Recommended Equipment

  • measuring spoons
  • pestle & mortar
  • airtight container

Ingredients

  • 1 cinnamon stick
  • 1/4 tsp peppercorns
  • 1 star anise
  • 1/4 tsp cilantro seeds
  • 2 cloves

Instructions

  • Place cinnamon stick, peppercorns, star anise, coriander seeds, and cloves in a mortar and grind finely for a few minutes. The powder can be used immediately or stored in an airtight container.
  • Cook Time: 5 min

CRAVING MORE?

Follow along here & don’t forget to subscribe to my substack!

Crispy Pork Gyoza, Miso Ginger Oil Glaze & Fried Seaweed

Crispy Pork Gyoza, Miso Ginger Oil Glaze & Fried Seaweed

Crispy Pork Gyoza, Miso Ginger Oil Glaze & Fried Seaweed

Crispy Pork Gyoza, Miso Ginger Oil Glaze & Fried Seaweed

July 29, 2024 by Kimberly

Dive into crispy pork gyoza with miso ginger oil glaze and fried seaweed – a flavor explosion that’s crunchy, savory, and totally irresistible. Perfect for any foodie adventure!

This website uses affiliate links which may earn commission for purchases made at no additional cost to you.

TOTAL TIME

40 min

SERVES

4 portions

DIET

vegan

EVERY RECIPE DESERVES

A Little Love Letter

Ready to elevate your appetizer game? Try these crispy pork gyoza drizzled with a mouth-watering miso ginger oil glaze, paired with crunchy fried seaweed. This dish is a fusion of amazing textures and flavors that will take your taste buds on an unforgettable journey. Perfect for impressing guests or enjoying a gourmet snack at home, these gyoza are a must-have for any cooking enthusiast.

Serve these crispy pork gyoza hot from the pan, generously drizzled with the miso ginger oil glaze for a savory kick. Pair them with the fried seaweed for an added crunch that perfectly complements the soft, flavorful gyoza. Garnish with sesame seeds and green onions for extra flavor and visual appeal. These gyoza make a fantastic appetizer, party snack, or light meal.

Store leftover gyoza in an airtight container in the fridge for up to three days. Reheat them in a hot pan to keep their crispiness. The miso ginger oil glaze can be stored separately in a sealed jar.

Hi, I'm Kimberly!

Hi, I'm Kimberly.

A hopeless romantic when it comes to food. Every recipe I share is a love letter to food itself. I’m so glad you’re here. Make yourself at home and stay a while.

Love,
Kimberly

Kimberly the Zett Signature

If you want to get to know me better,
click here!


Crispy Pork Gyoza, Miso Ginger Oil Glaze & Fried Seaweed

LET’S MAKE A PIECE OF HAPPINESS

Print
.tasty-recipe-responsive-iframe-container-877efee0 { position: relative; overflow: hidden; padding-top: 56.3%; } .tasty-recipe-responsive-iframe-container-877efee0 iframe { position: absolute; top: 0; left: 0; width: 100%; height: 100%; border: 0; } clock clock iconcutlery cutlery iconflag flag iconfolder folder iconinstagram instagram iconpinterest pinterest iconfacebook facebook iconprint print iconsquares squares iconheart heart iconheart solid heart solid icon
Crispy Pork Gyoza, Miso Ginger Oil Glaze & Fried Seaweed

Crispy Pork Gyoza, Miso Ginger Oil Glaze & Fried Seaweed


  • Author: Kimberly
  • Total Time: 40 min
  • Yield: 4

Description

Recommended Equipment

  • sharp knife
  • cutting board
  • medium bowl
  • large plate
  • three small bowls
  • measuring spoons
  • large pan with lid
  • scissors
  • small pan or pot

Ingredients

Units Scale
  • 20 Gyoza wrapper, homemade or store-bought
  • 1 tbsp high heat oil
  • 80 milliliters cold water
  • 400 grams seaweed salad (optional)
FILLING
  • 250 grams ground pork
  • 4 garlic cloves
  • 1 tsp sesame oil
  • 1 tsp ginger oil
  • 1 spring onion
  • 1.5 tbsp Hoisin sauce
  • 1 tsp soy sauce
  • 1/4 tsp Chinese Five Spice
  • 1 small egg
MISO GLAZE
  • 2 tbsp miso paste
  • 1 tbsp mirin
  • 1 tsp honey
  • 2 tsp soy sauce
  • 2 tsp ginger oil
  • 3 tbsp warm water
TOPPINGS
  • 1 Nori sheet
  • 1 tsp cornstarch
  • 2 tsp cold water
  • fresh cilantro
  • ginger oil

Instructions

PREPARATIONS

  • Here’s the recipe for Gyoza dough. You’ll need about 20 sheets, cut them into squares rather than rounds. Or, just get ready-made Gyoza wrappers from the Asian market.
  • Here’s the recipe for ginger oil. You’ll need about 2-3 tablespoons.
  • Here’s the recipe for Chinese Five Spice. You’ll need 1/4 teaspoon.

INSTRUCTIONS

  1. First, prepare the Gyoza filling. Peel and finely grate the garlic cloves into a medium bowl. Then, slice the spring onion into thin rings and add to the garlic. Next, add the ground pork, ginger oil, sesame oil, hoisin sauce, Chinese Five Spice, and the egg. Mix everything well.
  2. Take a large plate and sprinkle some flour on it. This will be the resting place for the filled Gyoza so they don’t stick to the plate. Also, prepare a small bowl with some cold water and have your Gyoza dough ready.
  3. Fill each Gyoza wrapper with 1 teaspoon of the pork filling. Dab a little water around the edge of the wrapper, fold it diagonally to seal, and press out all the air so the filling is well enclosed. Wet one side of the long edge, fold it over, and press firmly. Place on the floured plate. Repeat until all the filling is used up.
  4. Heat 1 tbsp of high-heat oil in a large pan over medium heat and add the Gyoza. Fry for a few minutes until the bottoms are crispy. Lower the heat and add about 100ml / 1/3 cup of cold water to the pan (be careful, it may splatter if the oil is too hot). Cover the pan with a lid and let the Gyoza steam.
  5. Meanwhile, fold the Nori sheet three times in the middle and cut it into thin strips with scissors. Mix the Nori strips with cornstarch in a small bowl. Add a bit of water and stir well. Heat about 1 cm of high-heat oil in a small pan or pot to around 180°C / 356°F. Fry the Nori strips for 2-3 minutes, then remove and drain on paper towels.
  6. The Gyoza should now be a bit translucent and the filling cooked through. Remove the lid and turn the heat back to medium to crisp up the Gyoza again.
  7. Meanwhile, make the Miso Glaze. In a small bowl, mix Mirin, honey, soy sauce, and ginger oil. Heat for a few seconds in the microwave (or in a small pan) until it simmers. Stir in the Miso paste well, add 3 tbsp warm water to thin it a bit and set aside.
  8. Finely chop the fresh coriander and set aside.
  9. Optionally, place seaweed salad in the center of the plate, arrange 5 Gyoza on top. Drizzle with Miso Glaze and top with fried Nori strips, chopped coriander, and toasted sesame seeds. Finish with a splash of ginger oil and serve immediately.
  • Cook Time: 40 min

CRAVING MORE?

Follow along here & don’t forget to subscribe to my substack!

Jalapeño Oil

Jalapeño Oil

Jalapeño Oil

Jalapeño Oil

July 23, 2024 by Kimberly

Jalapeño oil is the zesty kick your meals have been missing! It’s easy to make and instantly elevates any dish with its spicy, flavorful punch.

This website uses affiliate links which may earn commission for purchases made at no additional cost to you.

TOTAL TIME

50 min

SERVES

1 cup / 250 ml

DIET

vegan

EVERY RECIPE DESERVES

A Little Love Letter

Discover the magic of homemade jalapeño oil! This simple condiment adds a vibrant, spicy flair to your dishes. It’s a fantastic way to introduce a punch of flavor with minimal effort. Whether you’re drizzling it over pizza or stirring into soups, it’s guaranteed to impress.

Drizzle it over your morning eggs to kickstart your day or add a dash to your pasta for an evening treat. It’s perfect for enhancing grilled meats or as a zesty addition to your salad dressings. Experiment and let your taste buds lead the way! I love to eat it in this Spicy Rice Shrimp Bowl & Mango Avocado Salsa.

Keep your jalapeño oil in an airtight container in the fridge. It stays fresh and flavorful for up to 1-2 weeks, ready to add a spicy note whenever you need it.

Hi, I'm Kimberly!

Hi, I'm Kimberly.

A hopeless romantic when it comes to food. Every recipe I share is a love letter to food itself. I’m so glad you’re here. Make yourself at home and stay a while.

Love,
Kimberly

Kimberly the Zett Signature

If you want to get to know me better,
click here!


Jalapeño Oil
Jalapeño Oil
Jalapeño Oil
Jalapeño Oil

LET’S MAKE A PIECE OF HAPPINESS

Print
.tasty-recipe-responsive-iframe-container-80062444 { position: relative; overflow: hidden; padding-top: 56.3%; } .tasty-recipe-responsive-iframe-container-80062444 iframe { position: absolute; top: 0; left: 0; width: 100%; height: 100%; border: 0; } clock clock iconcutlery cutlery iconflag flag iconfolder folder iconinstagram instagram iconpinterest pinterest iconfacebook facebook iconprint print iconsquares squares iconheart heart iconheart solid heart solid icon
Jalapeño Oil

Jalapeño Oil


  • Author: Kimberly
  • Total Time: 50 min
  • Yield: 250 ml / 1 cup

Description

RECOMMENDED EQUIPMENT

  • blender
  • medium-sized saucepan
  • whisk
  • a bowl which the medium saucepan fits into
  • 2 medium-sized bowls
  • 2 fine sieves
  • sealable container (oil bottle)
  • ice cubes
  • coffee filter

Ingredients

Units Scale
  • 2 jalapeños
  • 250 milliliters unrefined cold-pressed sunflower oil

Instructions

  1. Cut the stems off and put the jalapeños into the blender. Pour in the oil. Blend on the highest setting until there are only tiny pieces of the jalapeños left.
  2. Pour the mixture from the blender into a medium-sized pot and heat it over medium heat to a temperature of about 103°C (217°F), and maintain this temperature for the next 10-15 minutes. Stir occasionally, making sure the temperature remains steady and nothing gets burned.
  3. Prepare a bowl large enough to fit a medium-sized pot, and fill it with cold water and a handful of ice cubes. Also, hang a fine sieve strainer over one medium-sized bowl and another fine sieve strainer, with a coffee filter inside it, over another medium-sized bowl.
  4. Now, place the pot in the ice water and stir to cool the oil quickly. Once the oil is almost cold, remove the pot from the water and pour the oil into the prepared fine sieve to catch the coarse particles.
  5. Then, pour the oil into the second sieve, which is equipped with a coffee filter, to catch the remaining finer particles.
  6. Allow the oil to drip through for about 30 minutes or maybe less depending on how many remaining particles are in the coffee filter. Once all the oil has passed through the coffee filter, transfer the collected amount of oil into a sealable container or directly into an oil bottle. Store in the refrigerator for up to one week.
  • Prep Time: 5 min
  • Passive Time: 30 min
  • Cook Time: 15 min

CRAVING MORE?

Follow along here & don’t forget to subscribe to my substack!

Spicy Rice Shrimp Bowl & Mango Avocado Salsa

Spicy Rice Shrimp Bowl & Mango Avocado Salsa

Spicy Rice Shrimp Bowl & Mango Avocado Salsa

Spicy Rice Shrimp Bowl & Mango Avocado Salsa

July 23, 2024 by Kimberly

Turn up the heat with this zesty rice shrimp bowl, packed with jalapeños and chili, and cooled by a fresh mango avocado salsa. It’s a fiery favorite with a tropical twist!

This website uses affiliate links which may earn commission for purchases made at no additional cost to you.

TOTAL TIME

40 min

SERVES

2 portions


DIET

vegan

EVERY RECIPE DESERVES

A Little Love Letter

Ignite your palate with this Spicy Rice Shrimp Bowl, complemented by a refreshing Mango Avocado Salsa! This dish is a thrilling blend of hot, spicy flavors and cool, sweet contrasts, perfect for those who love a bit of adventure in their meals.

Serve this fiery shrimp bowl fresh and hot, letting the cool mango avocado salsa contrast beautifully with the heat from the shrimp. It’s fantastic for a quick dinner or a vibrant, impressive dish at your next gathering. Add a dollop of cilantro-yogurt sauce for a creamy finish and add some sprouts for added crunch!

Best enjoyed fresh, but if you have leftovers, store them in separate airtight containers in the refrigerator. The rice and shrimp keep well for up to two days, while the salsa is best consumed within a day to maintain its freshness.

Hi, I'm Kimberly!

Hi, I'm Kimberly.

A hopeless romantic when it comes to food. Every recipe I share is a love letter to food itself. I’m so glad you’re here. Make yourself at home and stay a while.

Love,
Kimberly

Kimberly the Zett Signature

If you want to get to know me better,
click here!


Spicy Rice Shrimp Bowl & Mango Avocado Salsa

LET’S MAKE A PIECE OF HAPPINESS

Print
clock clock iconcutlery cutlery iconflag flag iconfolder folder iconinstagram instagram iconpinterest pinterest iconfacebook facebook iconprint print iconsquares squares iconheart heart iconheart solid heart solid icon
Spicy Rice Shrimp Bowl & Mango Avocado Salsa

Spicy Rice Shrimp Bowl & Mango Avocado Salsa


  • Author: Kimberly
  • Total Time: 40 min
  • Yield: 2-3

Description

Recommended Equipment

  • small bowl
  • measuring spoons
  • medium pot
  • tall container
  • immersion blender
  • sharp knife
  • cutting board
  • medium frying pan

Ingredients

Units Scale
  • 300 grams shrimps, raw peeled deveined
  • 2 small hands mung bean sprouts
  • 160 grams basmati rice
MARINADE
  • juice of half a lemon
  • 2 tbsp jalapeño oil
  • 1/2 fresh chili
  • 1 tsp cumin
  • 1 tsp salt
  • 1/2 tsp smoked paprika
  • 1/2 tsp garlic powder
  • 1/2 tsp cajun seasoning
  • 1/4 tsp onion powder
  • 1/4 tsp white pepper
  • 1/8 tsp cayenne pepper
CILANTRO YOGURT SAUCE
  • 3 tbsp yogurt
  • 1 tbsp jalapeño pulp from the production process of the jalapeño oil
  • juice of half a lemon
  • 1 garlic clove
  • 5 grams fresh cilantro
  • 5 grams fresh parsley
  • pinch of salt
  • pinch of pepper
MANGO AVOCADO SALAD
  • 1/2 ripe mango
  • 1/2 ripe avocado
  • 1 small red onion
  • juice of half a lemon
  • pinch of salt
TOPPINGS
  • fresh cilantro
  • lime slices
  • fresh chili

Instructions

PREPARATIONS
This dish is made with my Jalapeño Oil. If you want to replace it, you can use olive oil instead and for the pulp in the cilantro-yogurt sauce, use 1-2 fresh jalapeños + 1 tablespoon of olive oil.

INSTRUCTIONS

  1. In a small bowl, add cumin, salt, smoked paprika, garlic powder, onion powder, pepper, cayenne, and Cajun seasoning. Finely chop half of a fresh chili and add it to the spices. Finally, add 2 tablespoons of Jalapeño Oil and the juice of half a lime, and mix everything into a creamy paste. Wash the shrimp, pat dry, and place in a bowl. Add the creamy marinade and mix well to evenly coat all the shrimp. Set aside at room temperature.
  2. Wash and let your rice cook according to the package instructions.
  3. Meanwhile, in a tall container, blend yogurt, the pulp from making the Jalapeño Oil, 1-2 peeled garlic cloves, cilantro, parsley, salt, and pepper with an immersion blender until smooth. Set aside.
  4. Next, peel the mango, avocado, and red onion. Chop everything into small pieces and put in a medium bowl. Mix with the juice of half a lime and a little salt, and set aside.
  5. Wash and pat dry the mung bean sprouts and set aside.
  6. Heat 2 tablespoons of Jalapeño Oil in a frying pan and add the shrimp along with the remaining marinade. Briefly fry the shrimp on both sides and let the sauce reduce at the same time.
  7. In a deep bowl, distribute the rice, place mung bean sprouts on one side and the mango-avocado salad on the other. Add 1-2 tablespoons of the green cilantro-yogurt sauce to the sprouts, then lay the shrimp on top and drizzle with the sauce from the pan. You can also top it off with fresh lime juice, fresh cilantro, and fresh chili.
  • Cook Time: 40 min

CRAVING MORE?

Follow along here & don’t forget to subscribe to my substack!

Mediterranean Pasta Salad

Mediterranean Pasta Salad

Mediterranean Pasta Salad

Mediterranean Pasta Salad

July 18, 2024 by Kimberly

Dive into summer with this zesty Mediterranean pasta salad! Packed with bold flavors, it’s a refreshing twist that’s perfect for any picnic or potluck.

This website uses affiliate links which may earn commission for purchases made at no additional cost to you.

TOTAL TIME

1 hr + 15 min

SERVES

8 portions

DIET

vegetarian

EVERY RECIPE DESERVES

A Little Love Letter

Whisk your taste buds away to the sunny Mediterranean with this vibrant pasta salad! It’s bursting with bold flavors and is the perfect quick and healthy dish for any occasion. Ideal for those looking for a delicious, fuss-free meal!

This pasta salad shines at room temperature, making it ideal for picnics and outdoor gatherings. Serve it as a hearty side with grilled meats or enjoy it as a light main course with crusty bread. It’s also great as a next-day lunch, so consider doubling the recipe!

Keep the pasta salad in a sealed container in the refrigerator. It beautifully holds its flavor and texture for up to three days, making it a fantastic choice for meal prep or leftovers.

Hi, I'm Kimberly!

Hi, I'm Kimberly.

A hopeless romantic when it comes to food. Every recipe I share is a love letter to food itself. I’m so glad you’re here. Make yourself at home and stay a while.

Love,
Kimberly

Kimberly the Zett Signature

If you want to get to know me better,
click here!


Mediterranean Pasta Salad

LET’S MAKE A PIECE OF HAPPINESS

Print
.tasty-recipe-responsive-iframe-container-0c0ae4ef { position: relative; overflow: hidden; padding-top: 56.3%; } .tasty-recipe-responsive-iframe-container-0c0ae4ef iframe { position: absolute; top: 0; left: 0; width: 100%; height: 100%; border: 0; } clock clock iconcutlery cutlery iconflag flag iconfolder folder iconinstagram instagram iconpinterest pinterest iconfacebook facebook iconprint print iconsquares squares iconheart heart iconheart solid heart solid icon
Mediterranean Pasta Salad

Mediterranean Pasta Salad


  • Author: Kimberly
  • Total Time: 1 hour + 15 min
  • Yield: 8

Description

GOOD TO HAVE ON HAND

  • large pot
  • large salad bowl
  • whisk
  • sharp knife
  • cutting board
  • small pan
  • colander


Ingredients

Units Scale
  • 500 grams penne pasta
  • 150 grams Kalamata olives
  • 180 gram dried tomatoes in oil
  • 60 grams capers
  • 2 tbsp pine nuts
  • 15 grams fresh parsley or basil
DRESSING
  • 4 tbsp olive oil (you can use the oil from the dried tomatoes)
  • 3 tbsp balsamic vinegar
  • 2 tsp Dijon mustard
  • 1 tbsp honey
  • 1/4 tsp oregano
  • 1/4 tsp thyme
  • 1/4 tsp rosemary
  • 1/4 tsp salt

Instructions

  1. Fill a large pot with water and bring it to a boil.
  2. Meanwhile, prepare the dressing in the salad bowl. Mix olive oil, balsamic vinegar, Dijon mustard, honey, oregano, thyme, rosemary, and salt with a whisk until smooth. Set the bowl aside.
  3. Add the pasta and 1 tablespoon of salt to the boiling water and cook according to the package instructions until al dente.
  4. While the pasta cooks, halve the olives and chop the tomatoes into small pieces. Pluck the parsley leaves from the stems and finely chop them. Drain and rinse the capers.
  5. Toast the pine nuts in a small pan without adding oil until golden brown.
  6. Drain the pasta and add it directly to the bowl with the dressing, mixing well.
  7. Add the tomatoes, olives, capers, pine nuts, and parsley and combine thoroughly. Season with salt and pepper to taste, then let it cool and marinate for about 1 hour or overnight.
  • Passive Time: 1 hour
  • Cook Time: 15 min

CRAVING MORE?

Follow along here & don’t forget to subscribe to my substack!

Blueberry Lemon Curd Dutch Baby

Blueberry Lemon Curd Dutch Baby

Blueberry Lemon Curd Dutch Baby

Blueberry Lemon Curd Dutch Baby

July 16, 2024 by Kimberly

Indulge in a delightful Blueberry Lemon Curd Dutch Baby, bursting with fresh flavors and a fluffy, pancake-like texture. Perfect for a cozy brunch or special breakfast treat!

This website uses affiliate links which may earn commission for purchases made at no additional cost to you.

TOTAL TIME

45 min

SERVES

4 portions

DIET

vegetarian

EVERY RECIPE DESERVES

A Little Love Letter

Have you ever tried a Dutch Baby? It’s like a giant, fluffy pancake that’s perfect for impressing guests or treating yourself to something special. This Blueberry Lemon Curd Dutch Baby is a game-changer, blending tart lemon curd with sweet blueberries for an irresistible flavor combo. Plus, it’s super easy to make, so you can whip it up anytime you want a delicious, crowd-pleasing breakfast.

Simply dust it with powdered sugar, drizzle a bit more lemon curd on top, and scatter fresh blueberries for a beautiful presentation. Pair it with a cup of coffee or a mimosa for the ultimate brunch experience. This dish is also versatile – add a dollop of whipped cream or a scoop of vanilla ice cream for a decadent dessert version. Whether it’s a lazy weekend or a special occasion, this Dutch Baby is sure to impress. And for an extra decadent touch, my vanilla oil is a perfect match. Just drizzle a bit on top and serve.

Simply let it cool completely, then cover it with plastic wrap or place it in an airtight container. Keep it in the fridge for up to 2 days, and reheat it in the oven to retain its fluffiness.

Hi, I'm Kimberly!

Hi, I'm Kimberly.

A hopeless romantic when it comes to food. Every recipe I share is a love letter to food itself. I’m so glad you’re here. Make yourself at home and stay a while.

Love,
Kimberly

Kimberly the Zett Signature

If you want to get to know me better,
click here!


Blueberry Lemon Curd Dutch Baby

LET’S MAKE A PIECE OF HAPPINESS

Print
clock clock iconcutlery cutlery iconflag flag iconfolder folder iconinstagram instagram iconpinterest pinterest iconfacebook facebook iconprint print iconsquares squares iconheart heart iconheart solid heart solid icon
Blueberry Lemon Curd Dutch Baby

Blueberry Lemon Curd Dutch Baby


  • Author: Kimberly
  • Total Time: 45 min
  • Yield: 4

Description

GOOD TO HAVE ON HAND

  • grater
  • food processor
  • medium metal bowl
  • electric mixer
  • small pot
  • whisk
  • sealable container (e.g., jam jar)
  • cast iron skillet
  • medium bowl
  • sharp knife
  • cutting board
  • small sieve


Ingredients

Units Scale
LEMON CURD
  • 2 lemons (we use the zest, the juice and the remaining lemon as garnish)
  • 150 grams white sugar
  • 2 eggs
  • 70 grams butter, room temperature
  • pinch of salt
DUTCH BABY BATTER
  • 2 eggs
  • 65 grams all-purpose flour
  • 120 milliliters whole-fat milk
  • 1 tbsp white sugar
  • 1/2 tsp vanilla extract
  • 1/8 tsp salt
  • 1 tbsp butter, for greasing the pan
TOPPINGS
  • blueberries
  • mint leaves
  • powdered sugar
  • lemon slices

Instructions

  1. First, make the lemon curd: Grate the zest of the two lemons and add them to a food processor with 150g / 3/4 cup of sugar. Mix for 1-1.5 minutes until the zest is finely chopped and blended with the sugar.
  2. Transfer the sugar to a metal bowl and mix in the butter with an electric mixer. Next, add one egg at a time, mixing in between. Juice 3 of the 4 lemon halves and add the juice to the butter-sugar-egg mixture along with a pinch of salt. Mix well.
  3. Fill a small pot halfway with water and bring to a simmer over medium heat. Place the metal bowl on top of the pot and whisk the mixture constantly until it thickens, about 10-15 minutes. The right consistency is reached when the mixture is around 80-85°C (175-185°F) or when it started to thicken.
  4. Remove the bowl from the pot and pour the lemon curd into a clean, sealable container (I used an old jam jar) and set aside. The lemon curd will make exactly 300g / 10.5 oz. It will become more firm the longer it sits.
  5. Now prepare the Dutch Baby. Preheat the oven to 210°C (410°F) and place a cast iron skillet inside to heat up.
  6. In a medium bowl, whisk the eggs with salt and vanilla extract. Add the flour and mix until creamy. Gradually add the milk, whisking until you have a smooth batter.
  7. Once the oven is preheated, use an oven mitt to remove the skillet and add 1 tbsp of butter. Coat the skillet with the melted butter and pour in the batter. Return the skillet to the oven and bake on the middle rack for 11-12 minutes.
  8. Meanwhile, wash and dry the blueberries and mint leaves. Slice the remaining lemon quarter. Have powdered sugar and a small sieve ready.
  9. Remove the skillet from the oven, spread the lemon curd over the Dutch Baby, and garnish with powdered sugar, blueberries, lemon slices, and mint leaves.
  10. And for an extra decadent touch, my vanilla oil is a perfect match. Just drizzle a bit on top and serve.
  • Passive Time: 15 min
  • Cook Time: 30 min

CRAVING MORE?

Follow along here & don’t forget to subscribe to my substack!