Salmon Poke Bowl & Spicy Mayo Sauce

Salmon Poke Bowl & Spicy Mayo Sauce

Salmon Poke Bowl & Spicy Mayo Sauce

Salmon Poke Bowl & Spicy Mayo Sauce

August 21, 2024 by Kimberly

Dive into a fresh and vibrant bowl of goodness, packed with zesty spicy flavors, creamy textures, and a satisfying crunch. Perfect for a wholesome quick meal!

This website uses affiliate links which may earn commission for purchases made at no additional cost to you.

TOTAL TIME

20 min

SERVES

1 bowl

DIET

omnivore

EVERY RECIPE DESERVES

A Little Love Letter

This dish is like a hug in a bowl – a refreshing and vibrant mix of flavors that will take your taste buds on a little adventure. Perfect for when you’re craving something light yet satisfying, this bowl is loaded with fresh veggies like juicy mango, crisp red cabbage, and tender edamame, all sitting on a bed of fluffy rice. And the kicker? A drizzle of spicy mayo sauce that ties everything together with just the right amount of heat.

To serve, grab a big, beautiful bowl and start with a generous layer of rice. Arrange the colorful veggies on top – think creamy avocado, bright mango, and that gorgeous purple cabbage. Lay your protein of choice (like tender salmon) over the top, and then drizzle on the spicy mayo sauce. Sprinkle with sesame seeds and a little wakame salad for that extra touch. Serve it chilled and watch your guests (or yourself) light up with every bite!

Got leftovers? Store each component separately in airtight containers to keep everything fresh. The rice and veggies will last about 2-3 days in the fridge. Just keep the sauce in a small jar and give it a good shake before using it again. It’s best not to store thawed raw salmon. If you can’t finish it, cook it and enjoy it the next day or later the same day.

Hi, I'm Kimberly!

Hi, I'm Kimberly.

A hopeless romantic when it comes to food. Every recipe I share is a love letter to food itself. I’m so glad you’re here. Make yourself at home and stay a while.

Love,
Kimberly

Kimberly the Zett Signature

If you want to get to know me better,
click here!


Salmon Poke Bowl & Spicy Mayo Sauce

LET’S MAKE A PIECE OF HAPPINESS

Print
clock clock iconcutlery cutlery iconflag flag iconfolder folder iconinstagram instagram iconpinterest pinterest iconfacebook facebook iconprint print iconsquares squares iconheart heart iconheart solid heart solid icon
Salmon Poke Bowl & Spicy Mayo Sauce

Salmon Poke Bowl & Spicy Mayo Sauce


5 Stars 4 Stars 3 Stars 2 Stars 1 Star

5 from 1 review

  • Author: Kimberly
  • Total Time: 20 min
  • Yield: 1

Description

RECOMMENDED EQUIPMENT

  • sharp knife
  • cutting board
  • two small bowls
  • small pot
  • grater
  • paper towels

Ingredients

Units Scale
PRODUCE
  • 3 tbsp edamame
  • 1 tbsp avocado
  • a quarter of a lime
  • 1/4 mini cucumber
  • 2 tbsp wakame salad
  • 80 grams farmed salmon, sushi-grade, frozen and then thawed
  • 2 tbsp red cabbage
  • 1 radish
  • 1/4 mango
RICE
  • 80 grams sushi rice
  • 1 tbsp rice vinegar
  • 1/4 tsp salt
SPICY MAYO SAUCE
  • 1 tbsp mayonnaise or yogurt
  • 2 tbsp cold water
  • 1 tbsp sriracha
  • 1/4 tsp ginger, grated
  • 1 garlic clove, grated
  • 1/2 tsp soy sauce
  • 1/8 tsp sesame oil
  • pinch of white pepper
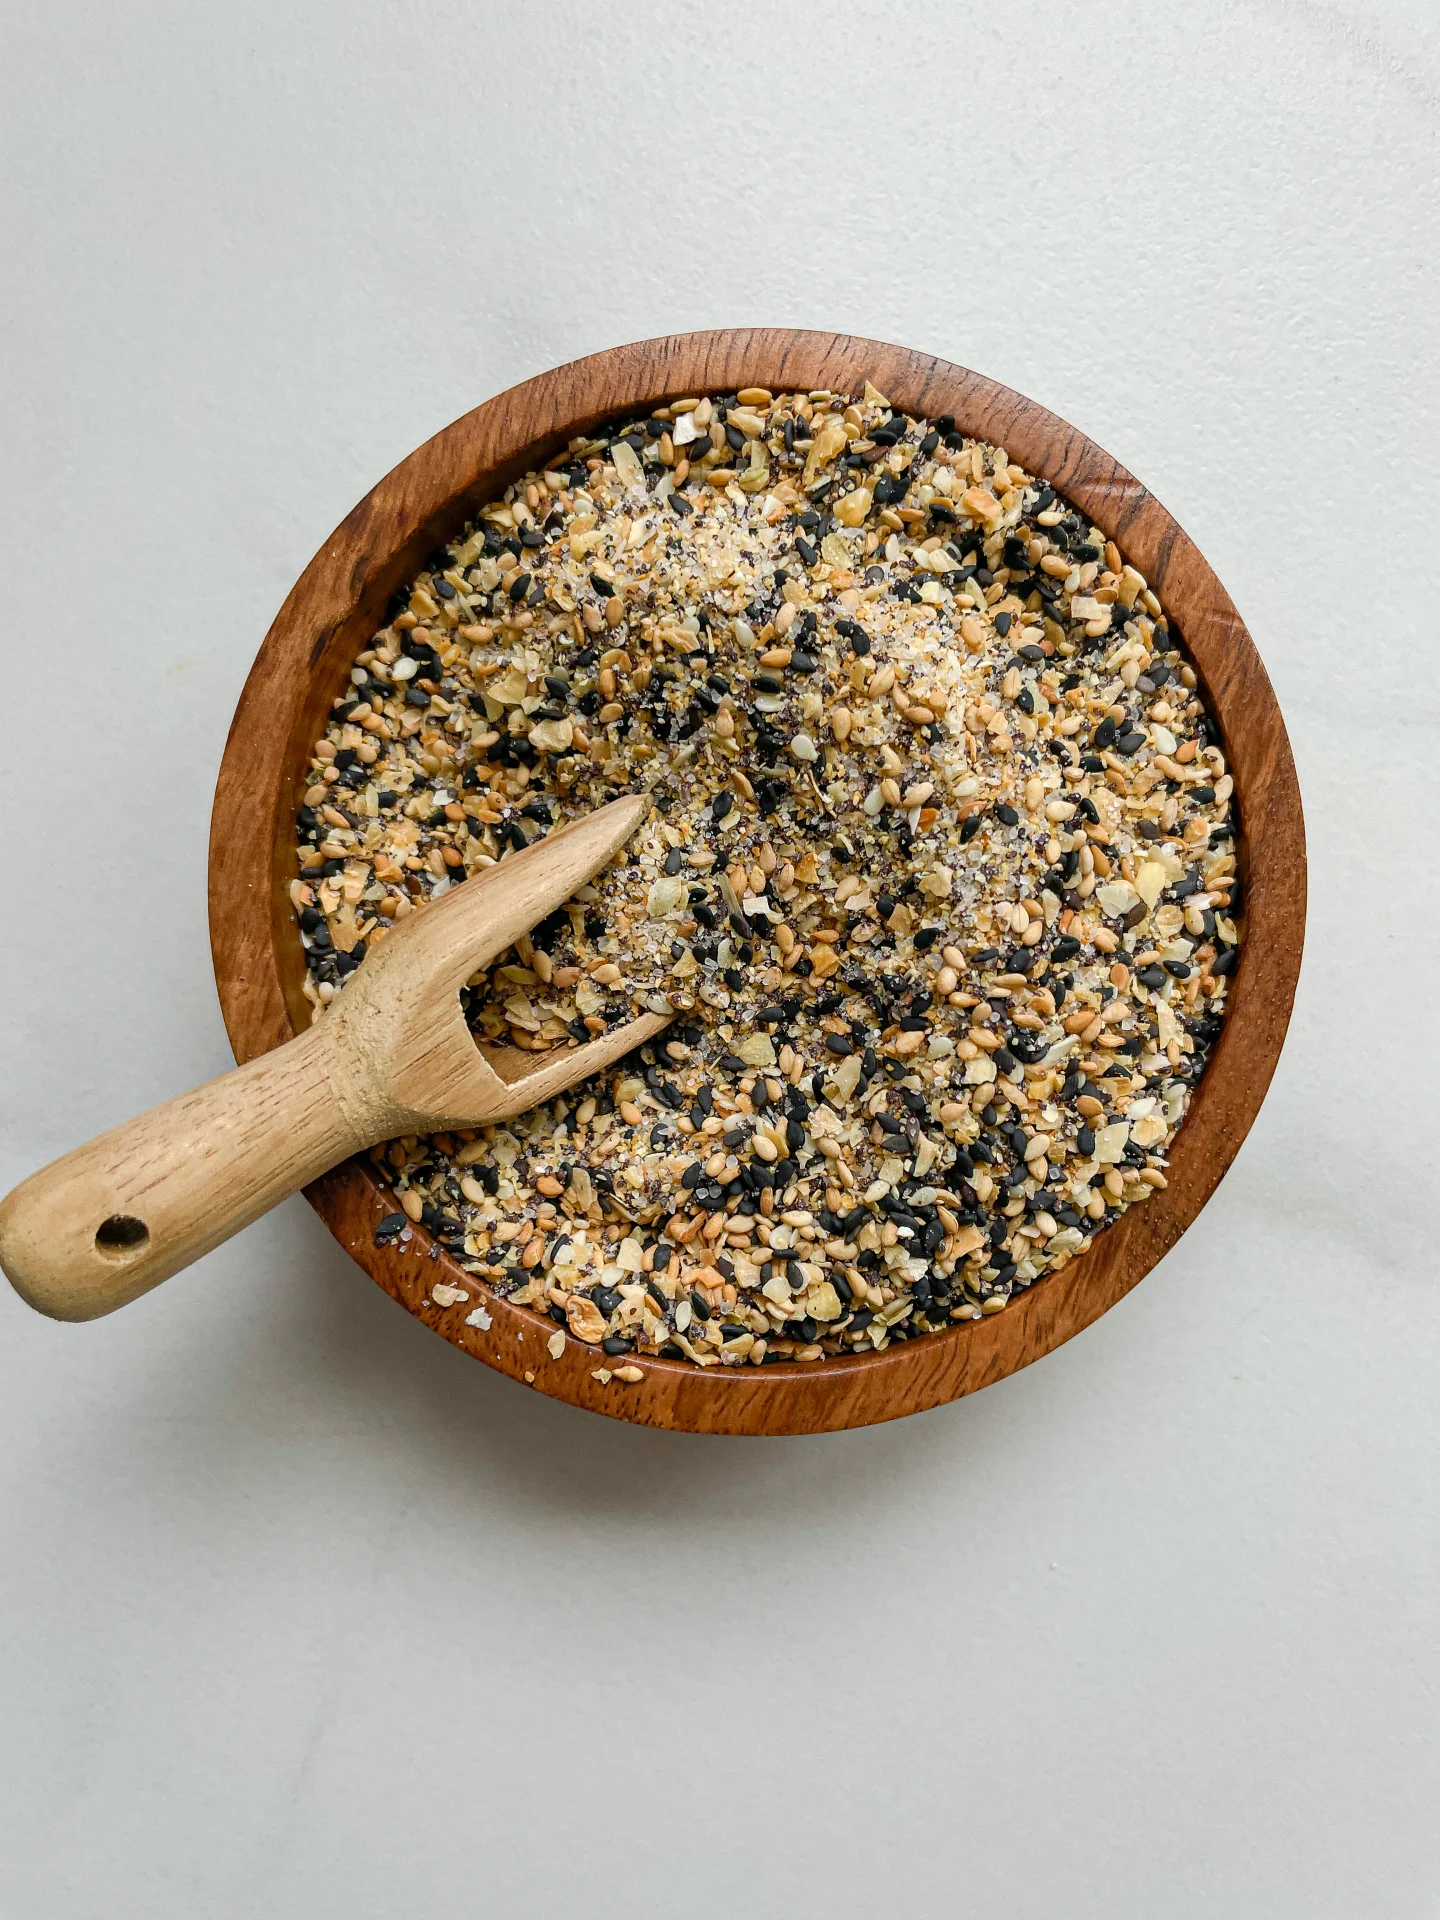
TOPPINGS
  • white sesame seeds
  • black sesame seeds
  • nori sheets
  • cress

Instructions

  1. Start by washing the rice until the water runs clear, then cook it in a rice cooker or small pot. Once it’s done, mix in rice vinegar and salt.
  2. Place the edamame in a small bowl, cover with hot water, and let it sit for 5 minutes. Drain the water afterward.
  3. For the spicy mayo sauce, peel the ginger and garlic, and grate them into a bowl. Add the rest of the sauce ingredients and mix everything together until smooth. Set aside.
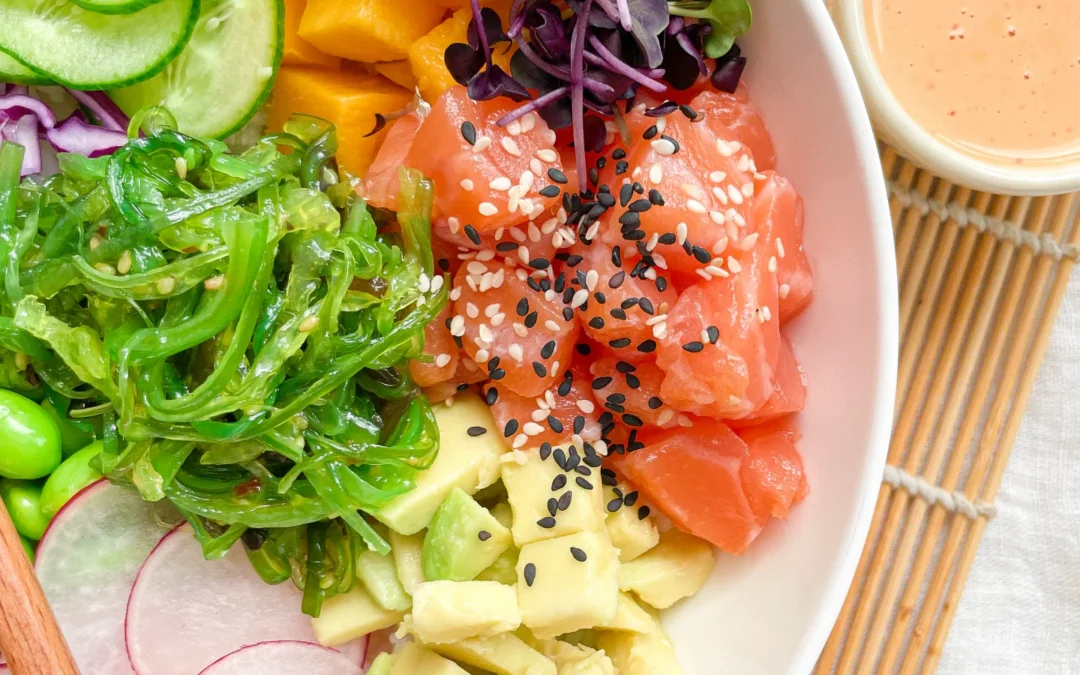
  4. Wash and dry the cucumber, then slice it thinly. Remove the outer leaves of the red cabbage, cut it into quarters, and finely grate it. Wash the radishes and slice them thinly or use a mandoline. Peel the mango and cut it into pieces. Scoop the avocado out of its skin, drizzle it with lime juice, and cut it into cubes. Arrange the sliced fruits and veggies on a plate for later.
  5. Rinse and pat dry the salmon, then cut it into cubes with a sharp knife.
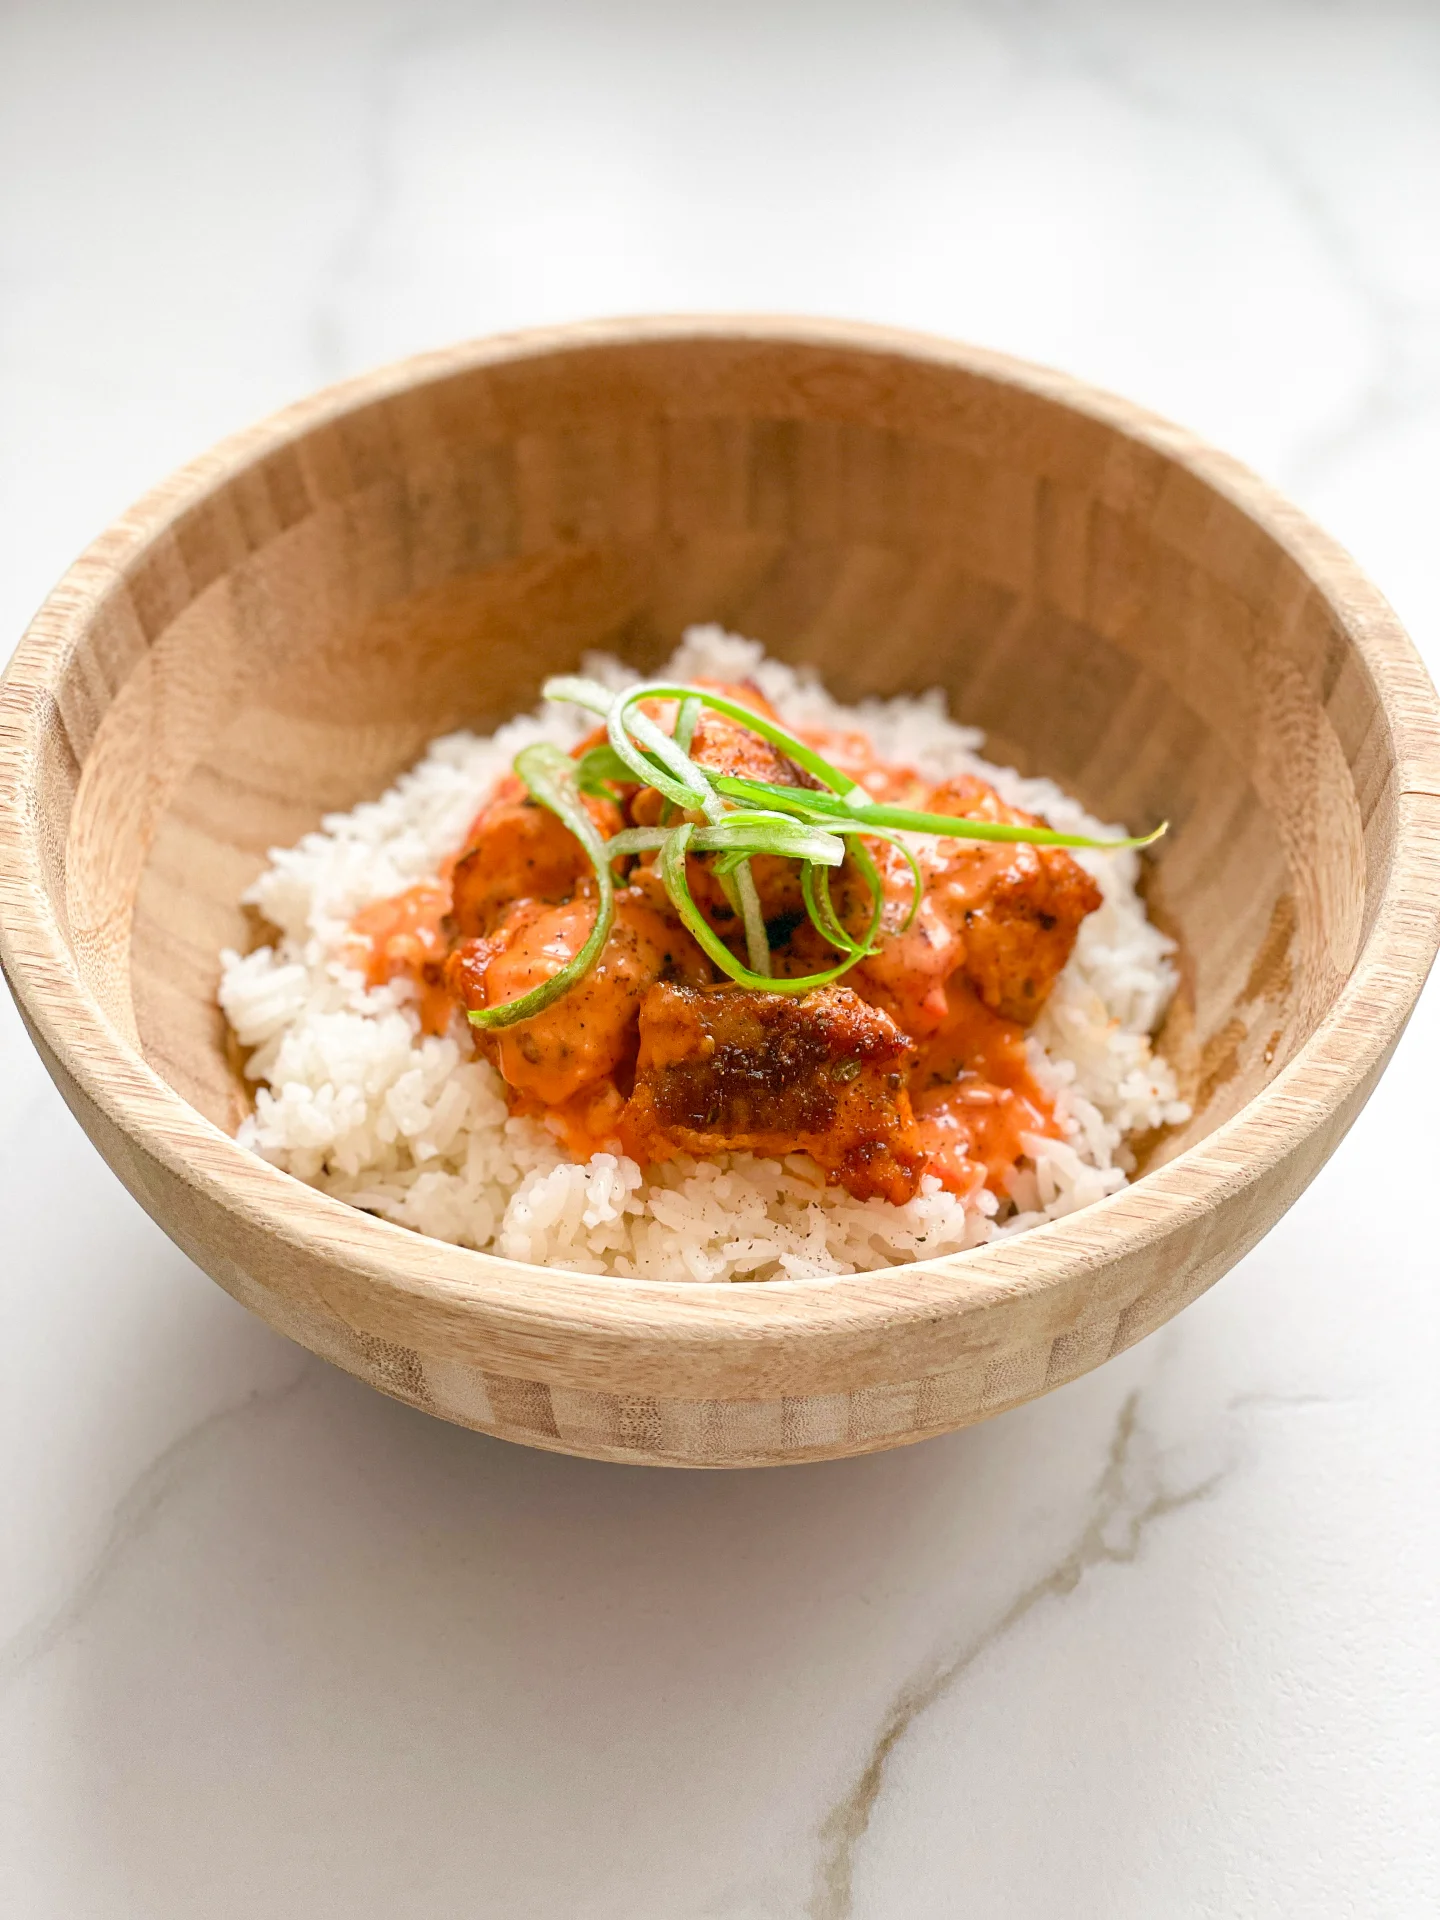
  6. In a deep bowl, start by layering the rice. Place the wakame salad in the center, then arrange the other components around it in a circle on top of the rice. Sprinkle the salmon with black and white sesame seeds and add a bit of cress. Place nori sheets on the side.
  7. Serve the sauce in a small bowl on the side, or drizzle it directly over the bowl.
  • Cook Time: 20 min

CRAVING MORE?

Follow along here & don’t forget to subscribe to my substack!

Cajun Seasoning

Cajun Seasoning

Cajun Seasoning

Cajun Seasoning

August 17, 2024 by Kimberly

Spice up your meals with this vibrant blend! Perfect for adding a kick to your favorite dishes, it brings a burst of flavor that makes every bite irresistible.

This website uses affiliate links which may earn commission for purchases made at no additional cost to you.

TOTAL TIME

10 min

SERVES

10 tbsp

DIET

vegan

EVERY RECIPE DESERVES

A Little Love Letter

If you’re looking to add some serious flavor to your meals, this spicy seasoning blend is your new best friend. With its bold and zesty mix of spices, it’s perfect for turning any dish into a flavor explosion. Whether you’re a seasoned chef or just starting out in the kitchen, this versatile spice blend is super easy to make and will quickly become a staple in your pantry.

This vibrant spice mix is incredibly versatile and can be used in so many ways. Sprinkle it over grilled chicken, fish, or veggies for an instant flavor boost. Mix it into soups, stews, or even pasta for a zesty kick. You can also use it as a rub for your favorite meats before cooking. The possibilities are endless, and it’s guaranteed to make your dishes stand out!

To keep your spice blend fresh and flavorful, store it in an airtight container in a cool, dry place. It’ll stay potent for up to six months, so you can always have this flavor powerhouse ready to go whenever you need it.

Hi, I'm Kimberly!

Hi, I'm Kimberly.

A hopeless romantic when it comes to food. Every recipe I share is a love letter to food itself. I’m so glad you’re here. Make yourself at home and stay a while.

Love,
Kimberly

Kimberly the Zett Signature

If you want to get to know me better,
click here!


Cajun Seasoning
Cajun Seasoning

LET’S MAKE A PIECE OF HAPPINESS

Print
.tasty-recipe-responsive-iframe-container-d8f4c434 { position: relative; overflow: hidden; padding-top: 56.3%; } .tasty-recipe-responsive-iframe-container-d8f4c434 iframe { position: absolute; top: 0; left: 0; width: 100%; height: 100%; border: 0; } clock clock iconcutlery cutlery iconflag flag iconfolder folder iconinstagram instagram iconpinterest pinterest iconfacebook facebook iconprint print iconsquares squares iconheart heart iconheart solid heart solid icon

Cajun Seasoning


  • Author: Kimberly
  • Total Time: 10 min
  • Yield: 10 tbsp

Description

Recommended Equipment

  • mortar & pestle or food processor
  • airtight container

Ingredients

  • 4 tbsp salt
  • 1 tbsp cilantro seeds
  • 1 tbsp celery salt
  • 1 tbsp smoked paprika
  • 1.5 tsp mustard seeds
  • 1 tsp chili flakes
  • 1 tsp onion powder
  • 1 tsp cumin
  • 1/2 tsp garlic powder
  • 1/2 tsp oregano
  • 1/2 tsp thyme
  • 1/4 tsp marjoram
  • 1/4 tsp black pepper

Instructions

  • Put all the spices in a mortar and grind them finely with the pestle. Alternatively, you can use a small high-performance food processor. Transfer the spice mix to an airtight jar.
  • Cook Time: 10 min

CRAVING MORE?

Follow along here & don’t forget to subscribe to my substack!

Cajun Shrimps with Honey Glaze & Cheesy Polenta

Cajun Shrimps with Honey Glaze & Cheesy Polenta

Cajun Shrimps with Honey Glaze & Cheesy Polenta

Cajun Shrimps with Honey Glaze & Cheesy Polenta

August 17, 2024 by Kimberly

Indulge in a cozy, Southern-inspired meal that’s all about comfort. Juicy shrimp, sweet honey glaze, and creamy, cheesy polenta come together for a dish that feels like a warm hug.

This website uses affiliate links which may earn commission for purchases made at no additional cost to you.

TOTAL TIME

40 min

SERVES

4 portions

DIET

omnivore

EVERY RECIPE DESERVES

A Little Love Letter

Get ready to treat yourself to a deliciously comforting meal that’s sure to become a favorite in your home. This dish brings together tender cajun shrimp with a sweet and spicy honey glaze, paired perfectly with creamy, cheesy polenta. It’s the kind of meal that feels fancy, but it’s surprisingly easy to make. Whether you’re cooking for a special occasion or just a cozy night in, this dish hits all the right notes.

Serve this dish fresh out of the pan, with the shrimp nestled on top of a generous scoop of polenta. For a little extra flair, garnish with fresh herbs like parsley or cilantro, and a wedge of lemon on the side to squeeze over the shrimp. It’s great as a stand-alone meal, but you can also pair it with a crisp salad or some sautéed greens for a complete dinner experience.

If you’ve got leftovers (lucky you!), store them in an airtight container in the fridge for up to 3 days. Reheat the shrimp and polenta separately in the microwave or on the stovetop, adding a splash of water or broth to keep the polenta creamy.

Hi, I'm Kimberly!

Hi, I'm Kimberly.

A hopeless romantic when it comes to food. Every recipe I share is a love letter to food itself. I’m so glad you’re here. Make yourself at home and stay a while.

Love,
Kimberly

Kimberly the Zett Signature

If you want to get to know me better,
click here!


Cajun Shrimps with Honey Glaze & Cheesy Polenta

LET’S MAKE A PIECE OF HAPPINESS

Print
.tasty-recipe-responsive-iframe-container-d8f4c434 { position: relative; overflow: hidden; padding-top: 56.3%; } .tasty-recipe-responsive-iframe-container-d8f4c434 iframe { position: absolute; top: 0; left: 0; width: 100%; height: 100%; border: 0; } clock clock iconcutlery cutlery iconflag flag iconfolder folder iconinstagram instagram iconpinterest pinterest iconfacebook facebook iconprint print iconsquares squares iconheart heart iconheart solid heart solid icon
Cajun Shrimps with Honey Glaze & Cheesy Polenta

Cajun Shrimps with Honey Glaze & Cheesy Polenta


  • Author: Kimberly
  • Total Time: 40 min
  • Yield: 4

Description

Recommended Equipment

  • medium-sized pot
  • bowl
  • small bowl
  • grater
  • sharp knife
  • cutting board
  • large pan

Ingredients

Units Scale
SHRIMPS
  • 800 grams jumbo (21/25 count) shrimp, peeled and deveined, thawed if frozen
  • 4 tbsp cajun seasoning
HONEY GLAZE
  • 4 tbsp honey
  • 1.5 tsp Dijon mustard
  • 4 tbsp mango oil
  • 3 garlic cloves
  • 1 red chili
  • 1/2 tsp cayenne pepper
  • 1/2 tsp oregano
  • 2 tbsp butter
  • 2 tbsp parsley
CHEESY POLENTA
  • 200 grams polenta
  • 750 milliliters beef stock
  • 250 milliliters full-fat milk
  • 50 grams butter
  • 200 grams heavy cream
  • 100 grams cheddar
  • 100 grams parmesan
  • 1 tsp garlic powder
  • 1/2 tsp white pepper
  • pinch nutmeg
  • juice of half a lemon
  • 1/2 tsp salt
TOPPINGS

Instructions

  1. In a medium-sized pot, bring the beef broth and milk to a simmer over medium heat. Add the polenta and stir well. Reduce the heat to low and let it simmer for about 15 minutes.
  2. Rub the shrimp with Cajun seasoning in a bowl and set aside at room temperature.
  3. For the honey glaze, melt the butter in a small bowl. Peel the garlic cloves and grate them into the butter. Slice the chili into thin rings and add them to the garlic butter. Chop the parsley and add it to the bowl along with all the other glaze ingredients. Set aside.
  4. Remove the polenta from the heat and add the cream and milk, stirring until everything is well combined. Next, add the butter, salt, grated cheddar, grated parmesan, garlic powder, white pepper, nutmeg, and lemon juice. Stir until the cheese has melted and the mixture is smooth and creamy. Cover the pot with a lid and set it aside on the turned-off stove.
  5. Now, heat a large pan and sear the shrimp with a bit of mango oil for 1 minute on each side. Pour the honey glaze into the pan and let it simmer with the shrimp for 2-3 minutes. Remove the pan from the heat.
  6. To serve, first spoon the polenta into deep plates, then place the shrimp in the center. Top with a bit of mango oil and fresh parsley.
  • Cook Time: 40 min

CRAVING MORE?

Follow along here & don’t forget to subscribe to my substack!

Homemade Bagels

Homemade Bagels

Homemade Bagels

Homemade Bagels

August 15, 2024 by Kimberly

Indulge in these cozy, chewy homemade bagels with irresistible toppings! Perfect for breakfast or brunch, they bring a warm, homemade touch to your mornings. Once you try these, you’ll never buy bagels again!

This website uses affiliate links which may earn commission for purchases made at no additional cost to you.

TOTAL TIME

2 hrs

SERVES

8 bagels

DIET

vegetarian

EVERY RECIPE DESERVES

A Little Love Letter

Imagine starting your day with the warm, comforting aroma of freshly baked bagels wafting through your kitchen. These delightful homemade bagels are not only easy to make but also offer a chewy, satisfying bite that pairs perfectly with your favorite toppings. Whether you prefer the nutty flavor of sesame seeds, the subtle crunch of poppyseeds, the spicy kick of cheddar and jalapeno, or the classic mix of everything bagel seasoning, there’s a bagel for everyone to love.

Slice them in half and spread on some creamy butter, tangy cream cheese, or your favorite jam. They also make fantastic bases for sandwiches – think smoked salmon with capers and red onion on a sesame bagel, or a turkey and avocado combo on a poppyseed bagel. For a real treat, try a cheddar and jalapeno bagel with a smear of guacamole. These bagels are versatile enough to be enjoyed any time of day, making them a must-have in your kitchen.

To keep your bagels fresh, store them in an airtight container at room temperature for up to two days. For longer storage, slice them in half and freeze them. When you’re ready to enjoy, simply pop them in the toaster straight from the freezer. This way, you’ll always have a delicious bagel ready whenever the craving strikes.

Hi, I'm Kimberly!

Hi, I'm Kimberly.

A hopeless romantic when it comes to food. Every recipe I share is a love letter to food itself. I’m so glad you’re here. Make yourself at home and stay a while.

Love,
Kimberly

Kimberly the Zett Signature

If you want to get to know me better,
click here!


Homemade Bagels
Homemade Bagels
Homemade Bagels
Homemade Bagels

LET’S MAKE A PIECE OF HAPPINESS

Print
.tasty-recipe-responsive-iframe-container-9abce299 { position: relative; overflow: hidden; padding-top: 56.3%; } .tasty-recipe-responsive-iframe-container-9abce299 iframe { position: absolute; top: 0; left: 0; width: 100%; height: 100%; border: 0; } clock clock iconcutlery cutlery iconflag flag iconfolder folder iconinstagram instagram iconpinterest pinterest iconfacebook facebook iconprint print iconsquares squares iconheart heart iconheart solid heart solid icon
Homemade Bagels

Homemade Bagels


  • Author: Kimberly
  • Total Time: 2 hrs
  • Yield: 8-12

Description

Recommended Equipment

  • tall container
  • large bowl
  • damp cloth
  • oven
  • large pot

Ingredients

Units Scale
DOUGH - YEAST MIXTURE
  • 500 milliliters lukewarm water
  • 7 grams active dry yeast
  • 1 tbsp sugar
DOUGH - DRY INGREDIENTS
  • 900 grams bread flour (in Germany flour type 550)
  • 2 tsp salt
  • 30 grams white sugar
WATER BATH
  • 2 liters simmering water
  • 1/4 cup brown sugar
TOPPINGS
  • white sesame seeds
  • poppy seeds
  • everything but the bagel seasoning
  • cheddar & jalapeño

Instructions

  1. In a tall container, briefly stir together the yeast mixture ingredients: lukewarm water, yeast, and sugar, then let it sit for 10 minutes.
  2. Meanwhile, in a large bowl, mix the dry ingredients: flour, salt, and sugar. Add the yeast-water-sugar mixture and stir until just combined.
  3. Transfer the dough to a clean work surface and knead by hand until it barely sticks anymore.
  4. Shape the dough into 8 balls of 180g / 6oz each for large bagels or 12 balls of 120g / 4oz each for smaller bagels. Let them rest under a damp cloth for about 20 minutes.
  5. Poke a hole in the center of each dough ball with your finger and form a bagel by stretching the dough evenly.
  6. Place the bagels on parchment paper and let them rise for another 30 minutes.
  7. Preheat the oven to 175°C / 350°F. Bring water to a simmer in a large pot and dissolve the brown sugar in it. Simmer each bagel for 1 minute on each side.
  8. Remove the bagels from the water and dip them in your favorite toppings or leave them plain. I like using poppy seeds, sesame seeds, everything but the bagel seasoning, or jalapenos and cheddar cheese.
  9. Once all bagels are topped, place them on a parchment-lined baking sheet and bake in the oven for about 25-30 minutes depending on their size.
  10. Remove the baking sheet and enjoy the bagels 🙂
  • Passive Time: 1 hr 30 min
  • Cook Time: 30 min

CRAVING MORE?

Follow along here & don’t forget to subscribe to my substack!

Turkish Beef Manti in Yogurt Sauce

Turkish Beef Manti in Yogurt Sauce

Turkish Beef Manti in Yogurt Sauce

Turkish Beef Manti in Yogurt Sauce

August 8, 2024 by Kimberly

Experience a taste of Turkey with this comforting, homemade dumpling dish. Tender beef manti drenched in creamy yogurt sauce with a spicy tomato and red pepper kick. Simply irresistible!

This website uses affiliate links which may earn commission for purchases made at no additional cost to you.

TOTAL TIME

2 hrs + 15 min

SERVES

4 portions

DIET

vegetarian

EVERY RECIPE DESERVES

A Little Love Letter

Today, I’m bringing a slice of Turkey straight to your kitchen with a recipe that’s sure to warm your heart and tantalize your taste buds. Imagine soft, beef-filled dumplings, each bite bursting with rich flavors, sitting in a creamy yogurt sauce that’s perfectly balanced by a spicy tomato and red pepper kick. This dish is the epitome of comfort food and is sure to become a favorite in your home.

When it comes to serving this delightful dish, presentation is key. Arrange cool, creamy yogurt sauce on a large platter, then place the tender beef dumplings on top. Finish off with the vibrant, spicy tomato and red pepper oil for a pop of color and flavor. Garnish with a sprinkle of sumac and dried mint. Pair it with a side of warm, crusty bread to soak up every bit of that delicious sauce.

If you have any leftovers (though I doubt you will!), store them in an airtight container in the refrigerator for up to three days. To reheat, simply warm them up in a microwave or on the stove, adding a splash of water to keep the dumplings moist and tender.

Hi, I'm Kimberly!

Hi, I'm Kimberly.

A hopeless romantic when it comes to food. Every recipe I share is a love letter to food itself. I’m so glad you’re here. Make yourself at home and stay a while.

Love,
Kimberly

Kimberly the Zett Signature

If you want to get to know me better,
click here!


Turkish Beef Manti in Yogurt Sauce

LET’S MAKE A PIECE OF HAPPINESS

Print
.tasty-recipe-responsive-iframe-container-14626b4b { position: relative; overflow: hidden; padding-top: 56.3%; } .tasty-recipe-responsive-iframe-container-14626b4b iframe { position: absolute; top: 0; left: 0; width: 100%; height: 100%; border: 0; } clock clock iconcutlery cutlery iconflag flag iconfolder folder iconinstagram instagram iconpinterest pinterest iconfacebook facebook iconprint print iconsquares squares iconheart heart iconheart solid heart solid icon
Turkish Beef Manti in Yogurt Sauce

Turkish Beef Manti in Yogurt Sauce


  • Author: Kimberly
  • Total Time: 2 hrs + 15 min
  • Yield: 4

Description

Recommended Equipment

  • shallow bowl
  • plastic wrap
  • two medium-sized bowls
  • grater
  • small pot
  • large plate
  • kitchen towel
  • rolling pin
  • sharp knife
  • medium-sized pot
  • slotted spoon

Ingredients

Units Scale
DOUGH
  • 240 grams all-purpose flour
  • 1 egg
  • 1/2 tsp salt
  • 80 milliliters water
FILLING
  • 250 grams minced beef
  • 1 small white onion
  • 2 tbsp red bell pepper oil
  • 1 tbsp minced fresh parsley
  • 1/2 tsp salt
  • 1/2 tsp ground pepper
  • 1/4 tsp cumin
  • 1/4 tsp chili flakes
YOGURT SAUCE
  • 600 grams
  • 6 garlic cloves
  • 1/8 tsp salt
TOMATO BELL PEPPER OIL SAUCE
  • 6 tbsp red bell pepper oil
  • 2 tbsp tomato paste
  • 2 tsp sumach
  • 2 tsp dried mint
  • pinch of salt
TOPPINGS
  • dried mint
  • sumach
  • parsely

Instructions

  1. First, you’ll prepare the Manti dough. Take a shallow bowl, add flour and sugar, and mix them together. Create a large well in the middle and crack the egg into it. Beat the egg with a fork and then add water. Mix everything with the fork until it forms a dough. Transfer the dough to a clean work surface and knead it into a smooth ball. If the dough is too sticky, add a bit more flour. Place the dough back in the bowl, cover it with plastic wrap, and let it rest for at least 1 hour.
  2. Next, take a medium-sized bowl and add the ground meat. Peel the onion and grate it directly into the bowl with the meat. Chop the parsley and add it to the meat as well. Season the meat with cumin, chili, salt, and pepper. Put the meat mixture in the fridge until you’re ready to use it.
  3. For the yogurt sauce, mix the yogurt with some salt. Peel the garlic cloves and grate them directly into the yogurt. Stir everything well and refrigerate until needed.
  4. To prepare the tomato-pepper sauce, mix the red pepper oil, tomato paste, sumac, mint, and a pinch of salt in a small pot. Place the pot on the stove but don’t heat it yet. We’ll get to this later.
  5. Take a large plate and sprinkle a thin layer of flour on it. Set it aside, you’ll need it soon to place your finished Manti. Also, prepare a clean kitchen towel to cover the Manti so they don’t dry out.
  6. Once the dough has rested, sprinkle a bit of flour on a clean work surface and place your dough ball on it. Sprinkle some flour on the dough ball as well. Roll out the dough into a rectangular shape measuring 36×50 cm / 14×20”. Cut the dough into squares measuring 6×6 cm / 2.3×2.3” using a pizza cutter or a sharp knife. You should get about 45-50 Manti squares from the dough.
  7. Place 1/2 to 1 teaspoon of filling on each square and fold them into Manti. To do this, bring the diagonal corners together and then fold the open corners towards the center, pressing the seams together. They should look like little envelopes.
  8. Take your 4 serving plates and evenly distribute the yogurt sauce on them. Set the plates aside.
  9. Fill a medium-sized pot about 3/4 full with water and bring it to a boil. Once the water is boiling, reduce the heat to medium and let it simmer. Add all the Manti to the water and cook for about 6-7 minutes.
  10. While the Manti are cooking, heat the pot with the tomato paste and red pepper oil over low heat. Stir well and keep it on low heat until the Manti are ready.
  11. Once the Manti are cooked, use a slotted spoon to remove them from the water and place them directly on the yogurt sauce on the plates. Pour the tomato-pepper oil sauce over the Manti and sprinkle with a bit of sumac and dried mint to finish.
  • Passive Time: 40 min
  • Cook Time: 1 hr + 35 min

CRAVING MORE?

Follow along here & don’t forget to subscribe to my substack!

Dark Chocolate Mousse

Dark Chocolate Mousse

Dark Chocolate Mousse

Dark Chocolate Mousse

August 3, 2024 by Kimberly

Indulge in a silky, rich dessert that melts in your mouth, delivering an intense cocoa experience. It’s like a cozy, chocolatey hug that’s perfect for any occasion!

This website uses affiliate links which may earn commission for purchases made at no additional cost to you.

TOTAL TIME

20 min

SERVES

4 portions

DIET

vegetarian

EVERY RECIPE DESERVES

A Little Love Letter

Let’s dive into something irresistibly decadent: a rich, dark chocolate mousse that’s pure indulgence. With at least 70% cocoa, this mousse is a dessert dream come true, offering an intense chocolate experience that’s both luxurious and simple to make. Perfect for a cozy night in or a fancy dinner party, this recipe is all about enjoying the finer things in life without spending hours in the kitchen.

Spoon the silky mousse into elegant dessert glasses or ramekins, and let it chill until perfectly set. For a touch of elegance, top it with a dollop of whipped cream, a sprinkle of cocoa powder, or some fresh berries. This dessert is best served chilled, making it a refreshing yet indulgent end to any meal. Whether it’s a casual family dinner or a sophisticated soirée, this mousse always steals the show.

Store any leftover mousse in the refrigerator, covered with plastic wrap or in airtight containers. It will stay fresh and delicious for up to two days.

Hi, I'm Kimberly!

Hi, I'm Kimberly.

A hopeless romantic when it comes to food. Every recipe I share is a love letter to food itself. I’m so glad you’re here. Make yourself at home and stay a while.

Love,
Kimberly

Kimberly the Zett Signature

If you want to get to know me better,
click here!


Dark Chocolate Mousse

LET’S MAKE A PIECE OF HAPPINESS

Print
.tasty-recipe-responsive-iframe-container-12573950 { position: relative; overflow: hidden; padding-top: 56.3%; } .tasty-recipe-responsive-iframe-container-12573950 iframe { position: absolute; top: 0; left: 0; width: 100%; height: 100%; border: 0; } clock clock iconcutlery cutlery iconflag flag iconfolder folder iconinstagram instagram iconpinterest pinterest iconfacebook facebook iconprint print iconsquares squares iconheart heart iconheart solid heart solid icon
Dark Chocolate Mousse

Dark Chocolate Mousse


  • Author: Kimberly
  • Total Time: 20 min
  • Yield: 4

Description

Recommended Equipment

  • sharp knife
  • cutting board
  • medium-sized bowl
  • small pot
  • electric mixer
  • small bowl
  • tall container
  • spatula

Ingredients

Units Scale
WHIPPED CREAM
  • 250 grams heavy cream
  • 75 grams powdered sugar
GANACHE
  • 100 grams heavy cream
  • 100 grams dark chocolate at least 70% cocoa

Instructions

  1. For the ganache, finely grate or chop the chocolate and place it in a medium-sized bowl. Set aside. Heat the cream in a small pot until it starts to steam slightly, but do not let it boil. Pour the cream over the grated chocolate and let it sit for 1-2 minutes. Then, start stirring slowly until the chocolate is fully combined with the cream and the mixture becomes noticeably thicker. Set aside and let it cool a bit.
  2. Meanwhile, prepare the whipped cream. Measure the powdered sugar into a small bowl. In a tall container, whip the cream until stiff peaks form, gradually adding the powdered sugar as you go. Set the whipped cream aside.
  3. Add the ganache to the whipped cream and gently fold everything together with a spatula until you have a medium-brown mousse.
  4. Spoon the mousse into dessert glasses and chill until ready to serve or enjoy immediately 🙂
  • Cook Time: 20 min

CRAVING MORE?

Follow along here & don’t forget to subscribe to my substack!