Olive Olive Oil

Olive Olive Oil

Olive Olive Oil

Olive Olive Oil

September 2, 2024 by Kimberly

Get ready to level up your olive oil game with this zesty twist! Infusing it with green olives makes the flavor pop, creating a bold, savory experience that’s unforgettable.

55 MINUTES

ADVANCED

VEGAN

INT.

40 PER TSP

FRUITY
SALTY

MICHELIN

OIL

ALL YEAR

INTRODUCTION

ABOUT THE RECIPE

If you’re obsessed with olives (like me) and love playing around in the kitchen, then this little hack is just what you need. While high-quality olive oil is already a superstar on its own, adding a handful of green olives takes it to the next level. It’s like giving your olive oil a little attitude boost – think bolder, more vibrant flavors that really make your taste buds dance. It’s a fun, simple experiment that’s perfect for anyone who loves to tinker with their food.

How to serve
This boosted olive oil is a total game-changer when drizzled over fresh salads, used as a dip for crusty bread, or even dribbled over pasta. It’s got that punchy, savory vibe that can really elevate a simple dish into something that feels a bit more gourmet. Try it as a finishing touch on grilled veggies or mix it into homemade vinaigrettes. The deep, rich flavor makes everything taste just a little bit more special – perfect for when you want to impress without too much effort. I love incorporating it into these Garlic Parmesan Butter Knots with Grated Tomato Dip.

How to store
Keep this infused olive oil in a cool, dark place like your fridge. It’ll last for about 1-2 weeks, but trust me, you’ll probably use it up way before then.

Hi, I'm Kimberly!

Hi, I'm Kimberly.

A passionate food lover who believes in the magic of homemade deliciousness that spreads love and warmth. Join me on this culinary adventure as I prepare wonderful dishes and let’s spread some happiness together!

Kimberly the Zett Signature

If you want to get to know me better, click here!


Olive Olive Oil
Olive Olive Oil
Olive Olive Oil
„Let’s make a piece of happiness“
Print
clock clock iconcutlery cutlery iconflag flag iconfolder folder iconinstagram instagram iconpinterest pinterest iconfacebook facebook iconprint print iconsquares squares iconheart heart iconheart solid heart solid icon
Olive Olive Oil

Olive Olive Oil


5 Stars 4 Stars 3 Stars 2 Stars 1 Star

No reviews

  • Author: Kimberly
  • Total Time: 55 min
  • Yield: 1 cup / 250 ml 1x

Description

RECOMMENDED EQUIPMENT

  • blender
  • medium-sized saucepan
  • whisk
  • a bowl which the medium saucepan fits into
  • 2 medium-sized bowls
  • 2 fine mesh strainers
  • oil bottle
  • ice cubes
  • coffee filter

Ingredients

Units Scale
  • 100 grams green olives
  • 250 milliliters olive oil

Instructions

  1. Put the green olives into the blender. Pour in the oil. Blend on the highest setting until there only small pieces are longer visible.
  2. Pour the mixture from the blender into a medium-sized pot and heat it over medium heat, constantly stirring, to a temperature of about 102°-103°C (215°-217°F). Then, let the oil simmer with the lid partially on for the next 20 minutes. Stir only occasionally, making sure the temperature remains steady and nothing gets burned. The cooking time is essential for all the water to evaporate. You’ll know all the water has evaporated when the oil in the pot barely bubbles anymore – so if it’s still bubbling vigorously, keep it simmering.
  3. At the end of the cooking process, prepare a bowl large enough to fit the medium-sized pot, filled with cold water and a handful of ice cubes. Also, hang a fine mesh sieve strainer over a medium-sized bowl.
  4. Now, place the pot in the ice water and stir to stop the cooking process. Once the oil is almost cold, remove the pot from the water and pour the oil into the first fine mesh sieve to catch the coarse particle.
  5. Then, pour the oil into the second fine mesh sieve, which you before equipped with a coffee filter, to catch the remaining finer particles.
  6. Allow the oil to drip through for about 30 minutes or maybe more depending on how many remaining particles are in the coffee filter. Once all the oil has passed through the coffee filter, transfer the collected amount of oil into an oil bottle. Store in the refrigerator for up to 1-2 weeks.
  • Prep Time: 5 min
  • Passive Time: 30 min
  • Cook Time: 20 min

German Bacon Pancake

German Bacon Pancake

German Bacon Pancake

German Bacon Pancake

April 15, 2024 by Kimberly

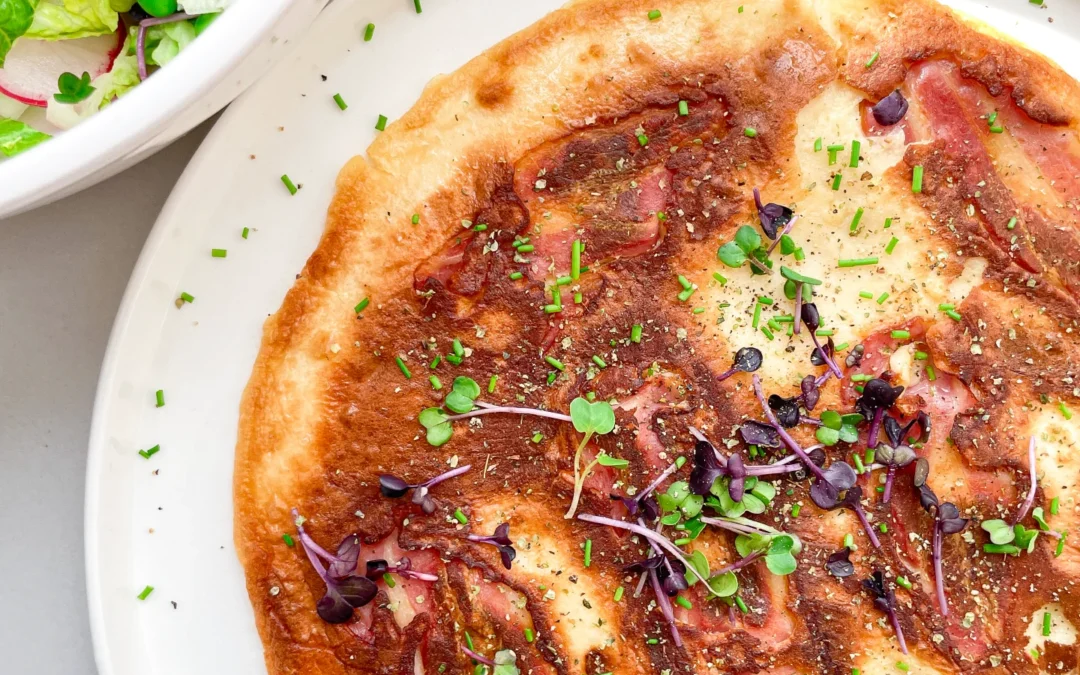
Experience a German classic! A perfect blend of crispy bacon and fluffy pancake, it’s the dinner you’ve been dreaming of.

30 MINUTES

EASY

OMNIVORE

GERMAN

512 PER PANCAKE

CRISPY
FLUFFY
COMFORT FOOD

EVERYDAY

DINNER

ALL YEAR

INTRODUCTION

ABOUT THE RECIPE

This savory twist on the classic pancake combines the crispiness of bacon with the soft, fluffy texture of pancakes to create a dinner that’s both satisfying and unique. It’s a traditional German dish that has stood the test of time, offering a perfect balance of flavors that will have everyone asking for seconds.

How to serve:
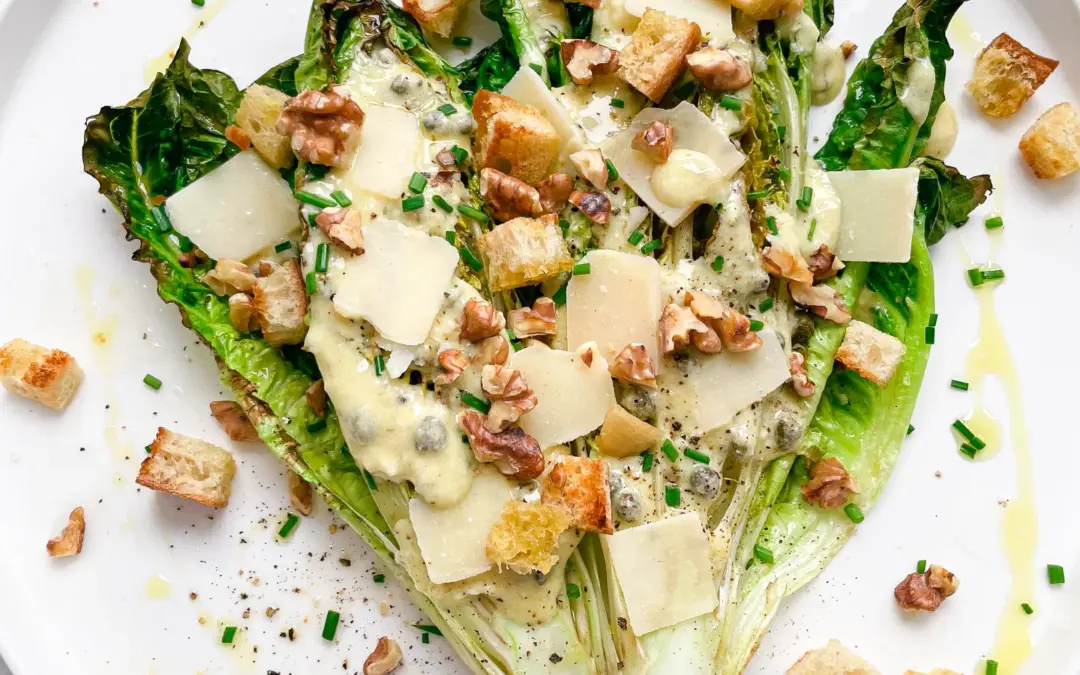
Serve these mouth-watering pancake fresh off the griddle, topped with some micro greens and chives. This dish is perfect for a lazy weeknight dinner or a brunch gathering with friends and family. Pair with a white wine or a side side salad to round out the meal and turn it into a feast fit for any appetite.

How to store:
Store your Bacon Pancake in the refrigerator, tightly covered, for up to one day. Reheat in the oven or on the stovetop to bring back that fresh-from-the-griddle warmth and crispiness.

Hi, I'm Kimberly!

Hi, I'm Kimberly.

A passionate food lover who believes in the magic of homemade deliciousness that spreads love and warmth. Join me on this culinary adventure as I prepare wonderful dishes and let’s spread some happiness together!

Kimberly the Zett Signature

If you want to get to know me better, click here!


German Bacon Pancake
„Let’s make a piece of happiness“

INGREDIENTS

FOR 2 PANCAKES

Batter

  • 125g all-purpose flour (1 cup)
  • 125ml whole-fat milk (1/2 cup)
  • 2 eggs
  • 1/2 tsp salt

FRYING

  • 70g bacon (2.5 oz)
  • 2 tsp clarified butter

TOPPINGS

  • chives
  • cress
  • majoram
  • black pepper
German Bacon Pancake
}

ACTIVE: 2 min

PASSIVE: –

PREPARATIONS

Recommended Equipment
  • sharp knife
  • cutting board
  • medium-sized bowl
  • whisk
  • large frying pan
  • spatula
  • Cut the bacon strips in half or thirds – depending on your preference.
}

ACTIVE: 15 min

PASSIVE: 15 min

COOKING

1. In a medium-sized bowl, whisk together milk and eggs. Now add the salt and flour and beat with the whisk until smooth. Let the batter sit for 10-15 minutes to thicken.

2. Place the bacon slices in a cold pan and cook over medium heat until they start to shrink and turn slightly brown. Then add a teaspoon of clarified butter and continue cooking the bacon for another 2-3 minutes—it should be dark pink but not too crispy.

3. Pour half of the batter over the bacon and let it cook for about 6-8 minutes. The batter should be fully cooked on one side, firm, and barely liquid before flipping.

4. Use a spatula to flip the pancake and cook for another minute on the other side, then transfer to a plate. Serve garnished with marjoram, freshly ground pepper, and microgreens.

NOTE: The calorie information may vary depending on the product used, country and region.

Easy Dumpling Dipping Sauce

Easy Dumpling Dipping Sauce

Easy Dumpling Dipping Sauce

Easy Dumpling Dipping Sauce

March 9, 2024 by Kimberly

Dip into delight with this easy Dumpling Dipping Sauce! A perfect blend of soy sauce, sriracha, and lemon juice for an unforgettable taste.

5 MINUTES

EASY

VEGAN

CHINESE

14 PER PORTION

UMAMI / ZESTY

EVERYDAY

DIPS & SPREADS

ALL YEAR

INTRODUCTION

ABOUT THE RECIPE

Elevate your dumpling experience with this easy Dumpling Dipping Sauce! This simple yet irresistible sauce combines the umami of soy sauce, the heat of sriracha, and the tanginess of lemon juice to create a mouthwatering condiment. It’s the perfect companion for any dumpling, adding a zesty and spicy kick that will leave you craving more.

How to serve:
This versatile dipping sauce is ideal for accompanying any kind of dumplings, whether they’re steamed, fried, or boiled. Serve it in a small bowl alongside your favorite dumplings, maybe these juicy pan-fried pork dumplings, for an instant flavor upgrade. It’s also great with spring rolls, potstickers, or korean pancakes.

How to store:
Keep this Dumpling Dipping Sauce fresh by storing it in an airtight container in the refrigerator. It stays flavorful for up to five days, ensuring you have delicious dipping sauce ready whenever those dumpling cravings hit.

Hi, I'm Kimberly!

Hi, I'm Kimberly.

A passionate food lover who believes in the magic of homemade deliciousness that spreads love and warmth. Join me on this culinary adventure as I prepare wonderful dishes and let’s spread some happiness together!

Kimberly the Zett Signature

If you want to get to know me better, click here!


Easy Dumpling Dipping Sauce
„Let’s make a piece of happiness“

INGREDIENTS

FOR 2 PORTIONS

SAUCE

  • 2 tbsp soy sauce
  • 1 tbsp lemon juice
  • 1/2 tbsp sriracha
Easy Dumpling Dipping Sauce
}

ACTIVE: –

PASSIVE: –

PREPARATIONS

Recommended Equipment
  • sharp knife
  • cutting board
  • small bowl
  • none
}

ACTIVE: 5 min

PASSIVE: –

COOKING

1. Cut the lemon in half and put 1 tbsp of the lemon juice in a small bowl. Mix with 2 tbsp soy sauce and 1/2 tbsp sriracha sauce and serve with your favorite dumplings.

NOTE: The calorie information may vary depending on the product used, country and region.

Grilled Romaine Salad with Lemon Yogurt Dressing & Garlic Croutons

Grilled Romaine Salad with Lemon Yogurt Dressing & Garlic Croutons

Grilled Romane Salad with Lemon Yogurt Dressing & Garlic Croutons

Grilled Romane Salad with Lemon Yogurt Dressing & Garlic Croutons

January 25, 2024 by Kimberly

Indulge in the unique taste of Grilled Romaine Salad, drizzled with zesty Lemon Yogurt Dressing and sprinkled with homemade Garlic Croutons – a true garden delight!

25 MINUTES

EASY

VEGETARIAN

INT.

384 PER PORTION

CRISPY / SALTY / UMAMI

EVERYDAY

DINNER

ALL YEAR

INTRODUCTION

ABOUT THE RECIPE

Step into a world of fresh and zesty flavors with this Grilled Romaine Salad, a perfect blend of smoky, tangy, and crunchy textures. This healthy salad recipe becomes a gastronomic delight when grilled, bringing out a delicious charred flavor. Drizzled with this easy yogurt dressing and topped with homemade garlic croutons, this dish is a refreshing departure from your usual salad routine, ideal for health-conscious gourmets and vegetarian salad enthusiasts alike.

How to serve:
Serving this dish is all about embracing the freshness and warmth. The grilled romaine leaves, with their slightly wilted yet crisp texture, make a perfect base for the zesty lemon flavor of the lemon yogurt dressing. The addition of crunchy, golden garlic croutons adds a delightful contrast, making every bite a perfect harmony of flavors. Serve it as a standalone light lunch or as a sophisticated side to your main course.

How to store:
If you have leftovers, keep the grilled romaine, dressing, and croutons separate. The lettuce can be refrigerated for up to two days, while the lemon yogurt dressing and garlic croutons can be stored for longer. This separation ensures that the croutons remain crunchy, and the lettuce stays fresh, allowing you to enjoy this zesty and healthy grilled romaine salad whenever you desire.

Hi, I'm Kimberly!

Hi, I'm Kimberly.

A passionate food lover who believes in the magic of homemade deliciousness that spreads love and warmth. Join me on this culinary adventure as I prepare wonderful dishes and let’s spread some happiness together!

Kimberly the Zett Signature

If you want to get to know me better, click here!


Grilled Romane Salad with Lemon Yogurt Dressing & Garlic Croutons

„Let’s make a piece of happiness“

INGREDIENTS

FOR 4 PORTIONS

SALAD

  • 2 romaine salads
  • 2 tbsp olive oil
  • pinch of salt

DRESSING

  • 4 tbsp olive oil
  • 1 tsp white wine vinegar
  • 1 tsp dijon mustard
  • 1 garlic clove
  • 3 tsp yogurt
  • 2 tbsp grated parmesan
  • 1 tsp lemon juice
  • 1 tsp capers
  • salt & pepper to taste

CROUTONS

  • 60g baguette
  • 2 tbsp olive oil
  • 1/8 tsp garlic powder
  • 1/8 tsp salt
  • 1/8 tsp pepper

TOPPINGS

  • chives
  • honey
  • 30g walnuts (1/4 cup)
  • 30g parmesan (1/4 cup)
Grilled Romane Salad with Lemon Yogurt Dressing & Garlic Croutons
}

ACTIVE: 10 min

PASSIVE: –

PREPARATIONS

Recommended Equipment
  • sharp knife
  • chopping board
  • cheese grater
  • sealable jar
  • Set the oven to the grill function at 250°C (480°F)
  • Wash the romaine lettuce (leave as whole) thoroughly.
  • Halve the lemon.
  • Roughly chop the walnuts.
  • Grate the parmesan.
  • Peel the garlic.
  • Cut the baguette into small cubes.
    }

    ACTIVE: 10 min

    PASSIVE: 5 min

    COOKING

    1. For the dressing, place 1 tsp capers, 1 tsp Dijon mustard, 1 tsp lemon juice, 4 tbsp olive oil, 1 tsp white wine vinegar, 1 tbsp grated Parmesan, salt, pepper, 3 tsp yoghurt and 1 pressed garlic clove in a sealable jar. Shake everything well and set aside.

    2. Slice the romaine lettuce hearts lengthways into two halves. Place the hearts flat side up on one half of a baking tray. Spread 2 tablespoons of olive oil evenly over the lettuce, rub in well with your hands and season with a little salt.

    3. Place the diced baguette on the other side of the baking tray. Spread 2 tablespoons of olive oil and 1/8 teaspoon each of salt, ground pepper and garlic powder over the bread cubes. Mix well.

    4. Place the baking tray in the oven and grill for 5-7 minutes.

    5. Remove the baking tray from the oven and arrange the salad on large plates. Top with the croutons and drizzle with the dressing. Top with chopped walnuts, coarsely grated Parmesan slices, chives, a little honey and freshly ground black pepper.

    NOTE: The calorie information may vary depending on the product used, country and region.

    Tarte Flambée

    Tarte Flambée

    Tarte Flambée

    Tarte Flambée

    November 29, 2023 by Kimberly

    A thin crust, full-bodied crème fraîche, spicy bacon and savory onions – the classic Alsatian tarte flambée.

    60 MINUTES

    EASY

    OMNIVORE

    FRENCH

    718 PER BAKING TRAY

    CRISPY / SALTY

    EVERYDAY

    LUNCH / DINNER

    ALL YEAR

    INTRODUCTION

    ABOUT THE RECIPE

    Indulge in the delectable charm of Tarte Flambée, a French classic celebrated for its crispy thin crust, creamy allure, and the delightful interplay of savory bacon and onions. Hailing from the picturesque Alsace region, this dish is a culinary masterpiece that elevates the dining experience with its unique blend of flavors.

    How to serve:
    This culinary delight pairs perfectly with a light salad or stands alone for a satisfying meal, bringing the essence of French cuisine to your table.

    How to store:
    For later enjoyment, store any leftover Tarte Flambée in an airtight container in the refrigerator. Reheat slices in the oven. Avoid microwaving to maintain its crispy texture.

    Hi, I'm Kimberly!

    Hi, I'm Kimberly.

    A passionate food lover who believes in the magic of homemade deliciousness that spreads love and warmth. Join me on this culinary adventure as I prepare wonderful dishes and let’s spread some happiness together!

    Kimberly the Zett Signature

    If you want to get to know me better, click here!


    Tarte Flambée
    Tarte Flambée
    Tarte Flambée

    „Let’s make a piece of happiness“

    INGREDIENTS

    For 1 BAKING TRAY

    DOUGH

    • 250g all-purpose flour (8.8 oz.)
    • 125ml water (4.2 fl. oz.)
    • 2 tbsp olive oil
    • 2 tsp salt

    TOPPINGS

    • 100g crème fraîche (3.5 oz.)
    • 125g bacon (4.5 oz.)
    • 1 red onion
    • salt
    • pepper
    • chives
    Tarte Flambée
    }

    ACTIVE: 5 min

    PASSIVE: 30 min

    PREPARATIONS

    Recommended Equipment
    • large mixing bowl
    • sieve
    • sharp knife
    • cutting board
    • Put the water, salt, olive oil and sifted flour in a bowl. Stir with a spoon until it is no longer sticky. Then remove everything from the bowl and work into a smooth dough with your hands for approx. 3 minutes. Do not add any more flour. Then wrap the dough in cling film and leave to rest at room temperature for approx. 30 minutes.
    }

    ACTIVE: 10 min

    PASSIVE: 15 min

    COOKING

    1. Remove the skin from the onions and cut into thin stripes.

    2. Sprinkle a little flour on a work surface. Place the dough piece on top and also sprinkle with a little flour. Then use a rolling pin to roll out the dough to the size of a baking tray, approx. 40×30 cm (16×12 inches).

    3. Place the dough on a baking tray lined with baking paper and brush with crème fraîche. Season with salt. Then spread the onions and bacon evenly on top.

    4. Bake the pastry at 250°C (480°F) using the grill function for approx. 15 minutes. Take out and top with freshly cracked pepper and chives.

    NOTE: The calorie information may vary depending on the product used, country and region.