Sesame Chili Dumpling Dipping Sauce

Sesame Chili Dumpling Dipping Sauce

Sesame Chili Dumpling Dipping Sauce

Sesame Chili Dumpling Dipping Sauce

April 21, 2024 by Kimberly

Kick up your dumpling game with Sesame Chili Dumpling Dipping Sauce! Spicy, nutty, and bursting with flavor, it’s the perfect match for any dumpling.

5 MINUTES

EASY

VEGAN

ASIAN

65 PER PORTION

SPICY
UMAMI

EVERYDAY

DIPS & SPREADS

ALL YEAR

INTRODUCTION

ABOUT THE RECIPE

Elevate your dumplings with this Sesame Chili Dumpling Dipping Sauce, a bold blend that combines the nutty depth of toasted sesame with the fiery kick of chili. This sauce is not just a side but a star, turning any dumpling, whether homemade or store-bought, into a gourmet treat. It’s perfect for those who love a little heat and a lot of flavor in their meals.

How to serve:
Serve this Sesame Chili Dumpling Dipping Sauce alongside your favorite dumplings. Its vibrant flavor complements everything from classic pork dumplings to vegetable gyoza. It’s also fantastic as a dressing for Asian salads or as a spicy drizzle over grilled meats. Whether you’re hosting a dinner party or enjoying a quiet meal at home, this sauce will add a delicious, zesty twist to your dishes.

How to store:
Keep this sauce fresh by storing it in an airtight container in the refrigerator. It stays vibrant and tasty for up to three days, making it a convenient and flavorful addition to quick meals and snacks.

Hi, I'm Kimberly!

Hi, I'm Kimberly.

A passionate food lover who believes in the magic of homemade deliciousness that spreads love and warmth. Join me on this culinary adventure as I prepare wonderful dishes and let’s spread some happiness together!

Kimberly the Zett Signature

If you want to get to know me better, click here!


Sesame Chili Dumpling Dipping Sauce
„Let’s make a piece of happiness“

INGREDIENTS

FOR 2 PORTIONS

DIPPING SAUCE

  • 2 tbsp soy sauce
  • 1 tbsp hot water
  • 1 tsp crispy chili oil
  • 1 tsp sugar
  • 1/2 tsp sesame oil
  • 1/2 tsp rice vinegar
  • 1.5 tsp sesame seeds
  • 2 garlic cloves
Sesame Chili Dumpling Dipping Sauce
}

ACTIVE: –

PASSIVE: –

PREPARATIONS

Recommended Equipment
  • sharp knife
  • cutting board
  • small bowl
  • small frying pan
  • none
}

ACTIVE: 5 min

PASSIVE: –

COOKING

1. Dissolve the sugar in the bowl by stirring in hot water.

2. Then, in a small pan without adding any oil, toast the sesame seeds until they are golden brown and fragrant.

3. Meanwhile, add the following ingredients to the sugar in the bowl: 2 tablespoons soy sauce, 1 teaspoon crispy chili oil, 1/2 teaspoon sesame oil, and 1/2 teaspoon rice vinegar. Peel and finely chop or press two garlic cloves and add them to the sauce. Stir everything well.

4. Carefully pour the hot sesame seeds into the sauce. It will sizzle beautifully 🙂 Now stir everything together and serve.

NOTE: The calorie information may vary depending on the product used, country and region.

Easy Homemade Dumpling Wrapper

Easy Homemade Dumpling Wrapper

Easy Homemade Dumpling Wrapper

Easy Homemade Dumpling Wrapper

April 19, 2024 by Kimberly

Create your own dumpling wrappers at home! Simple, fun, and perfect for holding all your delicious fillings—get ready for a truly customized dining experience!

2 HOURS
20 MINUTES

INTERMEDIATE

VEGAN

ASIAN

24 PER WRAPPER

COMFORT FOOD

EVERYDAY

DOUGH

ALL YEAR

INTRODUCTION

ABOUT THE RECIPE

Dive into the delightful world of homemade dumpling wrappers, your first step to authentic, scrumptious dumplings. Crafting these wrappers at home is not only simple, but it also allows you to infuse a personal touch into every bite, making each dumpling truly your own.

How to serve:
Fill these pliable wrappers with anything from seasoned pork to mixed vegetables, seal, and then steam, boil, or fry. Serve them hot with a side of soy sauce, vinegar, or a spicy dipping sauce for a perfect snack or meal. They’re a fantastic addition to any gathering, allowing guests to discover the joys of fresh, homemade dumplings.

How to store:
Store your dumpling wrappers by layering them with parchment paper and keeping them in an airtight container. They’ll stay fresh in the refrigerator for up to one day or can be frozen for extended use.

Hi, I'm Kimberly!

Hi, I'm Kimberly.

A passionate food lover who believes in the magic of homemade deliciousness that spreads love and warmth. Join me on this culinary adventure as I prepare wonderful dishes and let’s spread some happiness together!

Kimberly the Zett Signature

If you want to get to know me better, click here!


Easy Homemade Dumpling Wrapper
„Let’s make a piece of happiness“

INGREDIENTS

FOR 58-64 WRAPPER

WRAPPER

  • 400g all-purpose flour (3 cups + 1 tbsp)
  • 1 tsp salt
  • 220ml very hot water (1 cup)
Easy Homemade Dumpling Wrapper
}

ACTIVE: 5 min

PASSIVE: –

PREPARATIONS

Recommended Equipment
  • medium-sized bowl
  • plastic wrap
  • two medium-sized Tupperware containers with lids
  • small rolling pin
  • parchment paper
  • two chopsticks
  • dough cutter (or the dull side of a knife)
  • round dough cutter, about 11 cm in diameter (4” to 4.5”)
  • Cut the parchment paper into 58-64 squares, each with sides measuring 12 cm (5″)
}

ACTIVE: 75 min

PASSIVE: 60 min

COOKING

1. In a bowl, mix the flour with 1 tsp of salt. Then pour the very warm (not boiling) water into the center and stir with two chopsticks until the dough no longer combines easily. You’ll have larger flakes of dough and still quite a bit of loose flour in the bowl.

2. Now, continue with your hands and knead the dough until all the flour is incorporated and the dough has a smooth texture. It should be as soft as an earlobe, which will take about 5-8 minutes.

3. Form the dough into a ball and place it back in the bowl. Stretch plastic wrap tightly over the bowl to prevent the dough from drying out. Let the dough rest for at least 30 minutes, though 60 minutes is better, as the longer it rests, the easier it will be to work with later.

4. Once the resting time is up, remove the plastic wrap and place the dough on a clean work surface. Quarter the dough and then halve each quarter, and then cut those halves into four equal pieces, resulting in a total of 32 small dough pieces. Each piece will eventually make about 2 dumpling wrappers, so you’ll end up with around 58-64 pieces in total.

5. To keep the dough soft and pliable throughout the rolling process and prevent it from drying out, place all the unrolled dough pieces into one of the Tupperware containers. Lay the lid loosely on top so you can easily grab a new piece to roll out. Now, take the first piece of dough from the container.

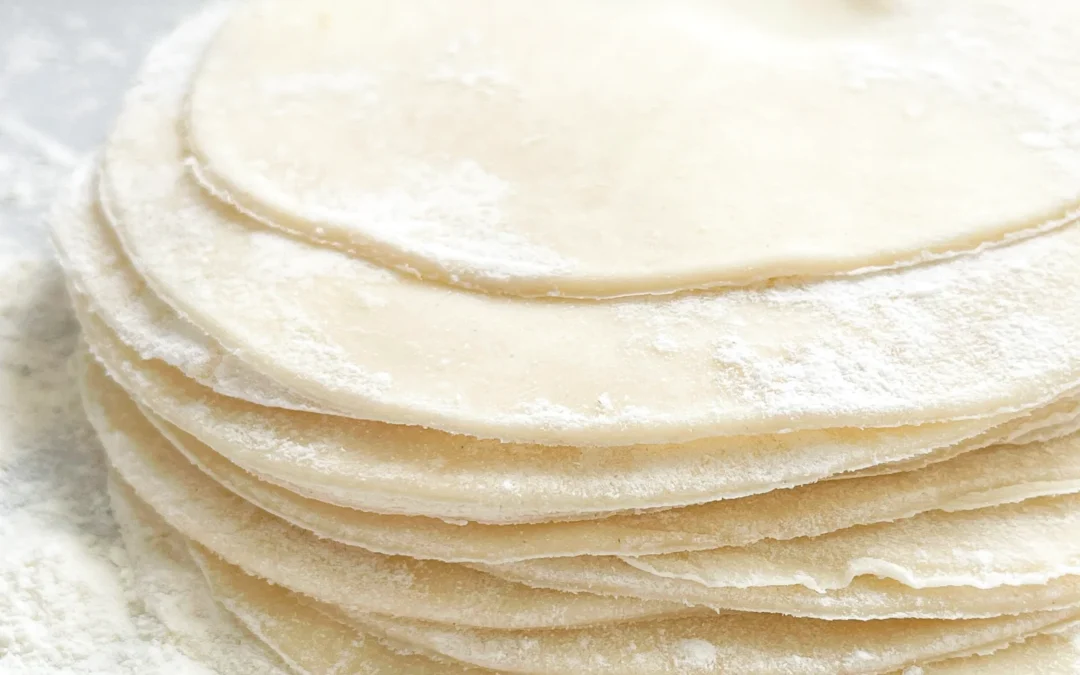
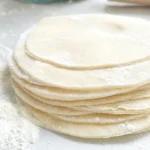
6. Dust a little flour on your work surface and on your piece of dough. Roll out the dough with a rolling pin until it’s big enough for the 11cm (4″ to 4.5″) dough cutter to fit over it with a little edge showing, and cut out the shape. Of course, pros can roll the dough directly into rounds without a cutter 😉 Then, take your second Tupperware container and place a square of parchment paper in it. Place the cut-out wrapper on the parchment and cover it with another piece of parchment. Replace the lid loosely. Any dough scraps from cutting should be placed back in the container with the other unrolled pieces.

7. Continue this process with each piece of dough until all the dough is used up. Knead the dough scraps back into a ball, divide it into 26-32 small pieces, and start the process over.

8. It’s worth noting that the number of wrappers can vary depending on how thin you roll the dough and the size of your cutter. Each rolled and cut wrapper weigh about 10g (1/3 oz).

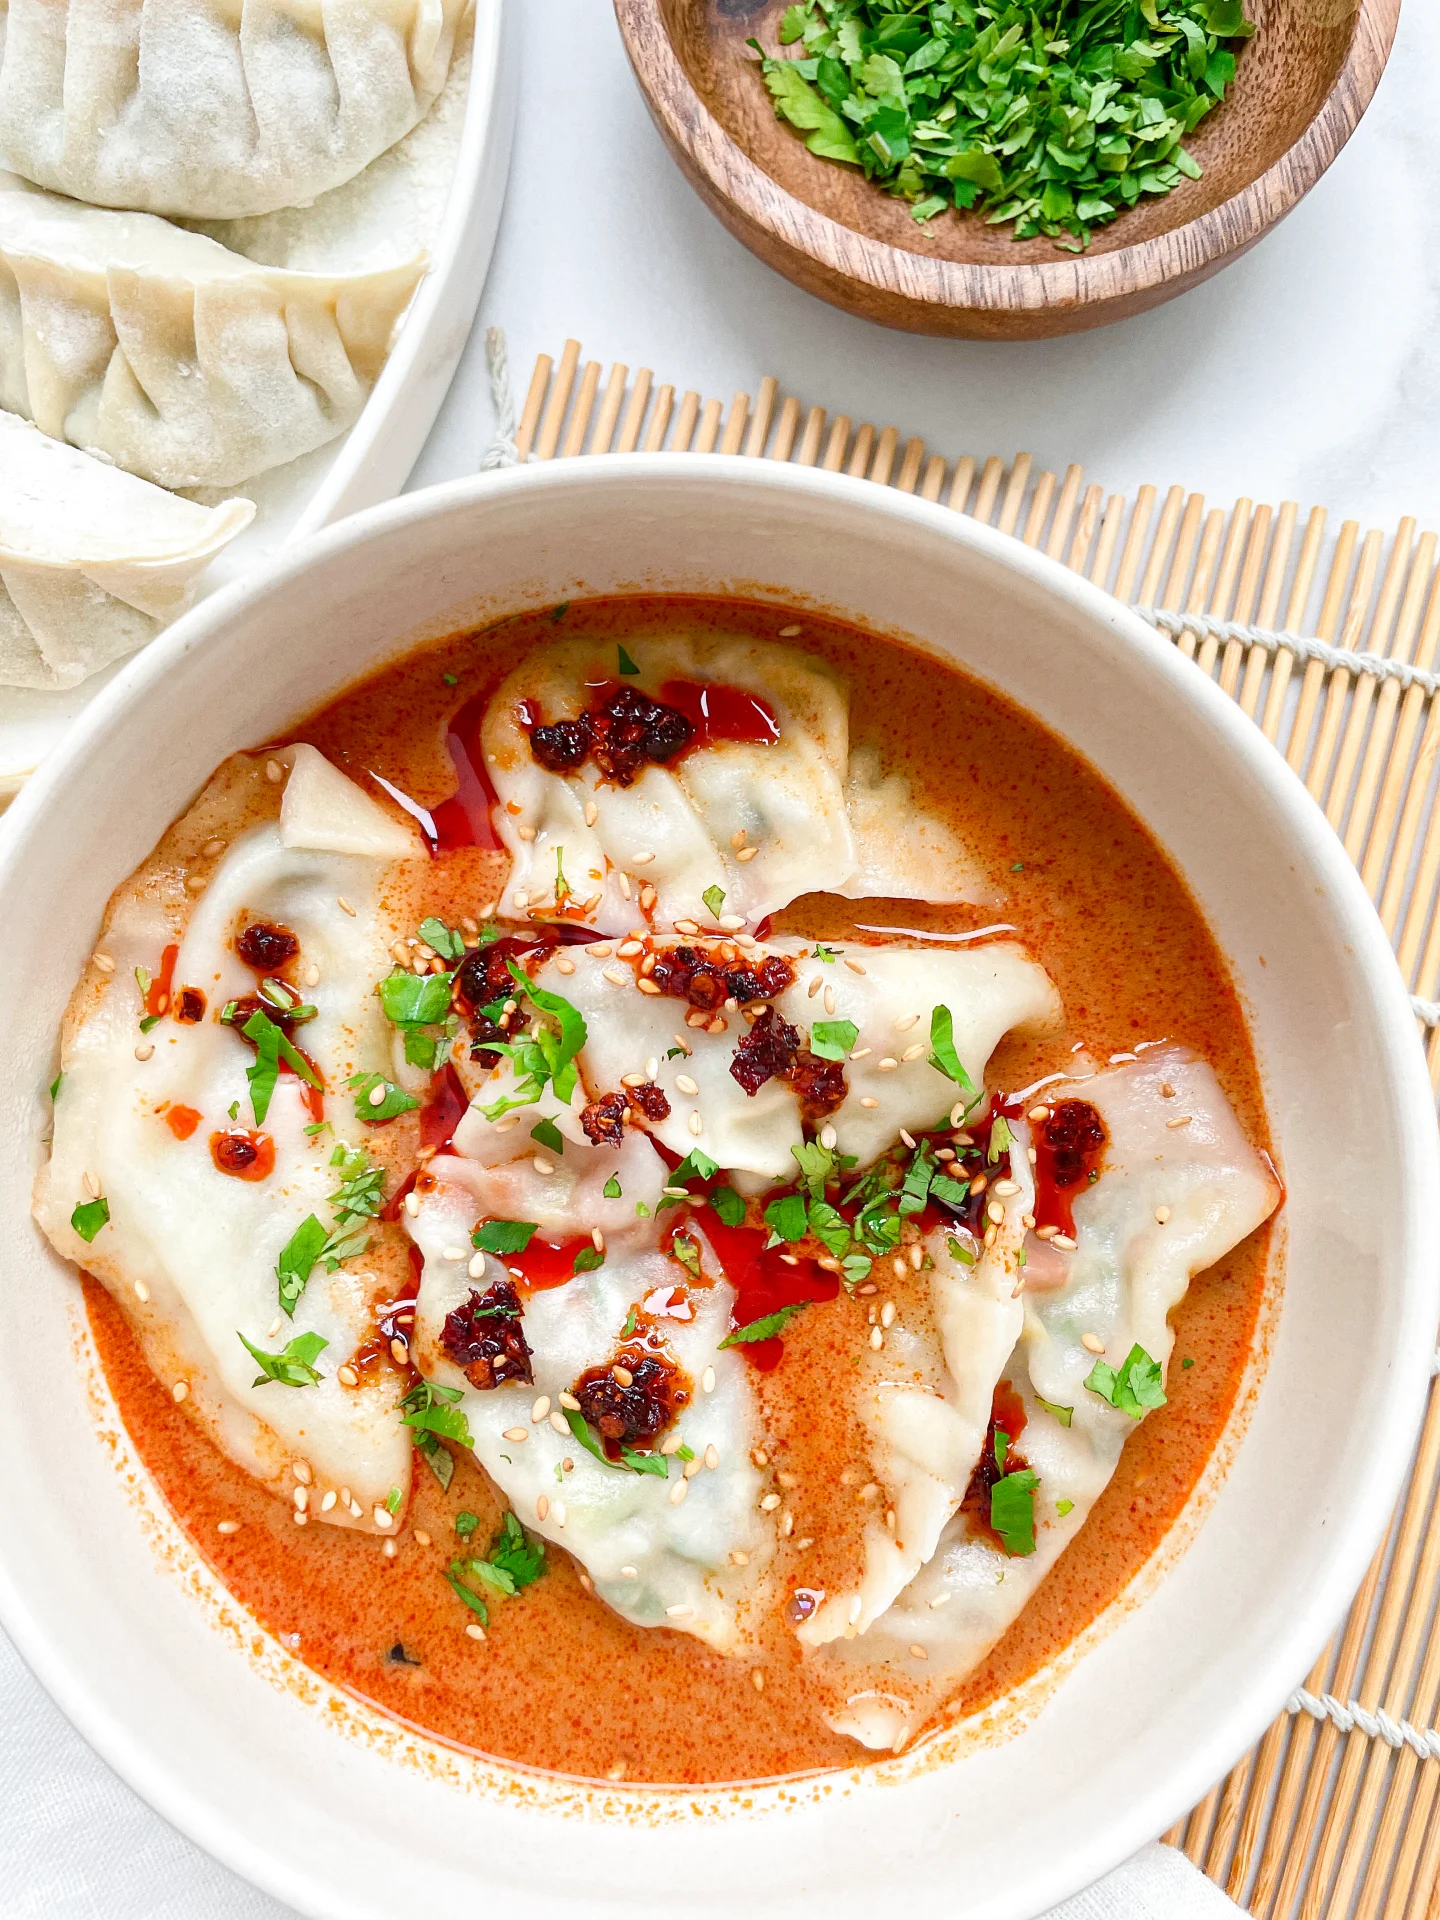
9. You should process the rolled wrappers as soon as possible, as the dough becomes stickier the longer it is stored. To freeze, you can either place the whole Tupperware container with the wrappers into the freezer or portion them into Ziploc bags. Make sure to keep parchment paper between the wrapper. The wrappers should be at room temperature for easy filling. You can use the dough for frying, boiling, or steaming.

NOTE: The calorie information may vary depending on the product used, country and region.

Basil Oil

Basil Oil

Basil Oil

Basil Oil

April 16, 2024 by Kimberly

Experience the vibrant, fresh flavors of homemade basil oil! Perfect for drizzling over pasta or enhancing salads and many more dished with its aromatic touch.

75 MINUTES

ADVANCED

VEGAN

ITALIAN

40 PER TSP

HERBACEOUS

MICHELIN

OIL

ALL YEAR

INTRODUCTION

ABOUT THE RECIPE

Discover the simplicity and elegance of homemade basil oil. This delightful infusion captures the essence of fresh basil, offering a quick way to add gourmet flair to your meals. Its vibrant color and fragrance enhance any dish effortlessly.

How to serve:
Drizzle basil oil over fresh pasta, salads, or toasted bread for an instant flavor boost. It’s also perfect as a finishing oil for pizzas and soups, adding a touch of sophistication. For a refreshing twist, mix it into your favorite vinaigrettes.

How to store:
Keep your basil oil refrigerated in an airtight container. It stays fresh for up to a week, ensuring you can savor its herbal freshness in various dishes.

Hi, I'm Kimberly!

Hi, I'm Kimberly.

A passionate food lover who believes in the magic of homemade deliciousness that spreads love and warmth. Join me on this culinary adventure as I prepare wonderful dishes and let’s spread some happiness together!

Kimberly the Zett Signature

If you want to get to know me better, click here!


Basil Oil
Basil Oil
Basil Oil
„Let’s make a piece of happiness“

INGREDIENTS

FOR 250ml (1 CUP)

BASIL OIL

  • 75g fresh basil leaves (1.7 oz)
  • 250ml neutral cooking oil (1 cup)
Basil Oil
}

ACTIVE: –

PASSIVE: –

PREPARATIONS

Recommended Equipment
  • blender
  • medium-sized saucepan
  • whisk
  • a bowl into which the medium saucepan fits
  • 2 medium-sized bowls
  • fine sieve
  • sealable container
  • ice cubes
  • coffee filter
  • none
}

ACTIVE: 15 min

PASSIVE: 60 min

COOKING

1. Separate the leaves from the stems and put the leaves into the blender. Pour in the oil. Blend on the highest setting until it becomes bright green and no pieces of basil are longer visible.

2. Pour the mixture from the blender into a medium-sized pot and heat it over medium heat, constantly stirring, to a temperature of about 102°-103°C (215°-217°F). Then, let the oil simmer with the lid partially on for the next 10 minutes. Stir only occasionally, making sure the temperature remains steady. This cooking time is essential for all the water to evaporate, allowing the perishable solids to settle at the bottom and the dark green oil to float on top. You’ll know all the water has evaporated when the oil in the pot barely bubbles anymore – so if it’s still bubbling vigorously, keep it simmering.

3. Meanwhile, prepare a bowl large enough to fit the medium-sized pot, filled with cold water and a handful of ice cubes. Also, hang a fine sieve strainer over a medium-sized bowl.

4. Now, place the pot in the ice water and stir to stop the cooking process. Once the oil is no longer boiling and is almost cold, remove the pot from the water and pour the oil into the fine sieve to catch the coarse particles.

5. Then, rinse the strainer and hang it over the second medium-sized bowl. Press a coffee filter into the strainer and pour the captured oil into the coffee filter, so that the remaining perishable and coarser particles are caught.

6. Allow the oil to drip through for about 1 hour or maybe more depending on how many remaining particles are in there. Once all the oil has passed through the coffee filter, transfer the collected amount into a sealable container or directly into an oil bottle. Store in the refrigerator for up to one week.

NOTE: The calorie information may vary depending on the product used, country and region.

Yellow Bell Pepper Oil

Yellow Bell Pepper Oil

Yellow Bell Pepper Oil

Yellow Bell Pepper Oil

April 9, 2024 by Kimberly

Unlock the vibrant taste of summer with this yellow bell pepper infused oil! Perfect for drizzling over salads or enhancing your favorite dishes. A kitchen must-have!

2 HOURS

ADVANCED

VEGAN

INT.

40 PER TSP

UMAMI
TANGY
REFRESHING

MICHELIN

OIL

ALL YEAR

INTRODUCTION

ABOUT THE RECIPE

Dive into the essence of culinary creativity with this yellow Bell Pepper Infused Oil! This simple yet transformative recipe brings a splash of color and a burst of flavor to any dish, making it an indispensable addition to your kitchen repertoire. It’s a gourmet twist suitable for drizzling over salads, pastas, and even for giving your bread dips an upgrade.

How to serve:
Drizzle it over a crisp, green salad to add a hint of sweetness and depth, or blend it into homemade mayonnaise for a unique twist on a classic condiment. It’s also perfect for finishing off grilled vegetables or pizzas, adding a layer of flavor that’s both nuanced and refreshing. The possibilities are endless, and this oil guarantees to turn even the simplest of dishes into a gourmet experience.

How to store:
To preserve the fresh flavors of your Yellow Bell Pepper Infused Oil, store it in a cool, dark place. A glass bottle with a tight seal is ideal, ensuring your oil stays fresh for up to a month. This way, you always have a splash of summer ready at your fingertips!

Hi, I'm Kimberly!

Hi, I'm Kimberly.

A passionate food lover who believes in the magic of homemade deliciousness that spreads love and warmth. Join me on this culinary adventure as I prepare wonderful dishes and let’s spread some happiness together!

Kimberly the Zett Signature

If you want to get to know me better, click here!


Yellow Bell Pepper Oil
„Let’s make a piece of happiness“

INGREDIENTS

FOR 350ml (1.5 CUPS)

YELLOW BELL PEPPER OIL

  • 450g fresh yellow bell peppers (1 lbs)
  • 350ml neutral cooking oil (1.5 cups)
Yellow Bell Pepper Oil
}

ACTIVE: 3 min

PASSIVE: –

PREPARATIONS

Recommended Equipment
  • blender
  • medium-sized saucepan
  • whisk
  • a bowl into which the medium saucepan fits
  • 2 medium-sized bowls
  • fine sieve
  • sealable container
  • ice cubes
  • coffee filter
  • Wash the peppers and remove both the stem and the core.
}

ACTIVE: 60 min

PASSIVE: 60 min

COOKING

1. Put the bell pepper pieces into the blender. Pour in the oil. Blend on the highest setting until it becomes a thick consistency and no pieces of bell pepper are longer visible.

2. Pour the mixture from the blender into a medium-sized pot and heat it over medium heat, constantly stirring, to a temperature of about 102°-103°C (215°-217°F). Then, let the oil simmer with the lid partially on for the next 40-45 minutes. Stir only occasionally, making sure the temperature remains steady. This long cooking time is essential for all the water to evaporate, allowing the perishable solids to settle at the bottom and the bright yellow oil to float on top. You’ll know all the water has evaporated when the oil in the pot barely bubbles anymore – so if it’s still bubbling vigorously, keep it simmering.

3. At the end of the cooking process, prepare a bowl large enough to fit the medium-sized pot, filled with cold water and a handful of ice cubes. Also, hang a fine sieve strainer over a medium-sized bowl.

4. Now, place the pot in the ice water and stir to stop the cooking process. Once the oil is no longer boiling and is almost cold, remove the pot from the water and pour the oil into the fine sieve to catch the coarse particles.

5. Then, rinse the strainer and dry it off well and hang it over the second medium-sized bowl. Press a coffee filter into the strainer and pour the captured oil into the coffee filter, so that the remaining perishable and coarser particles are caught.

6. Allow the oil to drip through for about 1 to 2 hours. Once all the oil has passed through the coffee filter, transfer the collected amount into a sealable container or directly into an oil bottle. Store in the refrigerator.

NOTE: The calorie information may vary depending on the product used, country and region.

Tomato Oil

Tomato Oil

Tomato Oil

Tomato Oil

April 2, 2024 by Kimberly

Discover the vibrant burst of flavor with homemade tomato oil! This easy-to-make oil adds a gourmet touch to any meal.

2 HOURS

ADVANCED

VEGAN

INT.

40 PER TSP

UMAMIMICHELIN

OIL

ALL YEAR

INTRODUCTION

ABOUT THE RECIPE

Dive into the world of gourmet flavors with my homemade tomato oil! Made from the freshest tomatoes, this oil is a game-changer for any kitchen. Its rich, tomato-infused taste transforms simple dishes into culinary masterpieces. Perfect for chefs of all levels, this easy recipe is your secret ingredient for that extra flavor kick.

How to serve:
Tomato oil is incredibly versatile, adding depth and aroma to any dish. Drizzle it over fresh salads for a summery vibe or blend it into your pasta for an instant flavor upgrade. It’s also perfect as a finishing oil on grilled vegetables, pizzas, and even soups. Elevate your bread dipping game by serving this rich oil alongside your favorite bread.

How to store:
For longevity, store your tomato oil in a clean, airtight container in the refrigerator. It keeps well for up to two weeks, ensuring you have this delightful flavor enhancer at hand whenever your dishes need a burst of tomato magic.

Hi, I'm Kimberly!

Hi, I'm Kimberly.

A passionate food lover who believes in the magic of homemade deliciousness that spreads love and warmth. Join me on this culinary adventure as I prepare wonderful dishes and let’s spread some happiness together!

Kimberly the Zett Signature

If you want to get to know me better, click here!


Tomato Oil
Tomato Oil
Tomato Oil
„Let’s make a piece of happiness“

INGREDIENTS

FOR 250ml (1 CUP)

TOMATO OIL

  • 400g fresh tomatoes (14 oz)
  • 250ml neutral cooking oil (1 cup)
Tomato Oil
}

ACTIVE: 2 min

PASSIVE: –

PREPARATIONS

Recommended Equipment
  • blender
  • medium-sized saucepan
  • whisk
  • a bowl into which the medium saucepan fits
  • 2 medium-sized bowls
  • fine sieve
  • sealable container
  • ice cubes
  • coffee filter
  • Wash the tomatoes and remove the greens.
}

ACTIVE: 60 min

PASSIVE: 60 min

COOKING

1. Put the tomatoes into the blender. Pour in the oil. Blend on the highest setting until it becomes a thick bright orange consistency and no pieces of tomatoes are longer visible.

2. Pour the mixture from the blender into a medium-sized pot and heat it over medium heat, constantly stirring, to a temperature of about 102°-103°C (215°-217°F). Then, let the oil simmer with the lid partially on for the next 30-40 minutes. Stir only occasionally, making sure the temperature remains steady. This long cooking time is essential for all the water to evaporate, allowing the perishable solids to settle at the bottom and the dark red oil to float on top. You’ll know all the water has evaporated when the oil in the pot barely bubbles anymore – so if it’s still bubbling vigorously, keep it simmering.

3. At the end of the cooking process, prepare a bowl large enough to fit the medium-sized pot, filled with cold water and a handful of ice cubes. Also, hang a fine sieve strainer over a medium-sized bowl.

4. Now, place the pot in the ice water and stir to stop the cooking process. Once the oil is no longer boiling and is almost cold, remove the pot from the water and pour the oil into the fine sieve to catch the coarse particles.

5. Then, rinse the strainer, dry it off well and hang it over the second medium-sized bowl. Press a coffee filter into the strainer and pour the captured oil into the coffee filter, so that the remaining perishable and coarser particles are caught.

6. Allow the oil to drip through for about 1 to 2 hours. Once all the oil has passed through the coffee filter, transfer the collected amount into a sealable container or directly into an oil bottle. Store in the refrigerator.

NOTE: The calorie information may vary depending on the product used, country and region.

Chive Oil

Chive Oil

Chive Oil

Chive Oil

March 3, 2024 by Kimberly

Elevate your dishes with homemade Chive Oil! Easy, flavorful, and vibrant, it’s the perfect finish to salads, soups, and meats. Fresh, herbal, and utterly delightful.

60 MINUTES

ADVANCED

VEGAN

INT.

1 CUP
250 ML

HERBACEOUS

MICHELIN

OIL

ALL YEAR

INTRODUCTION

ABOUT THE RECIPE

Discover the simplicity and elegance of Homemade Chive Oil! This vibrant, flavorful oil adds a gourmet touch to any dish. With its fresh, herbal notes, this oil transforms ordinary meals into culinary masterpieces. Perfect for foodies and culinary enthusiasts alike, this easy-to-make infusion will become a staple in your kitchen. Let’s bring the essence of garden-fresh chives to your table!

How to serve:
Drizzle this aromatic Chive Oil over roasted vegetables, fresh salads, or grilled fish to enhance flavor and presentation. It’s an excellent addition to potato dishes, scrambled eggs, or as a dip for crusty bread. Incorporate this versatile oil into vinaigrettes or use as a finishing touch on soups for a burst of color and taste.

How to store:
Store your Chive Oil in an airtight glas in the refrigerator for several weeks. Keep it away from direct sunlight to maintain its vibrant color and fresh flavor.

Hi, I'm Kimberly!

Hi, I'm Kimberly.

A passionate food lover who believes in the magic of homemade deliciousness that spreads love and warmth. Join me on this culinary adventure as I prepare wonderful dishes and let’s spread some happiness together!

Kimberly the Zett Signature

If you want to get to know me better, click here!


Chive Oil
Chive Oil
Chive Oil
„Let’s make a piece of happiness“

INGREDIENTS

FOR 400ml (1.5 CUPS)

CHIVE OIL

  • 60g fresh chives (2 oz)
  • 400ml neutral cooking oil (1.5 cups)
Chive Oil
}

ACTIVE: –

PASSIVE: –

PREPARATIONS

Recommended Equipment
  • blender
  • medium-sized saucepan
  • whisk
  • a bowl into which the medium saucepan fits
  • 2 medium-sized bowls
  • fine sieve
  • sealable container
  • ice cubes
  • coffee filter
  • none
}

ACTIVE: 20 min

PASSIVE: 60 min

COOKING

1. Roughly chop or tear the chives and put them into the blender. Pour in the oil. Blend on the highest setting until it becomes bright green and no pieces of chive are longer visible.

2. Pour the mixture from the blender into a medium-sized pot and heat it over medium heat, constantly stirring, to a temperature of about 102°-103°C (215°-217°F). Then, let the oil simmer with the lid partially on for the next 5-10 minutes. Stir only occasionally, making sure the temperature remains steady. This cooking time is essential for all the water to evaporate, allowing the perishable solids to settle at the bottom and the dark green oil to float on top. You’ll know all the water has evaporated when the oil in the pot barely bubbles anymore – so if it’s still bubbling vigorously, keep it simmering.

3. Meanwhile, prepare a bowl large enough to fit the medium-sized pot, filled with cold water and a handful of ice cubes. Also, hang a fine sieve strainer over a medium-sized bowl.

4. Now, place the pot in the ice water and stir to stop the cooking process. Once the oil is no longer boiling and is almost cold, remove the pot from the water and pour the oil into the fine sieve to catch the coarse particles.

5. Then, rinse the strainer and hang it over the second medium-sized bowl. Press a coffee filter into the strainer and pour the captured oil into the coffee filter, so that the remaining perishable and coarser particles are caught.

6. Allow the oil to drip through for about 1 hour. Once all the oil has passed through the coffee filter, transfer the collected amount into a sealable container or directly into an oil bottle. Store in the refrigerator.

NOTE: The calorie information may vary depending on the product used, country and region.