Turkish Flatbread (Bazlama)

Turkish Flatbread (Bazlama)

Flatbread serving ideas

Turkish Flatbread (Bazlama)

August 20, 2024 by Kimberly

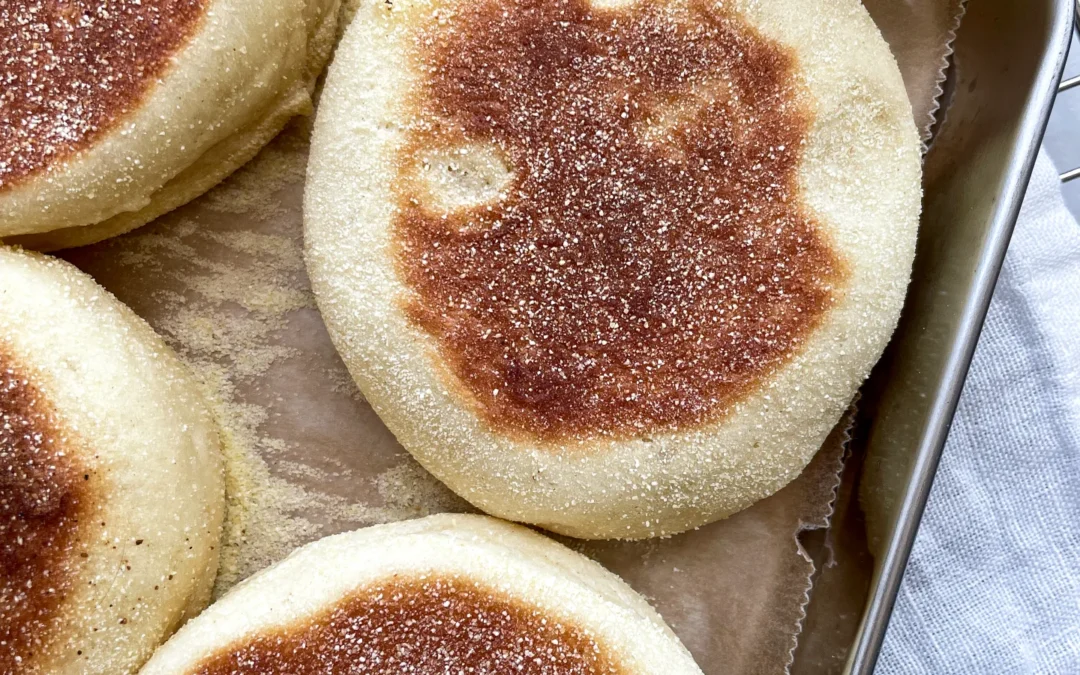
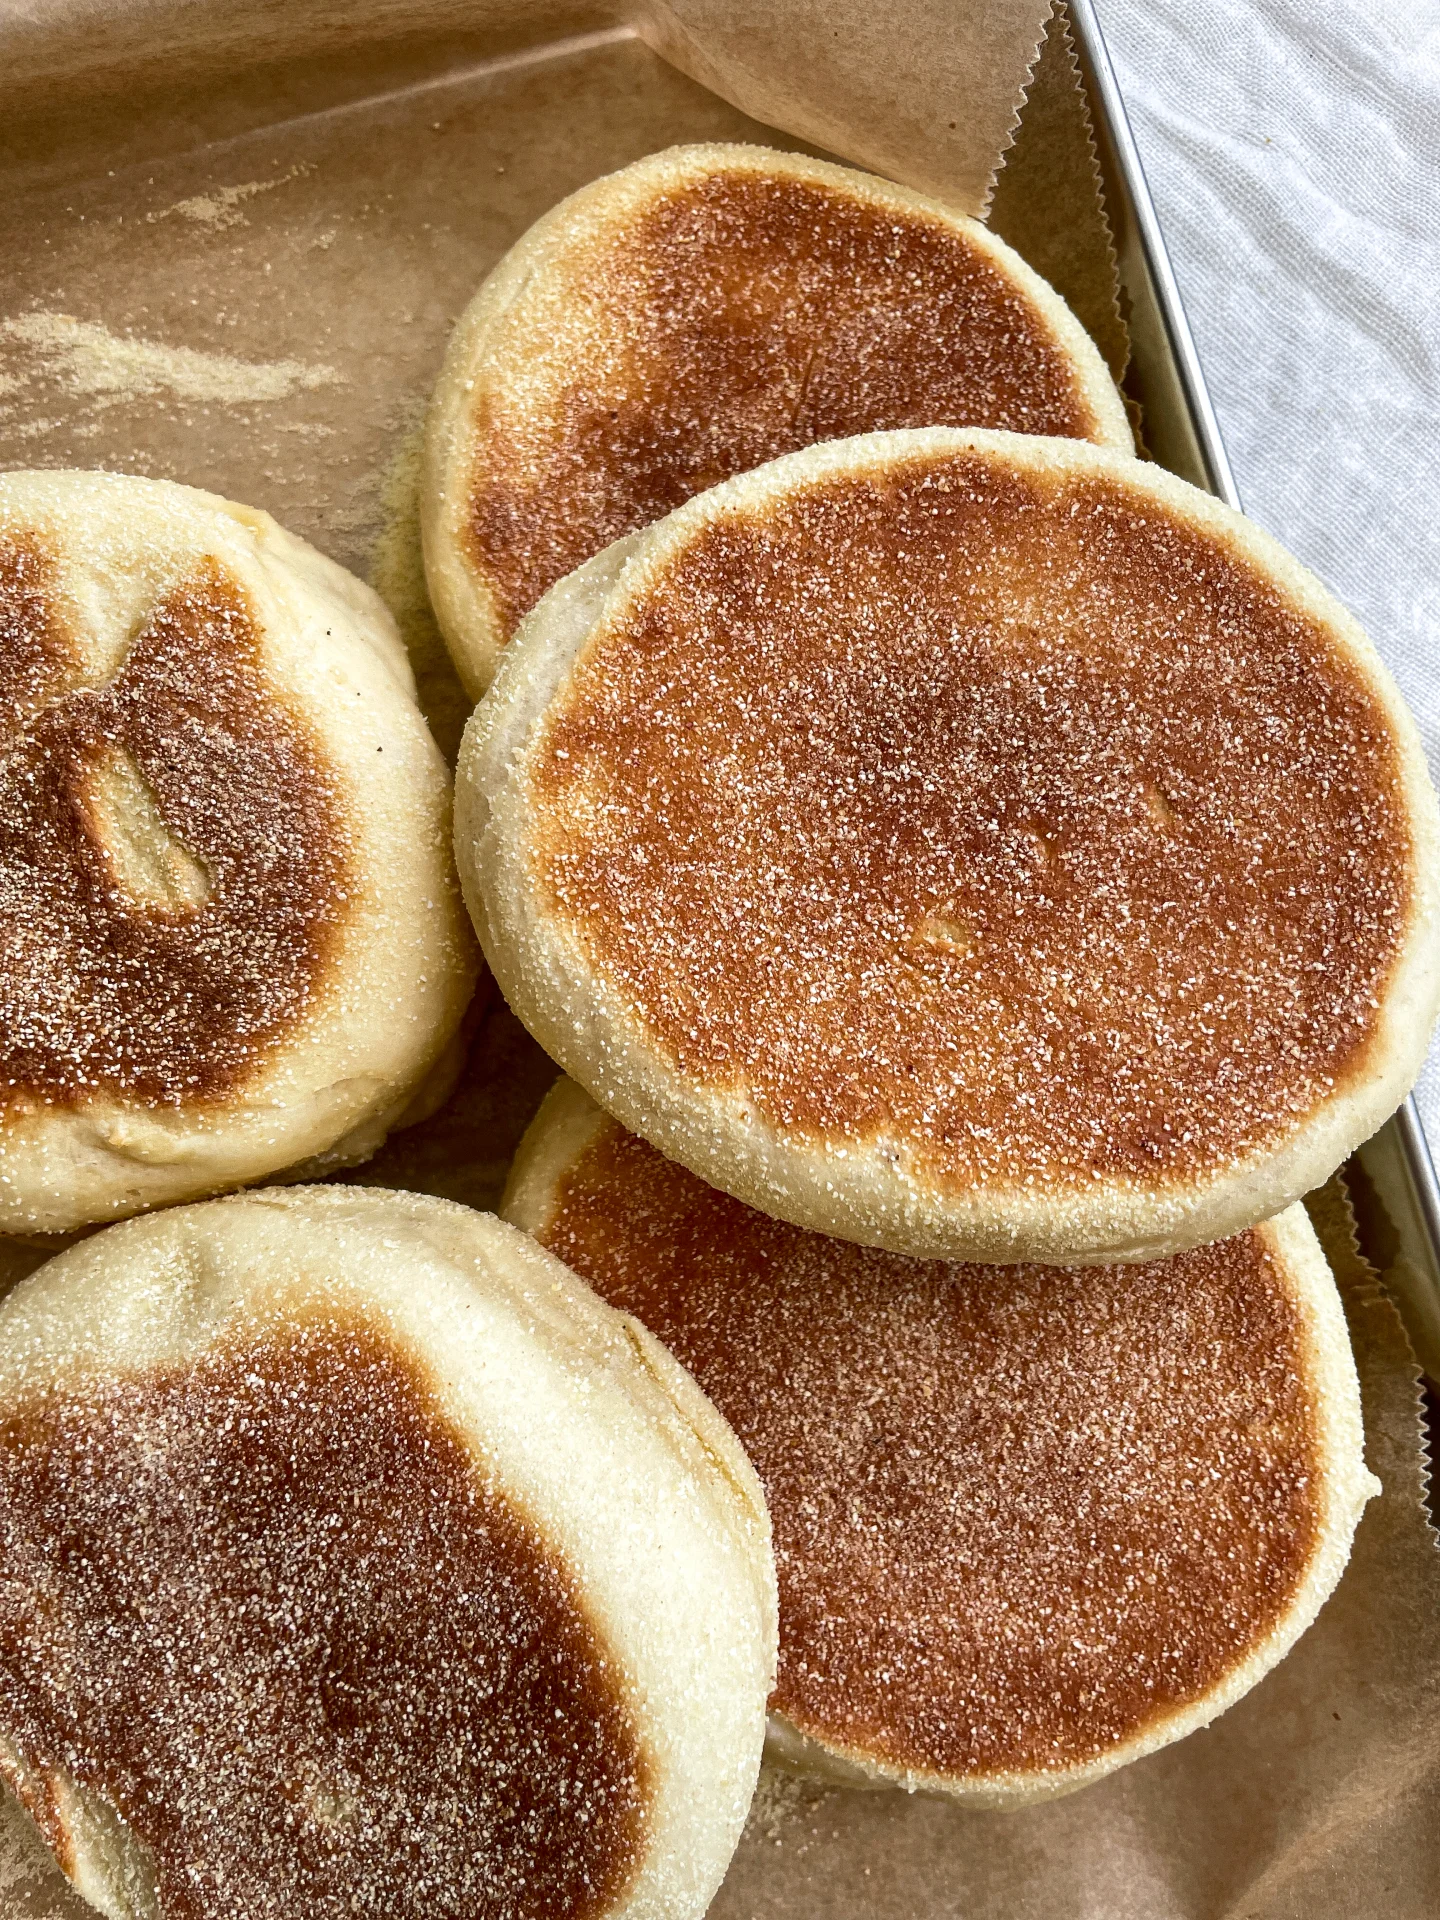
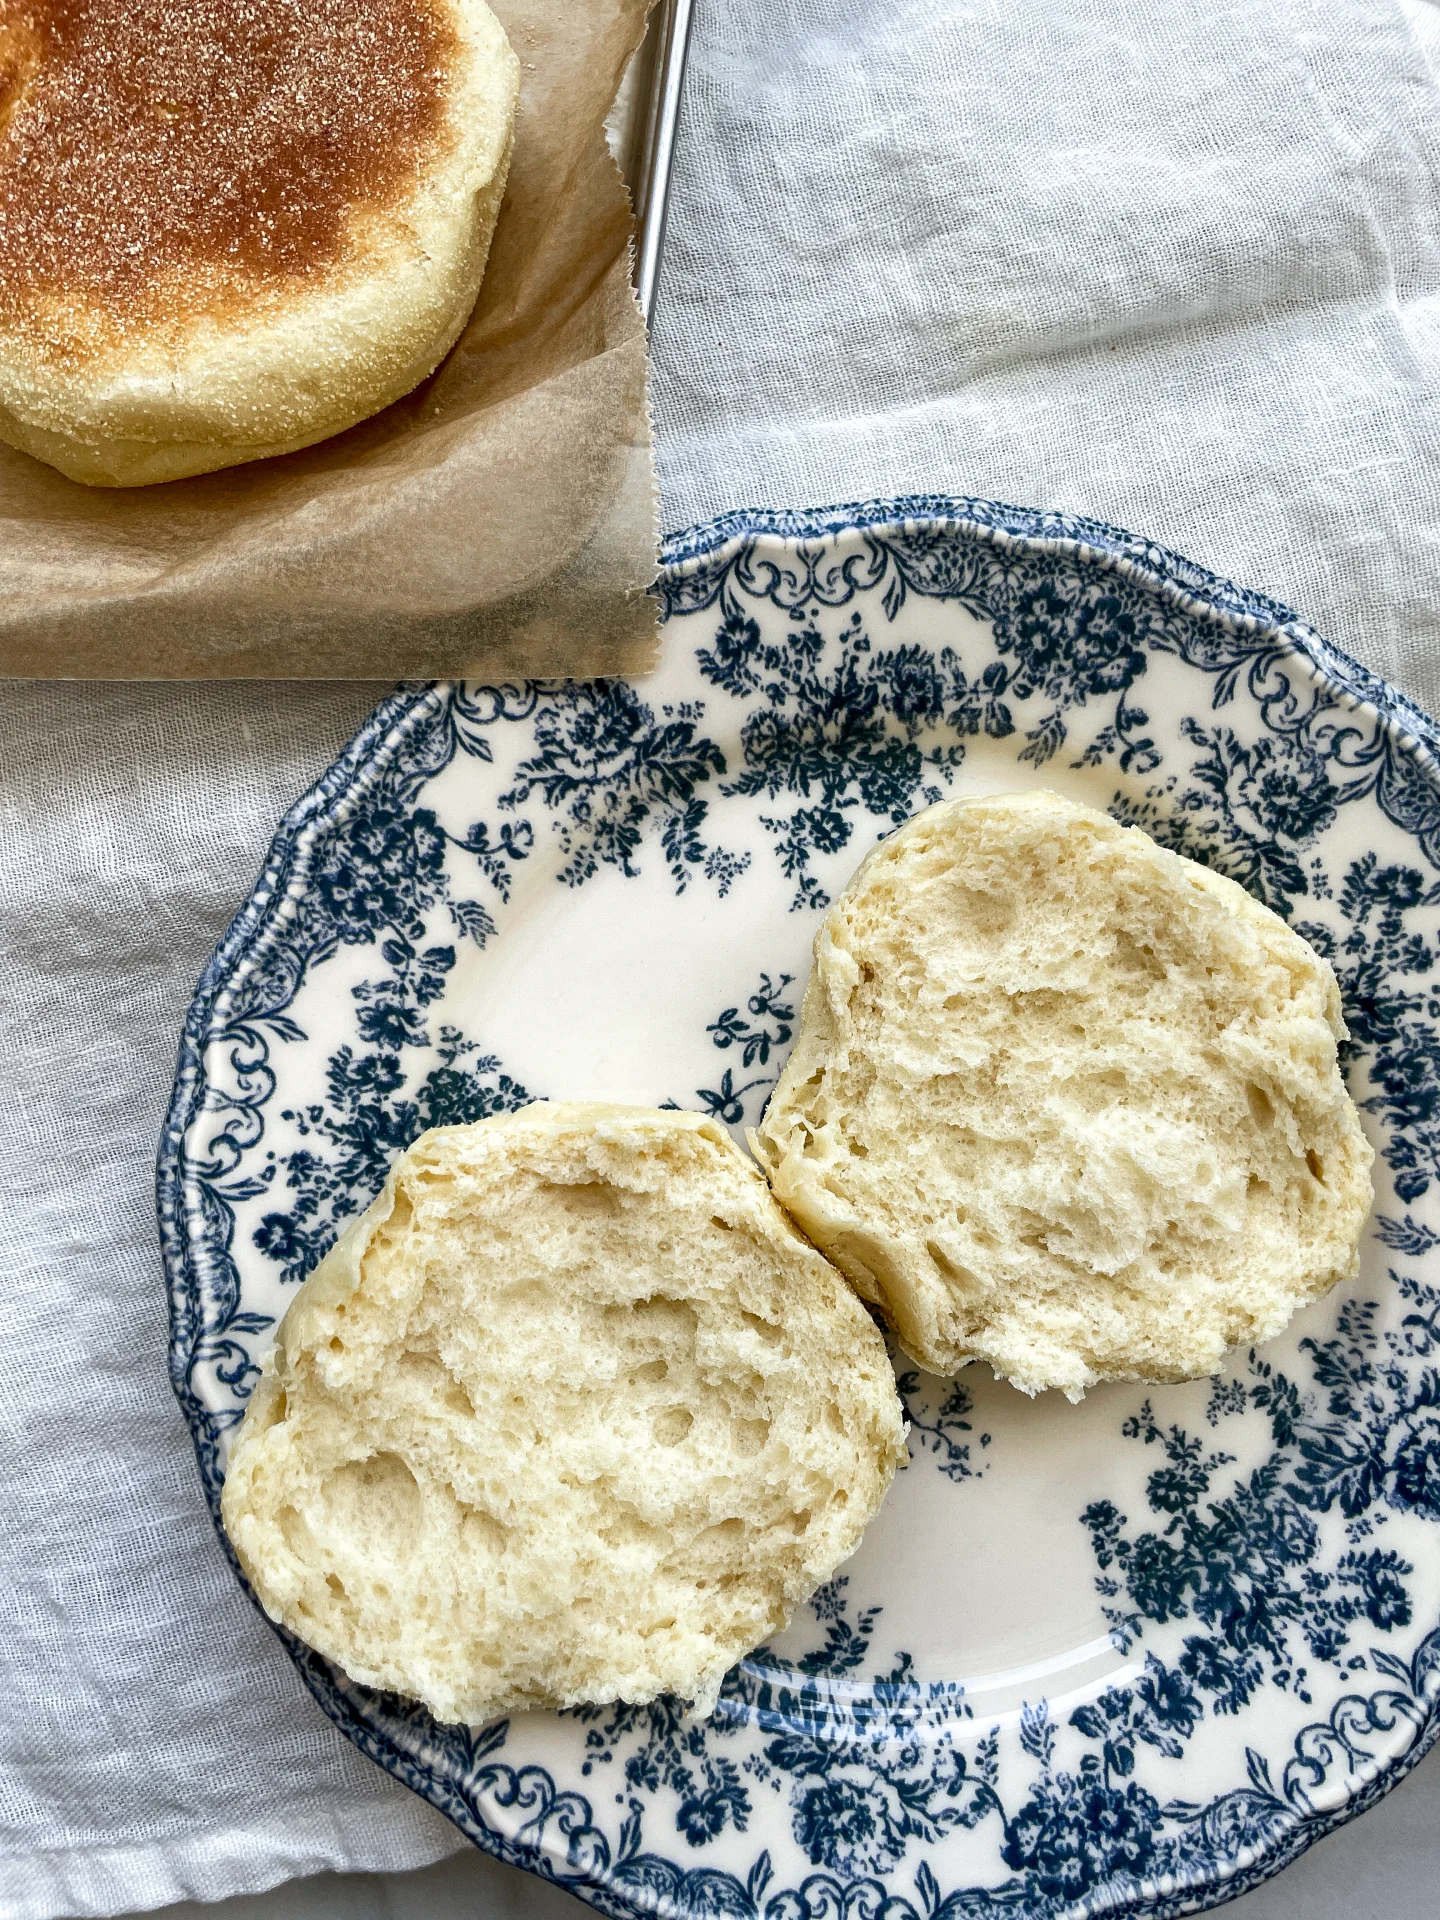
Imagine the warmth of freshly made Turkish flatbread, delightfully fluffy and perfect for any meal. This cozy, homemade treat brings a touch of comfort and joy to your table.

90 MINUTES

EASY

VEGETARIAN

TURKISH

254 PER PORTION

BUTTERY

EVERYDAY

BREAD

ALL YEAR

INTRODUCTION

ABOUT THE RECIPE

If you’re craving something warm, fluffy, and straight out of your cozy food dreams, you’re in for a treat. This traditional Turkish flatbread, known as Bazlama, is super easy to whip up and is perfect for any meal. Imagine the delight of pulling apart a piece of this soft, pillowy bread, fresh from the pan. This recipe will become your go-to favorite. Let’s dive into the comforting world of Turkish cuisine with this delightful bread.

How to serve
Pair it with a spread of hummus, baba ganoush, or tzatziki. It’s also fantastic as a side with soups, stews, or your favorite salads. For a quick and satisfying snack, enjoy it warm with a generous pat of butter or your preferred cheese. I like to serve it with this Spicy Turkish Vegetable Spread (Ezme) and Mint Yogurt & Cucumber Dill Salad (Cacik inspired) as a Meze variation.

How to store
Simply let it cool completely, then wrap it tightly in plastic wrap or store in an airtight container. It stays fresh at room temperature for up to two days. For longer storage, pop it in the freezer for up to a month. When you’re ready to enjoy it again, just reheat it in a warm oven or toaster, and it’ll be as good as new.

Hi, I'm Kimberly!

Hi, I'm Kimberly.

A passionate food lover who believes in the magic of homemade deliciousness that spreads love and warmth. Join me on this culinary adventure as I prepare wonderful dishes and let’s spread some happiness together!

Kimberly the Zett Signature

If you want to get to know me better, click here!


Flatbread serving ideas
„Let’s make a piece of happiness“
Print
clock clock iconcutlery cutlery iconflag flag iconfolder folder iconinstagram instagram iconpinterest pinterest iconfacebook facebook iconprint print iconsquares squares iconheart heart iconheart solid heart solid icon
Flatbread serving ideas

Turkish Flatbread (Bazlama)


5 Stars 4 Stars 3 Stars 2 Stars 1 Star

No reviews

  • Author: Kimberly
  • Total Time: 90 min
  • Yield: 4-8 1x

Description

Recommended Equipment

  • measuring cup
  • large bowl
  • plastic wrap
  • pan
  • rolling pin
  • small bowl
  • kitchen brush
  • sharp knife
  • cutting board

Ingredients

Units Scale

DOUGH

  • 250 grams all-purpose flour
  • 80 milliliters warm water
  • 80 milliliters warm full-fat milk
  • 3/4 tsp active dry yeast
  • 1/2 tbsp white sugar
  • 1/2 tsp salt

TOPPING

  • 1 tbsp butter
  • 1 tbsp chopped parsley

Instructions

  1. In a measuring cup, mix warm water and warm milk with sugar and dry yeast, and let it sit for 10 minutes. Meanwhile, combine flour and salt in a bowl.
  2. Add the yeast mixture to the flour and stir with a spoon until it becomes crumbly.
  3. Place the dough on a clean surface and knead by hand until it is smooth and no longer sticky. Shape the dough into a ball, place it back in the bowl, cover well with plastic wrap, and let it rise for at least 1 hour.
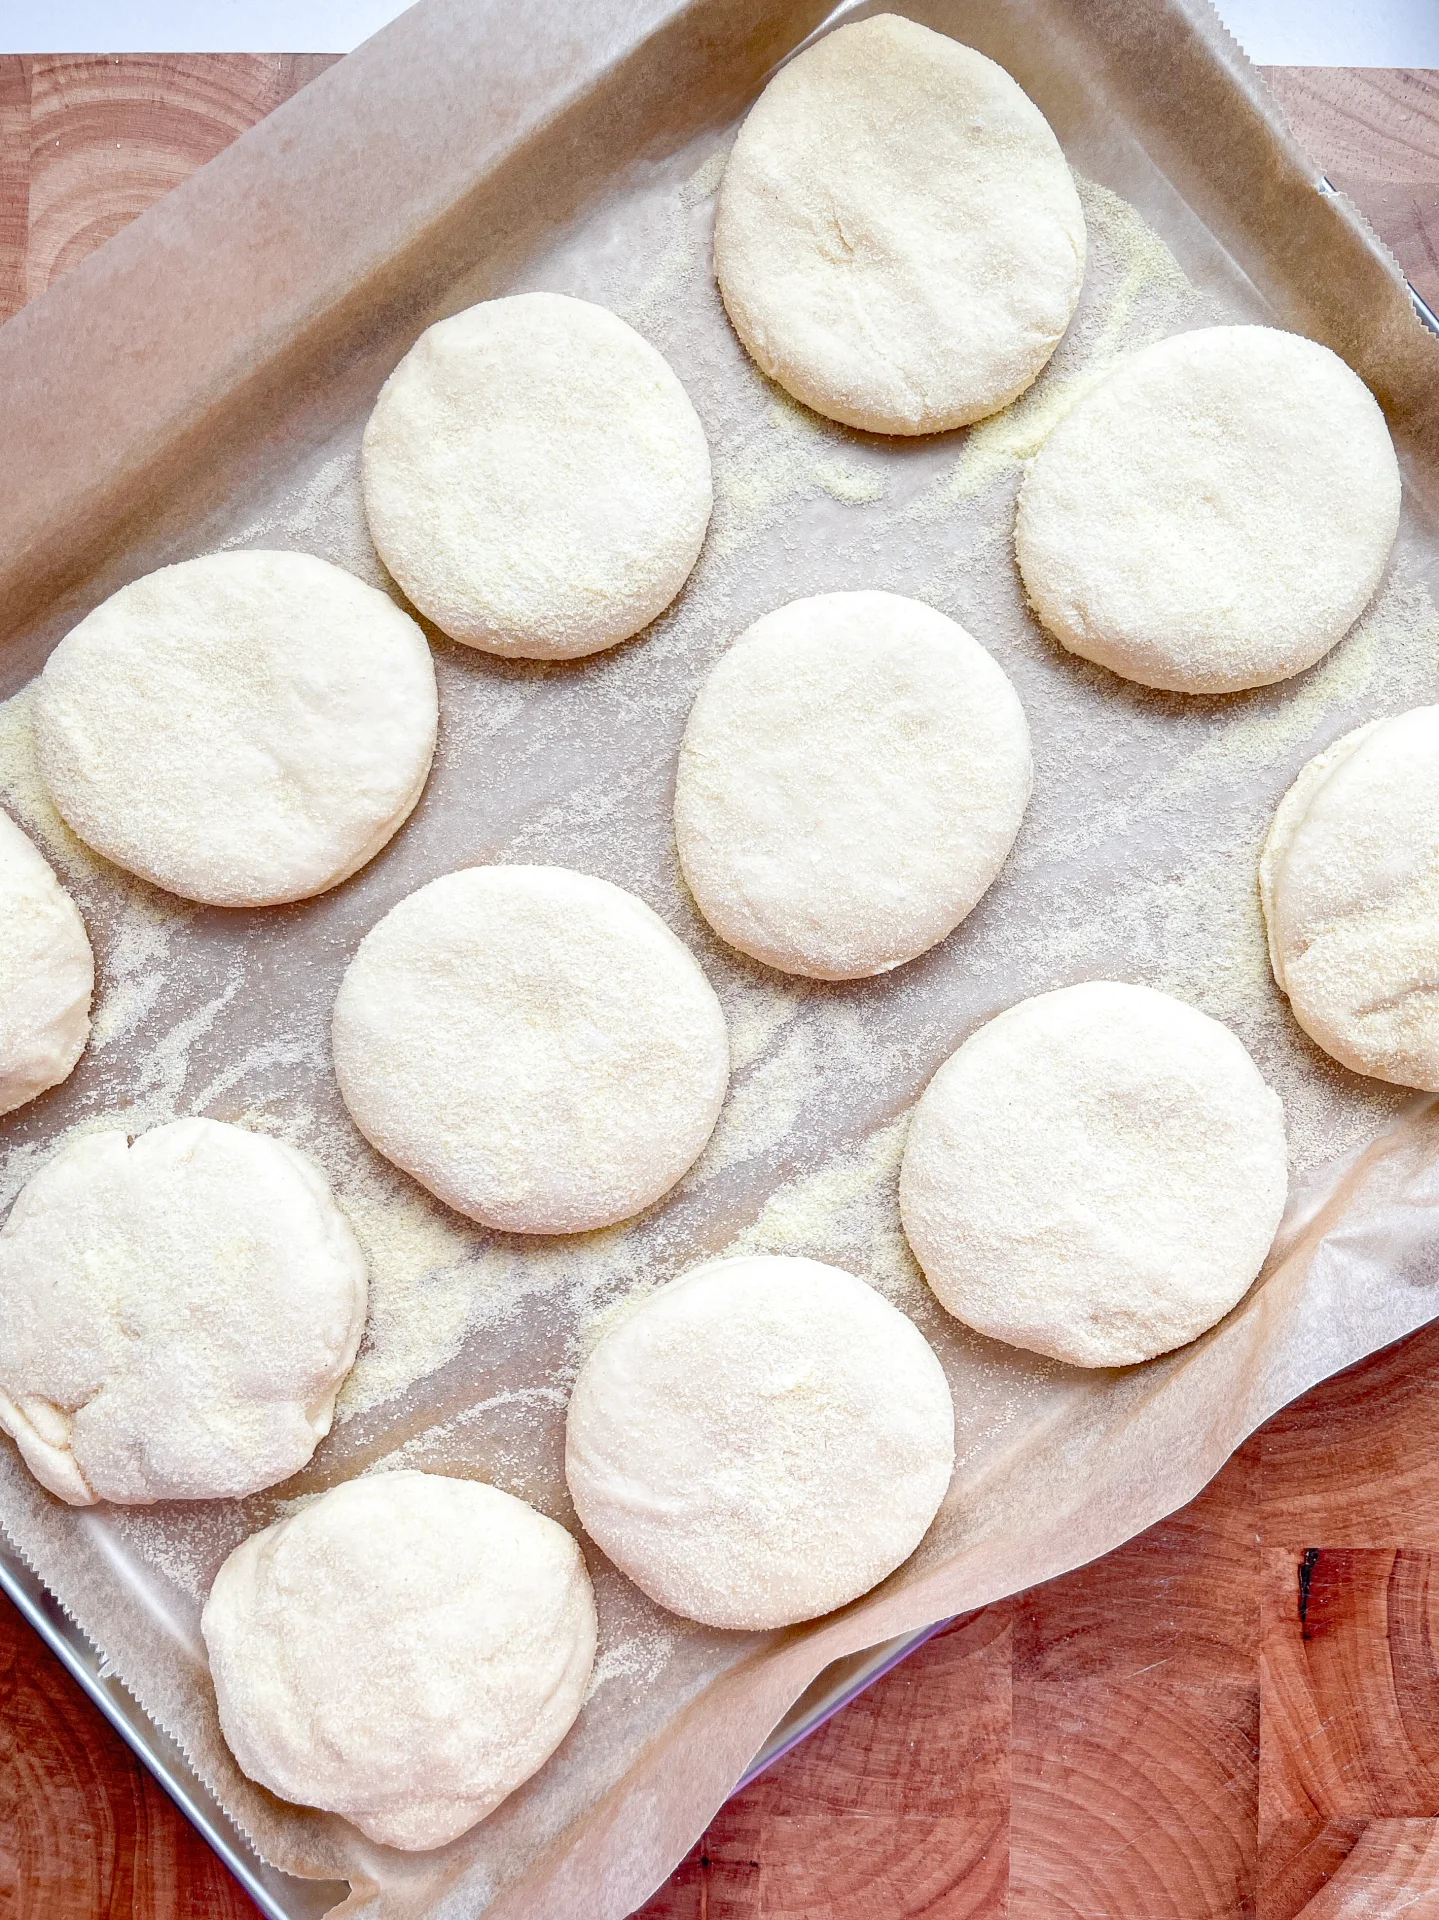
  4. Divide the dough into 4 pieces (for larger flatbreads) or 8 pieces (for smaller flatbreads). Keep the individual pieces in the bowl and loosely cover with plastic wrap.
  5. Heat a pan over medium heat without adding any fat.
  6. Roll each piece of dough into a very thin, round flatbread using a rolling pin. If the dough is too sticky, sprinkle a little flour on the surface.
  7. Cook the flatbreads one at a time in the pan without adding any fat. Once you see several bubbles, flip the flatbread to the other side. Remove from the pan and keep warm under a cloth.
  8. While the first flatbread is cooking, melt the butter and chop the parsley. Mix the parsley with the melted butter and brush each flatbread with the butter mixture.
  9. Serve the bread immediately for the best taste.
  • Passive Time: 60 min
  • Cook Time: 30 min

Mint Yogurt & Cucumber Dill Salad (Cacik inspired)

Mint Yogurt & Cucumber Dill Salad (Cacik inspired)

Mint Yogurt & Cucumber Dill Salad (Cacik inspired)

Mint Yogurt & Cucumber Dill Salad (Cacik inspired)

August 20, 2024 by Kimberly

Refresh your taste buds with this creamy & crunchy yogurt cucumber salad. The blend of mint and dill brings a burst of summer flavors that’s perfect for any occasion. Light, tangy, and irresistible!

15 MINUTES

EASY

VEGETARIAN

TURKISH

153 PER PORTION

CREAMY
CRUNCHY

EVERYDAY

DIPS & SPREADS

ALL YEAR

INTRODUCTION

ABOUT THE RECIPE

If you’re craving something light, refreshing, and bursting with flavor, you’re going to adore this Cacik-inspired dip-salad situation. It’s a delightful mix of creamy yogurt, fresh cucumbers, and aromatic herbs like mint and dill. Perfect for hot summer days or when you need a quick, healthy snack, this dip-salad is a breeze to whip up and incredibly satisfying. Trust me, once you try it, you’ll be hooked on its cool and tangy goodness!

How to serve
Enjoy it as a refreshing side dish with your grilled meats or fish, or as a cool appetizer to start your meal. It’s also perfect as a dip with some warm pita bread or crispy veggies. For a more substantial meal, pair it with a quinoa or grain bowl. This salad’s creamy, tangy flavor profile complements a wide range of dishes, making it a fantastic addition to any menu. I like to serve it with this Turkish Flatbread (Bazlama) and Spicy Turkish Vegetable Spread (Ezme) as a Meze variation.

How to store
Transfer it to an airtight container and keep it in the fridge. It stays fresh for up to three days, but it’s best enjoyed within the first day or two to maintain its crisp texture. Keep it chilled, and you’ll have a delicious, refreshing dip-salad ready whenever you need it.

Hi, I'm Kimberly!

Hi, I'm Kimberly.

A passionate food lover who believes in the magic of homemade deliciousness that spreads love and warmth. Join me on this culinary adventure as I prepare wonderful dishes and let’s spread some happiness together!

Kimberly the Zett Signature

If you want to get to know me better, click here!


Mint Yogurt & Cucumber Dill Salad (Cacik inspired)
„Let’s make a piece of happiness“
Print
clock clock iconcutlery cutlery iconflag flag iconfolder folder iconinstagram instagram iconpinterest pinterest iconfacebook facebook iconprint print iconsquares squares iconheart heart iconheart solid heart solid icon
Mint Yogurt & Cucumber Dill Salad (Cacik inspired)

Mint Yogurt & Cucumber Dill Salad (Cacik inspired)


  • Author: Kimberly
  • Total Time: 15 min
  • Yield: 4-6 1x

Description

RECOMMENDED EQUIPMENT

  • sharp knife
  • cutting board
  • small bowl
  • medium bowl

Ingredients

Units Scale

SALAD

  • 1 cucumber
  • 2 tbsp extra virgin olive oil
  • 1 tbsp lemon juice
  • 1 tbsp dill
  • salt & pepper to taste

YOGURT

  • 300 grams 10% fat yogurt
  • 2 garlic cloves
  • 1 tbsp fresh mint, chopped
  • pinch of salt

TOPPING

  • pistachios
  • dill
  • mint

Instructions

  1. Peel the garlic and grate it into a small bowl. Wash and dry the mint thoroughly. Pluck the leaves from the stems, finely chop them, and add them to the garlic. Then add the yogurt and salt. Mix everything well.
  2. Next, wash and dry the cucumber. Halve it lengthwise, then halve each piece again lengthwise and remove the seeds. Quarter the cucumber again lengthwise and cut into large chunks. Place the cucumber pieces in a medium bowl and season with salt, olive oil, lemon juice, and pepper. Wash, dry, and roughly chop the dill, then add it to the cucumbers. Mix everything well.
  3. Shell and finely chop the pistachios. Set aside.
  4. Spread the yogurt on a deep plate and top with the cucumber salad. Sprinkle with pistachios. Optionally, garnish with a few mint leaves and dill, and drizzle with a bit of olive oil.
  • Cook Time: 15 min

Homemade Bagels

Homemade Bagels

Homemade Bagels

Homemade Bagels

August 15, 2024 by Kimberly

Indulge in these cozy, chewy homemade bagels with irresistible toppings! Perfect for breakfast or brunch, they bring a warm, homemade touch to your mornings. Once you try these, you’ll never buy bagels again!

2 HOURS

INTERMEDIATE

VEGETARIAN

US AMERICAN

274 PER BAGEL

CHEWY

BRUNCH

BREAKFAST

ALL YEAR

INTRODUCTION

ABOUT THE RECIPE

Imagine starting your day with the warm, comforting aroma of freshly baked bagels wafting through your kitchen. These delightful homemade bagels are not only easy to make but also offer a chewy, satisfying bite that pairs perfectly with your favorite toppings. Whether you prefer the nutty flavor of sesame seeds, the subtle crunch of poppyseeds, the spicy kick of cheddar and jalapeno, or the classic mix of everything bagel seasoning, there’s a bagel for everyone to love.

How to serve
Slice them in half and spread on some creamy butter, tangy cream cheese, or your favorite jam. They also make fantastic bases for sandwiches – think smoked salmon with capers and red onion on a sesame bagel, or a turkey and avocado combo on a poppyseed bagel. For a real treat, try a cheddar and jalapeno bagel with a smear of guacamole. These bagels are versatile enough to be enjoyed any time of day, making them a must-have in your kitchen.

How to store
To keep your bagels fresh, store them in an airtight container at room temperature for up to two days. For longer storage, slice them in half and freeze them. When you’re ready to enjoy, simply pop them in the toaster straight from the freezer. This way, you’ll always have a delicious bagel ready whenever the craving strikes.

Hi, I'm Kimberly!

Hi, I'm Kimberly.

A passionate food lover who believes in the magic of homemade deliciousness that spreads love and warmth. Join me on this culinary adventure as I prepare wonderful dishes and let’s spread some happiness together!

Kimberly the Zett Signature

If you want to get to know me better, click here!


Homemade Bagels
Homemade Bagels
Homemade Bagels
„Let’s make a piece of happiness“
Print
clock clock iconcutlery cutlery iconflag flag iconfolder folder iconinstagram instagram iconpinterest pinterest iconfacebook facebook iconprint print iconsquares squares iconheart heart iconheart solid heart solid icon
Homemade Bagels

Homemade Bagels


  • Author: Kimberly
  • Total Time: 2 hrs
  • Yield: 8-12 1x

Description

Recommended Equipment

  • tall container
  • large bowl
  • damp cloth
  • oven
  • large pot

Ingredients

Units Scale

DOUGH – YEAST MIXTURE

  • 500 milliliters lukewarm water
  • 7 grams active dry yeast
  • 1 tbsp sugar

DOUGH – DRY INGREDIENTS

  • 900 grams bread flour (in Germany flour type 550)
  • 2 tsp salt
  • 30 grams white sugar

WATER BATH

  • 2 liters simmering water
  • 1/4 cup brown sugar

TOPPINGS

  • white sesame seeds
  • poppy seeds
  • everything but the bagel seasoning
  • cheddar & jalapeño

Instructions

  1. In a tall container, briefly stir together the yeast mixture ingredients: lukewarm water, yeast, and sugar, then let it sit for 10 minutes.
  2. Meanwhile, in a large bowl, mix the dry ingredients: flour, salt, and sugar. Add the yeast-water-sugar mixture and stir until just combined.
  3. Transfer the dough to a clean work surface and knead by hand until it barely sticks anymore.
  4. Shape the dough into 8 balls of 180g / 6oz each for large bagels or 12 balls of 120g / 4oz each for smaller bagels. Let them rest under a damp cloth for about 20 minutes.
  5. Poke a hole in the center of each dough ball with your finger and form a bagel by stretching the dough evenly.
  6. Place the bagels on parchment paper and let them rise for another 30 minutes.
  7. Preheat the oven to 175°C / 350°F. Bring water to a simmer in a large pot and dissolve the brown sugar in it. Simmer each bagel for 1 minute on each side.
  8. Remove the bagels from the water and dip them in your favorite toppings or leave them plain. I like using poppy seeds, sesame seeds, everything but the bagel seasoning, or jalapenos and cheddar cheese.
  9. Once all bagels are topped, place them on a parchment-lined baking sheet and bake in the oven for about 25-30 minutes depending on their size.
  10. Remove the baking sheet and enjoy the bagels 🙂
  • Passive Time: 1 hr 30 min
  • Cook Time: 30 min
Poppyseed Crepe with Lemon Pastry Cream & Blueberry Meringue
Poppyseed Crepe with Lemon Pastry Cream & Blueberry Meringue

Poppyseed Crepe with Lemon Pastry Cream & Blueberry Meringue

Poppyseed Crepe with Lemon Pastry Cream & Blueberry Meringue

August 11, 2024 by Kimberly

Delight in every bite with these poppyseed crepes! Filled with zesty lemon cream and topped with crunchy blueberry meringue, it’s like a sunny day wrapped up just for you.

2 HOURS
30 MINUTES

INTERMEDIATE

VEGETARIAN

INT.

329 PER PORTION

CREAMY
FRUITY

EVERYDAY

DESSERT

SPRING
SUMMER

INTRODUCTION

ABOUT THE RECIPE

Get ready to elevate your dessert game with these fabulous poppyseed crepes. Imagine the nutty crunch of poppyseeds paired with a tangy soft lemon pastry cream and a crunchy blueberry meringue on top. It’s a treat that’s perfect for a special Sunday dessert or impressing friends at brunch. Each bite is a delightful mix of flavors and textures that will make you feel like you’re dining at a chic café.

How to serve
For a picture-perfect breakfast, fold the crepes elegantly and fill them with a generous dollop of lemon pastry cream and a swirl of blueberry sauce. Sprinkle some crunched blueberry meringue on top. A drizzle of honey and a few fresh blueberries will add the final touch.

How to store
To keep your poppyseed crepes fresh, store any leftovers in an airtight container in the fridge. They’ll stay good for about a day. You can also prepare everything in advance and enjoy them when you’re ready.

Hi, I'm Kimberly!

Hi, I'm Kimberly.

A passionate food lover who believes in the magic of homemade deliciousness that spreads love and warmth. Join me on this culinary adventure as I prepare wonderful dishes and let’s spread some happiness together!

Kimberly the Zett Signature

If you want to get to know me better, click here!


Poppyseed Crepe with Lemon Pastry Cream & Blueberry Meringue
„Let’s make a piece of happiness“
Print
clock clock iconcutlery cutlery iconflag flag iconfolder folder iconinstagram instagram iconpinterest pinterest iconfacebook facebook iconprint print iconsquares squares iconheart heart iconheart solid heart solid icon
Poppyseed Crepe with Lemon Pastry Cream & Blueberry Meringue

Poppyseed Crepe with Lemon Pastry Cream & Blueberry Meringue


  • Author: Kimberly
  • Total Time: 2 hr + 30 min
  • Yield: 6 1x

Description

Recommended Equipment

  • two small pots
  • vegetable peeler
  • medium-sized bowl
  • whisk
  • two mixing bowls
  • electric mixer
  • mortar & pestle
  • spatula
  • small frying pan
  • spatula

Ingredients

Units Scale

BATTER

  • 90 milliliters full-fat milk
  • 60 milliliters water
  • 1 egg
  • 1 tbsp melted butter
  • 1 tbsp poppyseeds
  • zest of 1/2 lemon
  • 60 grams all-purpose flour
  • 1/8 tsp salz

LEMON PASTRY CREAM

  • 90 milliliters full-fat milk
  • 90 milliliters heavy cream
  • 2 egg yolks
  • 50 grams white sugar
  • 1 tsp vanilla extract
  • 1 tbsp flour
  • zest of 1 lemon

BLUEBERRY MERINGUE

  • 2 egg whites
  • 100 grams white sugar
  • pinch of salt
  • 1/8 tsp cream of tartar
  • 1.5 tbsp freeze-dried blueberries

BLUEBERRY SAUCE

  • 100 grams frozen blueberries
  • juice of 1/2 lemon
  • 1 tsp white sugar
  • pinch of salt

TOPPINGS

  • fresh blueberries
  • honey

Instructions

  1. Start by preparing the blueberry meringue. Preheat the oven to 100°C (212°F) with the fan on. Separate two eggs and place the egg whites into a bowl. Save the yolks for later, as you’ll use them to make the lemon pastry cream. Add a pinch of salt and the cream of tartar to the egg whites. Measure out the sugar and set it aside in a small bowl. Using an electric hand mixer, beat the egg whites on medium to high speed until they start to stiffen. Gradually add the sugar while continuing to beat the mixture until the egg whites are creamy, firm, glossy, and snow-white.
  2. Prepare the blueberry powder. Use a mortar and pestle to grind the freeze-dried blueberries into a fine powder. Gently fold the powder into the egg white mixture using a spatula until the mixture turns a light lavender color.
  3. Shape the meringues. Line a baking sheet with parchment paper. Using two tablespoons, spoon the egg white mixture onto the parchment, forming six individual mounds. Place the baking sheet in the oven for about 2 hours.
  4. Make the crepe batter. In a mixing bowl, combine flour, salt, milk, water, egg, melted butter, lemon zest, and poppy seeds. Stir until smooth, then refrigerate the batter for about 30 minutes.
  5. Prepare the lemon cream. In a small pot, combine milk and cream. Use a peeler to remove large strips of zest from a lemon, ensuring they are big enough to remove later. Heat the pot over medium heat, stirring occasionally to prevent a skin from forming. Heat until it begins to steam. Remove from the heat and set aside.
  6. Mix the lemon pastry cream. In a heatproof glass or metal bowl, combine the reserved egg yolks with flour, sugar, and vanilla extract. Stir until you have a smooth, creamy mixture.
  7. Combine and cook the cream. Gradually pour the warm milk and cream mixture into the egg yolk mixture, stirring constantly. Rinse the pot and fill it halfway with water. Bring the water to a simmer over medium heat, then place the bowl with the cream mixture over the pot, creating a double boiler. Heat the mixture to about 78°C (172°F) while stirring continuously, until it thickens to a creamy consistency. Once thickened, remove the bowl from the heat. Cover the cream with plastic wrap, pressing it directly onto the surface to prevent a skin from forming, and refrigerate.
  8. Prepare the blueberry sauce. In a small pot, combine the frozen blueberries with lemon juice, sugar, and a pinch of salt. Simmer over medium heat until the blueberries release their juices. Set aside.
  9. Cool the meringues. Once the meringues have finished baking, remove them from the oven and allow them to cool slightly.
  10. Cook the crepes. Heat a 20cm (8-inch) frying pan over medium heat. Add a small amount of butter, then wipe out the excess with a paper towel, leaving only a thin film. Pour about 4 tablespoons of batter into the pan, swirling quickly to spread it evenly. Cook for 1-2 minutes on one side, then flip and cook for another 30 seconds to 1 minute. Repeat with the remaining batter.
  11. Assemble the dish. Spread lemon pastry cream over each crepe, fold in half, then fold again to form a triangle. Drizzle the blueberry sauce over the crepes, crumble one meringue over each serving, and garnish with fresh blueberries and a drizzle of honey. Enjoy immediately!
  • Passive Time: 1 hr 30 min
  • Cook Time: 60 min

Double Chocolate Cookies with Strawberry Frosting

Double Chocolate Cookies with Strawberry Frosting

Double Chocolate Cookies with Strawberry Frosting

Double Chocolate Cookies with Strawberry Frosting

August 6, 2024 by Kimberly

Indulge in these rich, chocolaty cookies topped with a sweet, creamy & fruity frosting. Every bite is a heavenly mix of chocolate bliss and strawberry freshness, perfect for satisfying your sweet tooth!

2 HOURS
35 MINUTES

EASY

VEGETARIAN

INT.

434 PER COOKIE

COMFORT FOOD
SWEET

TEA TIME

DESSERT
COOKIES

SUMMER

INTRODUCTION

ABOUT THE RECIPE

Today, I’m thrilled to share a recipe that’s bound to become your new favorite: rich, double chocolate cookies topped with a luscious strawberry frosting. These cookies are the ultimate treat for any chocolate lover, with a fruity twist that makes them extra special. They’re perfect for any occasion, whether you’re hosting a party or just indulging in a cozy night at home. Let’s dive into the delicious details!

How to serve
Arrange them on a cute platter, and don’t be shy with the strawberry frosting – a generous dollop on each cookie makes them look and taste irresistible. These cookies are great for dessert tables, afternoon tea, or a sweet snack anytime. Pair them with a cold glass of milk or a hot cup of coffee for the ultimate treat.

How to store
If you have any leftovers (though that’s unlikely!), store the cookies in an airtight container. They’ll stay fresh at room temperature for up to three days. For longer storage, you can keep them in the fridge for up to a week. Just bring them to room temperature before enjoying them again to get that perfect, soft texture.

Hi, I'm Kimberly!

Hi, I'm Kimberly.

A passionate food lover who believes in the magic of homemade deliciousness that spreads love and warmth. Join me on this culinary adventure as I prepare wonderful dishes and let’s spread some happiness together!

Kimberly the Zett Signature

If you want to get to know me better, click here!


Double Chocolate Cookies with Strawberry Frosting
„Let’s make a piece of happiness“
Print
clock clock iconcutlery cutlery iconflag flag iconfolder folder iconinstagram instagram iconpinterest pinterest iconfacebook facebook iconprint print iconsquares squares iconheart heart iconheart solid heart solid icon
Double Chocolate Cookies with Strawberry Frosting

Double Chocolate Cookies with Strawberry Frosting


  • Author: Kimberly
  • Total Time: 2 hrs + 35 min
  • Yield: 8 cookies 1x

Description

Recommended Equipment

  • sharp knife
  • cutting board
  • small bowl
  • small pot (or microwave)
  • three medium bowls
  • whisk
  • spatula
  • mortar & pestle

Ingredients

Units Scale

COOKIE DOUGH

  • 120 grams all-purpose flour
  • 80 grams cocoa powder
  • 35 grams cornstarch
  • 1 tsp baking powder
  • 1/2 tsp salt
  • 140 grams butter
  • 150 grams brown sugar
  • 50 grams white sugar
  • 100 grams milk chocolate
  • 1 egg
  • 1 egg yolk

STRAWBERRY FROSTING

  • 20 grams freeze-dried strawberries
  • 75 grams butter
  • 75 grams cream cheese
  • 175 grams powdered sugar

TOPPINGS

  • milk chocolate
  • freeze-dried strawberries


Instructions

PREPARATIONS

  • Chop the chocolate into coarse pieces.
  • Melt the butter for the cookie dough in a pot or microwave.
  • Bring the butter for the frosting to room temperature.

INSTRUCTIONS

  1. In a medium bowl, mix together flour, cornstarch, cocoa powder, baking powder, and salt. Set aside.
  2. In another medium bowl, combine the brown and white sugar. Add the melted butter and whisk until creamy.
  3. Add one whole egg and one egg yolk, whisking until the mixture becomes thick.
  4. Next, add the dry ingredients from the other bowl and mix slightly, then add the chocolate and combine until no flour is visible. Be careful not to overmix.
  5. Form the dough into 8 equal-sized balls and place them in a container that fits in the fridge. Chill the cookie dough balls for at least 2 hours. If you want to prepare the dough ahead, you can refrigerate it for up to 48 hours.
  6. Preheat the oven to 220°C / 425°F (top/bottom heat). Once the oven is hot, place the cookies on a baking sheet lined with parchment paper and bake for 8 minutes.
  7. Remove the baking sheet from the oven and let the cookies cool for 15 minutes.
  8. Meanwhile, prepare the strawberry frosting: Beat room-temperature butter with an electric mixer in a medium bowl until pale yellow and fluffy. Add cream cheese and mix again. Then, add powdered sugar and mix for another 1-2 minutes until creamy.
  9. Grind the freeze-dried strawberries into a fine powder using a mortar and pestle or a powerful food processor. Add the strawberry powder to the frosting and mix until it turns a lovely pink color.
  10. Once the cookies have cooled and are no longer warm, spread 1 tablespoon of strawberry frosting evenly on each cookie.
  11. Optionally, sprinkle with some melted chocolate and crushed freeze-dried strawberries.
  • Prep Time: 5 min
  • Passive Time: 2 hrs
  • Cook Time: 30 min

Dark Chocolate Mousse

Dark Chocolate Mousse

Dark Chocolate Mousse

Dark Chocolate Mousse

August 3, 2024 by Kimberly

Indulge in a silky, rich dessert that melts in your mouth, delivering an intense cocoa experience. It’s like a cozy, chocolatey hug that’s perfect for any occasion!

20 MINUTES

INTERMEDIATE

VEGETARIAN

FRENCH

489 PER PORTION

COMFORT FOOD
CREAMY

EVERYDAY

DESSERT

ALL YEAR

INTRODUCTION

ABOUT THE RECIPE

Let’s dive into something irresistibly decadent: a rich, dark chocolate mousse that’s pure indulgence. With at least 70% cocoa, this mousse is a dessert dream come true, offering an intense chocolate experience that’s both luxurious and simple to make. Perfect for a cozy night in or a fancy dinner party, this recipe is all about enjoying the finer things in life without spending hours in the kitchen.

How to serve
Spoon the silky mousse into elegant dessert glasses or ramekins, and let it chill until perfectly set. For a touch of elegance, top it with a dollop of whipped cream, a sprinkle of cocoa powder, or some fresh berries. This dessert is best served chilled, making it a refreshing yet indulgent end to any meal. Whether it’s a casual family dinner or a sophisticated soirée, this mousse always steals the show.

How to store
Store any leftover mousse in the refrigerator, covered with plastic wrap or in airtight containers. It will stay fresh and delicious for up to two days.

Hi, I'm Kimberly!

Hi, I'm Kimberly.

A passionate food lover who believes in the magic of homemade deliciousness that spreads love and warmth. Join me on this culinary adventure as I prepare wonderful dishes and let’s spread some happiness together!

Kimberly the Zett Signature

If you want to get to know me better, click here!


Dark Chocolate Mousse
„Let’s make a piece of happiness“
Print
clock clock iconcutlery cutlery iconflag flag iconfolder folder iconinstagram instagram iconpinterest pinterest iconfacebook facebook iconprint print iconsquares squares iconheart heart iconheart solid heart solid icon
Dark Chocolate Mousse

Dark Chocolate Mousse


  • Author: Kimberly
  • Total Time: 20 min
  • Yield: 4 1x

Description

Recommended Equipment

  • sharp knife
  • cutting board
  • medium-sized bowl
  • small pot
  • electric mixer
  • small bowl
  • tall container
  • spatula

Ingredients

Units Scale

WHIPPED CREAM

  • 250 grams heavy cream
  • 75 grams powdered sugar

GANACHE

  • 100 grams heavy cream
  • 100 grams dark chocolate at least 70% cocoa

Instructions

  1. For the ganache, finely grate or chop the chocolate and place it in a medium-sized bowl. Set aside. Heat the cream in a small pot until it starts to steam slightly, but do not let it boil. Pour the cream over the grated chocolate and let it sit for 1-2 minutes. Then, start stirring slowly until the chocolate is fully combined with the cream and the mixture becomes noticeably thicker. Set aside and let it cool a bit.
  2. Meanwhile, prepare the whipped cream. Measure the powdered sugar into a small bowl. In a tall container, whip the cream until stiff peaks form, gradually adding the powdered sugar as you go. Set the whipped cream aside.
  3. Add the ganache to the whipped cream and gently fold everything together with a spatula until you have a medium-brown mousse.
  4. Spoon the mousse into dessert glasses and chill until ready to serve or enjoy immediately 🙂
  • Cook Time: 20 min