


Description
RECOMMENDED EQUIPMENT
- mixing bowl
- plastic wrap
- sharp knife
- cutting board
- two small bowls
- rolling pin
Ingredients
Units Scale
DOUGH
- 200 grams all-purpose flour
- 150 grams butter, cold &; cubed
- 1 tbsp brown sugar
- 1/4 tsp salt
- 60 milliliters cold water
- 1 tbsp apple cider vinegar
- 1 egg (for brushing the crust)
- 2 tbsp white sugar (for topping the crust)
- 50 grams butter, soft
- 50 grams brown sugar
- 70 grams grounded almonds
- 1 egg
- 1 tsp vanilla extract
- 200 grams fresh rhubarb
- 200 grams fresh strawberries
- 1 tsp powdered sugar
- 1 tbsp corn starch
- sliced almonds
- ice cream, whipped cream or vanilla sauce
Instructions
- For the dough, combine the flour, sugar, and salt in a large mixing bowl. Add the cold butter in small cubes and work it in quickly with your hands until the mixture resembles coarse crumbs with pea-sized bits of butter throughout. Add the cold water and apple cider vinegar, then bring everything together with your hands until a rough dough forms. Shape it into a rectangle on your work surface, cut it into four equal pieces, stack them on top of each other, gently press together, and wrap the stack in plastic wrap. Chill in the fridge for about 45 minutes.
- Meanwhile, wash the rhubarb thoroughly, peel if necessary, and cut it into finger-length pieces. Depending on your preference, slice them into thin strips or slightly thicker chunks. Toss the rhubarb in a bowl with cornstarch and powdered sugar, then set aside. Wash and hull the strawberries, then slice them as well.
- Next, prepare the almond cream. Cream the soft butter and sugar until light and fluffy, then add the egg, salt, vanilla extract, and ground almonds. Mix until smooth and set aside.
- Preheat the oven to 200 °C / 392 °F. Remove the chilled dough from the fridge, let it rest briefly on a floured surface, then roll or press it out into a large, rustic circle using short movements. Don’t worry if the dough tears slightly, this is typical for shortcrust pastry and can be patched with leftover scraps. Gently roll the dough around your rolling pin and transfer it to a baking sheet lined with parchment paper.
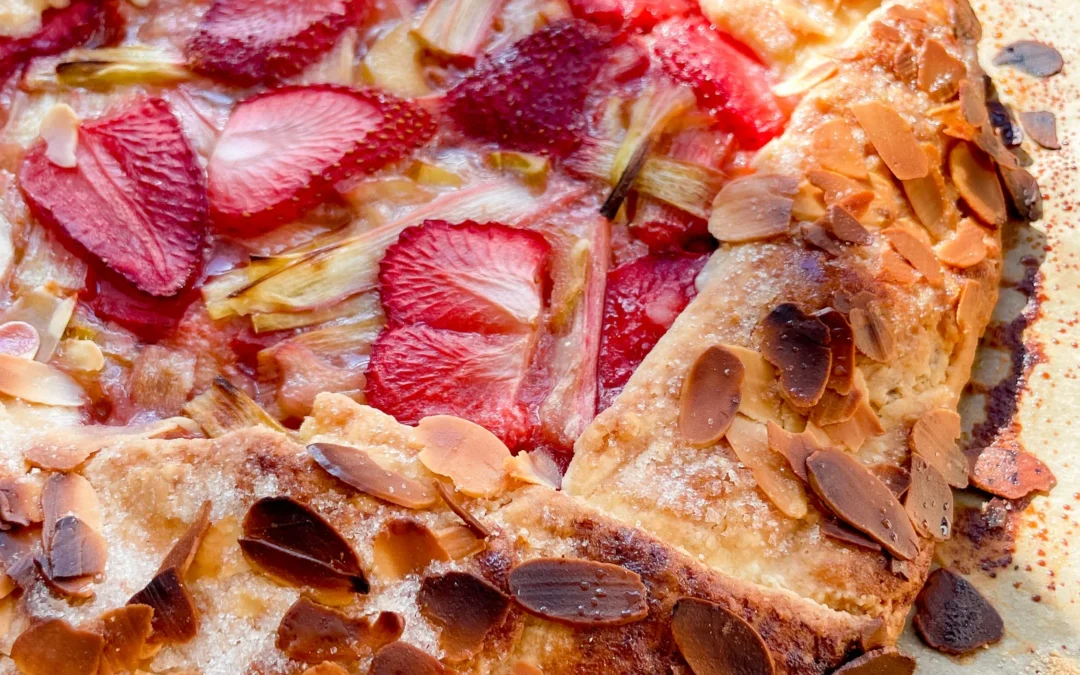
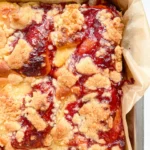
- Spread the almond cream evenly over the dough, leaving a border of about 8 cm (3 inches) all around. Distribute the prepared fruit over the almond cream, then fold the edges of the dough over the filling and press them down gently. Brush the crust with oil or a beaten egg, sprinkle with sliced almonds and a bit of sugar, and bake the galette for about 40 minutes, or until golden brown.
- Serve best while still slightly warm paired with a scoop of ice cream, whipped cream, or vanilla sauce. I used pistachio ice cream, which pairs beautifully with the almond cream and the tart rhubarb.
- Passive Time: 1 hr + 40 min
- Cook Time: 60 min


")
")
")