Classic Vanilla Ice Cream

Classic Vanilla Ice Cream

Classic Vanilla Ice Cream

Classic Vanilla Ice Cream

July 2, 2026 by Kimberly

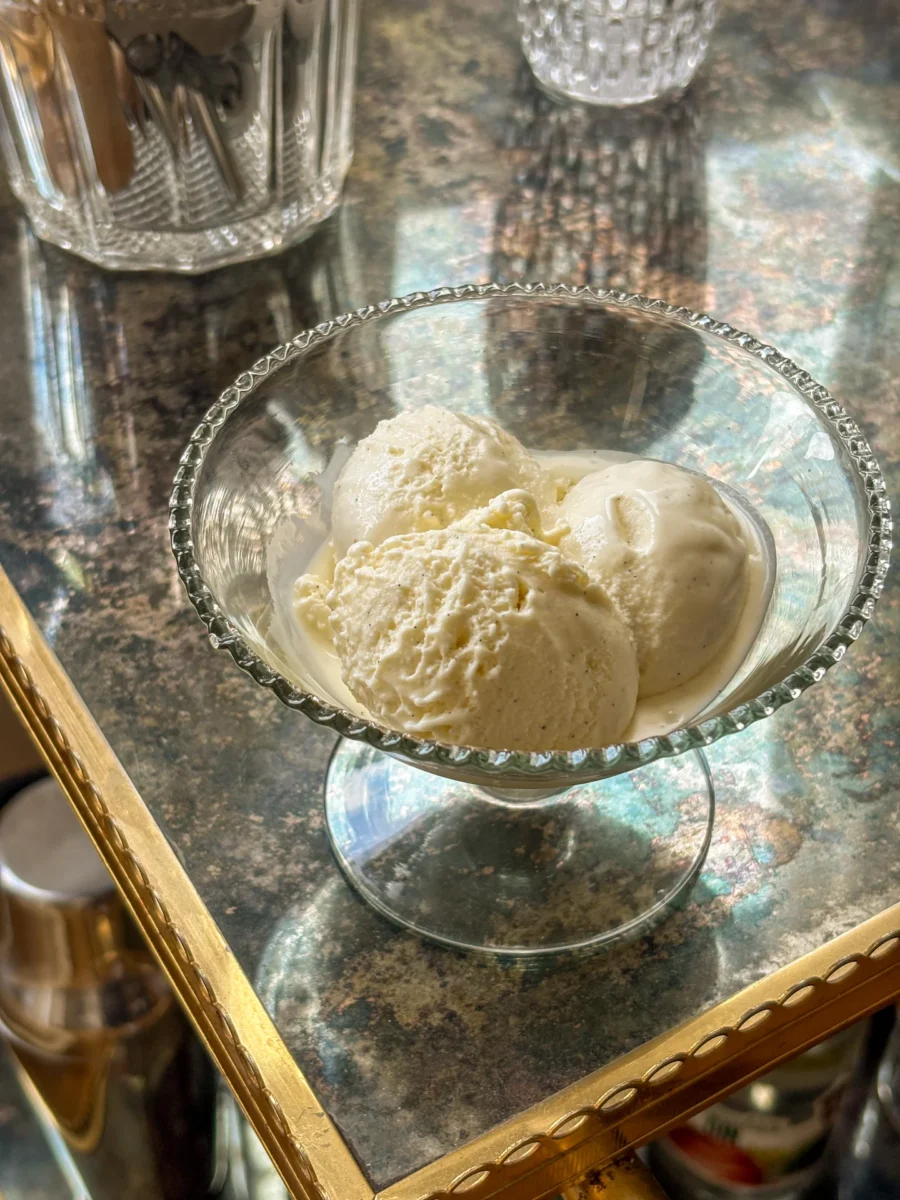
By the first spoonful at the latest, you understand why homemade vanilla ice cream just feels different. It is not simply cold and sweet, but melts slowly on your tongue, turning soft, creamy, and almost a little nostalgic. Suddenly, your mind is somewhere between a warm summer day, a bowl of ice cream on the balcony, and that little evening moment when you only meant to have one scoop and then somehow find yourself going back to the freezer.

This website uses affiliate links which may earn commission for purchases made at no additional cost to you.

TOTAL TIME

9 hrs

SERVES

6 portions

DIET

vegetarian

EVERY RECIPE DESERVES

A Little Love Letter

Some things sound so simple at first that you almost underestimate them. Vanilla ice cream, for example. At first glance, it is the classic, the safe choice, the flavor that is somehow always there. But when vanilla ice cream is made really well, it suddenly is not plain at all. It is creamy, rounded, soft, aromatic, and exactly the kind of ice cream that makes you think after the first spoonful: Oh, this is what it is supposed to taste like.

For me, homemade vanilla ice cream felt like the perfect way to start our little ice cream month. If you are going to begin with ice cream love, you might as well begin with the foundation. With the recipe that shows whether an ice cream is truly good. No hiding behind toppings, sauces, or wild flavor combinations. Just milk, cream, egg yolks, sugar, and vanilla. But done properly.

And that is exactly why two vanilla pods go into this base. Not because we want to be dramatic — although, maybe a little — but because real vanilla simply makes all the difference. Those tiny black specks do not just look beautiful; they give the ice cream that warm, deep flavor that store-bought vanilla ice cream so often misses.

To be honest, I had a little respect for making ice cream with egg yolks myself, but in the end, it is much more doable than you might think. You take a little time in the morning to prepare the base, let it chill peacefully in the fridge, and then pour it into the ice cream maker in the evening. And then that moment happens: the machine is running, the mixture becomes lighter, thicker, creamier — and at some point, the ice cream looks like the softest vanilla ice cream in the world. Straight from the machine, it is basically like soft serve, which for me personally is already a very strong argument for going in immediately with a spoon.

Hi, I'm Kimberly!

Hi, I'm Kimberly.

A hopeless romantic when it comes to food. Every recipe I share is a love letter to food itself. I’m so glad you’re here. Make yourself at home and stay a while.

Love,
Kimberly

Kimberly the Zett Signature

If you want to get to know me better,
click here!


Classic Vanilla Ice Cream

LET’S MAKE A PIECE OF HAPPINESS

Print
clock clock iconcutlery cutlery iconflag flag iconfolder folder iconinstagram instagram iconpinterest pinterest iconfacebook facebook iconprint print iconsquares squares iconheart heart iconheart solid heart solid icon
Classic Vanilla Ice Cream

Classic Vanilla Ice Cream


5 Stars 4 Stars 3 Stars 2 Stars 1 Star

No reviews

  • Author: Kimberly
  • Total Time: 8 hrs + 60 min
  • Yield: 6 portions 1x

Description

By the first spoonful at the latest, you understand why homemade vanilla ice cream just feels different. It is not simply cold and sweet, but melts slowly on your tongue, turning soft, creamy, and almost a little nostalgic. Suddenly, your mind is somewhere between a warm summer day, a bowl of ice cream on the balcony, and that little evening moment when you only meant to have one scoop and then somehow find yourself going back to the freezer.

GOOD TO HAVE ON HAND


Ingredients

Units Scale
  • 500 grams heavy whipping cream
  • 500 milliliters full-fat cow milk
  • 190 grams white sugar
  • 5 egg yolks
  • 2 vanilla beans
  • pinch of salt

Instructions

  1. In the morning: Add the milk, cream, scraped vanilla seeds, vanilla pods, salt, and half of the sugar to a saucepan and heat slowly. The mixture should become hot, but not boil. Remove the saucepan from the heat and set aside.
  2. In the meantime, whisk the egg yolks with the remaining sugar until well combined.
  3. Slowly pour the warm milk and cream mixture into the egg yolks while whisking constantly to prevent the eggs from curdling. Then pour everything back into the saucepan.
  4. Heat the mixture over low to medium heat, stirring constantly, until it reaches 84°C and slightly thickens.
  5. Pour the ice cream base through a fine sieve. Add the vanilla pods back in so they can continue to infuse the mixture while it chills.
  6. Place the mixture directly in the fridge.
  7. In the evening: Remove the vanilla pods from the well-chilled ice cream base.
  8. Pour the mixture directly into the ice cream maker and churn until creamy.
  9. Serve the finished ice cream immediately or transfer it to a suitable container and freeze for another 4 hours until firm.
  • Prep Time: 60 min
  • Passive Time: 8 hrs

CRAVING MORE?

Follow along here & don’t forget to subscribe to my substack!

Pink Deviled Eggs

Pink Deviled Eggs

Pink Deviled Eggs

Pink Deviled Eggs

April 17, 2025 by Kimberly

Tangy, creamy, a little crunchy. This snack turns heads and taste buds. Bold color, punchy flavor, and that one friend who says “Wait, what’s in these?” every single time.

This website uses affiliate links which may earn commission for purchases made at no additional cost to you.

TOTAL TIME

2 hrs + 20 min

SERVES

6 eggs / 12 halves

DIET

omnivore

EVERY RECIPE DESERVES

A Little Love Letter

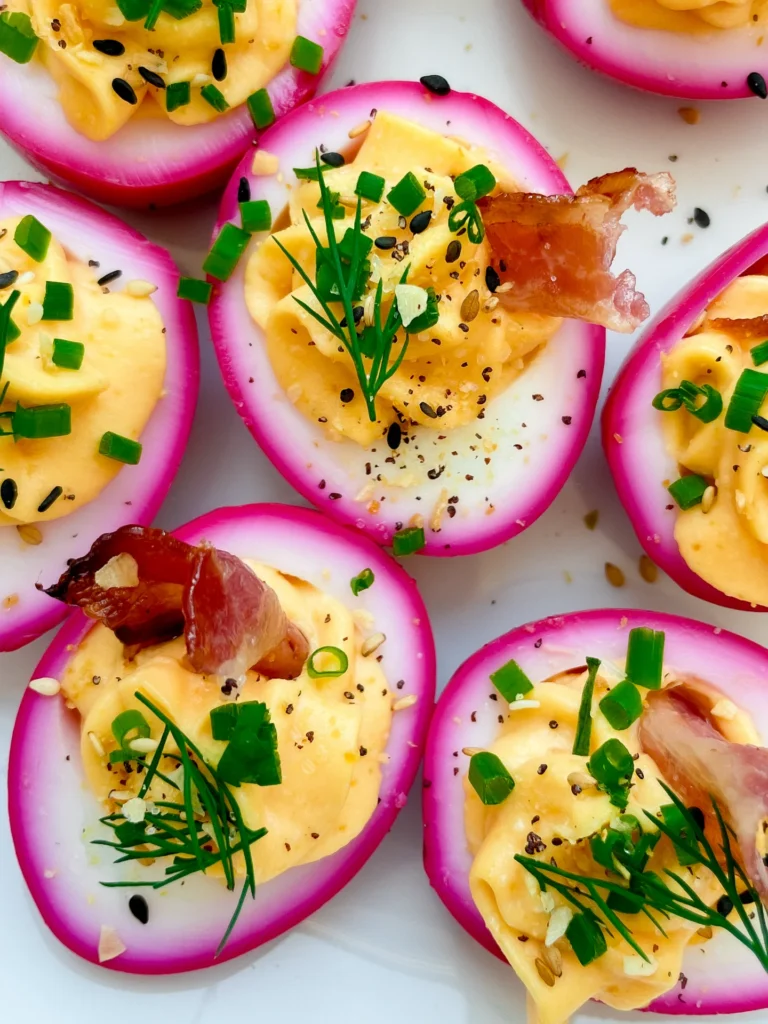
They might look fancy, but these little guys are secretly the easiest crowd-pleaser ever. You know those recipes that make people pause mid-bite and go, “Wait—what is this?” Yeah, it’s one of those. The vibrant color comes from a quick beet juice bath (don’t worry, they’re not beety, just beautiful), and the filling is creamy, tangy, and somehow nostalgic and elevated at the same time. Perfect for Easter brunches or as appetizers for dinner parties.

These pop right off the plate, so serve them cold on a pretty platter with a sprinkle of herbs and a little crispy bacon on top. A dusting of everything bagel seasoning makes them feel extra fun and just a little cheeky. Ideal for Easter brunch, a spring picnic, or as that one unexpected hit at your dinner party.

Store leftovers in an airtight container in the fridge for up to 2 days. The color stays vibrant, and the texture holds up surprisingly well.

Hi, I'm Kimberly!

Hi, I'm Kimberly.

A hopeless romantic when it comes to food. Every recipe I share is a love letter to food itself. I’m so glad you’re here. Make yourself at home and stay a while.

Love,
Kimberly

Kimberly the Zett Signature

If you want to get to know me better,
click here!


Pink Deviled Eggs
Pink Deviled Eggs
Pink Deviled Eggs
Pink Deviled Eggs

LET’S MAKE A PIECE OF HAPPINESS

Print
clock clock iconcutlery cutlery iconflag flag iconfolder folder iconinstagram instagram iconpinterest pinterest iconfacebook facebook iconprint print iconsquares squares iconheart heart iconheart solid heart solid icon
Pink Deviled Eggs

Pink Deviled Eggs


  • Author: Kimberly
  • Total Time: 2 hrs + 2 min
  • Yield: 12 1x

Description

RECOMMENDED EQUIPMENT

  • small pot
  • two small bowls
  • immersion blender (or regular one)
  • piping bag & star tip (optional)
  • sharp knife
  • cutting board

Ingredients

Units Scale
  • 6 eggs
  • 400 milliliters beetroot juice
FILLING
  • (the yolks from the 6 eggs)
  • 4 tbsp mayonnaise
  • 1 tsp dijon mustard
  • 2 tsp lemon juice
  • 1/2 tsp garlic powder
  • 1 tsp onion powder
  • salt & pepper to taste
TOPPINGS
  • 2 bacon slices
  • fresh dill
  • fresh chives
  • everything but the bagel seasoning

Instructions

  1. Boil the eggs for 8 minutes. Then transfer them to a bowl of cold water and let them sit for about 5 minutes. After that, pour out the water and add the beet juice to the same bowl. While the eggs are still warm, peel them completely and let them soak in the beet juice for about 2 hours.
  2. Meanwhile, cook the bacon until super crispy. Set it aside and let it cool down.
  3. After marinating, carefully slice the eggs in half lengthwise using a sharp knife. Be sure to wipe the knife after each egg to keep the next one looking clean and neat.
  4. Gently scoop out the yolks from the 6 eggs and place them in a separate bowl. Mix with mayo, lemon juice, mustard, garlic powder, onion powder, and salt and pepper to taste. Blend everything until smooth using an immersion blender. You can either fill the egg halves using a piping bag with a star tip (looks extra cute) or just use two spoons. It works either way. Pipe or spoon the filling into each egg half until all the mix is used up.
  5. For the topping, I used crispy bacon, fresh chives, fresh dill, and a generous sprinkle of Everything Bagel Seasoning. But honestly? You can top them with whatever makes your heart happy.
  • Passive Time: 2 hrs
  • Cook Time: 20 min

CRAVING MORE?

Follow along here & don’t forget to subscribe to my substack!

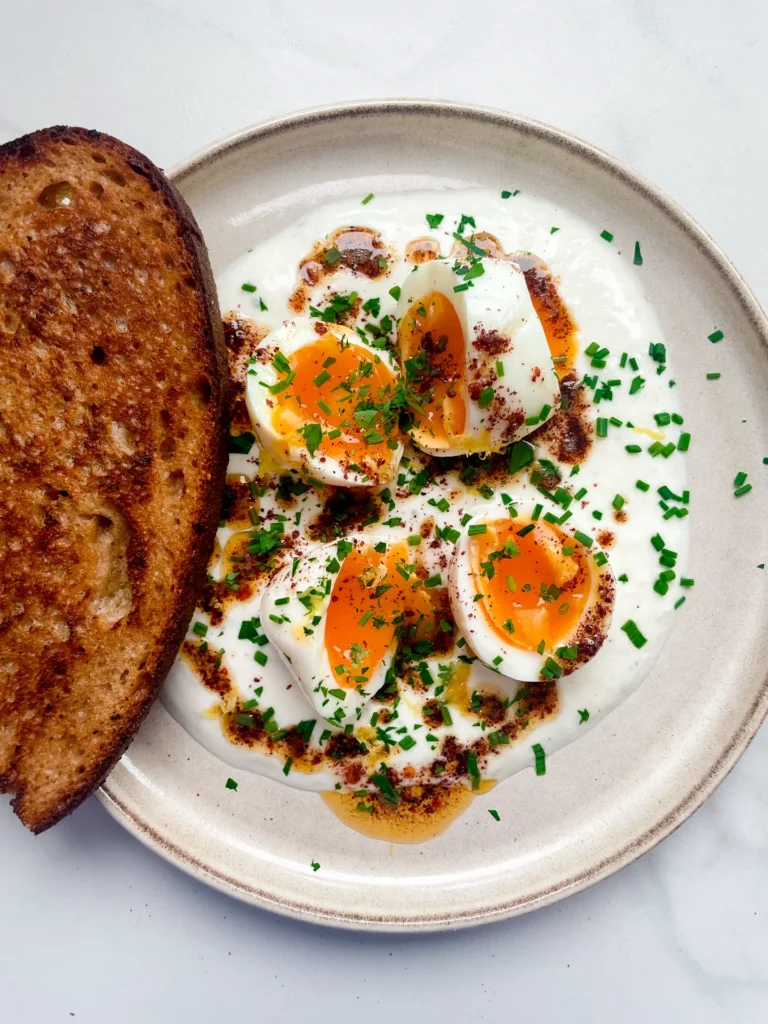
Turkish-Style Eggs on Lemon Yogurt with Chili Butter

Turkish-Style Eggs on Lemon Yogurt with Chili Butter

Turkish-Style Eggs on Lemon Yogurt with Chili Butter

Turkish-Style Eggs on Lemon Yogurt with Chili Butter

April 5, 2024 by Kimberly

The moment the warm butter hits the cold lemony yogurt, everything in life makes sense again. Silky eggs, spice, tang, drama: this is breakfast, brunch, lunch you name it and “I deserve this” energy.

This website uses affiliate links which may earn commission for purchases made at no additional cost to you.

TOTAL TIME

15 min

SERVES

2 portions

DIET

vegetarian

EVERY RECIPE DESERVES

A Little Love Letter

It’s creamy, lemony, just the right kind of spicy, and somehow manages to be elegant and comforting at the same time. Think of it as your new go-to brunch move when you want something easy that feels elevated. Or when you’re slightly dramatic about lunch (like me).

Best served still warm, the yogurt slightly chilled, the eggs just done, and the chili butter piping hot so it melts and swirls. Spoon it all together with fresh herbs (I love dill, parsley, or chives) and a hunk of crusty bread. It’s the kind of meal that makes people ask, “Wait, what is this?”

You can prep the yogurt mix a day ahead. Store it in the fridge in a sealed container. And you can easily boil your eggs a few days in advance, and just reheat the chili butter quickly in a pan when ready to serve.

Hi, I'm Kimberly!

Hi, I'm Kimberly.

A hopeless romantic when it comes to food. Every recipe I share is a love letter to food itself. I’m so glad you’re here. Make yourself at home and stay a while.

Love,
Kimberly

Kimberly the Zett Signature

If you want to get to know me better,
click here!


Turkish-Style Eggs on Lemon Yogurt with Chili Butter
LET’S MAKE A PIECE OF HAPPINESS
Print
clock clock iconcutlery cutlery iconflag flag iconfolder folder iconinstagram instagram iconpinterest pinterest iconfacebook facebook iconprint print iconsquares squares iconheart heart iconheart solid heart solid icon
Turkish-Style Eggs on Lemon Yogurt with Chili Butter

Turkish-Style Eggs on Lemon Yogurt with Chili Butter


  • Author: Kimberly
  • Total Time: 15 min
  • Yield: 2 1x

Description

RECOMMENDED EQUIPMENT

  • small pan
  • toaster
  • small pot
  • sharp knife
  • cutting board

Ingredients

Units Scale
LEMON YOGURT
  • 300 grams yogurt
  • 2 garlic cloves
  • zest of 1 lemon
  • salt & pepper to taste
CHILI BUTTER
  • 40 grams butter
  • 1 tsp chili flakes (or store-bought crispy chili oil)
OTHER INGREDIENTS
  • 2 slices sourdough bread
  • 4 eggs
  • parsley
  • sumach, optional

Instructions

  • Bring water to a boil and cook the eggs for about 7 minutes, just enough so the yolks stay soft and runny.
  • While the eggs are cooking, mix the yogurt with grated garlic, lemon zest, salt, and pepper. Spread the yogurt onto two plates and smooth it out.
  • In a small pan, melt the butter until it starts to bubble. Add the chili flakes and warm it briefly, then set aside. For a faster option just use some of that store-bought crispy chili oil
  • Toast the bread and finely chop the herbs.
  • Peel the eggs and place them on top of the yogurt. Slice them in half, drizzle everything with the chili butter, sprinkle over the herbs, and serve with the toasted bread.
  • Cook Time: 15 min
CRAVING MORE?
Follow along here & don’t forget to subscribe to my substack!

Egg Salad

Egg Salad

Egg Salad

Egg Salad

November 17, 2024 by Kimberly

Creamy, tangy, and absolutely crave-worthy! This rich egg salad hits all the comfort notes with just the right balance of freshness and zing. Perfect on toast or as a party favorite.

This website uses affiliate links which may earn commission for purchases made at no additional cost to you.

TOTAL TIME

15 min

SERVES

2 portions

DIET

vegetarian

EVERY RECIPE DESERVES

A Little Love Letter

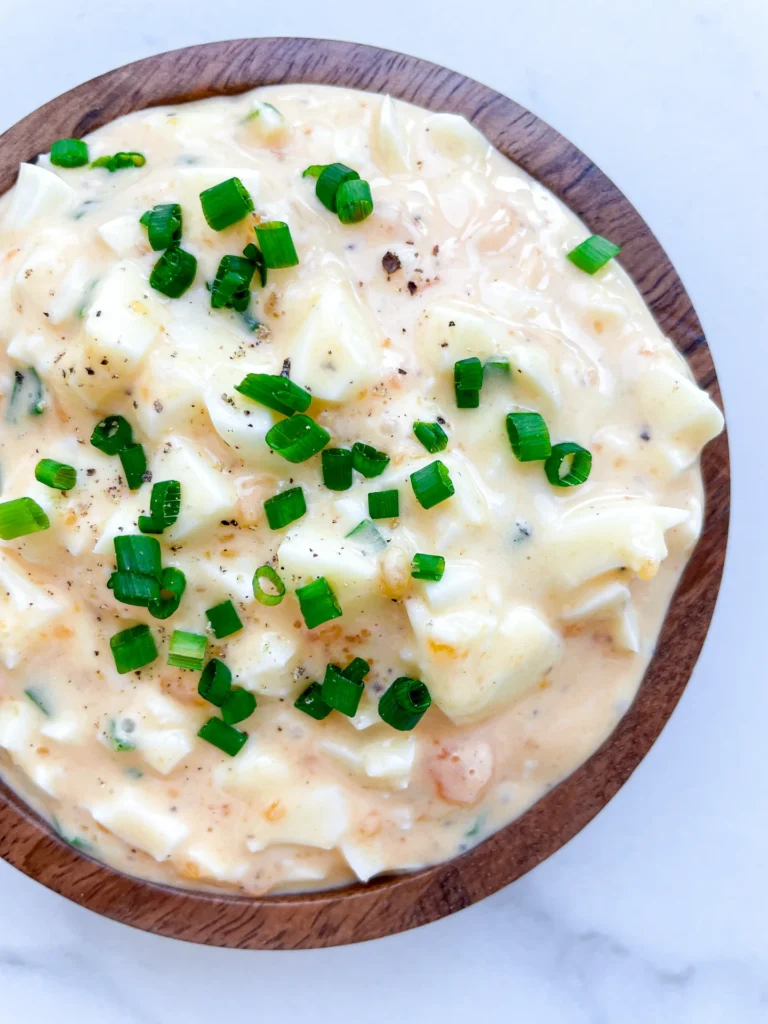
This creamy egg salad is a cozy twist on a classic, with layers of rich flavor from a touch of Dijon and a sprinkle of fresh chives. It’s a go-to recipe for those moments when you need a quick, delicious meal with a bit of a zing. With its velvety texture and perfectly balanced tang, this salad makes you wonder why you’d ever buy pre-made again. One bite, and you’ll see why it’s so easy to fall in love with! If you’re not so confident with boiling eggs yet, read on for a full guide and get the best tips for achieving The Perfect Boiled Egg.

This egg salad is endlessly versatile, perfect as a sandwich filling or spooned over crunchy toast for an easy lunch. It also makes a great dip for crackers or veggies when served at a gathering. Feeling fancy? Add it to a croissant or as a topping for a crisp salad. This dish is all about the comfort factor, so serve it however makes you feel the coziest – it’s that kind of meal.

To keep this egg salad fresh and tasty, store it in an airtight container in the fridge for up to 2 days. Just give it a stir before serving to freshen up the texture, and enjoy chilled. Perfect for make-ahead lunches or snack prep!

Hi, I'm Kimberly!

Hi, I'm Kimberly.

A hopeless romantic when it comes to food. Every recipe I share is a love letter to food itself. I’m so glad you’re here. Make yourself at home and stay a while.

Love,
Kimberly

Kimberly the Zett Signature

If you want to get to know me better,
click here!


Egg Salad
Egg Salad
Egg Salad
Egg Salad

LET’S MAKE A PIECE OF HAPPINESS

Print
clock clock iconcutlery cutlery iconflag flag iconfolder folder iconinstagram instagram iconpinterest pinterest iconfacebook facebook iconprint print iconsquares squares iconheart heart iconheart solid heart solid icon
Egg Salad

Egg Salad


  • Author: Kimberly
  • Total Time: 15 min
  • Yield: 2 1x

Description

Recommended Equipment

  • small saucepan
  • medium-sized bowl
  • sharp knife
  • cutting board

Ingredients

Units Scale
  • 4 eggs
  • 50 grams mayonnaise
  • 1-2 tsp white wine vinegar
  • 1/2-1 tsp Dijon mustard
  • chives
  • salt & pepper to taste

Instructions

  1. Boil the eggs for about 7-8 minutes until hard-boiled. If you’re not so confident with cooking eggs yet, read on for a full guide and get the best tips for achieving the perfect boiled egg.
  2. Meanwhile, finely chop the chives and place them in a bowl. Add the mayonnaise, white wine vinegar, Dijon mustard, salt, and pepper, and set aside for now.
  3. Once the eggs are cooked, place them in a bowl with cold water to cool for about 5 minutes. Peel the eggs, carefully score the egg whites, and gently separate them so the yolks remain whole. Separate all the eggs into whites and yolks, adding the yolks to the other ingredients in the bowl.
  4. Mash the yolks with the other ingredients until you get a smooth, light orange mixture.
  5. Cut the egg whites into small pieces and add them to the bowl with the other ingredients. Mix everything well and serve.
  • Passive Time: 5 min
  • Cook Time: 10 min

CRAVING MORE?

Follow along here & don’t forget to subscribe to my substack!

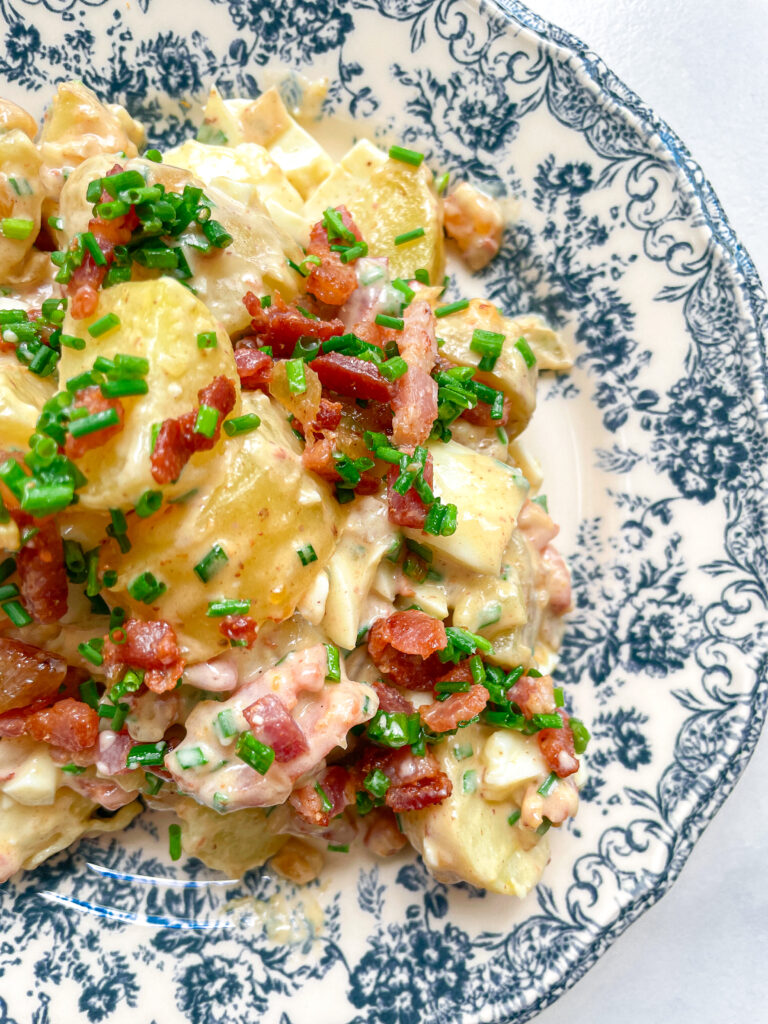
Potato Salad with Eggs Bacon Pickles & Caramalized Onions

Potato Salad with Eggs Bacon Pickles & Caramalized Onions

Potato Salad with Eggs Bacon Pickles & Caramalized Onions

Potato Salad with Eggs Bacon Pickles & Caramalized Onions

November 24, 2024 by Kimberly

Dive into a delicious story with our creamy potato salad! Imagine boiled eggs, smoky bacon, tangy pickles, and sweet caramelized onions coming together for a magical taste in every bite.

This website uses affiliate links which may earn commission for purchases made at no additional cost to you.

TOTAL TIME

1 hr + 20 min

SERVES

8 portions

DIET

omnivore

EVERY RECIPE DESERVES

A Little Love Letter

Step into a world of flavor with this Potato Salad featuring the perfect quartet of ingredients – eggs, bacon, pickles, and caramelized onions. This delightful twist on a classic dish promises a harmonious blend of creamy textures and mouthwatering tastes.

Present this Potato Salad on a festive platter, allowing the vibrant colors and aromas to captivate your guests. Garnish with fresh chives for a burst of color. Ideal as a side dish for barbecues or picnics, this salad also shines as a standalone star at family gatherings. Serve chilled and watch as each forkful becomes a symphony of flavors. 

To maintain the salad’s freshness, store any leftovers in an airtight container in the refrigerator for up to three days. Gently toss before serving to restore its creamy consistency. While this salad is best enjoyed fresh, you can prepare it a day ahead and refrigerate, adding the bacon just before serving to retain its crispiness.

Hi, I'm Kimberly!

Hi, I'm Kimberly.

A hopeless romantic when it comes to food. Every recipe I share is a love letter to food itself. I’m so glad you’re here. Make yourself at home and stay a while.

Love,
Kimberly

Kimberly the Zett Signature

If you want to get to know me better,
click here!


Potato Salad with Eggs Bacon Pickles & Caramalized Onions

LET’S MAKE A PIECE OF HAPPINESS

Print
clock clock iconcutlery cutlery iconflag flag iconfolder folder iconinstagram instagram iconpinterest pinterest iconfacebook facebook iconprint print iconsquares squares iconheart heart iconheart solid heart solid icon
Potato Salad with Eggs Bacon Pickles & Caramalized Onions

Potato Salad with Eggs Bacon Pickles & Caramalized Onions


  • Author: Kimberly
  • Total Time: 80 min
  • Yield: 8 portions 1x

Description

RECOMMENDED EQUIPMENT
  • sharp knife
  • chopping board
  • peeler
  • large pot
  • small pot
  • large pan
  • large salad bowl
  • medium bowl

Ingredients

Units Scale
SALAD COMPONENTS
  • 1 kilogramm potatoes
  • 250 grams bacon
  • 200 grams onion
  • 1 tbsp butter
  • 150 grams pickles
  • 8 eggs
DRESSING
  • 200 grams mayonnaise
  • 4-6 tbsp white wine vinegar
  • 3 tbsp chives
  • 4 tsp Dijon mustard
  • salt & pepper to taste

Instructions

PREPARATIONS

  • Peel the potatoes and cut into medium-sized pieces.
  • Peel the onions and cut into small pieces.
  • Cut the pickles into small pieces.
  • Cut the chives into small rolls.

INSTRUCTIONS

  1. Cook the potatoes in a large pot filled with salted water until done.
  2. Meanwhile, fill a small pot with water and bring to the boil. As soon as the water boils, add the eggs and cook for 8 minutes until firm. Drain the potatoes and eggs and set both aside to cool. It’s best to let the eggs cool in an ice bath to prevent them from cooking further.
  3. Caramelize the onions in 1 tbsp butter and a bit of salt in a pan for about 30 minutes. Remove the onions from the pan and fry the bacon until crispy. There may be a residue – the best way to deglaze this is with a dash of white wine or stock to release the wonderful aromas from the bottom of the pan.
  4. Now peel the eggs and separate the yolks from the whites. Cut the egg whites into small pieces and set aside. Place the egg yolks in a medium-sized bowl. Add the fried bacon, caramelized onions, chives, pickles, dijon mustard, mayonnaise and white wine vinegar to the bowl. Stir everything together and season to taste with salt and pepper. Fold in the chopped egg white pieces. The mixture should taste very over-seasoned, as the potatoes will take away a lot of the flavor when they are mixed in later.
  5. When the potatoes are cooled cut them in coarse pieces, add them to the salad cream and mix everything well. Season to taste and serve.
  • Prep Time: 20 min
  • Passive Time: 40 min
  • Cook Time: 20 min

CRAVING MORE?

Follow along here & don’t forget to subscribe to my substack!

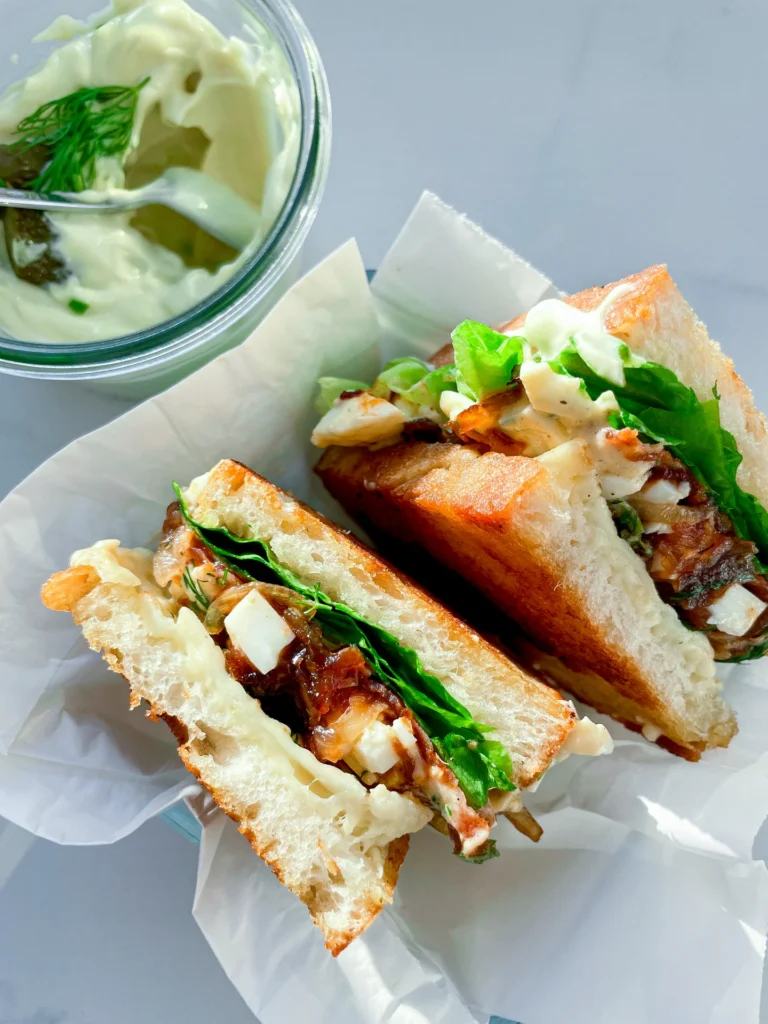
Crispy Sandwich with Egg Salad Spicy Bacon & Caramalized Onions

Crispy Sandwich with Egg Salad Spicy Bacon & Caramalized Onions

Crispy Sandwich with Egg Salad Spicy Bacon & Caramalized Onions

Crispy Sandwich with Egg Salad Spicy Bacon & Caramalized Onions

October 8, 2024 by Kimberly

Get ready for a crunchy, savory explosion in every bite! This sandwich layers rich flavors like creamy egg salad, crispy bacon, and caramelized onions with a tangy twist, leaving you totally satisfied.

This website uses affiliate links which may earn commission for purchases made at no additional cost to you.

TOTAL TIME

50 min

SERVES

2 sandwiches

DIET

omnivore

EVERY RECIPE DESERVES

A Little Love Letter

Looking for a sandwich that hits all the right notes? This crispy masterpiece combines rich egg salad, spicy bacon, and sweet caramelized onions with a punchy dill gremolata and creamy, tangy picklenaise (pickle-infused mayo). The balance of crunchy, creamy, spicy, and tangy in every bite will make this sandwich your new go-to for lunch or a snack. It’s a burst of flavor that’ll have you craving it again and again.

This sandwich is best served fresh and warm, right after toasting the bread to crispy perfection. Pair it with a side of fresh salad to make it a complete meal. The dill gremolata and picklenaise add an unexpected tangy touch, making it a great option for casual get-togethers or a solo lunch treat.

If you need to store this sandwich, keep the components separate – store the egg salad, bacon, and caramelized onions in airtight containers in the fridge for up to 2 days. Toast your bread fresh when ready to assemble for the best texture and taste!

Hi, I'm Kimberly!

Hi, I'm Kimberly.

A hopeless romantic when it comes to food. Every recipe I share is a love letter to food itself. I’m so glad you’re here. Make yourself at home and stay a while.

Love,
Kimberly

Kimberly the Zett Signature

If you want to get to know me better,
click here!


Crispy Sandwich with Egg Salad Spicy Bacon & Caramalized Onions

LET’S MAKE A PIECE OF HAPPINESS

Print
clock clock iconcutlery cutlery iconflag flag iconfolder folder iconinstagram instagram iconpinterest pinterest iconfacebook facebook iconprint print iconsquares squares iconheart heart iconheart solid heart solid icon
Crispy Sandwich with Egg Salad Spicy Bacon & Caramalized Onions

Crispy Sandwich with Egg Salad Spicy Bacon & Caramalized Onions


  • Author: Kimberly
  • Total Time: 50 minutes
  • Yield: 2 1x

Description

Recommended Equipment

  • small pot
  • medium bowl
  • deep dish
  • sharp knife
  • cutting board
  • small bowl
  • large pan
  • parchment paper

Ingredients

Units Scale
EGG SALAD
  • 4 eggs
  • 1 tsp Dijon mustard
  • 1 tsp white wine vinegar
  • 1 tbsp picklenaise (or regular mayonnaise)
  • chives
  • salt & pepper to taste
GREMOLATA
  • 10 grams fresh dill
  • 5 grams fresh chives
  • 3 tbsp pickle oil (or any other oil you like)
  • 2 garlic cloves
  • juice of 1/2 lemon
  • salt & pepper to taste
CARAMALIZED ONIONS
  • 6 small white onions
  • 2 tbsp balsamic vinegar
  • 1 tsp clarified butter
  • salt
CRISPY BACON
  • 8 slices bacon
  • 4 tsp brown sugar
  • 4 tsp cayennepepper
OTHER INGREDIENTS
  • 60 grams picklenaise (or regular mayonnaise)
  • 8 slices white bread of choice
  • 4 romaine lettuce leaves
  • 60 grams gouda cheese

Instructions

PREPARATIONS

  • Here’s the recipe for the picklenaise. You’ll need about 6-8 tablespoons.
  • Here’s the recipe for the pickle oil. You’ll need about 3 tablespoons.

INSTRUCTIONS

  1. For the egg salad, fill a pot with water and bring it to a boil. Carefully add the eggs and set a timer for 8 minutes. While they cook, prepare a bowl of ice water. After 8 minutes, transfer the eggs to the ice water to stop them from cooking further. Let them cool completely. Peel the eggs, separate the yolks from the whites, and place the yolks in a deep dish. Chop the egg whites into small pieces and set aside. To the yolks, add Dijon mustard, pickle-mayo, salt, pepper, white wine vinegar, and chopped chives. Mix everything together, mashing the yolks with a fork. Finally, fold in the chopped egg whites and mix again. Place the salad in the fridge until you’re ready to use it.
  2. For the gremolata, finely chop the dill and slice the chives into small rings. Mix both in a small bowl with lemon juice and pickle oil. Peel the garlic cloves and grate them into the bowl. Stir everything well and season with salt and pepper. Set aside.
  3. For the caramelized onions, peel the onions and slice them into thin half-rings. Heat a large pan over medium heat, melt 1 teaspoon of butter, then add the onions and a pinch of salt. Stir well and cook for 15-20 minutes, stirring occasionally, until the onions are golden and creamy. Add balsamic vinegar and stir again. Set the onions aside.
  4. Meanwhile, prepare the crispy bacon. Lay the slices on parchment paper and sprinkle them evenly with brown sugar and cayenne pepper. Bake at 200°C / 392°F for about 15 minutes or until the sugar has melted and the bacon is a deep pink.
  5. Butter the outside of the white bread slices and cut the Gouda into thin slices. Wash and dry the lettuce leaves, and get the picklenaise ready.
  6. Heat a pan over low to medium heat and place the buttered bread slices, butter-side down, in the pan. Add Gouda to half of the slices. Cover the pan so the cheese can melt. Remove the bread once the cheese is soft and the bottoms are golden and crispy.
  7. Spread mayo on the plain bread slices and gremolata on the cheesy ones.
  8. Now layer the sandwich in this order: lettuce on the mayo side, followed by egg salad, bacon, and caramelized onions. Top it off with the cheese-gremolata slice. Cut the sandwich in half and enjoy!
  • Cook Time: 50 min

CRAVING MORE?

Follow along here & don’t forget to subscribe to my substack!