


Description
Recommended Equipment
- sharp knife
- cutting board
- small bowl
- small pot (or microwave)
- three medium bowls
- whisk
- spatula
- mortar & pestle
Ingredients
Units Scale
COOKIE DOUGH
- 120 grams all-purpose flour
- 80 grams cocoa powder
- 35 grams cornstarch
- 1 tsp baking powder
- 1/2 tsp salt
- 140 grams butter
- 150 grams brown sugar
- 50 grams white sugar
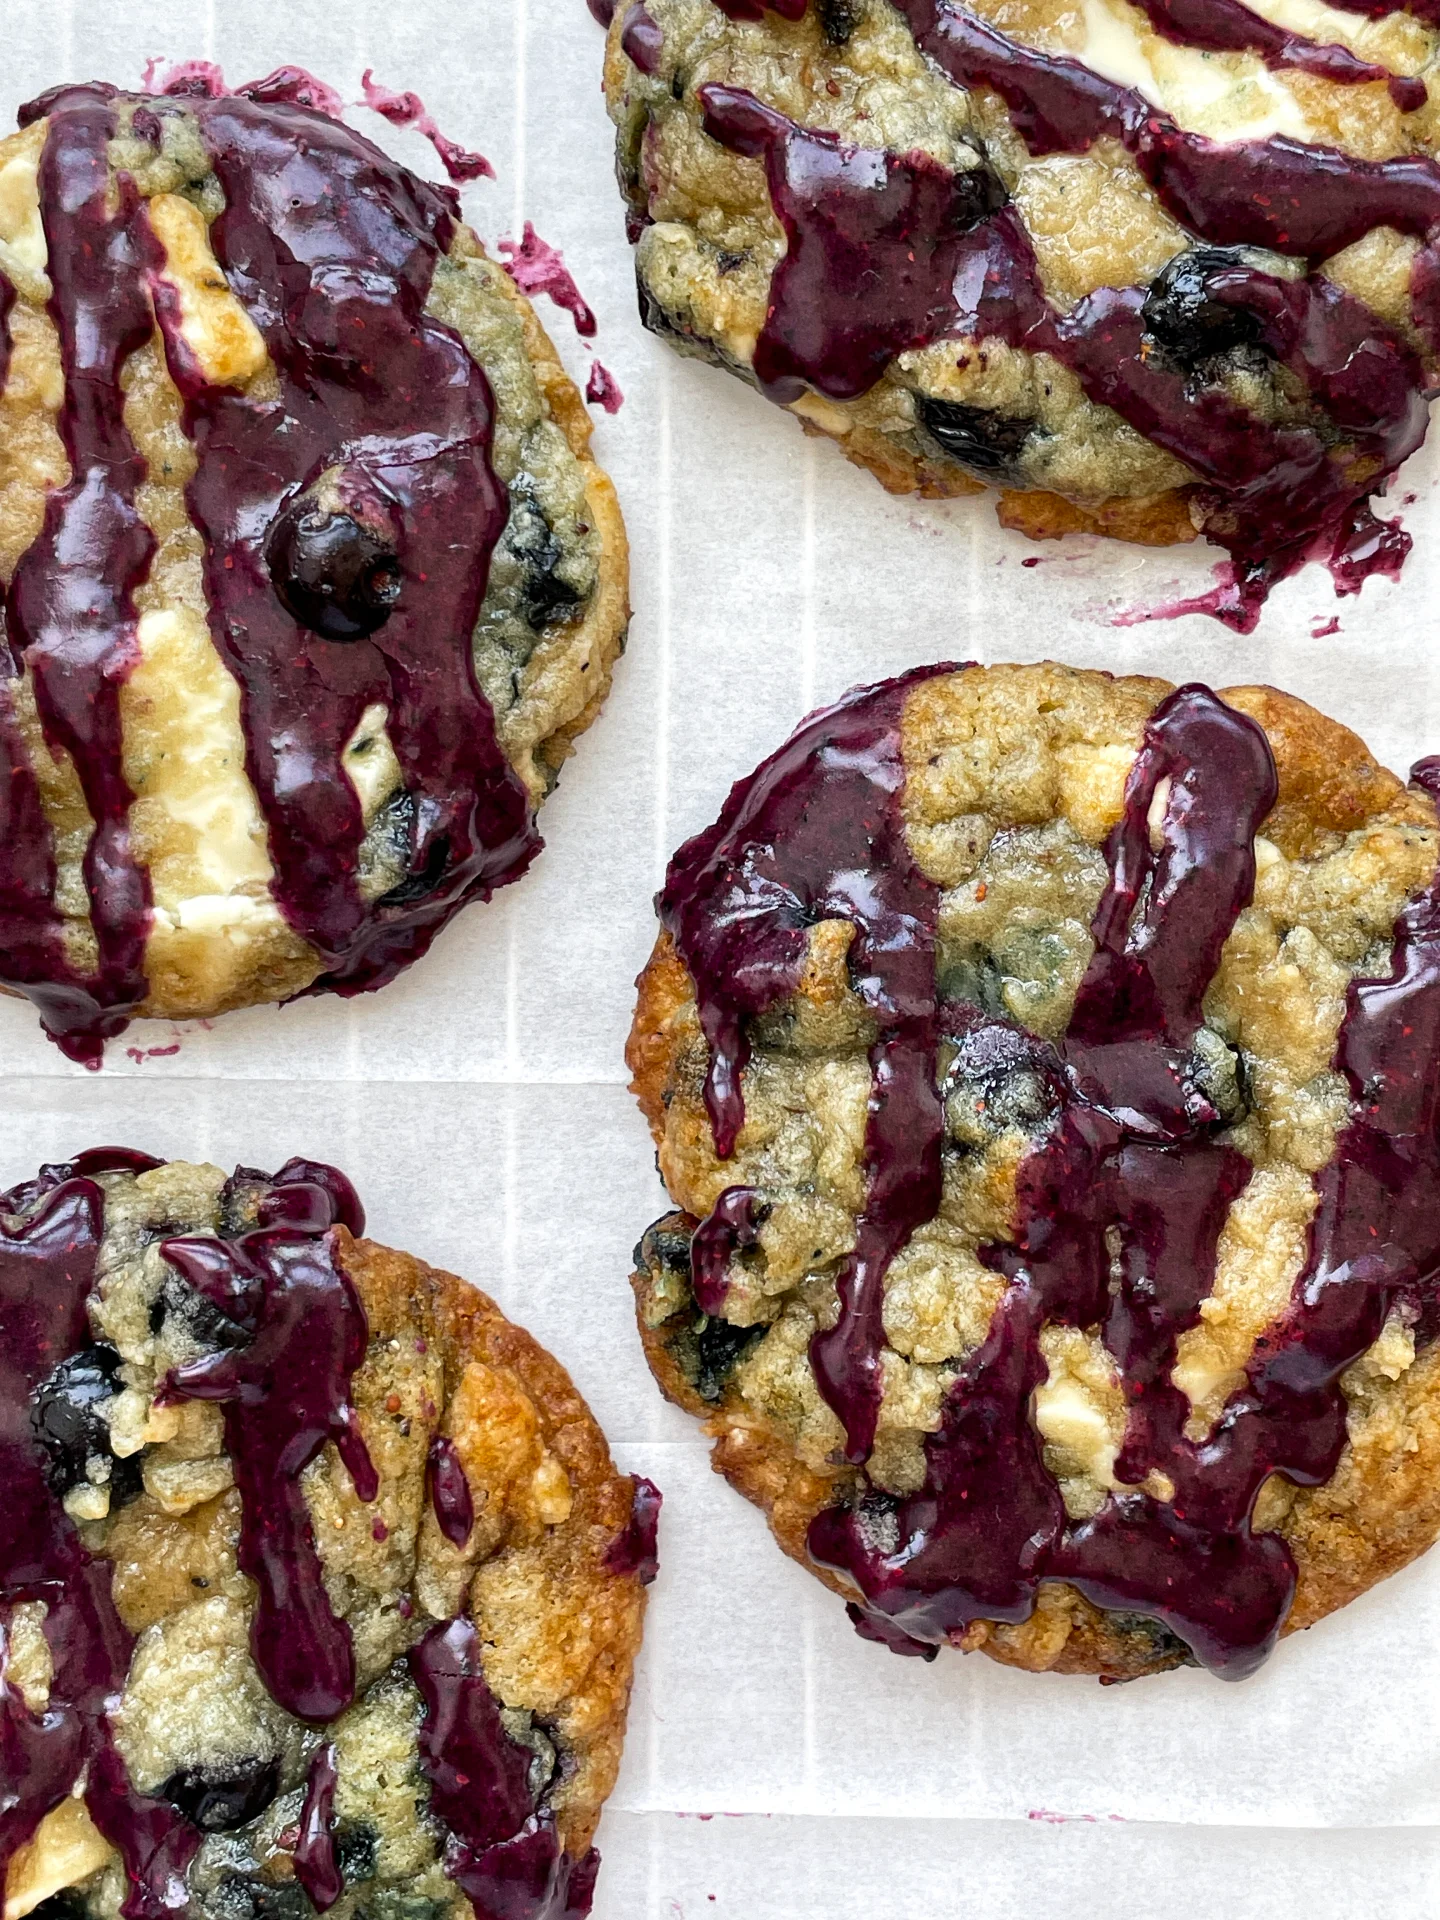
- 100 grams milk chocolate
- 1 egg
- 1 egg yolk
- 20 grams freeze-dried strawberries
- 75 grams butter
- 75 grams cream cheese
- 175 grams powdered sugar
- milk chocolate
- freeze-dried strawberries
Instructions
PREPARATIONS
- Chop the chocolate into coarse pieces.
- Melt the butter for the cookie dough in a pot or microwave.
- Bring the butter for the frosting to room temperature.
INSTRUCTIONS
- In a medium bowl, mix together flour, cornstarch, cocoa powder, baking powder, and salt. Set aside.
- In another medium bowl, combine the brown and white sugar. Add the melted butter and whisk until creamy.
- Add one whole egg and one egg yolk, whisking until the mixture becomes thick.
- Next, add the dry ingredients from the other bowl and mix slightly, then add the chocolate and combine until no flour is visible. Be careful not to overmix.
- Form the dough into 8 equal-sized balls and place them in a container that fits in the fridge. Chill the cookie dough balls for at least 2 hours. If you want to prepare the dough ahead, you can refrigerate it for up to 48 hours.
- Preheat the oven to 220°C / 425°F (top/bottom heat). Once the oven is hot, place the cookies on a baking sheet lined with parchment paper and bake for 8 minutes.
- Remove the baking sheet from the oven and let the cookies cool for 15 minutes.
- Meanwhile, prepare the strawberry frosting: Beat room-temperature butter with an electric mixer in a medium bowl until pale yellow and fluffy. Add cream cheese and mix again. Then, add powdered sugar and mix for another 1-2 minutes until creamy.
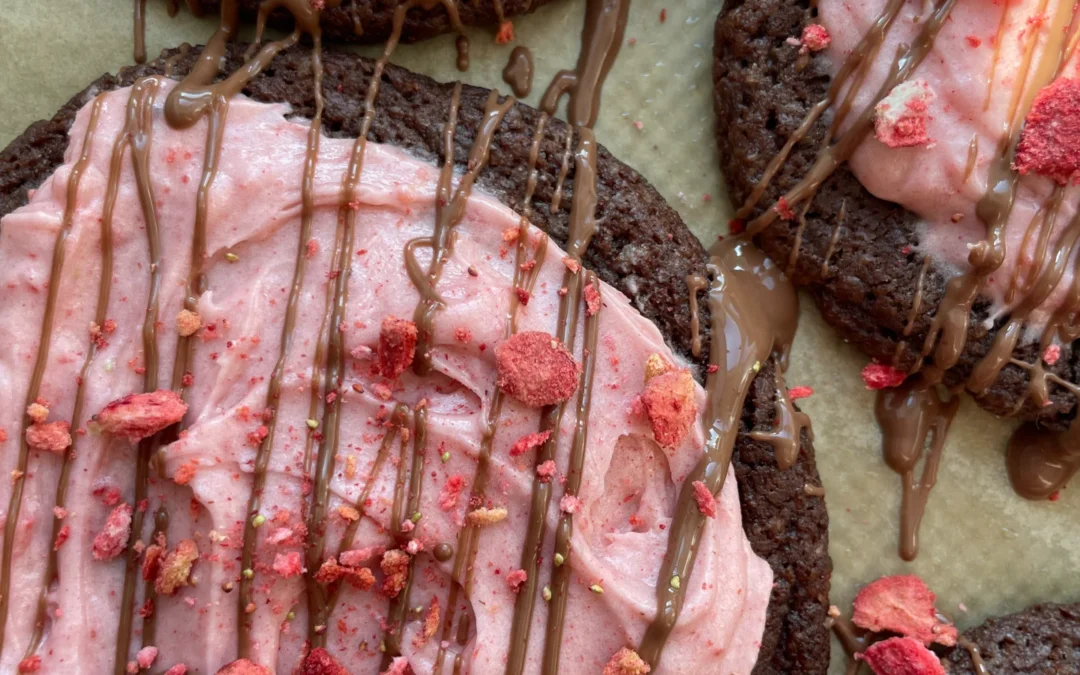
- Grind the freeze-dried strawberries into a fine powder using a mortar and pestle or a powerful food processor. Add the strawberry powder to the frosting and mix until it turns a lovely pink color.
- Once the cookies have cooled and are no longer warm, spread 1 tablespoon of strawberry frosting evenly on each cookie.
- Optionally, sprinkle with some melted chocolate and crushed freeze-dried strawberries.
- Prep Time: 5 min
- Passive Time: 2 hrs
- Cook Time: 30 min