


Description
RECOMMENDED EQUIPMENT
- oven
- aluminum foil
- large pan
- sharp knife
- cutting board
- small bowl
Ingredients
Units Scale
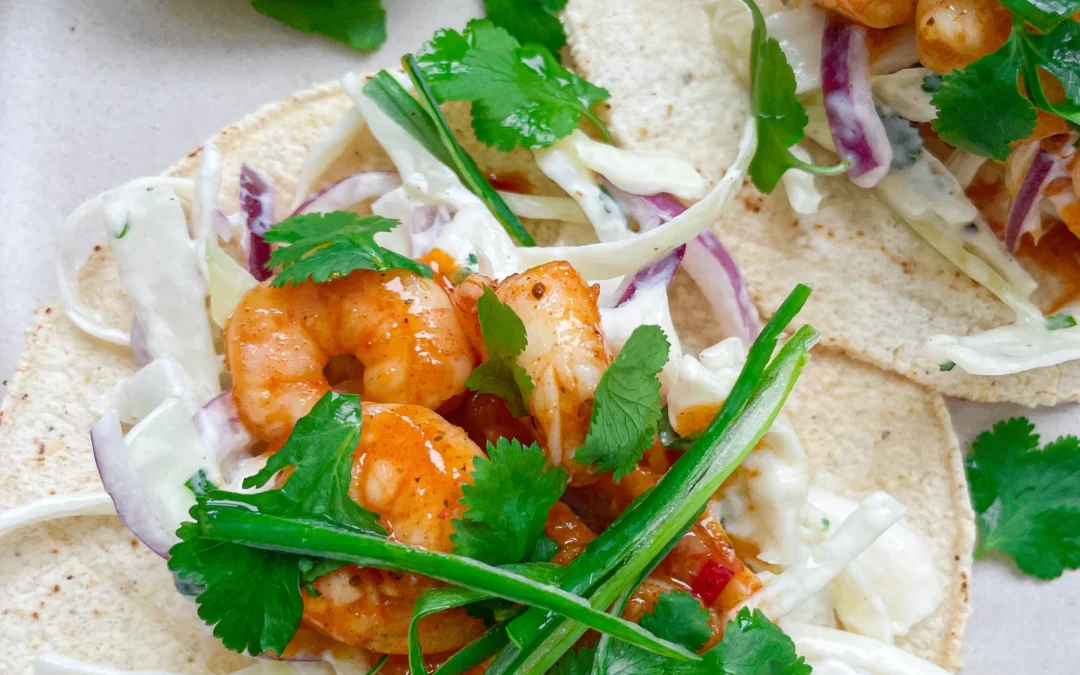
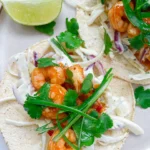
SHRIMPS
- 300 grams shrimps
- 2 tbsp Cajun seasoning
- 2 tbsp oil for frying
- 2 tbsp honey
- 1 tsp Dijon mustard
- 2 tbsp avocado oil
- 2 garlic cloves
- 1 fresh chili
- 1/4 tsp cayenne pepper
- 1 tbsp butter
- 200 grams white cabbage
- 5 grams fresh cilantro
- 1 red onion
- 100 grams yogurt
- juice of 1 lime
- 1 passionfruit
- salt & pepper to taste
- 4 corn tortillas
- fresh cilantro, for topping
- scallions, for topping
Instructions
- Preheat the oven to 200°C / 392°F. Stack the tortillas, wrap them tightly in aluminum foil, and place them in the oven to keep them warm and soft.
- Prepare the Cajun seasoning. Toss the shrimp with the seasoning and set aside.
- Make the Passionfruit Lime Slaw. Thinly slice the cabbage and red onion. Pick the cilantro leaves off the stems and add everything to a large bowl. Mix in yogurt, lime juice, salt, and pepper, and toss well. Cut open a passionfruit, scoop out the pulp and juice, and mix it into the slaw.
- Prep the toppings. Thinly slice the green part of the scallions and pick some extra cilantro leaves. Set aside for later.
- Make the glaze. In a small bowl, mix honey, Dijon mustard, avocado oil, pressed garlic, finely chopped fresh chili, cayenne pepper, and melted butter. Set aside.
- Cook the shrimp. Heat a large pan over high heat. Once hot, add a little oil and sear the shrimp quickly. Pour in the prepared glaze and let it simmer over medium heat until it thickens into a creamy consistency.
- Assemble the tacos. Remove the tortillas from the oven and place two on each plate. Layer with the slaw, then spoon the glazed shrimp (with sauce) on top. Finish with sliced scallions and fresh cilantro. Serve immediately.
- Cook Time: 25 min