White Chocolate Shortbread Passionfruit Bars

White Chocolate Shortbread Passionfruit Bars

White Chocolate Shortbread Passionfruit Bars

White Chocolate Shortbread Passionfruit Bars

March 19, 2025 by Kimberly

Golden, buttery shortbread, silky passionfruit filling, and a crisp white chocolate shell with puffed quinoa. It’s sweet, tangy, crunchy, basically what I imagine luxury tastes like. A little indulgent, absolutely worth it.

70 MINUTES

ADVANCED

OMNIVORE


INT.

8-16 PORTIONS

SWEET

EVERYDAY

DESSERT & SWEETS

SPRING
SUMMER

INTRODUCTION

ABOUT THE RECIPE

If you love desserts that are crispy, creamy, and have just the right amount of freshness, these bars are about to be your new obsession. A golden, melt-in-your-mouth base holds a smooth, tangy passionfruit filling, all wrapped in a crisp layer of white chocolate with puffed quinoa for that extra crunch. It’s sweet, tart, creamy, and light all at once. Basically, if tropical sunshine had a dessert form, this would be it. Perfect for when you want something a little extra but totally effortless.

How to serve
These bars are best served straight from the fridge when the chocolate is still crisp and the filling is perfectly creamy. They’re great as a mid-afternoon pick-me-up, a stunning party dessert, or honestly, just something to have stashed away when your sweet tooth hits. Pro tip: Pair with an iced coffee.

How to store
Store these in an airtight container in the fridge for up to 5 days. The chocolate coating keeps everything fresh, and the flavors only get better with time.

Hi, I'm Kimberly!

Hi, I'm Kimberly.

A passionate food lover who believes in the magic of homemade deliciousness that spreads love and warmth. Join me on this culinary adventure as I prepare wonderful dishes and let’s spread some happiness together!

Kimberly the Zett Signature

If you want to get to know me better, click here!


White Chocolate Shortbread Passionfruit Bars
„Let’s make a piece of happiness“
Print
clock clock iconcutlery cutlery iconflag flag iconfolder folder iconinstagram instagram iconpinterest pinterest iconfacebook facebook iconprint print iconsquares squares iconheart heart iconheart solid heart solid icon
White Chocolate Shortbread Passionfruit Bars

White Chocolate Shortbread Passionfruit Bars


5 Stars 4 Stars 3 Stars 2 Stars 1 Star

No reviews

  • Author: Kimberly
  • Total Time: 70 min
  • Yield: 8-16 1x

Description

This post may contain affiliate links, please see privacy policy for details.

RECOMMENDED EQUIPMENT

  • silicone molds in various sizes (I used these and trimmed the shortbread bars slightly)
  • small bowl
  • whisk
  • double boiler
  • sharp knife
  • cutting board
  • medium bowl


Ingredients

Units Scale

SHORTBREAD

  • 120 grams all-purpose flour
  • 115 grams butter, soft
  • 50 grams white sugar
  • 1 tsp vanilla extract
  • pinch of salt

PASSIONFRUIT FILLING

  • 150 grams passionfruit purée
  • 6 grams instant gelatine

CHOCOLATE SHELL

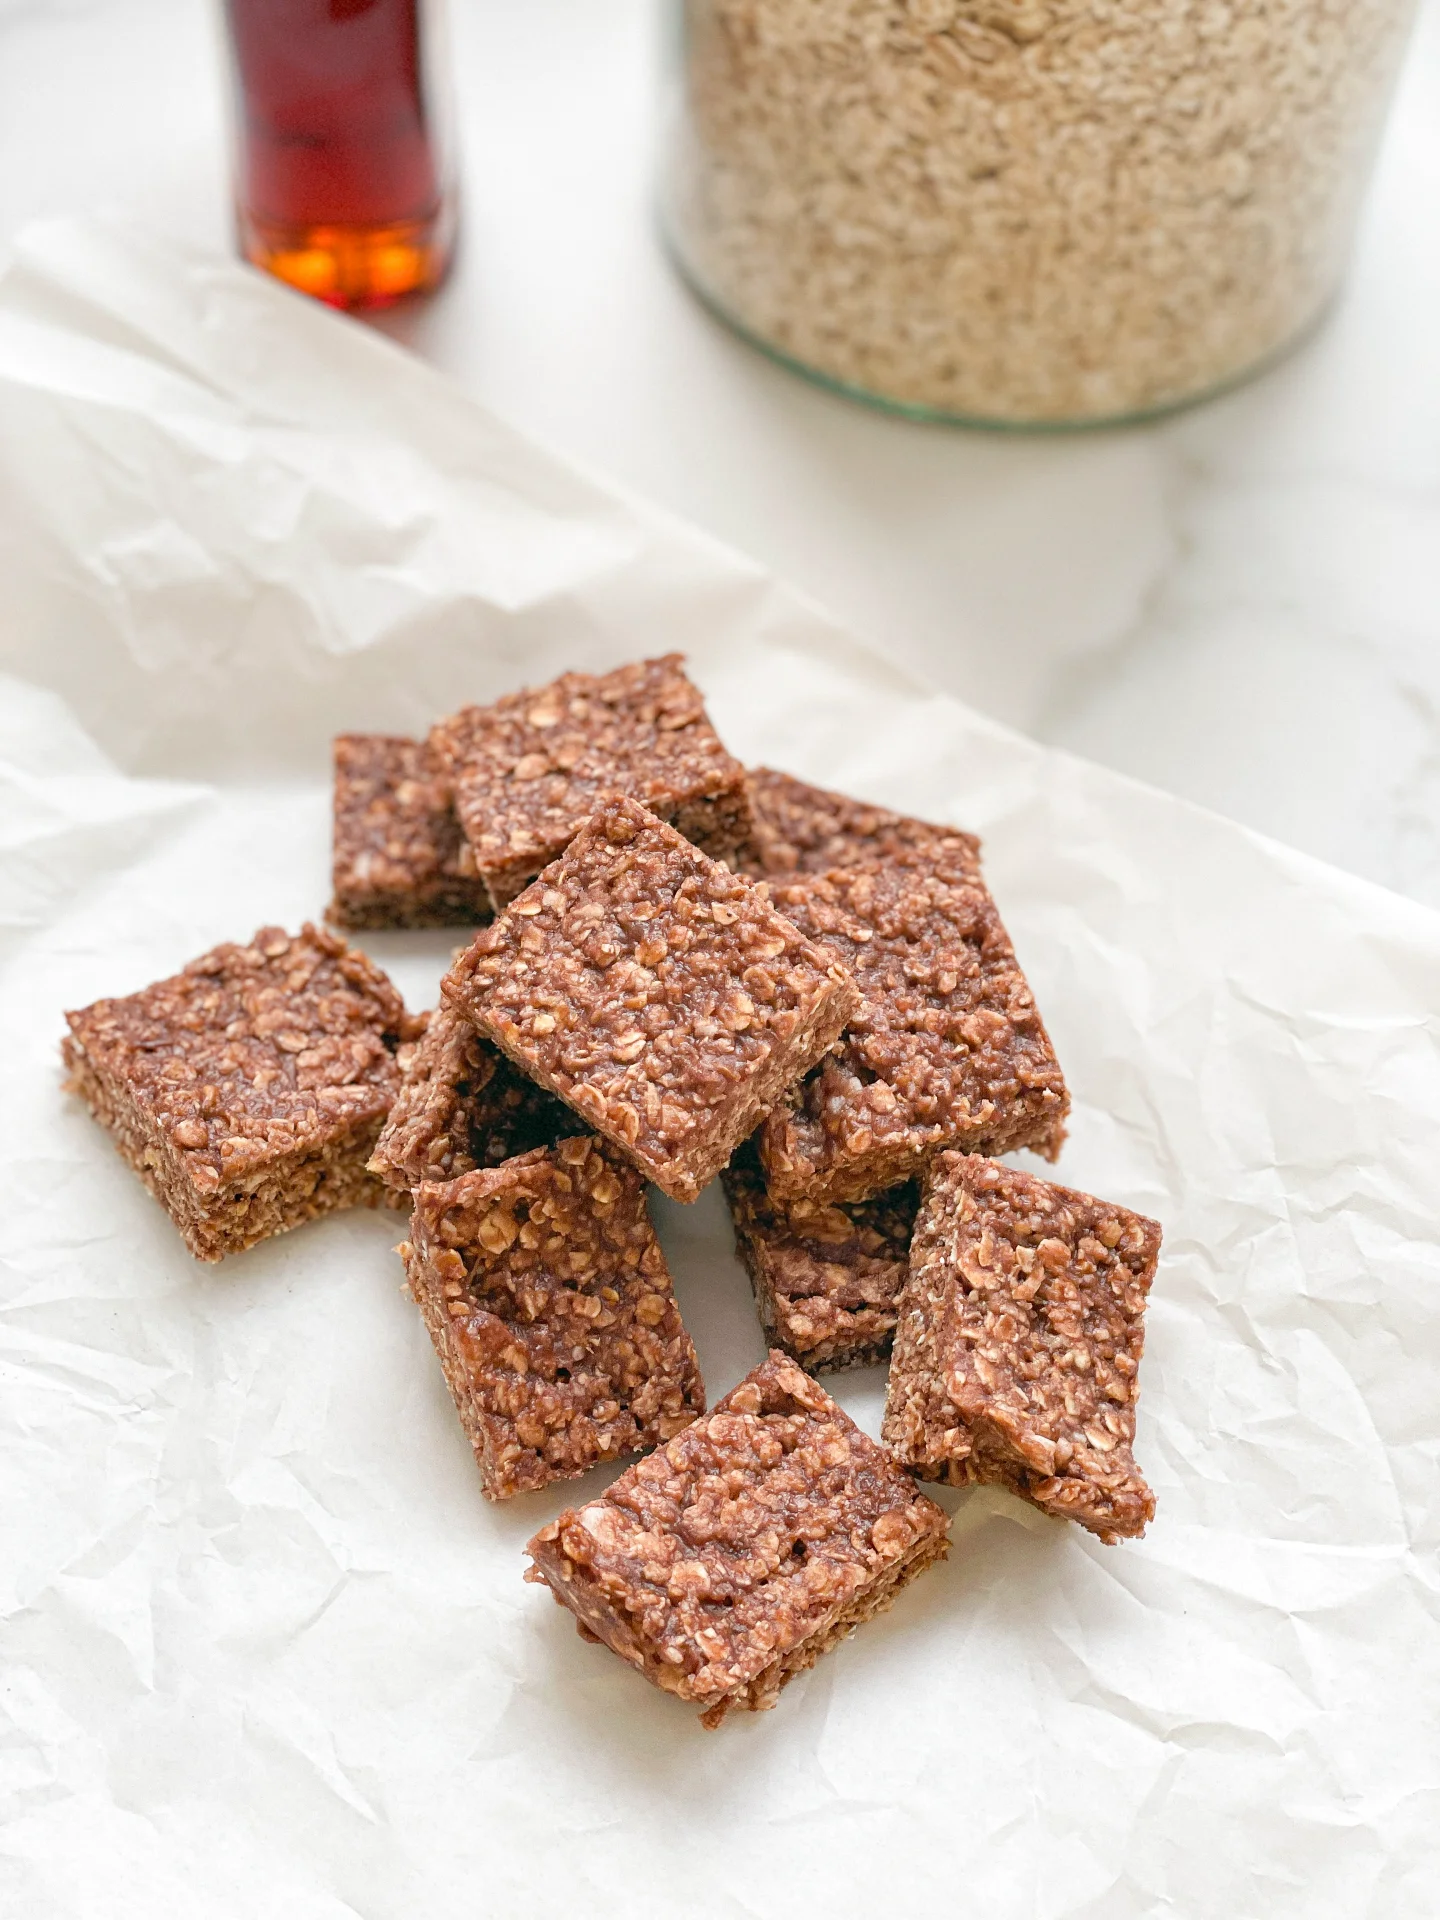
  • 350 grams white chocolate
  • 15 grams puffed quinoa

Instructions

  1. Preheat the oven to 175°C / 347°F.
  2. Make the shortbread dough. In a medium bowl, mix flour, butter, sugar, vanilla extract, and salt until the texture resembles firm sand. Refrigerate the dough for 10 minutes to allow the butter to firm up slightly.
  3. Prepare the passionfruit filling. While the dough chills, set aside the smallest silicone mold. Pour the passionfruit purée into a bowl and whisk in the instant gelatin until fully dissolved. (Make sure to use cold-soluble gelatin.) Transfer the mixture into the smallest silicone mold and freeze until completely solid.
  4. Bake the shortbread base. Remove the dough from the fridge and press it into the medium silicone mold. Bake for about 20 minutes until lightly golden. Let cool completely.
  5. Temper the white chocolate. Prepare a double boiler and melt only 200g of the 350g white chocolate, heating it carefully to 35°C / 95°F. Meanwhile, finely chop the remaining 150g of white chocolate. Once melted, remove from heat and stir in the chopped chocolate until fully melted.
  6. Keep the chocolate at a working temperature of 29-30°C / 84-86°F over the double boiler to ensure smooth assembly.
  7. Assemble the bars. Once the shortbread is fully cooled and the passionfruit filling is frozen, get the largest silicone mold ready.
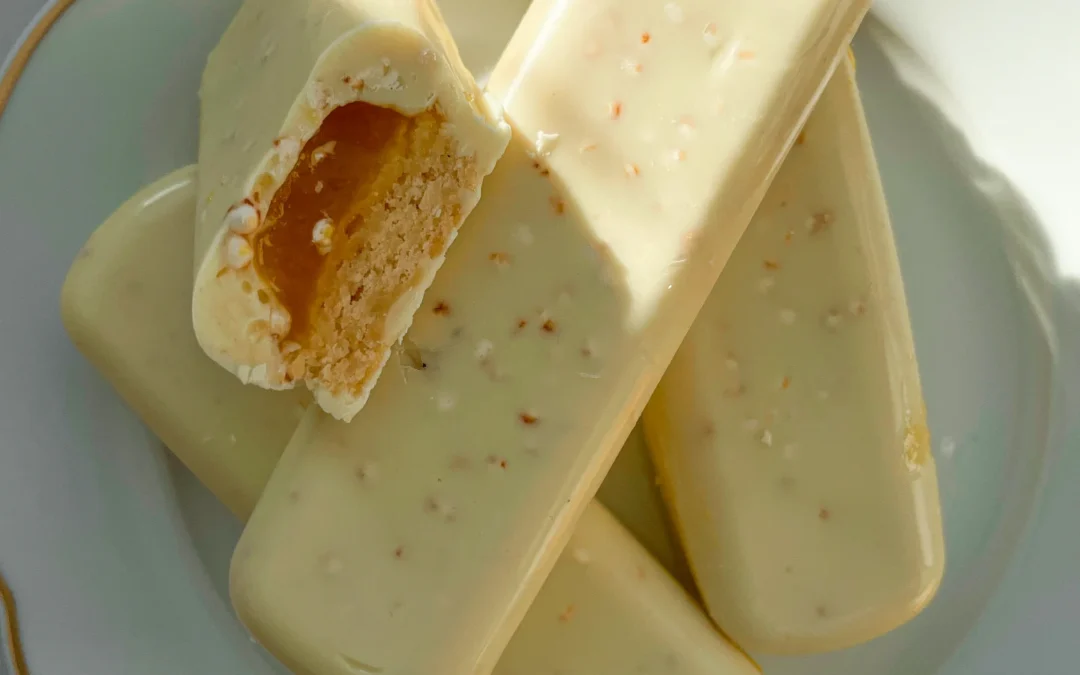
  8. Coat the mold. Stir the puffed quinoa into the tempered white chocolate. Fill each mold cavity halfway with the mixture. Immediately press a frozen passionfruit strip and a shortbread piece into each cavity, ensuring they are surrounded by the chocolate.
  9. Seal the bars. Pour the remaining white chocolate over the top to fully encase the bars.
  10. Let the bars set. Thanks to the tempered chocolate and frozen passionfruit filling, they will firm up quickly. For extra security, chill them in the fridge for 10 minutes. After that, they’re ready to enjoy!
  • Passive Time: 30 min
  • Cook Time: 40 min

Brownie Batter Chocolate Hummus

Brownie Batter Chocolate Hummus

Brownie Batter Chocolate Hummus

Brownie Batter Chocolate Hummus

February 18, 2025 by Kimberly

This ultra-creamy, rich chocolate dip tastes like straight-up brownie batter but is secretly packed with good-for-you ingredients. Perfect for spreading, dipping, or just eating by the spoonful…no judgment here!!

10 MINUTES

EASY

VEGAN

INTERNATIONAL

4 PORTIONS

CREAMY
SWEET

EVERYDAY

SNACKS
DESSERT

ALL YEAR

INTRODUCTION

ABOUT THE RECIPE

If you’ve never tried sweet hummus before, this one’s about to change your life. Imagine the rich, fudgy taste of brownie batter but in a smooth, creamy dip that also happens to be good for you. No refined sugar, no weird additives, just simple ingredients blending into pure chocolatey magic. Whether you’re dipping fruit, spreading it on toast, or eating it straight from the jar (I see you), this is your new go-to for a guilt-free chocolate fix.

How to serve
Swipe it onto warm toast, pair it with strawberries, banana slices, or apple wedges, or go all in and dunk some pretzels for that sweet-salty combo. Feeling extra? Stir it into oatmeal, drizzle it over pancakes, or layer it in a yogurt parfait for a next-level treat.

How to store
Store your chocolate hummus in an airtight container in the fridge for up to 4 days, but let’s be real, it won’t last that long. If it thickens up, just stir in a splash of plant milk to bring back that creamy goodness. Freezing? Not recommended, it’s best fresh!

Hi, I'm Kimberly!

Hi, I'm Kimberly.

A passionate food lover who believes in the magic of homemade deliciousness that spreads love and warmth. Join me on this culinary adventure as I prepare wonderful dishes and let’s spread some happiness together!

Kimberly the Zett Signature

If you want to get to know me better, click here!


Brownie Batter Chocolate Hummus
„Let’s make a piece of happiness“
Print
clock clock iconcutlery cutlery iconflag flag iconfolder folder iconinstagram instagram iconpinterest pinterest iconfacebook facebook iconprint print iconsquares squares iconheart heart iconheart solid heart solid icon
Brownie Batter Chocolate Hummus

Brownie Batter Chocolate Hummus


  • Author: Kimberly
  • Total Time: 10 min
  • Yield: 4 1x

Description

RECOMMENDED EQUIPMENT

  • food processor
  • sieve

Ingredients

Units Scale
  • 265 grams canned chickpeas, drained
  • 2 tbsp tahini
  • 60 grams unsweetened cocoa powder
  • 4 tbsp date syrup
  • 1 tsp vanilla extract
  • 1/4 tsp salt
  • 2 tbsp coconut oil
  • 2 tbsp milk of choice
  • 1/2 cup ice cubes
  • fruits of your choice for dipping – strawberries, bananas, apples…

Instructions

  • Drain the chickpeas and rinse them under cold water. Add them to a food processor.
  • Next, add tahini, vanilla, unsweetened cocoa powder, coconut oil, salt, date syrup, and milk. Blend on high speed until it forms a thick paste. Then, gradually add ice cubes. Just enough to make it super fluffy and creamy.
  • Transfer to a bowl and enjoy with your favorite fruits or cracker!!

Chocolate Mint Oil

Chocolate Mint Oil

Chocolate Mint Oil

Chocolate Mint Oil

December 20, 2024 by Kimberly

This infused oil is minty-fresh and oh-so-delicious, even if the chocolate vibes didn’t show up. Perfect for drizzling on salads or desserts – it’s a happy accident you’ll love.

40 MINUTES

ADVANCED

VEGAN

ENGLISH

40 PER TSP

REFRESHING

MICHELIN

OIL

ALL YEAR

INTRODUCTION

ABOUT THE RECIPE

Not every recipe turns out as expected, but sometimes the result is even better! This Chocolate Mint Oil was supposed to capture both chocolate and mint flavors, but only the fresh, vibrant mint transferred – and honestly? It’s absolutely delicious. The cocoa nibs didn’t quite make the impact I hoped for, but the minty finish is so versatile and refreshing. Perfect for sweet and savory dishes, this oil still deserves a spot in your kitchen.

How to serve
Drizzle this minty oil over fresh salads for a herby twist or use it to finish a dessert like brownies, ice cream, or fruit salads. It also works as a light drizzle over roasted vegetables, adding a subtle mint freshness to balance the flavors. For an unexpected yet delicious pairing, try it with lamb or feta cheese for a Mediterranean-inspired vibe. Versatile and fresh, it’s a little experiment gone right. For an extravagant dessert with a wow factor, you absolutely have to try this oil on my Vanilla Parfait with Chocolate Soil!

How to store
Store this infused oil in a clean, airtight bottle in the fridge for up to one week.

Hi, I'm Kimberly!

Hi, I'm Kimberly.

A passionate food lover who believes in the magic of homemade deliciousness that spreads love and warmth. Join me on this culinary adventure as I prepare wonderful dishes and let’s spread some happiness together!

Kimberly the Zett Signature

If you want to get to know me better, click here!


Chocolate Mint Oil
Chocolate Mint Oil
Chocolate Mint Oil
„Let’s make a piece of happiness“
Print
clock clock iconcutlery cutlery iconflag flag iconfolder folder iconinstagram instagram iconpinterest pinterest iconfacebook facebook iconprint print iconsquares squares iconheart heart iconheart solid heart solid icon
Chocolate Mint Oil

Chocolate Mint Oil


  • Author: Kimberly
  • Total Time: 40 min
  • Yield: 1 cup / 250 ml 1x

Description

RECOMMENDED EQUIPMENT

  • blender
  • medium-sized saucepan
  • whisk
  • a bowl which the medium saucepan fits into
  • 2 medium-sized bowls
  • 2 fine mesh strainers
  • oil bottle
  • ice cubes
  • coffee filter

Ingredients

Units Scale
  • 15 grams cocoa nibs
  • 15 grams fresh mint
  • 250 milliliter rapeseed oil

Instructions

  1. Put cocoa nibs and leaves of the mint into the blender. Pour in the oil. Blend on the highest setting until it no coarse pieces are longer visible.
  2. Pour the mixture from the blender into a medium-sized pot and heat it over medium heat, constantly stirring, to a temperature of about 102°-103°C (215°-217°F). Then, let the oil simmer with the lid partially on for the next 10 minutes. Stir only occasionally, making sure the temperature remains steady and nothing gets burned.
  3. At the end of the cooking process, prepare a bowl large enough to fit the medium-sized pot, filled with cold water and a handful of ice cubes. Also, hang a fine mesh sieve strainer over a medium-sized bowl.
  4. Now, place the pot in the ice water and stir to stop the cooking process. Once the oil is almost cold, remove the pot from the water and pour the oil into the first fine mesh sieve to catch the coarse particle.
  5. Then, pour the oil into the second fine mesh sieve, which you before equipped with a coffee filter, to catch the remaining finer particles.
  6. Allow the oil to drip through for about 30 minutes or maybe less depending on how many remaining particles are in the coffee filter. Once all the oil has passed through the coffee filter, transfer the collected amount of oil into an oil bottle. Store in the refrigerator for up to 1 week.
  • Passive Time: 30 min
  • Cook Time: 10 min

Milk Chocolate Pudding with Chantilly Cream & Hazelnut Brittle

Milk Chocolate Pudding with Chantilly Cream & Hazelnut Brittle

Milk Chocolate Pudding with Chantilly Cream & Hazelnut Brittle

Milk Chocolate Pudding with Chantilly Cream & Hazelnut Brittle

August 29, 2024 by Kimberly

Indulge in a silky, luscious delight that melts in your mouth, combining rich chocolate bliss with fluffy cream and a satisfying crunchy surprise. Pure dessert heaven!

35 MINUTES

EASY

VEGETARIAN

INT.

424 PER PORTION

CREAMY

DATE NIGHT

DESSERT

ALL YEAR

INTRODUCTION

ABOUT THE RECIPE

Get ready to dive into a world of creamy chocolate bliss with this decadent sweet treat that’s sure to satisfy your sweet tooth. This velvety chocolate delight is the perfect combination of smooth indulgence and a delightful crunch, making it an elegant dessert that’s unbelievably easy to whip up at home. Whether you’re hosting a festive gathering or simply craving some classic comfort food, this homemade pudding will surely become your new favorite dessert inspiration.

How to serve
To elevate this gourmet treat, serve it chilled in elegant glassware topped with a dollop of fluffy whipped cream (chantilly) and a sprinkle of crunchy goodness for that extra touch of texture. You can also get creative by adding fresh berries or a drizzle of caramel sauce to enhance the rich chocolate flavor. This crowd-pleasing treat pairs wonderfully with a hot cup of coffee or a glass of dessert wine, making every bite a true sweet culinary adventure.

How to store
Keep any leftovers of this indulgent dessert refrigerated in an airtight container to maintain its creamy texture and fresh taste. It stays delicious for up to three days, ensuring you can enjoy this simple homemade sweet whenever the craving strikes. Just remember to add the crunchy topping right before serving to keep it perfectly crisp!

Hi, I'm Kimberly!

Hi, I'm Kimberly.

A passionate food lover who believes in the magic of homemade deliciousness that spreads love and warmth. Join me on this culinary adventure as I prepare wonderful dishes and let’s spread some happiness together!

Kimberly the Zett Signature

If you want to get to know me better, click here!


Milk Chocolate Pudding with Chantilly Cream & Hazelnut Brittle
„Let’s make a piece of happiness“
Print
clock clock iconcutlery cutlery iconflag flag iconfolder folder iconinstagram instagram iconpinterest pinterest iconfacebook facebook iconprint print iconsquares squares iconheart heart iconheart solid heart solid icon
Milk Chocolate Pudding with Chantilly Cream & Hazelnut Brittle

Milk Chocolate Pudding with Chantilly Cream & Hazelnut Brittle


  • Author: Kimberly
  • Total Time: 35 min
  • Yield: 6 1x

Description

Recommended Equipment

  • sharp knife
  • cutting board
  • small pan
  • parchment paper
  • rolling pin
  • tall container
  • electric mixer
  • small pot
  • small glass
  • medium-sized bowl

Ingredients

Units Scale

HAZELNUT BRITTLE

  • 75 grams hazelnuts
  • 50 grams white sugar
  • 1 tbsp butter
  • pinch of salt

CHANTILLY CREAM

  • 100 milliliters heavy cream, cold
  • 25 grams powdered sugar

CHOCOLADE PUDDING

  • 300 milliliters whole-fat milk
  • 200 grams milk chocolate
  • 100 milliliters heavy cream
  • 30 grams white sugar
  • 15 grams cornstarch
  • 1 tsp vanilla extract

Instructions

  1. Hazelnut Brittle: First, finely chop the hazelnuts and set them aside. Next, prepare two sheets of parchment paper. Then, add the sugar and a pinch of salt to a small pan and heat it over medium heat until the sugar starts to become transparent. Once most of the sugar has melted, slowly stir with a spoon until the sugar turns amber. Quickly add 1 tablespoon of butter and stir well. Then, mix in the chopped hazelnuts and pour the entire mixture onto one of the sheets of parchment paper. Place the other sheet of parchment paper on top and roll it flat with a rolling pin. Set it aside to cool. Once the brittle has cooled, you can chop it into small crumbs with a knife or break it down in a food processor. Store it in a bag until ready to use.
  2. Chantilly Cream: In a tall container, whip the cold cream at low speed while gradually adding the powdered sugar. Once the cream starts to thicken, increase the speed to medium and continue whipping until the cream is creamy and stiff. Keep it in the fridge until ready to use.
  3. Chocolate Pudding: In a small pot, combine 2/3 of the milk, cream, sugar (you can skip the sugar if you don’t like it too sweet), and vanilla extract, and heat over medium heat. Meanwhile, finely grate the chocolate. Remove the pot from the heat and stir in the chocolate until it melts. In a small glass, mix the remaining 1/3 of the milk with the cornstarch until smooth, then pour it into the chocolate pudding and bring it to a boil while stirring. The pudding will thicken as it cooks. You can either serve the pudding warm or pour it into a bowl and cover the surface with plastic wrap to prevent a skin from forming. Let the bowl cool to room temperature, then refrigerate until ready to serve.
  4. To serve, spoon the pudding into glasses or bowls, top with 1-1.5 tablespoons of the Chantilly cream, and finish with a tablespoon of the hazelnut brittle.
  • Cook Time: 35 min

Double Chocolate Cookies with Strawberry Frosting

Double Chocolate Cookies with Strawberry Frosting

Double Chocolate Cookies with Strawberry Frosting

Double Chocolate Cookies with Strawberry Frosting

August 6, 2024 by Kimberly

Indulge in these rich, chocolaty cookies topped with a sweet, creamy & fruity frosting. Every bite is a heavenly mix of chocolate bliss and strawberry freshness, perfect for satisfying your sweet tooth!

2 HOURS
35 MINUTES

EASY

VEGETARIAN

INT.

434 PER COOKIE

COMFORT FOOD
SWEET

TEA TIME

DESSERT
COOKIES

SUMMER

INTRODUCTION

ABOUT THE RECIPE

Today, I’m thrilled to share a recipe that’s bound to become your new favorite: rich, double chocolate cookies topped with a luscious strawberry frosting. These cookies are the ultimate treat for any chocolate lover, with a fruity twist that makes them extra special. They’re perfect for any occasion, whether you’re hosting a party or just indulging in a cozy night at home. Let’s dive into the delicious details!

How to serve
Arrange them on a cute platter, and don’t be shy with the strawberry frosting – a generous dollop on each cookie makes them look and taste irresistible. These cookies are great for dessert tables, afternoon tea, or a sweet snack anytime. Pair them with a cold glass of milk or a hot cup of coffee for the ultimate treat.

How to store
If you have any leftovers (though that’s unlikely!), store the cookies in an airtight container. They’ll stay fresh at room temperature for up to three days. For longer storage, you can keep them in the fridge for up to a week. Just bring them to room temperature before enjoying them again to get that perfect, soft texture.

Hi, I'm Kimberly!

Hi, I'm Kimberly.

A passionate food lover who believes in the magic of homemade deliciousness that spreads love and warmth. Join me on this culinary adventure as I prepare wonderful dishes and let’s spread some happiness together!

Kimberly the Zett Signature

If you want to get to know me better, click here!


Double Chocolate Cookies with Strawberry Frosting
„Let’s make a piece of happiness“
Print
clock clock iconcutlery cutlery iconflag flag iconfolder folder iconinstagram instagram iconpinterest pinterest iconfacebook facebook iconprint print iconsquares squares iconheart heart iconheart solid heart solid icon
Double Chocolate Cookies with Strawberry Frosting

Double Chocolate Cookies with Strawberry Frosting


  • Author: Kimberly
  • Total Time: 2 hrs + 35 min
  • Yield: 8 cookies 1x

Description

Recommended Equipment

  • sharp knife
  • cutting board
  • small bowl
  • small pot (or microwave)
  • three medium bowls
  • whisk
  • spatula
  • mortar & pestle

Ingredients

Units Scale

COOKIE DOUGH

  • 120 grams all-purpose flour
  • 80 grams cocoa powder
  • 35 grams cornstarch
  • 1 tsp baking powder
  • 1/2 tsp salt
  • 140 grams butter
  • 150 grams brown sugar
  • 50 grams white sugar
  • 100 grams milk chocolate
  • 1 egg
  • 1 egg yolk

STRAWBERRY FROSTING

  • 20 grams freeze-dried strawberries
  • 75 grams butter
  • 75 grams cream cheese
  • 175 grams powdered sugar

TOPPINGS

  • milk chocolate
  • freeze-dried strawberries


Instructions

PREPARATIONS

  • Chop the chocolate into coarse pieces.
  • Melt the butter for the cookie dough in a pot or microwave.
  • Bring the butter for the frosting to room temperature.

INSTRUCTIONS

  1. In a medium bowl, mix together flour, cornstarch, cocoa powder, baking powder, and salt. Set aside.
  2. In another medium bowl, combine the brown and white sugar. Add the melted butter and whisk until creamy.
  3. Add one whole egg and one egg yolk, whisking until the mixture becomes thick.
  4. Next, add the dry ingredients from the other bowl and mix slightly, then add the chocolate and combine until no flour is visible. Be careful not to overmix.
  5. Form the dough into 8 equal-sized balls and place them in a container that fits in the fridge. Chill the cookie dough balls for at least 2 hours. If you want to prepare the dough ahead, you can refrigerate it for up to 48 hours.
  6. Preheat the oven to 220°C / 425°F (top/bottom heat). Once the oven is hot, place the cookies on a baking sheet lined with parchment paper and bake for 8 minutes.
  7. Remove the baking sheet from the oven and let the cookies cool for 15 minutes.
  8. Meanwhile, prepare the strawberry frosting: Beat room-temperature butter with an electric mixer in a medium bowl until pale yellow and fluffy. Add cream cheese and mix again. Then, add powdered sugar and mix for another 1-2 minutes until creamy.
  9. Grind the freeze-dried strawberries into a fine powder using a mortar and pestle or a powerful food processor. Add the strawberry powder to the frosting and mix until it turns a lovely pink color.
  10. Once the cookies have cooled and are no longer warm, spread 1 tablespoon of strawberry frosting evenly on each cookie.
  11. Optionally, sprinkle with some melted chocolate and crushed freeze-dried strawberries.
  • Prep Time: 5 min
  • Passive Time: 2 hrs
  • Cook Time: 30 min

Dark Chocolate Mousse

Dark Chocolate Mousse

Dark Chocolate Mousse

Dark Chocolate Mousse

August 3, 2024 by Kimberly

Indulge in a silky, rich dessert that melts in your mouth, delivering an intense cocoa experience. It’s like a cozy, chocolatey hug that’s perfect for any occasion!

20 MINUTES

INTERMEDIATE

VEGETARIAN

FRENCH

489 PER PORTION

COMFORT FOOD
CREAMY

EVERYDAY

DESSERT

ALL YEAR

INTRODUCTION

ABOUT THE RECIPE

Let’s dive into something irresistibly decadent: a rich, dark chocolate mousse that’s pure indulgence. With at least 70% cocoa, this mousse is a dessert dream come true, offering an intense chocolate experience that’s both luxurious and simple to make. Perfect for a cozy night in or a fancy dinner party, this recipe is all about enjoying the finer things in life without spending hours in the kitchen.

How to serve
Spoon the silky mousse into elegant dessert glasses or ramekins, and let it chill until perfectly set. For a touch of elegance, top it with a dollop of whipped cream, a sprinkle of cocoa powder, or some fresh berries. This dessert is best served chilled, making it a refreshing yet indulgent end to any meal. Whether it’s a casual family dinner or a sophisticated soirée, this mousse always steals the show.

How to store
Store any leftover mousse in the refrigerator, covered with plastic wrap or in airtight containers. It will stay fresh and delicious for up to two days.

Hi, I'm Kimberly!

Hi, I'm Kimberly.

A passionate food lover who believes in the magic of homemade deliciousness that spreads love and warmth. Join me on this culinary adventure as I prepare wonderful dishes and let’s spread some happiness together!

Kimberly the Zett Signature

If you want to get to know me better, click here!


Dark Chocolate Mousse
„Let’s make a piece of happiness“
Print
clock clock iconcutlery cutlery iconflag flag iconfolder folder iconinstagram instagram iconpinterest pinterest iconfacebook facebook iconprint print iconsquares squares iconheart heart iconheart solid heart solid icon
Dark Chocolate Mousse

Dark Chocolate Mousse


  • Author: Kimberly
  • Total Time: 20 min
  • Yield: 4 1x

Description

Recommended Equipment

  • sharp knife
  • cutting board
  • medium-sized bowl
  • small pot
  • electric mixer
  • small bowl
  • tall container
  • spatula

Ingredients

Units Scale

WHIPPED CREAM

  • 250 grams heavy cream
  • 75 grams powdered sugar

GANACHE

  • 100 grams heavy cream
  • 100 grams dark chocolate at least 70% cocoa

Instructions

  1. For the ganache, finely grate or chop the chocolate and place it in a medium-sized bowl. Set aside. Heat the cream in a small pot until it starts to steam slightly, but do not let it boil. Pour the cream over the grated chocolate and let it sit for 1-2 minutes. Then, start stirring slowly until the chocolate is fully combined with the cream and the mixture becomes noticeably thicker. Set aside and let it cool a bit.
  2. Meanwhile, prepare the whipped cream. Measure the powdered sugar into a small bowl. In a tall container, whip the cream until stiff peaks form, gradually adding the powdered sugar as you go. Set the whipped cream aside.
  3. Add the ganache to the whipped cream and gently fold everything together with a spatula until you have a medium-brown mousse.
  4. Spoon the mousse into dessert glasses and chill until ready to serve or enjoy immediately 🙂
  • Cook Time: 20 min