


Description
RECOMMENDED EQUIPMENT
- deep baking dish or roasting pan
- aluminum foil
- sharp knife
- cutting board
- kitchen brush for glazing
- meat thermometer
- vegetable peeler
- small pot
Ingredients
Units Scale
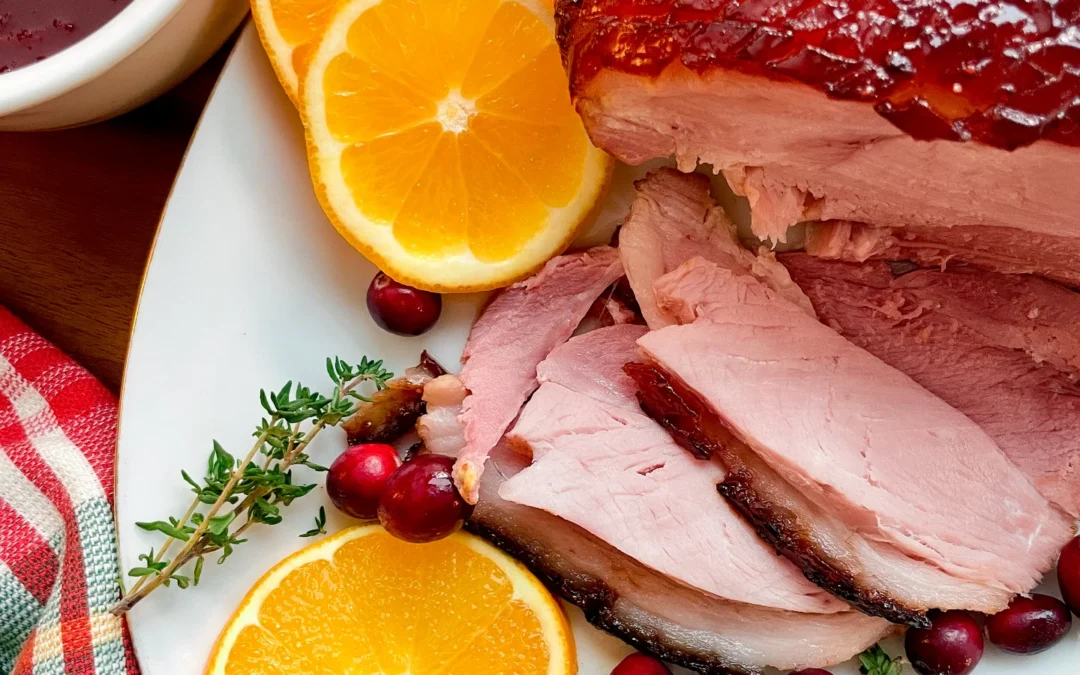
PORK HAM
- 1.8 kilogramm cured pork ham with rind
- 2 tsp dijon mustard
- salt & pepper
- 750 milliliter vegetable stock
- 1.5 white onions
- 3 garlic cloves
- 2 carrots
- 2 bay leaves
- 1 tbsp black pepper corns
- 1 lemon
- 1 orange
- 200 milliliter port wine
- 1 shallot
- 3/4 tsp fresh ginger, grated
- 1 tsp dijon mustard
- 100 grams fresh cranberries
- 200 grams redcurrant jelly
- salt & black pepper
Instructions
- Passive Time: 2 hrs + 10 min
- Cook Time: 30 min