Ham & Cheese Scones with Ranch Compound Butter

Ham & Cheese Scones with Ranch Compound Butter

Ham & Cheese Scones with Ranch Compound Butter

Ham & Cheese Scones with Ranch Compound Butter

April 14, 2025 by Kimberly

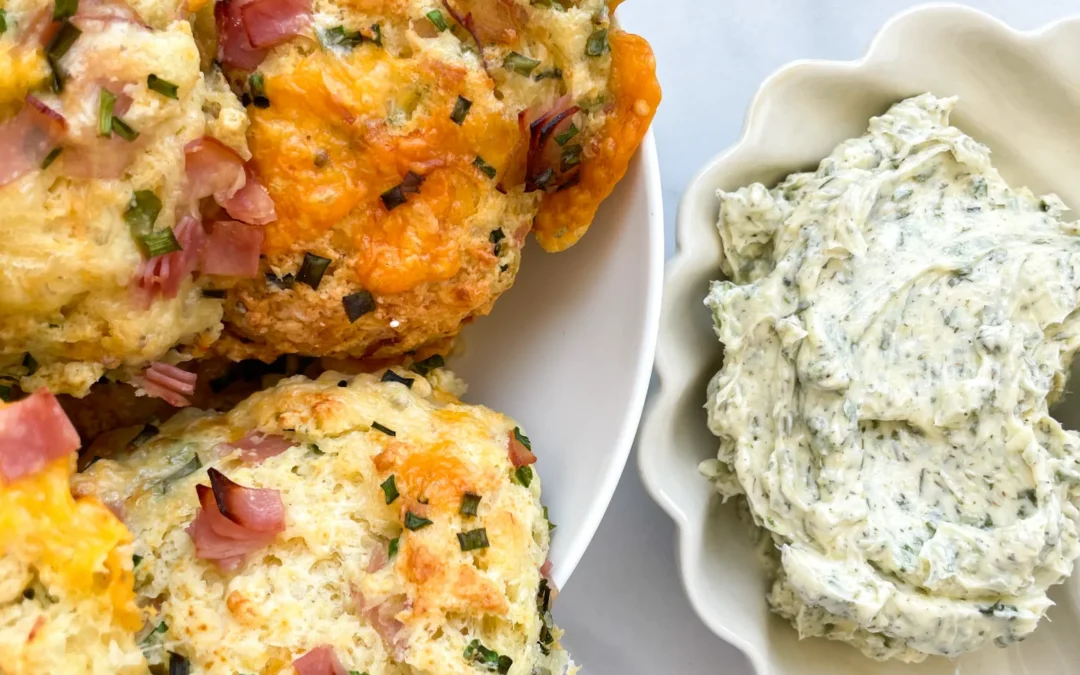
Flaky, buttery, and loaded with cheddar, ham, and chives. These savory scones are what your brunch dreams are made of. Especially with that ranch butter. Comfort food, but make it interesting.

35 MINUTES

INTERMEDIATE

OMNIVORE

INT.

10 SCONES

COMFORT FOOD

BRUNCH

SANDWICHES

ALL YEAR

INTRODUCTION

ABOUT THE RECIPE

There’s something about warm, cheesy pastries that just hits differently. Especially when they’re packed with melty cheddar, smoky ham, and fresh chives. These golden, flaky scones aren’t your typical dainty teatime snack, they’re the brunch version of it. The kind of thing you bake once and instantly regret ever offering to share.

How to serve
Serve these warm from the oven with a generous slather of the ranch butter melting into every crevice. Add a fried egg on the side if you’re feeling extra, or go classic with a cup of black coffee and your favorite playlist on repeat. They’re great for lazy Sundays, fancy brunch tables, or mid-week I-deserve-this moments. Pro tip: break them in half and turn them into a breakfast sandwich with scrambled eggs or crispy bacon. Zero judgment.

How to store
Store leftovers (if you’re lucky enough to have any) in an airtight container for up to 2 days at room temp. Reheat in the oven for that just-baked vibe.

Hi, I'm Kimberly!

Hi, I'm Kimberly.

A passionate food lover who believes in the magic of homemade deliciousness that spreads love and warmth. Join me on this culinary adventure as I prepare wonderful dishes and let’s spread some happiness together!

Kimberly the Zett Signature

If you want to get to know me better, click here!


Ham & Cheese Scones with Ranch Compound Butter
„Let’s make a piece of happiness“
Print
clock clock iconcutlery cutlery iconflag flag iconfolder folder iconinstagram instagram iconpinterest pinterest iconfacebook facebook iconprint print iconsquares squares iconheart heart iconheart solid heart solid icon
Ham & Cheese Scones with Ranch Compound Butter

Ham & Cheese Scones with Ranch Compound Butter


5 Stars 4 Stars 3 Stars 2 Stars 1 Star

No reviews

  • Author: Kimberly
  • Total Time: 35 min
  • Yield: 10 1x

Description

RECOMMENDED EQUIPMENT

  • box grater
  • mixing bowl
  • sharp knife
  • cutting board
  • round cookie cutter
  • spatula

Ingredients

Units Scale

SCONES

  • 300 grams all-purpose flour
  • 1/2 tsp salt
  • 1/4 tsp pepper
  • 4 tsp backing powder
  • 2 tbsp brown sugar (optional)
  • 90 grams butter, cold
  • 1 egg
  • 160 milliliters full-fat cow milk
  • 150 grams cheddar cheese
  • 150 grams ham
  • 20 grams fresh chives

RANCH COMPOUND BUTTER

  • 125 grams butter, soft
  • 3 tsp dried chives
  • 1 tsp dried parsley
  • 1 tsp dried onion powder
  • 1/2 tsp dried dill
  • 1/2 tsp dried garlic powder
  • 1/81/4 tsp salt
  • 1/8 tsp white pepper

Instructions

  1. Place the butter for the scones in the freezer for 15 minutes. Let the butter for the ranch compound butter soften at room temperature. Line a baking sheet with parchment paper and preheat the oven to 200°C/390°F. Dice the ham into small squares, grate the cheese, and finely slice the chives. Set aside about 1/3 of each to top the scones later.
  2. In a medium bowl, combine the flour, brown sugar, baking powder, salt, and pepper. Grate the cold butter directly into the dry ingredients using a box grater.
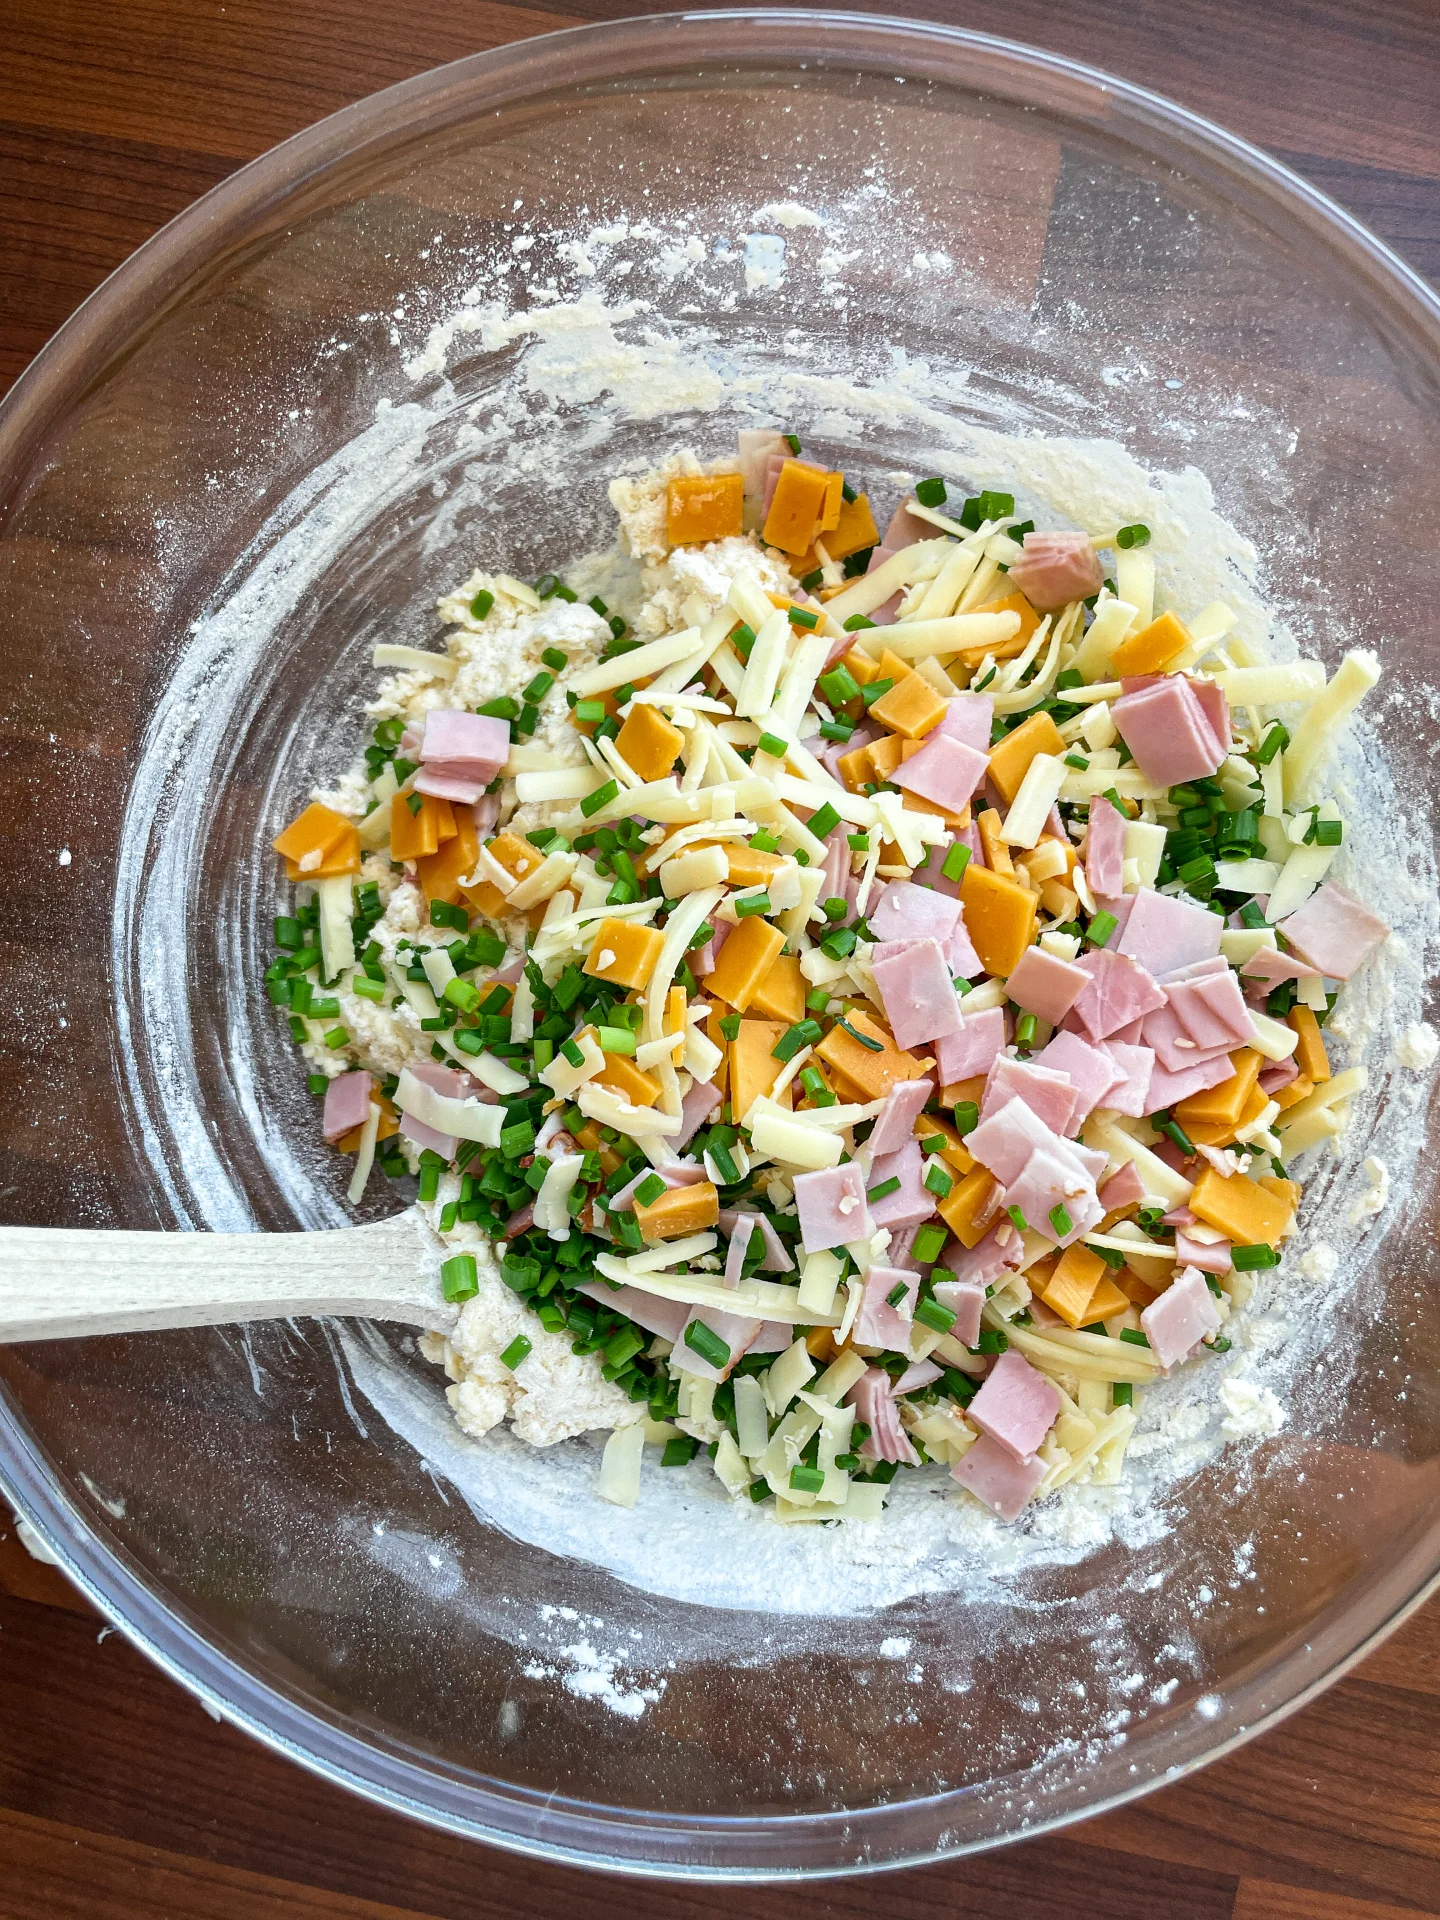
  3. In a small glass or bowl, whisk together the milk and egg, then pour into the dry mixture. Mix with a spoon just until the dough comes together. You should still see streaks of flour. Add the ham, cheese, and chives and gently fold in. Transfer the dough to a clean work surface and shape it into a rectangle (about 20x30cm) using a spatula. Avoid using your hands because keeping the butter cold is key to flaky scones. Sprinkle the remaining ham, cheese, and chives over the top.
  4. Use a round cutter to cut out as many scones as possible. Gather and gently reshape the scraps to cut more until all the dough is used. If you don’t have a cutter, simply slice the dough into triangles. This recipe yields about 10 scones.
  5. Arrange the scones on the baking sheet with a bit of space in between and bake for about 15 minutes until golden. Let cool slightly and serve fresh.
  • Passive Time: 15 min
  • Cook Time: 20 min

Vanilla Porridge with Passionfruit Pear Compote

Vanilla Porridge with Passionfruit Pear Compote

Vanilla Porridge with Passionfruit Pear Compote

Vanilla Porridge with Passionfruit Pear Compote

March 12, 2025 by Kimberly

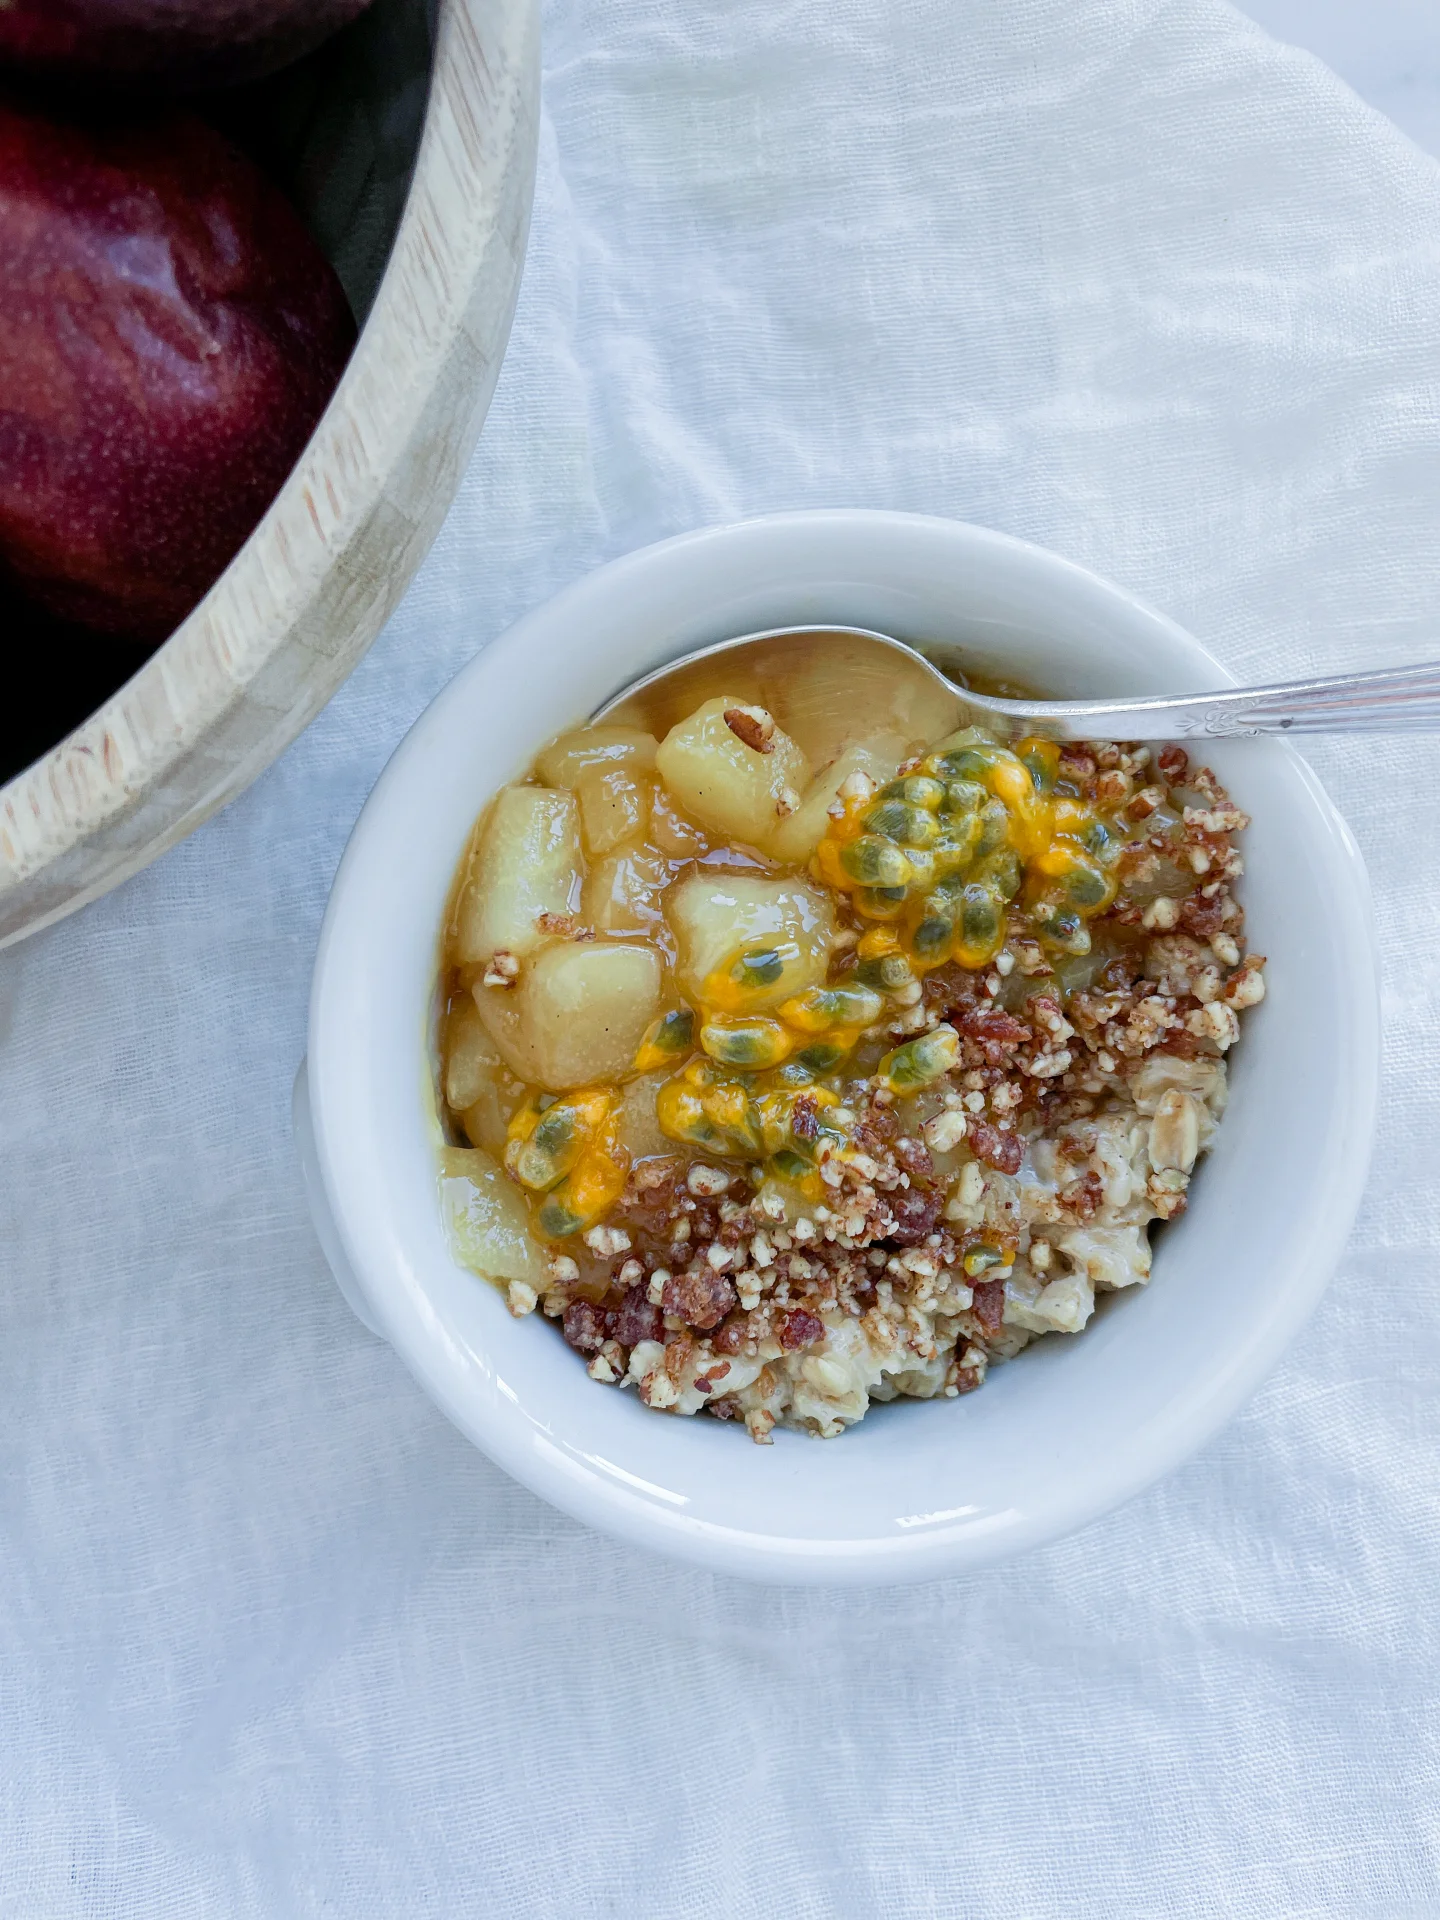
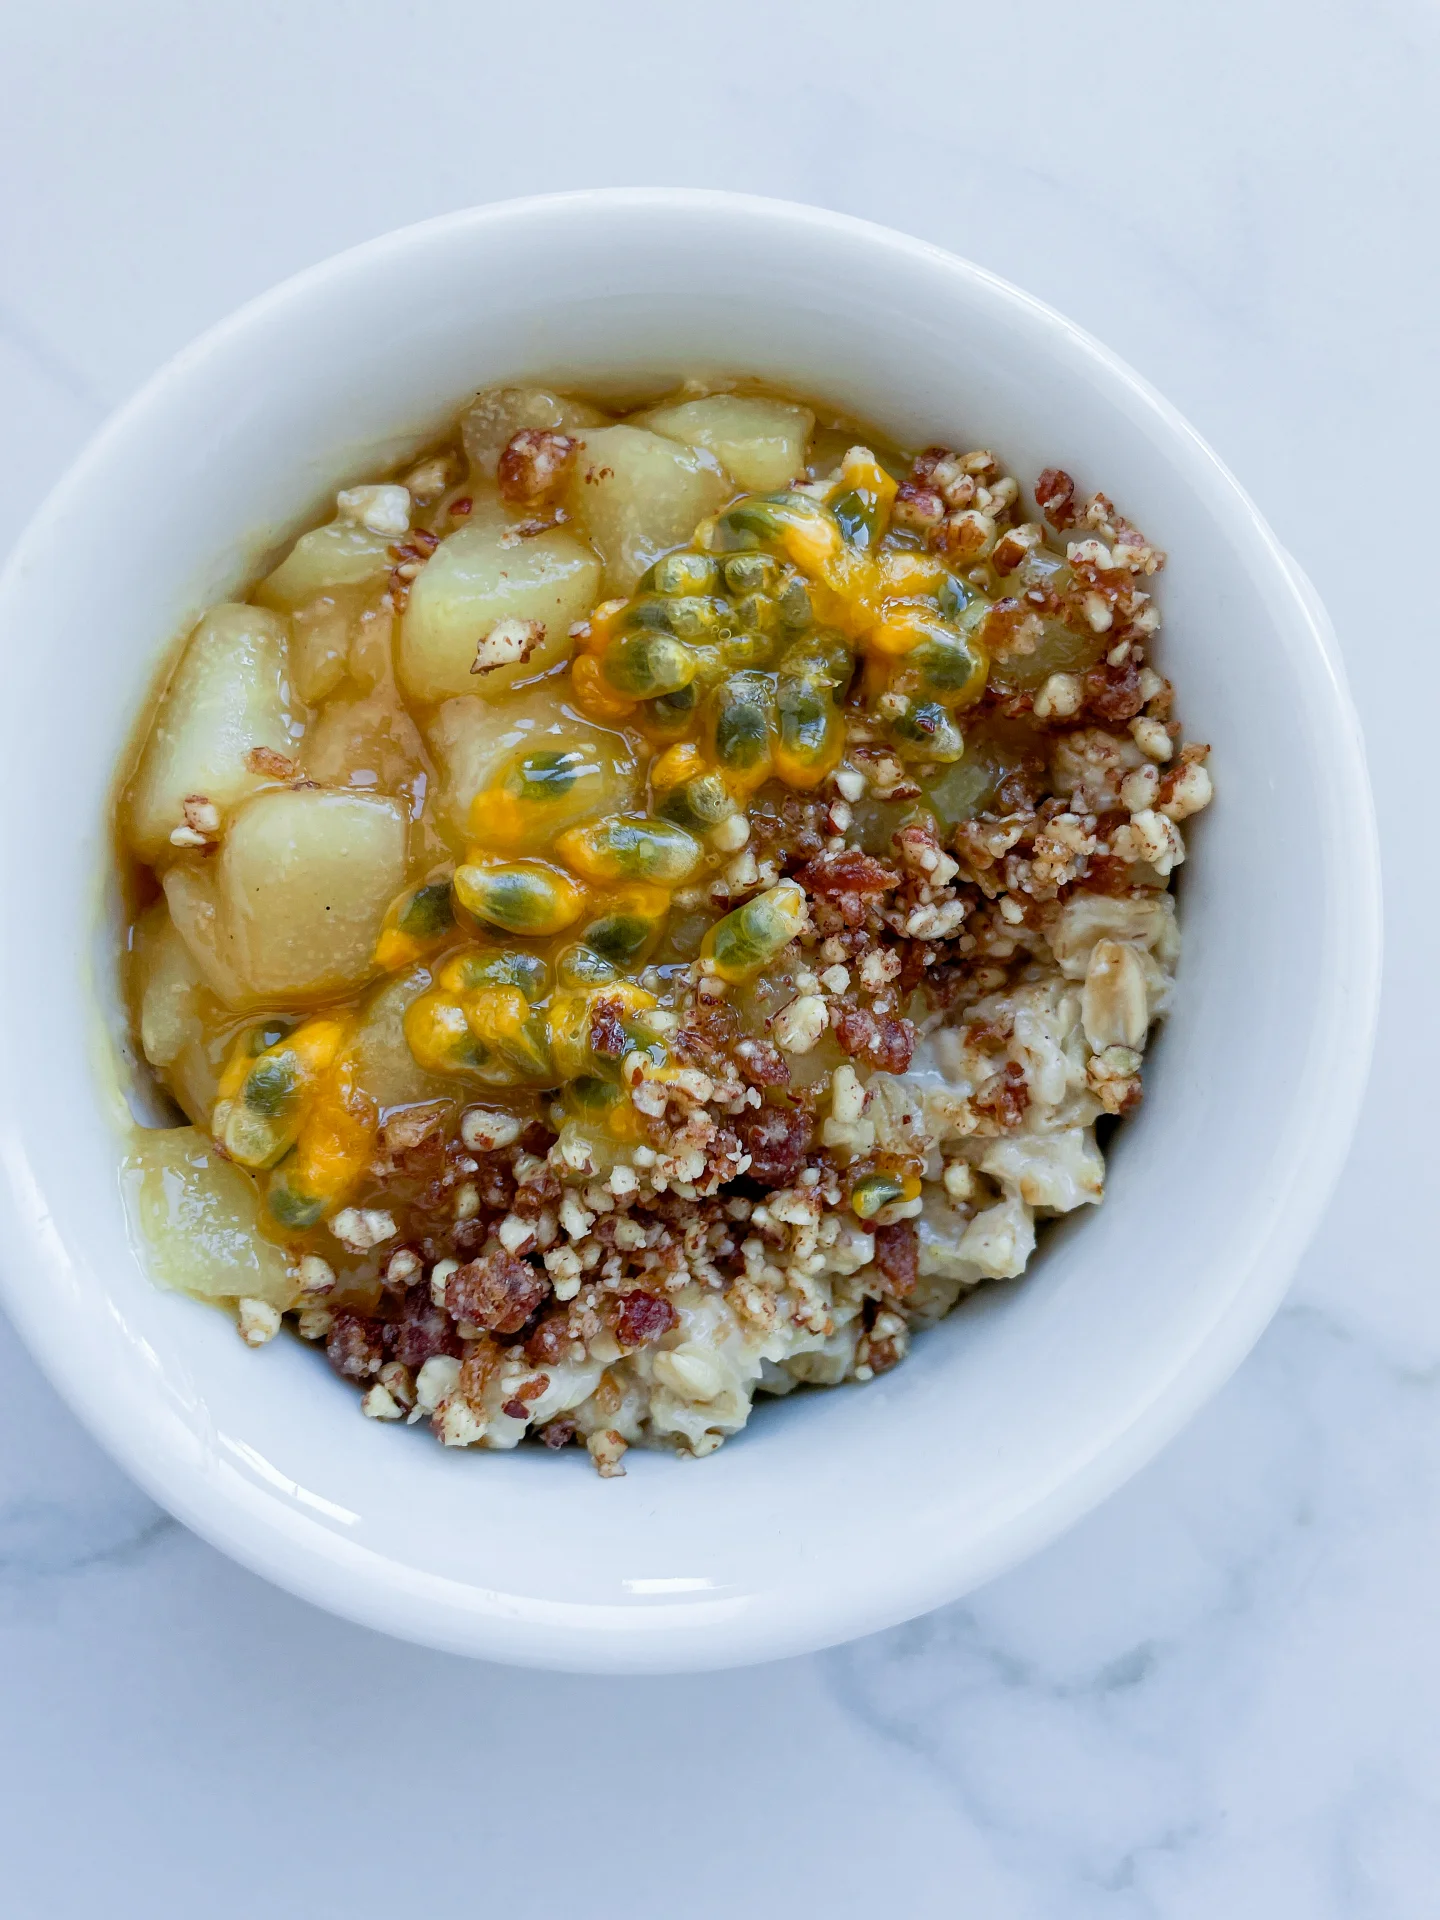
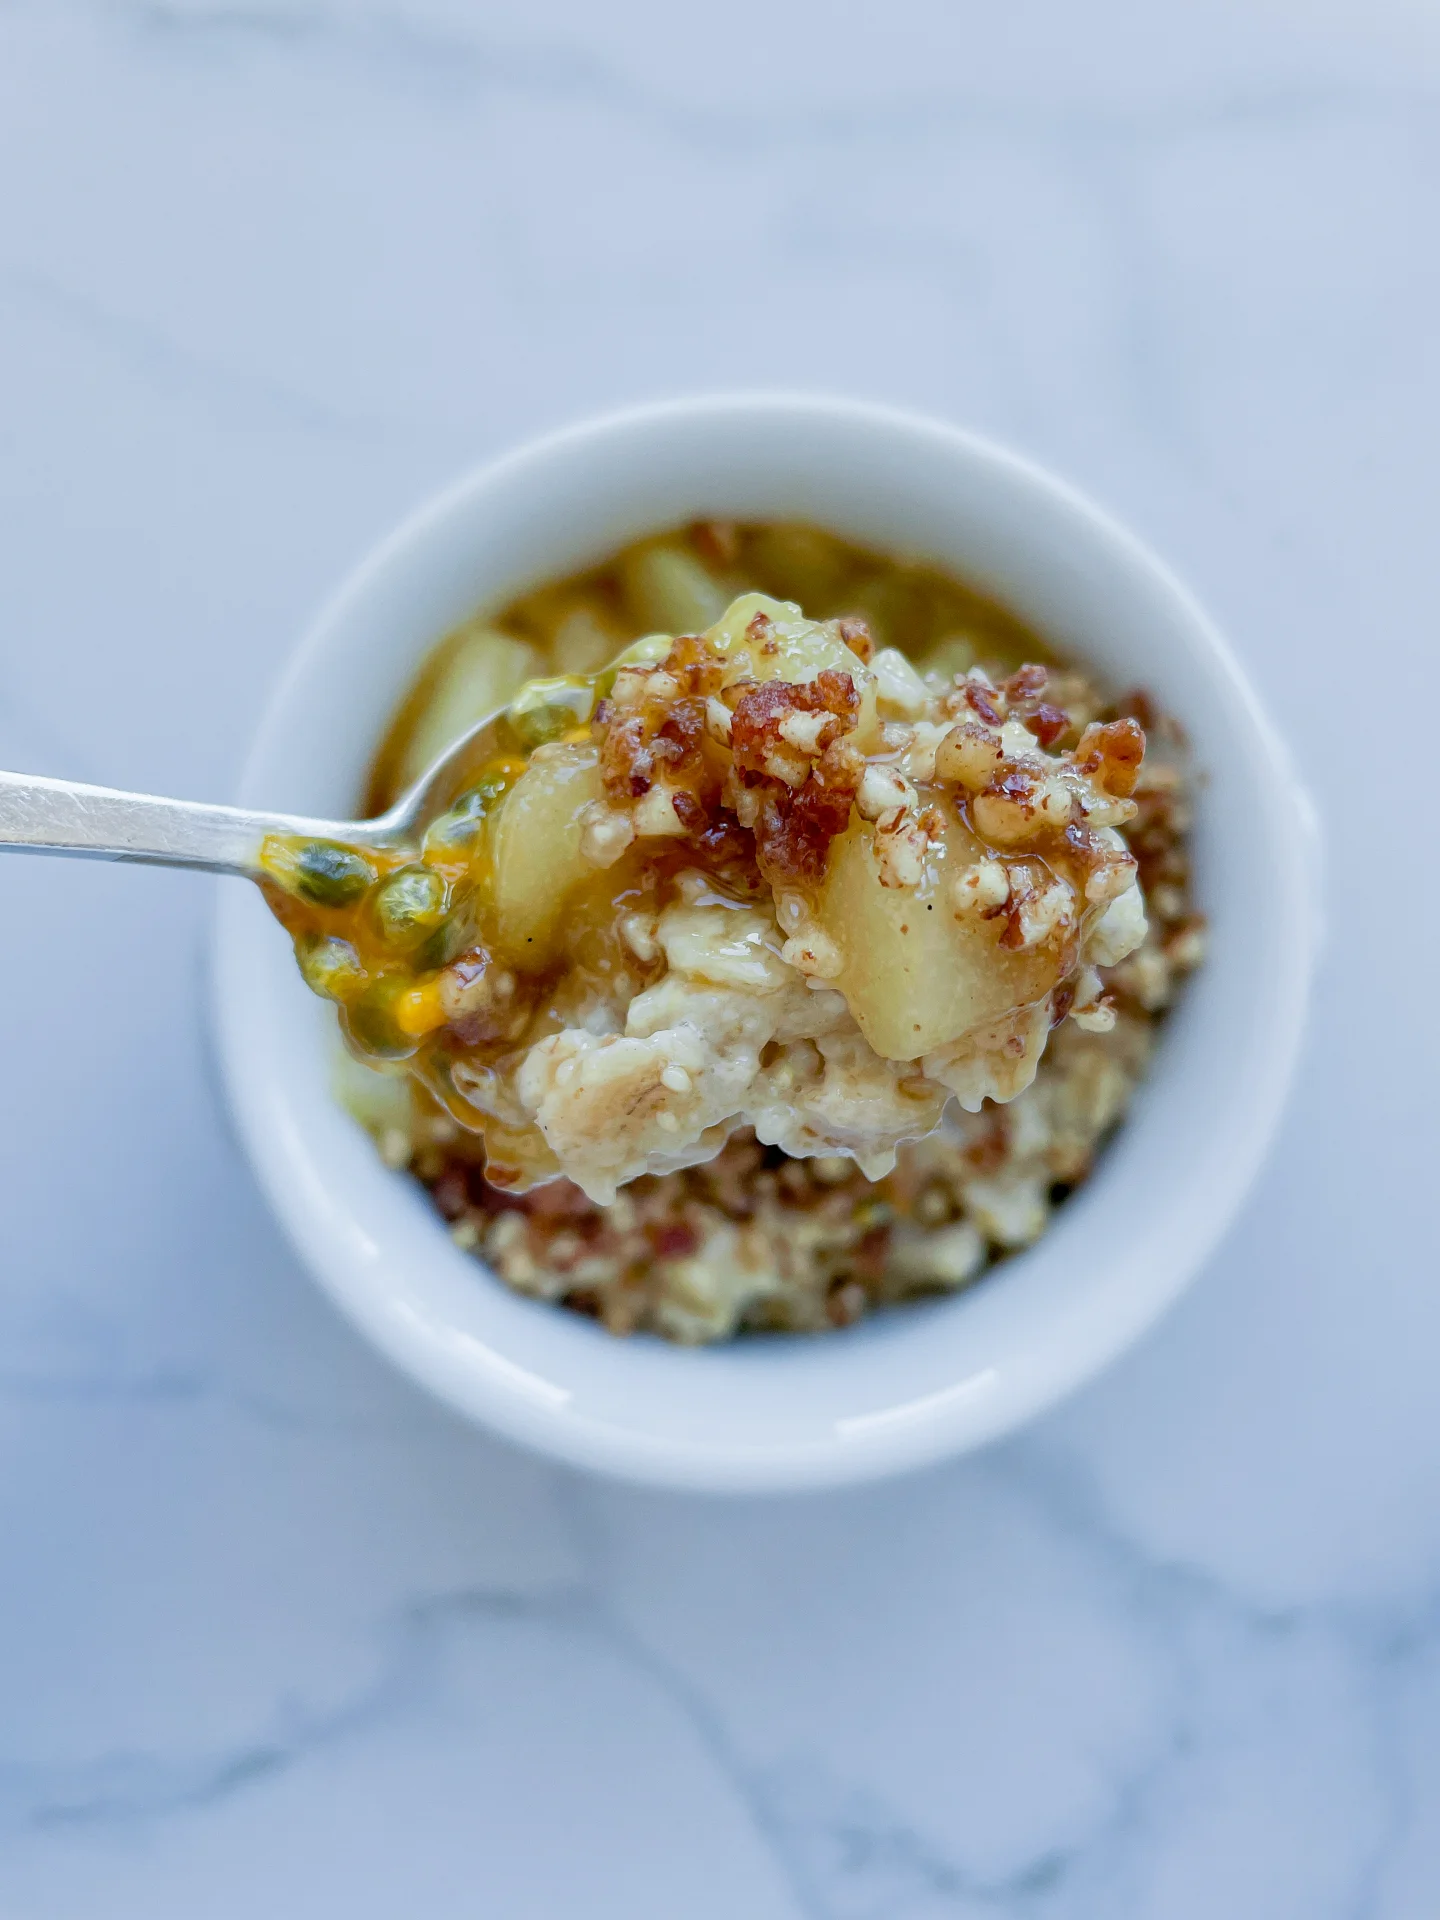
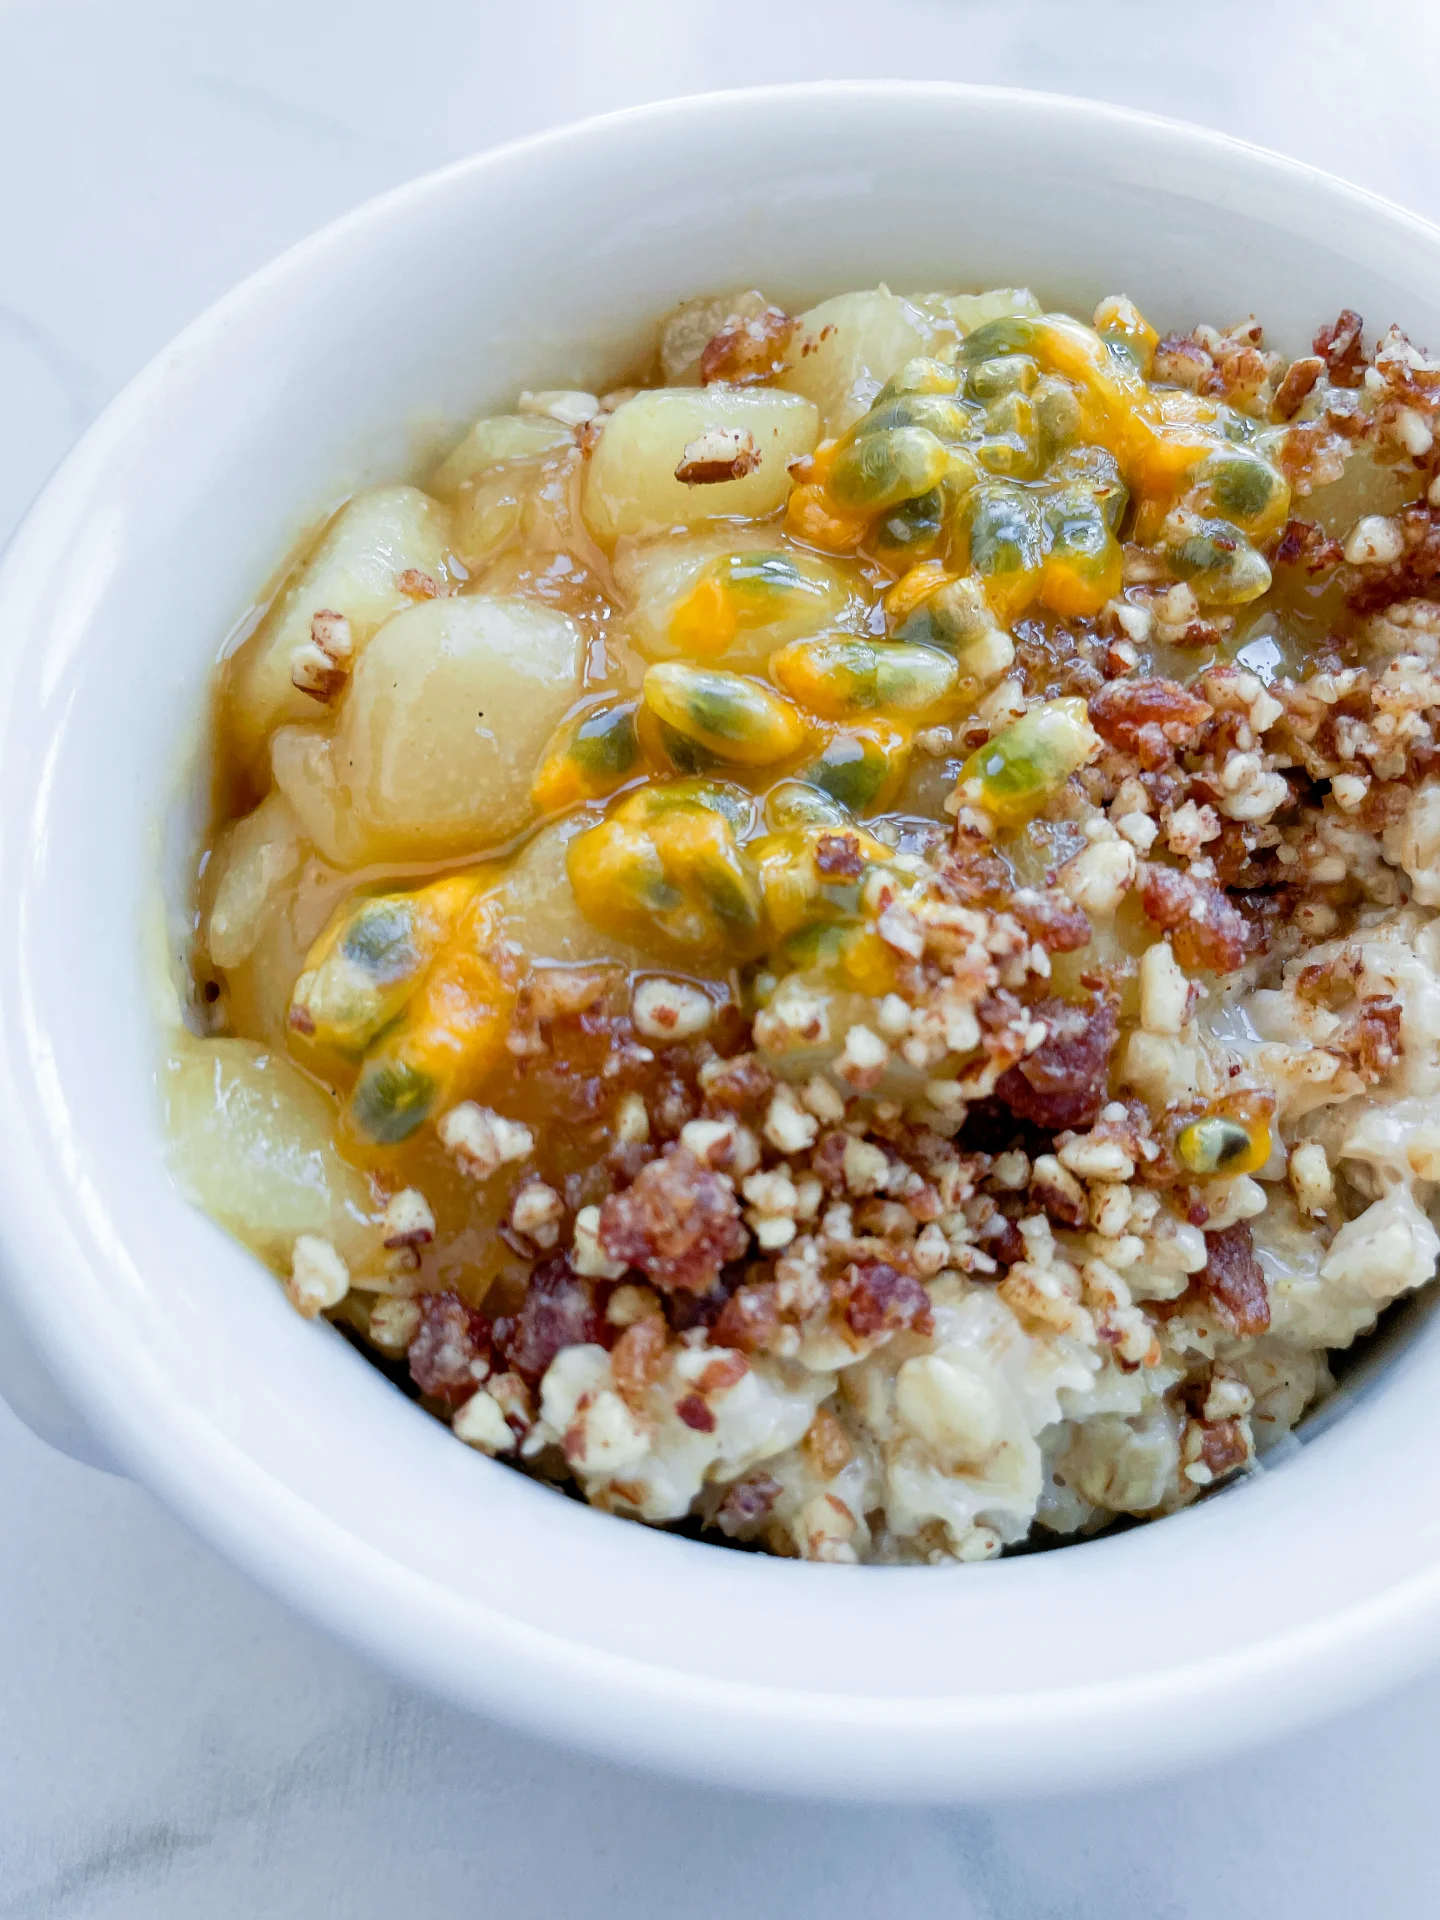
Golden, creamy oats meet warm, soft pears, a crunchy pecan date topping, and the tangy pop of passionfruit. It’s cozy, rich, and just indulgent enough to feel like a little morning luxury.

20 MINUTES

EASY

VEGETARIAN

INT.

2 PORTIONS

SWEET

BRUNCH

BREAKFAST

ALL YEAR

INTRODUCTION

ABOUT THE RECIPE

Creamy, slow-cooked oats, sweet, jammy pears, a crispy pecan-date crunch, and a final hit of passionfruit to keep things interesting. It’s rich but not heavy, naturally sweet but not cloying, and the kind of thing that makes you feel like you’re staying at a really nice boutique hotel (even if you’re still in pajamas). Plus, it’s easy to make ahead, which is always a win.

How to serve
Serve this in your favorite bowl, drizzle with a little extra syrup if you’re feeling fancy, and don’t skimp on the crunch, it’s the best part. The passionfruit should be the last thing you add to keep that fresh, tart contrast. If you want to take it up a notch, add a dollop of yogurt or a splash of coconut milk. And if you’re a texture person, toasted coconut or cacao nibs would be a solid move.

How to store
Leftover oats keep in the fridge for up to 3 days, just reheat with a splash of milk or water to bring them back to life. The pear compote and crunch store separately in airtight containers (compote in the fridge, crunch at room temp) for easy layering all week.

Hi, I'm Kimberly!

Hi, I'm Kimberly.

A passionate food lover who believes in the magic of homemade deliciousness that spreads love and warmth. Join me on this culinary adventure as I prepare wonderful dishes and let’s spread some happiness together!

Kimberly the Zett Signature

If you want to get to know me better, click here!


Vanilla Porridge with Passionfruit Pear Compote
„Let’s make a piece of happiness“
Print
clock clock iconcutlery cutlery iconflag flag iconfolder folder iconinstagram instagram iconpinterest pinterest iconfacebook facebook iconprint print iconsquares squares iconheart heart iconheart solid heart solid icon
Vanilla Porridge with Passionfruit Pear Compote

Vanilla Porridge with Passionfruit Pear Compote


  • Author: Kimberly
  • Total Time: 20 min
  • Yield: 2 1x

Description

RECOMMENDED EQUIPMENT

  • two small pots
  • sharp knife
  • cutting board
  • vegetable peeler
  • food processor

Ingredients

Units Scale

OATS

  • 100 grams oats
  • 200 milliliters whole milk
  • 2 tsp vanilla extract
  • 2 tsp sweetener of choice (I used agave syrup)
  • pinch of salt

PEAR COMPOTE

  • 1 pear
  • 1 tsp vanilla extract
  • 2 tsp sweetener of choice (I used honey)
  • juice of half a lemon
  • pinch of salt

TOPPINGS

  • 2 dates
  • 50 grams pecans
  • pinch of salt
  • 1 passionfruit

Instructions

  1. Start by peeling the pears and cutting them into small pieces. Add them to a small pot with vanilla extract, honey, a pinch of salt, and lemon juice. Let them simmer over medium heat for 15 to 20 minutes.
  2. While the compote is cooking, combine oats, milk, agave syrup, a pinch of salt, and vanilla extract in a second small pot. Cook over medium heat for 10 to 15 minutes until creamy.
  3. Meanwhile, add dates, a pinch of salt, and pecans to a food processor. Pulse until finely chopped and crumbly.
  4. Cut open a fresh passionfruit and set the pulp aside.
  5. Once the porridge and pear compote are ready, divide the porridge between two bowls, spoon the pear compote on top, and sprinkle with the date-pecan crunch.
  6. Finish by adding the fresh passionfruit on top and enjoy.
  • Cook Time: 20 min

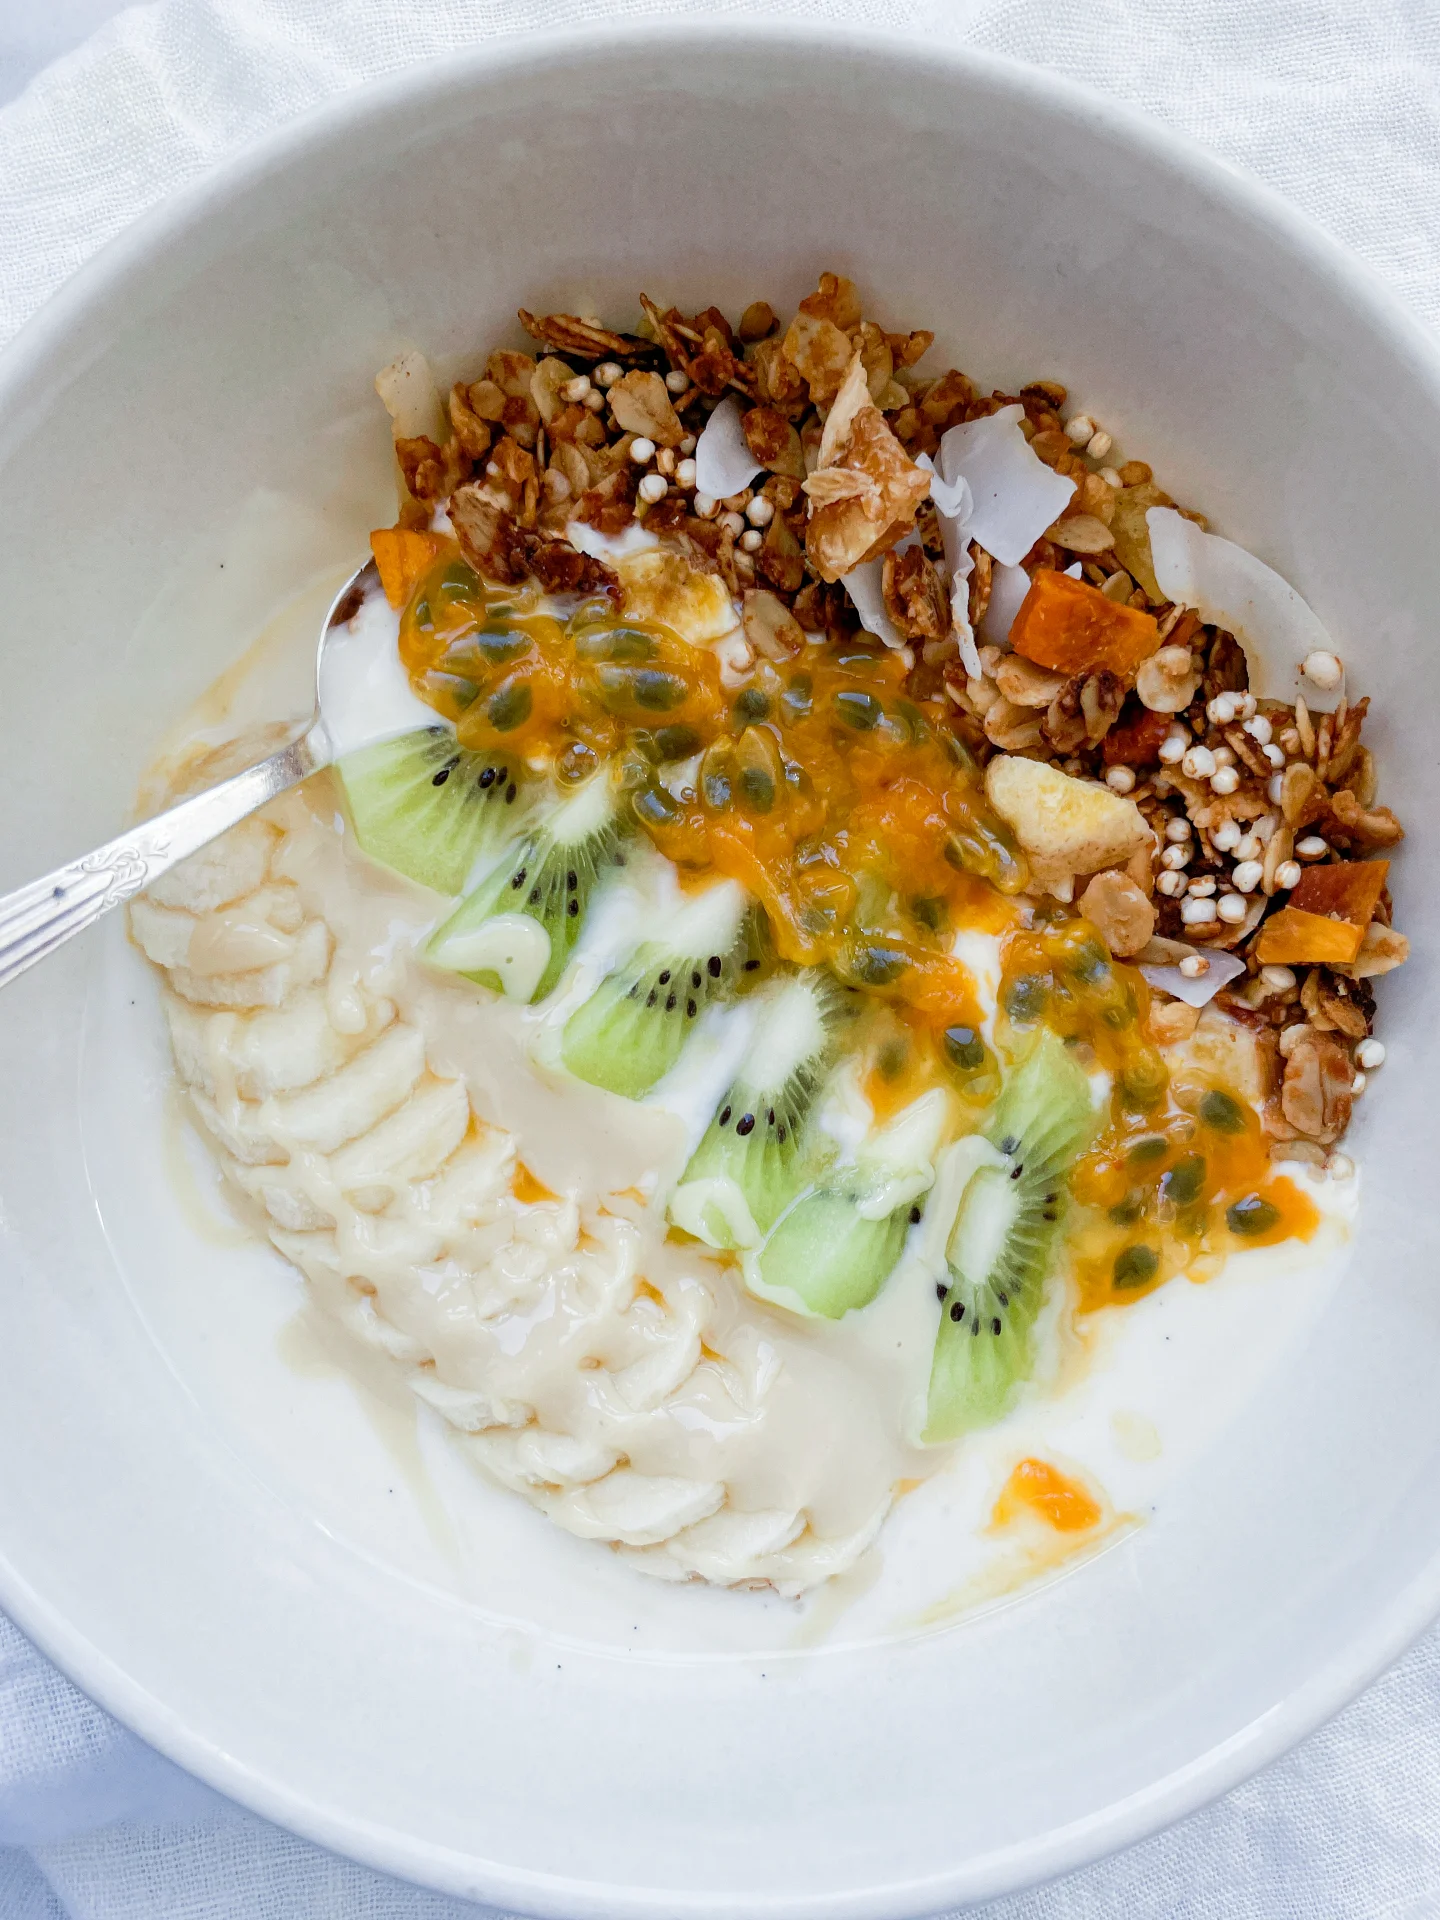
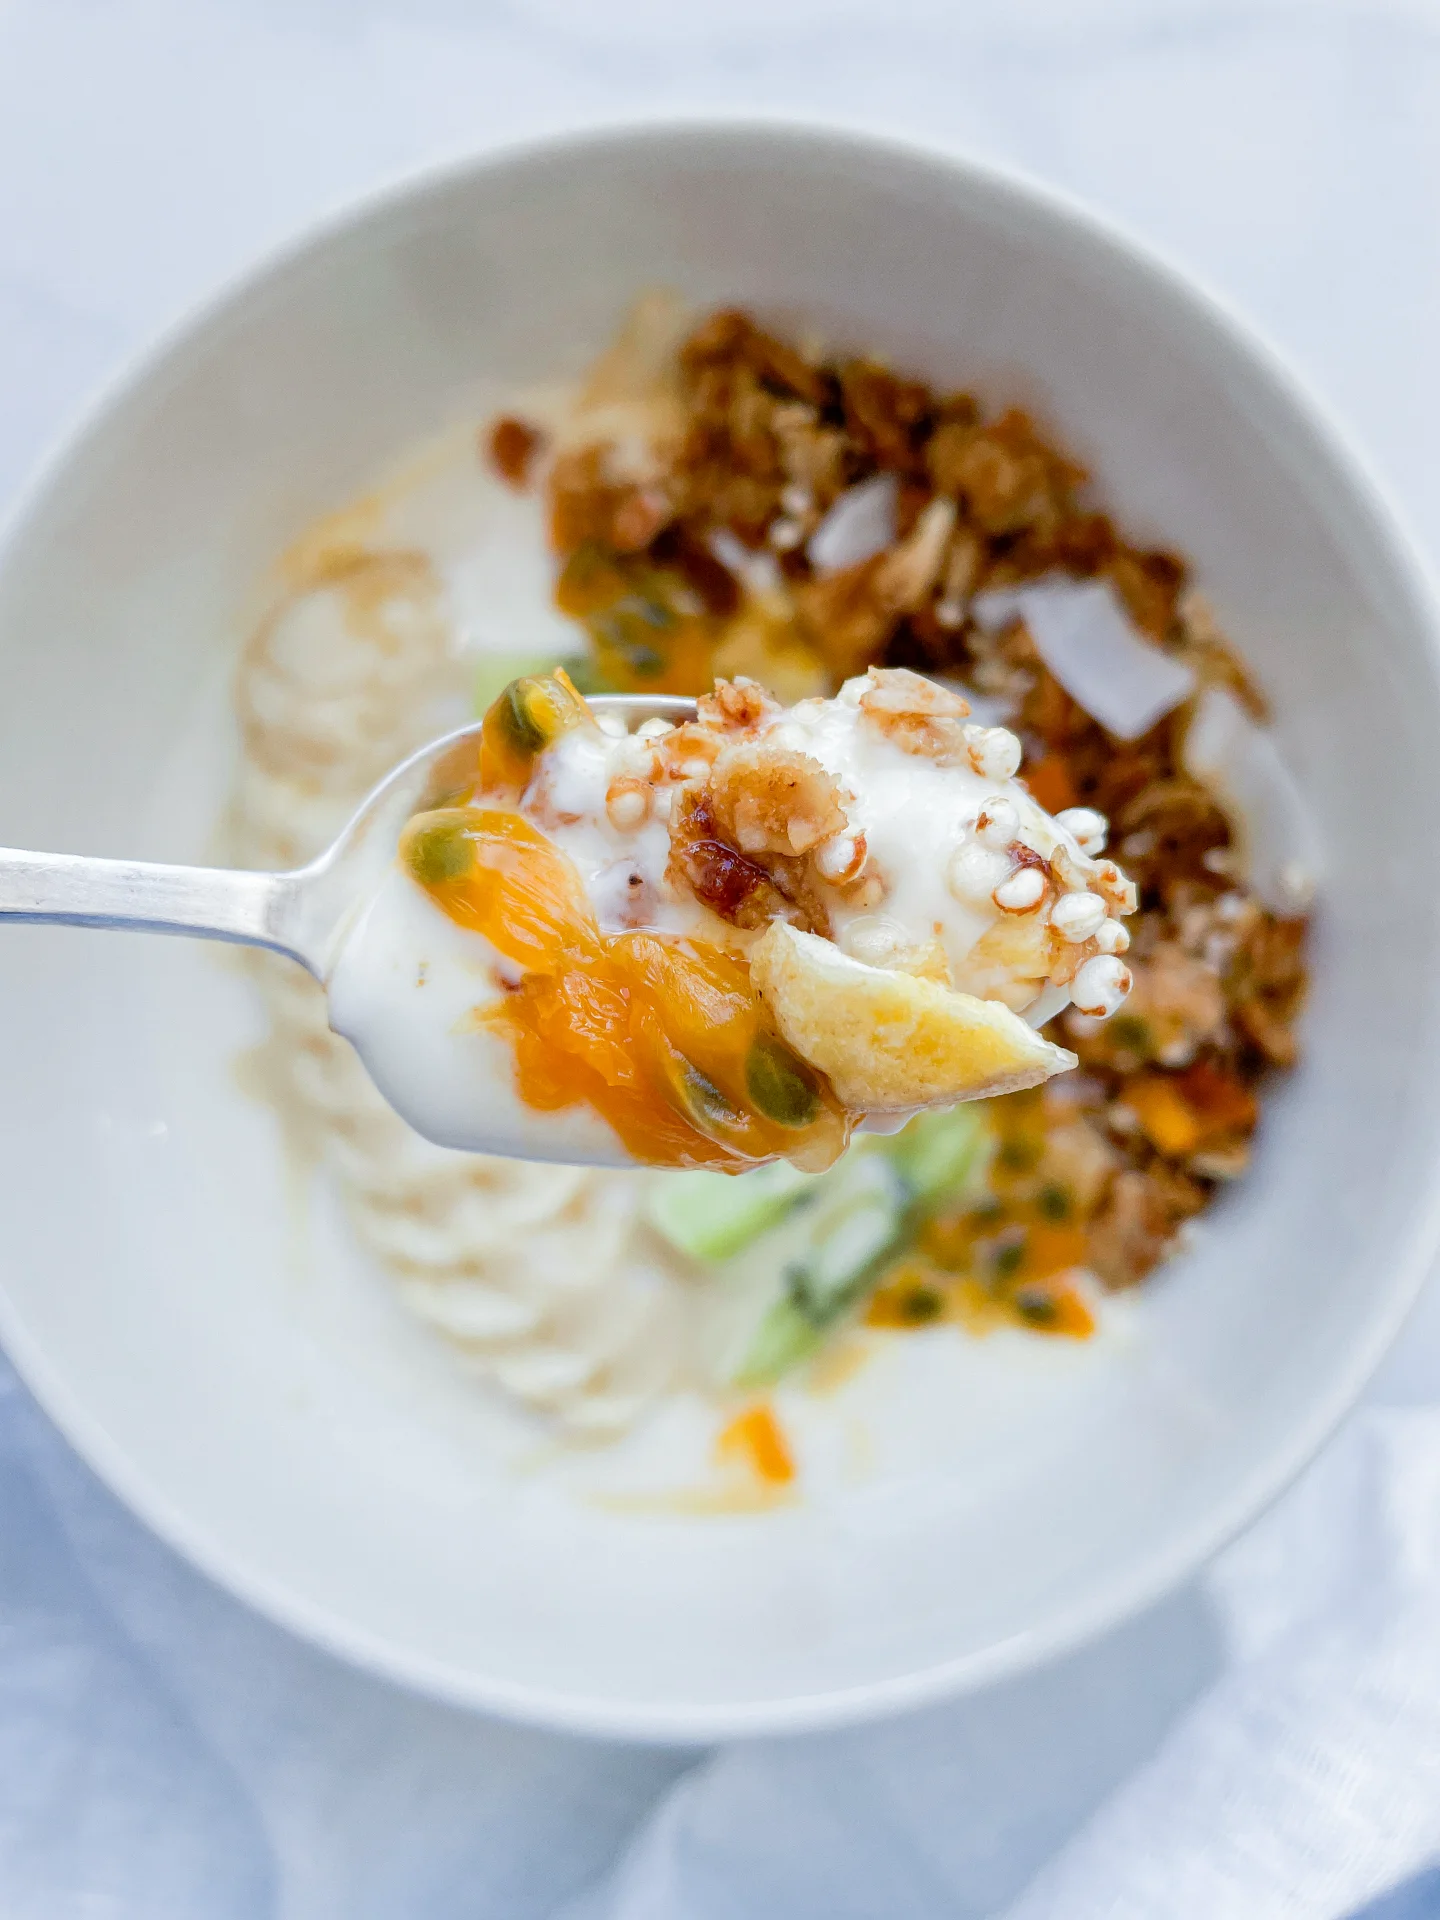
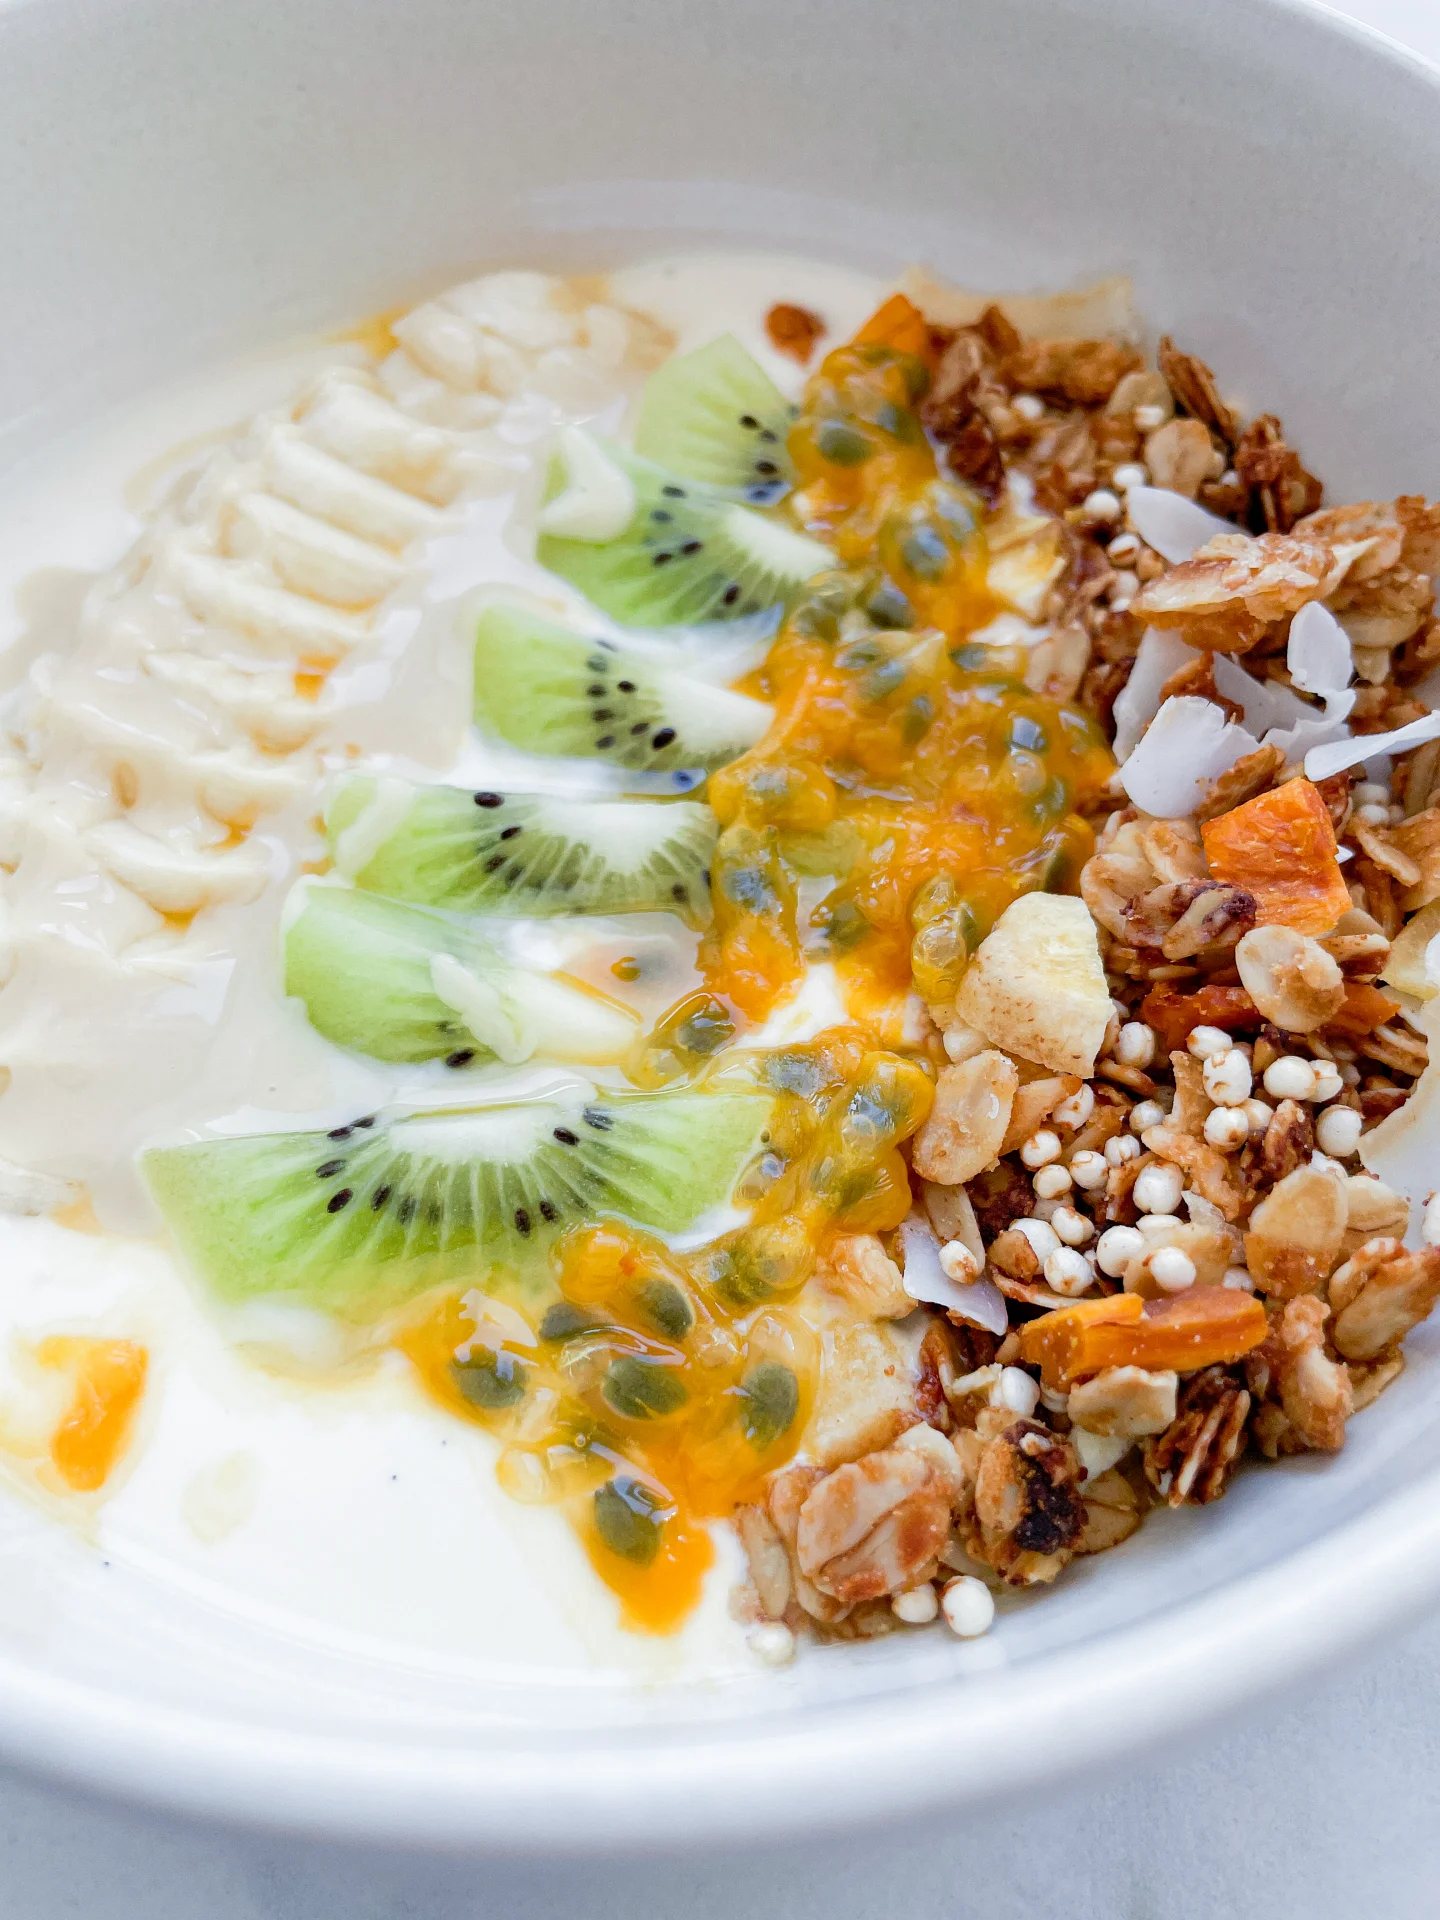
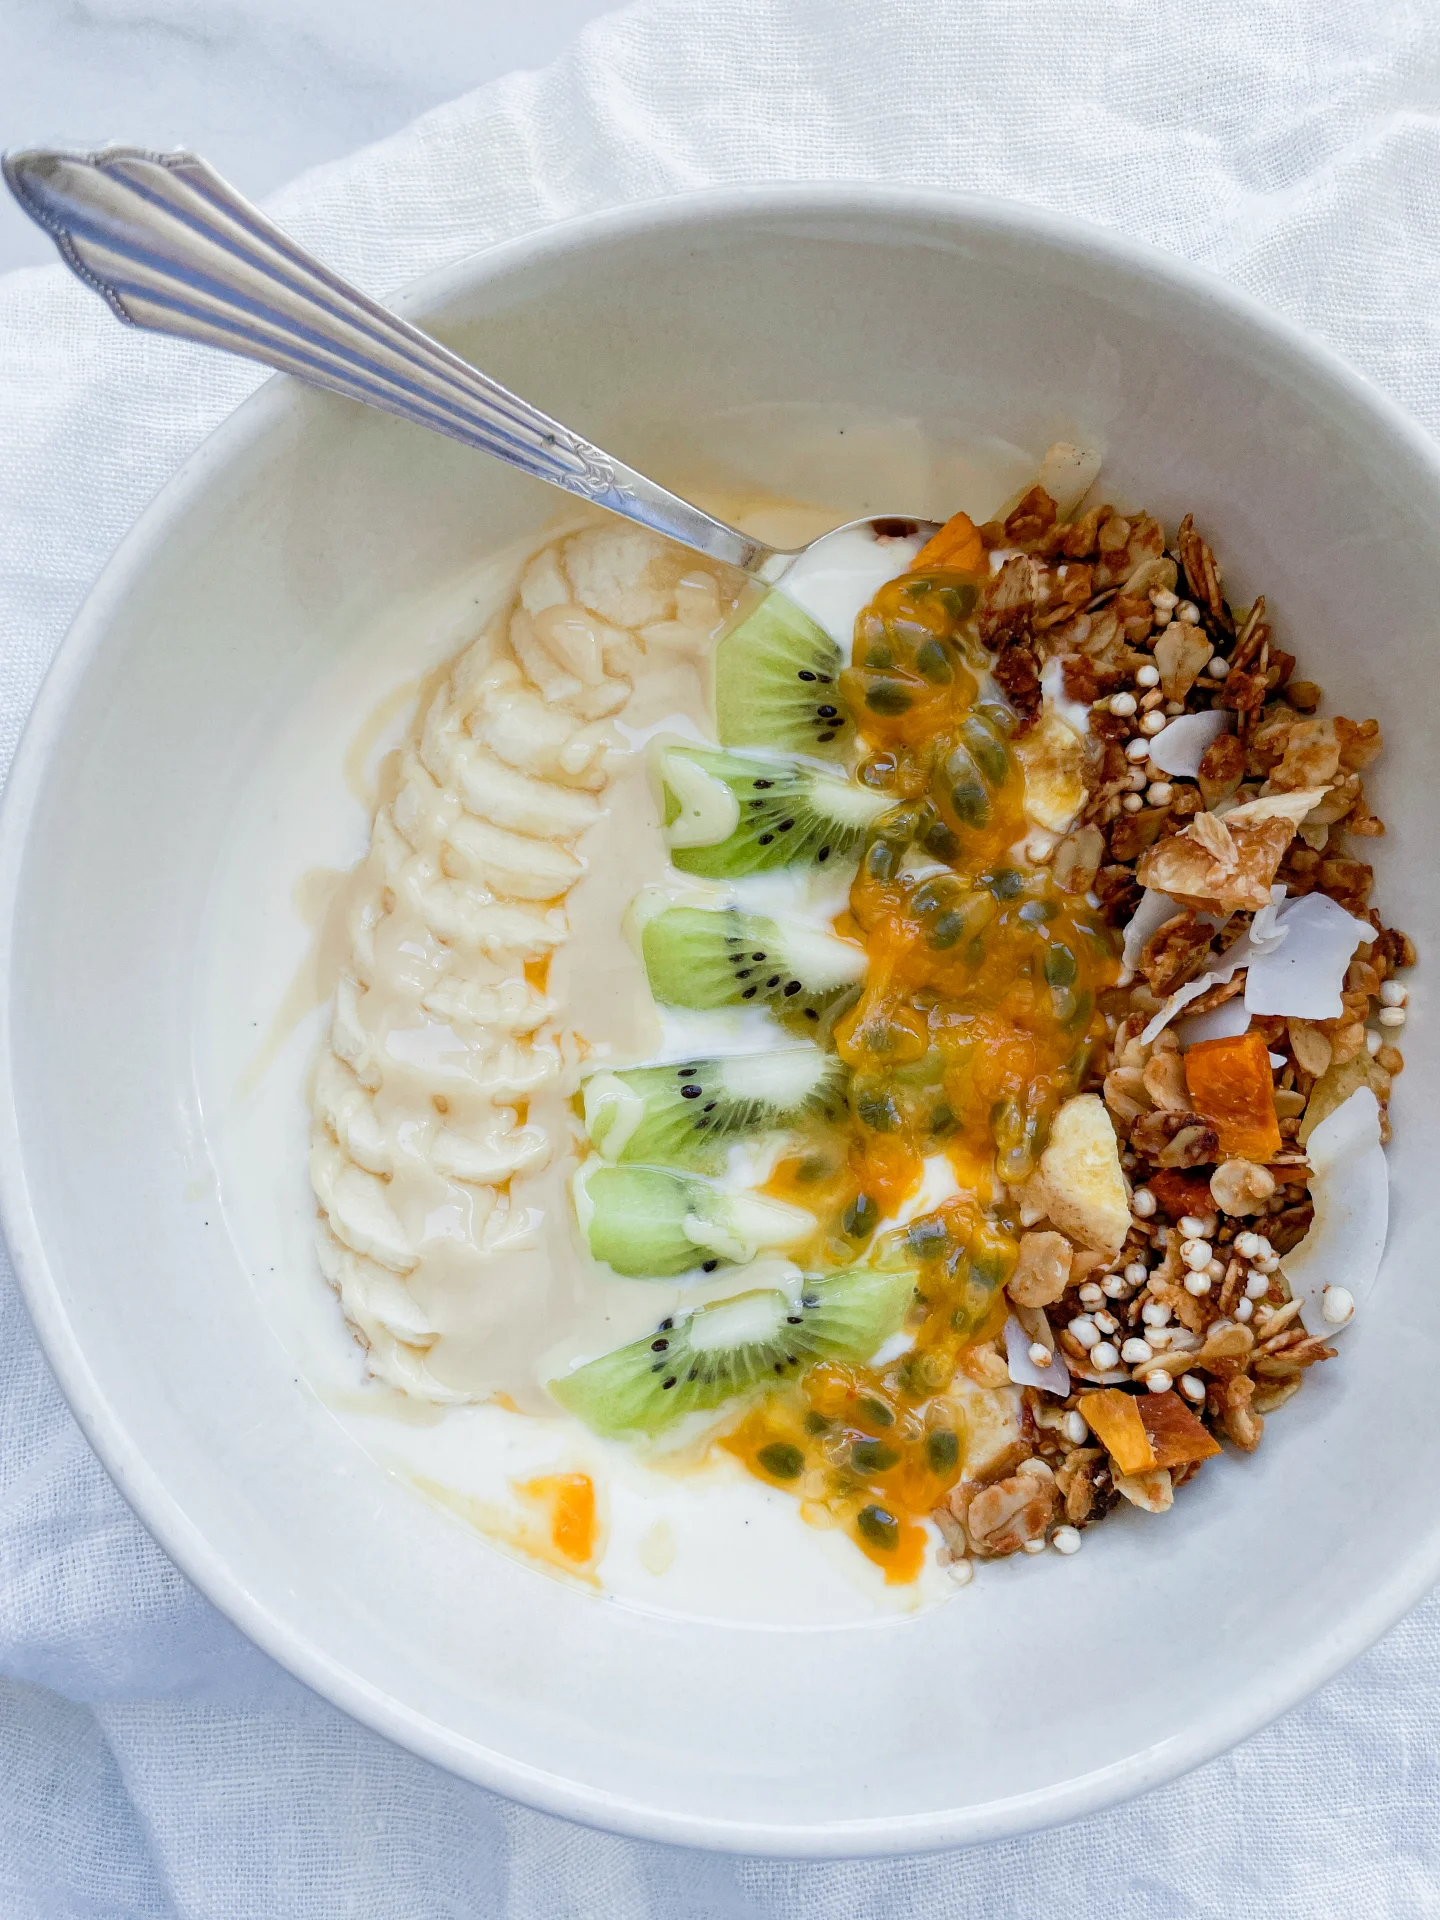
Vanilla Yogurt Bowl & Tropical Granola

Vanilla Yogurt Bowl & Tropical Granola

Vanilla Yogurt Bowl & Tropical Granola

Vanilla Yogurt Bowl & Tropical Granola

March 11, 2025 by Kimberly

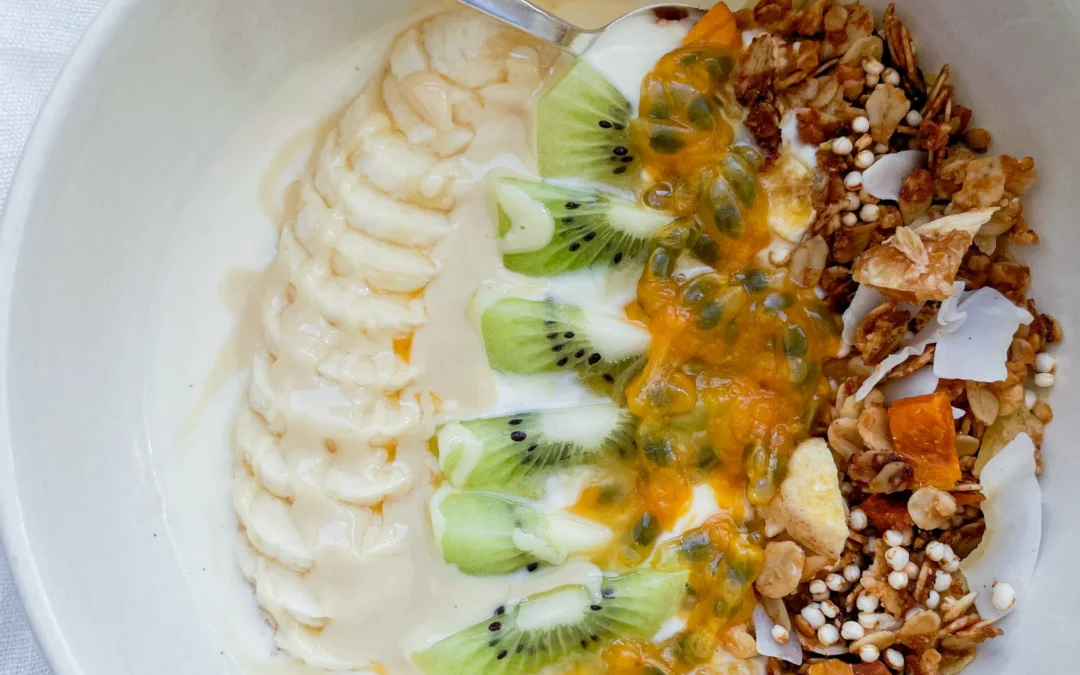
Creamy vanilla yogurt meets tropical crunch. Sweet bananas, juicy kiwi, tart passion fruit, and golden granola loaded with chewy dried fruit. It’s fresh, indulgent, and kinda feels like eating breakfast on vacation.

25 MINUTES

EASY

VEGETARIAN

INT.

2 PORTIONS

SWEET

BRUNCH

BREAKFAST

ALL YEAR

INTRODUCTION

ABOUT THE RECIPE

This is the kind of breakfast that makes mornings feel a little fancier than they actually are. Creamy vanilla yogurt, perfectly chilled, topped with fresh banana, kiwi, and passion fruit for that sweet-tart balance, plus a generous spoonful of homemade granola that’s golden, crunchy, and packed with chewy dried fruit. It’s fresh, naturally sweet, and can easily be prepped ahead, ideal for busy mornings or lazy Sundays.

How to serve
This bowl is best served cold, straight from the fridge. For the perfect bite, get a little bit of everything on your spoon: creamy yogurt, juicy fruit, and crunchy granola. Want to level it up? Drizzle some almond butter on top or add a sprinkle of coconut flakes for an extra tropical twist. If you’re feeling fancy, serve it in a chilled bowl for that extra-refreshing vibe. Morning coffee on the side? Always a good idea.

How to store
The granola keeps for weeks in an airtight container, so make a big batch ahead of time. The yogurt and fruit are best assembled fresh, but you can pre-chop the fruit and store it in the fridge for a quick grab-and-go breakfast. Just add everything together when you’re ready to eat!

Hi, I'm Kimberly!

Hi, I'm Kimberly.

A passionate food lover who believes in the magic of homemade deliciousness that spreads love and warmth. Join me on this culinary adventure as I prepare wonderful dishes and let’s spread some happiness together!

Kimberly the Zett Signature

If you want to get to know me better, click here!


Vanilla Yogurt Bowl & Tropical Granola
„Let’s make a piece of happiness“
Print
clock clock iconcutlery cutlery iconflag flag iconfolder folder iconinstagram instagram iconpinterest pinterest iconfacebook facebook iconprint print iconsquares squares iconheart heart iconheart solid heart solid icon
Vanilla Yogurt Bowl & Tropical Granola

Vanilla Yogurt Bowl & Tropical Granola


  • Author: Kimberly
  • Total Time: 25 min
  • Yield: 2 1x

Description

RECOMMENDED EQUIPMENT

  • two small bowls
  • sharp knife
  • cutting board

Ingredients

Units Scale
  • 300 grams yogurt
  • 2 tsp agave syrup
  • 2 tsp vanilla extract
  • 1 passionfruit
  • 1 banana
  • 2 kiwis
  • 2 tsp almond butter
  • 4 tbsp tropical granola

Instructions

  1. First, prepare the tropical granola. You can find the full recipe here. While the granola is baking in the oven, get the other ingredients ready.
  2. In a bowl, mix the yogurt with agave syrup and vanilla extract until well combined.
  3. Slice the banana into thin rounds. Peel the kiwi and cut it into small pieces.
  4. Top the yogurt with the banana slices and kiwi pieces.
  5. Once the granola is done baking, follow the recipe to finish it. Then, add about 2 tablespoons per serving on top of the yogurt and fruit.
  6. Finally, top the bowl with fresh passion fruit and a drizzle of almond butter.
  • Prep Time: 10 min
  • Cook Time: 15 min

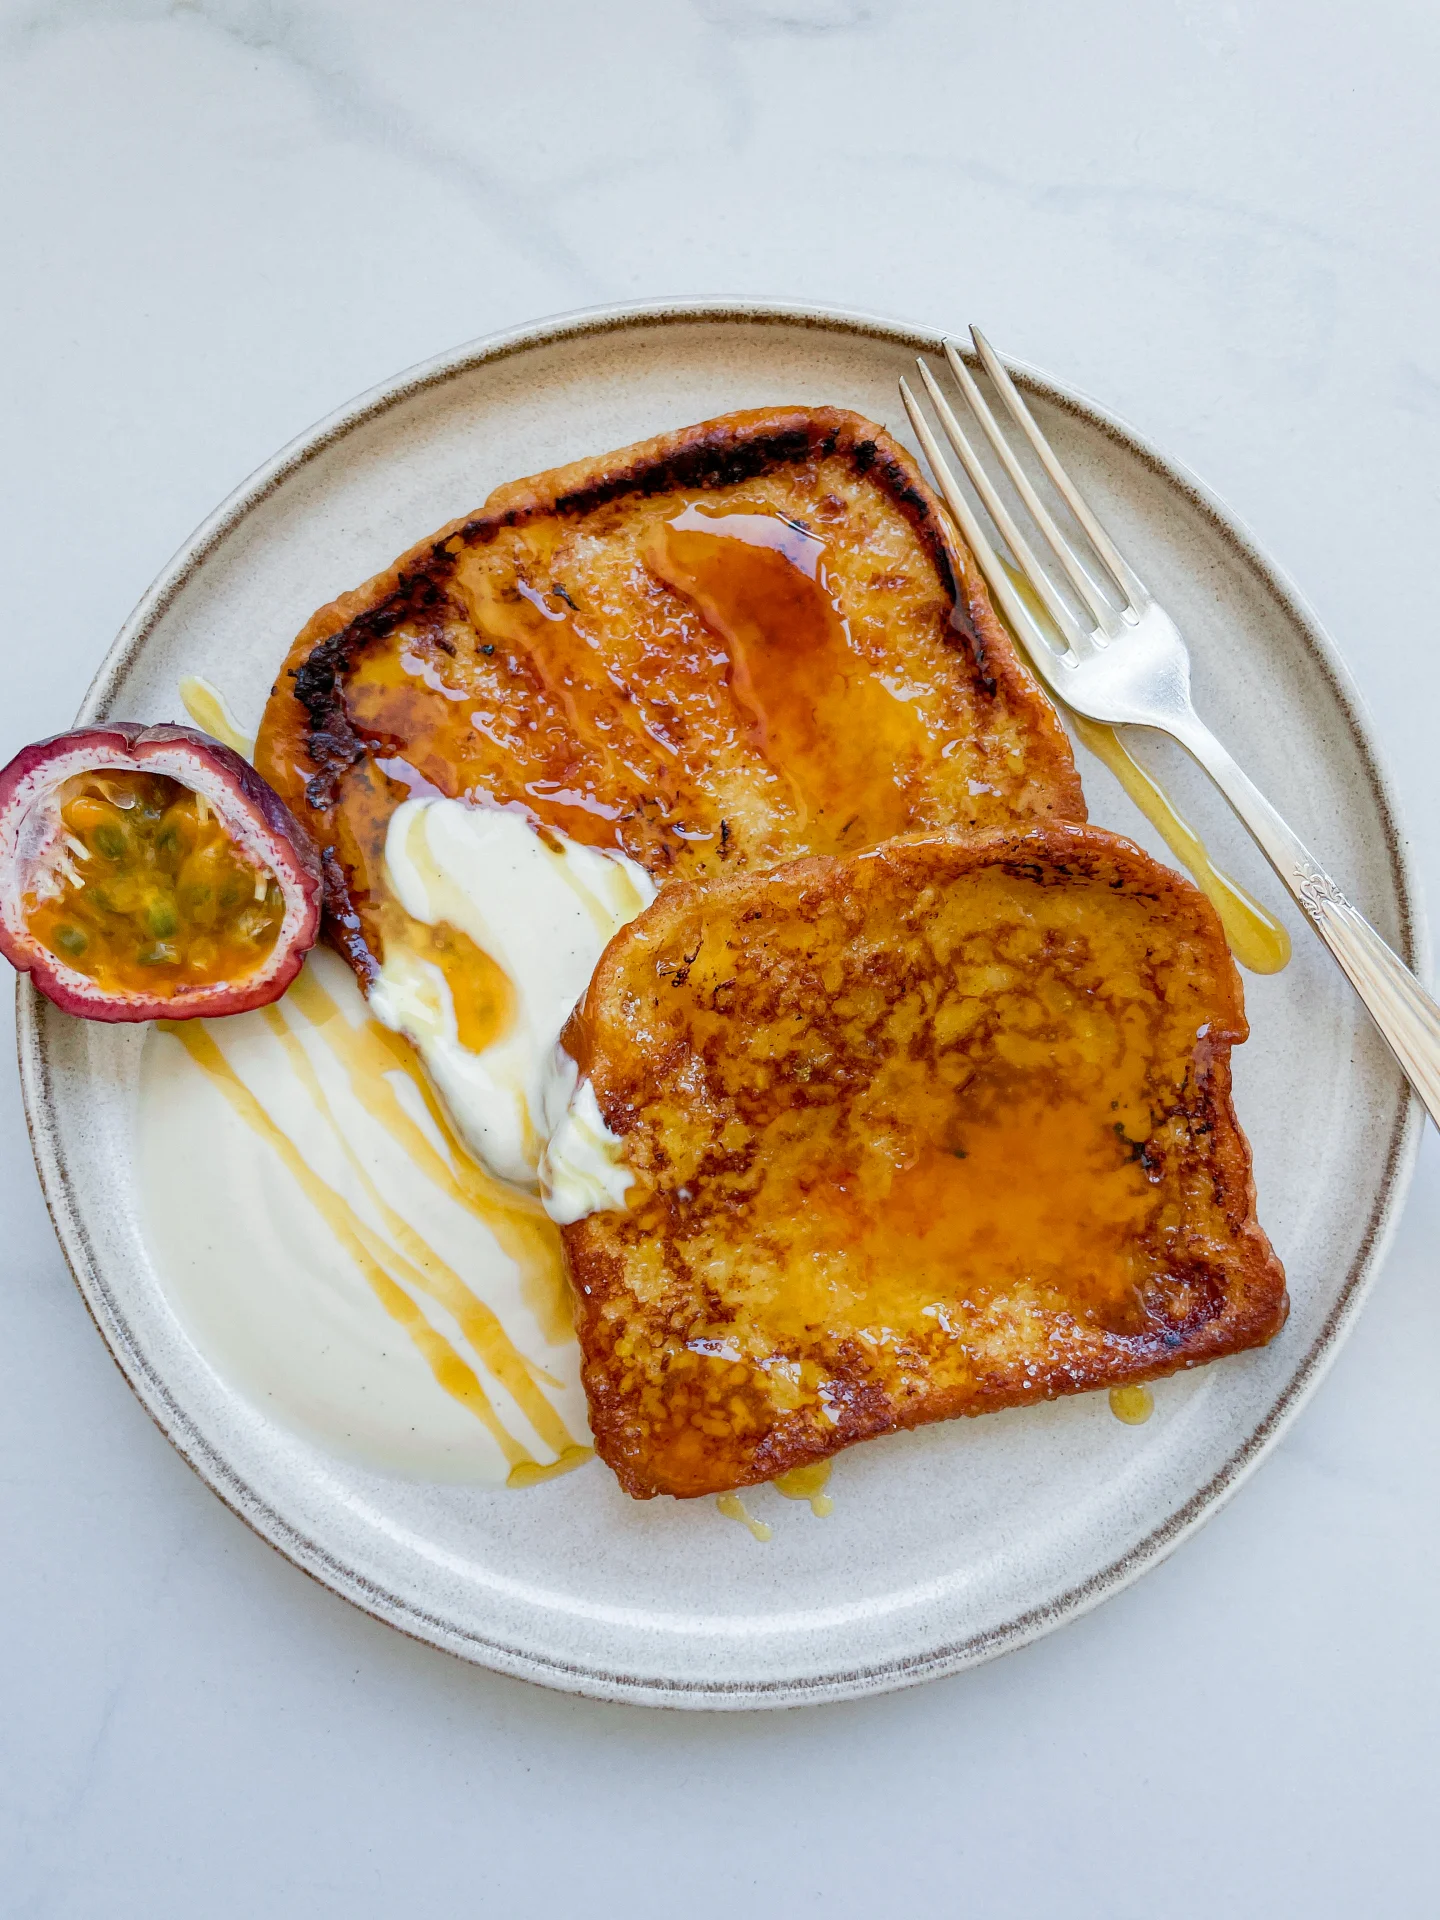
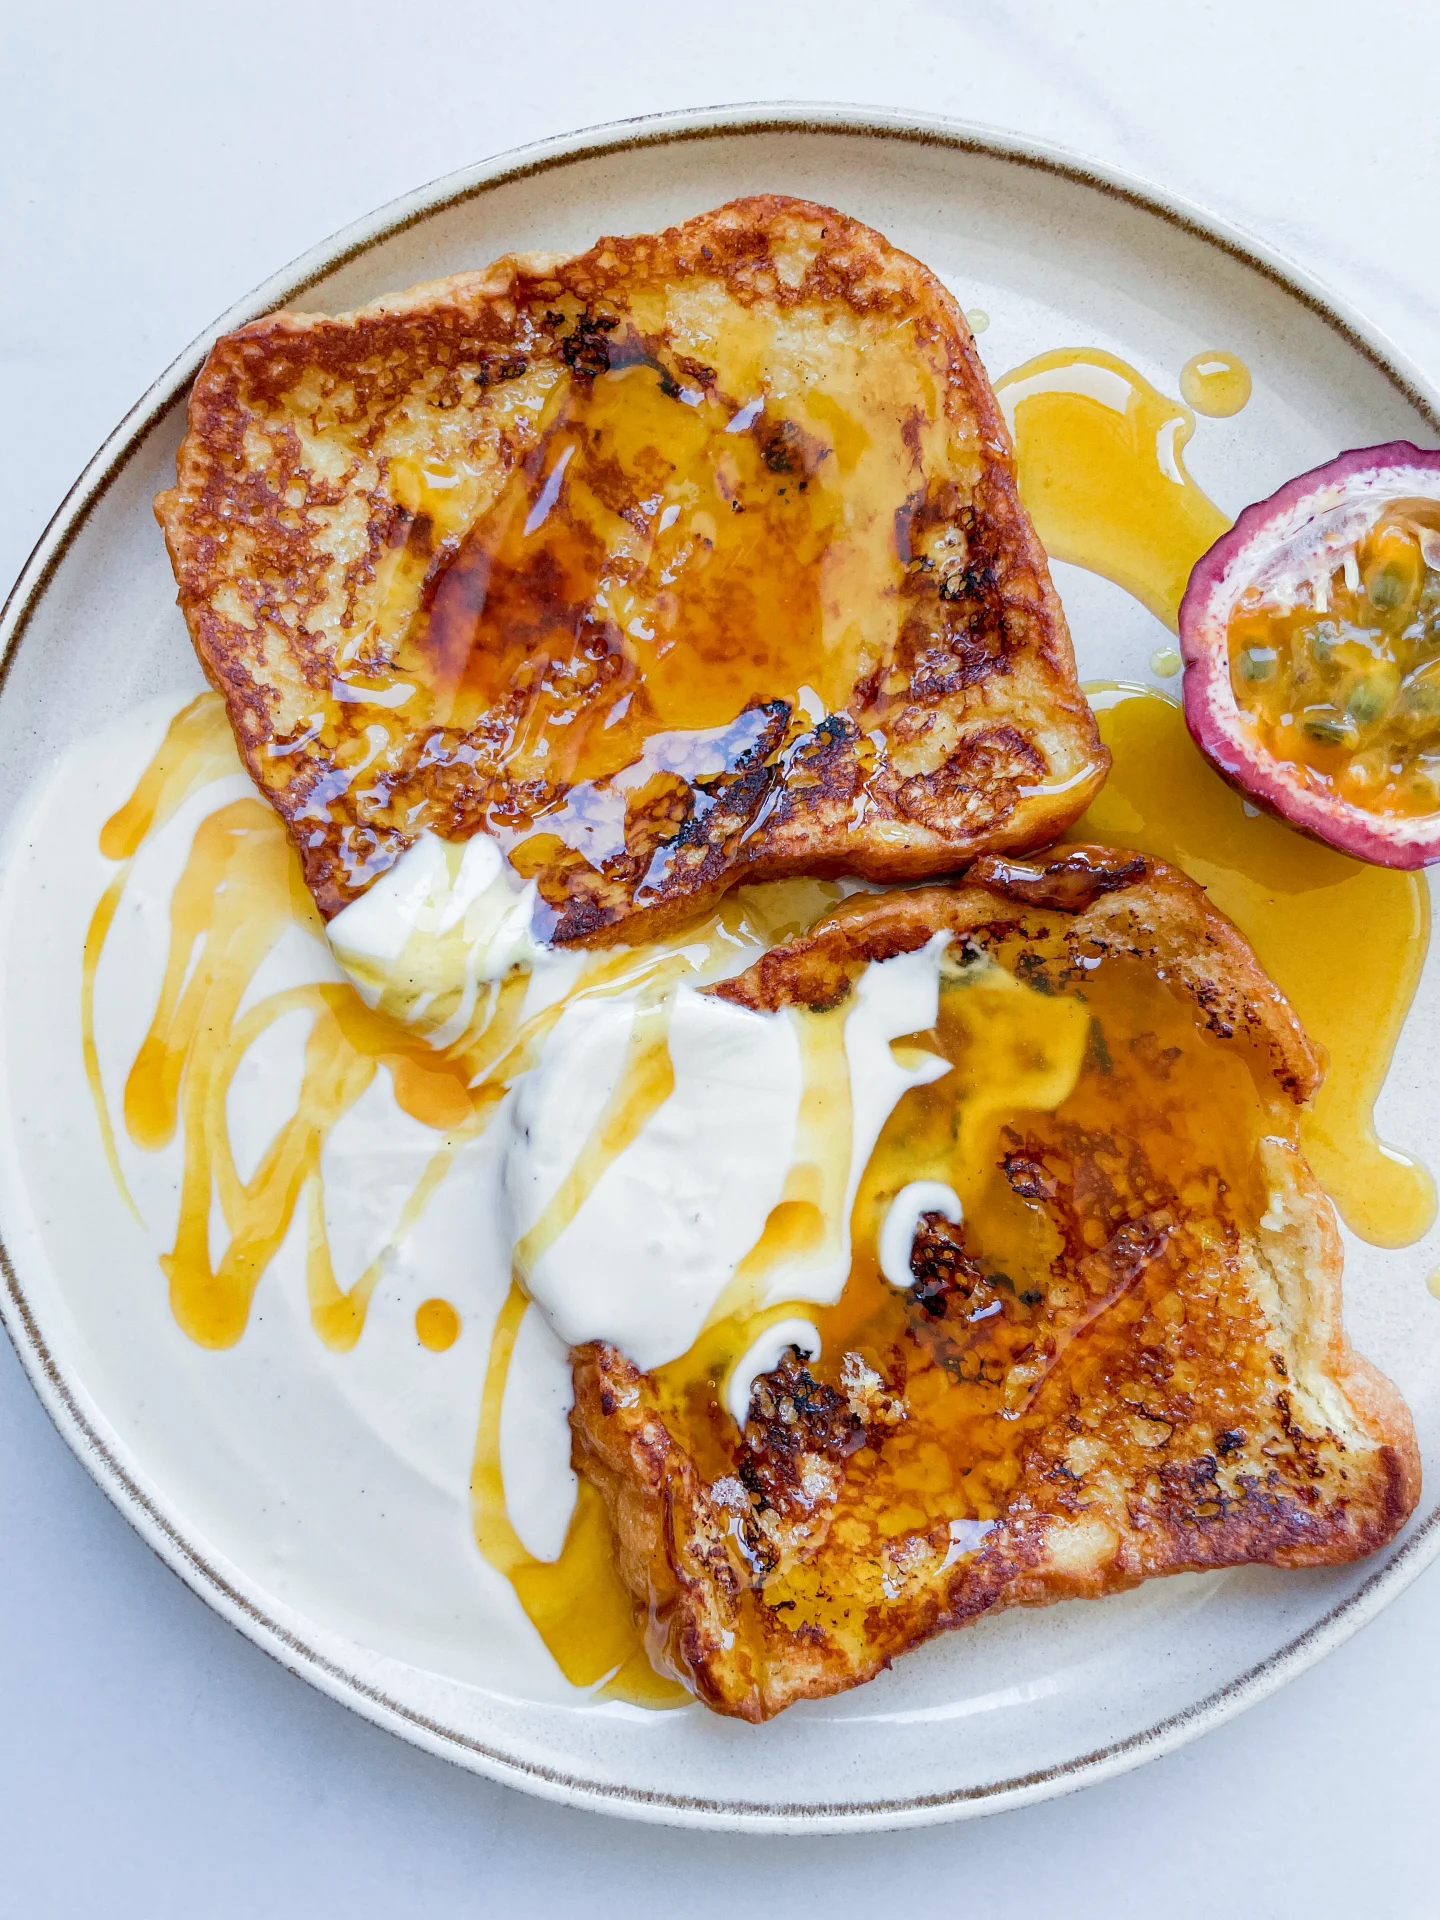
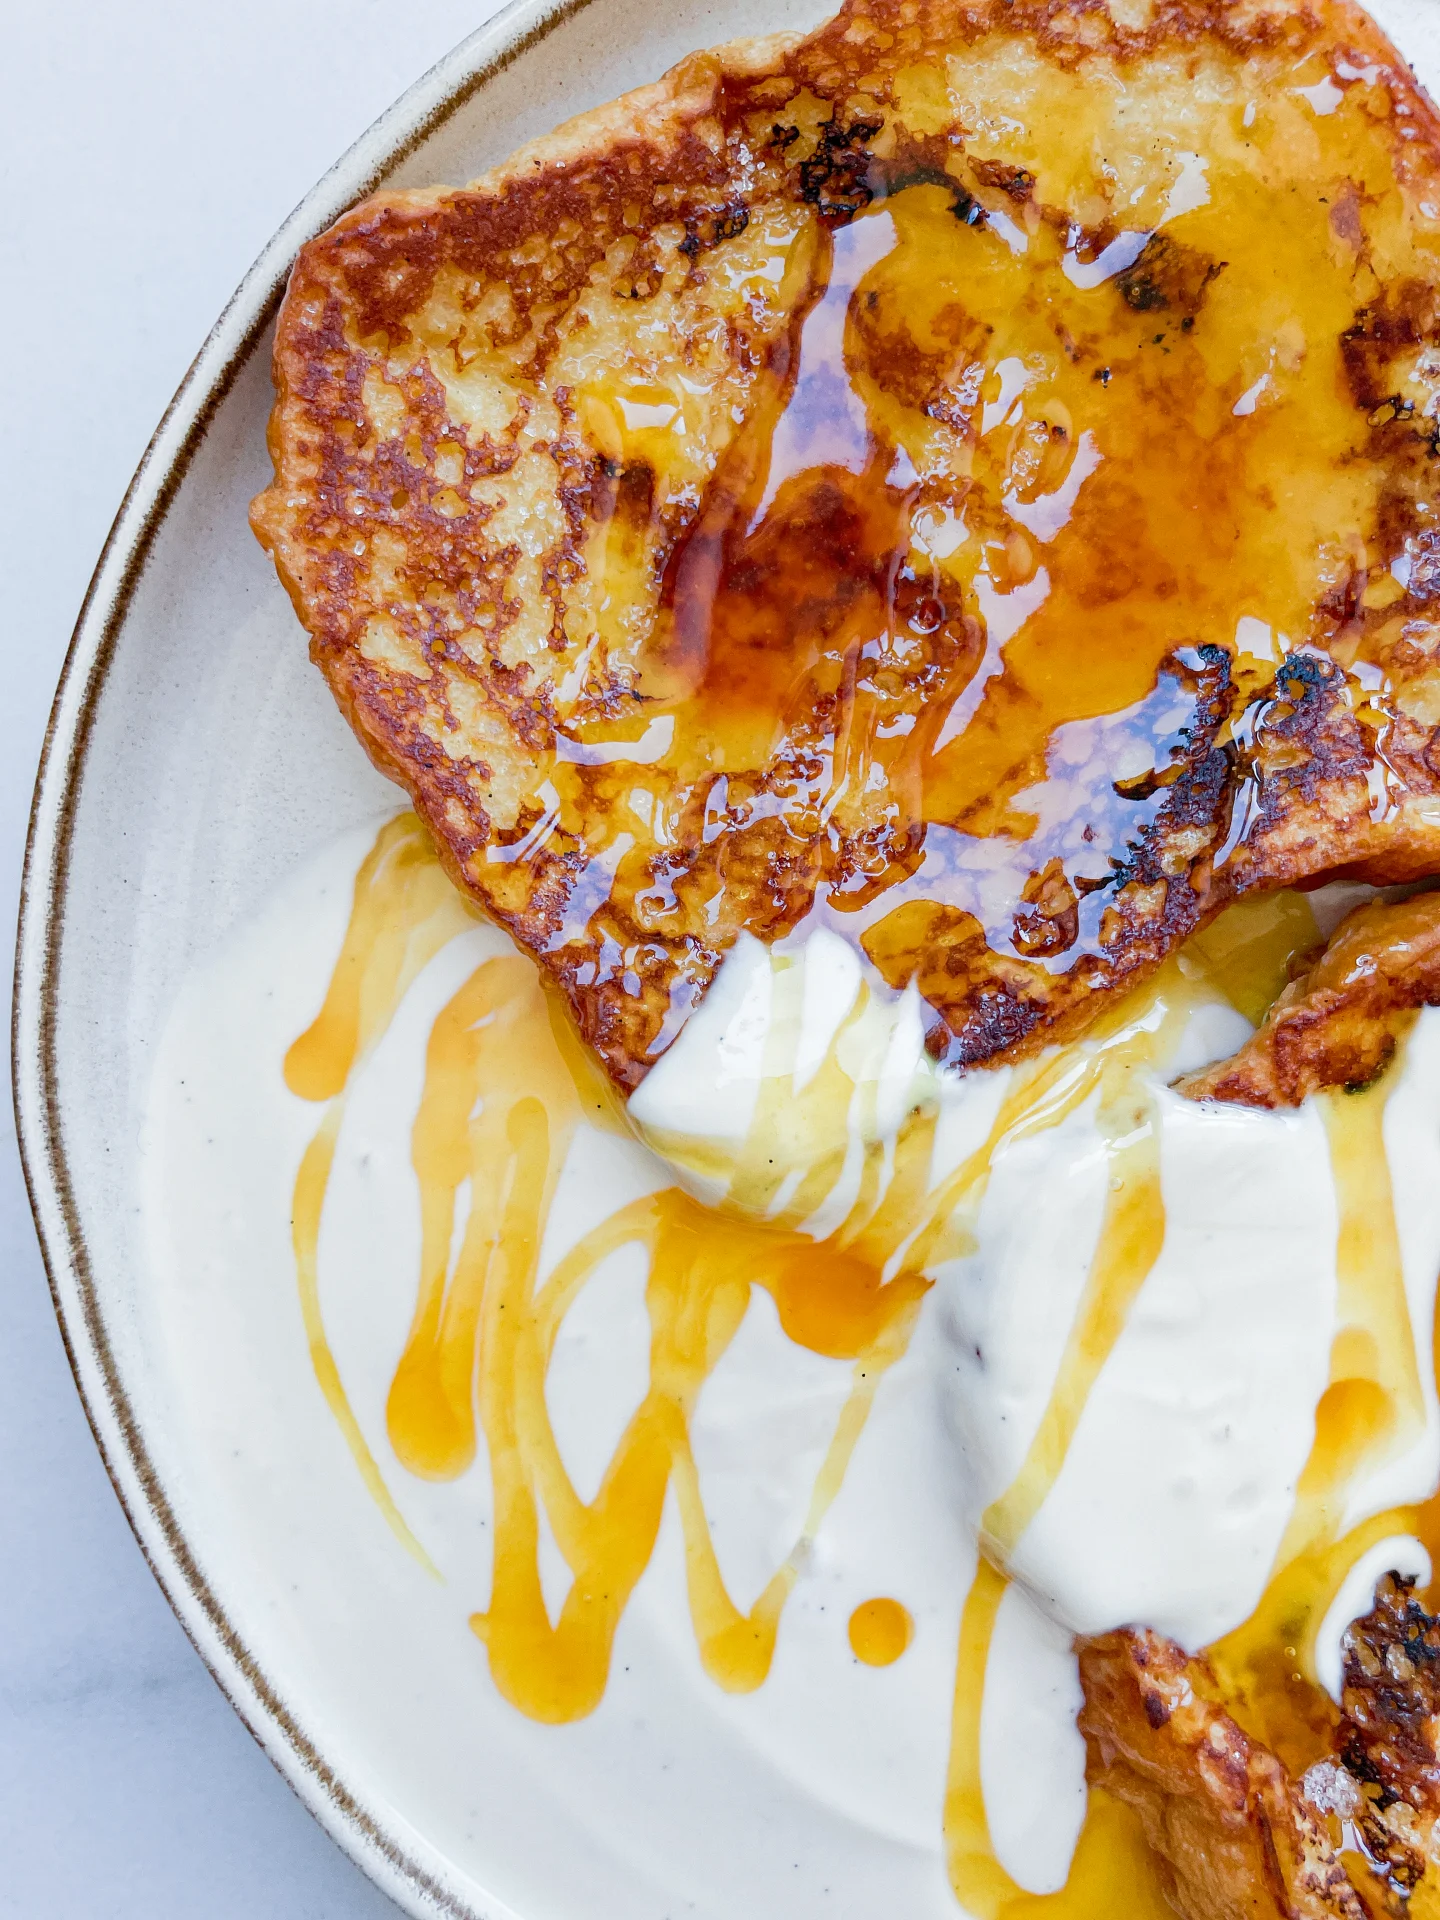
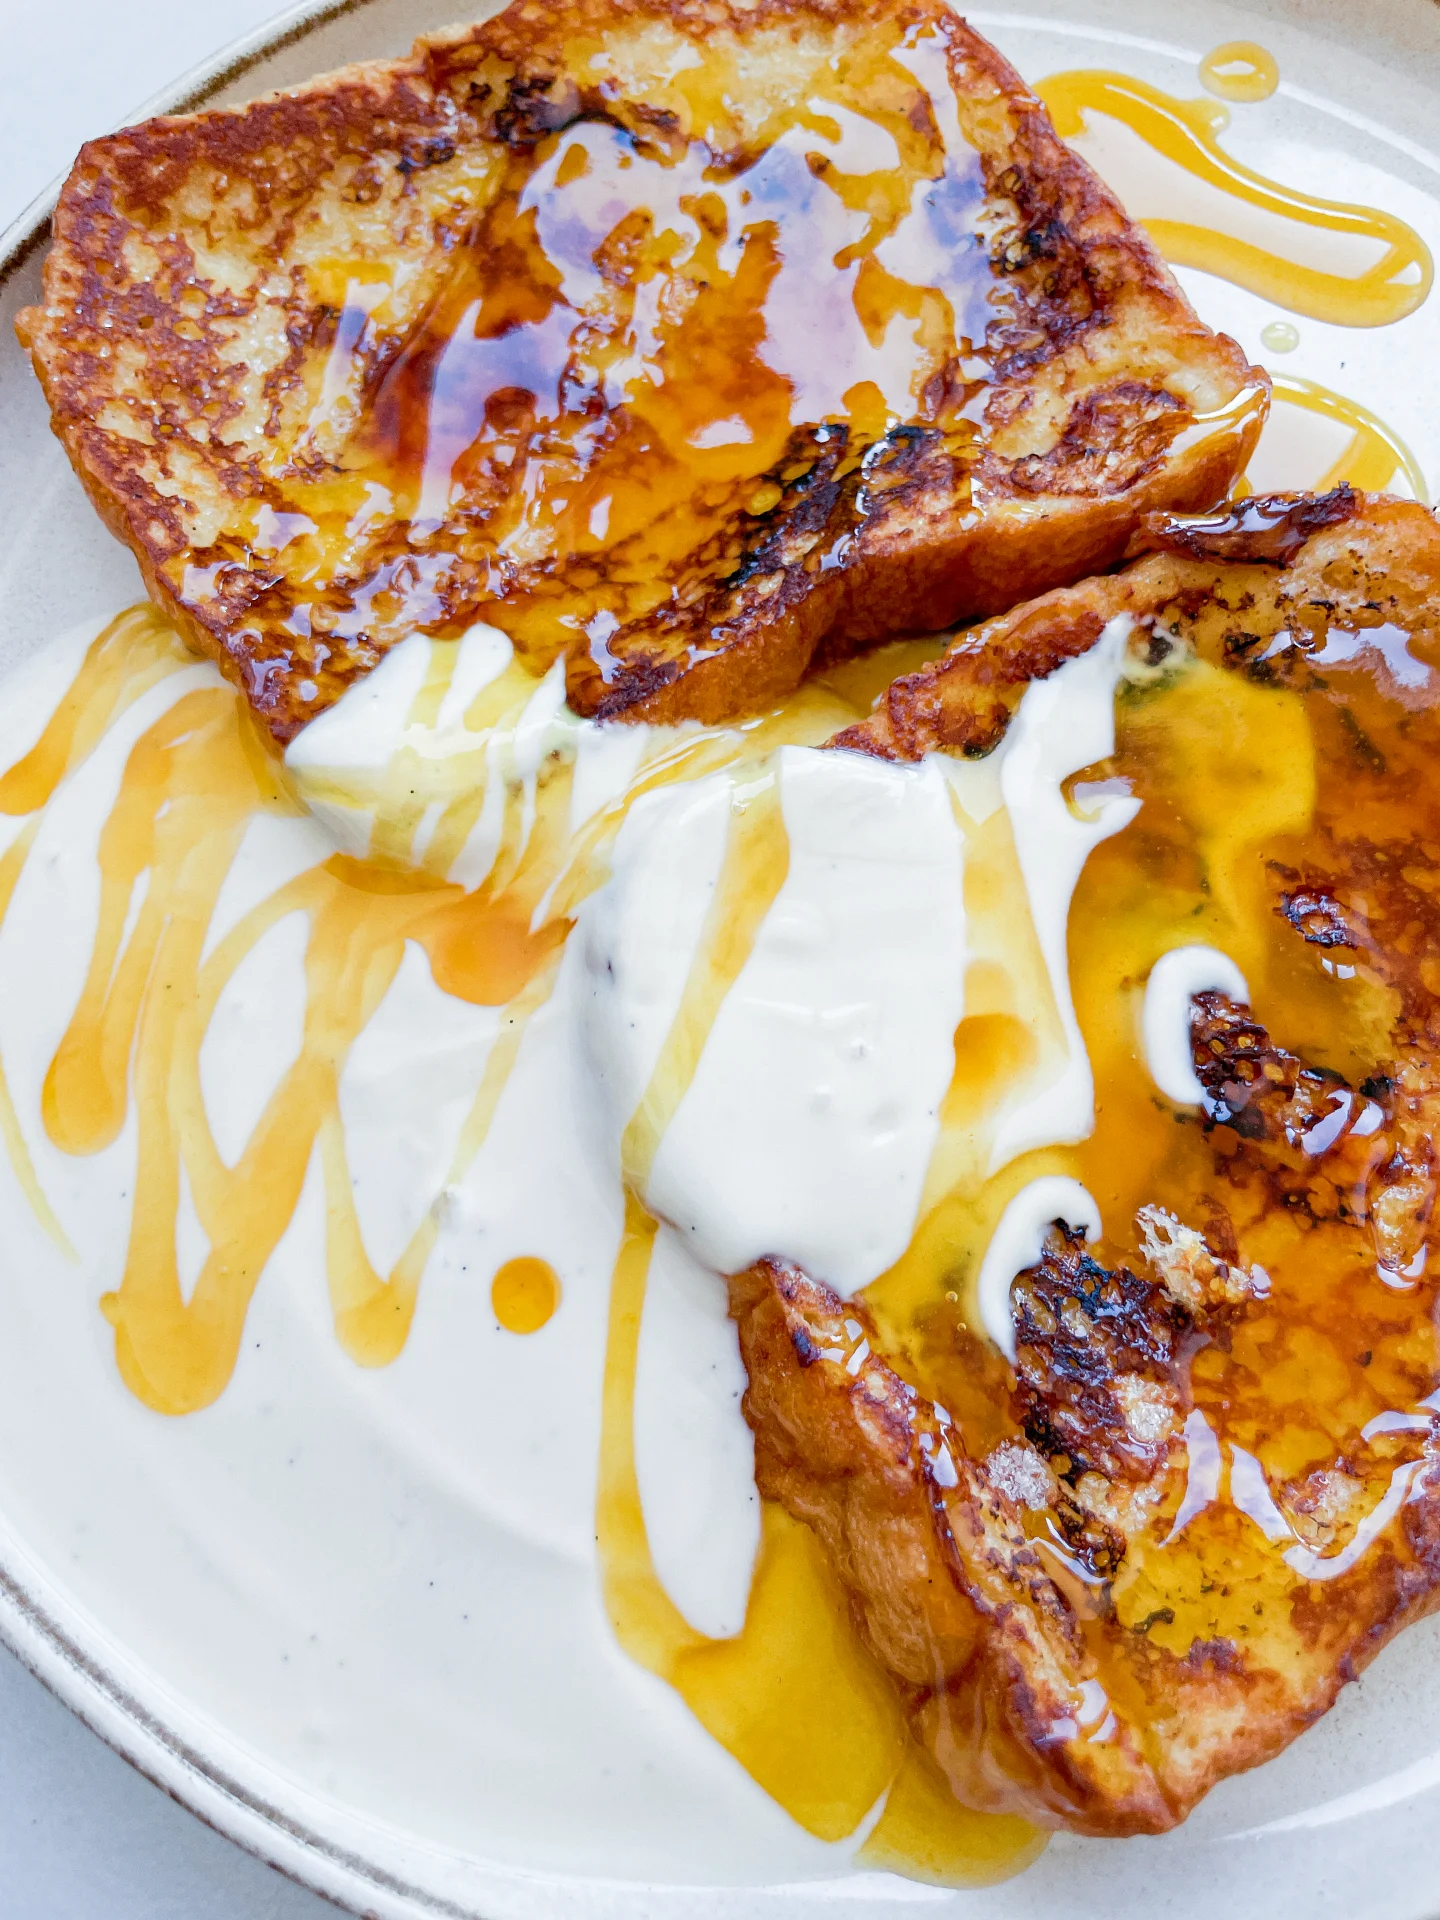
Caramalized French Toast with Vanilla Yogurt & Passionfruit Glaze

Caramalized French Toast with Vanilla Yogurt & Passionfruit Glaze

Caramalized French Toast with Vanilla Yogurt & Passionfruit Glaze

Caramalized French Toast with Vanilla Yogurt & Passionfruit Glaze

March 10, 2025 by Kimberly

Indulge in golden, caramel-kissed French toast paired with creamy vanilla yogurt and a tangy passionfruit drizzle. A breakfast that feels like a sunlit morning in paradise.

25 MINUTES

EASY

VEGETARIAN

FRENCH

2 PORTIONS

SWEET

BRUNCH

BREAKFAST

ALL YEAR

INTRODUCTION

ABOUT THE RECIPE

This is not your basic French toast. We’re talking crispy, caramelized edges, a creamy vanilla yogurt topping, and a tangy passionfruit glaze that adds just the right amount of freshness. It’s that perfect balance of buttery, crunchy, and melt-in-your-mouth softness that makes brunch feel extra. Whether you’re treating yourself on a slow Sunday morning or trying to impress someone with minimal effort, this dish is a guaranteed win. Think tropical, cozy, and just fancy enough to feel special without the hassle.

How to serve
This one shines brightest when served fresh off the pan: crispy and golden. Drizzle that passionfruit glaze generously, dollop some vanilla yogurt on top, and let it all melt together in the best way.

How to store
French toast is best enjoyed fresh, but if you have leftovers, store them in an airtight container in the fridge for up to one day. Reheat in a pan to keep the crispiness. The yogurt and glaze should be stored separately and added just before serving.

Hi, I'm Kimberly!

Hi, I'm Kimberly.

A passionate food lover who believes in the magic of homemade deliciousness that spreads love and warmth. Join me on this culinary adventure as I prepare wonderful dishes and let’s spread some happiness together!

Kimberly the Zett Signature

If you want to get to know me better, click here!


Caramalized French Toast with Vanilla Yogurt & Passionfruit Glaze
„Let’s make a piece of happiness“
Print
clock clock iconcutlery cutlery iconflag flag iconfolder folder iconinstagram instagram iconpinterest pinterest iconfacebook facebook iconprint print iconsquares squares iconheart heart iconheart solid heart solid icon
Caramalized French Toast with Vanilla Yogurt & Passionfruit Glaze

Caramalized French Toast with Vanilla Yogurt & Passionfruit Glaze


5 from 2 reviews

  • Author: Kimberly
  • Total Time: 25 min
  • Yield: 2 1x

Description

RECOMMENDED EQUIPMENT

  • large pan
  • shallow dish
  • small saucepan
  • small bowl
  • kitchen torch

Ingredients

Units Scale

PASSIONFRUIT GLAZE

  • 100 grams passionfruit purée
  • 100 grams white sugar
  • 25 grams water

FRENCH TOAST

  • 4 slices brioche bread
  • 75 grams cow milk
  • 1 egg
  • 1 tsp vanilla extract
  • butter for frying
  • sugar for the crust

TOPPING

  • 3 tbsp yogurt
  • 1 tsp vanilla extract
  • 2 passionfruits

Instructions

  1. In a small saucepan, combine the passion fruit purée, water, and sugar. Stir and bring to a gentle simmer over medium heat. Let it cook for 15–20 minutes until it thickens into a syrup-like consistency. Remove from heat and let it cool slightly. It will thicken a bit more as it cools.
  2. In a small bowl, mix the yogurt with vanilla extract (or fresh vanilla) until smooth. Set aside.
  3. In a shallow dish, whisk together the eggs, milk, and vanilla extract. Dip each slice of brioche into the egg mixture, making sure both sides are evenly coated. In a pan over medium heat, melt the butter and cook the brioche slices until golden brown and crispy on both sides. Remove from the pan.
  4. Sprinkle a thin layer of sugar over each slice of French toast. Using a kitchen torch, caramelize the sugar until it turns golden and crisp.
  5. Place two slices of caramelized French toast on a plate. Top with a generous dollop of vanilla yogurt and drizzle with the passion fruit glaze.
  6. Cut a fresh passion fruit in half and scoop the pulp over the toast for an extra burst of flavor. Serve immediately and enjoy!

  • Cook Time: 25 min

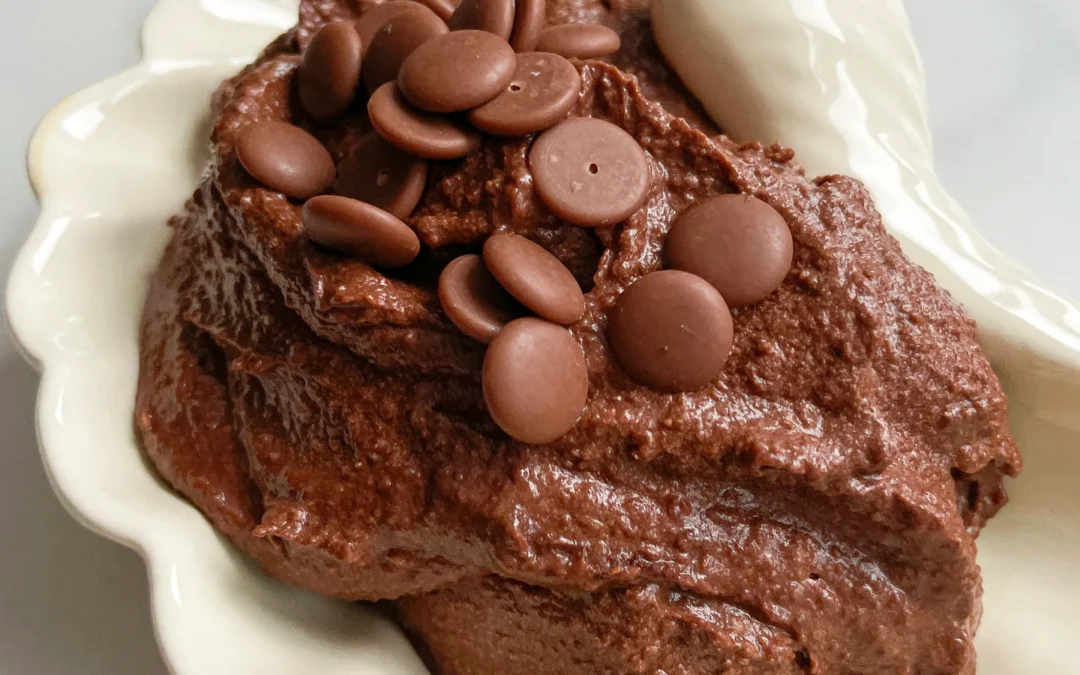
Brownie Batter Chocolate Hummus

Brownie Batter Chocolate Hummus

Brownie Batter Chocolate Hummus

Brownie Batter Chocolate Hummus

February 18, 2025 by Kimberly

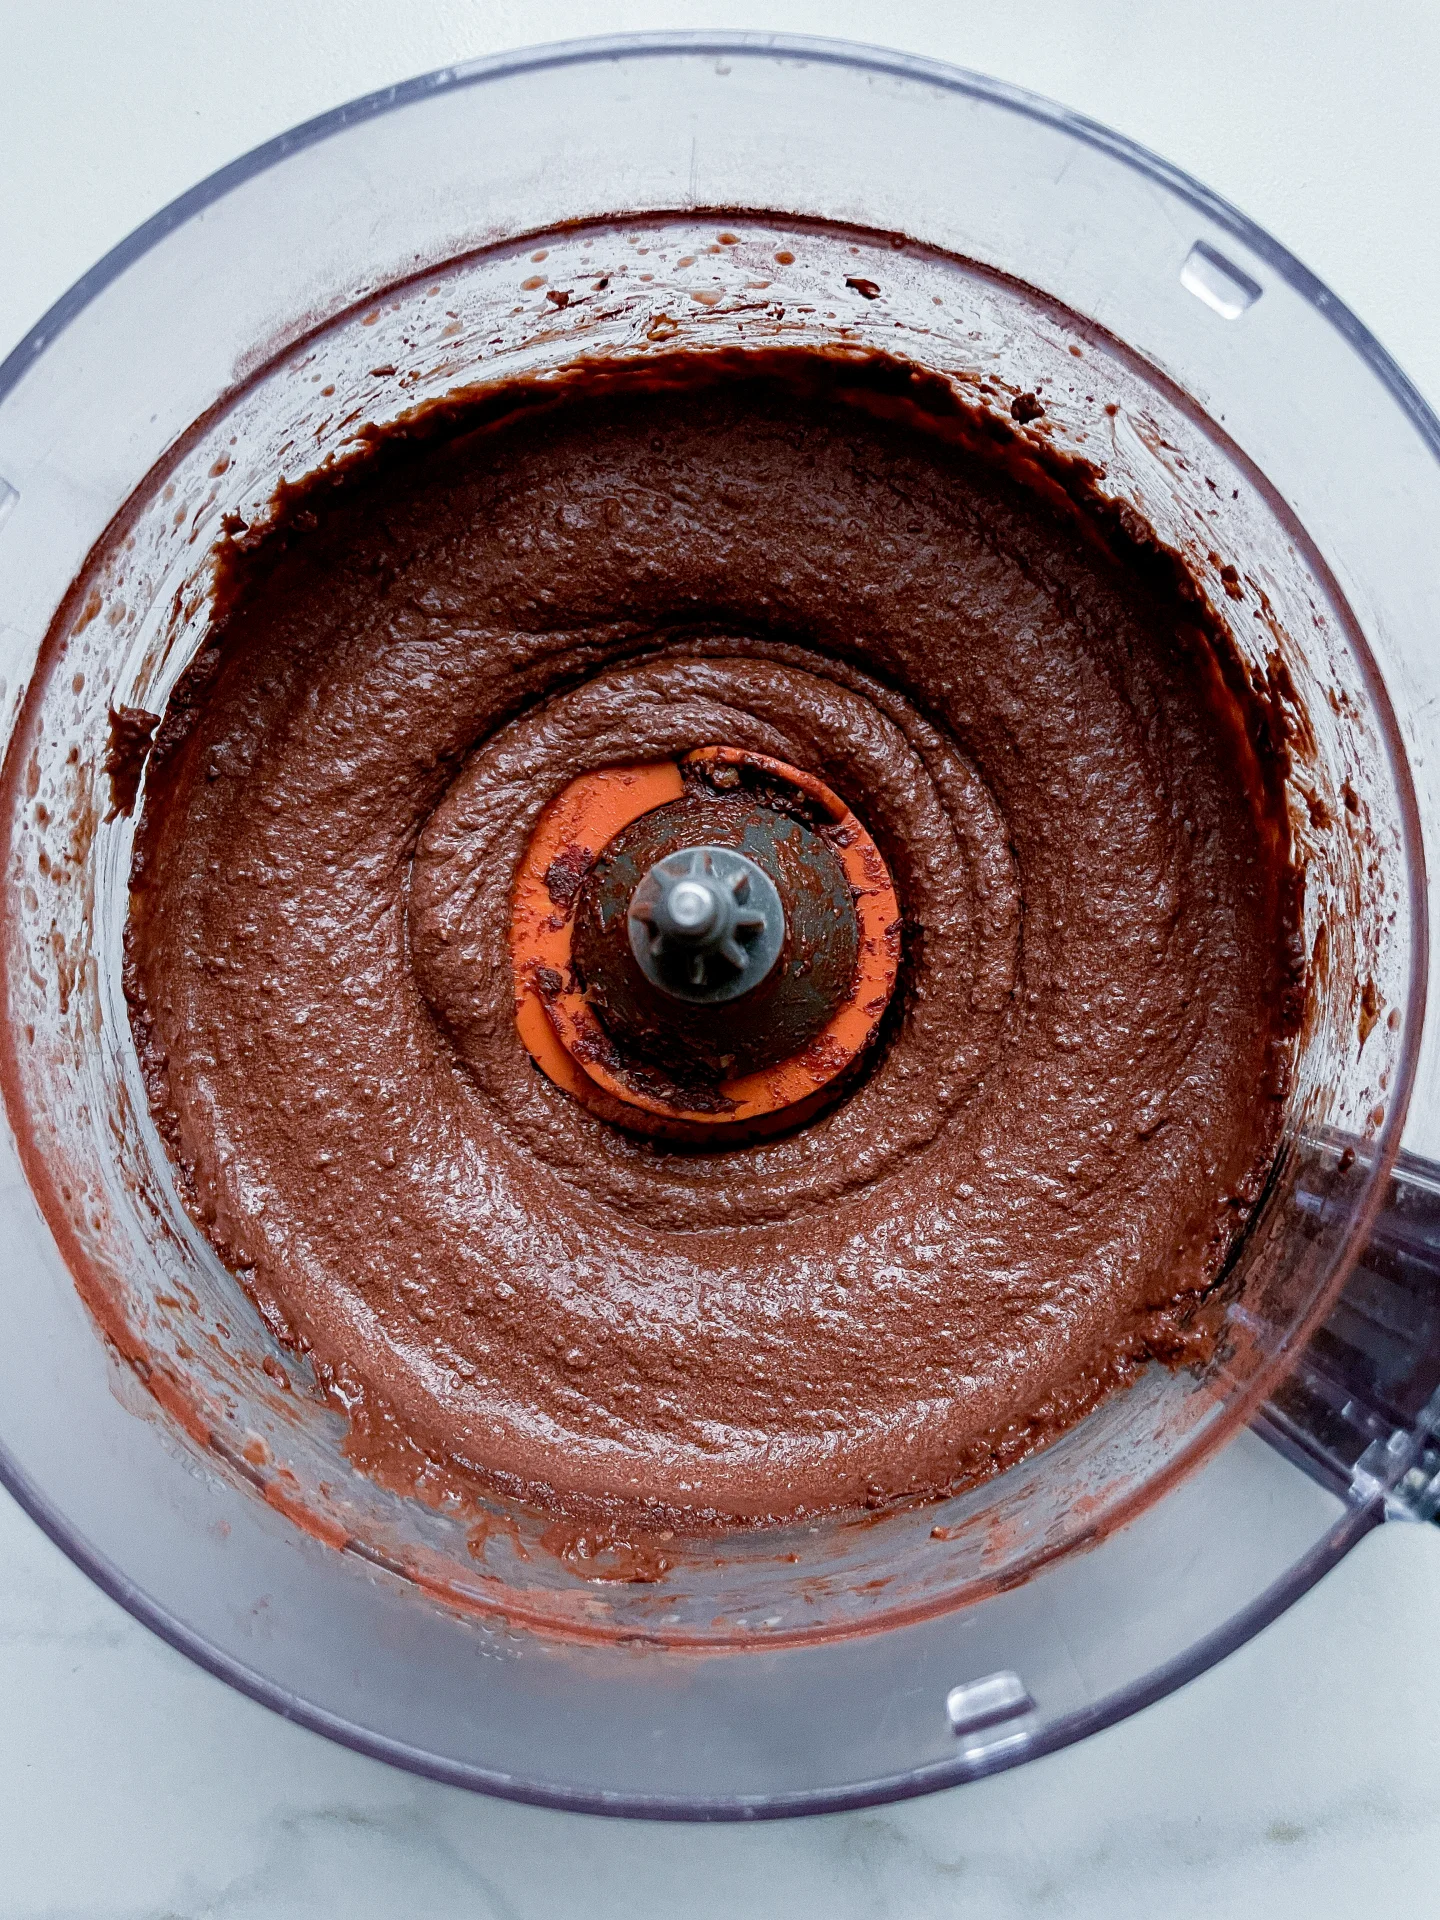
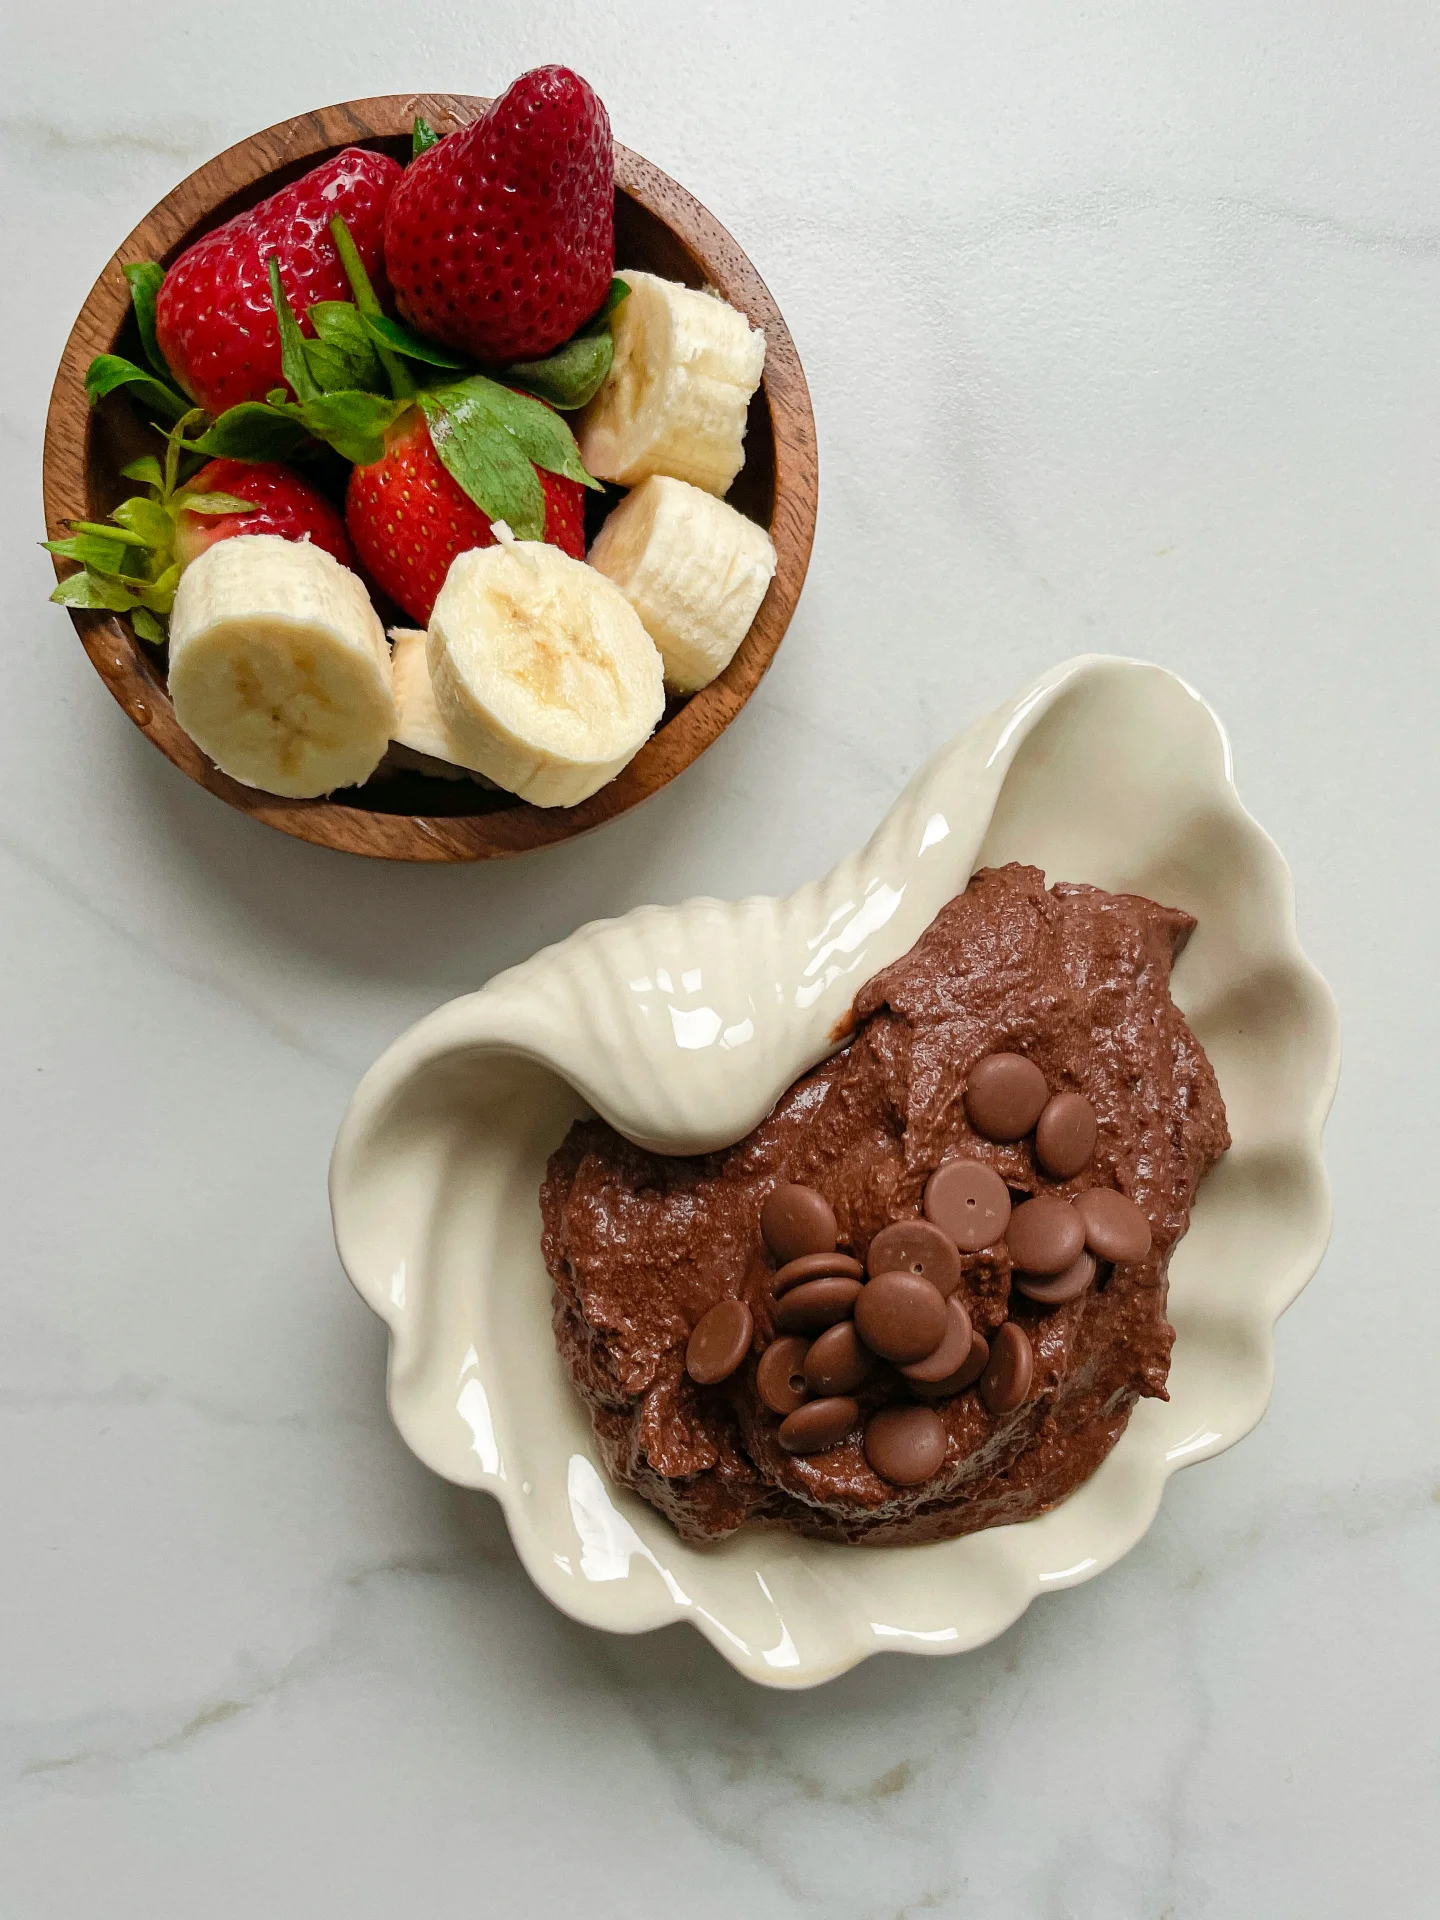
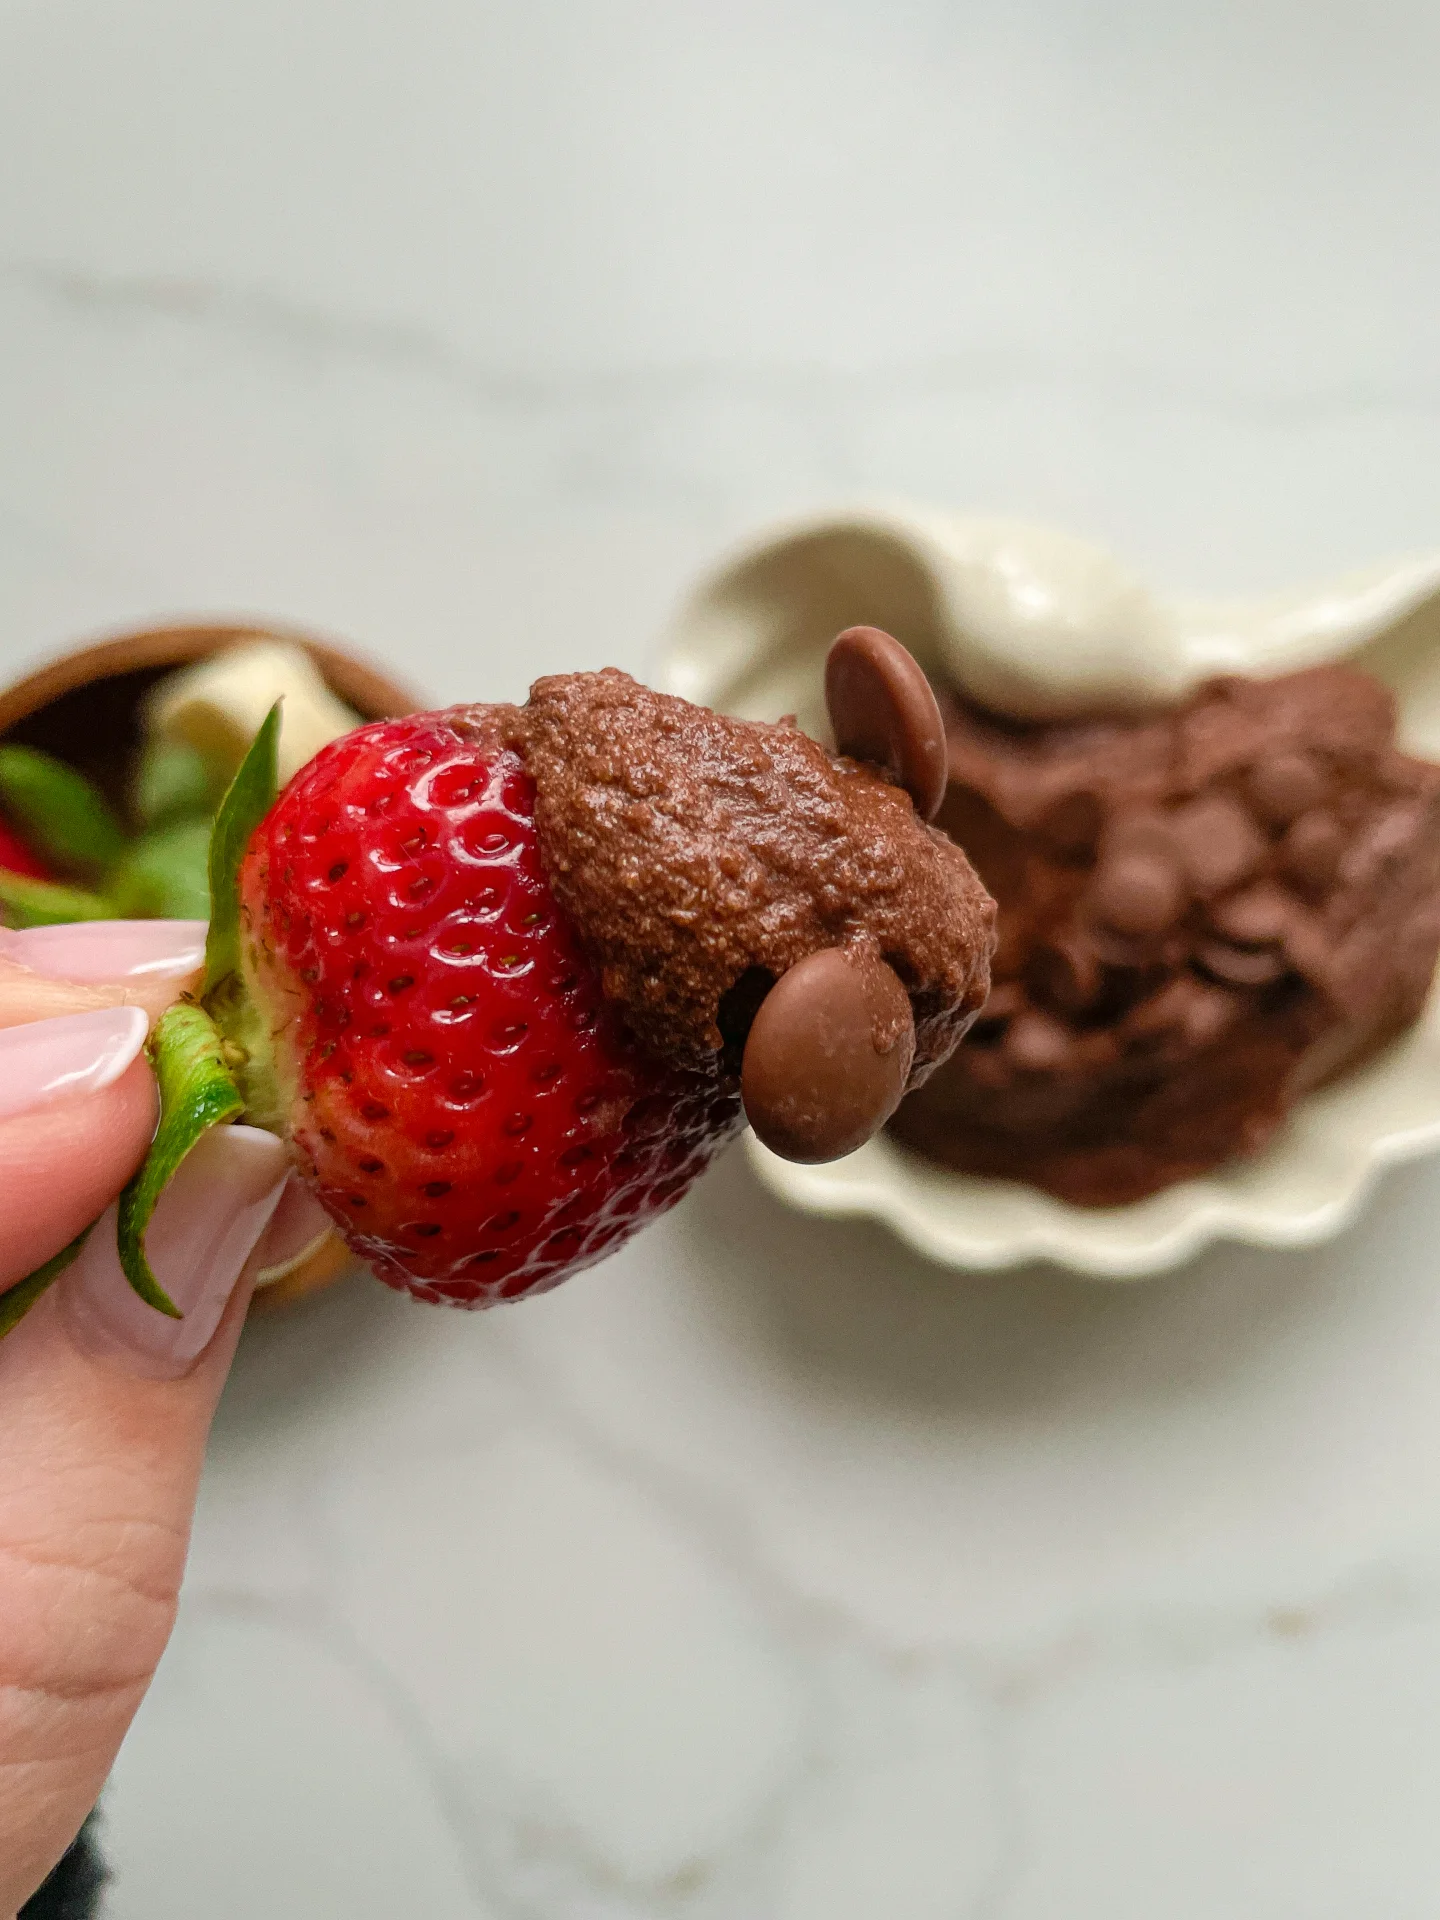
This ultra-creamy, rich chocolate dip tastes like straight-up brownie batter but is secretly packed with good-for-you ingredients. Perfect for spreading, dipping, or just eating by the spoonful…no judgment here!!

10 MINUTES

EASY

VEGAN

INTERNATIONAL

4 PORTIONS

CREAMY
SWEET

EVERYDAY

SNACKS
DESSERT

ALL YEAR

INTRODUCTION

ABOUT THE RECIPE

If you’ve never tried sweet hummus before, this one’s about to change your life. Imagine the rich, fudgy taste of brownie batter but in a smooth, creamy dip that also happens to be good for you. No refined sugar, no weird additives, just simple ingredients blending into pure chocolatey magic. Whether you’re dipping fruit, spreading it on toast, or eating it straight from the jar (I see you), this is your new go-to for a guilt-free chocolate fix.

How to serve
Swipe it onto warm toast, pair it with strawberries, banana slices, or apple wedges, or go all in and dunk some pretzels for that sweet-salty combo. Feeling extra? Stir it into oatmeal, drizzle it over pancakes, or layer it in a yogurt parfait for a next-level treat.

How to store
Store your chocolate hummus in an airtight container in the fridge for up to 4 days, but let’s be real, it won’t last that long. If it thickens up, just stir in a splash of plant milk to bring back that creamy goodness. Freezing? Not recommended, it’s best fresh!

Hi, I'm Kimberly!

Hi, I'm Kimberly.

A passionate food lover who believes in the magic of homemade deliciousness that spreads love and warmth. Join me on this culinary adventure as I prepare wonderful dishes and let’s spread some happiness together!

Kimberly the Zett Signature

If you want to get to know me better, click here!


Brownie Batter Chocolate Hummus
„Let’s make a piece of happiness“
Print
clock clock iconcutlery cutlery iconflag flag iconfolder folder iconinstagram instagram iconpinterest pinterest iconfacebook facebook iconprint print iconsquares squares iconheart heart iconheart solid heart solid icon
Brownie Batter Chocolate Hummus

Brownie Batter Chocolate Hummus


  • Author: Kimberly
  • Total Time: 10 min
  • Yield: 4 1x

Description

RECOMMENDED EQUIPMENT

  • food processor
  • sieve

Ingredients

Units Scale
  • 265 grams canned chickpeas, drained
  • 2 tbsp tahini
  • 60 grams unsweetened cocoa powder
  • 4 tbsp date syrup
  • 1 tsp vanilla extract
  • 1/4 tsp salt
  • 2 tbsp coconut oil
  • 2 tbsp milk of choice
  • 1/2 cup ice cubes
  • fruits of your choice for dipping – strawberries, bananas, apples…

Instructions

  • Drain the chickpeas and rinse them under cold water. Add them to a food processor.
  • Next, add tahini, vanilla, unsweetened cocoa powder, coconut oil, salt, date syrup, and milk. Blend on high speed until it forms a thick paste. Then, gradually add ice cubes. Just enough to make it super fluffy and creamy.
  • Transfer to a bowl and enjoy with your favorite fruits or cracker!!

Cinnamon Rolls

Cinnamon Rolls

Cinnamon Rolls

Cinnamon Rolls

October 2, 2024 by Kimberly

Get ready for the fluffiest, most melt-in-your-mouth rolls ever! Soft, buttery layers soaked in cream before baking—it’s like biting into a cloud of sweet cinnamon heaven with every bite.

100 MINUTES

INTERMEDIATE

VEGETARIAN

US AMERICAN

429 PER ROLL

SWEET
FLUFFY
CREAMY

BRUNCH

DESSERT

AUTUMN
WINTER

INTRODUCTION

ABOUT THE RECIPE

Imagine starting your day with soft, pillowy rolls that are bursting with cinnamon sweetness. The secret? A little heavy cream poured between the rolls before baking. It creates the dreamiest, most moist cinnamon rolls you’ll ever try. These rolls are more than just a treat – they’re a cozy, comforting hug wrapped in cinnamon-sugar goodness. Whether you’re baking them for a holiday morning or just because, they bring that extra something special to the table.

How to serve
These rolls are perfect fresh out of the oven, still warm and gooey. Drizzle them with a sweet vanilla glaze or a classic cream cheese frosting for that extra indulgent touch. Pair them with your morning coffee, or serve them up as a weekend brunch star alongside fresh fruit or a light mimosa. Trust me, they’re a hit at any gathering, or even for a solo cozy morning in!

How to store
To keep these rolls soft and fluffy, store them in an airtight container at room temperature for up to two days. Want to enjoy them later? Pop them in the fridge and reheat in the oven to bring back that fresh-baked magic.

Hi, I'm Kimberly!

Hi, I'm Kimberly.

A passionate food lover who believes in the magic of homemade deliciousness that spreads love and warmth. Join me on this culinary adventure as I prepare wonderful dishes and let’s spread some happiness together!

Kimberly the Zett Signature

If you want to get to know me better, click here!


Cinnamon Rolls
Cinnamon Rolls
Cinnamon Rolls
„Let’s make a piece of happiness“
Print
clock clock iconcutlery cutlery iconflag flag iconfolder folder iconinstagram instagram iconpinterest pinterest iconfacebook facebook iconprint print iconsquares squares iconheart heart iconheart solid heart solid icon
Cinnamon Rolls

Cinnamon Rolls


5 from 1 review

  • Author: Kimberly
  • Total Time: 100 min
  • Yield: 12 rolls 1x

Description

Recommended Equipment

  • small bowl
  • small whisk
  • large bowl
  • plastic wrap
  • two medium bowls
  • rolling pin
  • sharp knife
  • baking dish
  • oven

Ingredients

Units Scale

DOUGH

  • 500 grams bread flour (in Germany that’s Type 550)
  • 170 grams yogurt
  • 1/2 tsp salt
  • 1 egg
  • 130 milliliters full-fat milk
  • 1 tbsp white sugar
  • 21 grams fresh yeast

FILLING

  • 115 grams butter, room temperature
  • 150 grams brown sugar
  • 2 tbsp cinnamon
  • 1/4 tsp salt
  • 100 milliliters heavy cream
  • 50 milliliters cinnamon oil (optional)

FROSTING

  • 120 grams cream cheese
  • 120 grams powdered sugar
  • 50 grams butter, room temperature
  • 1 tsp vanilla extract
  • 1 tsp lemon juice

Instructions

  1. First, we activate the fresh yeast. Heat the milk to a temperature between 32°C and 38°C (90°F to 100°F). Add the white sugar and stir well. Crumble the fresh yeast into the warm milk and whisk it until fully dissolved. Let the mixture sit for 5 minutes. You should see small bubbles forming on the surface by then.
  2. Meanwhile, in a large bowl, add the flour, salt, yogurt, and egg. Pour in the yeast mixture and stir everything together with a wooden spoon. Transfer the dough to a clean work surface and knead by hand for about 10-15 minutes. The goal is to get a smooth and elastic dough. Using an electric mixer will cut the time in half. The dough is ready when you can stretch a piece thin enough to let light through without tearing. Place the dough back in the bowl and cover it with plastic wrap to keep it from drying out. Let it rise in a warm, draft-free spot for about an hour until it doubles in size.
  3. In the meantime, prepare the filling. Mix together softened butter, brown sugar, cinnamon, and a pinch of salt into a creamy mixture. Set it aside at room temperature.
  4. Next, prepare the frosting. Mix together cream cheese, powdered sugar, softened butter, vanilla extract, and lemon juice until smooth and creamy. Store in the fridge until ready to use.
  5. After the dough has risen for an hour, it should have doubled in size and is ready to work with. Prepare a large baking dish. Transfer the dough to a lightly floured, clean surface and roll it out to a 50×30 cm (about 20×12 inch) rectangle. Spread the butter-sugar-cinnamon mixture evenly over the dough. Then, cut the dough lengthwise into 12 equal strips. Roll each strip into a spiral and place them in the baking dish, forming 3 rows of 4 rolls. Let the rolls rise again for another 30 minutes.
  6. About 10 minutes before the rising time is up, preheat the oven to 190°C (375°F). Once the rolls have risen, pour the heavy cream and optional cinnamon oil in between the rolls. Bake for 20-25 minutes until the tops are golden brown. Be careful not to overbake them, as they may become dry.
  7. Remove the rolls from the oven and let them cool for about 10 minutes. Take the frosting out of the fridge and spread it evenly over the warm rolls. Enjoy!
  • Passive Time: 60 min
  • Cook Time: 40 min