Cinnamon Rolls

Cinnamon Rolls

Cinnamon Rolls

Cinnamon Rolls

October 2, 2024 by Kimberly

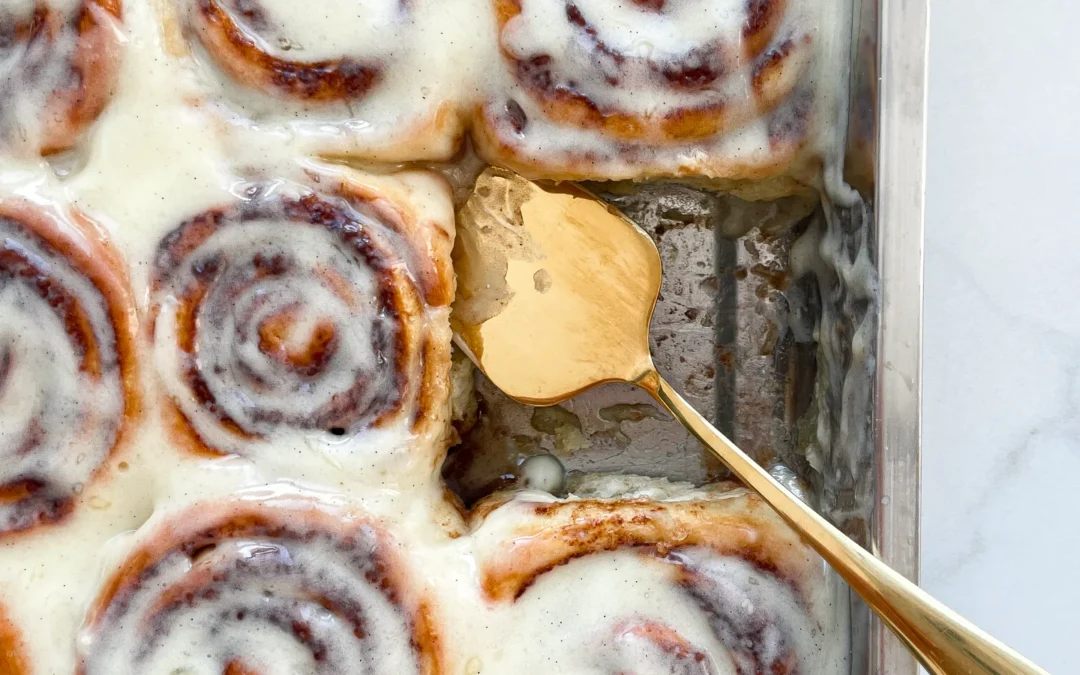
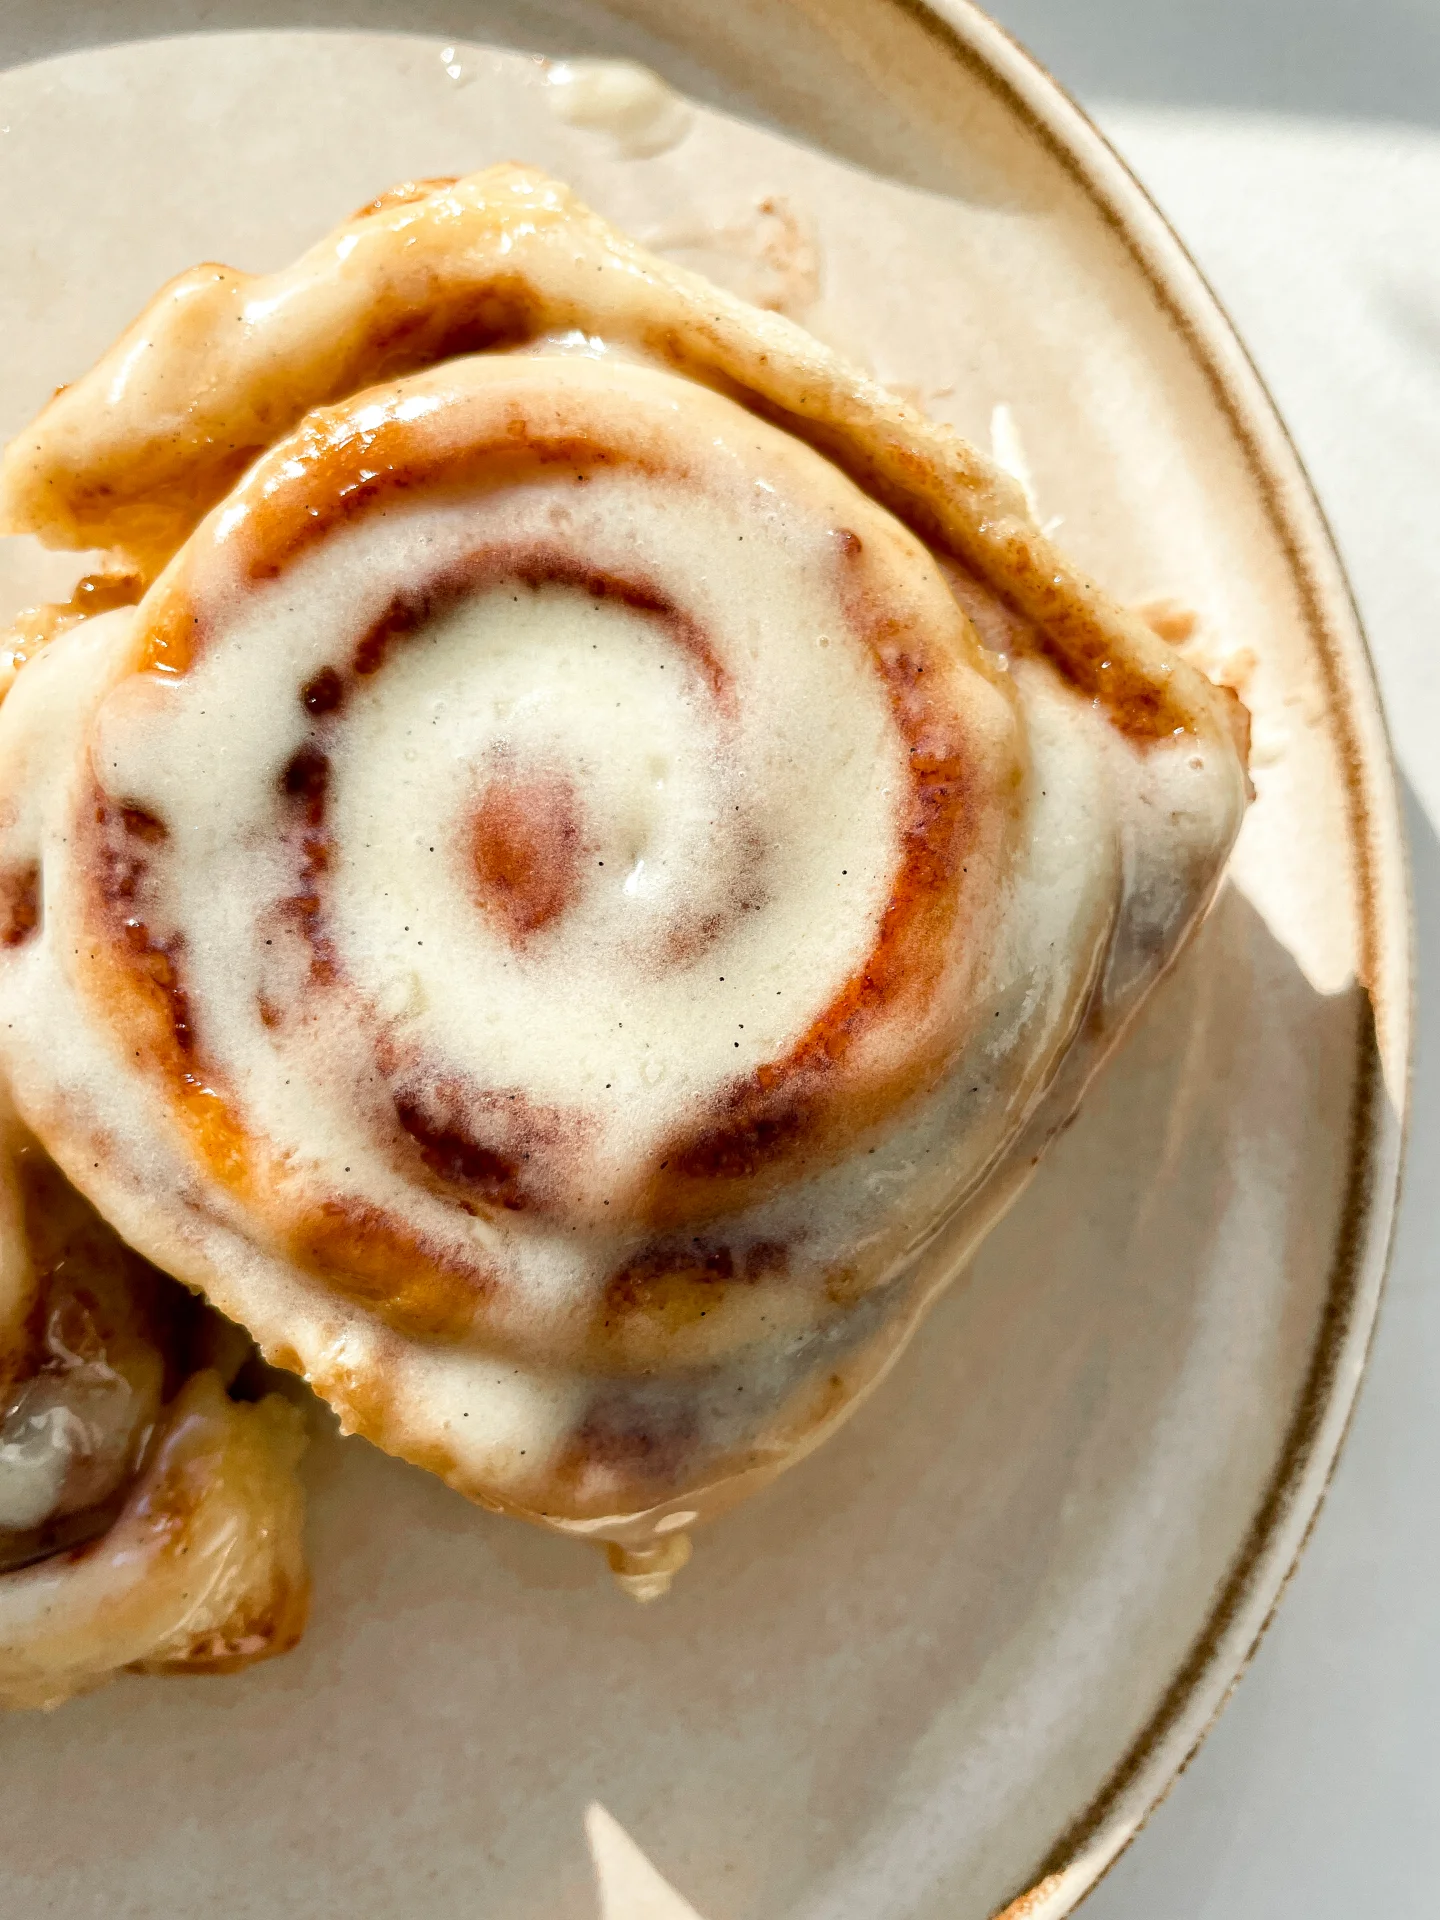
Get ready for the fluffiest, most melt-in-your-mouth rolls ever! Soft, buttery layers soaked in cream before baking—it’s like biting into a cloud of sweet cinnamon heaven with every bite.

100 MINUTES

INTERMEDIATE

VEGETARIAN

US AMERICAN

429 PER ROLL

SWEET
FLUFFY
CREAMY

BRUNCH

DESSERT

AUTUMN
WINTER

INTRODUCTION

ABOUT THE RECIPE

Imagine starting your day with soft, pillowy rolls that are bursting with cinnamon sweetness. The secret? A little heavy cream poured between the rolls before baking. It creates the dreamiest, most moist cinnamon rolls you’ll ever try. These rolls are more than just a treat – they’re a cozy, comforting hug wrapped in cinnamon-sugar goodness. Whether you’re baking them for a holiday morning or just because, they bring that extra something special to the table.

How to serve
These rolls are perfect fresh out of the oven, still warm and gooey. Drizzle them with a sweet vanilla glaze or a classic cream cheese frosting for that extra indulgent touch. Pair them with your morning coffee, or serve them up as a weekend brunch star alongside fresh fruit or a light mimosa. Trust me, they’re a hit at any gathering, or even for a solo cozy morning in!

How to store
To keep these rolls soft and fluffy, store them in an airtight container at room temperature for up to two days. Want to enjoy them later? Pop them in the fridge and reheat in the oven to bring back that fresh-baked magic.

Hi, I'm Kimberly!

Hi, I'm Kimberly.

A passionate food lover who believes in the magic of homemade deliciousness that spreads love and warmth. Join me on this culinary adventure as I prepare wonderful dishes and let’s spread some happiness together!

Kimberly the Zett Signature

If you want to get to know me better, click here!


Cinnamon Rolls
Cinnamon Rolls
Cinnamon Rolls
„Let’s make a piece of happiness“
Print
clock clock iconcutlery cutlery iconflag flag iconfolder folder iconinstagram instagram iconpinterest pinterest iconfacebook facebook iconprint print iconsquares squares iconheart heart iconheart solid heart solid icon
Cinnamon Rolls

Cinnamon Rolls


5 Stars 4 Stars 3 Stars 2 Stars 1 Star

No reviews

  • Author: Kimberly
  • Total Time: 100 min
  • Yield: 12 rolls 1x

Description

Recommended Equipment

  • small bowl
  • small whisk
  • large bowl
  • plastic wrap
  • two medium bowls
  • rolling pin
  • sharp knife
  • baking dish
  • oven

Ingredients

Units Scale

DOUGH

  • 500 grams bread flour (in Germany that’s Type 550)
  • 170 grams yogurt
  • 1/2 tsp salt
  • 1 egg
  • 130 milliliters full-fat milk
  • 1 tbsp white sugar
  • 21 grams fresh yeast

FILLING

  • 115 grams butter, room temperature
  • 150 grams brown sugar
  • 2 tbsp cinnamon
  • 1/4 tsp salt
  • 100 milliliters heavy cream
  • 50 milliliters cinnamon oil (optional)

FROSTING

  • 120 grams cream cheese
  • 120 grams powdered sugar
  • 50 grams butter, room temperature
  • 1 tsp vanilla extract
  • 1 tsp lemon juice

Instructions

  1. First, we activate the fresh yeast. Heat the milk to a temperature between 32°C and 38°C (90°F to 100°F). Add the white sugar and stir well. Crumble the fresh yeast into the warm milk and whisk it until fully dissolved. Let the mixture sit for 5 minutes. You should see small bubbles forming on the surface by then.
  2. Meanwhile, in a large bowl, add the flour, salt, yogurt, and egg. Pour in the yeast mixture and stir everything together with a wooden spoon. Transfer the dough to a clean work surface and knead by hand for about 10-15 minutes. The goal is to get a smooth and elastic dough. Using an electric mixer will cut the time in half. The dough is ready when you can stretch a piece thin enough to let light through without tearing. Place the dough back in the bowl and cover it with plastic wrap to keep it from drying out. Let it rise in a warm, draft-free spot for about an hour until it doubles in size.
  3. In the meantime, prepare the filling. Mix together softened butter, brown sugar, cinnamon, and a pinch of salt into a creamy mixture. Set it aside at room temperature.
  4. Next, prepare the frosting. Mix together cream cheese, powdered sugar, softened butter, vanilla extract, and lemon juice until smooth and creamy. Store in the fridge until ready to use.
  5. After the dough has risen for an hour, it should have doubled in size and is ready to work with. Prepare a large baking dish. Transfer the dough to a lightly floured, clean surface and roll it out to a 50×30 cm (about 20×12 inch) rectangle. Spread the butter-sugar-cinnamon mixture evenly over the dough. Then, cut the dough lengthwise into 12 equal strips. Roll each strip into a spiral and place them in the baking dish, forming 3 rows of 4 rolls. Let the rolls rise again for another 30 minutes.
  6. About 10 minutes before the rising time is up, preheat the oven to 190°C (375°F). Once the rolls have risen, pour the heavy cream and optional cinnamon oil in between the rolls. Bake for 20-25 minutes until the tops are golden brown. Be careful not to overbake them, as they may become dry.
  7. Remove the rolls from the oven and let them cool for about 10 minutes. Take the frosting out of the fridge and spread it evenly over the warm rolls. Enjoy!
  • Passive Time: 60 min
  • Cook Time: 40 min

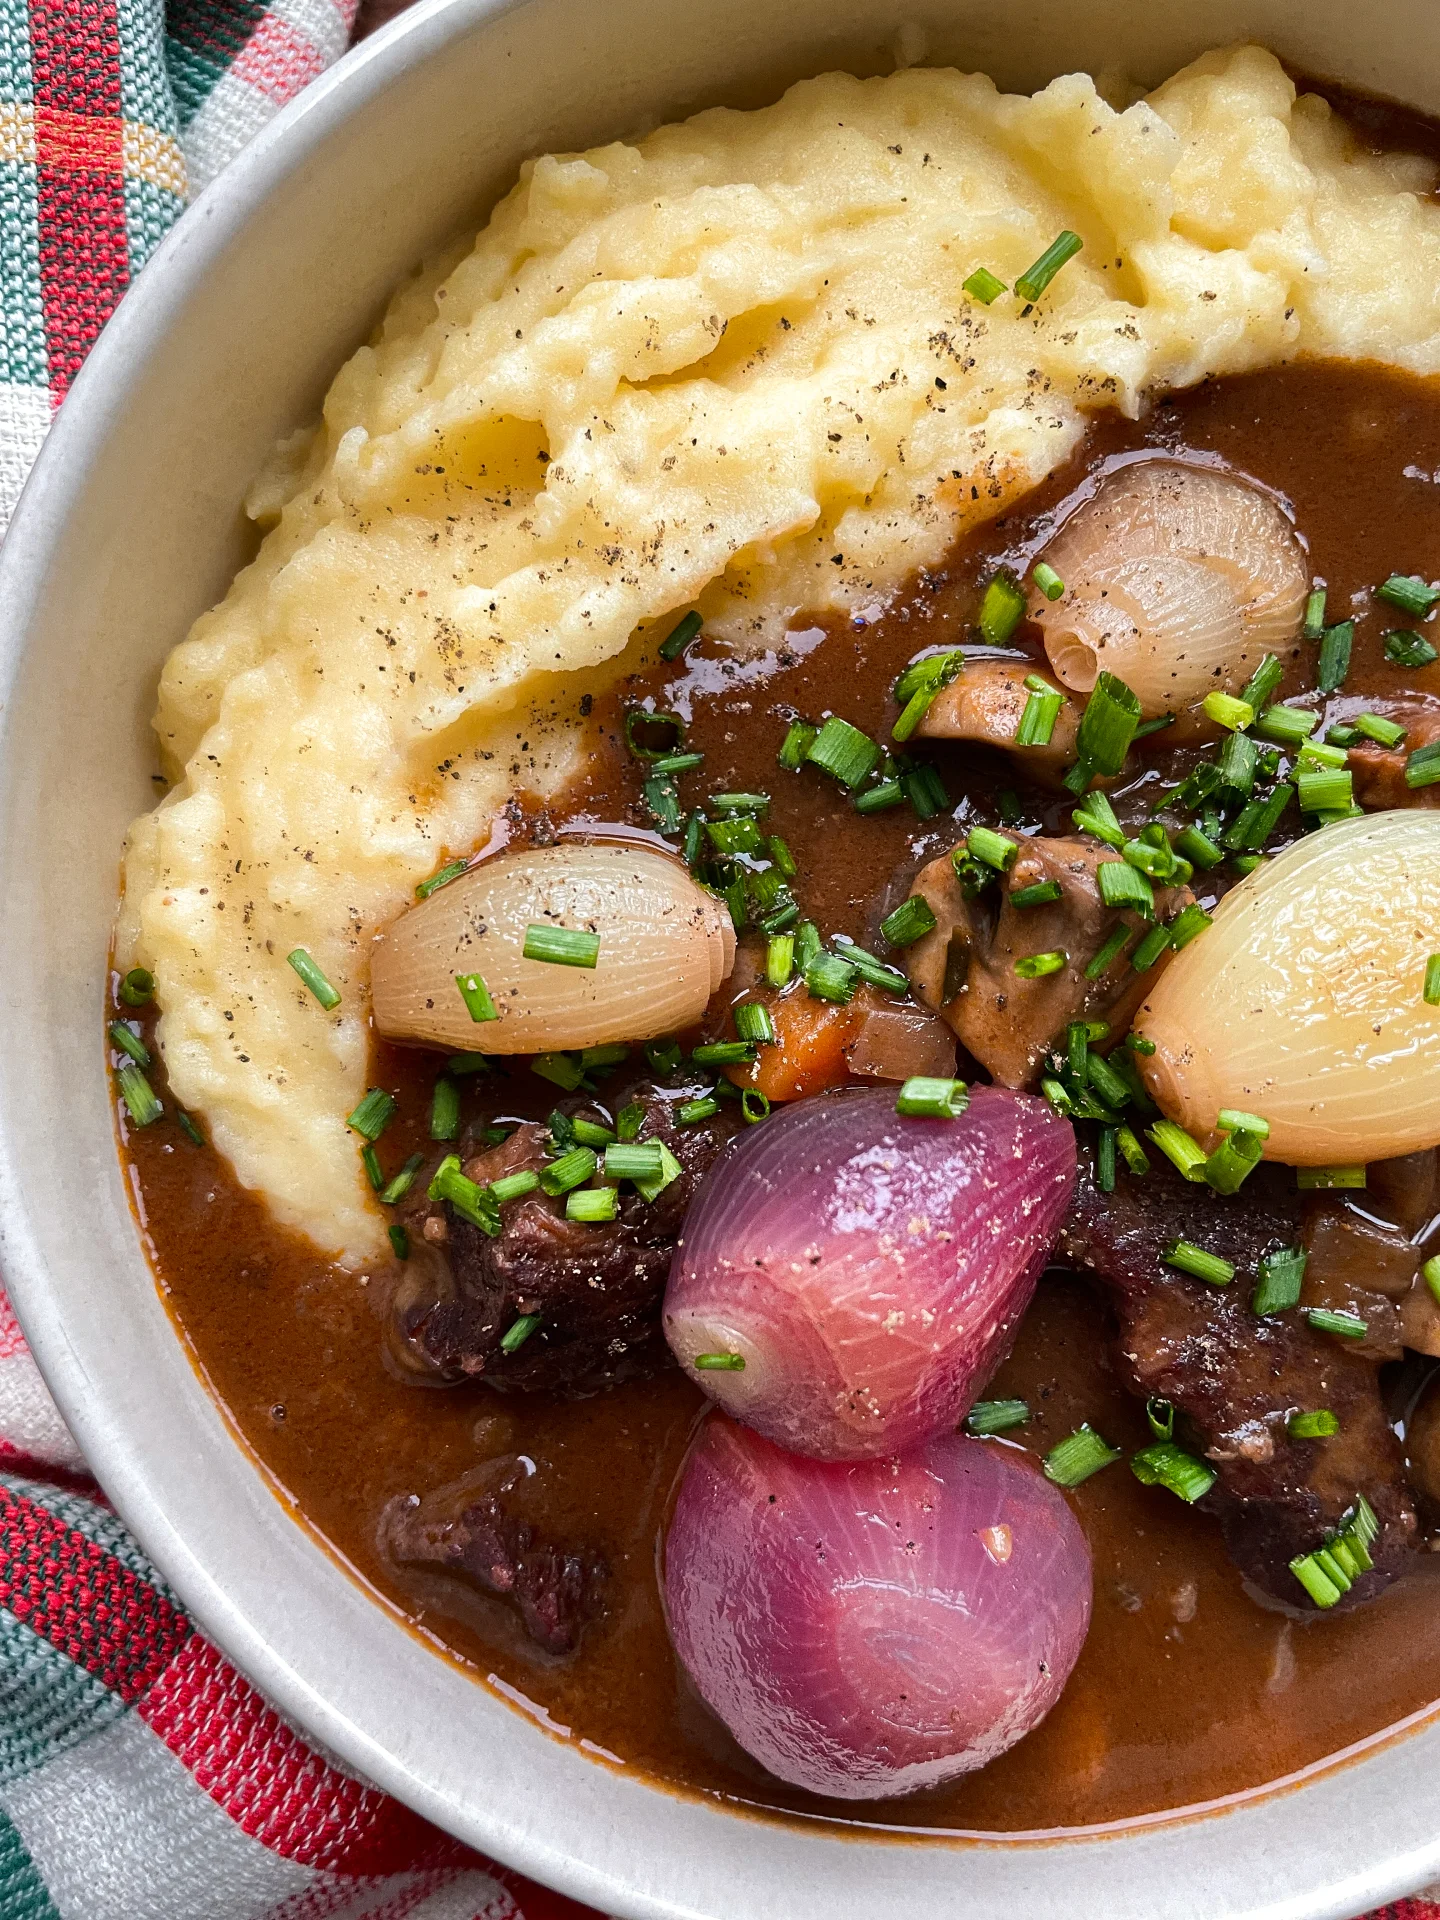
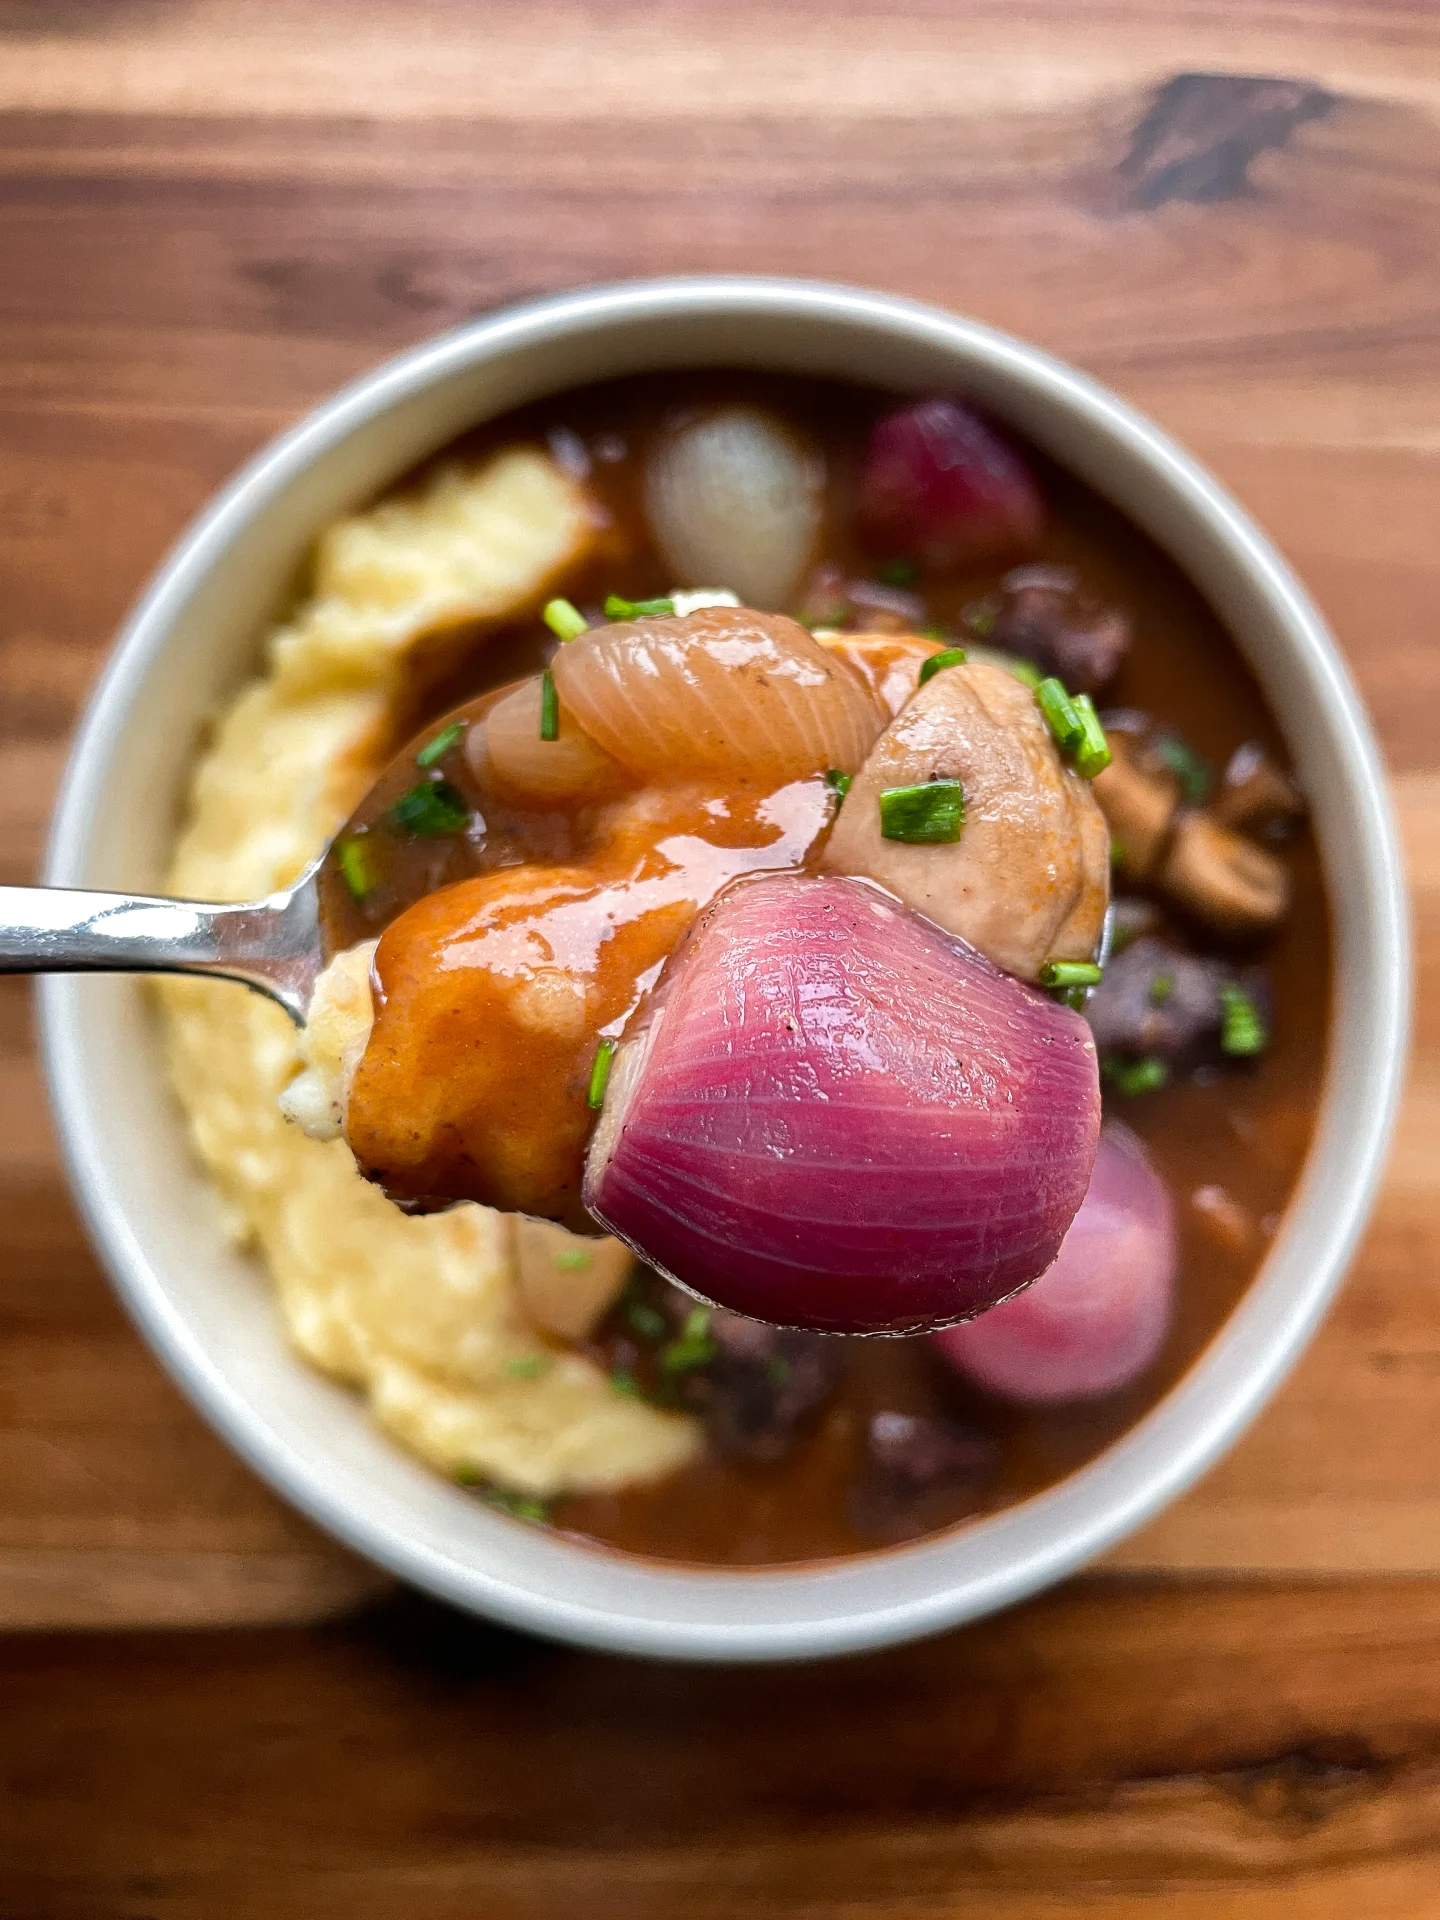
Boeuf Bourguignon with Mashed Potatoes & Pearl Onions

Boeuf Bourguignon with Mashed Potatoes & Pearl Onions

Boeuf Bourguignon with Mashed Potatoes & Pearl Onions

Boeuf Bourguignon with Mashed Potatoes & Pearl Onions

December 9, 2023 by Kimberly

A classic French dish, features tender beef slow-cooked in red wine, complemented by flavorful veggies. Served alongside velvety mashed potatoes and caramelized pearl onions for a truly indulgent dining experience.

3.5 HOURS

INTERMEDIATE

OMNIVORE

FRENCH

940 PER PORTION

COMFORT FOOD

CHRISTMAS

DINNER

WINTER

INTRODUCTION

ABOUT THE RECIPE

You know those meals that taste like love in a bowl? This one’s it. Rich, slow-cooked beef in a bold red wine sauce paired with creamy mashed potatoes and sweet, soft pearl onions – it’s the ultimate cozy dinner for when you’re feeling fancy but also need that comforting omg-this-is-so-good moment. Whether it’s for a holiday dinner or just a random Tuesday when you’re feeling yourself, this dish is about to be your new fave.

How to serve
Serve this beauty hot, right out of the pot. Pour that glossy, rich sauce over the creamiest mashed potatoes for a plate that’s basically edible therapy. Add a sprinkle of fresh parsley for a pop of color, and don’t forget a slice of crusty bread to scoop up all the saucy goodness. Pair it with a bold glass of red wine because it’s a whole vibe. Perfect for cozy nights or impressing dinner guests.

How to store
Store leftovers in an airtight container in the fridge for up to 3 days. Reheat gently on the stovetop, adding a splash of broth or wine to keep it saucy and delish. Pro tip: it tastes even better the next day because flavors get all cozy overnight.

Hi, I'm Kimberly!

Hi, I'm Kimberly.

A passionate food lover who believes in the magic of homemade deliciousness that spreads love and warmth. Join me on this culinary adventure as I prepare wonderful dishes and let’s spread some happiness together!

Kimberly the Zett Signature

If you want to get to know me better, click here!


Boeuf Bourguignon with Mashed Potatoes & Pearl Onions

„Let’s make a piece of happiness“

Print
clock clock iconcutlery cutlery iconflag flag iconfolder folder iconinstagram instagram iconpinterest pinterest iconfacebook facebook iconprint print iconsquares squares iconheart heart iconheart solid heart solid icon
Boeuf Bourguignon with Mashed Potatoes & Pearl Onions

Boeuf Bourguignon


  • Author: Kimberly
  • Total Time: 3 hrs
  • Yield: 6 1x

Description

RECOMMENDED EQUIPMENT

  • dutch oven
  • sharp knife
  • cutting board
  • large pot
  • small pan with a lid
  • large pan
  • potato masher

Ingredients

Units Scale

BOEUF BOURGUIGNON

  • 1.5 kilograms beef brisket or beef shoulder
  • 3 white onions
  • 3 carrots
  • 2 tbsp tomato paste
  • 750 milliliter red wine
  • 2 bay leaves
  • 400 milliliter beef stock
  • 150 grams pancetta
  • 250 grams mushrooms
  • 1 tsp clarified butter
  • 1 tbsp all-purpose flour
  • 3 garlic cloves
  • 2 fresh thyme sprigs
  • 25 grams dark chocolate
  • 50 milliliter espresso
  • salt & pepper to taste

MASHED POTATOES

  • 2 kilograms potatoes
  • 500 milliliter full-fat milk
  • 150 grams butter
  • 150 grams creme fraiche
  • salt, pepper & nutmeg to taste

PEARL ONIONS

  • 400 grams pearl onions
  • 1 tsp clarified butter
  • 1 bay leaf
  • 1 fresh thyme sprig
  • 10 grams fresh parsley
  • 150 milliliter white wine
  • salt & pepper

BEURRE MANIÉ

  • 2 tbsp butter, room temperature
  • 2 tbsp all-purpose flour

Instructions

PREPARATIONS

  1. Peel the carrots and cut them into bite-sized pieces.
  2. Peel the onions and chop them into small pieces.
  3. Pat the beef dry, remove any silver skin if necessary, and cut it into roughly 4×4 cm pieces. Beef brisket or shoulder (also known as “falsches Filet” in Germany) works best.
  4. Cut the pancetta into strips.
  5. Peel the garlic cloves. They’ll be pressed into the pot later.
  6. Open the bottle of wine. Pick a Pinot Noir, Merlot, or Cabernet Sauvignon all work great. A bold, fruity red wine is ideal.

INSTRUCTIONS

  1. Place the pancetta in a cold Dutch oven. Slowly heat it over medium heat and fry until crispy, allowing the fat to render out. Remove the pancetta and set it aside, leaving the bacon fat in the Dutch oven.
  2. If the bacon fat isn’t enough, add 1 tbsp of clarified butter and let it melt. Sear the beef in batches on both sides over high heat to create a nice crust. Remove the beef from the pot.
  3. Add the carrots, onions, and tomato paste to the Dutch oven. Press the garlic through a garlic press into the pot and stir everything well. Sauté for about 5 minutes, then sprinkle 1 tbsp of flour over the vegetables and mix well.
  4. Pour in about 1/4 of the red wine, stir, and let it reduce over medium heat without a lid until almost no liquid remains (about 5 minutes). The wine and flour should form a creamy texture with the veggies.
  5. Return the seared beef to the pot, pour in the remaining wine and the beef stock, and stir well. Place thyme sprigs and bay leaves on top, cover, and bring to a boil. Then reduce to low heat and simmer with the lid on for 2.5-3 hours.
  6. Meanwhile, peel the pearl onions carefully without cutting through them. Set them aside in a bowl.
  7. Next brush the mushrooms clean with a pastry brush or peel them directly, then quarter them. Set them aside as well.
  8. Next to prepare the mashed potatoes peel and quarter them. Fill a large pot with water, add the potatoes and 1 tsp salt and boil until soft. Drain the water and keep the potatoes covered.
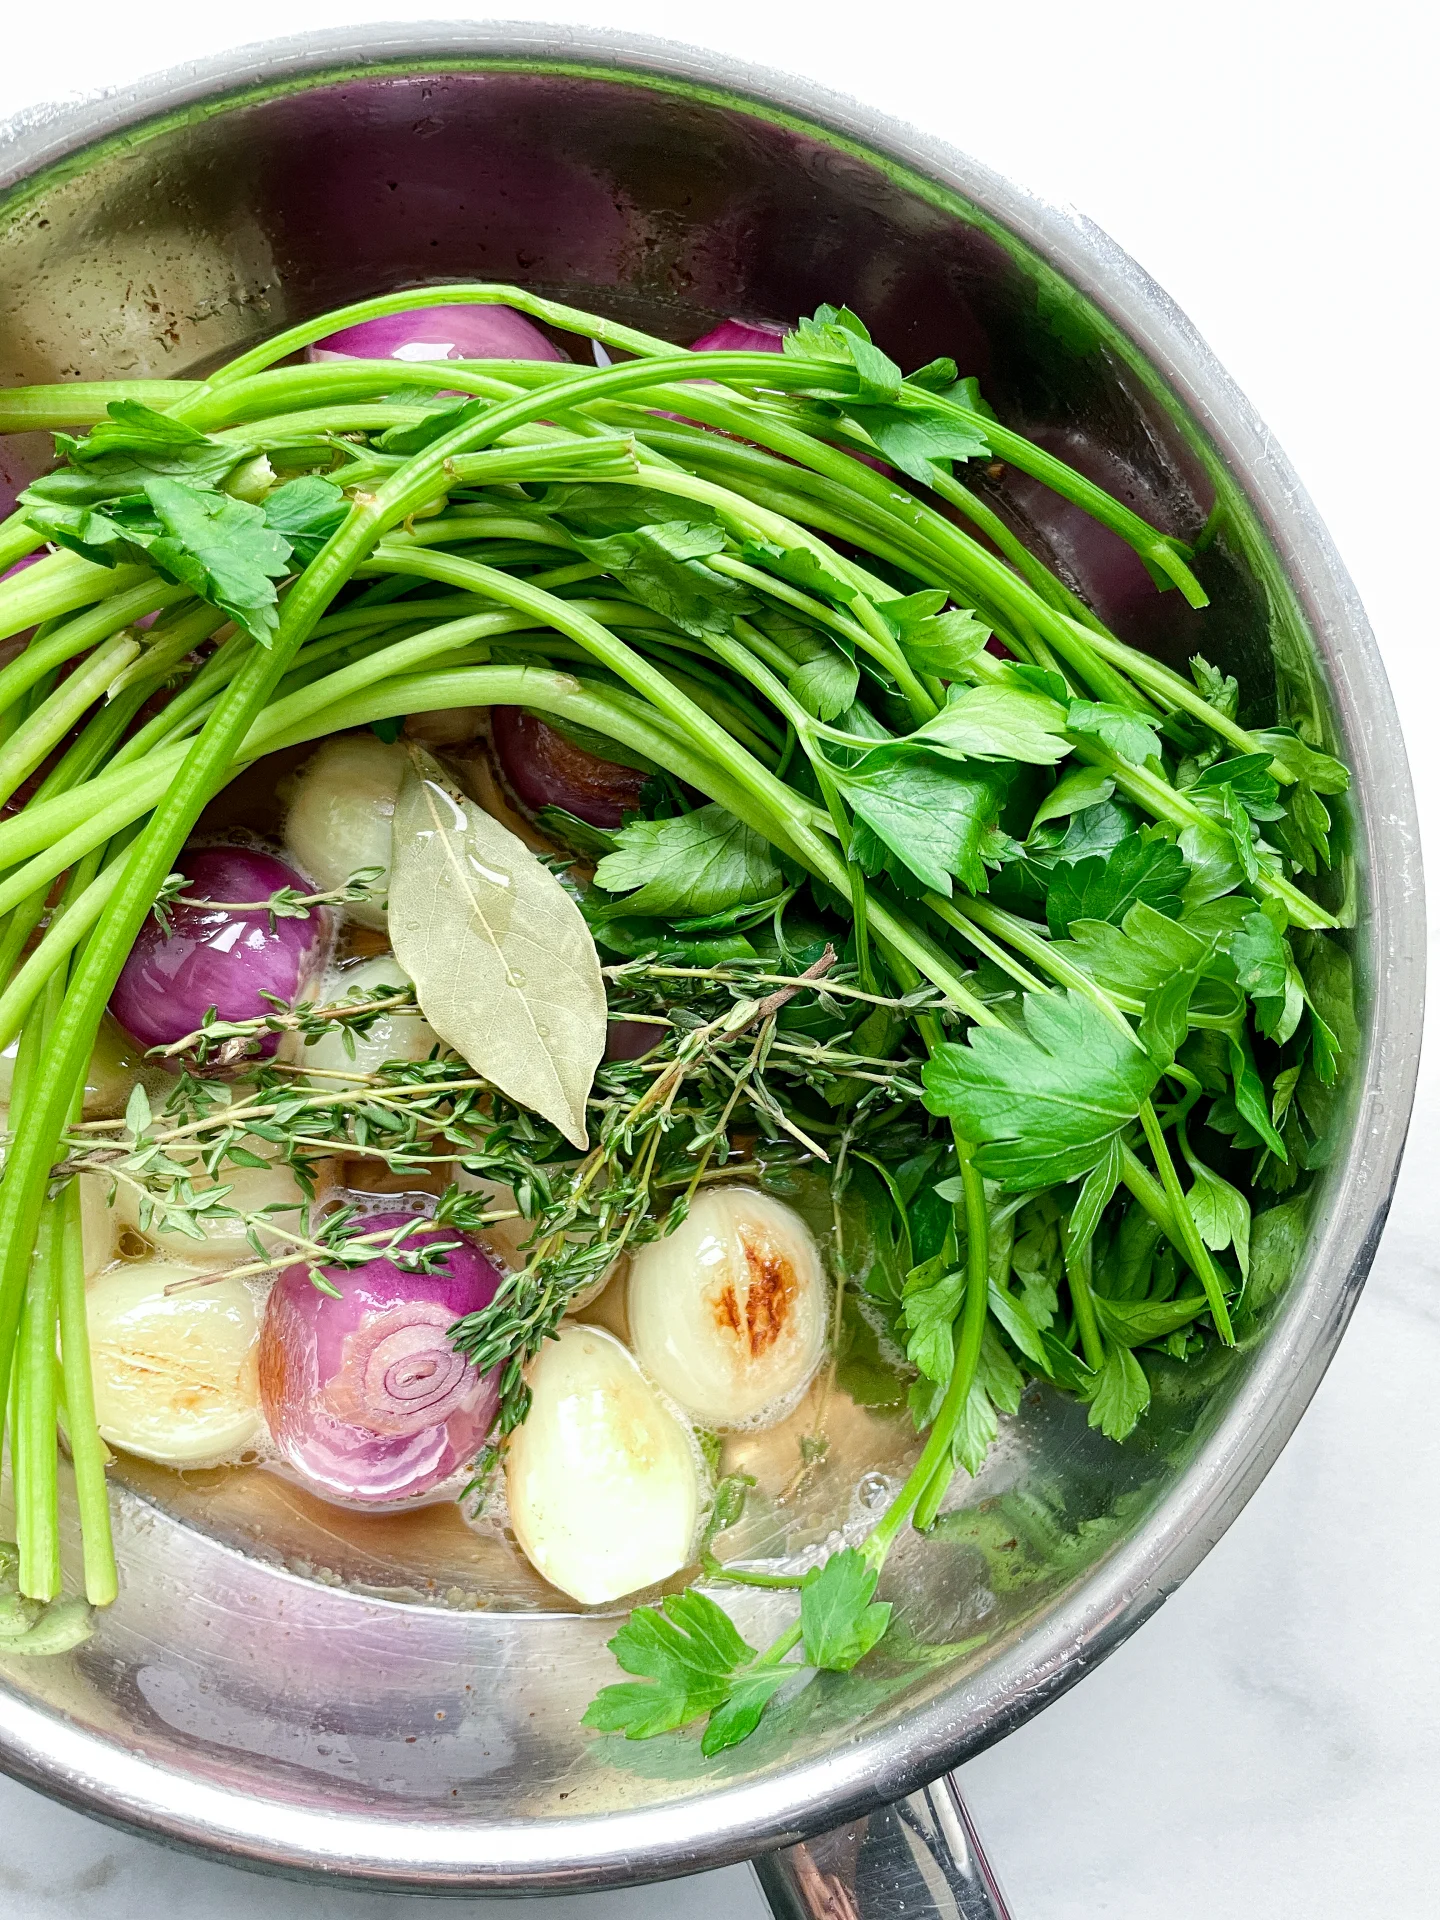
  9. Heat a small pan over medium heat, melt 1 tsp of clarified butter, and sauté the pearl onions for about 5 minutes, stirring frequently, until they turn golden brown. Deglaze with white wine, add thyme, parsley, and a bay leaf on top, cover, and simmer for about 25 minutes until the wine has mostly evaporated and the onions are soft. Remove the herbs before serving and keep the onions warm on the stove. Season with salt & pepper.
  10. To thicken the Boeuf Bourguignon sauce, prepare a beurre manié. Mix 2 tbsp of softened butter with 2 tbsp of flour into a creamy paste. Add it gradually to the stew about 30 minutes before the end of the cooking time to thicken the sauce. Stir the beurre manié into the Dutch oven in portions and bring everything to a quick boil.
  11. After about 1.5 hours of simmering, sauté the quartered mushrooms in a large pan with 1 tsp of clarified butter until golden brown. While they’re cooking, prepare an espresso. Add the mushrooms, pancetta, dark chocolate, and espresso to the Dutch oven. Stir well and let it simmer for at least another 30 minutes.
  12. For the mashed potatoes, warm milk and butter in a small pot until the butter has melted. Add the mixture to the potatoes, grate in some nutmeg, and mash everything into a chunky texture. For a smoother mash, pass the potatoes through a sieve or food mill. Season with salt and pepper, then stir in crème fraîche.
  13. To serve, spoon the mashed potatoes onto plates, top with Boeuf Bourguignon, and add some pearl onions. Garnish with fresh chives.
  • Prep Time: 30 min
  • Passive Time: 60 min
  • Cook Time: 90 min

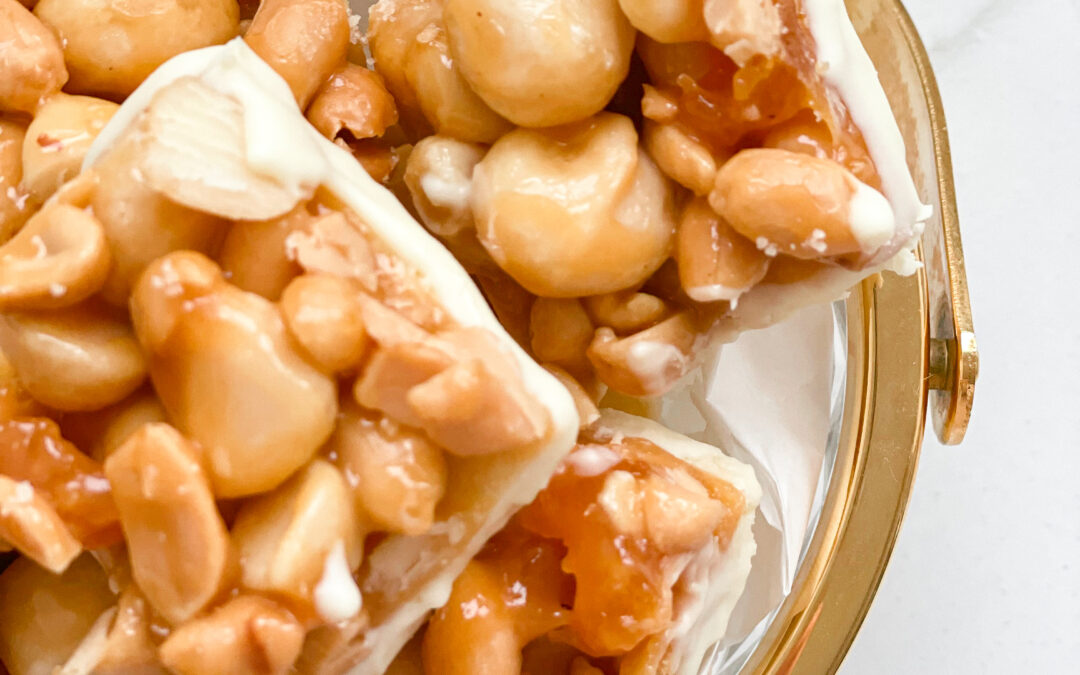
White Chocolate Macadamia Peanut Caramel Bites

White Chocolate Macadamia Peanut Caramel Bites

White Chocolate Macadamia Peanut Caramel Bites

White Chocolate Macadamia Peanut Caramel Bites

November 27, 2023 by Kimberly

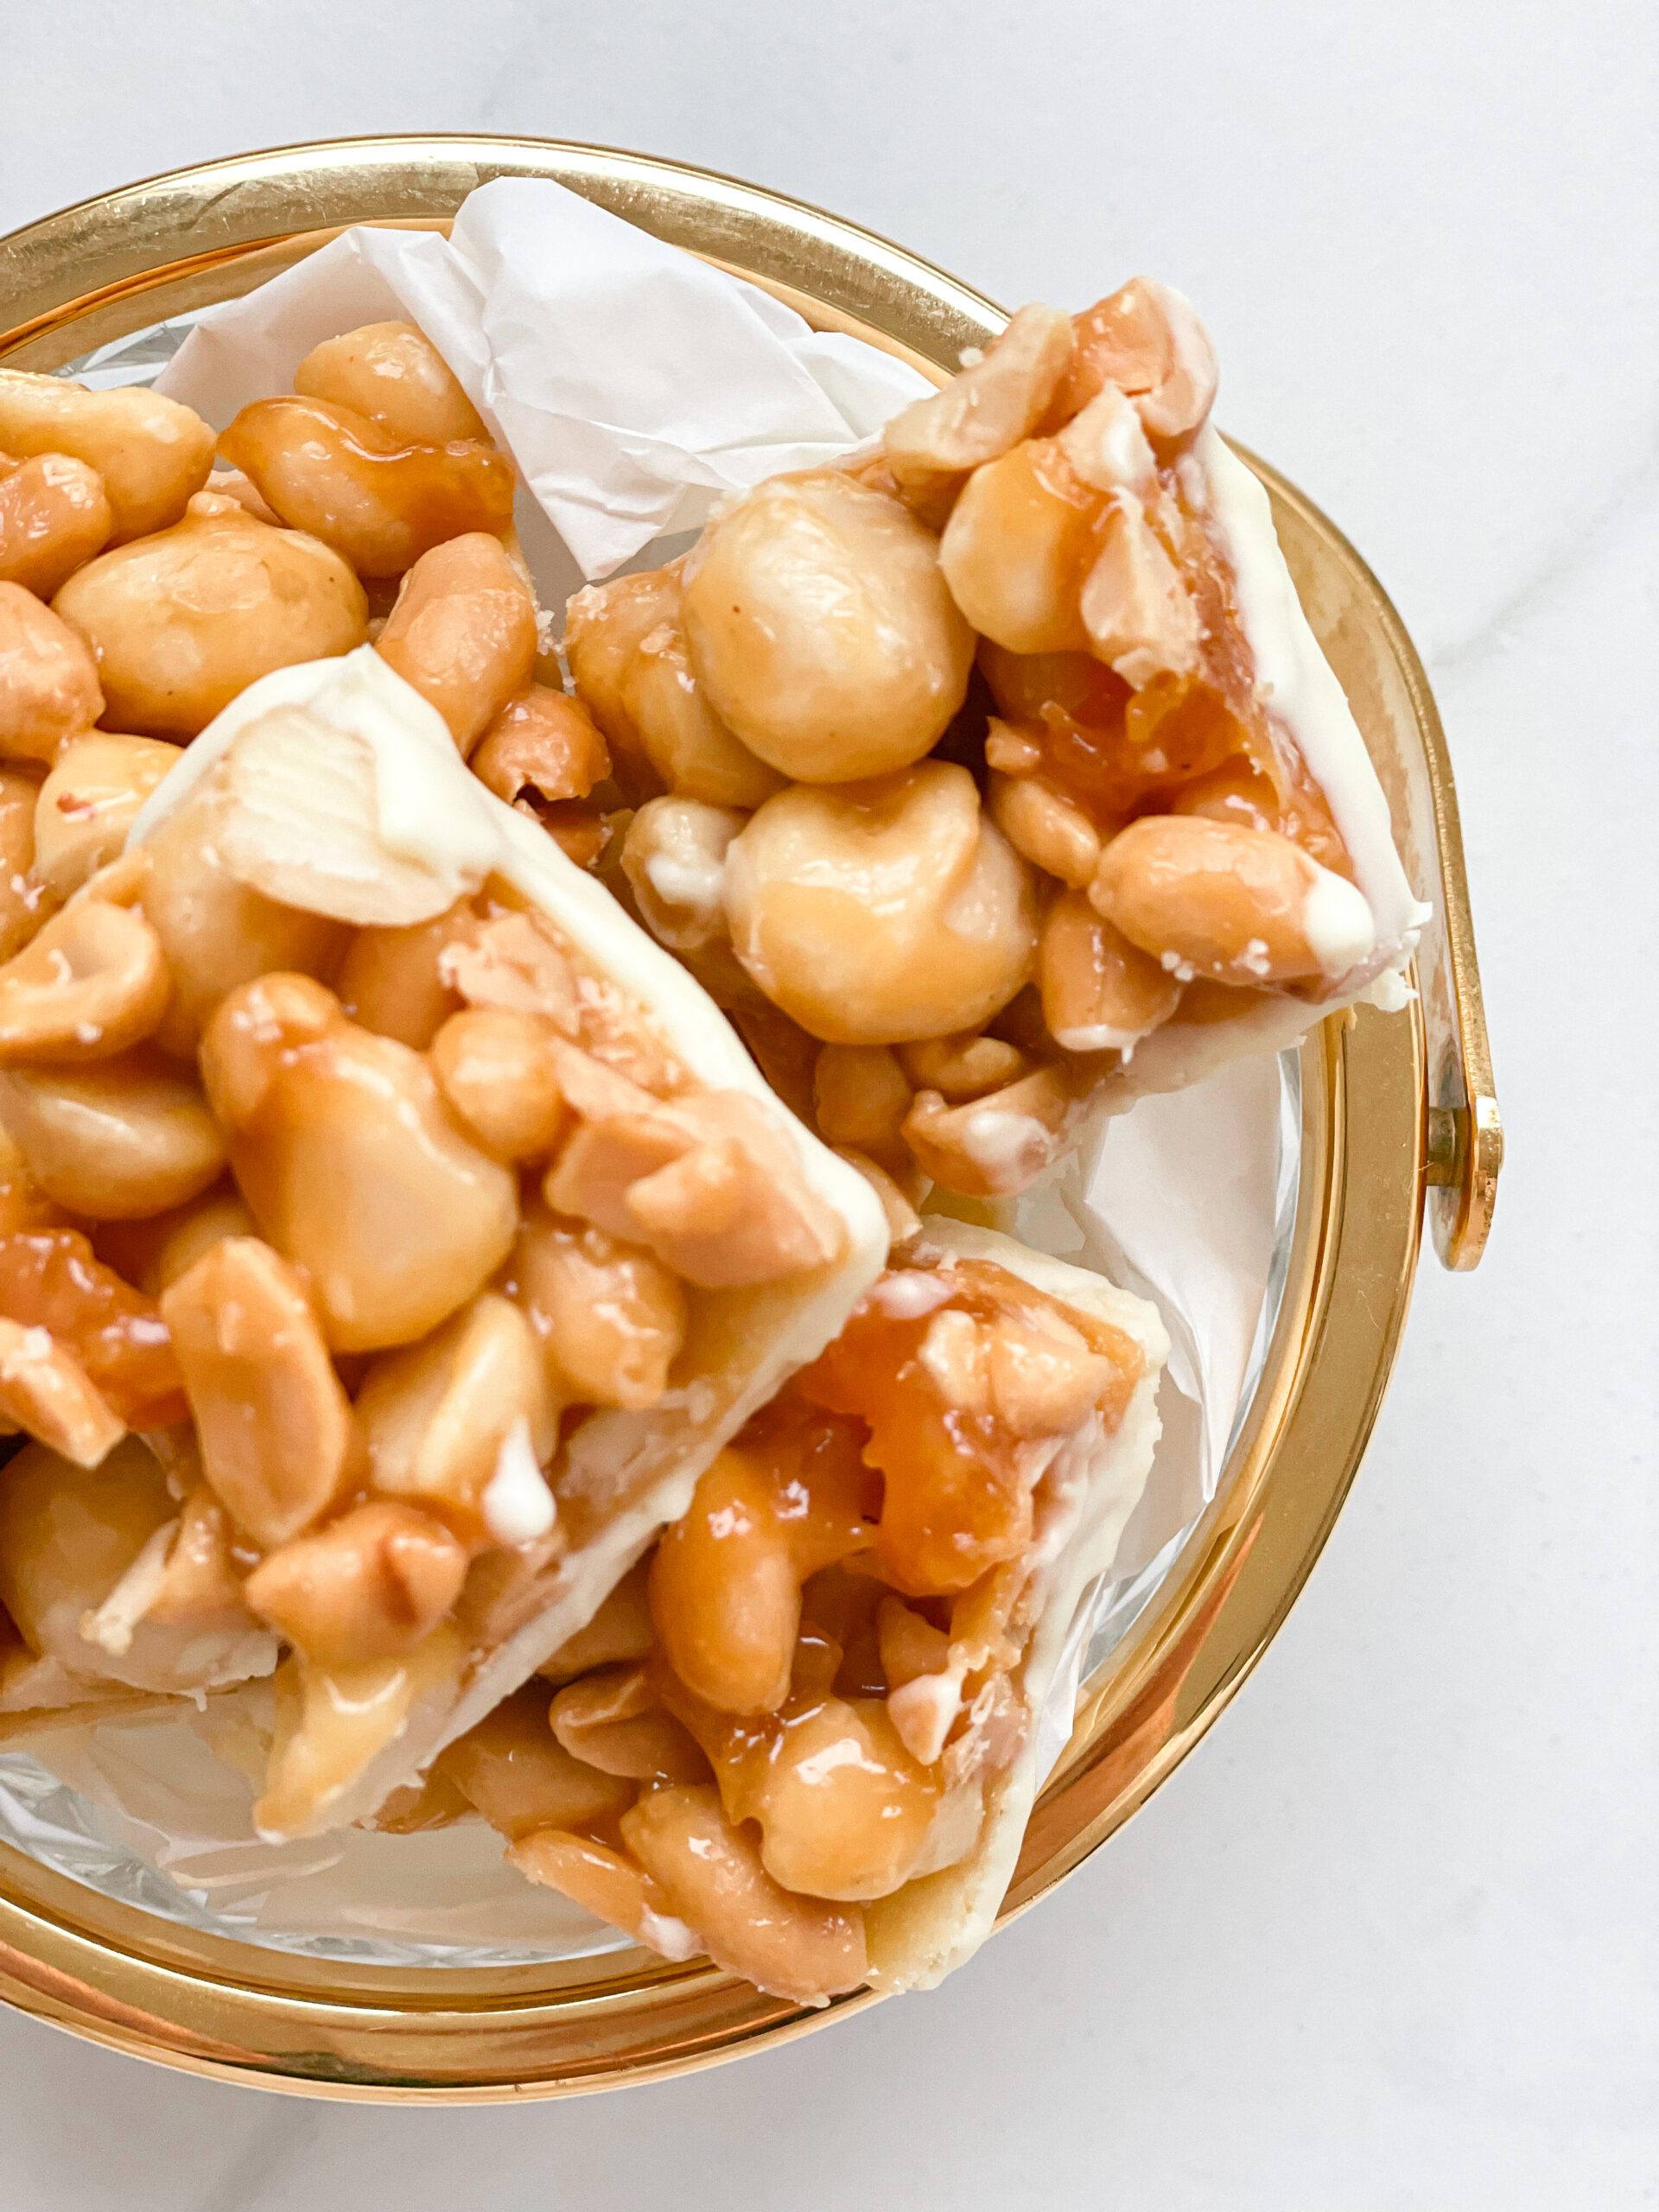
Savor the festive season with these dreamy, creamy bites loaded with smooth caramel and crunchy nutty goodness. Christmas bliss in every delightful bite.

100 MINUTES

INTERMEDIATE

VEGETARIAN

INT.

152 PER PIECE

SWEET
NUTTY

CHRISTMAS

COOKIES

WINTER

INTRODUCTION

ABOUT THE RECIPE

Imagine that moment when you want a treat that’s just the right mix of creamy, crunchy, and rich in flavor—these caramel and nutty bites deliver exactly that! Each little piece is packed with macadamias, peanuts, caramel and smooth white chocolate, making it the ultimate indulgence without the hassle of a big dessert. They’re perfect for holiday spreads, cozy evenings, or anytime you want something sweet and satisfying in your life. Whether you’re a caramel lover, a white chocolate fan, or just need a no-fuss recipe, these bites will steal your heart.

How to serve
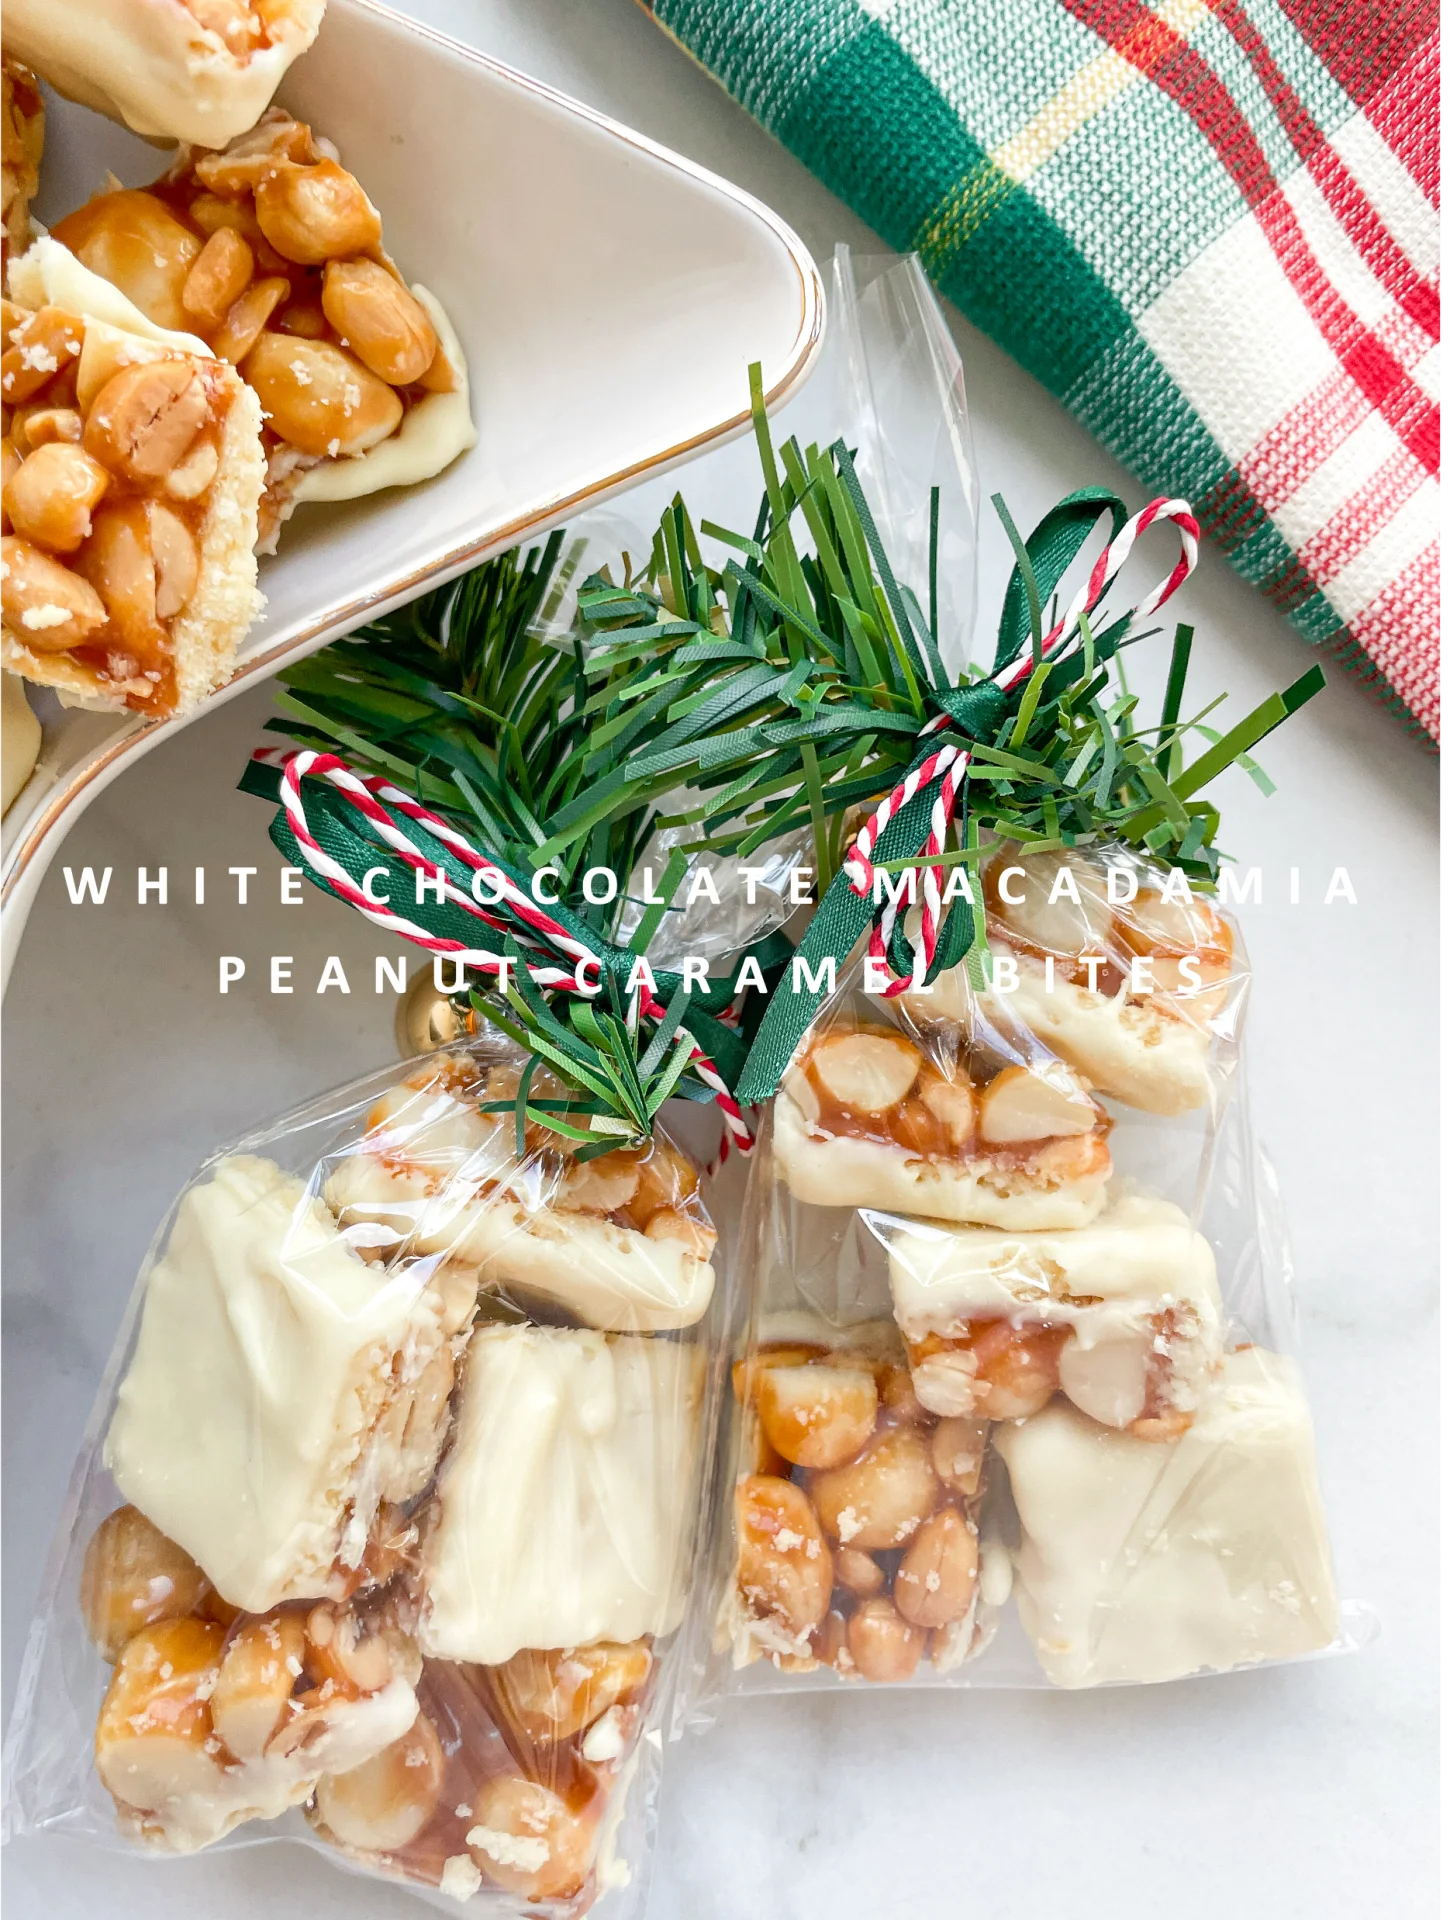
Arrange them on a dessert platter for holiday gatherings or family movie nights. If you want to keep things casual, just pop them in a bowl and let everyone grab a few. They’re also perfect for gift-giving: pack them up in a cute box or jar for friends and family.

How to store
Store any leftovers in an airtight container at room temperature for up to 10 days. If you prefer a firmer texture, keep them in the fridge – they’ll stay fresh and delicious!

Hi, I'm Kimberly!

Hi, I'm Kimberly.

A passionate food lover who believes in the magic of homemade deliciousness that spreads love and warmth. Join me on this culinary adventure as I prepare wonderful dishes and let’s spread some happiness together!

Kimberly the Zett Signature

If you want to get to know me better, click here!


White Chocolate Macadamia Peanut Caramel Bites

„Let’s make a piece of happiness“

Print
clock clock iconcutlery cutlery iconflag flag iconfolder folder iconinstagram instagram iconpinterest pinterest iconfacebook facebook iconprint print iconsquares squares iconheart heart iconheart solid heart solid icon
White Chocolate Macadamia Peanut Caramel Bites

White Chocolate Macadamia Peanut Caramel Bites


  • Author: Kimberly
  • Total Time: 105 min
  • Yield: 50 squares 1x

Description

RECOMMENDED EQUIPMENT
  • medium bowl
  • cling film
  • small pot
  • sharp knife
  • cutting board
  • small bowl that fits the small pot

Ingredients

Units Scale

DOUGH

  • 125 grams butter, room-temperature
  • 75 grams white sugar
  • 250 grams all-purpose flour
  • 8g vanilla sugar
  • pinch of salt
  • 1 egg

CARAMEL

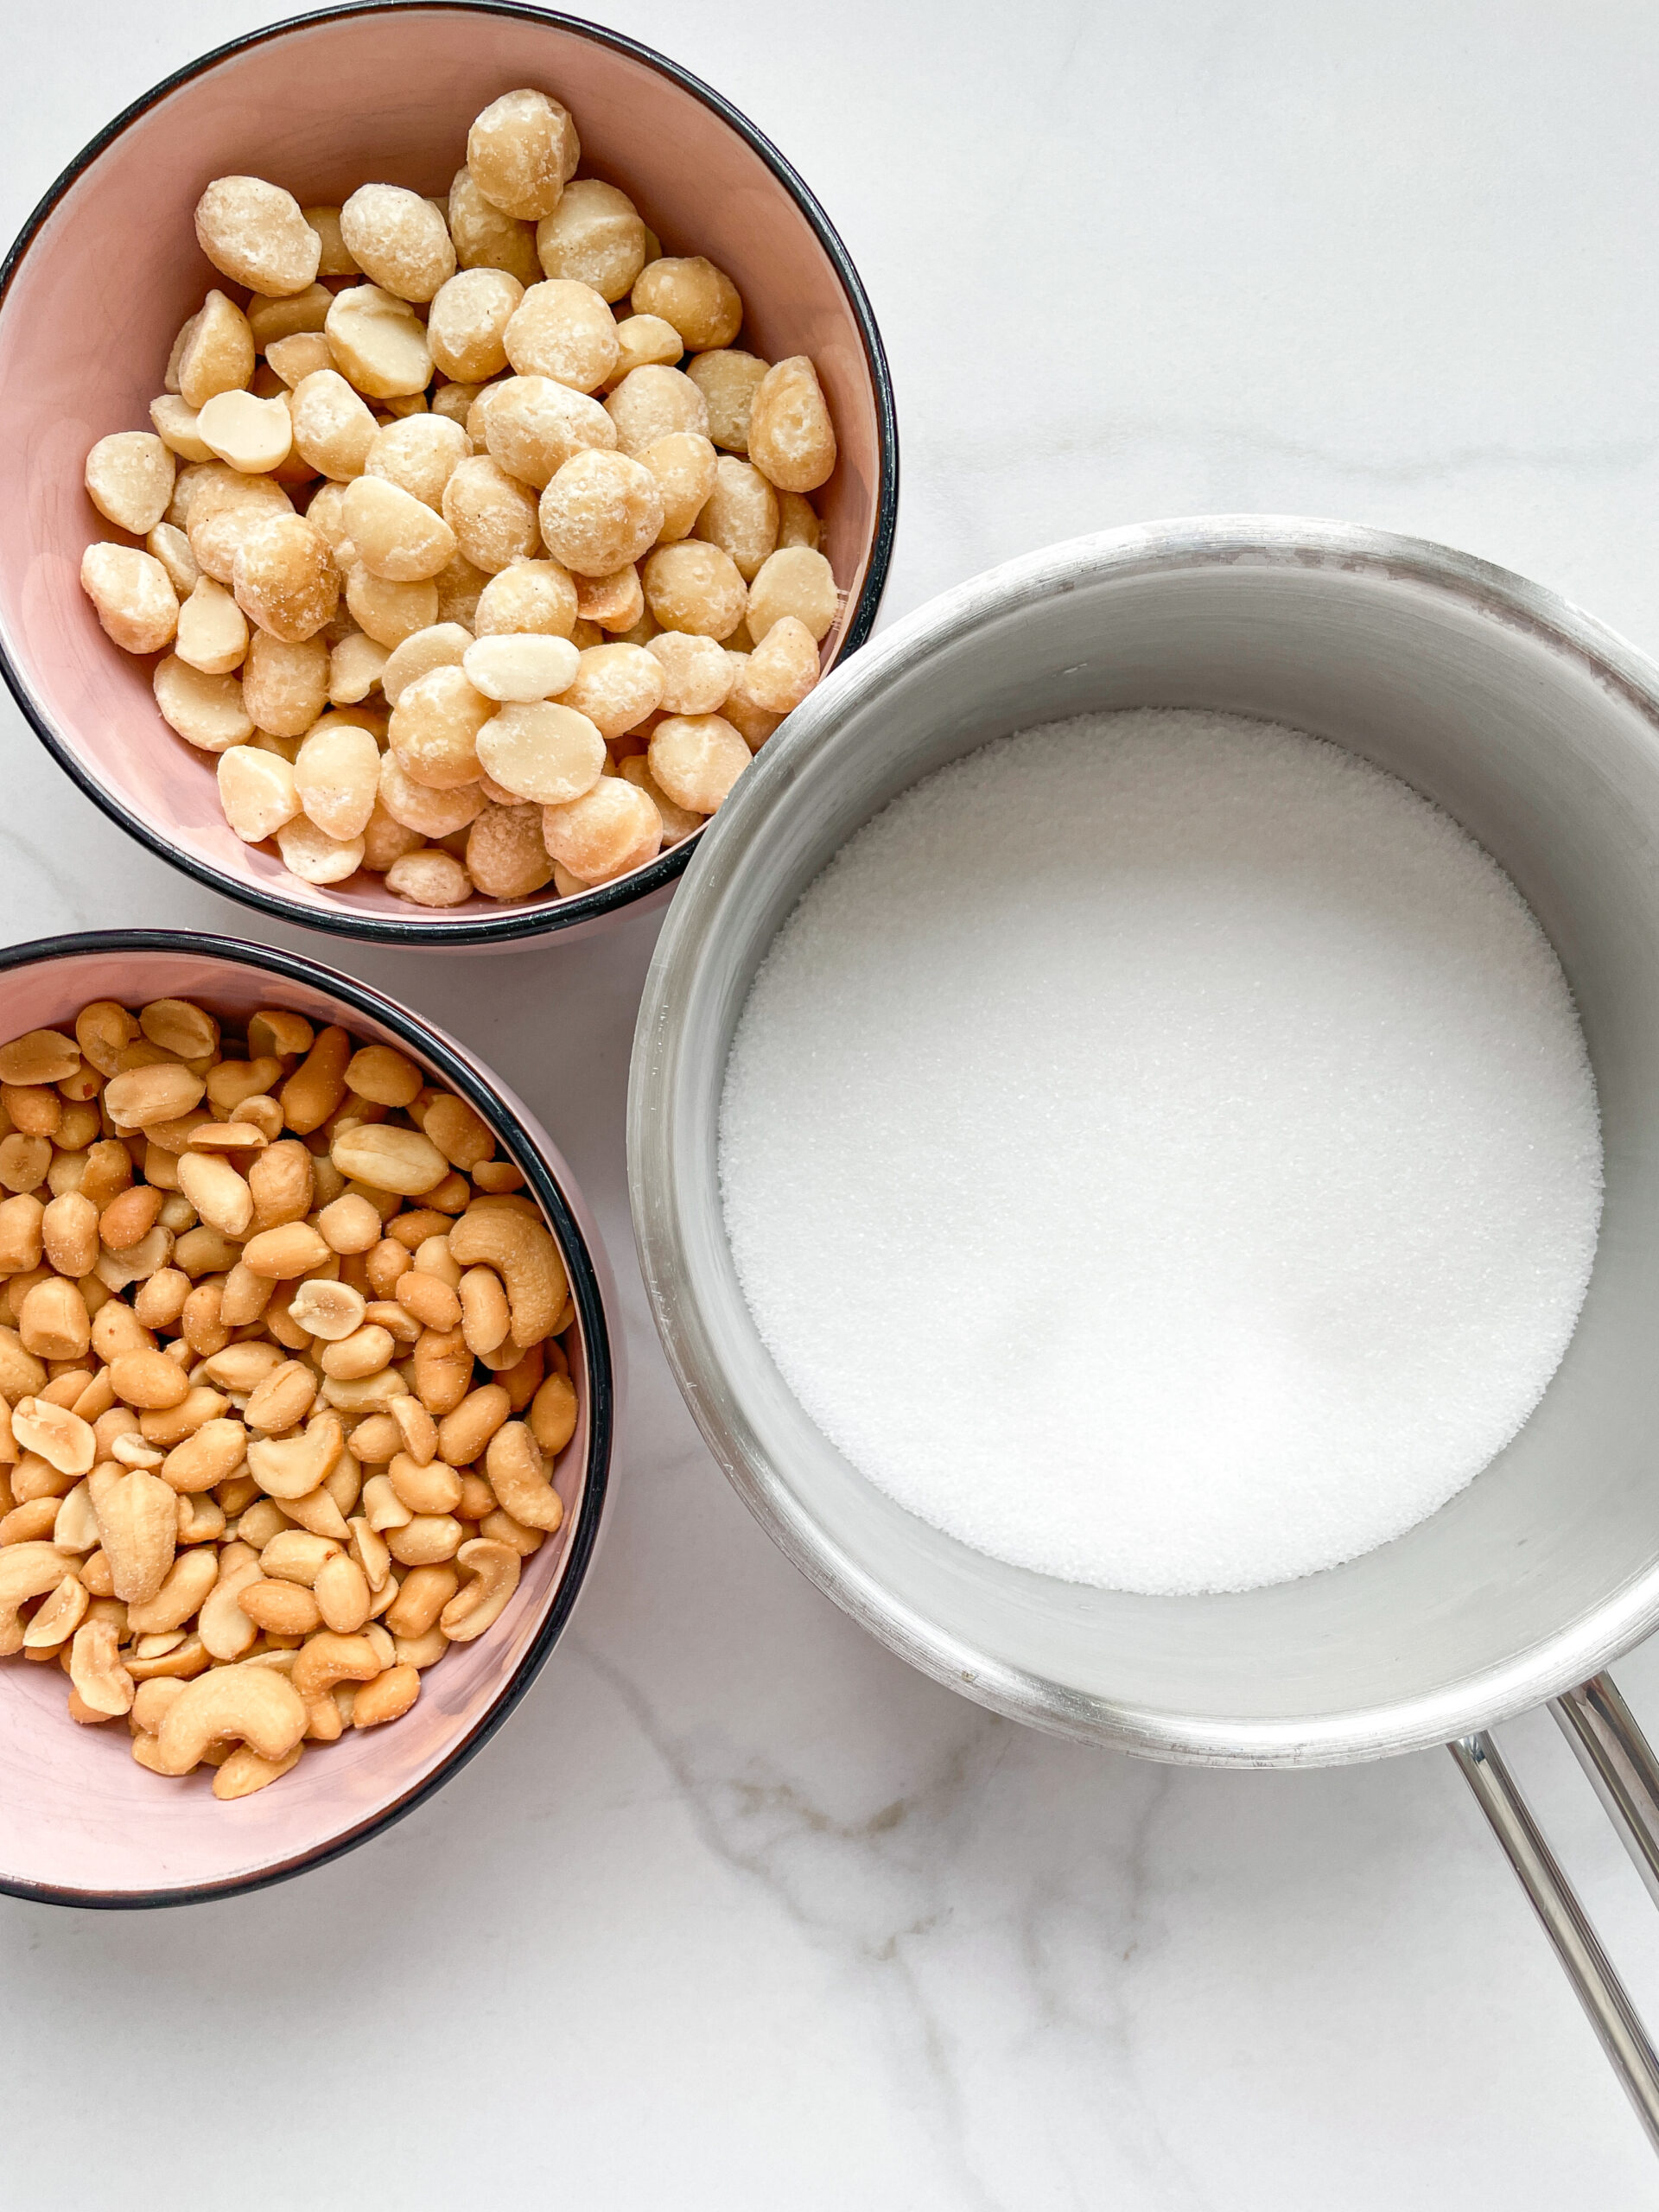
  • 225 grams white sugar
  • 250 grams macadamia nuts
  • 200 grams peanuts
  • 2 tbsp butter
  • 50 grams heavy cream

TOPPING

  • 300 grams white chocolate
  • 1.5 tsp coconut oil

Instructions

PREPARATIONS

  • Weigh out all the ingredients beforehand and have them ready. Make sure you have the right amount of nuts to hand, as you need to prepare the caramel quickly.

INSTRUCTIONS

  1. Place butter, sugar, all-purpose flour, vanilla sugar, a pinch of salt and an egg in a medium-sized bowl. Knead into a shortcrust pastry. Wrap the ball of dough in cling film and place in the fridge for 30 minutes.
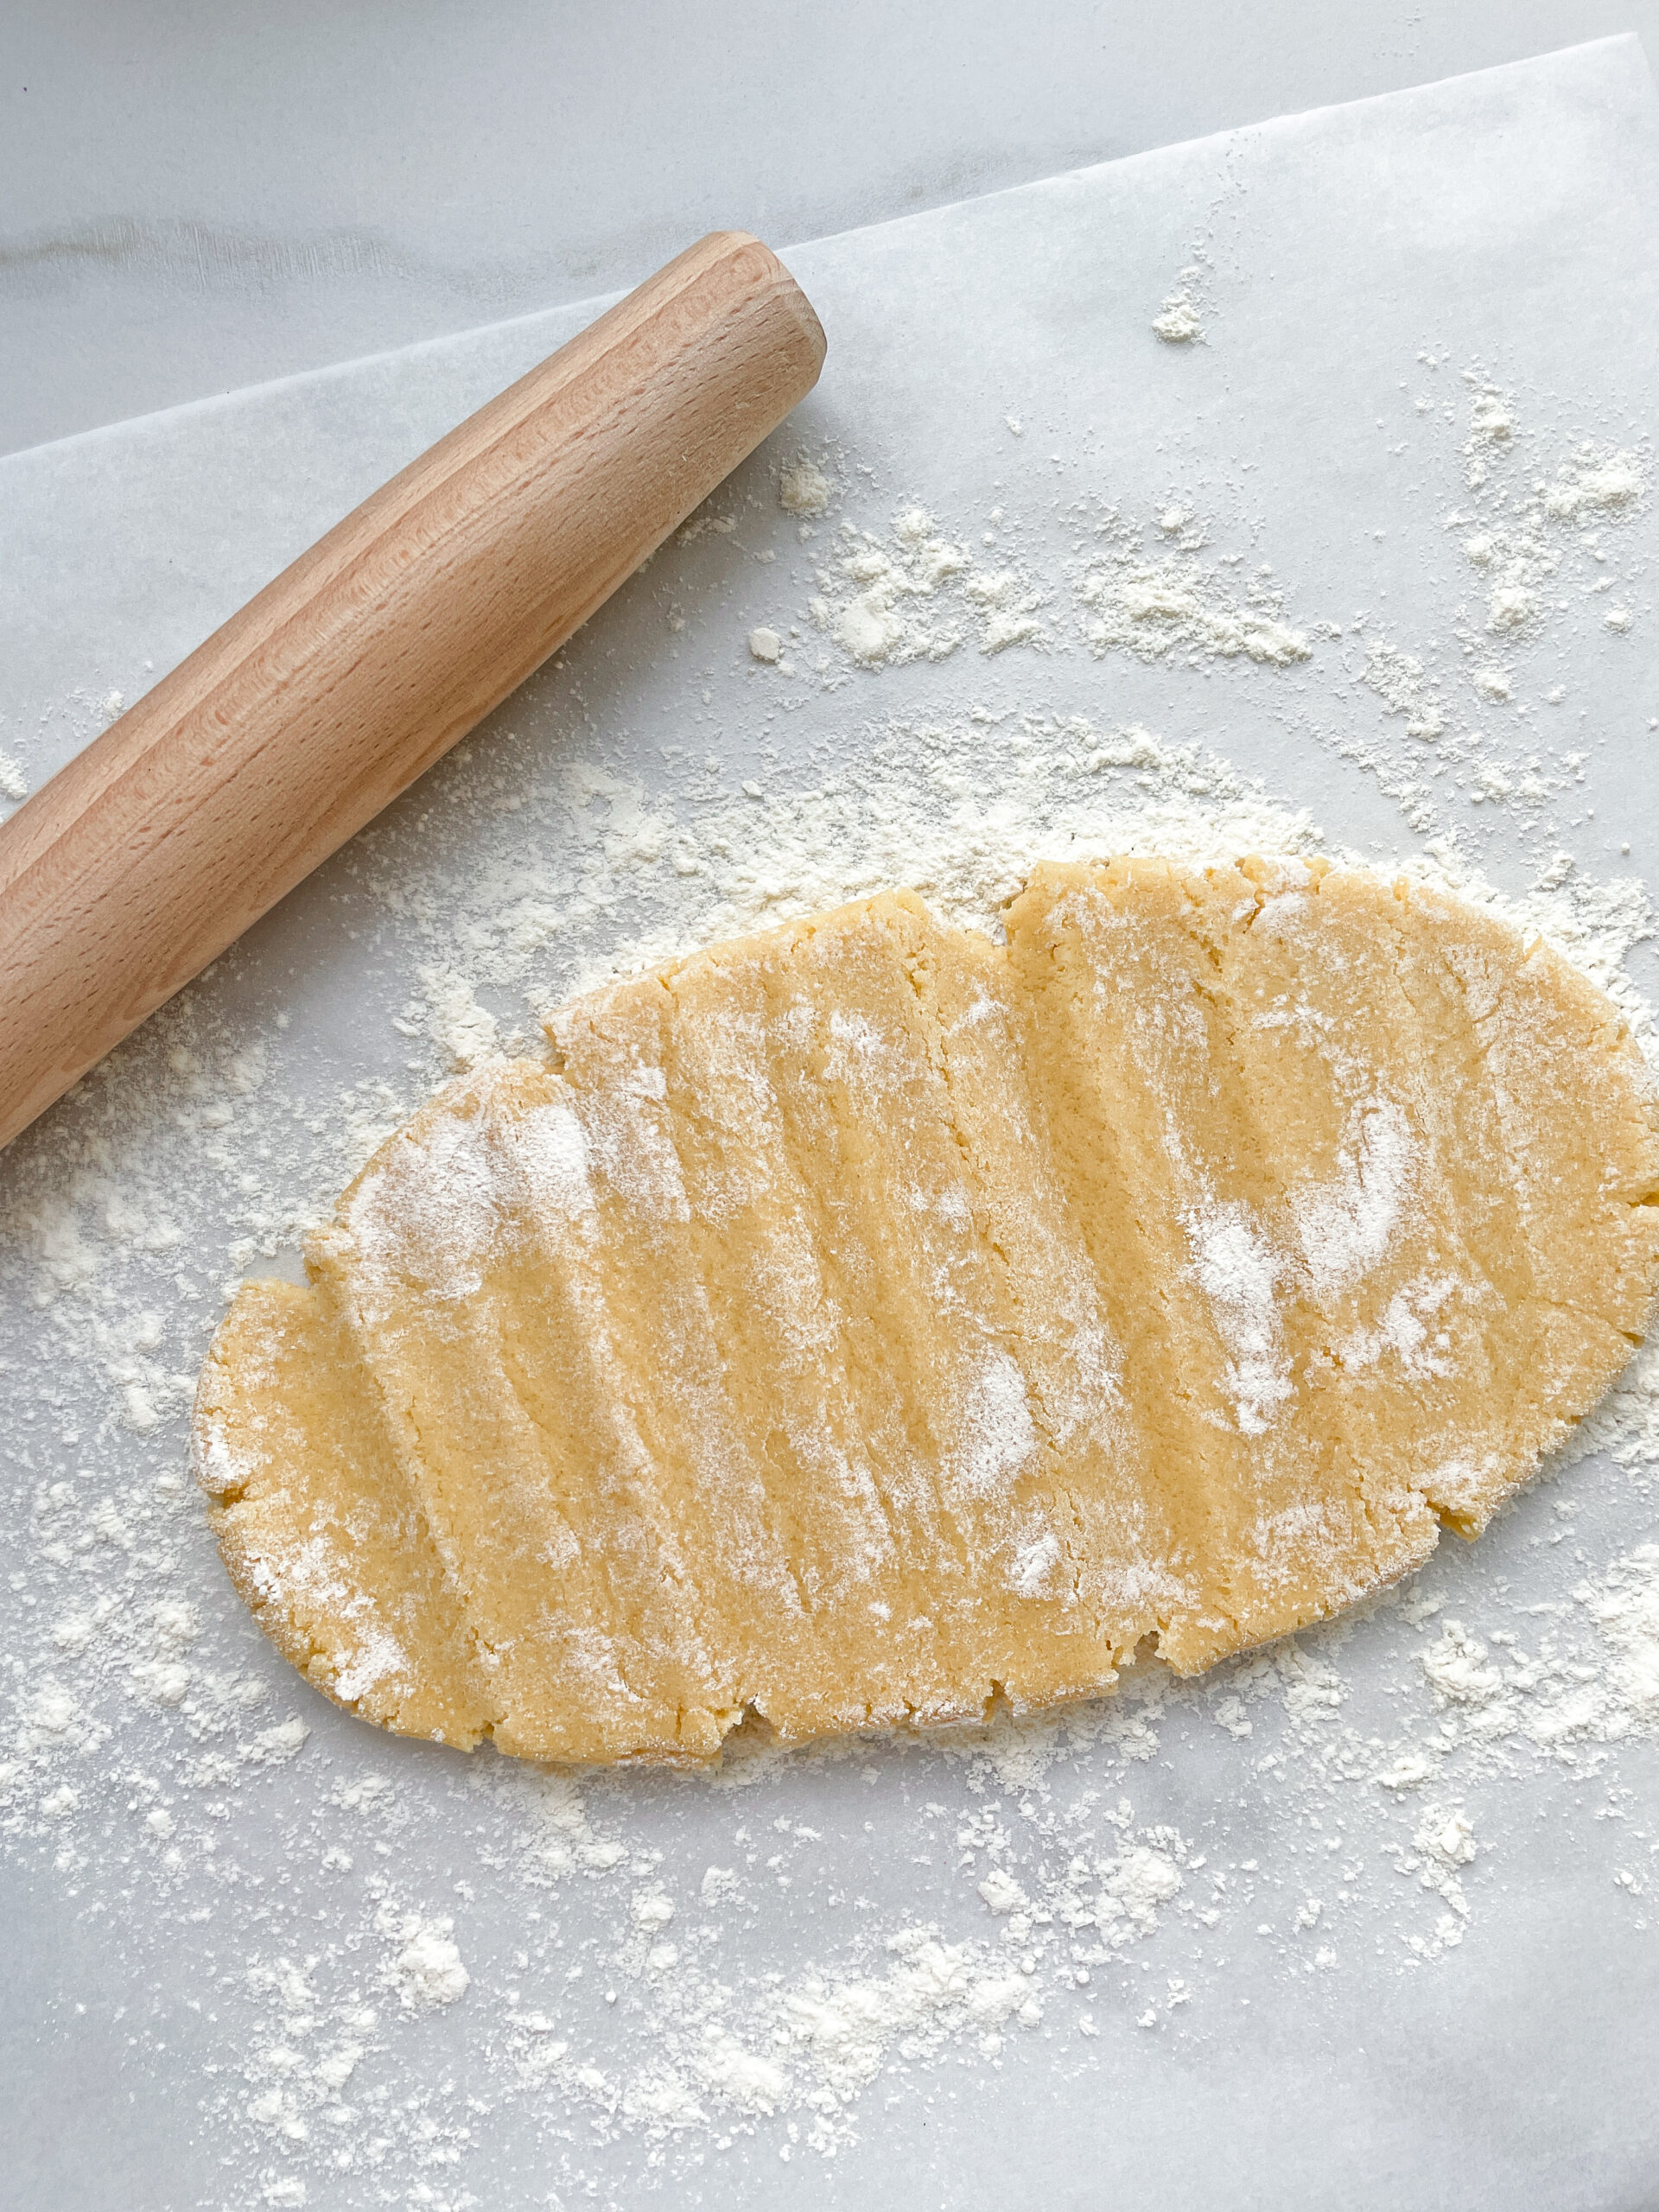
  2. After 30 minutes, preheat the oven to 200°C / 390°F and spread a layer of baking paper on a work surface. Sprinkle with a little flour and roll out the dough ball from the fridge to a size of about 31×24 cm (approximately 12×9 inches). Now place the baking paper with the dough on a baking tray and bake in the oven for around 12-13 minutes. The dough should be light in color when it comes out of the oven and at most slightly brown at the edges. Then remove the dough from the oven and leave to cool.
  3. Meanwhile make the caramel in a small pot. To do this, melt sugar over a low to medium heat, stirring constantly. As soon as the sugar has completely melted and turned amber, remove from the heat and stir in butter and heavy cream, one at a time. Don’t panic it’s normal that it gets bubbly just keep stirring, but be careful not to burn yourself. While stirring let it simmer for a minute or so on a low heat.
  4. Once the mixture has become a smooth caramel, stir in whole macadamia nuts and peanuts. Now quickly spread the nut-caramel mixture evenly over the cooled dough and press lightly onto the dough so that the caramel and the dough can combine, and leave to stand for around 45-60 minutes so that the caramel can harden.
  5. In the meantime, place the chocolate and coconut oil in a small heatproof glass or stainless steel bowl and fill the pot in which you prepared the caramel with water and bring to the boil over a medium heat on the stove. This not only makes it very easy to remove the caramel residue but also melts the chocolate for the next step. Do not pour the water away, but hang the bowl with the chocolate in the pot. But it shouldn’t touch the water. White chocolate is a little diva and only needs the steam to melt. Leave it to stand for approx. 10-15 minutes. Stir the chocolate from time to time and make sure no water gets in the bowl.
  6. As soon as the caramel hardened, use a sharp knife to cut the nut caramel sheet as desired. I opted for squares. Now hold the squares by the nut-caramel layer and dip them with the dough layer into the melted chocolate and allow to drip off well. Leave the squares to dry on the nut-caramel layer. For quicker drying, place the squares in the fridge.
  7. Enjoy 🙂
  • Prep Time: 5 min
  • Passive Time: 40 min
  • Cook Time: 60 min

Cumberland Sauce

Cumberland Sauce

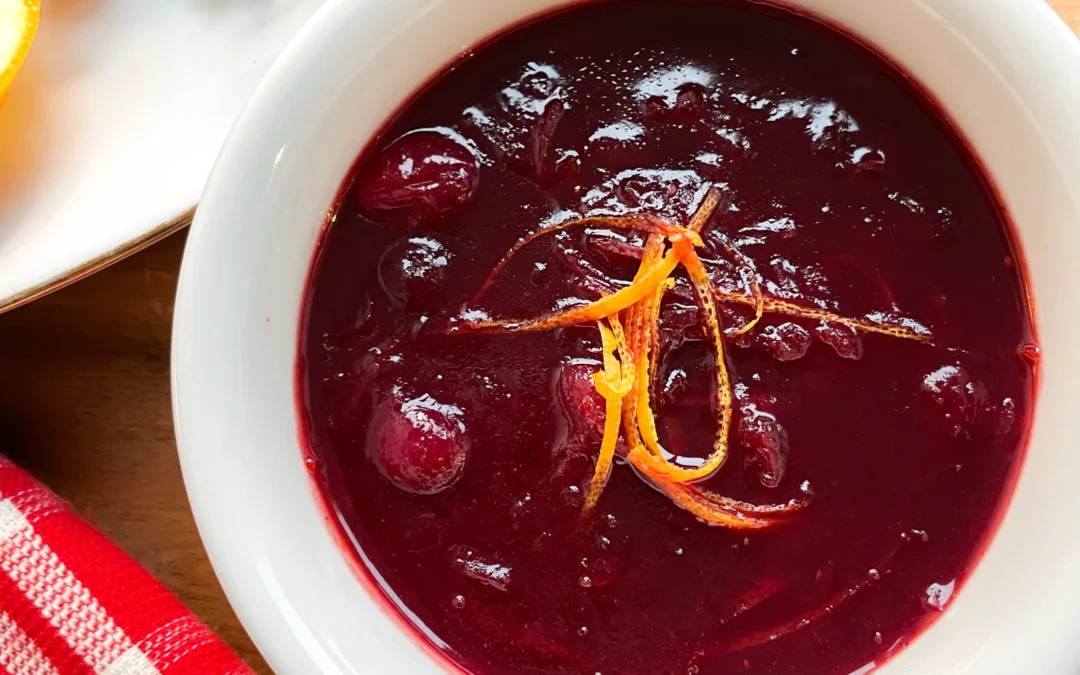
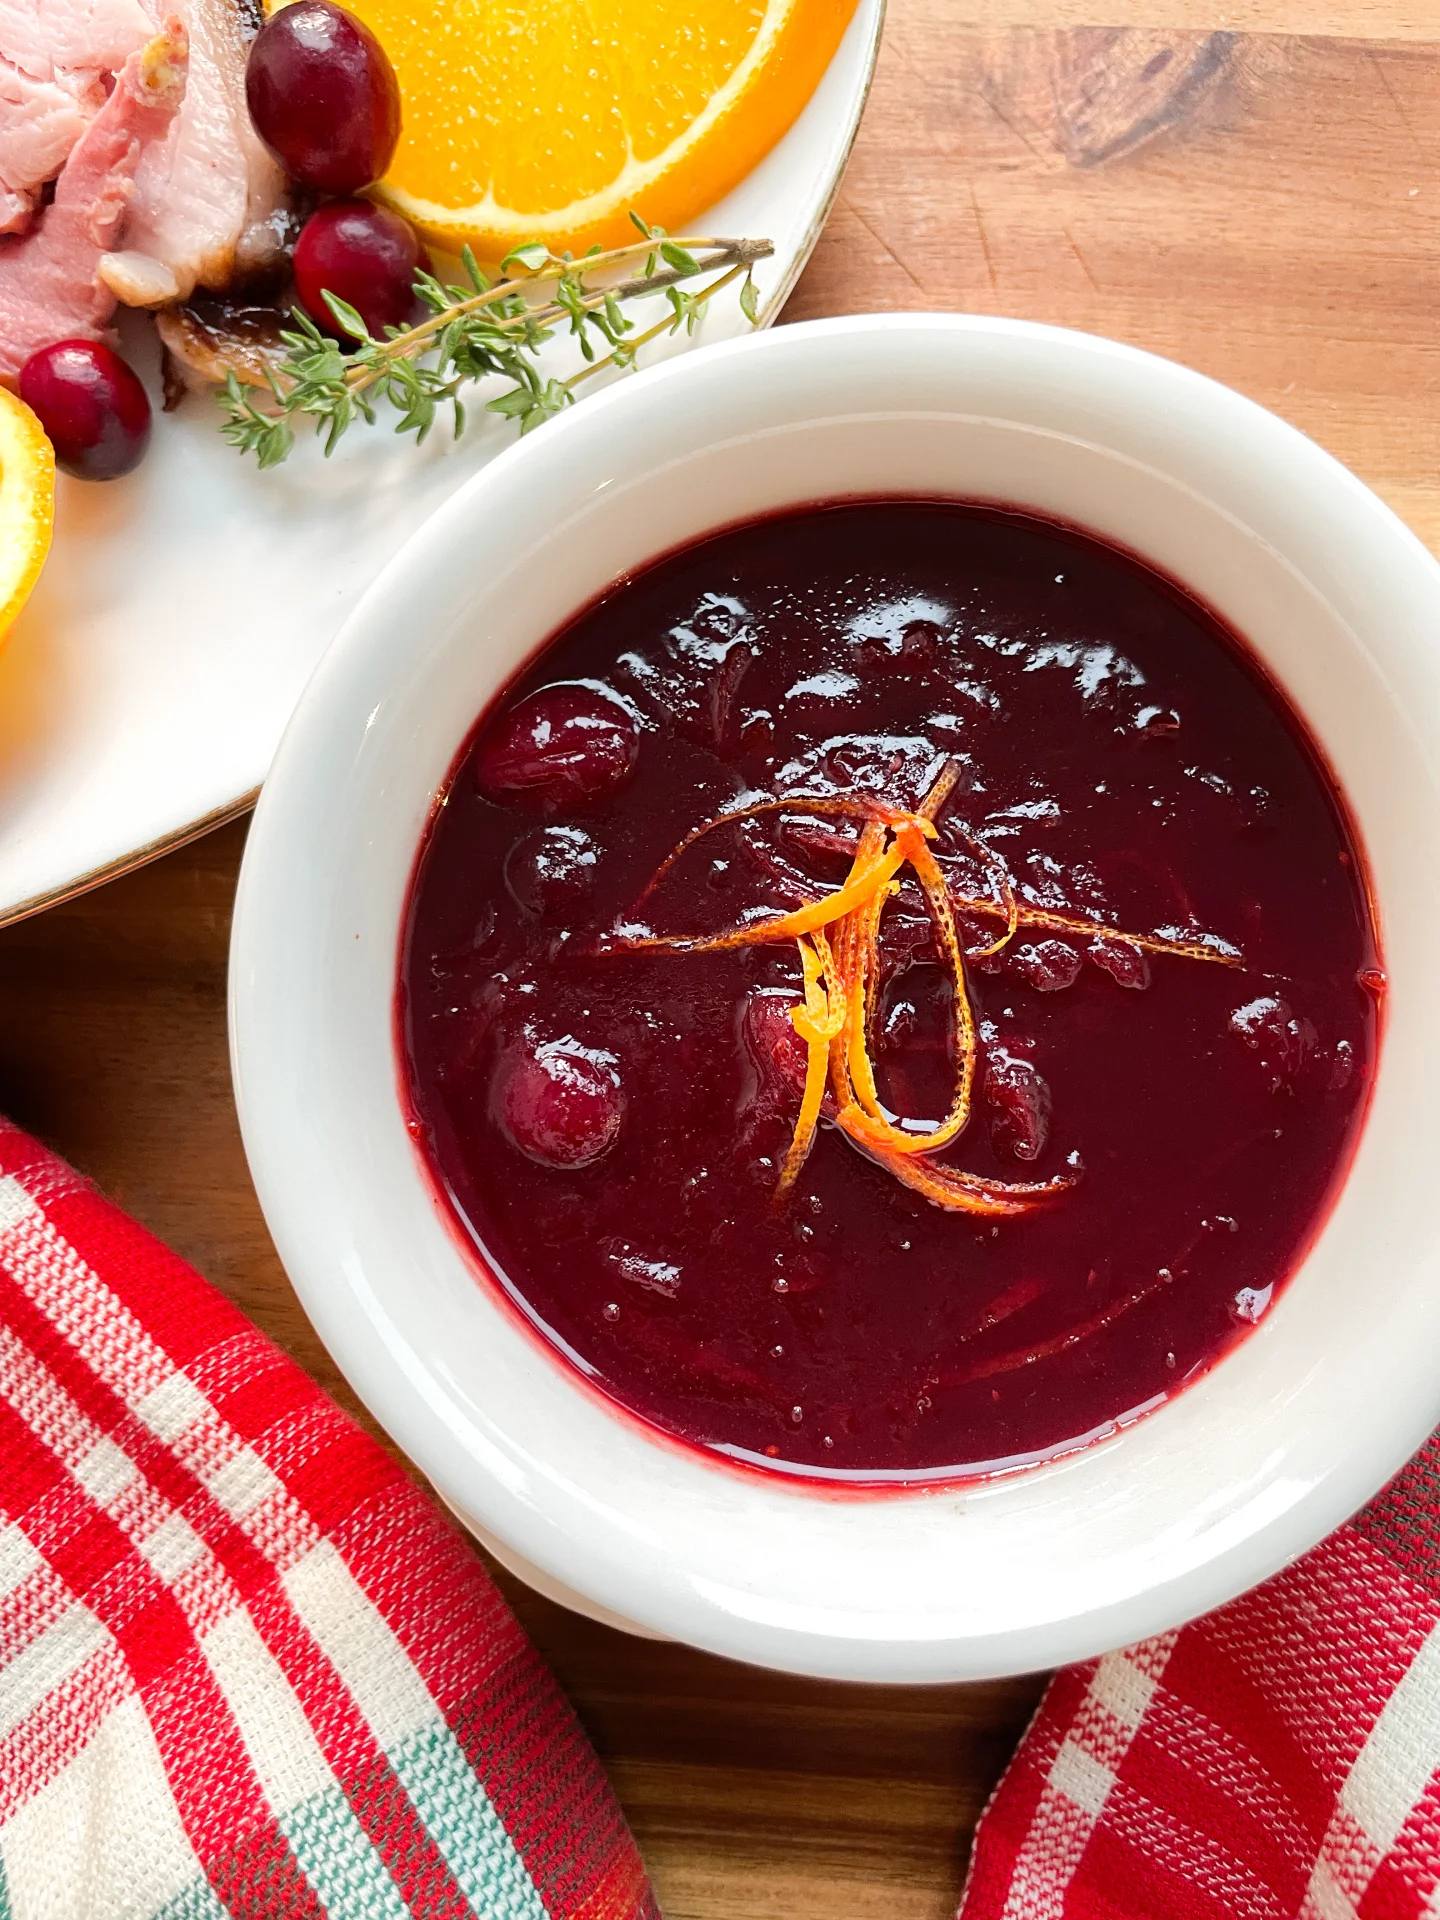
Cranberry Cumberland Sauce

Cranberry Cumberland Sauce

November 21, 2023 by Kimberly

Tangy, fruity, and a little zesty – this sauce brings festive vibes to your table. Perfect for cozy dinners or holiday feasts, it’s like a warm hug for your taste buds.

30 MINUTES

EASY

VEGAN

ENGLISH

149 PER PORTION

ZESTY
TANGY

CHRISTMAS

SAUCE

WINTER

INTRODUCTION

ABOUT THE RECIPE

You know that feeling when a dish just makes the meal? This fruity, tangy, and slightly spiced sauce does exactly that. Whether you’re hosting a big holiday gathering, elevating a simple roast dinner, or looking for the perfect pairing for your appetizers, this recipe is your go-to for adding a pop of flavor and elegance to any plate. It’s absolutely divine with my Fingerfood Beef Wellington, bringing out those rich, savory notes, and pairs beautifully with my Cranberry Orange Glazed Pork Roast for a show-stopping main course. It’s classic, cozy, and totally irresistible, making every bite feel festive and full of love. Bonus? It’s ridiculously easy to whip up.

How to serve
Pair this zesty goodness with roasted meats like turkey, pork, or ham for a perfect balance of sweet and savory. It’s also a surprising win drizzled over creamy brie or slathered on a crusty sandwich. Looking for a quick appetizer? Serve it with crackers, a wedge of sharp cheese, and nuts for a crowd-pleasing snack board. It’s versatile enough to go beyond holiday feasts – any time you want a hit of bold, fruity flavor, this sauce has you covered.

How to store
Keep it fresh by storing it in an airtight container in the fridge for up to 3 days. You can also freeze it for up to three months – just thaw in the fridge overnight when needed.

Hi, I'm Kimberly!

Hi, I'm Kimberly.

A passionate food lover who believes in the magic of homemade deliciousness that spreads love and warmth. Join me on this culinary adventure as I prepare wonderful dishes and let’s spread some happiness together!

Kimberly the Zett Signature

If you want to get to know me better, click here!


Cumberland Sauce
Cumberland Sauce
Cumberland Sauce

„Let’s make a piece of happiness“

Print
clock clock iconcutlery cutlery iconflag flag iconfolder folder iconinstagram instagram iconpinterest pinterest iconfacebook facebook iconprint print iconsquares squares iconheart heart iconheart solid heart solid icon
Cranberry Cumberland Sauce

Cranberry Cumberland Sauce


  • Author: Kimberly
  • Total Time: 30 min
  • Yield: 6 1x

Description

RECOMMENDED EQUIPMENT
  • sharp knife
  • chopping board
  • peeler
  • grater
  • small pot
  • measuring cup
  • juicer (or by hand)

Ingredients

Units Scale
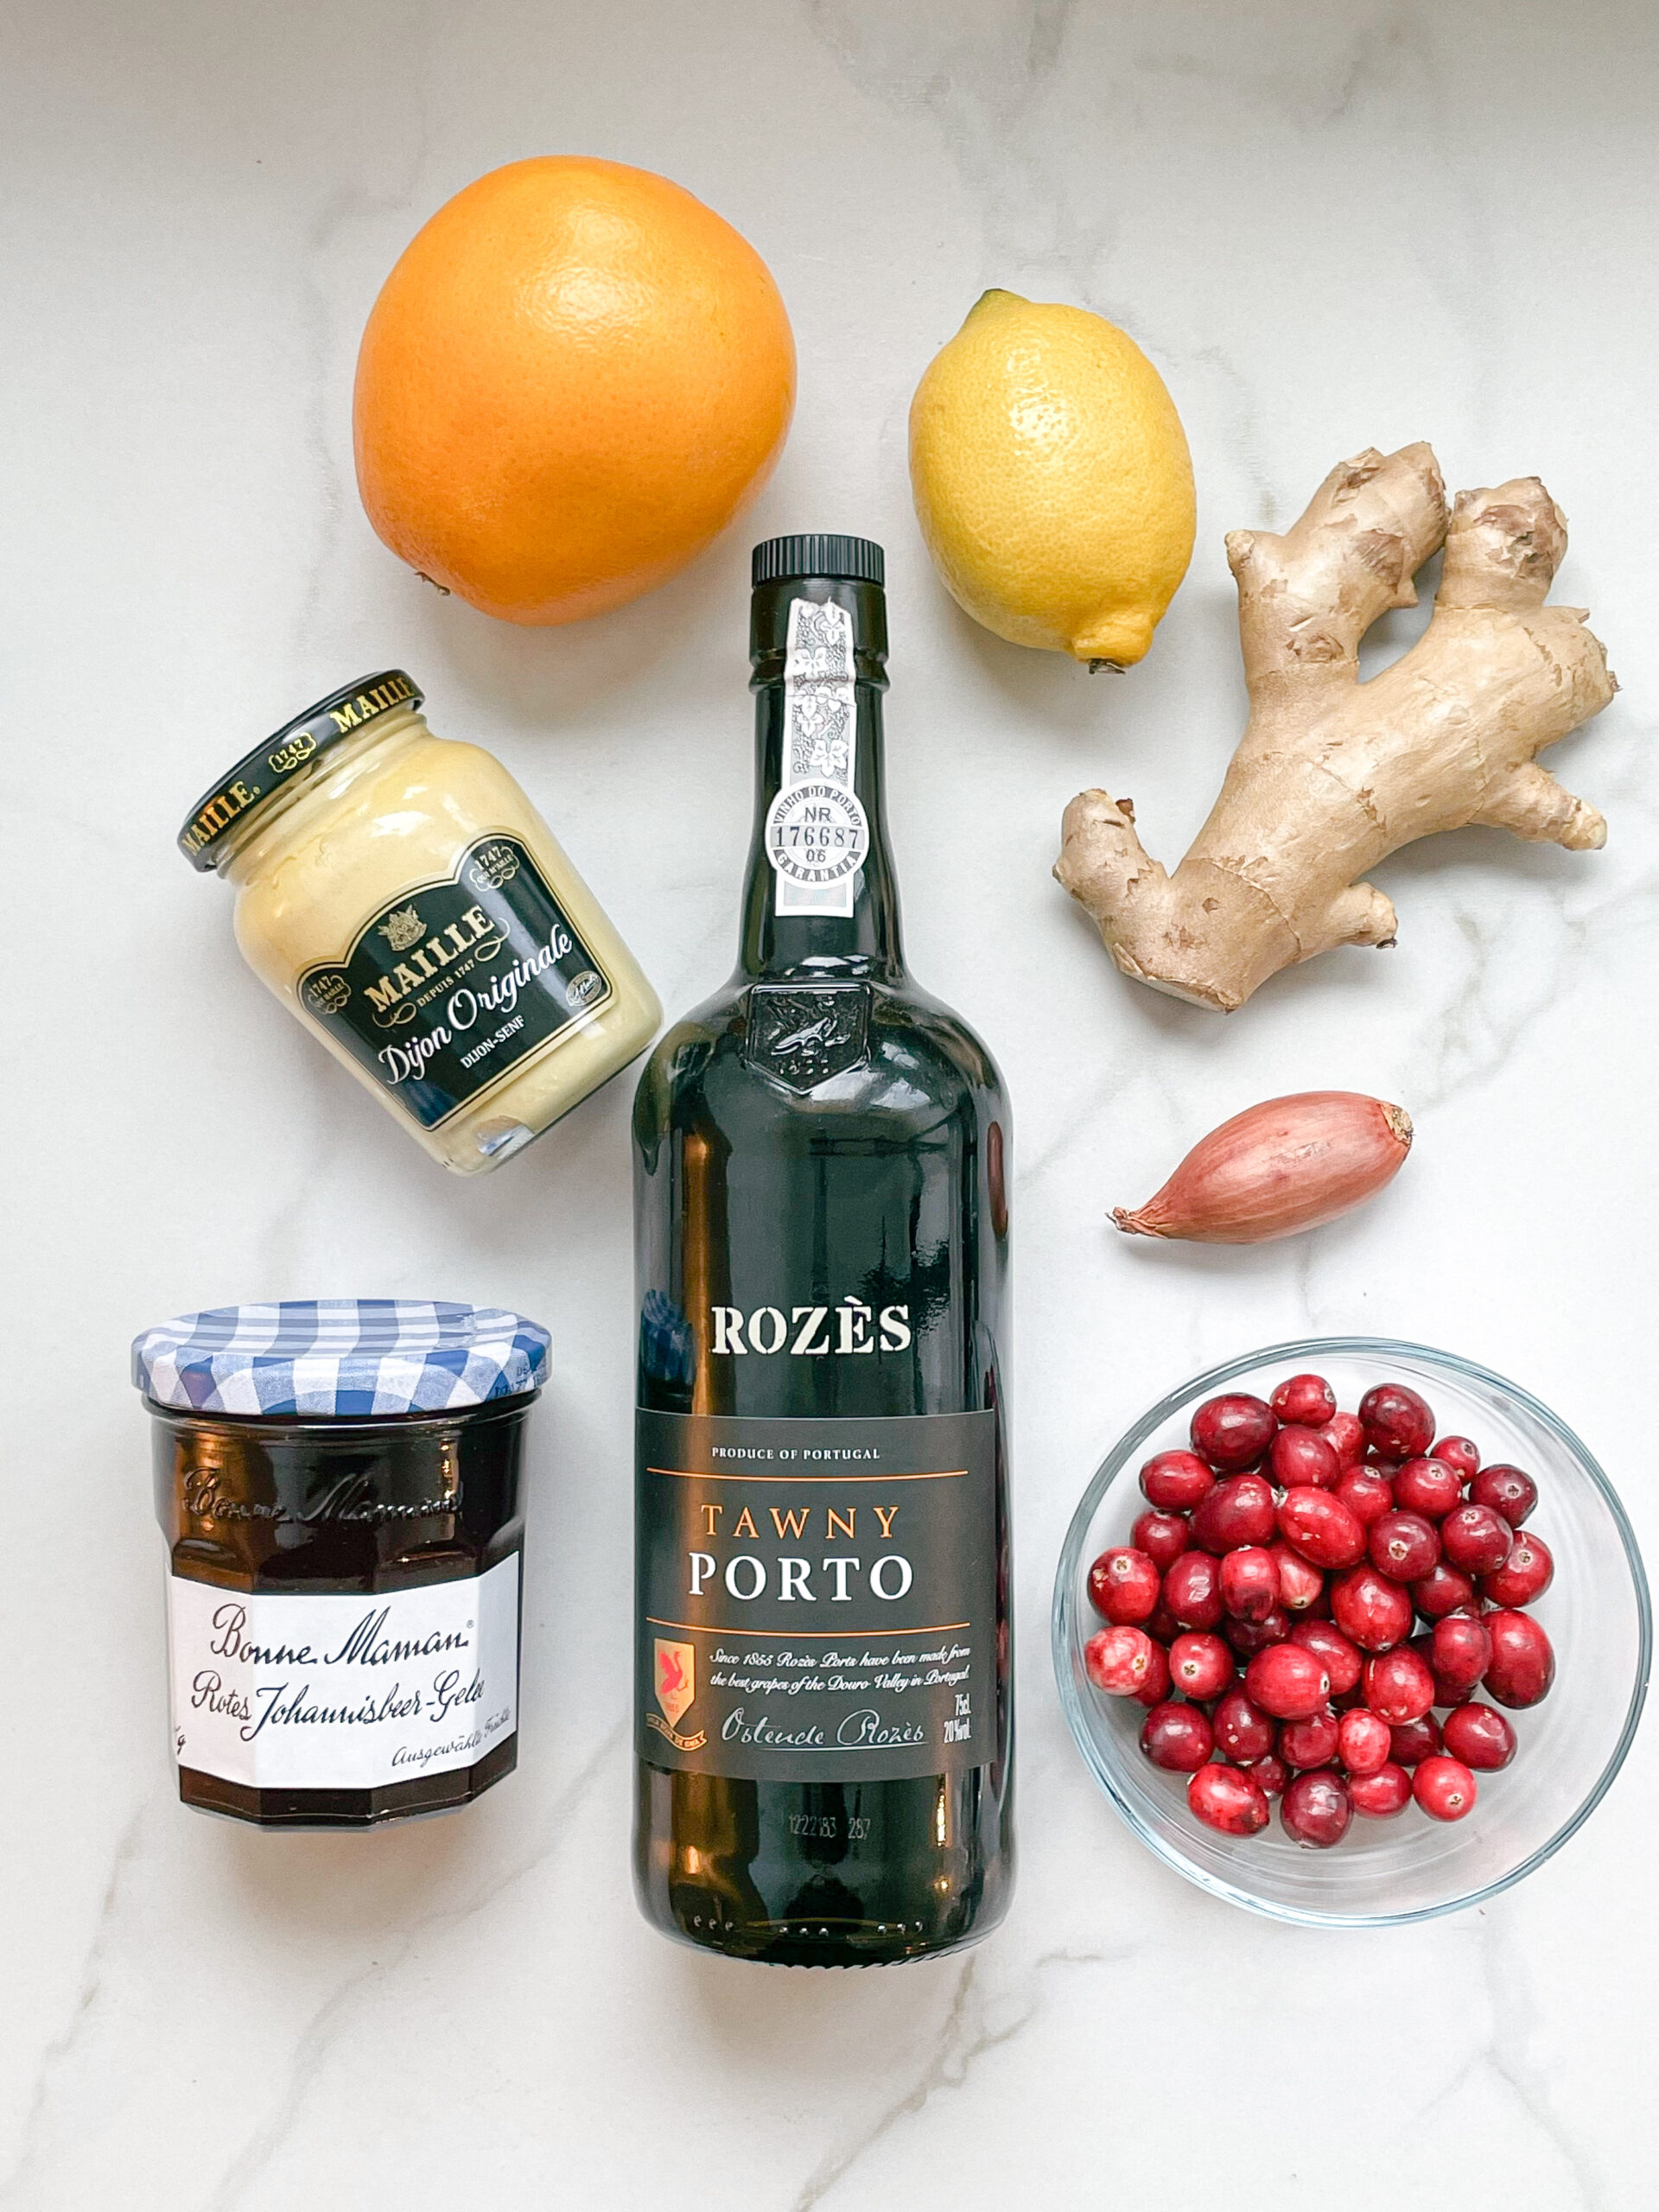
  • 1 lemon
  • 1 orange
  • 200 milliliter port wine
  • 1 shallot
  • 3/4 tsp fresh ginger, grated
  • 1 tsp dijon mustard
  • 100 grams fresh cranberries
  • 200 grams redcurrant jelly
  • salt & finely grated black pepper

Instructions

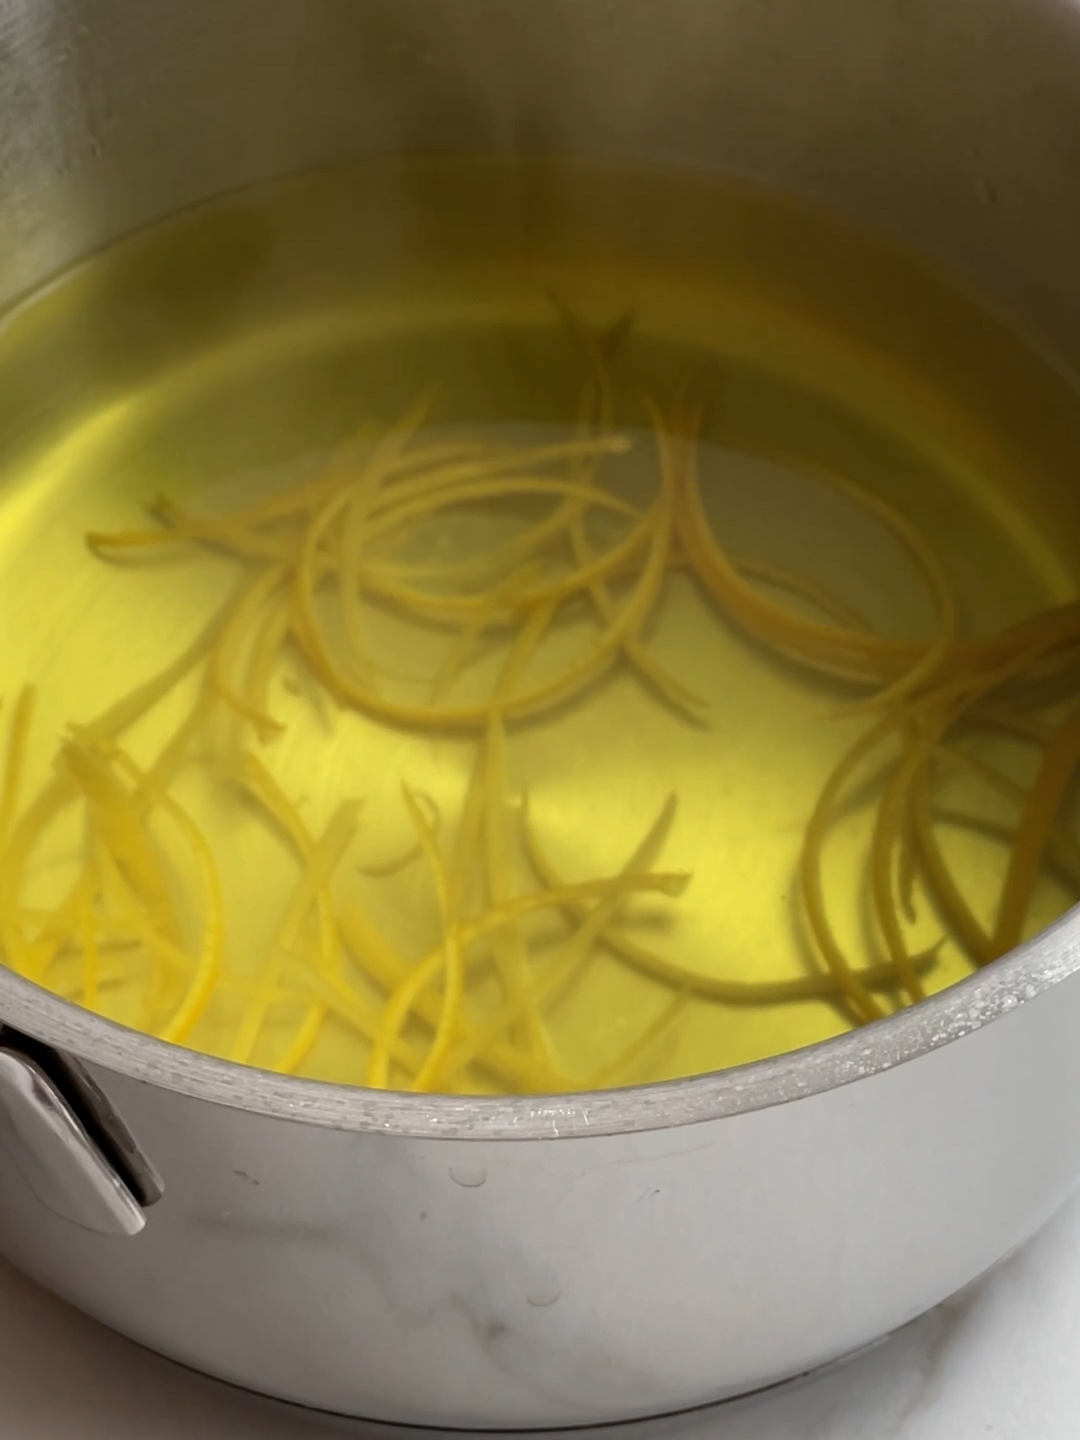
  1. Thoroughly wash and dry the lemon and orange. Peel 3–4 strips from each using a peeler, then slice the peels into fine julienne strips. Juice the orange, aiming for about 100 ml (3 fl. oz.) of juice.
  2. In a small saucepan, bring water to a boil and simmer the julienne strips for 5 minutes to soften and reduce their bitterness. Drain and set aside.
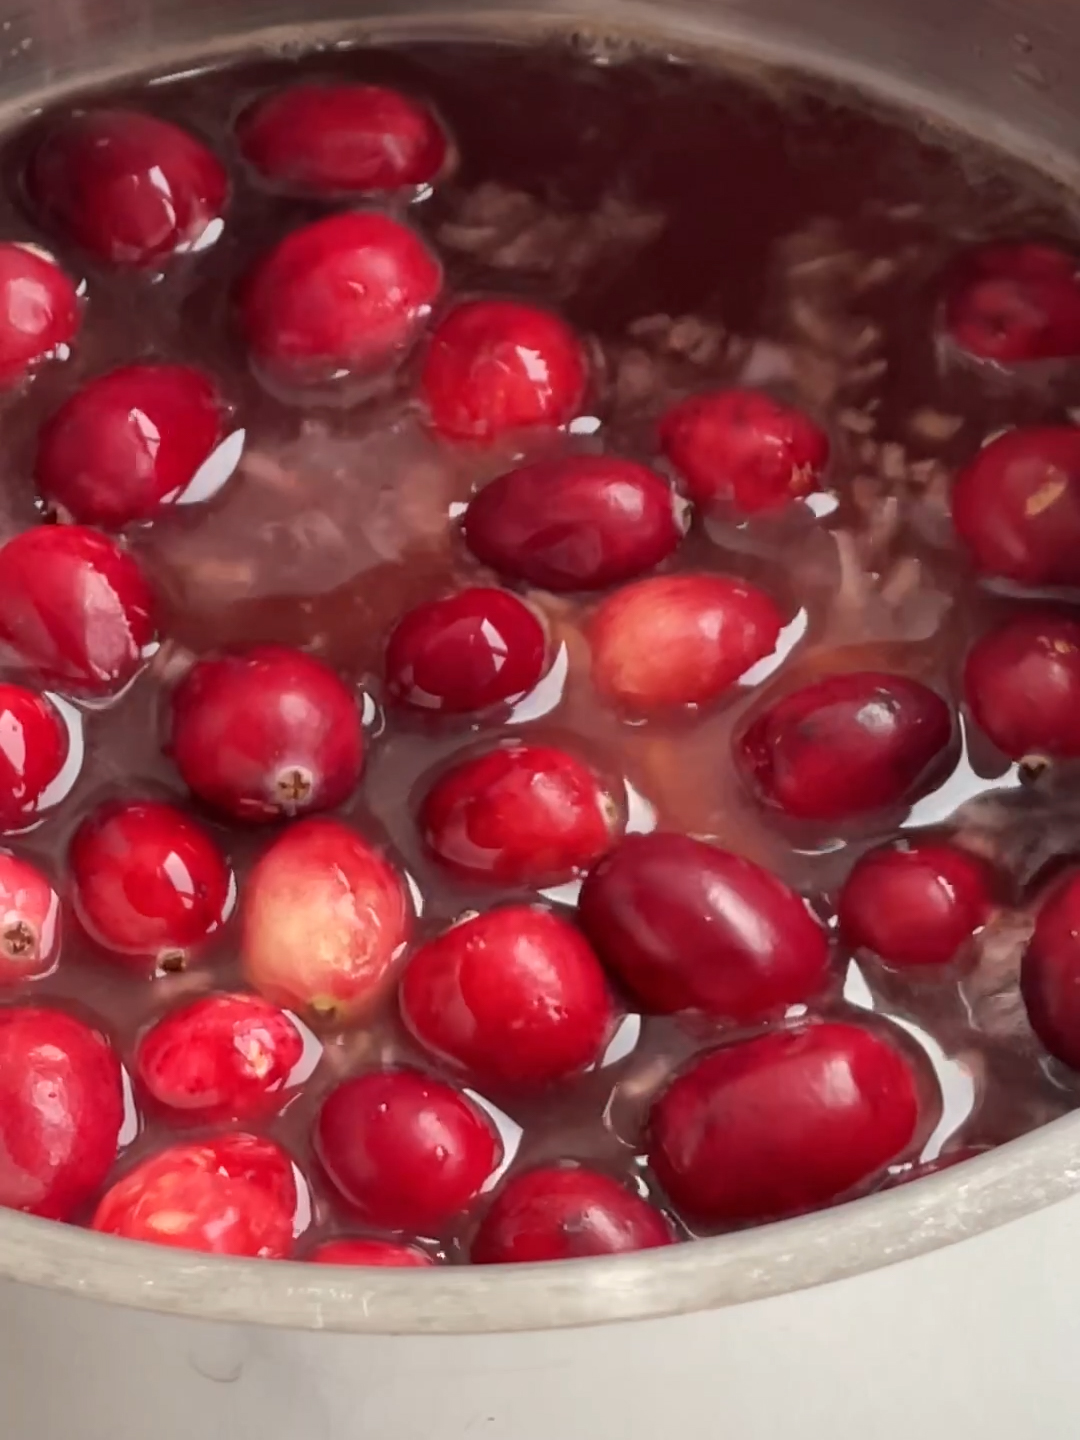
  3. Finely dice the shallot and grate the ginger directly into the saucepan. Add the port wine, orange juice, mustard, and cranberries. Bring everything to a boil over medium heat. Once boiling, lower the heat and simmer for about 15 minutes, until the cranberries soften and the liquid reduces.
  4. Next, stir in the redcurrant jelly and continue simmering for another 6–7 minutes, or until the sauce thickens. Season with salt and finely ground pepper to taste.
  5. Finally, fold the julienne strips into the sauce and let it cool. The sauce will thicken further as it cools and can be reheated anytime for serving.
  • Passive Time: 20 min
  • Cook Time: 10 min

Finger Food Beef Wellington

Finger Food Beef Wellington

Finger Food Beef Wellington

Finger Food Beef Wellington

November 21, 2023 by Kimberly

Enjoy the fancy version of Beef Wellington in bite-sized form. Enjoy tender beef wrapped in buttery batter and create a delicious and premium snack. Perfect for adding a touch of class to any gathering or occasion, a simple yet sophisticated treat that everyone will enjoy.

45 MINUTES

INTERMEDIATE

OMNIVORE

ENGLISH

93 PER PIECE

FANCY

DINNER PARTY
CHRISTMAS

APPETIZER

AUTUM/ WINTER

INTRODUCTION

ABOUT THE RECIPE

Take your event to the next level with these mini beef wellingtons, as a symphony of flavors unfolds with every bite, seamlessly blending mushrooms, Parma ham and a touch of Dijon mustard. This exquisite combination offers a sophisticated taste sensation in each delicious, finger-friendly parcel – perfect for adding a touch of gourmet flair to your party or event.

How to serve:

Present these delicious Beef Wellington finger foods at your Christmas party or on Christmas Eve, for example. These beef bites can be enjoyed on their own or with my spicy Cumberland sauce for an extra festive kick. With their delicious flavors, these canapés will enhance your Christmas party and are an irresistible and perfect addition to your festive table.

How to store:

To ensure optimum freshness, keep Beef Wellington wrapped in plastic wrap, beeswax cloths, aluminum foil or an airtight container in the refrigerator for up to two days. If you plan to store them for longer, freeze them in an airtight container, making sure to separate the layers with parchment paper. When you’re ready to enjoy the Wellingtons, reheat them in the oven to keep the batter crispy. Defrost frozen Wellingtons in the fridge before reheating to ensure they retain their delicious texture.

Hi, I'm Kimberly!

Hi, I'm Kimberly.

A passionate food lover who believes in the magic of homemade deliciousness that spreads love and warmth. Join me on this culinary adventure as I prepare wonderful dishes and let’s spread some happiness together!

Kimberly the Zett Signature

If you want to get to know me better, click here!


Finger Food Beef Wellington

„Let’s make a piece of happiness“

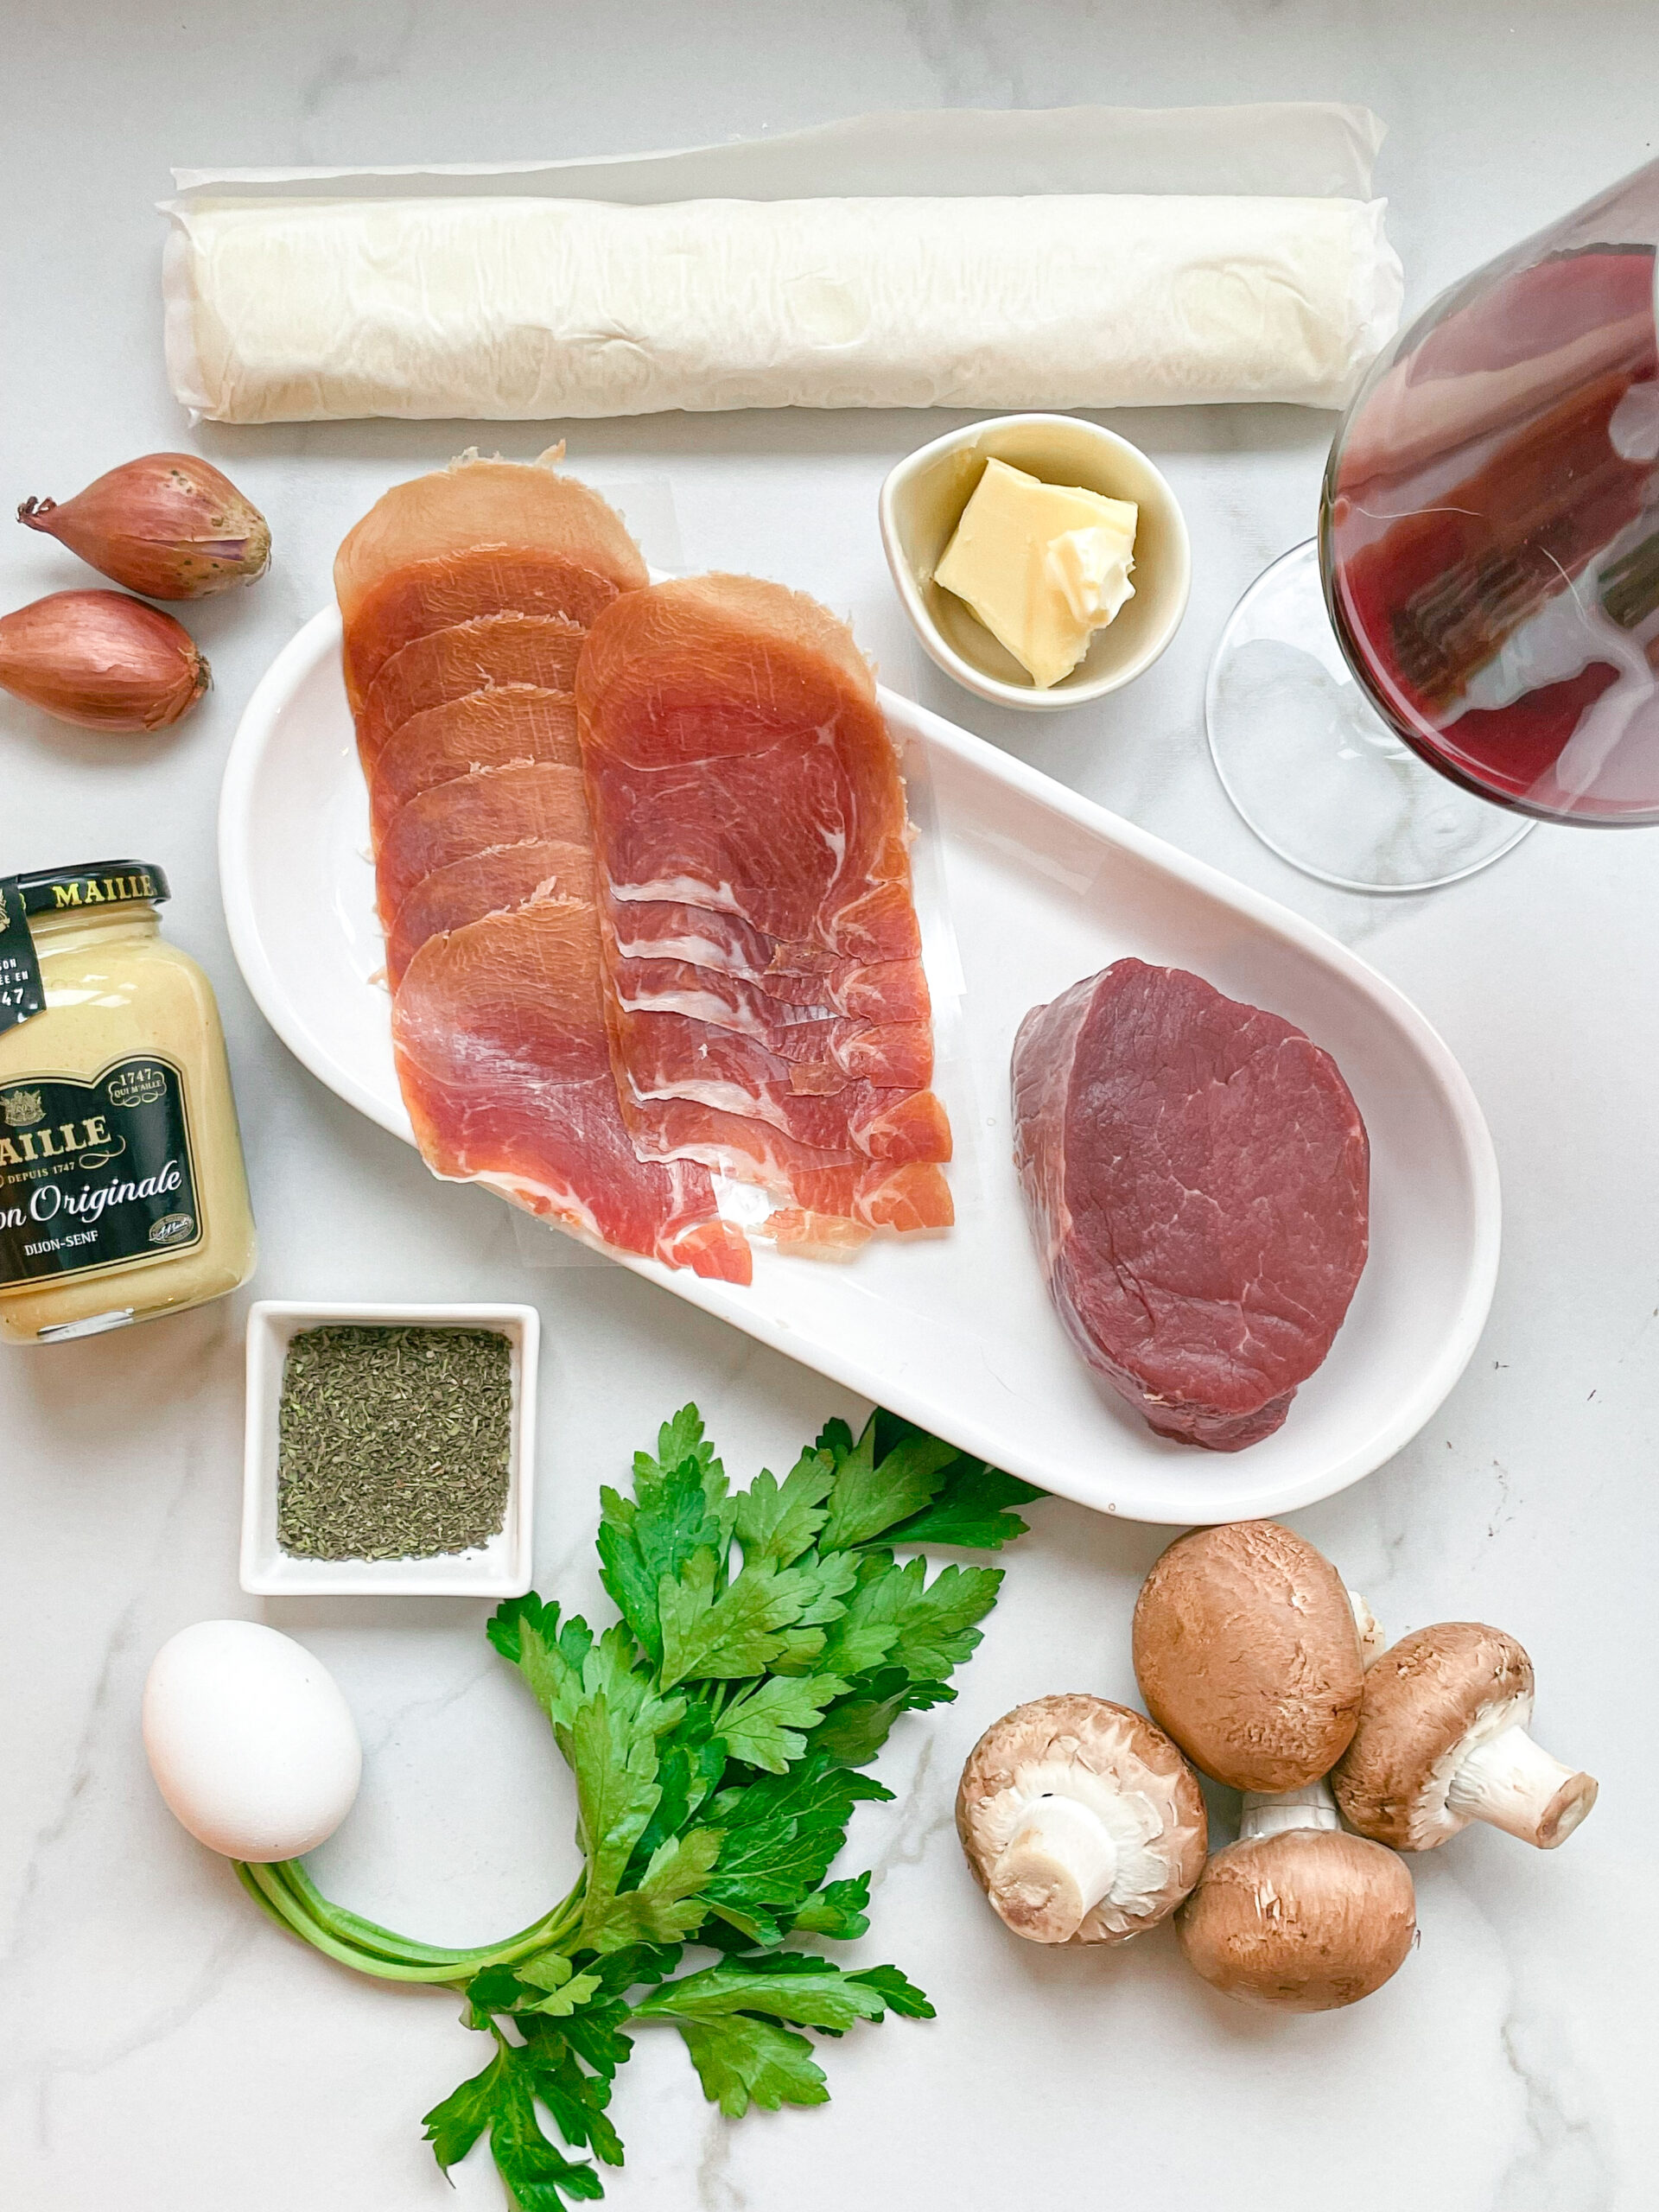
INGREDIENTS

FOR 16 PIECES

Mushroom Filling

  • 1 shallot 
  • 1 tbsp butter
  • 180g mushrooms (1.5 cups) 
  • 1 tsp dried thyme
  • 1 tbsp fresh parsley
  • 3 tbsp port wine (or any other red wine) 
  • salt
  • pepper

individual ingredients

  • 1 store-bought puff pastry
  • 200g beef fillet (7 oz.) 
  • 100g prosciutto di parma (3.5 oz.) 
  • 1 tbsp butter
  • 1 tsp dijon mustard
  • 1 egg
  • salt
  • pepper
Finger Food Beef Wellington
}

ACTIVE: 10 min

PASSIVE: 0 min

PREPARATIONS

Recommended Equipment
  • sharp knife
  • chopping board
  • food processor if necessary
  • small bowl
  • small pan
  • kitchen basting brush
  • Cut the mushrooms into very small pieces with a knife or chop briefly in a food processor.
  • Cut the shallot into very small pieces or chop briefly in a food processor.
  • Finely chop the parsley.
  • Cut the puff pastry into 16 equal pieces.
  • Cut or tear the Prosciutto di Parma into 16 equal pieces.
  • Crack an egg into a bowl and whisk it together.
}

ACTIVE: 25 min
PASSIVE: 10 min

COOKING

1. Fry the mushrooms in a pan without adding any fat so that the water can evaporate and the mushrooms do not become mushy and brown. Once the mushrooms are lightly browned, add a tablespoon of butter to the pan.

2. Secondly fry the finely chopped shallot in the pan with the mushrooms and melted butter until soft. When the onions are soft, deglaze everything with 3 tablespoons red wine and reduce for approx. 5-8 minutes. There should be no liquid left on the bottom, but everything should be absorbed into the mushrooms. Next, add the chopped fresh parsley, dried thyme and salt & pepper to taste to the pan. Set the mushroom mixture aside.

3. Now sear the fillet of beef very briefly on all sides in a pan with 1 tbsp butter. Remove the meat from the pan and cut into 16 equal pieces. Set aside.

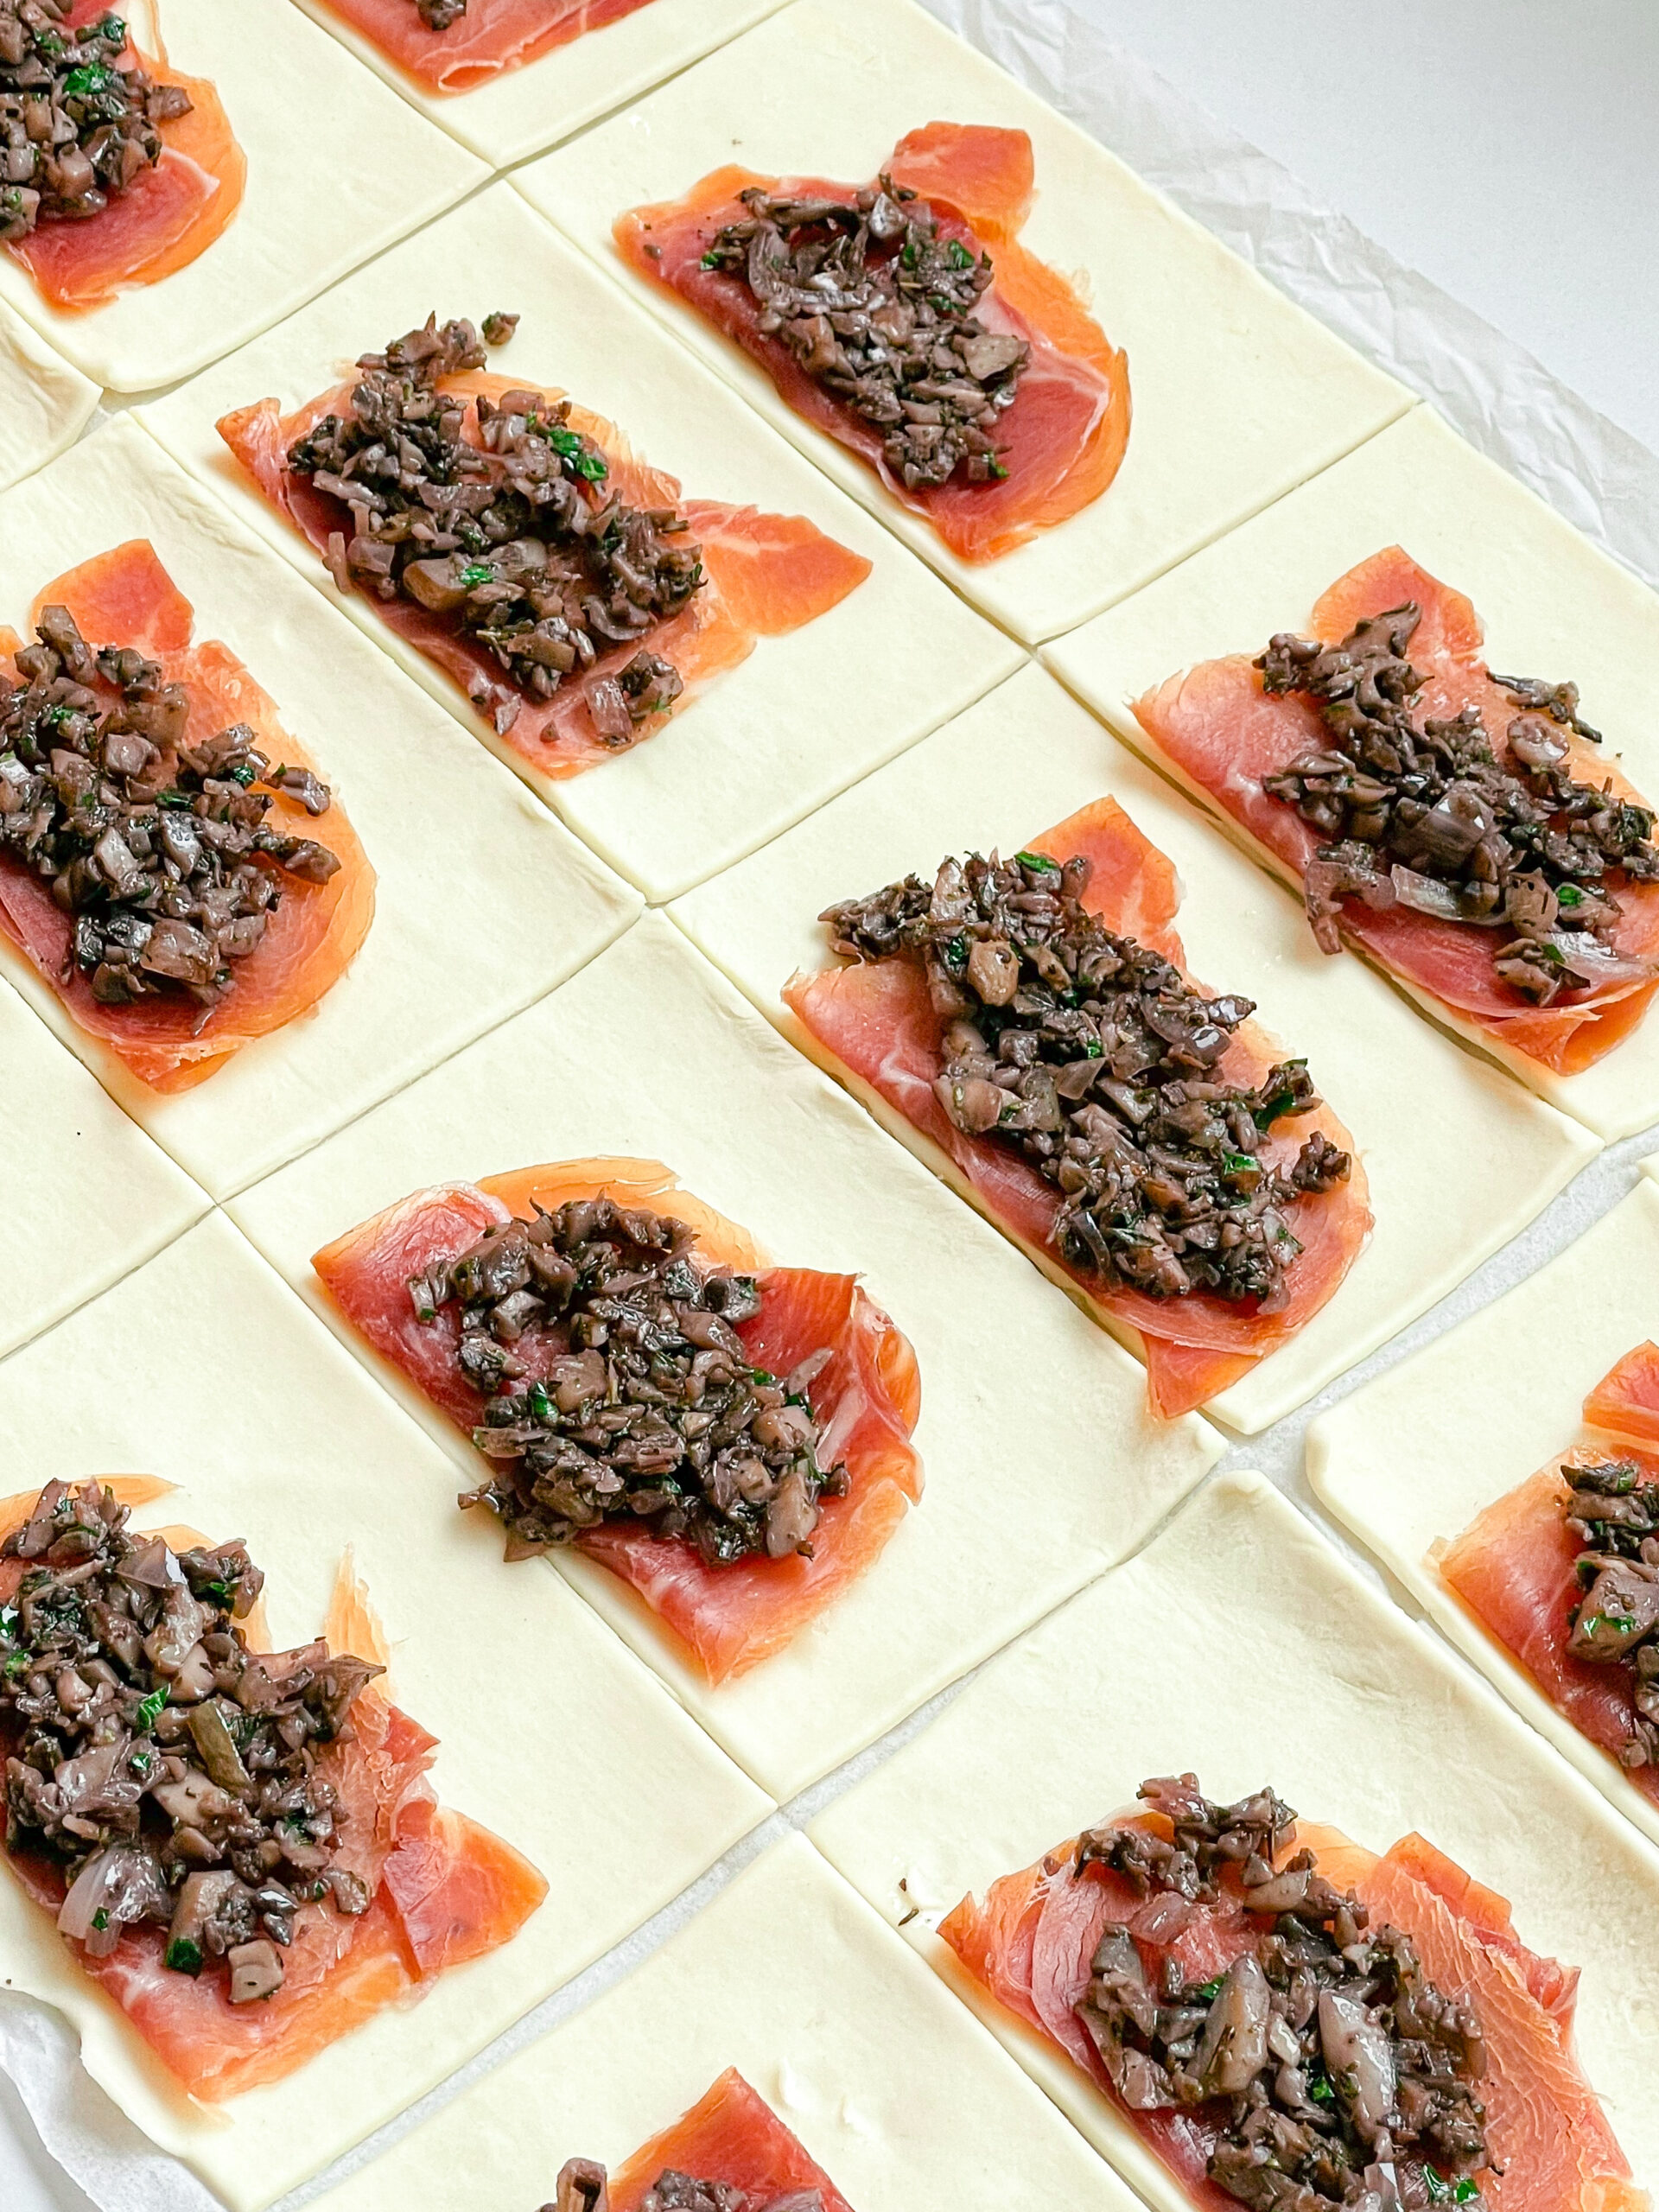
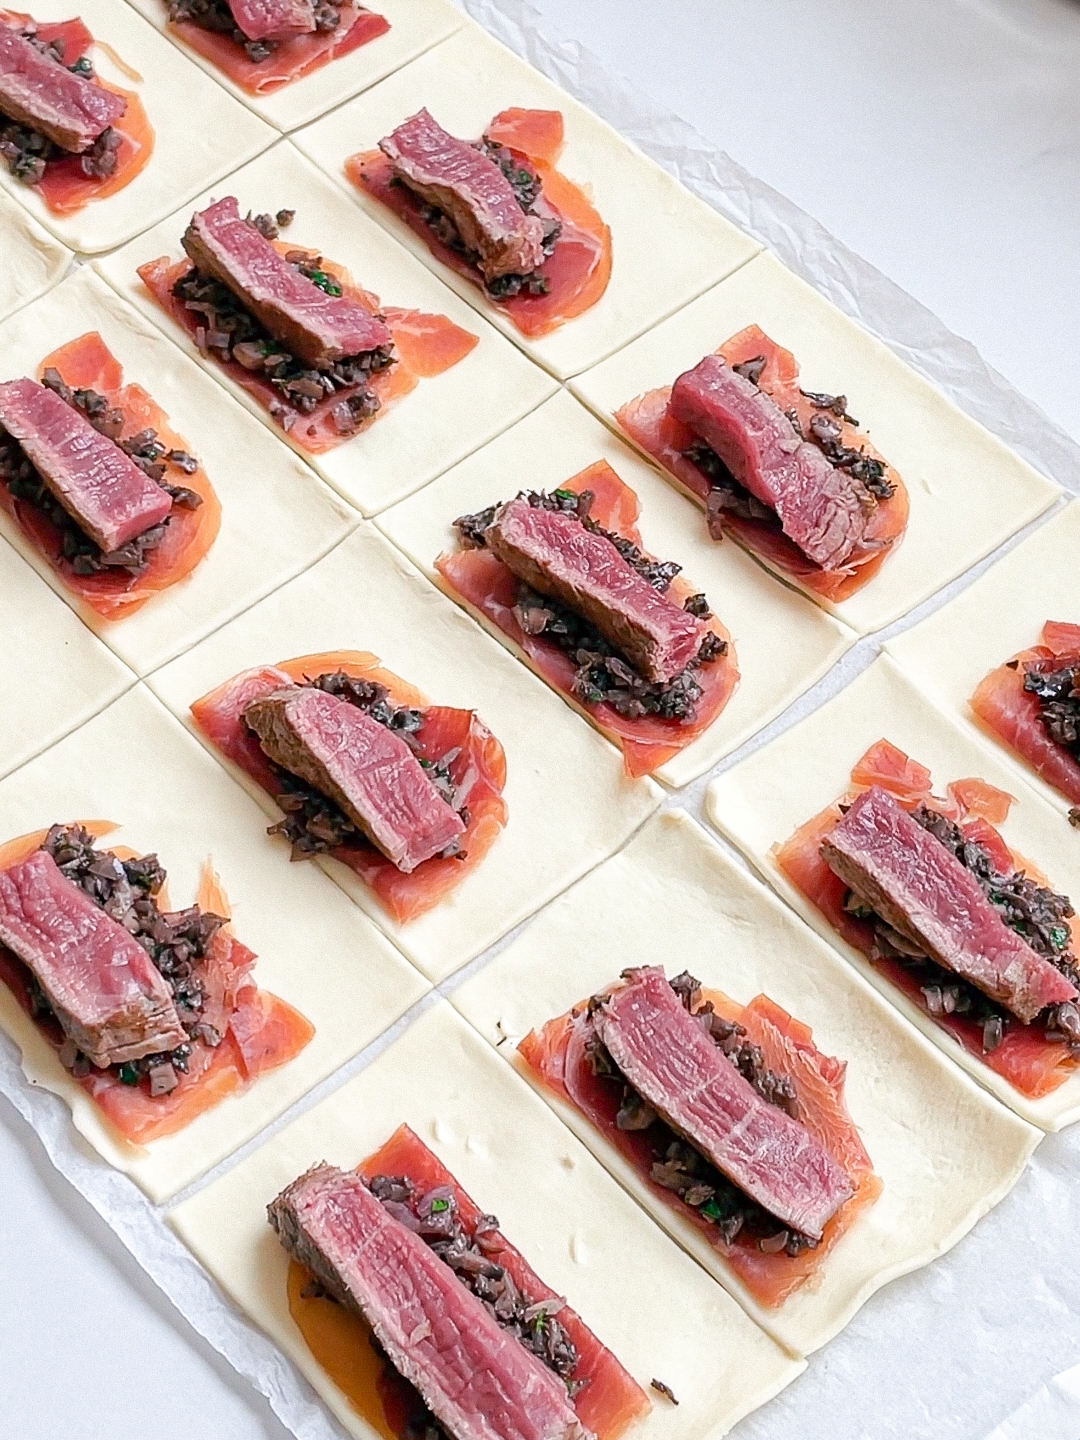
4. First place the Prosciutto di Parma on the individual pieces of puff pastry so that the edges of the pastry are still visible around the ham. Next, place approx. 1/2 tsp of the mushroom mixture on each piece of ham. Then place a piece of beef fillet on top of the mushroom mixture. Brush the fillet of beef with a little mustard. Now roll up the pieces and seal the ends.

5. Preheat the oven to 200°C (390°F) and place the Beef Wellington finger food in the fridge until then.

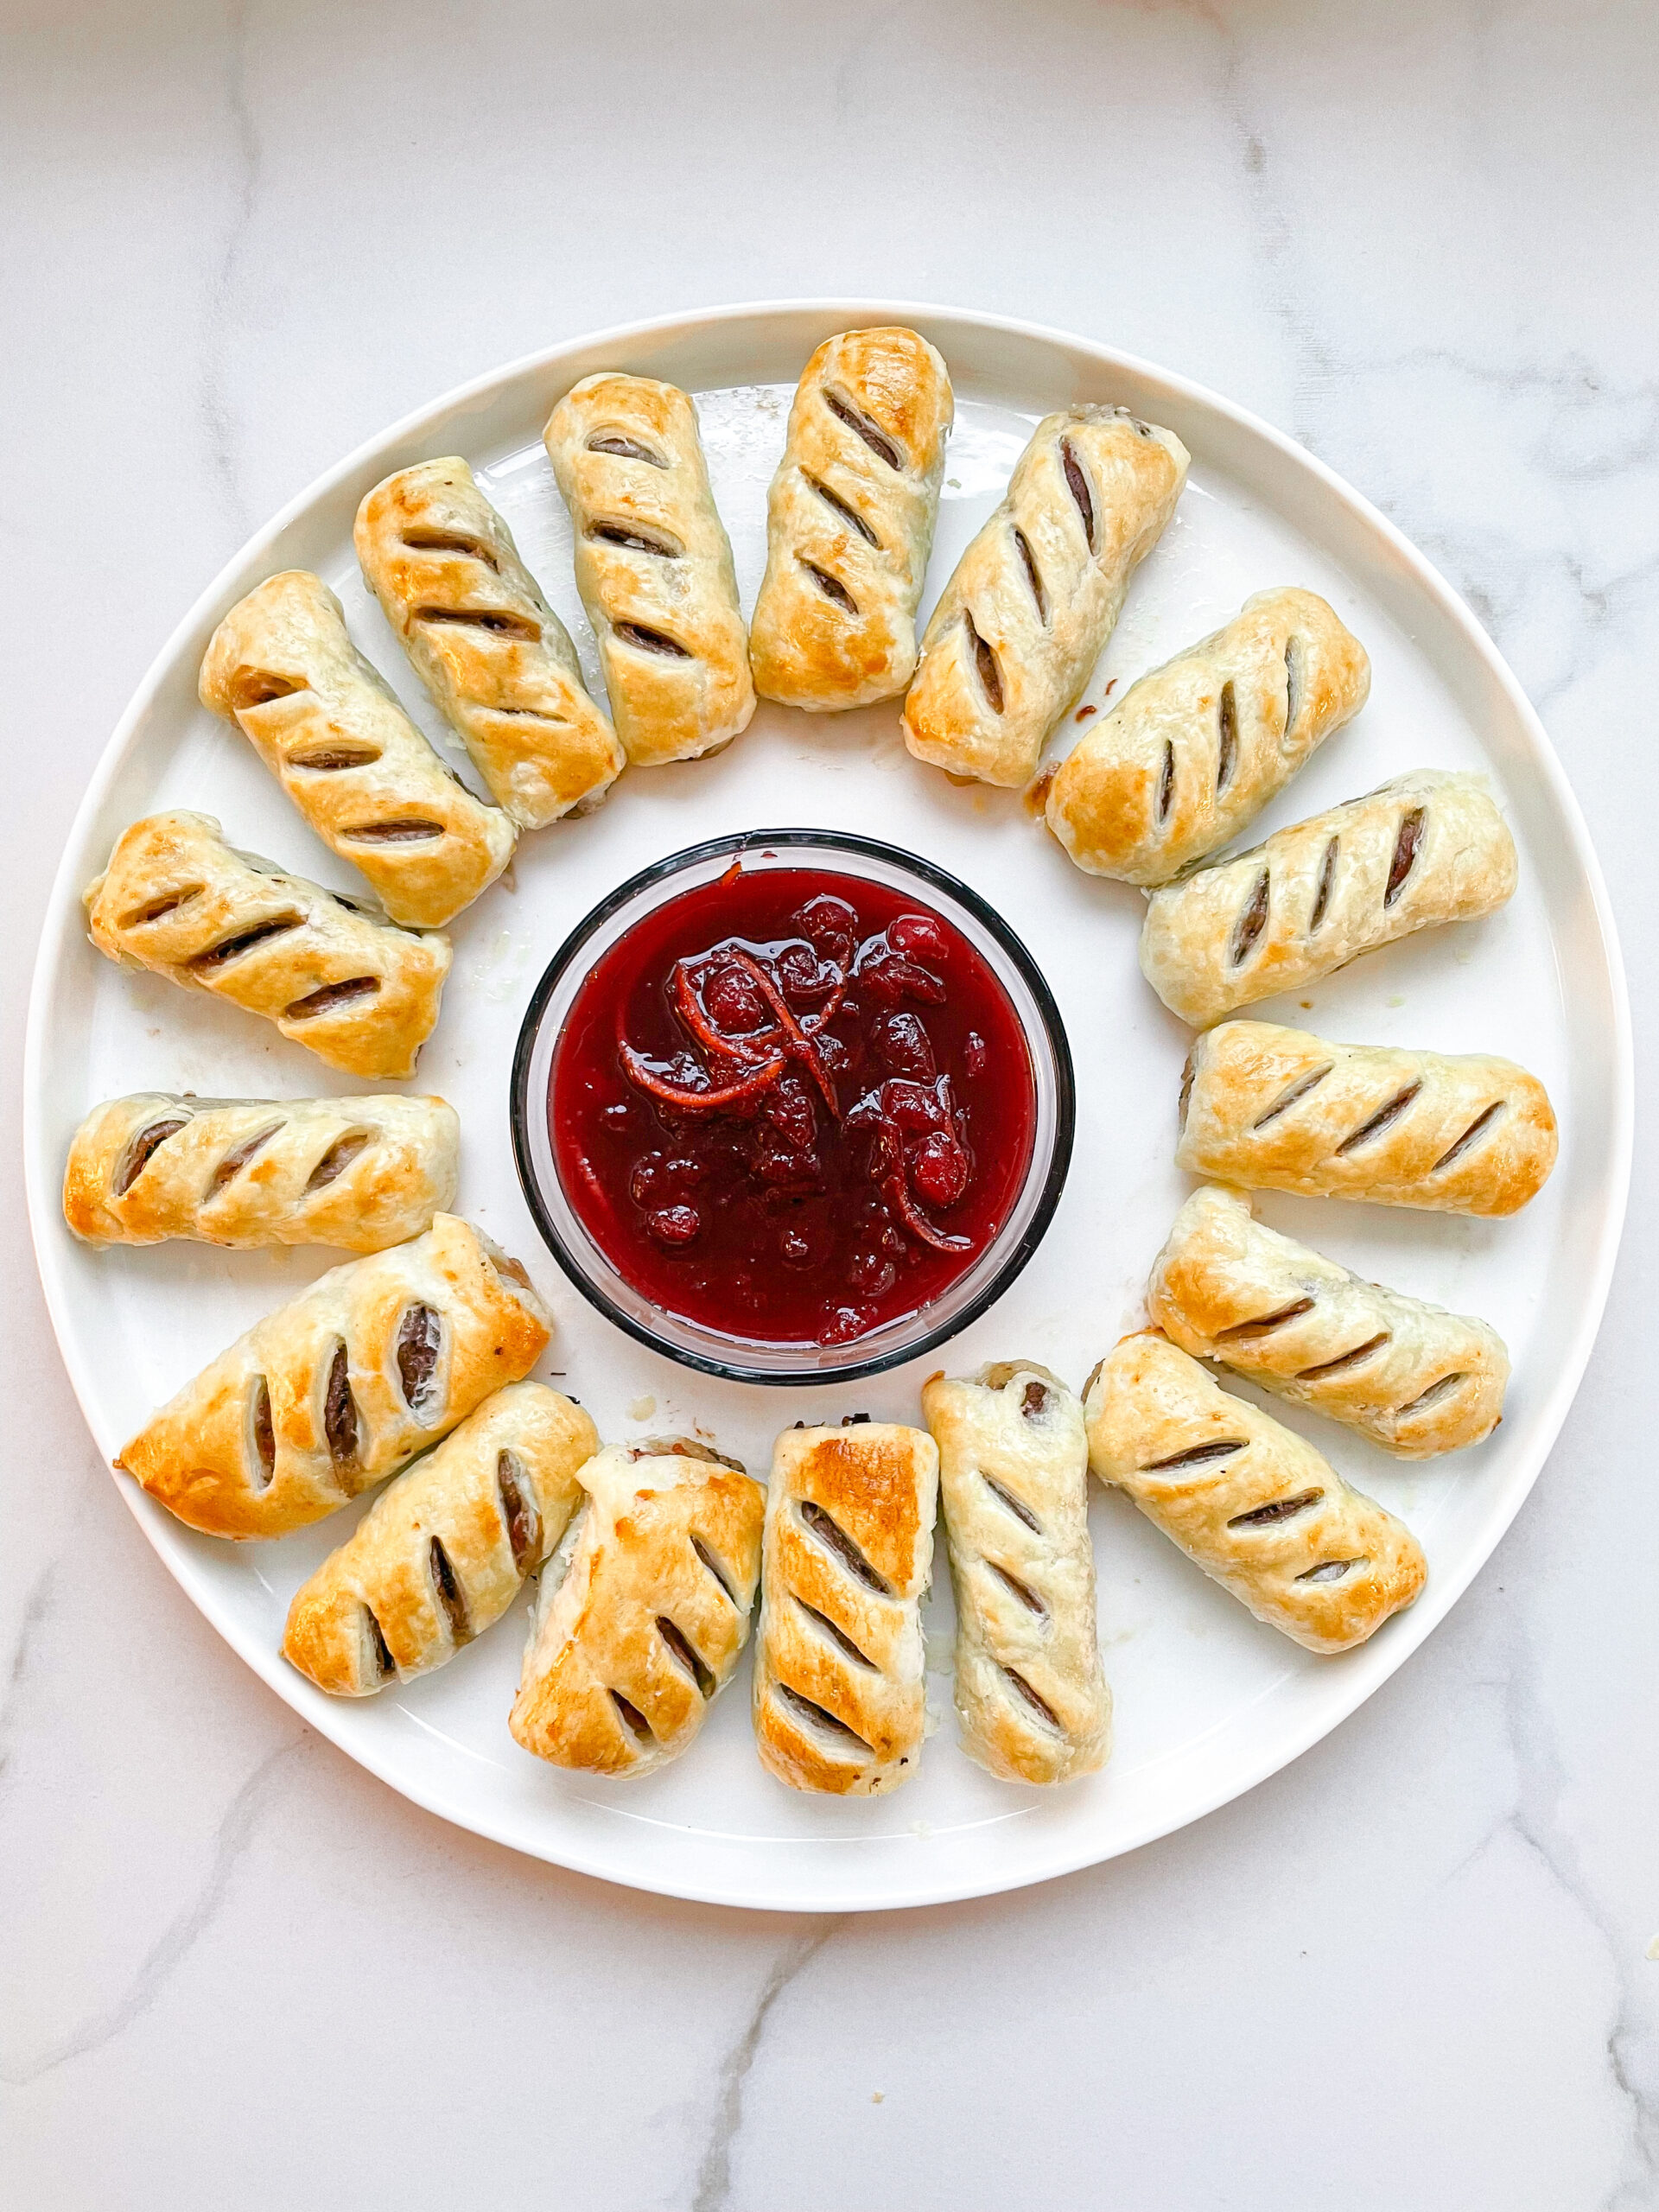
6. When the oven is preheated take the Beef Wellington Finger Food pieces out of the fridge and place on a baking tray lined with baking paper. Make diagonal incisions in all the pieces and brush with the beaten egg.

7. Finally bake in the oven at 200°C (390°F) for about 10 minutes or until lightly browned on the outside. If the pieces of meat are very thin, it cannot be guaranteed that the meat will be cooked medium. But even if the meat is not medium, it will be very tender and fall apart in the mouth. My Cumberland sauce goes wonderfully with this.

NOTE: The calorie information may vary depending on the product used, country and region.

Parmesan Soup with Truffle Oil

Parmesan Soup with Truffle Oil

Parmesan Soup with Truffle Oil

Parmesan Soup with Truffle Oil

November 20, 2023 by Kimberly

This creamy, festive soup feels like Christmas in a bowl – silky Parmesan, a hint of truffle, and pure comfort. It’s the perfect starter to warm hearts this holiday season.

30 MINUTES

EASY

VEGETARIAN

ITALIAN

519 PER PORTION

FANCY

CHRISTMAS

SOUP

WINTER

INTRODUCTION

ABOUT THE RECIPE

The holidays are all about bringing people together, and what better way than with a soup that tastes like Christmas itself? Creamy Parmesan meets the luxurious touch of truffle, creating a dish that feels both festive and comforting. Whether it’s served as the starter for your Christmas dinner or enjoyed during a cozy evening by the fireplace, this soup is the perfect way to spread warmth and joy. It’s indulgent, simple to make, and guaranteed to be a holiday favorite.

How to serve
Serve this festive soup as the opening act for your Christmas dinner or alongside a beautiful cheese board for a cozy holiday gathering. Pair it with fresh baguette slices or crispy garlic croutons to complement its creamy texture. For an elegant finish, drizzle a touch of truffle oil and add a sprinkle of fresh herbs like thyme or parsley. This dish pairs beautifully with a glass of white wine or sparkling apple cider for a complete holiday experience.

How to store
Store leftover soup in an airtight container in the fridge for up to three days. Reheat gently on the stovetop, adding a splash of milk or cream to keep it smooth and creamy. This festive treat is best enjoyed fresh, so savor it while the holiday magic lasts!

Hi, I'm Kimberly!

Hi, I'm Kimberly.

A passionate food lover who believes in the magic of homemade deliciousness that spreads love and warmth. Join me on this culinary adventure as I prepare wonderful dishes and let’s spread some happiness together!

Kimberly the Zett Signature

If you want to get to know me better, click here!


Parmesan Soup with Truffle Oil

„Let’s make a piece of happiness“

Print
clock clock iconcutlery cutlery iconflag flag iconfolder folder iconinstagram instagram iconpinterest pinterest iconfacebook facebook iconprint print iconsquares squares iconheart heart iconheart solid heart solid icon
Parmesan Soup with Truffle Oil

Parmesan Soup with Truffle Oil


  • Author: Kimberly
  • Total Time: 30 min
  • Yield: 4 mains / 8 starters 1x

Description

RECOMMENDED EQUIPMENT

  • sharp knife
  • cutting board
  • cheese grater
  • two medium pots
  • fine mesh strainer
  • hand blender

Ingredients

Units Scale
  • 2 shallots
  • 12 garlic cloves
  • 1 tbsp butter
  • 2 tbsp risotto rice
  • 200 grams parmesan (or grana padano)
  • 300 milliliter vegetable stock
  • 300 grams heavy cream
  • 70 milliliter dry white wine
  • salt & pepper to taste
  • truffle oil
  • fresh parsley

Instructions

PREPARATIONS

  • Slice the shallots into thin rings.
  • Peel the garlic and cut it into thin slices.
  • Finely grate the Parmesan.

INSTRUCTIONS

  1. Melt butter in a pot and sauté the risotto rice, shallots, and garlic for about 4 minutes, stirring occasionally, until they look glossy and smell amazing.
  2. Add broth and white wine to the pot, bring it to a boil, and let it reduce over medium heat for about 10 minutes until the liquid is halved.
  3. Pour in the cream, toss in the grated Parmesan, and stir gently over the lowest heat until the cheese is melted. Be careful not to overheat – it’s all about that smooth, creamy vibe.
  4. Once the risotto rice is soft, blend the soup with a hand blender until it’s silky smooth.
  5. Strain the soup through a fine mesh strainer into another pot. You’ll end up with a little clump of risotto and Parmesan left in the sieve that can be tossed and don’t forget to scrape off the bottom of the strainer for extra flavor! Season the soup with salt and pepper to taste.
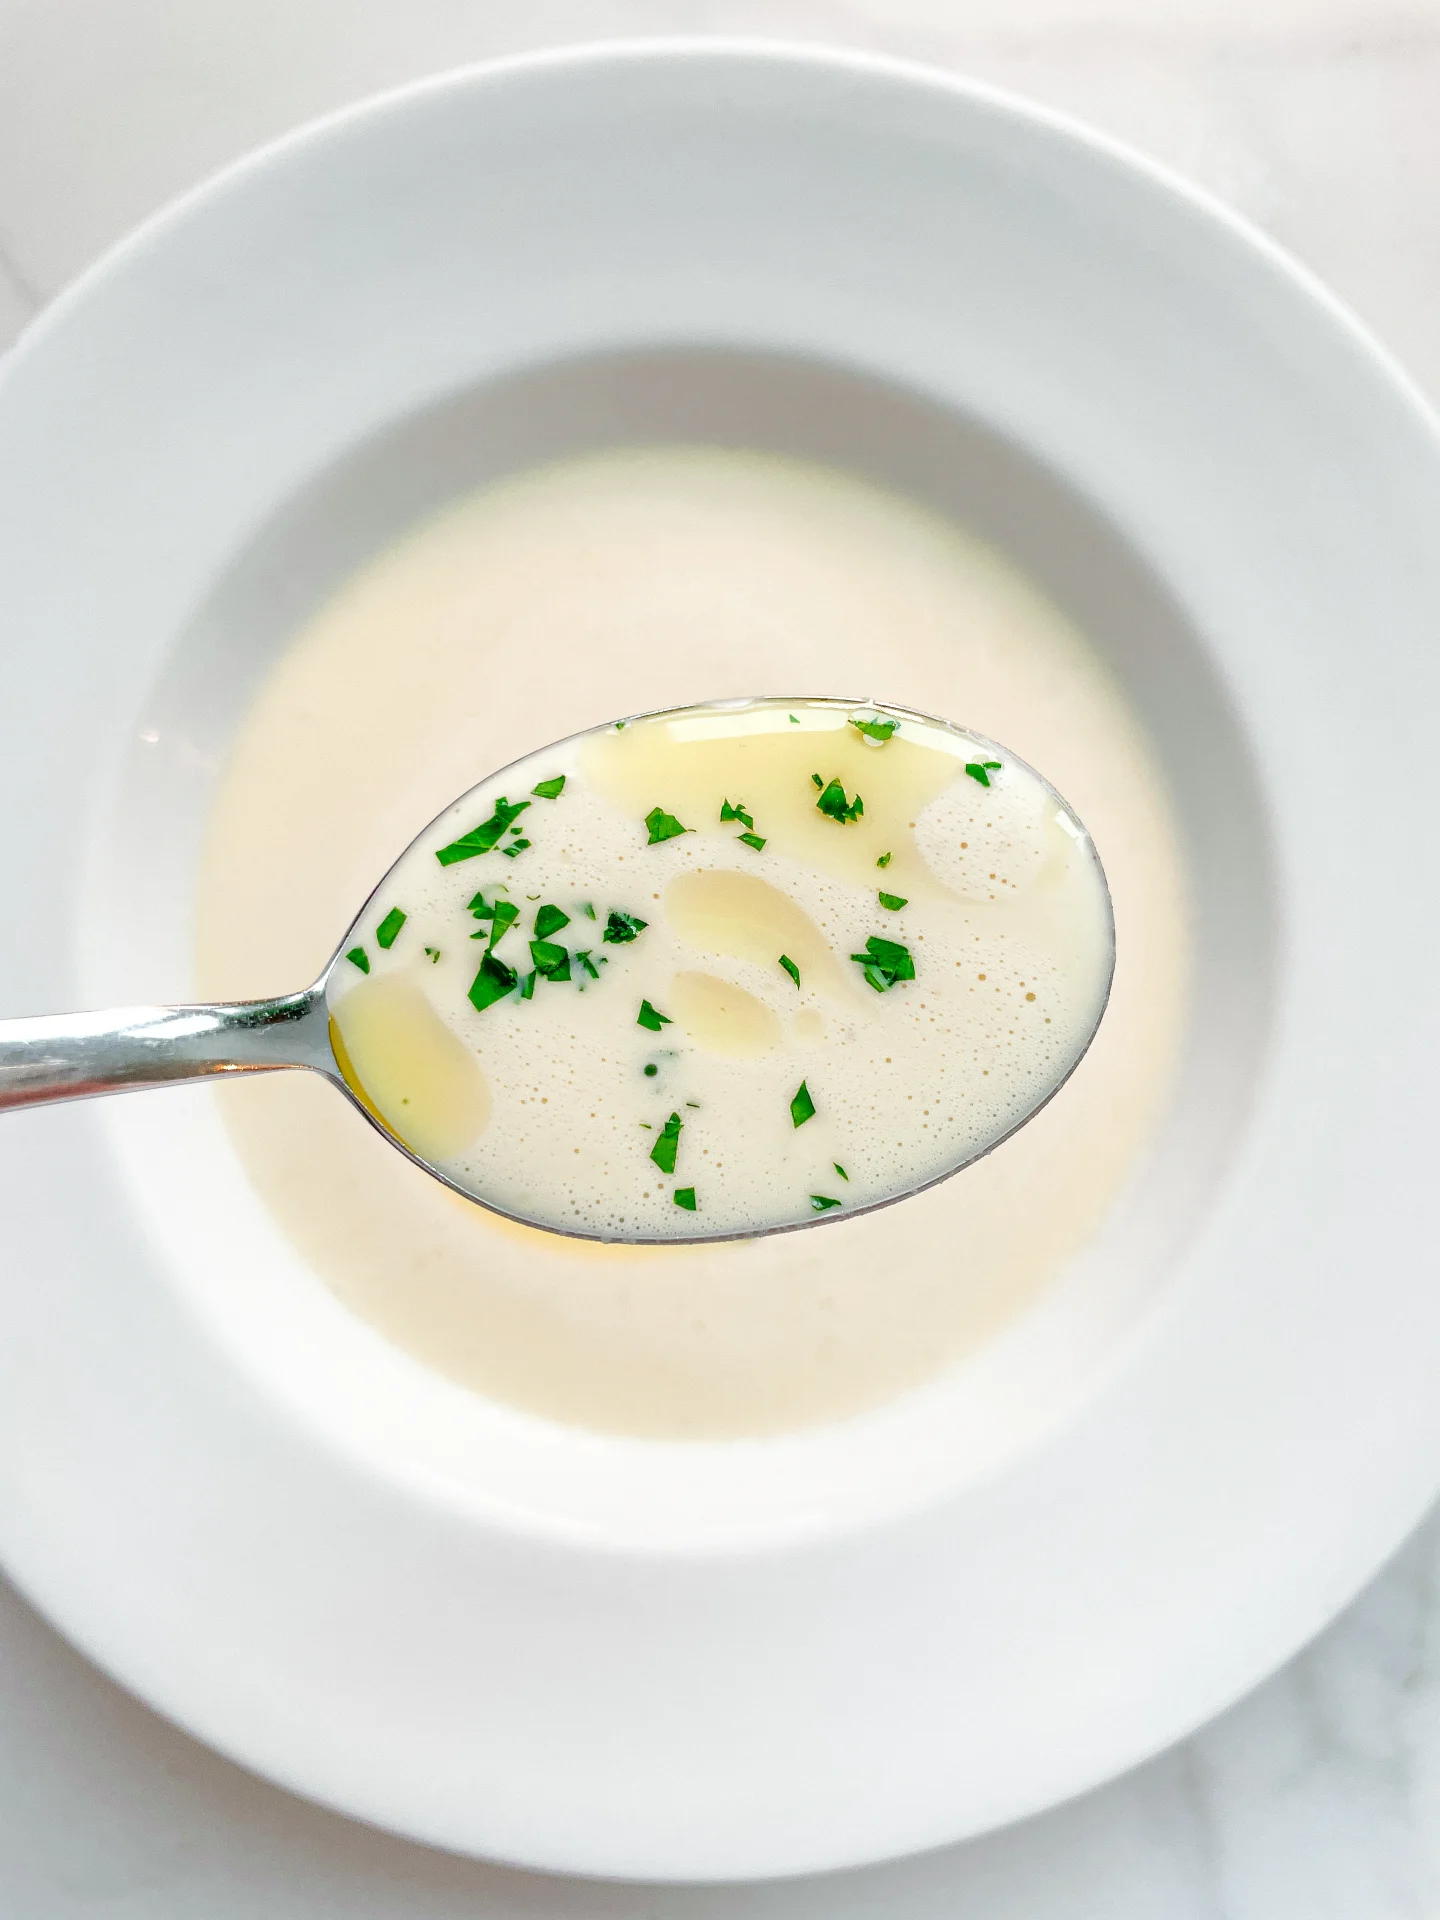
  6. Serve with a few drops of truffle oil and a sprinkle of chopped parsley.
  • Prep Time: 5 min
  • Cook Time: 25 min