English Muffins

English Muffins

English Muffins

English Muffins

September 16, 2024 by Kimberly

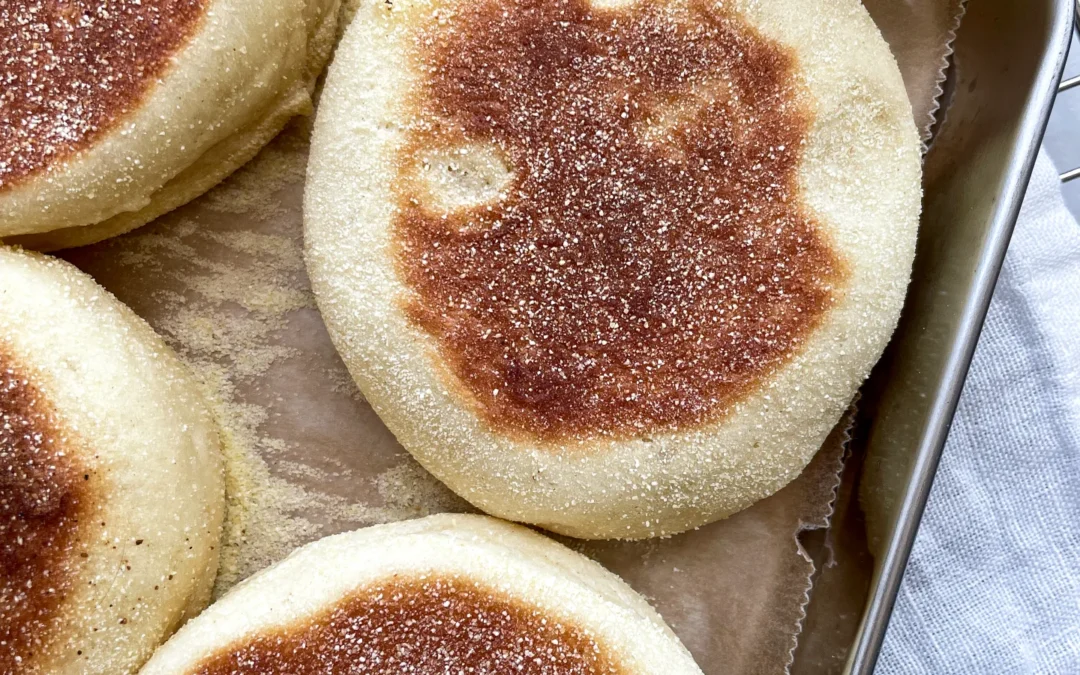
Soft, fluffy, and perfectly golden – these warm homemade breakfast bites are pure comfort. Ideal for lazy mornings or a cozy brunch, they’ll instantly make you feel like a pro in the kitchen.

1 HOUR
50 MINUTES

EASY

VEGETARIAN

ENGLISH

212 PER MUFFIN

FLUFFY

BRUNCH

BREAKFAST

ALL YEAR

INTRODUCTION

ABOUT THE RECIPE

There’s nothing like the feeling of biting into a soft, warm, homemade breakfast muffin, fresh from the pan. They’re golden, fluffy, and absolutely perfect for cozy mornings or a weekend brunch. Whether you’re topping them with butter, jam, or using them as the base for a breakfast sandwich, these little bites of comfort will brighten up any meal. Plus, making them from scratch is way easier than you might think – and the result? Total kitchen hero vibes.

How to serve
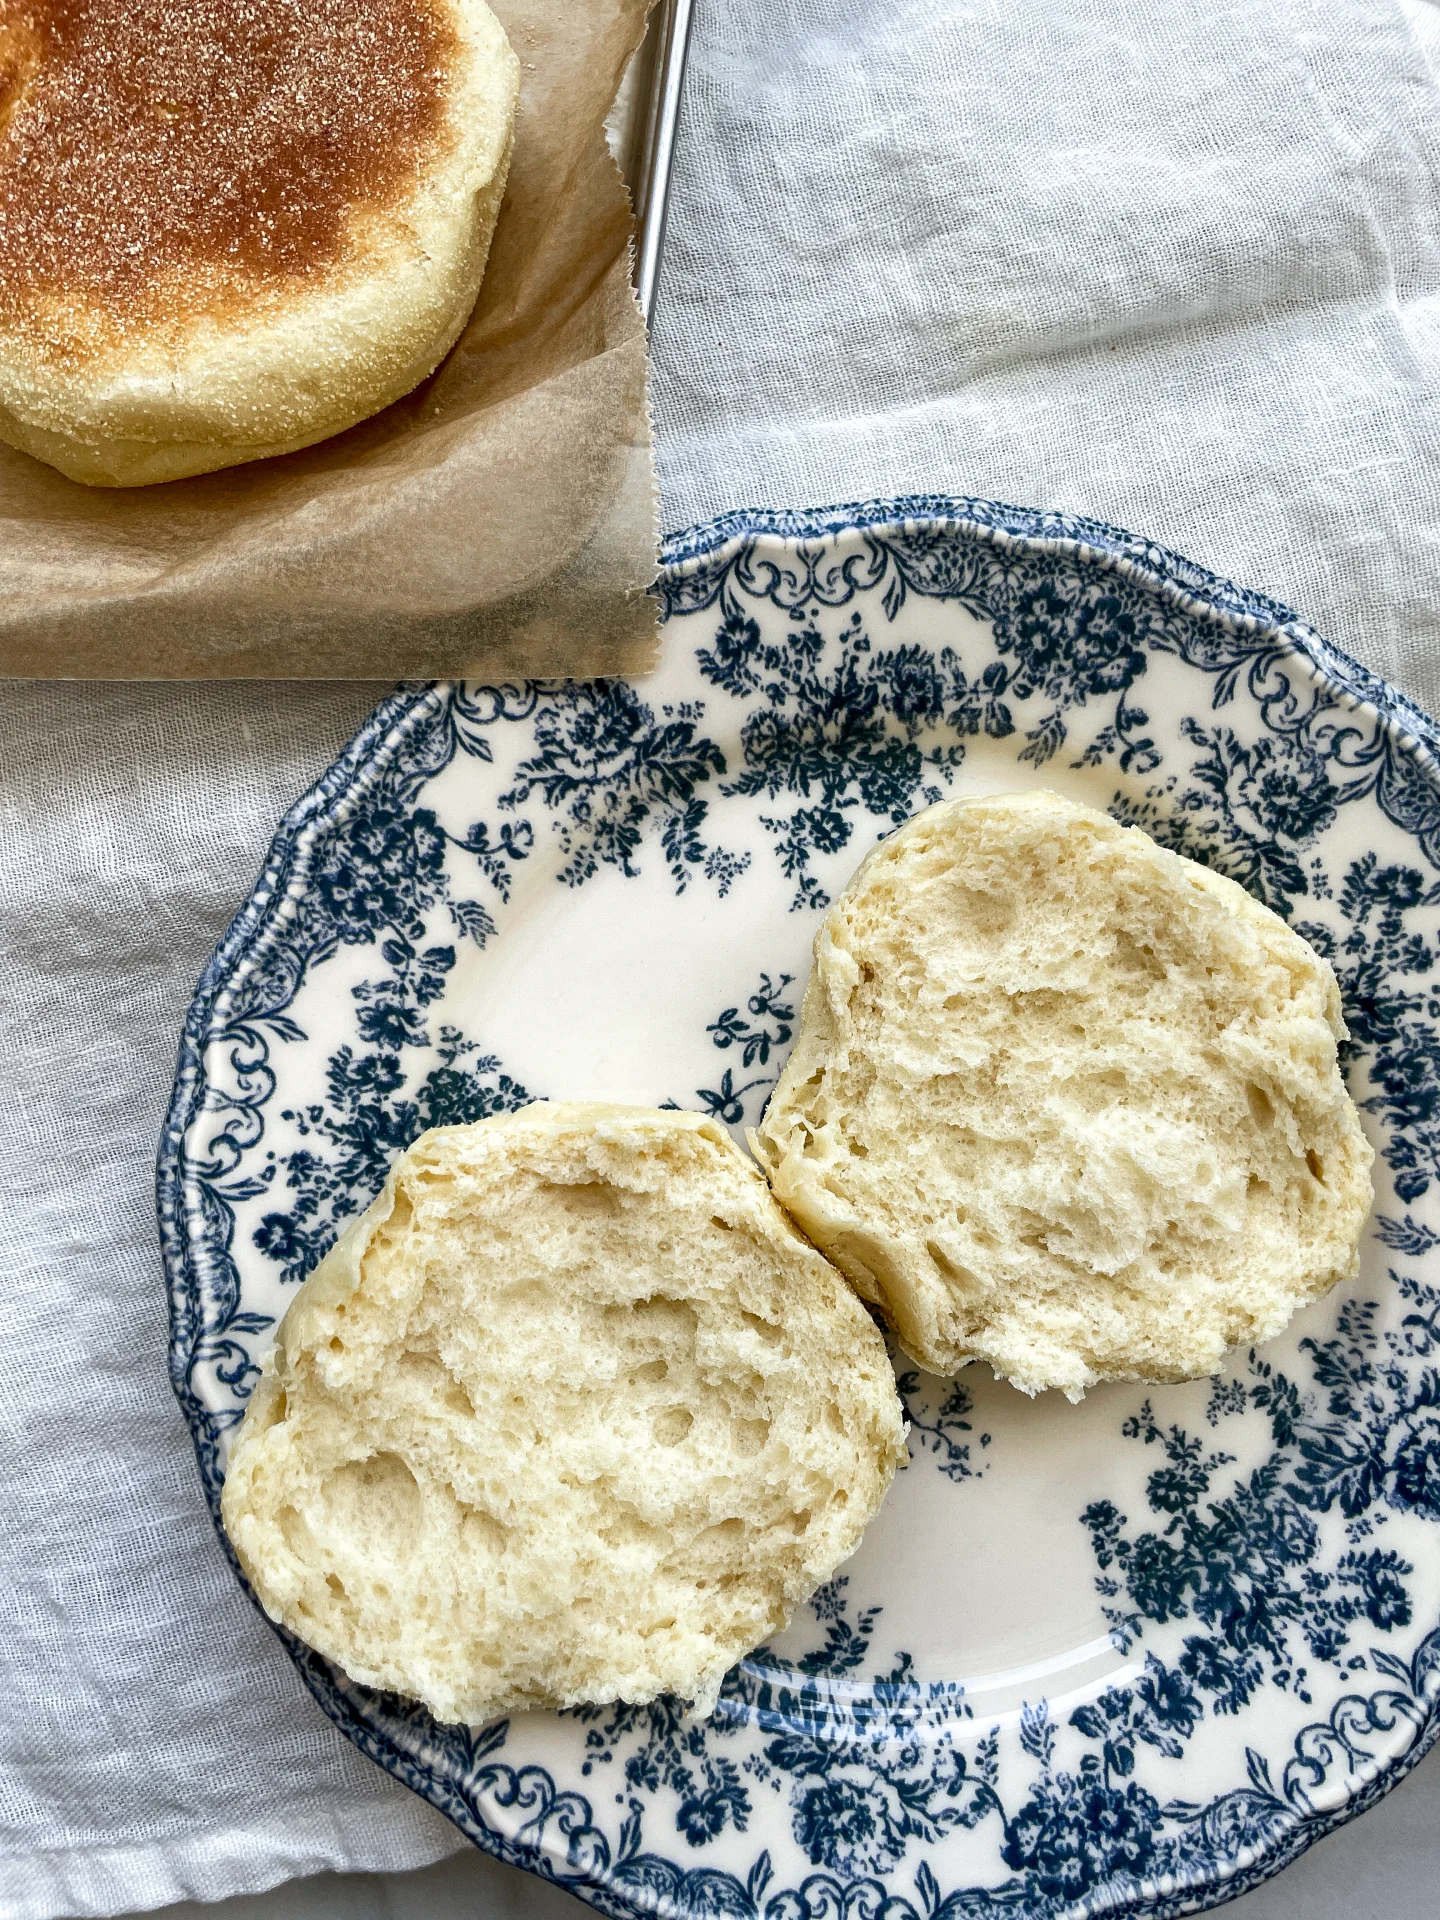
You can slice them open and spread them with butter or a dollop of your favorite jam. Or, level up your brunch game by turning them into breakfast sandwiches. Load them up with eggs, cheese, bacon, or avocado. Whether it’s a simple snack or a fully loaded breakfast, these muffins are ready for anything!

How to store
To keep them fresh, store your muffins in an airtight container at room temperature for up to three days. If you want to keep them longer, just pop them in the freezer!

Hi, I'm Kimberly!

Hi, I'm Kimberly.

A passionate food lover who believes in the magic of homemade deliciousness that spreads love and warmth. Join me on this culinary adventure as I prepare wonderful dishes and let’s spread some happiness together!

Kimberly the Zett Signature

If you want to get to know me better, click here!


English Muffins
English Muffins
English Muffins
„Let’s make a piece of happiness“
Print
clock clock iconcutlery cutlery iconflag flag iconfolder folder iconinstagram instagram iconpinterest pinterest iconfacebook facebook iconprint print iconsquares squares iconheart heart iconheart solid heart solid icon
English Muffins

English Muffins


5 Stars 4 Stars 3 Stars 2 Stars 1 Star

No reviews

  • Author: Kimberly
  • Total Time: 1 hr + 50 min
  • Yield: 12 1x

Description

Recommended Equipment

  • large bowl
  • spatula
  • plastic wrap
  • round cookie cutter
  • parchment paper
  • large pan

Ingredients

Units Scale
  • 7 grams drive-active yeast
  • 25 grams white sugar
  • 200 milliliters full-fat cow milk
  • 100 milliliters water
  • 1 egg
  • 40 grams butter
  • 1.5 tsp salt
  • 550 grams bread flour (in Germany Type 550)
  • semolina

Instructions

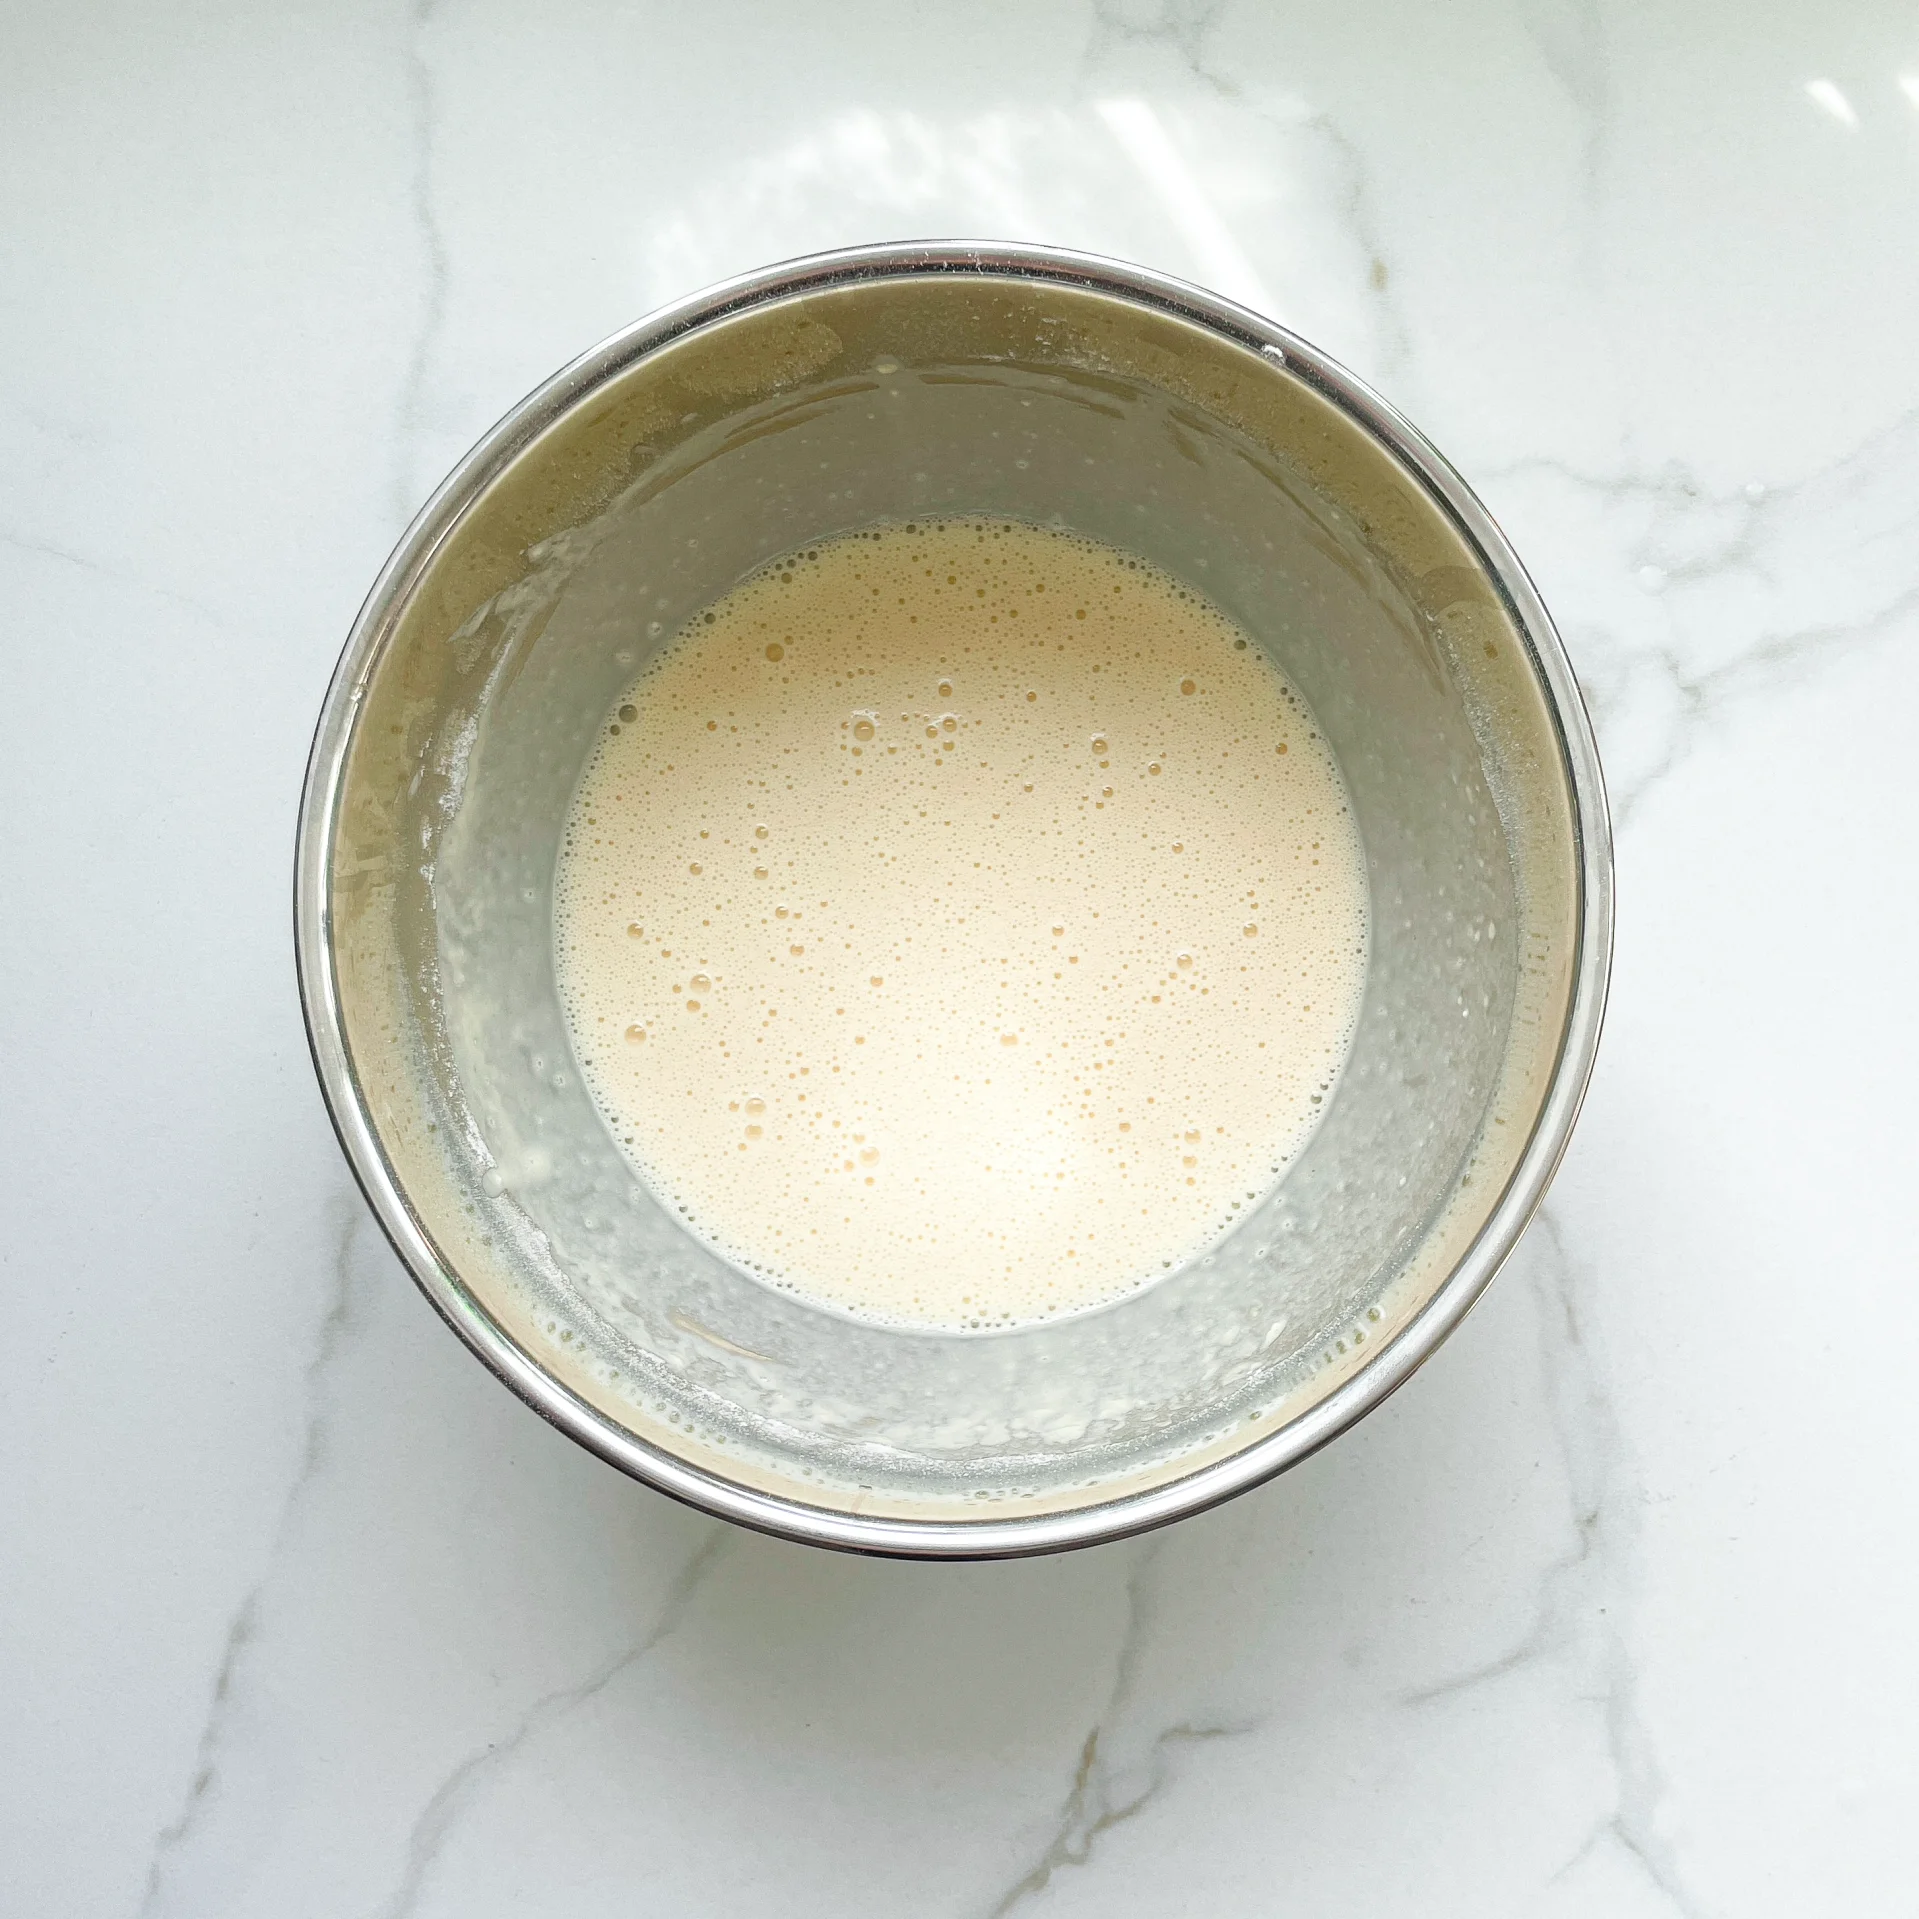
  1. Stir together the yeast, warm milk, warm water, and sugar in a large bowl and let it sit for 10 minutes. The milk and water should be between 32°-36°C / 90°-97°F.
  2. Add the egg to the melted butter, mix well, and pour it into the bowl with the yeast mixture. Then add the flour and salt, and mix everything with a spatula until the dough is smooth and sticky. Keep kneading by hand until the dough no longer sticks to your fingers. This should take about 10 minutes. Put the dough back in the bowl and cover it with plastic wrap. Let it rest for about 45 minutes.
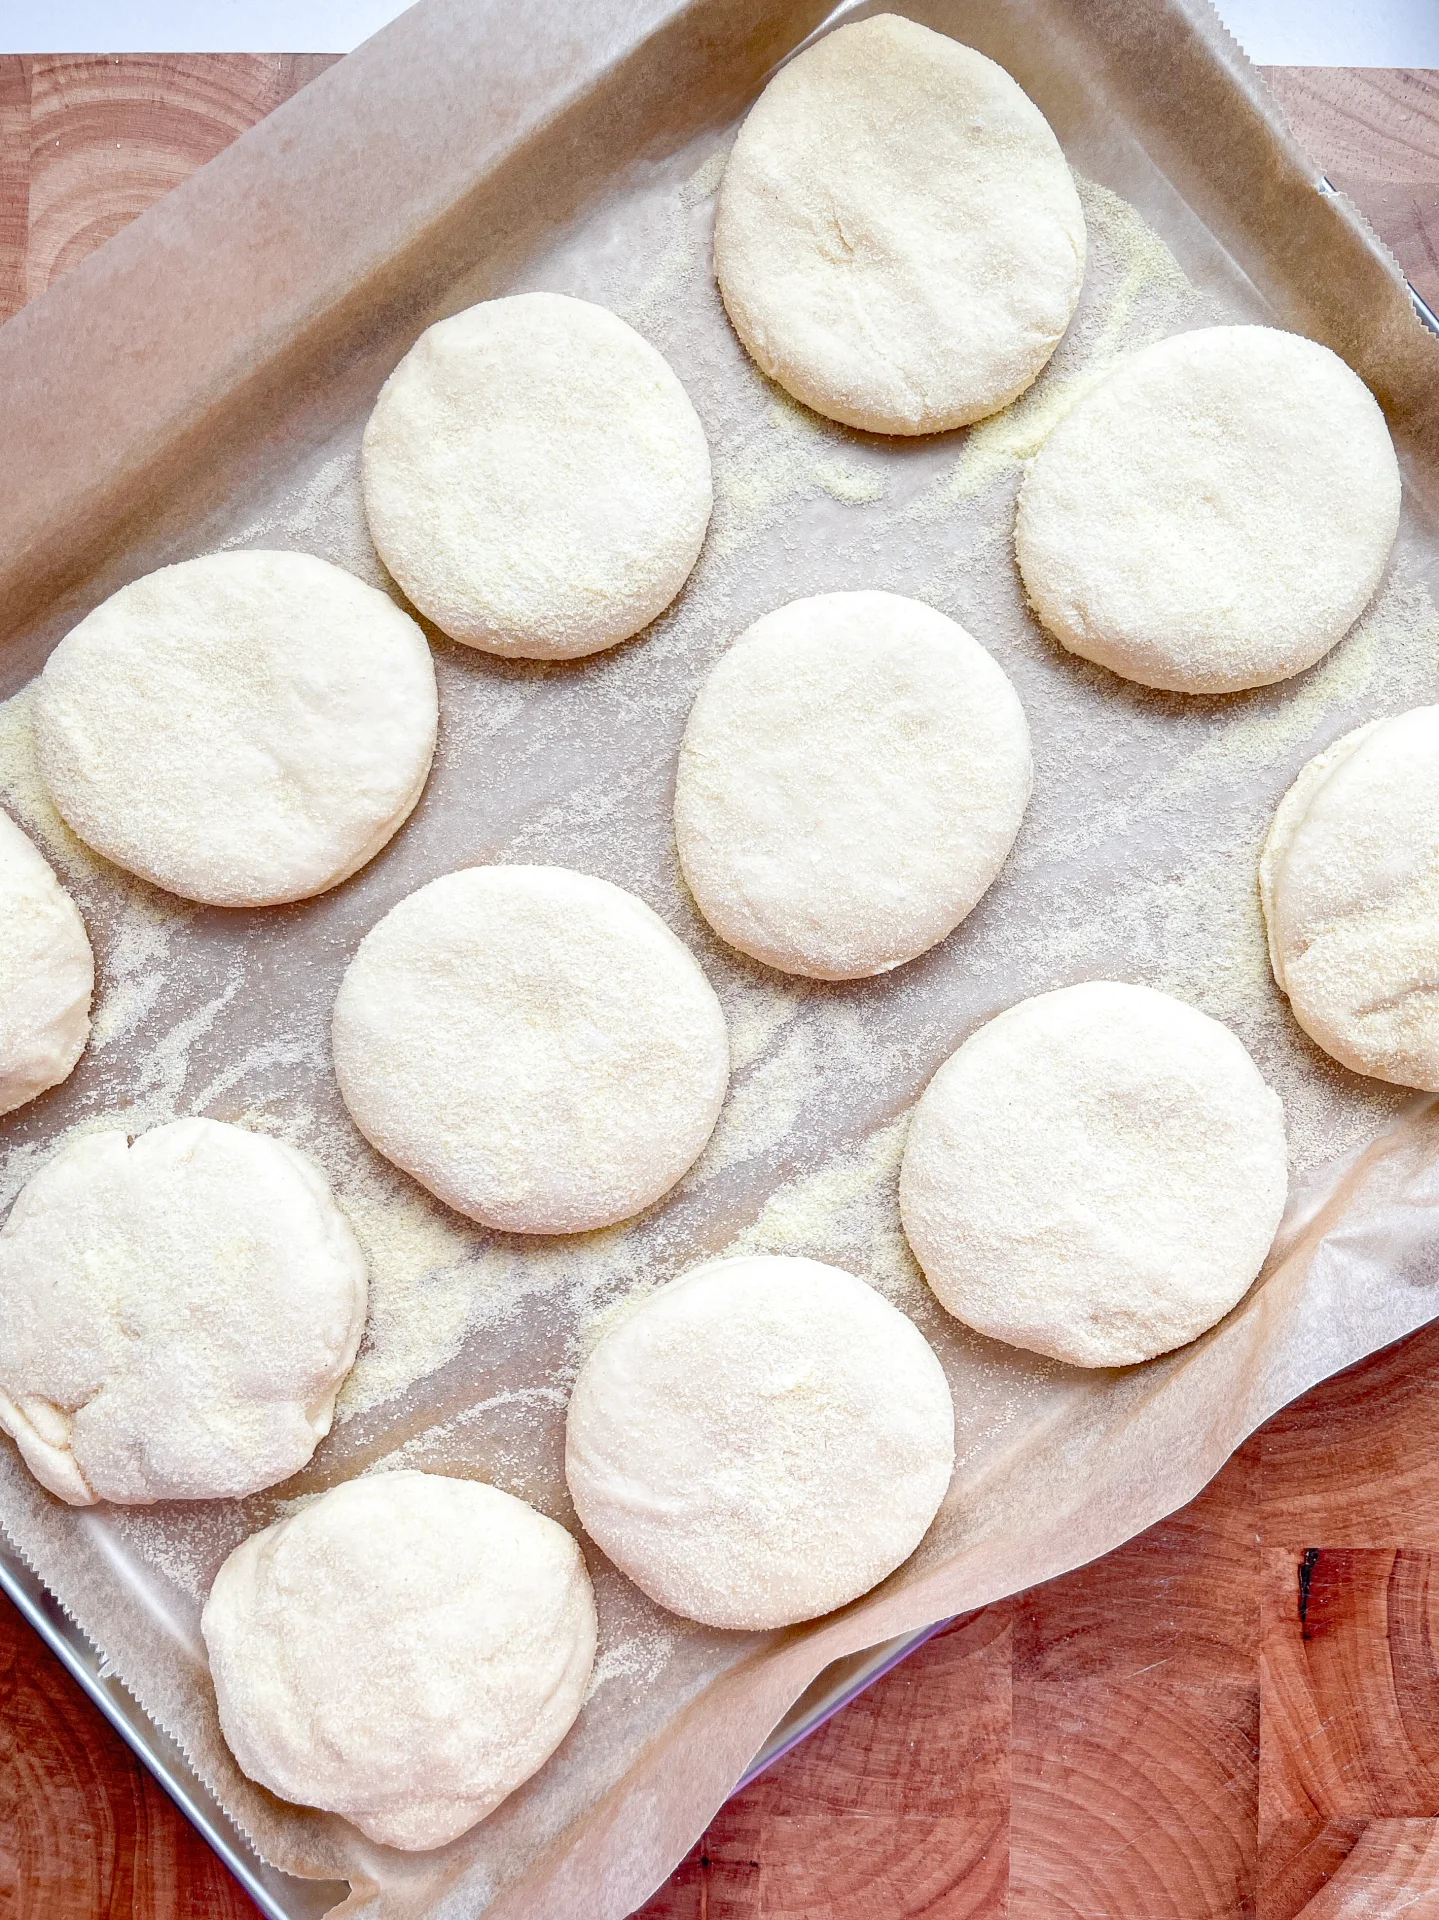
  3. Sprinkle some semolina on your work surface, place the dough on it, and flatten it to about 2-3 cm thick. Sprinkle a bit of semolina on top of the dough as well. Use a round cutter to cut out circles, place them on parchment paper, and cover them with a damp cloth to rest for 15 minutes.
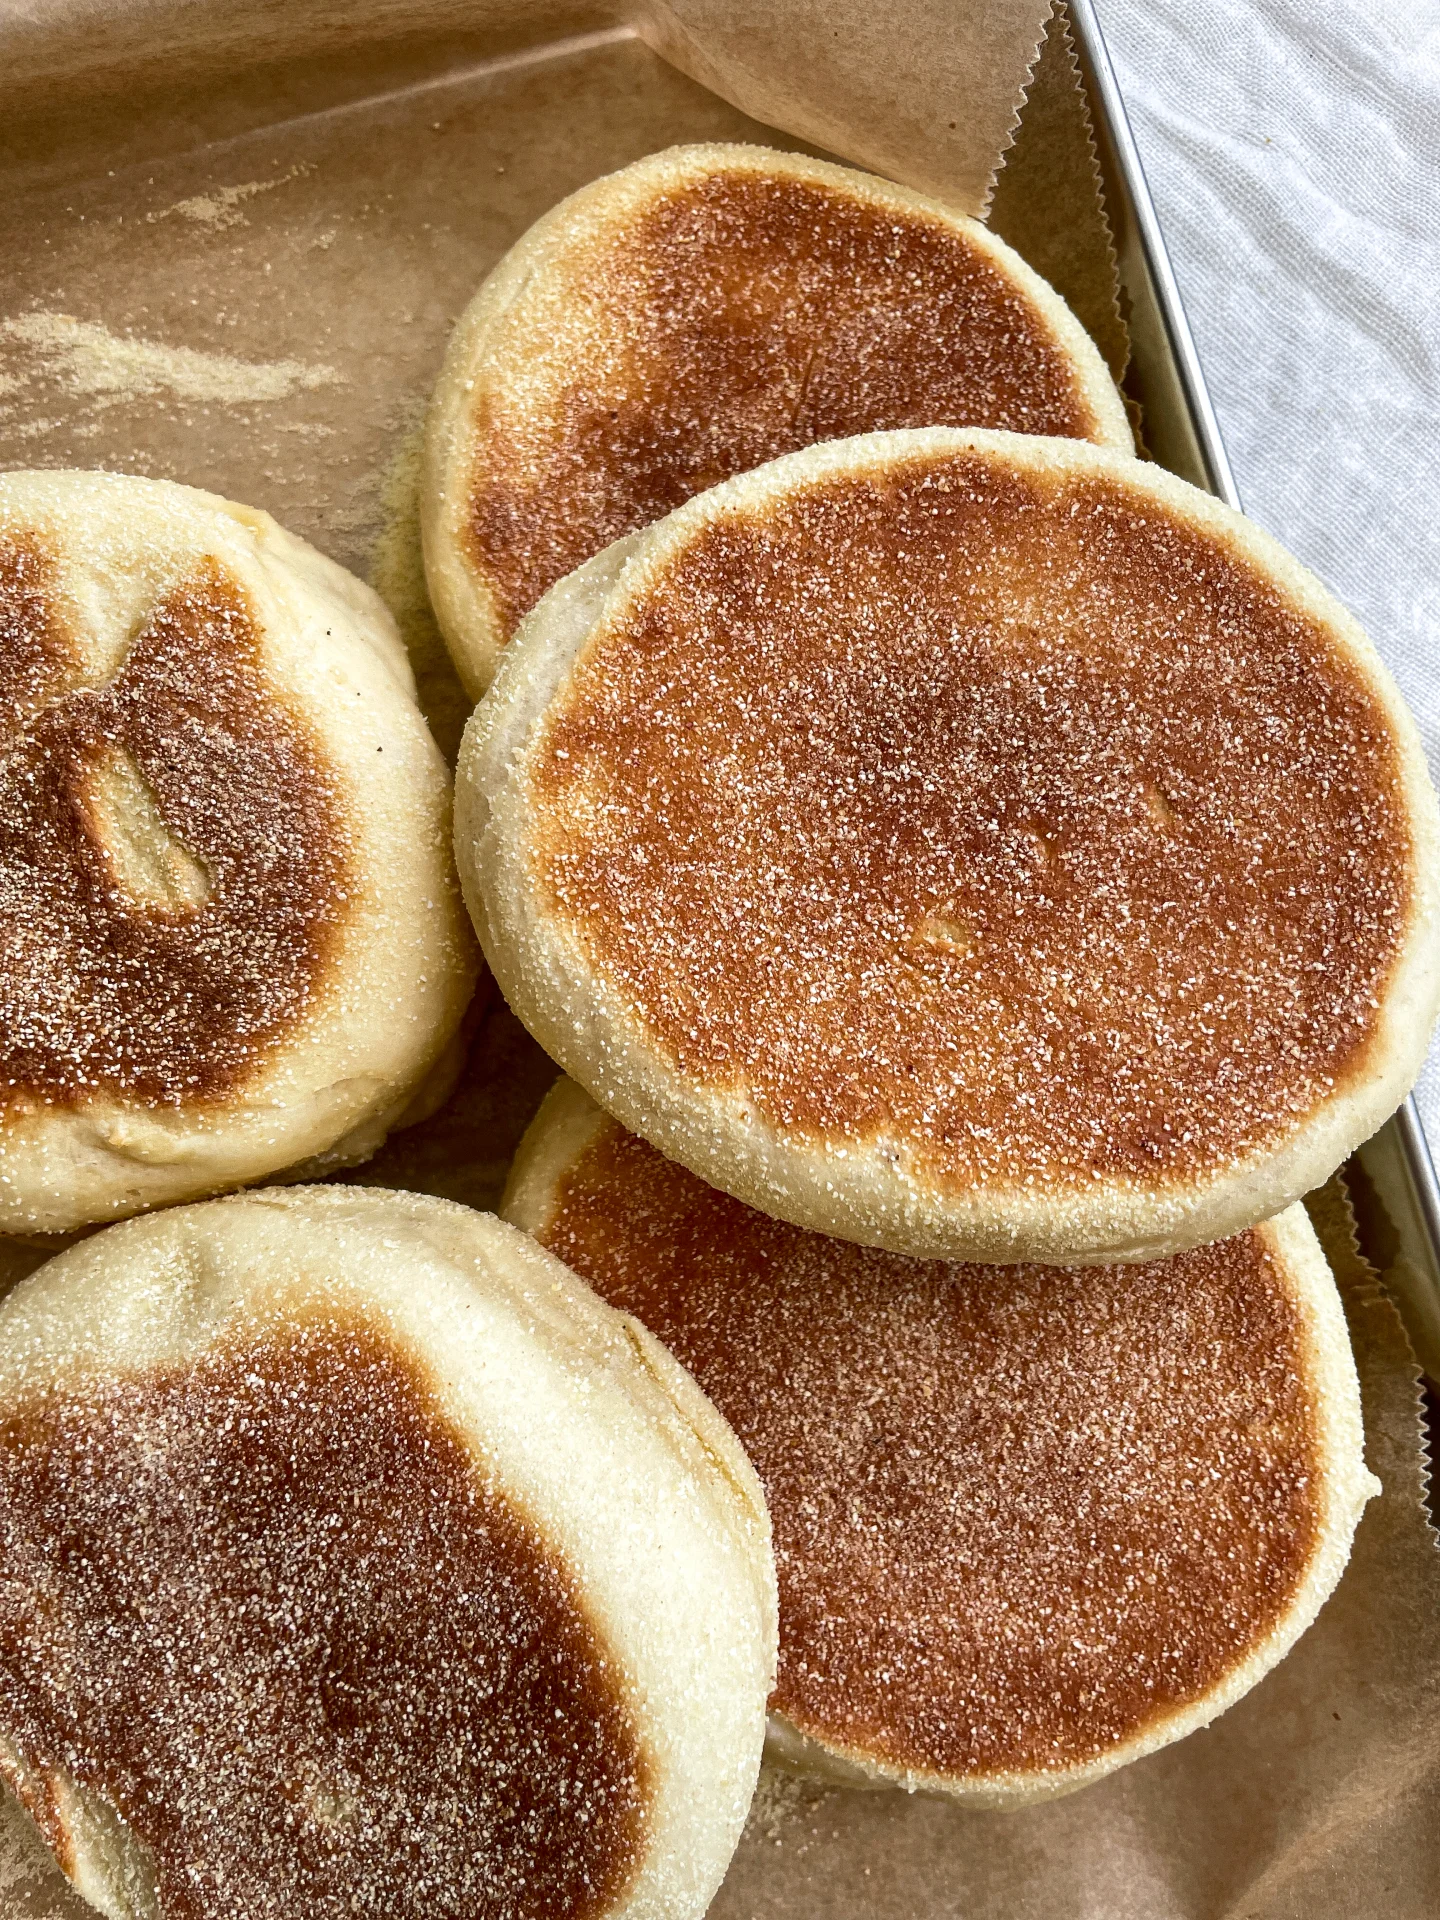
  4. Heat a pan and once it’s warm (you should feel the heat when your hand is close to it), place the dough circles in the pan. Cook them on low heat for 5-7 minutes on each side until they are crispy and golden brown on the outside, and soft and fluffy on the inside. Keep the finished English muffins warm in a bread basket with a towel, and enjoy! 🙂
  • Passive Time: 70 min
  • Cook Time: 40 min
Apple Fritters with Lemon Vanilla Glaze

Apple Fritters with Lemon Vanilla Glaze

Apple Fritters with Lemon Vanilla Glaze

Apple Fritters with Lemon Vanilla Glaze

August 25, 2024 by Kimberly

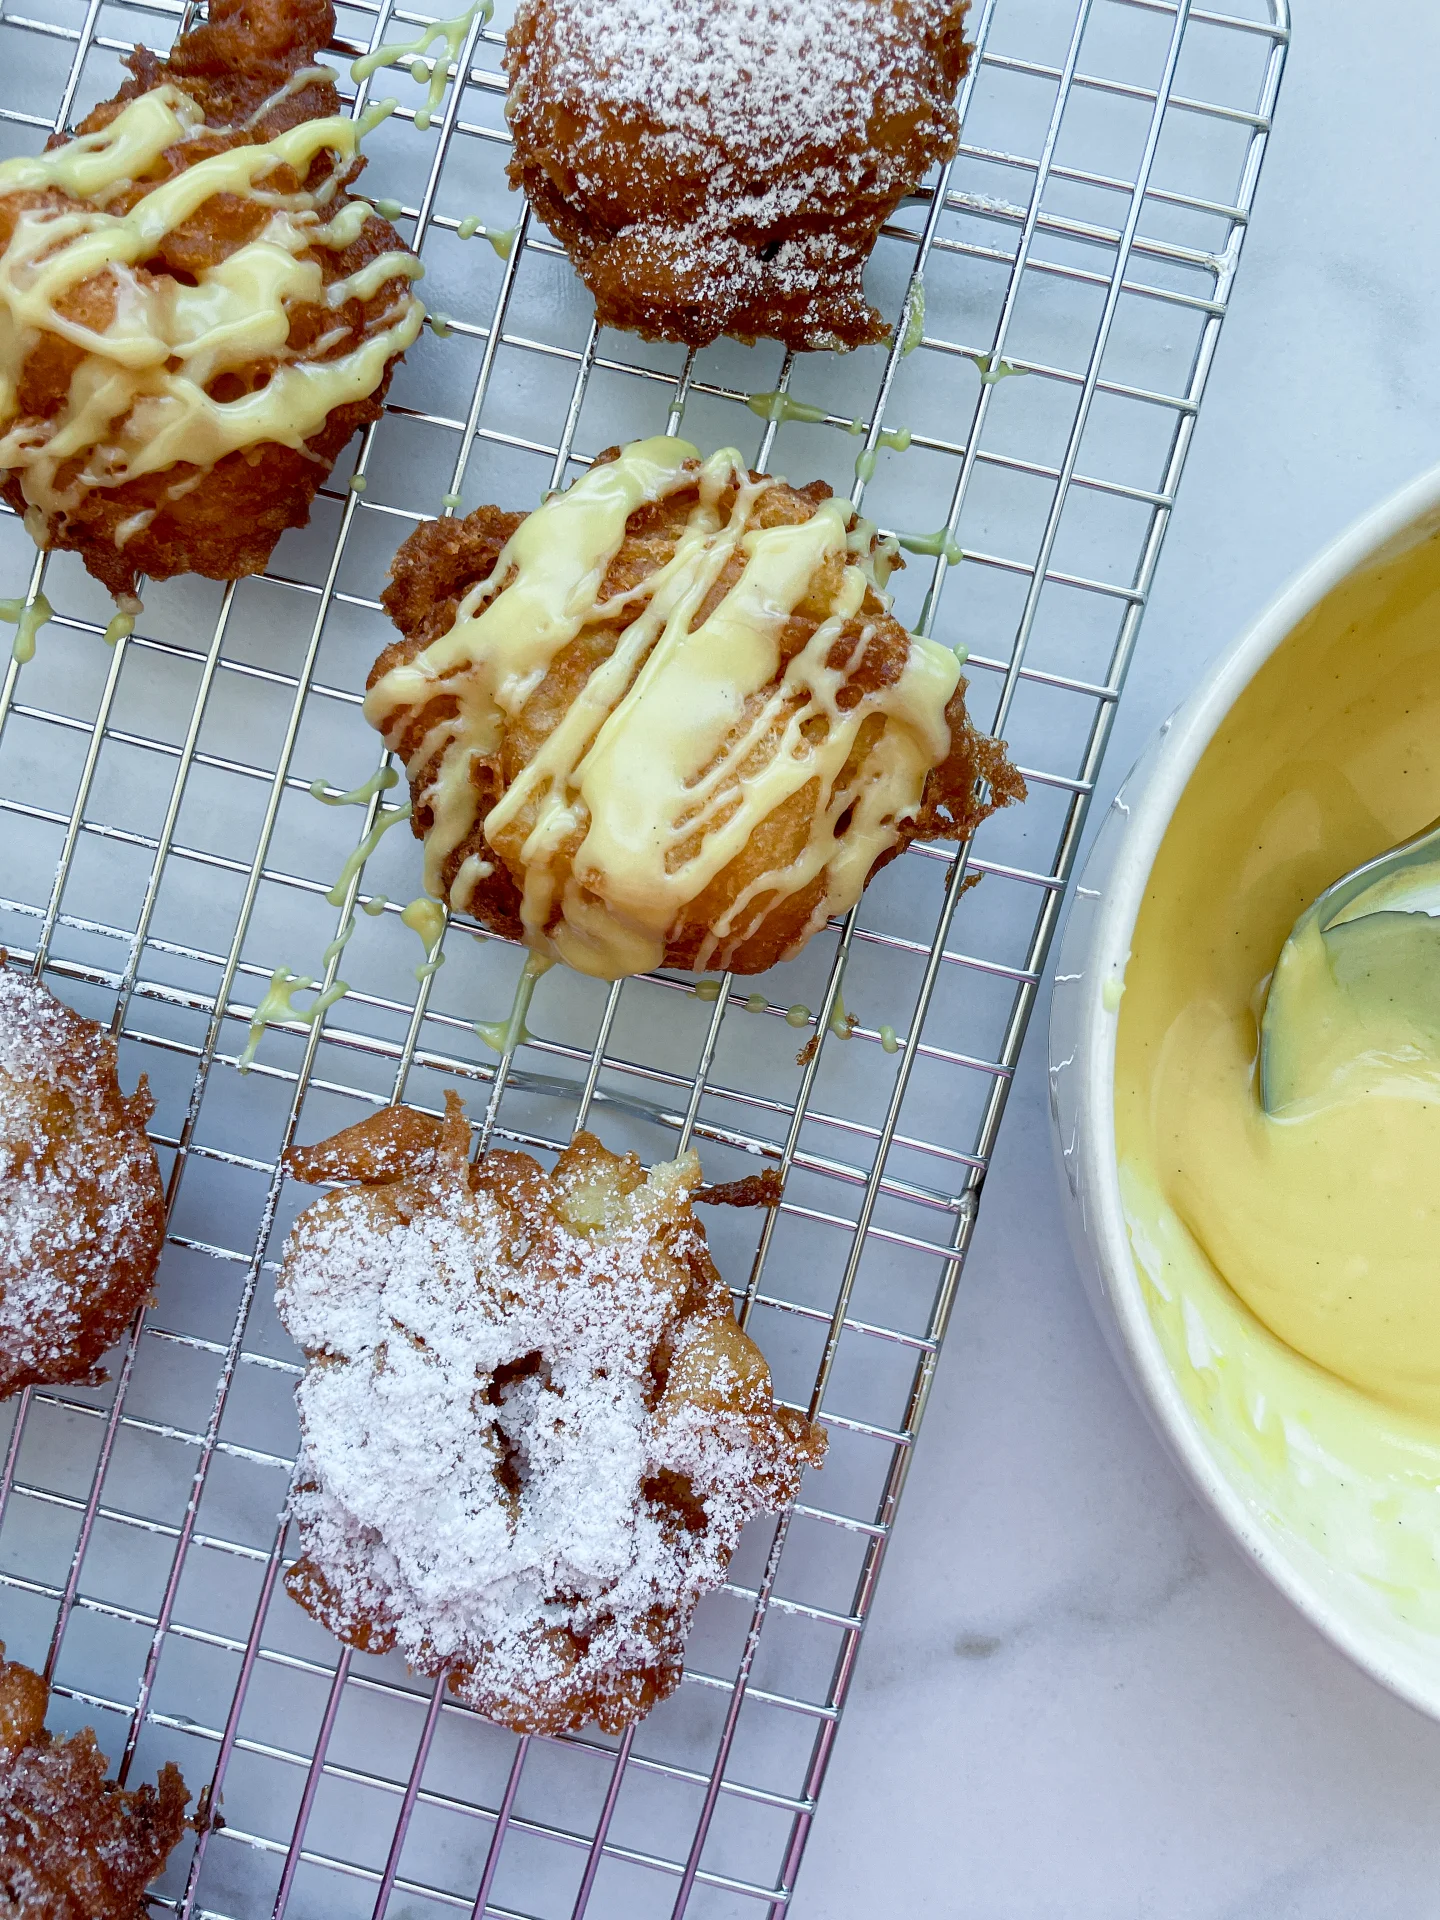
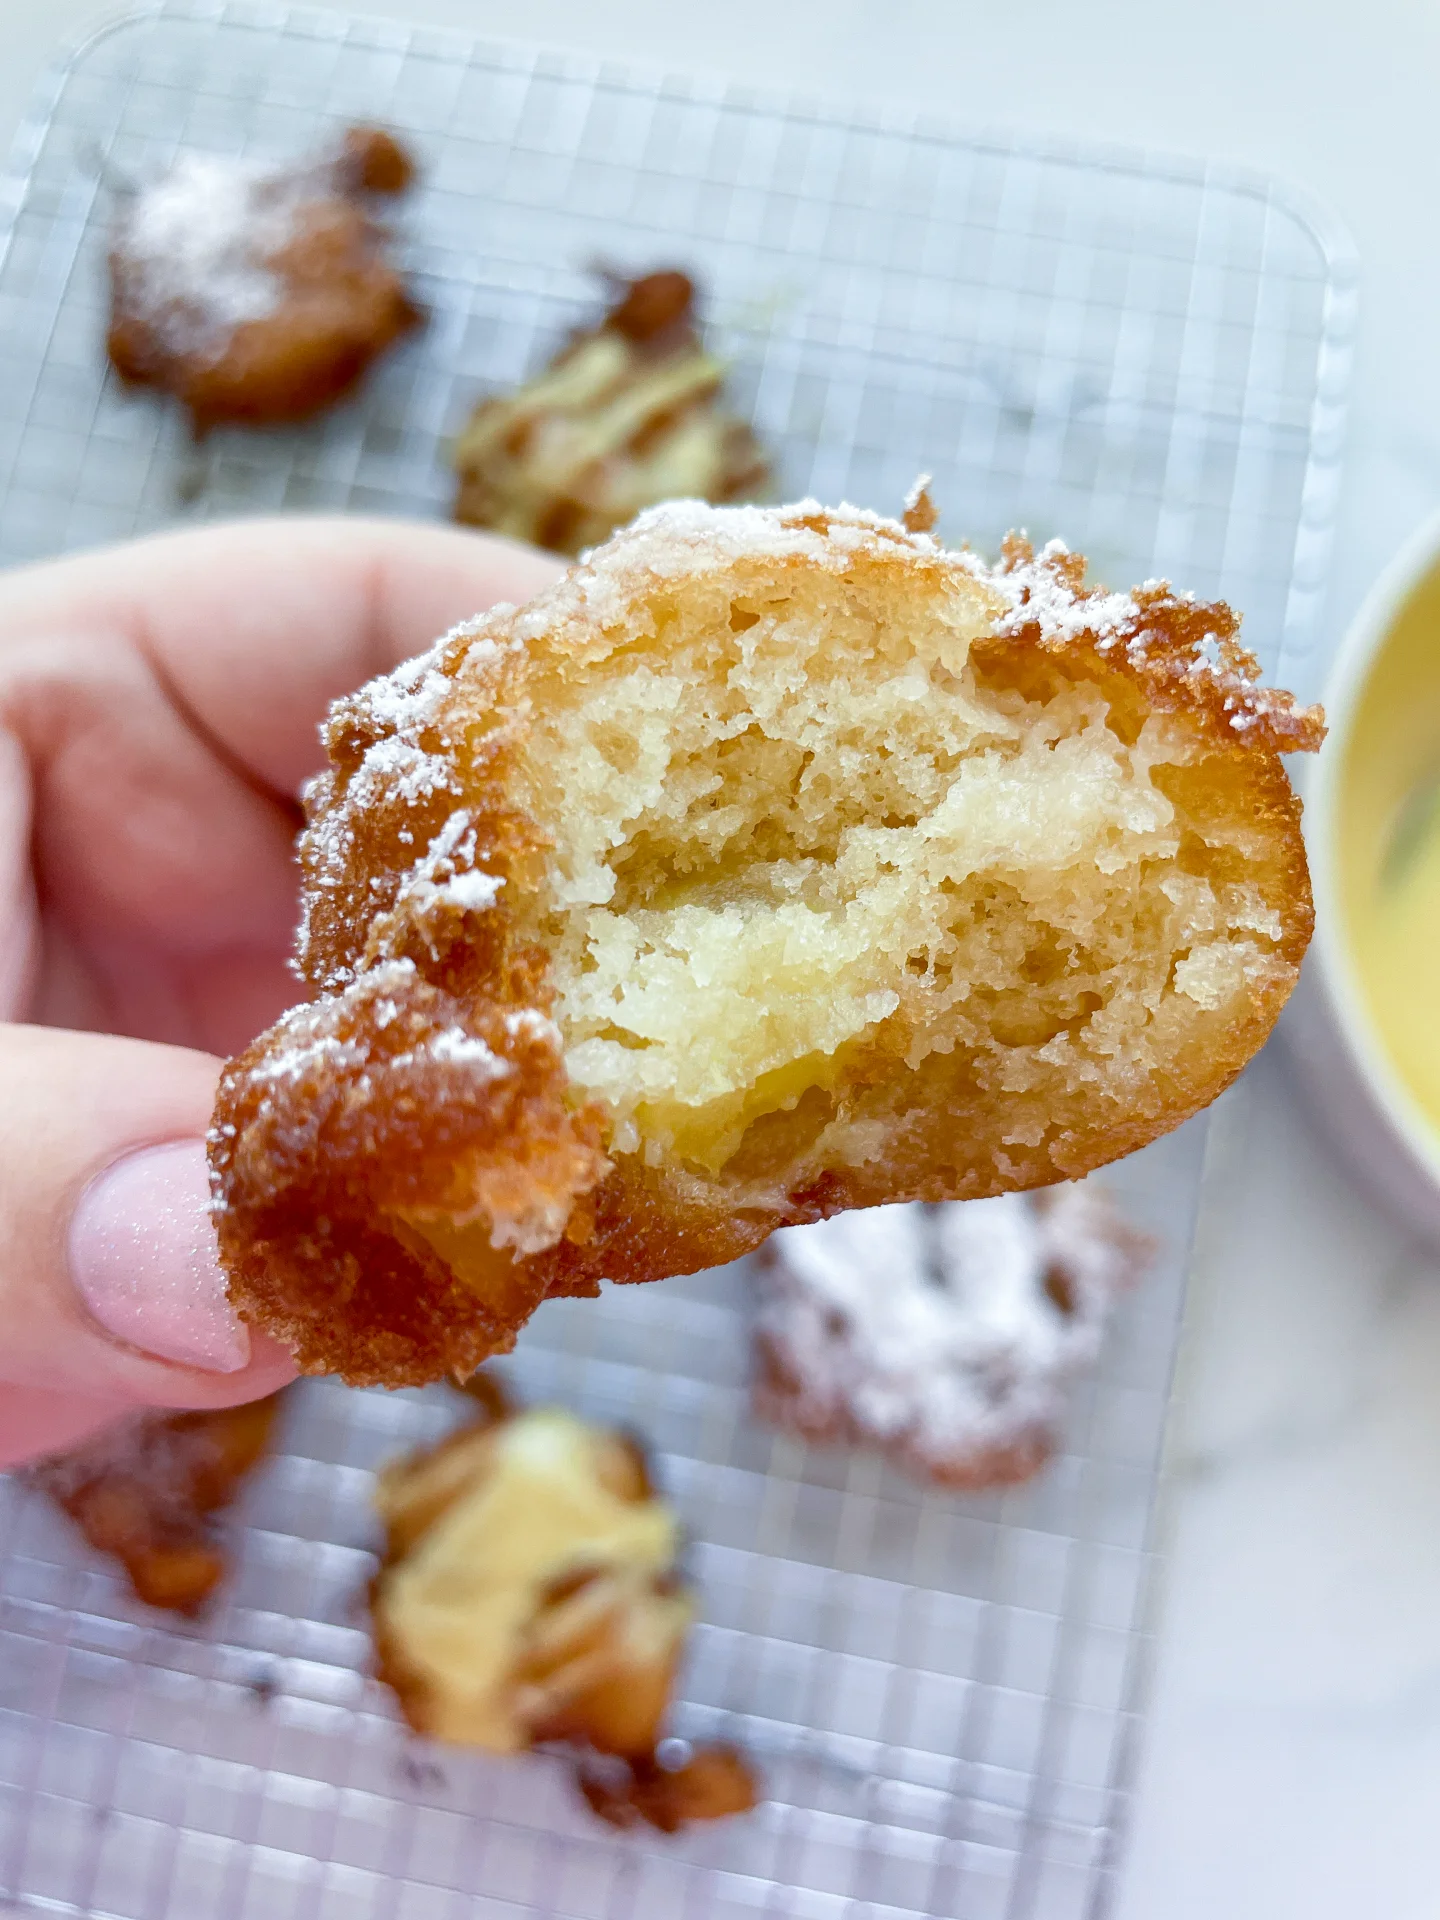
Imagine biting into warm, fluffy fritters bursting with juicy apples, drizzled with a sweet, tangy glaze. It’s like a cozy hug on a chilly morning – a little piece of homemade heaven!

30 MINUTES

EASY

VEGETARIAN

US AMERICAN

150 PER FRITTER

FLUFFY

EVERYDAY

DESSERT

ALL YEAR

INTRODUCTION

ABOUT THE RECIPE

Ever feel like treating yourself to something that’s a mix of comfort and a touch of fancy? These fluffy apple fritters are just that! They’re packed with juicy apple chunks, fried to golden perfection, and then topped with a mouthwatering lemon vanilla glaze. It’s the kind of snack that feels like a warm hug, perfect for cozy mornings or as a delightful dessert to share with friends. Trust me, once you try these, they’ll become your go-to treat!

How to serve
They’re best enjoyed fresh and warm, right out of the frying pan, with the glaze still slightly gooey and dripping down the sides. Pair them with a hot cup of coffee or tea for a perfect morning pick-me-up. If you’re feeling extra indulgent, a scoop of vanilla ice cream on the side turns these fritters into an irresistible dessert.

How to store
If you have leftovers (which I doubt!), store these fritters in an airtight container at room temperature for up to two days. For the best experience, reheat them in the oven at a low temperature.

Hi, I'm Kimberly!

Hi, I'm Kimberly.

A passionate food lover who believes in the magic of homemade deliciousness that spreads love and warmth. Join me on this culinary adventure as I prepare wonderful dishes and let’s spread some happiness together!

Kimberly the Zett Signature

If you want to get to know me better, click here!


Apple Fritters with Lemon Vanilla Glaze
„Let’s make a piece of happiness“
Print
clock clock iconcutlery cutlery iconflag flag iconfolder folder iconinstagram instagram iconpinterest pinterest iconfacebook facebook iconprint print iconsquares squares iconheart heart iconheart solid heart solid icon
Apple Fritters with Lemon Vanilla Glaze

Apple Fritters with Lemon Vanilla Glaze


  • Author: Kimberly
  • Total Time: 30 min
  • Yield: 12 fritters 1x

Description

Recommended Equipment

  • small pot
  • cooling rack
  • two bowls
  • whisk
  • sharp knife
  • cutting board
  • small bowl

Ingredients

Units Scale

BATTER

  • 100 grams all-purpose flour
  • 50 grams brown sugar
  • 1 tsp baking powder
  • 1/4 tsp salt
  • 1/3 cup milk
  • 1 egg
  • 1 tbsp butter, melted
  • 1/2 tsp vanilla extract
  • 2 apples
  • fat for frying

GLAZE

  • 65 grams powdered sugar
  • 1 tbsp milk
  • 1 tbsp lemon juice
  • 1/2 tsp vanilla extract

Instructions

  1. Heat frying fat in a small pot to around 175°C / 350°F. Prepare a cooling rack with some paper towels underneath to catch any excess oil when the fritters are done.
  2. Meanwhile, in a mixing bowl, combine the flour, brown sugar, baking powder, and salt. Set aside.
  3. In another mixing bowl, crack the egg and whisk it together with milk, vanilla extract, and melted butter. Set aside.
  4. Peel, core, and dice the apples into small pieces. Set aside.
  5. Pour the wet ingredients into the dry ingredients and stir until a thick batter forms. Then, add the apple pieces and mix everything together again.
  6. Drop spoonfuls of the batter into the hot oil, frying each side for about 2-3 minutes, depending on thickness. I used about 1 heaping tablespoon of batter per fritter. Place the fritters on the cooling rack to drain any excess oil.
  7. While the fritters are frying, mix powdered sugar, lemon juice, and vanilla extract in a small bowl to create a thick glaze. Drizzle the glaze over the fritters. I think they taste best when warm, so feel free to enjoy them right away 🙂
  • Cook Time: 30 min
Garlic Herb Pull Apart Bread

Garlic Herb Pull Apart Bread

Garlic Herb Pull Apart Bread

Garlic Herb Pull Apart Bread

May 30, 2024 by Kimberly

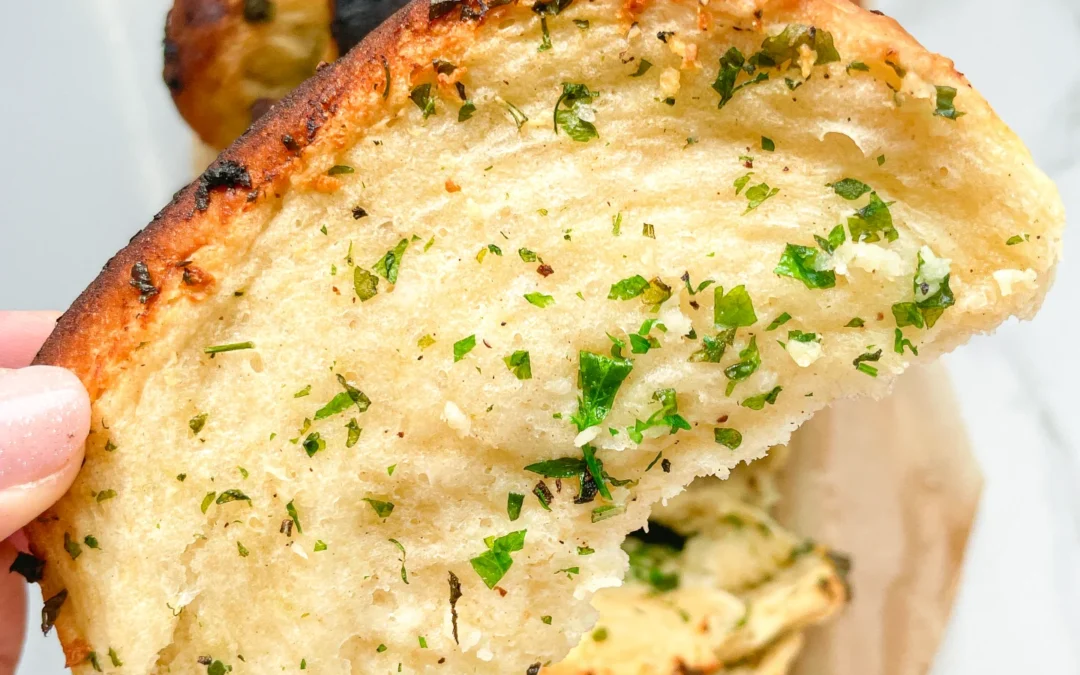
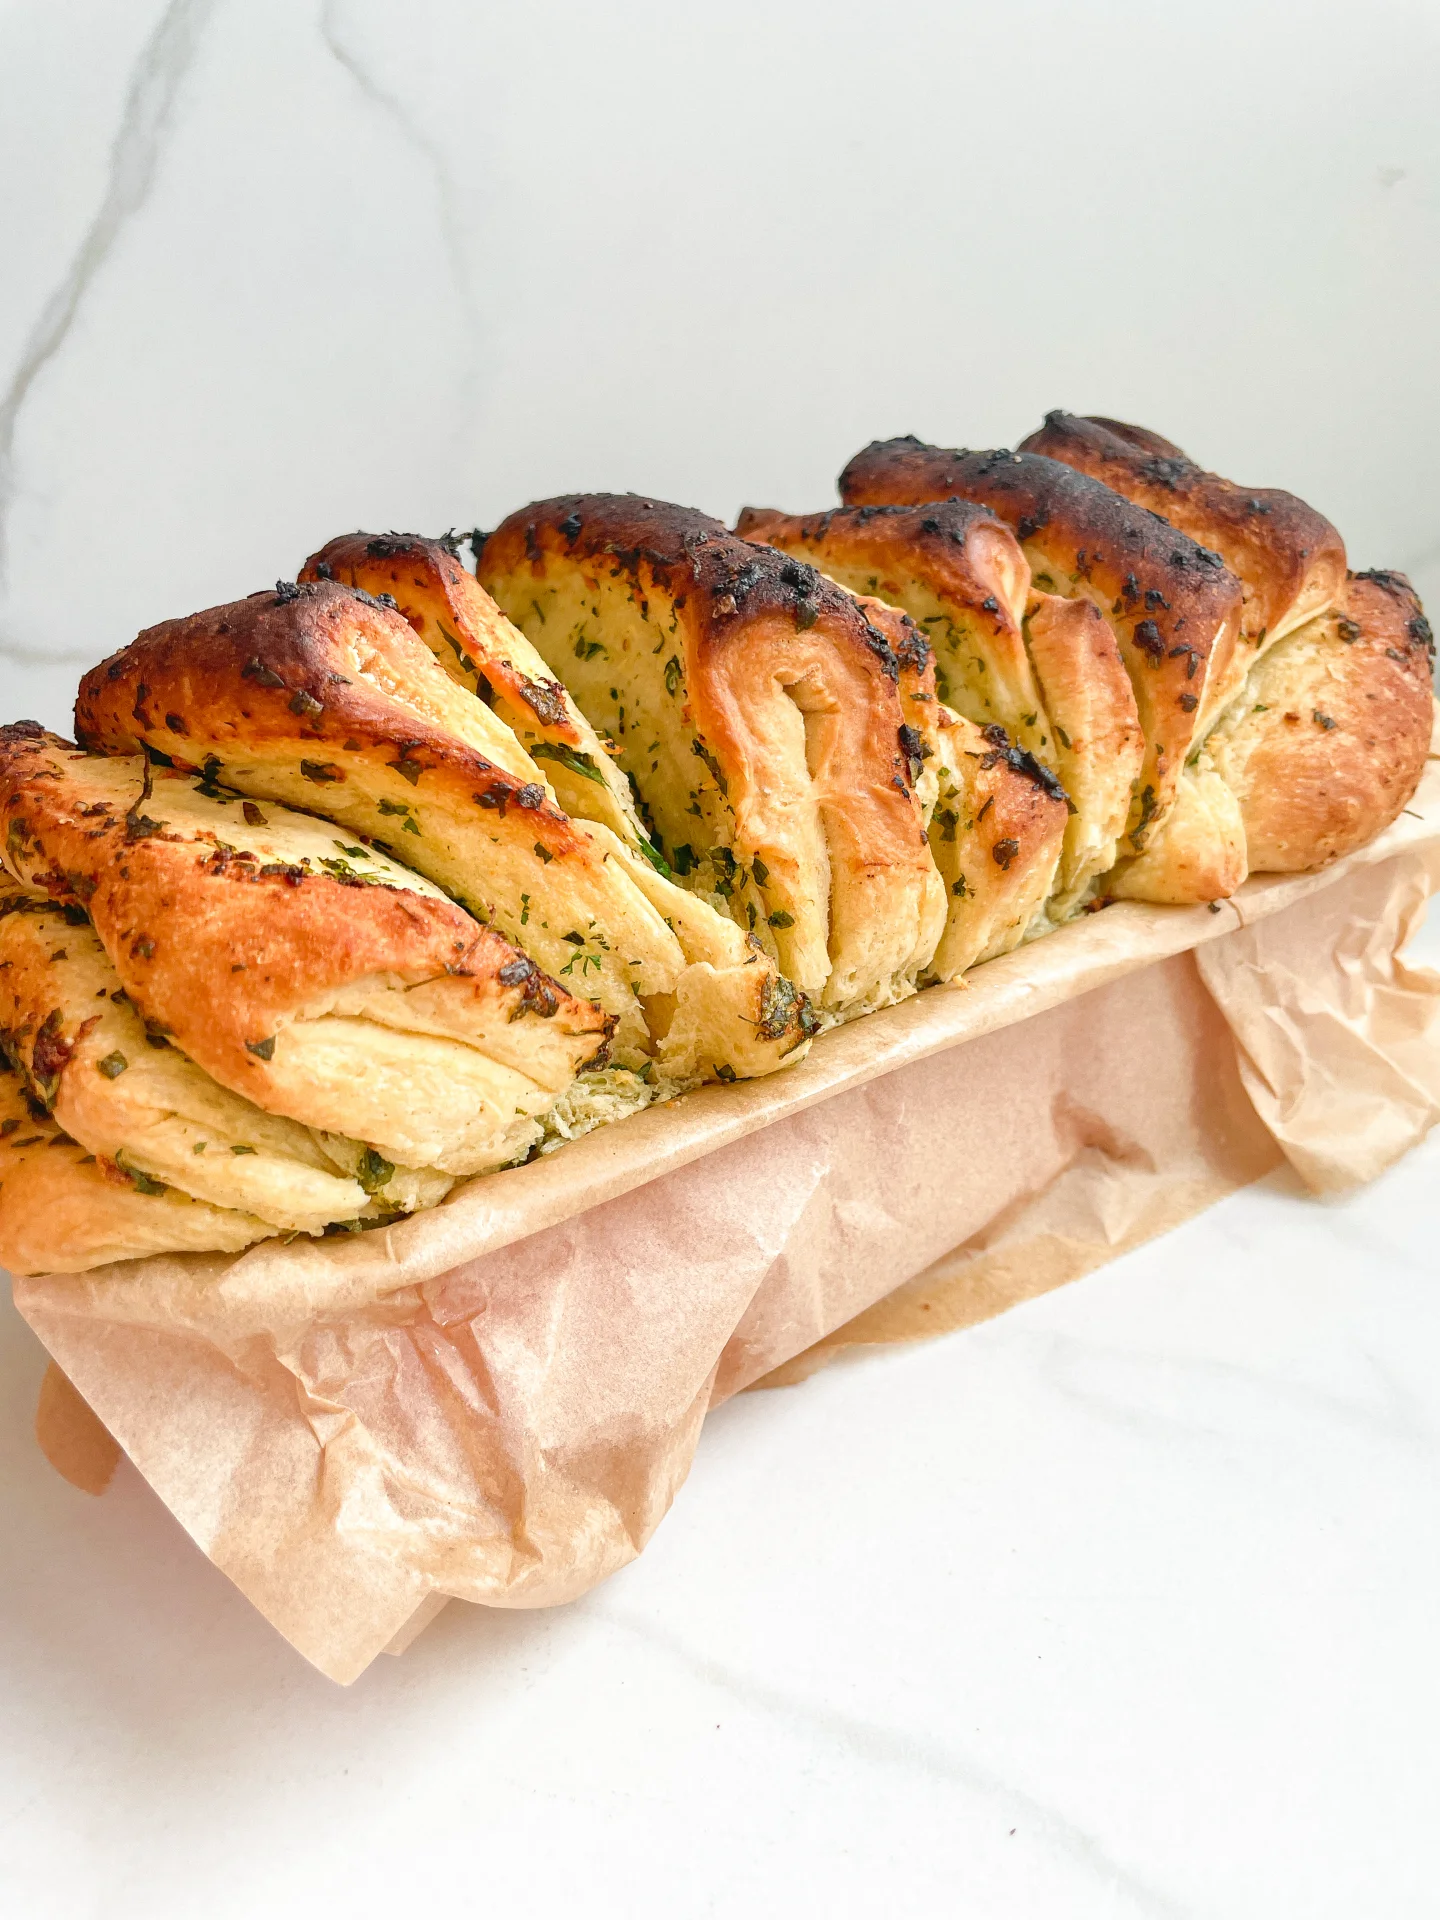
Garlic Herb Pull Apart Bread is the perfect addition to any meal, bringing together the flavors of fresh garlic and herbs in a soft, pull-apart bread.

2 HOURS
50 MINUTES

INTERMEDIATE

VEGETARIAN

INT.

352 PER PORTION

FLUFFY
HERBACEOUS

DINNER PARTY

BREAD
SIDE

ALL YEAR

INTRODUCTION

ABOUT THE RECIPE

Garlic Herb Pull Apart Bread is the perfect addition to any meal, bringing together the flavors of fresh garlic and herbs in a soft, pull-apart bread. This bread is not only delicious but also incredibly fun to eat, making it a hit at parties and family gatherings.

How to serve
Serve this mouthwatering Garlic Herb Pull Apart Bread as an appetizer at your next party or alongside a big salad. It’s also perfect for dipping into soups and stews, or simply enjoy it on its own. The combination of herbs and garlic makes every bite a delightful experience.

How to store
To store your leftover Garlic Herb Pull Apart Bread, wrap it tightly in aluminum foil and keep it at room temperature for up to 2 days. For longer storage, place it in an airtight container and refrigerate for up to 4 days. Reheat in the oven to bring back its fresh-baked taste and texture.

Hi, I'm Kimberly!

Hi, I'm Kimberly.

A passionate food lover who believes in the magic of homemade deliciousness that spreads love and warmth. Join me on this culinary adventure as I prepare wonderful dishes and let’s spread some happiness together!

Kimberly the Zett Signature

If you want to get to know me better, click here!


Garlic Herb Pull Apart Bread
„Let’s make a piece of happiness“
Print
clock clock iconcutlery cutlery iconflag flag iconfolder folder iconinstagram instagram iconpinterest pinterest iconfacebook facebook iconprint print iconsquares squares iconheart heart iconheart solid heart solid icon
Garlic Herb Pull Apart Bread

Garlic Herb Pull Apart Bread


  • Author: Kimberly
  • Total Time: 2 hours 50 min
  • Yield: 10 1x

Description

RECOMMENDED EQUIPMENT

  • baking pan (I used a 28x8cm / 11”x3” loaf pan)
  • large bowl
  • measuring cup
  • plastic wrap (or kitchen towel)
  • small bowl
  • sharp knife
  • cutting board
  • garlic press
  • rolling pin
Ingredients

Units Scale

DOUGH

  • 600 grams all-purpose flour
  • 42 grams fresh yeast
  • 2 tsp sugar
  • 2 tsp salt
  • 50 milliliters oil of your choice (I used cold-pressed rapeseed oil)
  • 350 milliliters lukewarm water

FILLING

  • 5 garlic cloves
  • 30 grams fresh herbs (I used thyme, oregano, basil, rosemary & parsley)
  • 125 grams soft butter
  • salt & pepper

Instructions

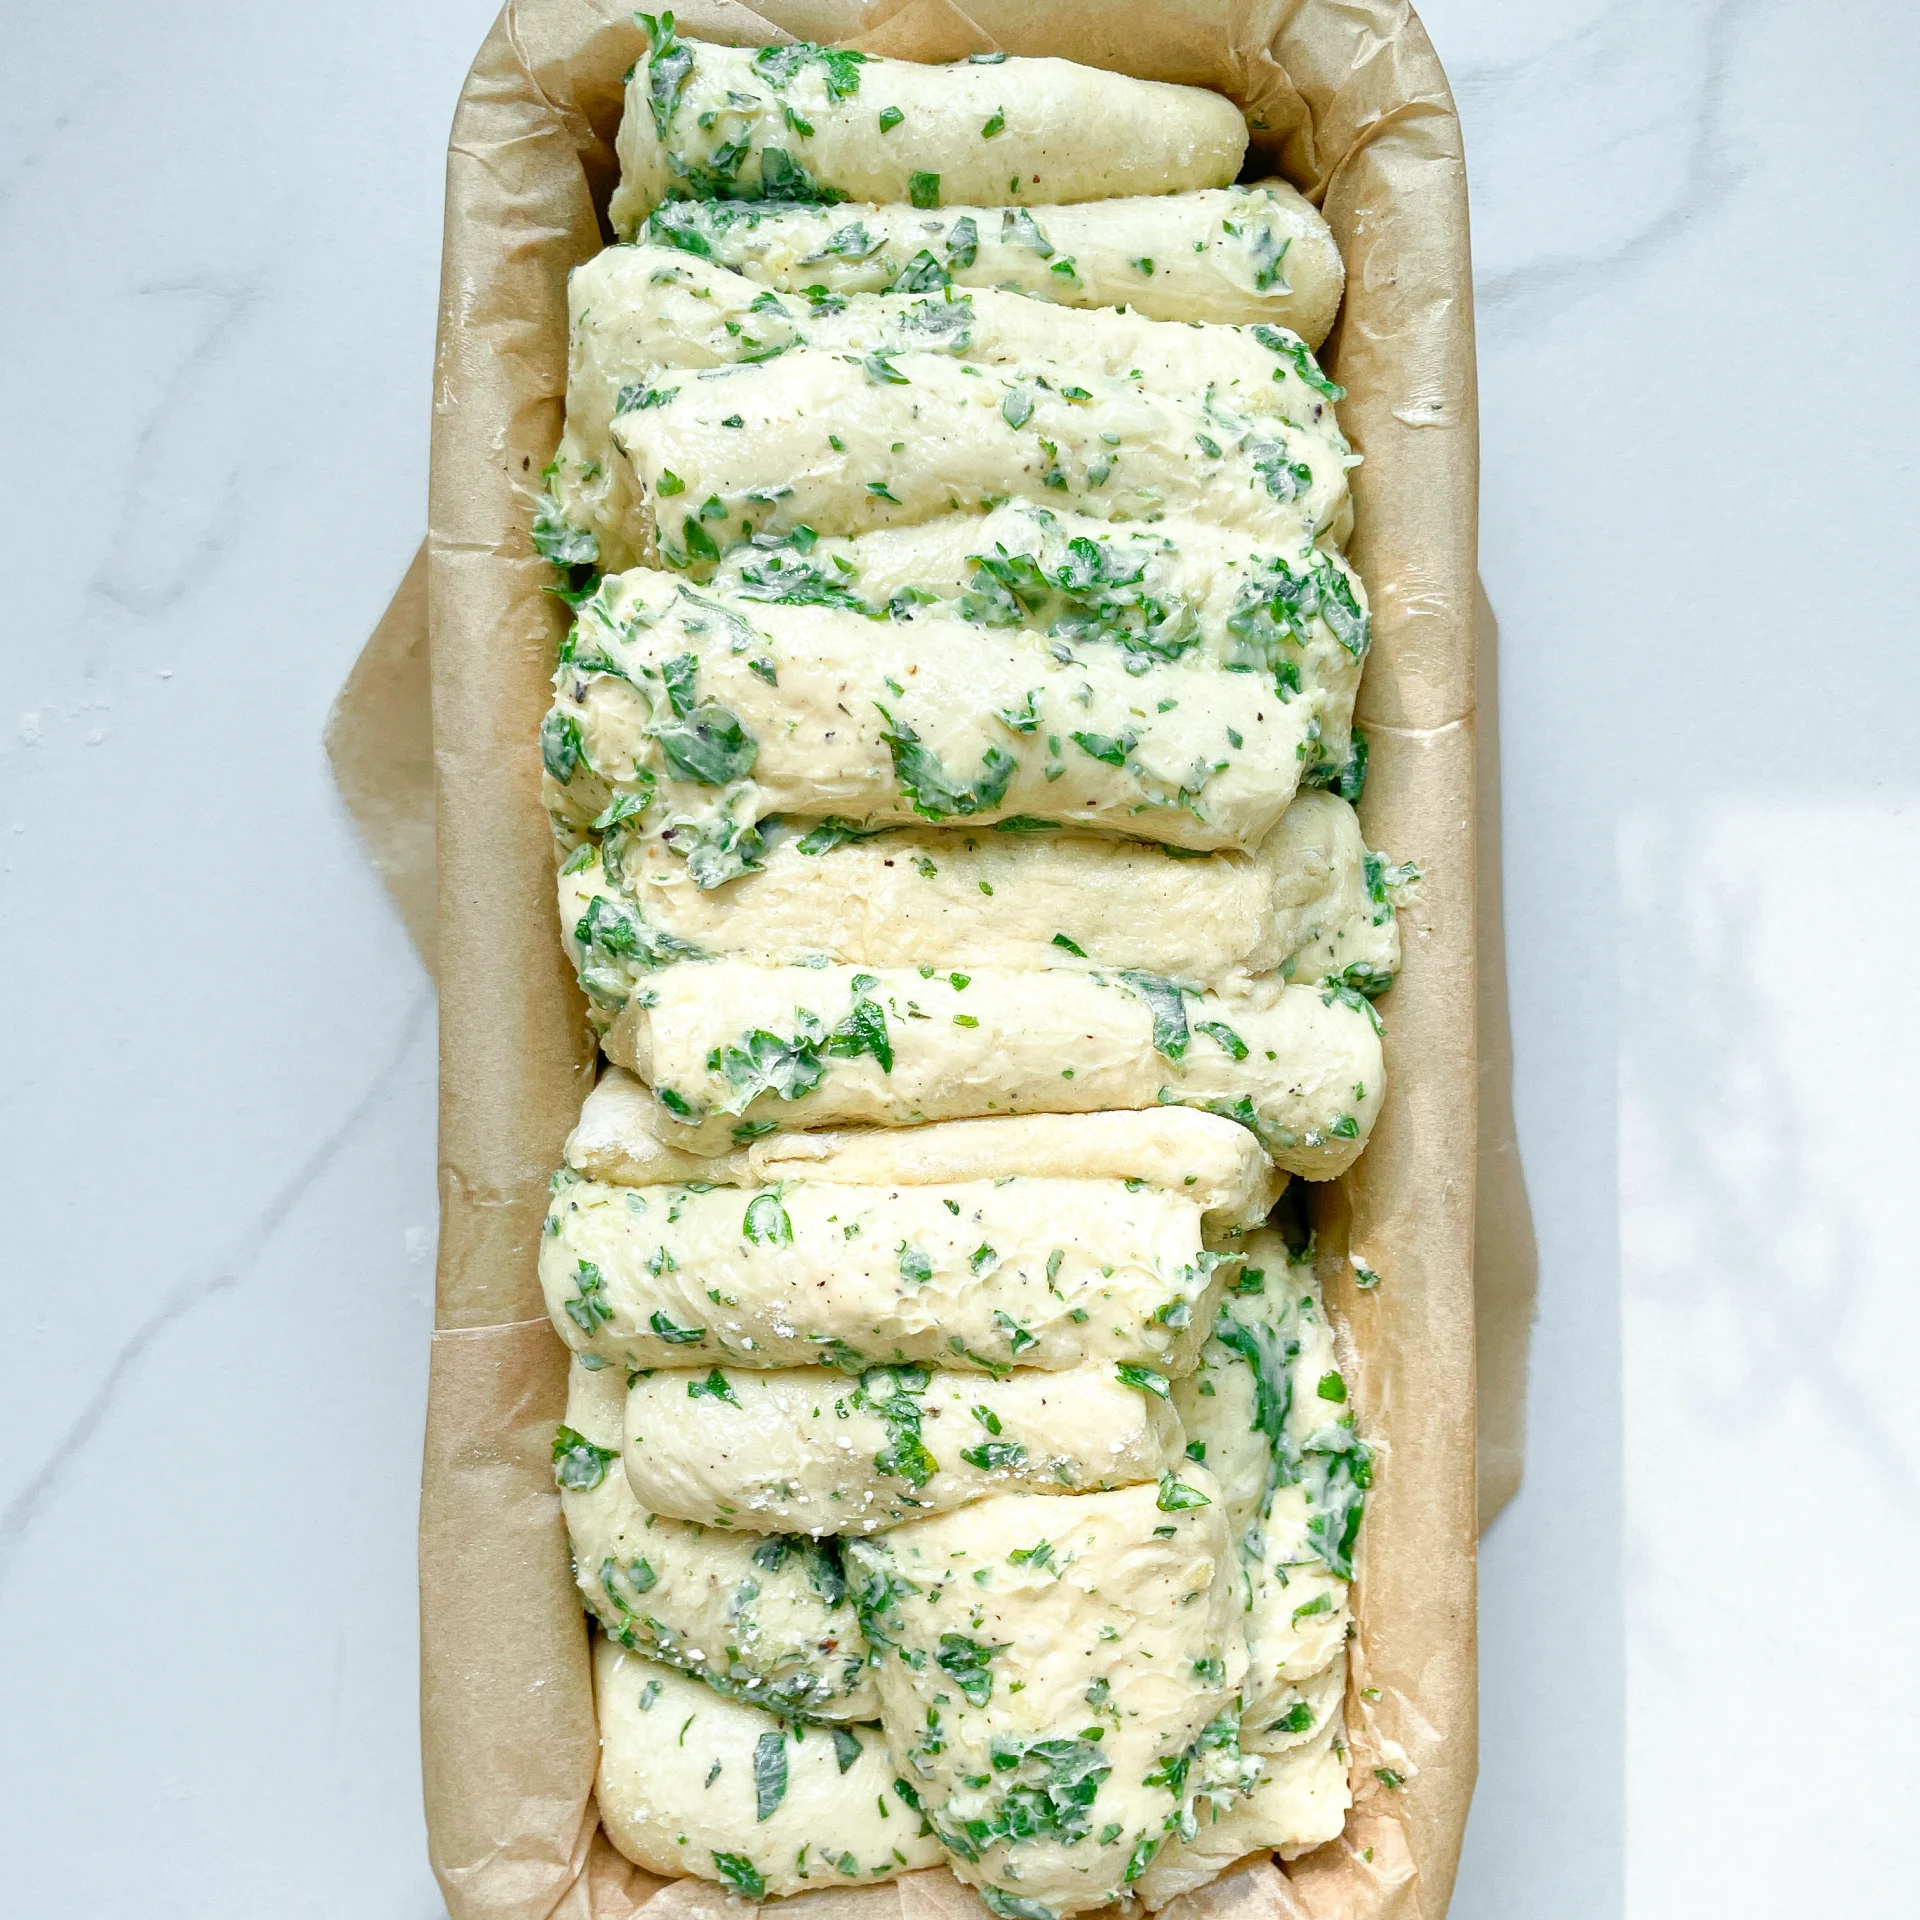
  1. For the dough, mix flour, sugar, and salt in a large bowl. In a measuring cup, measure out the lukewarm water, crumble in the fresh yeast, and stir until the yeast dissolves. Add the yeast water and olive oil to the flour-sugar-salt mixture and mix until a sticky dough forms. Cover the bowl with plastic wrap or a damp towel and set aside for 10 minutes.
  2. With a wet hand, grab one side of the dough, lift it up, and fold it into the middle. Repeat with the other three sides. Let the dough rest for another 10 minutes, then repeat the folding process and let the dough rise, covered, for 1 hour.
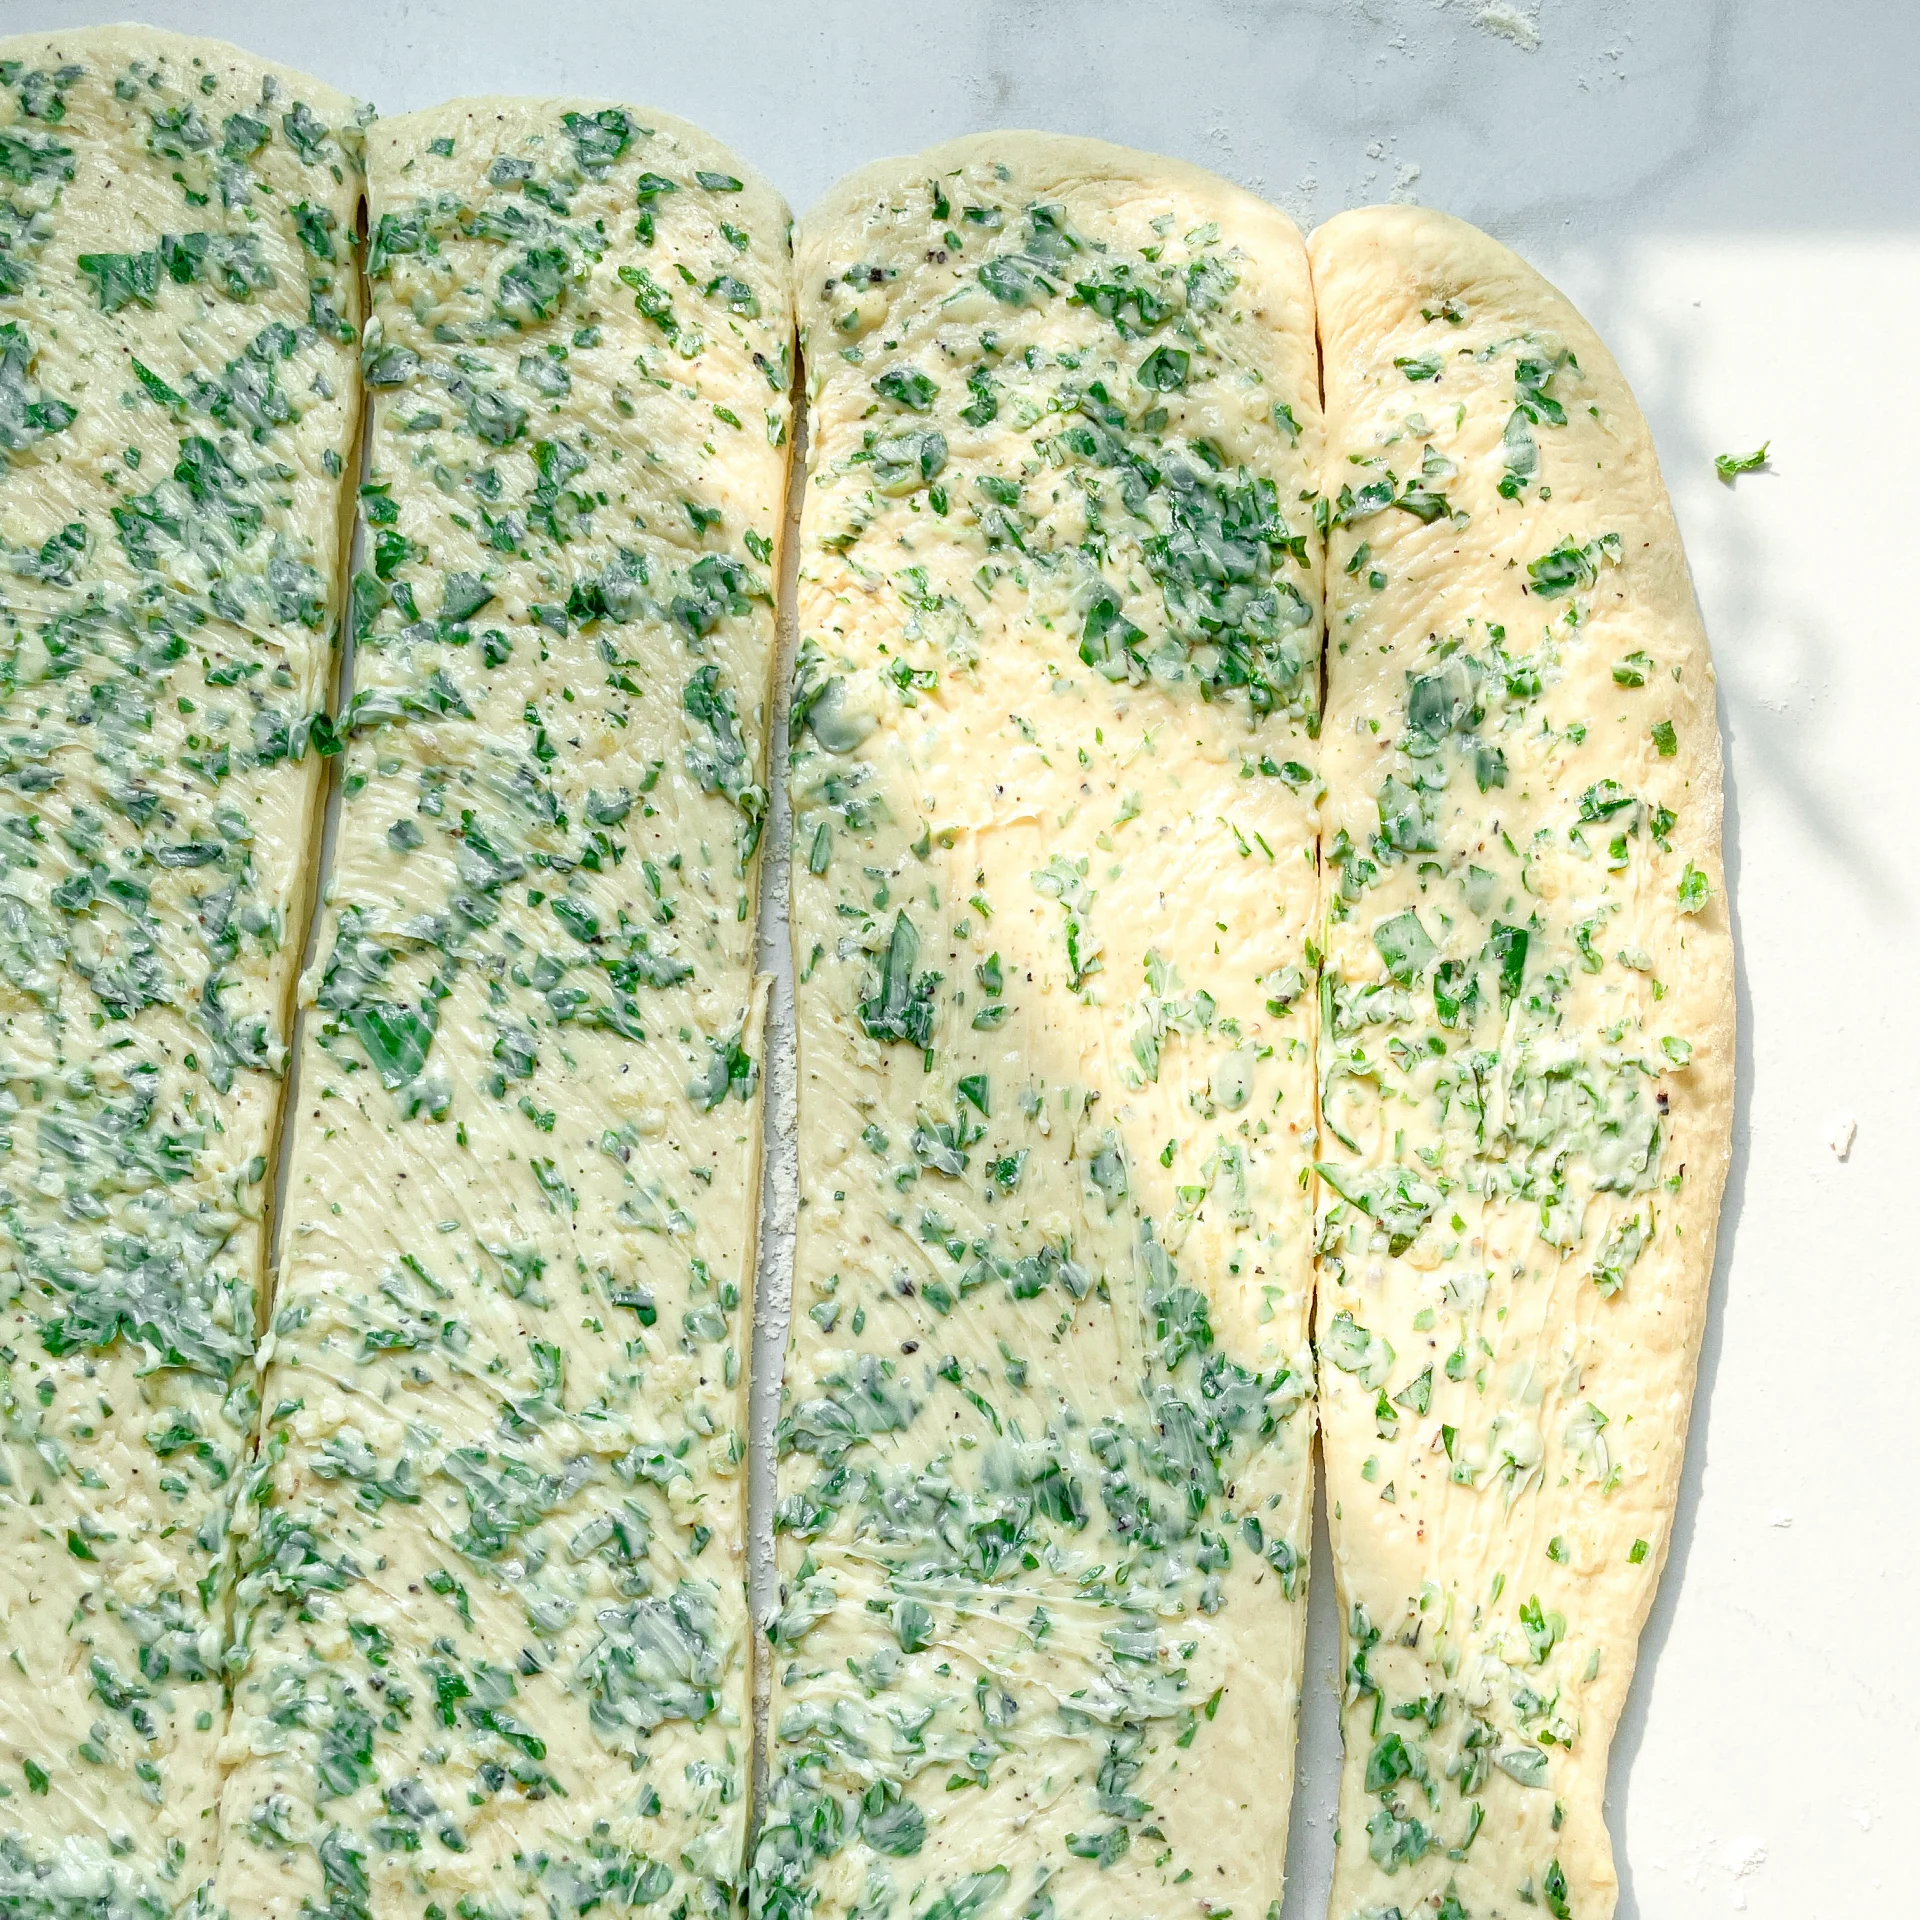
  3. Meanwhile, prepare the filling. Finely chop the herbs and peel the garlic cloves, then either finely chop them or use a garlic press. In a small bowl, mix the softened butter, herbs, garlic, salt, and pepper into a paste and set aside (do not refrigerate, the butter should remain spreadable). Prepare the baking pan by either greasing it with a bit of butter or lining it with parchment paper, and set aside.
  4. After the dough has risen for an hour, perform one final round of folding and let it rise, covered, for another hour.
  5. Turn the dough out onto a clean, lightly floured surface and roll it out into a rectangle about 1/2” thick. Spread the butter-garlic-herb paste evenly over the dough. Cut the dough into strips about 8cm / 3” wide. Fold each strip like an accordion and place them upright in the baking pan with the buttered side facing up. Repeat with all the strips, pressing the dough snugly into the pan. Preheat the oven to 200°C / 392°F. Bake the dough for about 30 minutes. Serve warm or let cool. And now enjoy this piece of happiness 🙂

Notes

The calorie information may vary depending on the product used, country and region.

  • Passive Time: 2 hours 30 min
  • Cook Time: 20 min

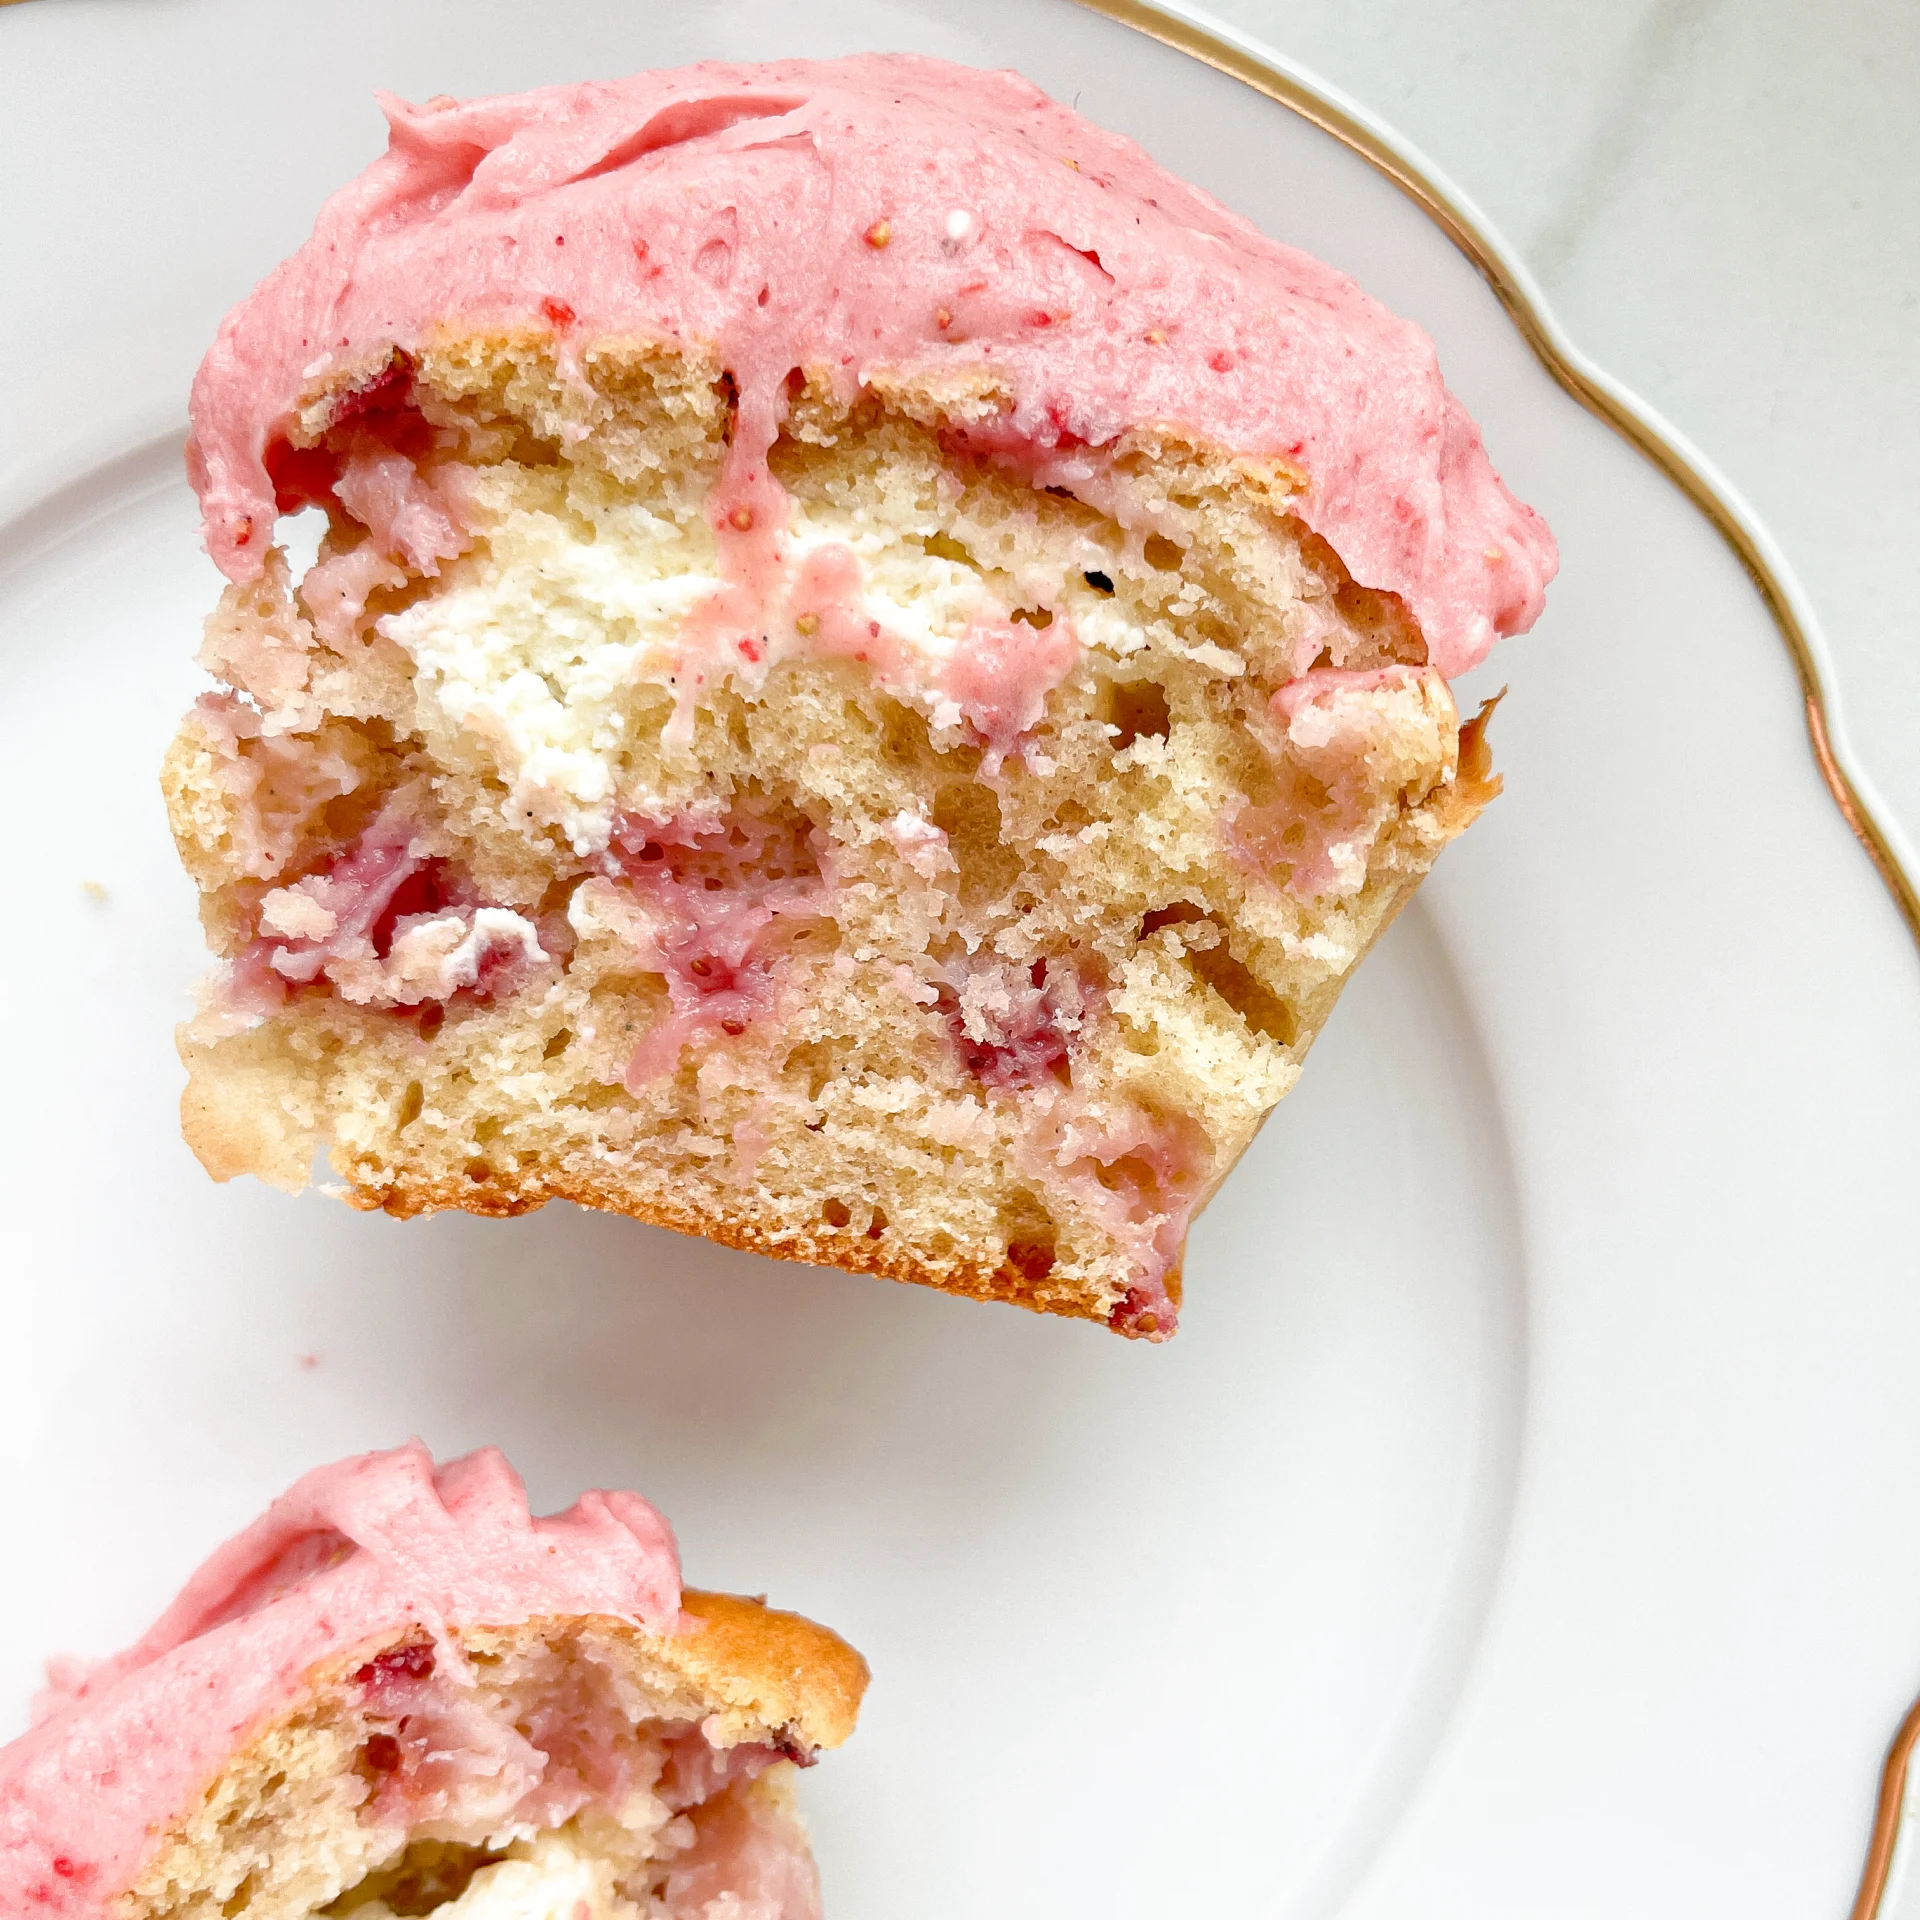
Strawberry Cupcakes with Cream Cheese Frosting & Cheesecake Filling

Strawberry Cupcakes with Cream Cheese Frosting & Cheesecake Filling

Strawberry Cupcakes with Cream Cheese Frosting & Cheesecake Filling

Strawberry Cupcakes with Cream Cheese Frosting & Cheesecake Filling

April 24, 2024 by Kimberly

Savor the irresistible charm of these Strawberry Cupcakes, brimming with lush cheesecake filling and crowned with velvety cream cheese frosting—ideal for satisfying any dessert craving!

100 MINUTES

INTERMEDIATE

VEGETARIAN

INT.

471 PER CUPCAKE

SWEET
CREAMY
FLUFFY

EVERYDAY

DESSERT
CUPCAKE

SPRING
SUMMER

INTRODUCTION

ABOUT THE RECIPE

Dive into the delightful world of Strawberry Cupcakes with Cream Cheese Frosting and Cheesecake Filling! These heavenly cupcakes are a fusion of fruity, creamy, and utterly decadent flavors, making them the ultimate dessert for any occasion.

HOW TO SERVE
Serve these Strawberry Cupcakes chilled or at room temperature to let the flavors shine. They pair beautifully with a cup of coffee or a glass of cold milk. Perfect for celebrations or as a special treat, their gorgeous appearance and exquisite taste will impress any guest!

HOW TO STORE
Keep the cupcakes in an airtight container in the refrigerator. They stay fresh and delicious for up to 3 days.

Hi, I'm Kimberly!

Hi, I'm Kimberly.

A passionate food lover who believes in the magic of homemade deliciousness that spreads love and warmth. Join me on this culinary adventure as I prepare wonderful dishes and let’s spread some happiness together!

Kimberly the Zett Signature

If you want to get to know me better, click here!


Strawberry Cupcakes with Cream Cheese Frosting & Cheesecake Filling
„Let’s make a piece of happiness“
Print
clock clock iconcutlery cutlery iconflag flag iconfolder folder iconinstagram instagram iconpinterest pinterest iconfacebook facebook iconprint print iconsquares squares iconheart heart iconheart solid heart solid icon
Strawberry Cupcakes with Cream Cheese Frosting & Cheesecake Filling

Strawberry Cupcakes with Cream Cheese Frosting & Cheesecake Filling


5 from 1 review

  • Author: Kimberly
  • Total Time: 100 min
  • Yield: 12 cupcakes 1x

Description

RECOMMENDED EQUIPMENT

  • sharp knife
  • cutting board
  • cupcake tin
  • parchment paper
  • two small bowls
  • three medium bowls
  • whisk
  • cookie scoop (or spoon)
  • spatula
  • fine mesh sieve
  • mortar and pestle
  • electric mixer

Ingredients

Units Scale

BATTER

  • 500 grams all-purpose flour
  • 2 tsp backing powder
  • 1/4 tsp baking soda
  • 100 grams white sugar
  • 100 grams unsalted butter
  • 2 eggs
  • 150 grams yogurt
  • 1 tsp vanilla extract
  • 200 grams strawberries
  • pinch of salt

FILLING

  • 150 grams cream cheese
  • 20 grams powdered sugar
  • zest of half a lemon
  • 1/2 tsp vanilla extract

FROSTING

  • 75 grams butter
  • 75 grams cream cheese
  • 175 grams powdered sugar
  • 20 grams freeze-dried strawberries

CRUMBLES

  • 100 grams all-purpose flour
  • 75 grams butter
  • 25 grams white sugar
  • pinch of salt

Instructions

PREPARATIONS

  1. Thoroughly wash the strawberries, dry them, and cut into small pieces. Set aside.
  2. Cut parchment paper into small squares and press two layers into every other cup of the cupcake tin. Alternatively, you can skip the parchment paper and use cupcake liners instead. Set the prepared tin aside.

COOKING

  1. For the crumbles: In a small bowl, knead together room temperature butter, flour, sugar, and a pinch of salt until combined, then break into large chunks. Store in the refrigerator until needed.
  2. For the filling: In a small bowl, mix together cream cheese, powdered sugar, zest from half a lemon, and 1/2 teaspoon vanilla extract until creamy. Store in the refrigerator until needed. Preheat the oven to 180°C (350°F).
  3. For the batter: In one of the medium bowls, mix together the dry ingredients – flour, 2 teaspoons baking powder, 1/4 teaspoon baking soda, sugar, and a pinch of salt. Set aside.
  4. In another medium bowl, combine the wet ingredients – melted butter, eggs, yogurt, milk, and 1 teaspoon vanilla extract using a whisk until smooth.
  5. Add the flour mixture to the wet ingredients and use a spatula to blend into a batter. Mix just until no flour streaks remain, then fold in the chopped strawberries.
  6. Grab the crumbles and cream cheese mix from the fridge.
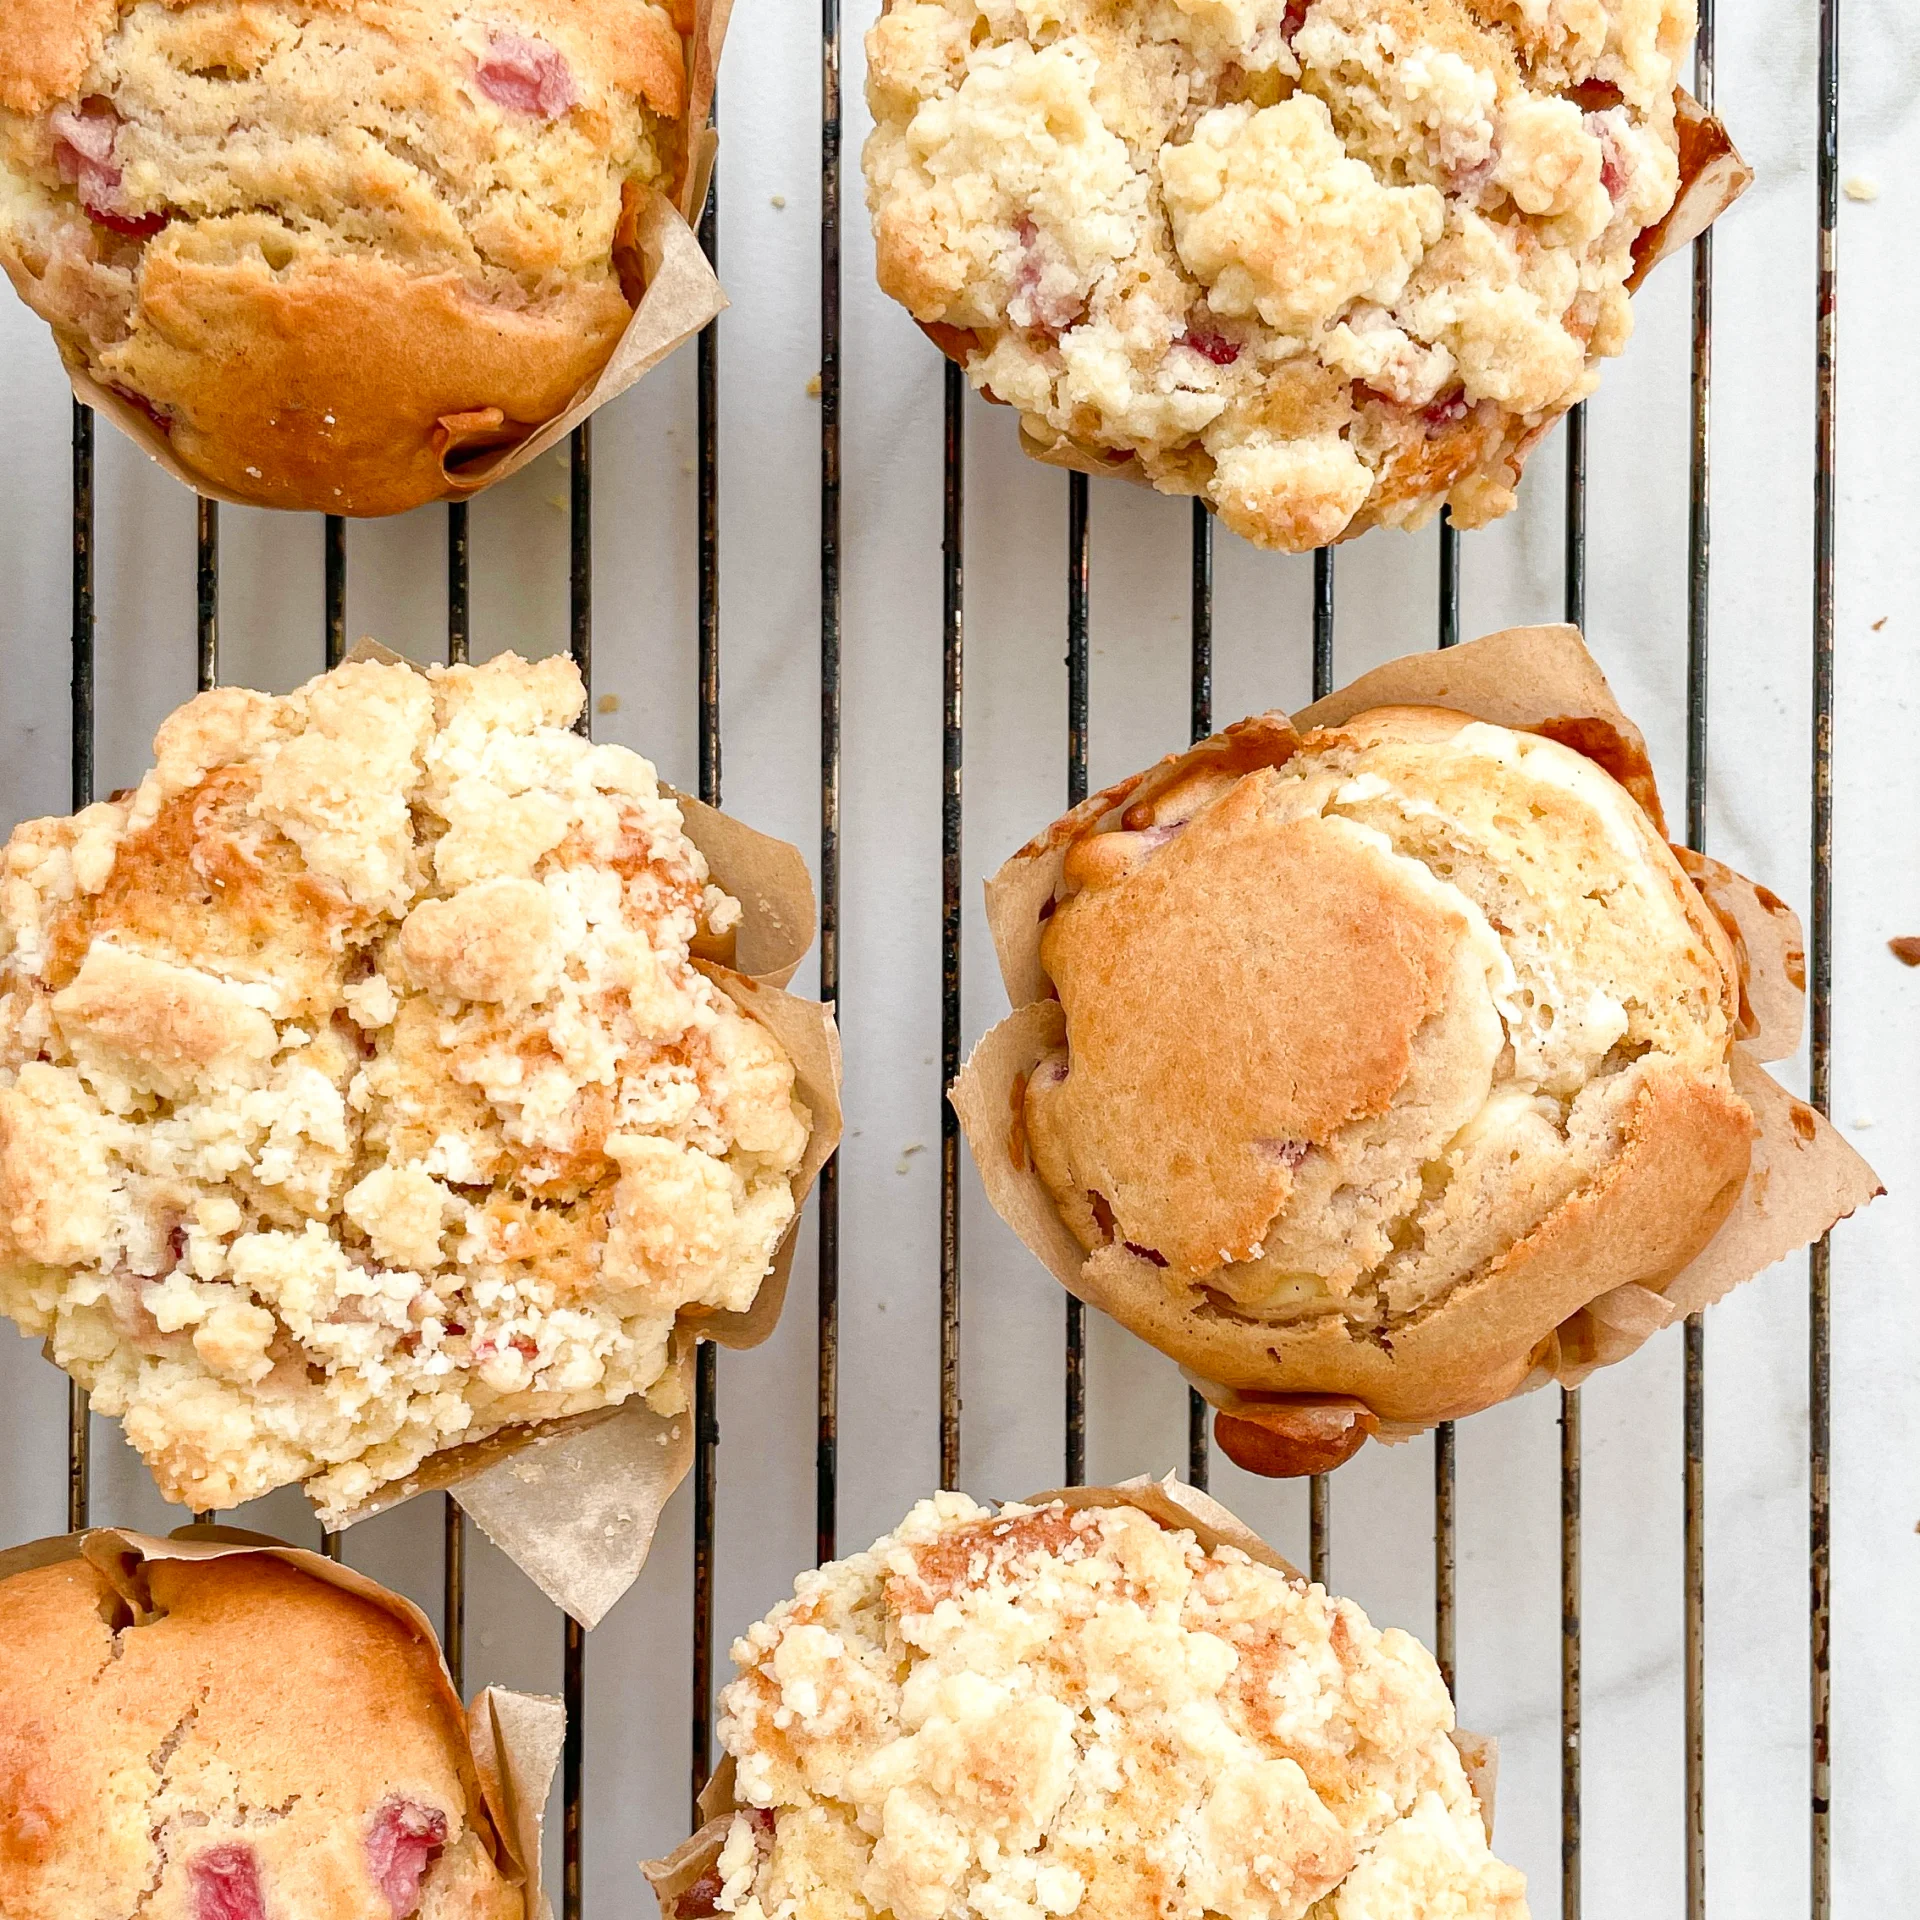
  7. Place a scoop of batter into every second cup of the cupcake tin. Press a scoop in the center and add 1 teaspoon of the cream cheese filling. Cover with another scoop of batter. Distribute crumbles over 6 of the 12 cupcakes, pressing down firmly. Leave the other 6 plain for the strawberry frosting later.
  8. Bake the cupcakes for 20-25 minutes. Remove the tin from the oven and let cool briefly before removing them to a wire rack to cool completely. Prepare the next batch of cupcakes similarly, but without the crumbles. Let all cupcakes cool completely.
  9. Meanwhile, make the frosting: In a medium bowl, beat room temperature butter with an electric mixer until pale yellow and fluffy. Add cream cheese and mix again. Then, add sifted powdered sugar and mix for 1-2 minutes until creamy.
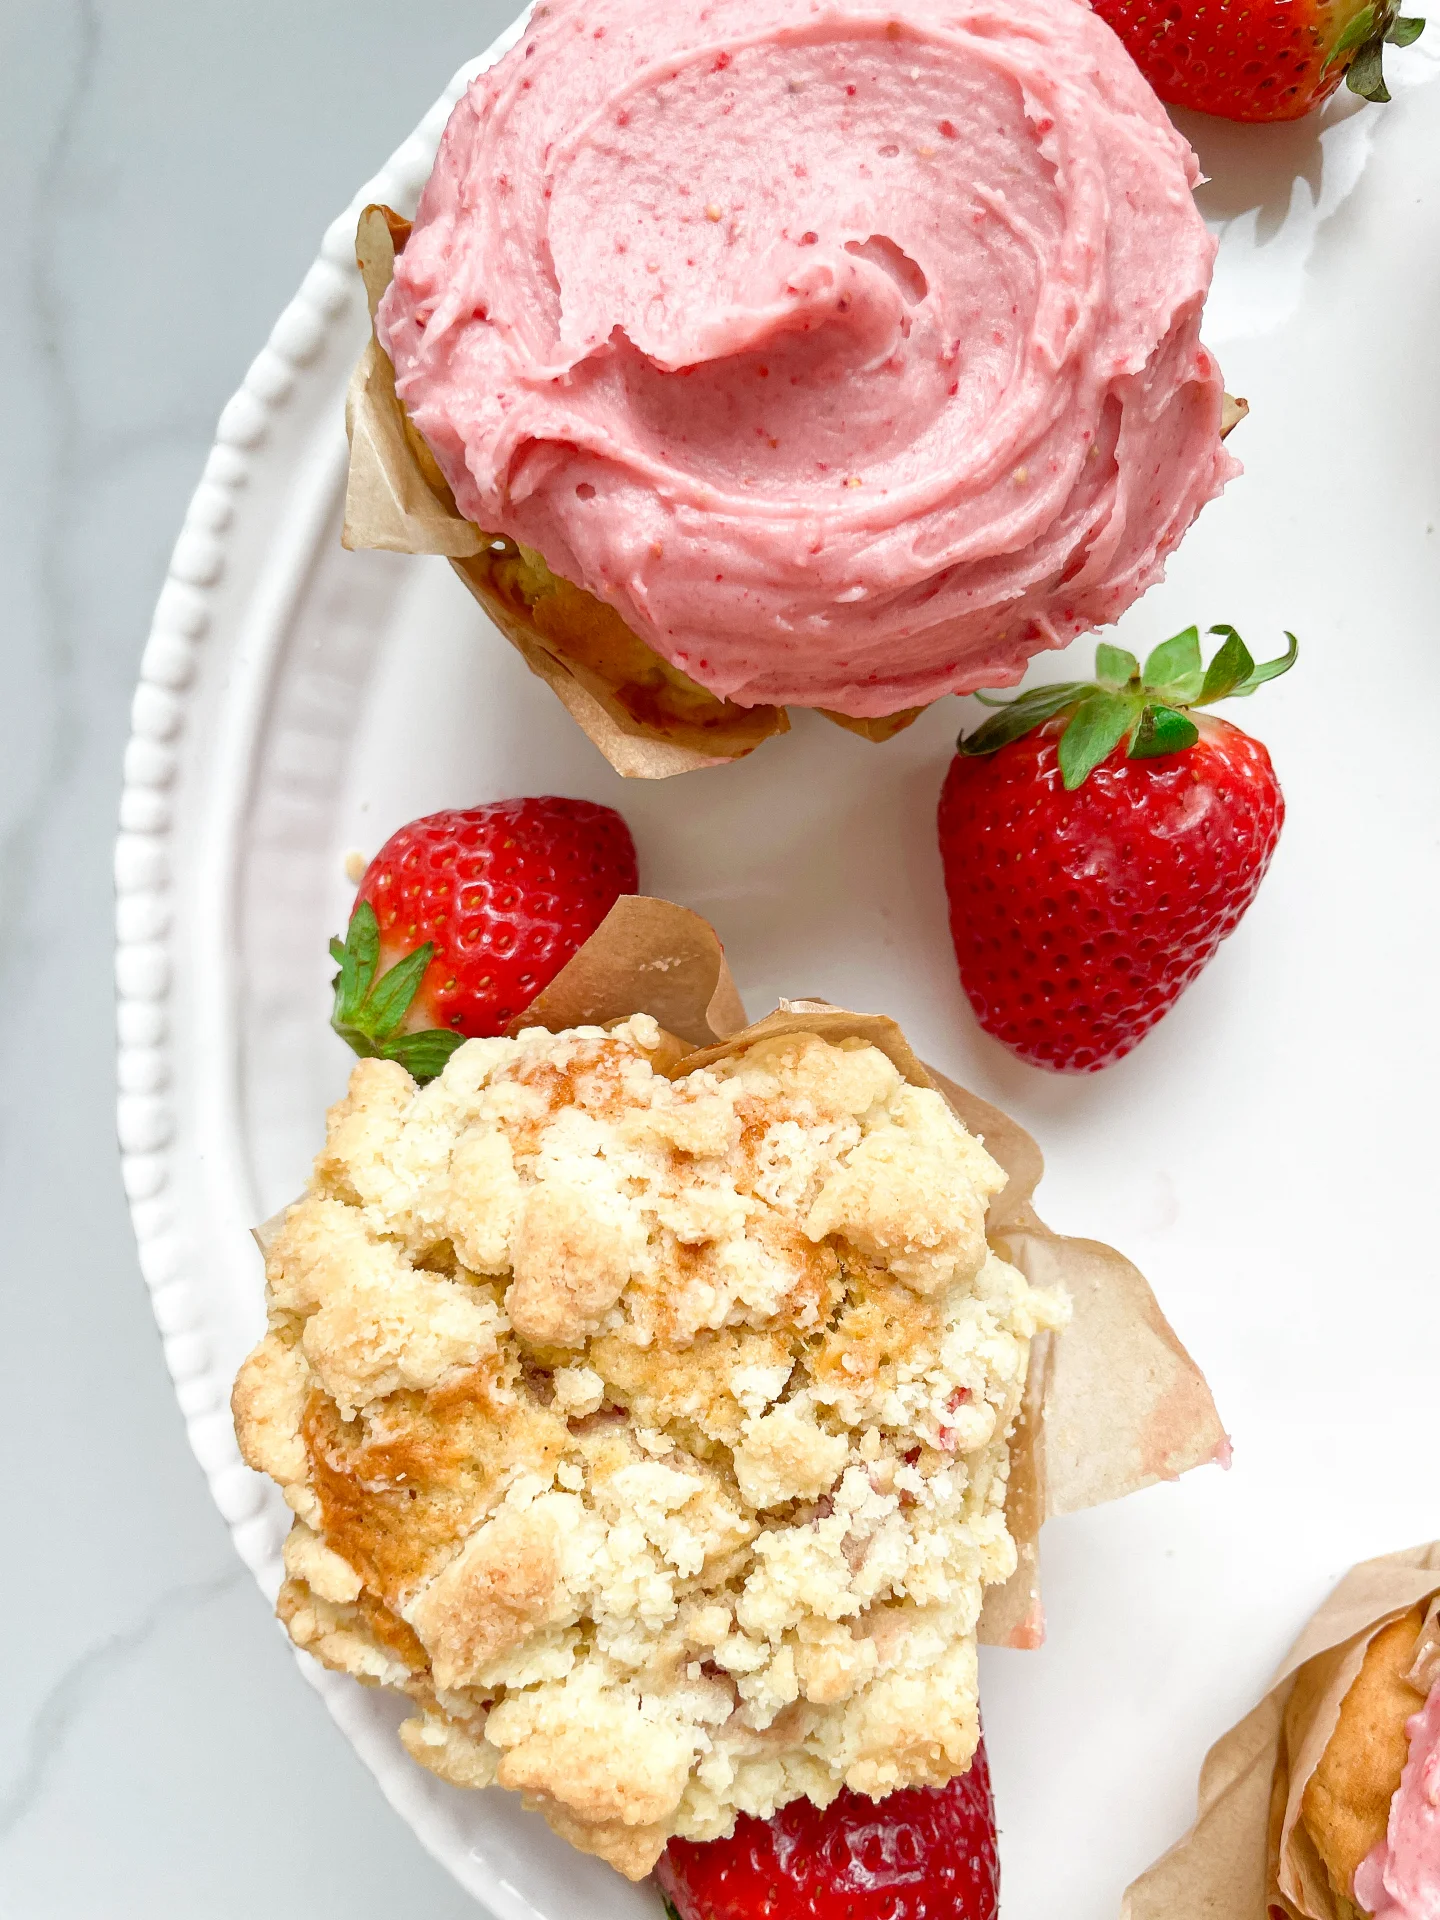
  10. Crush freeze-dried strawberries into a fine powder using a mortar and pestle (or a powerful food processor). Mix this strawberry powder into the frosting until evenly pink.
  11. Once the cupcakes are completely cool, evenly spread and smooth the frosting over the 6 plain cupcakes. And now enjoy your pieces of happiness!

Notes

The calorie information may vary depending on the product used, country and region.

  • Prep Time: 10 min
  • Passive Time: 60 min
  • Cook Time: 30 min

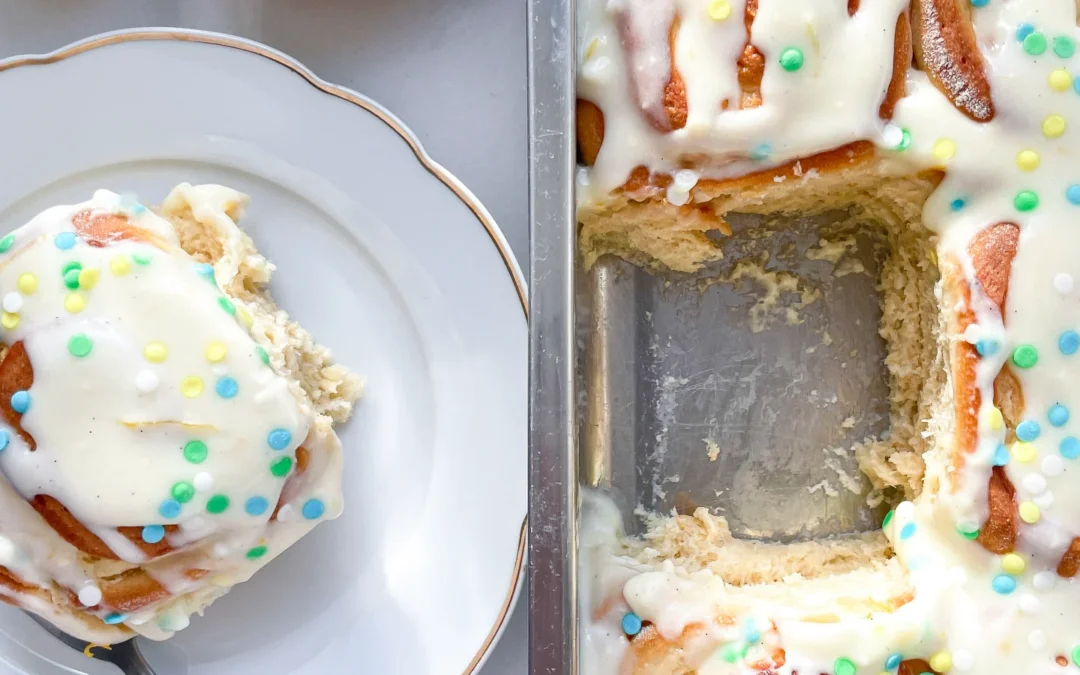
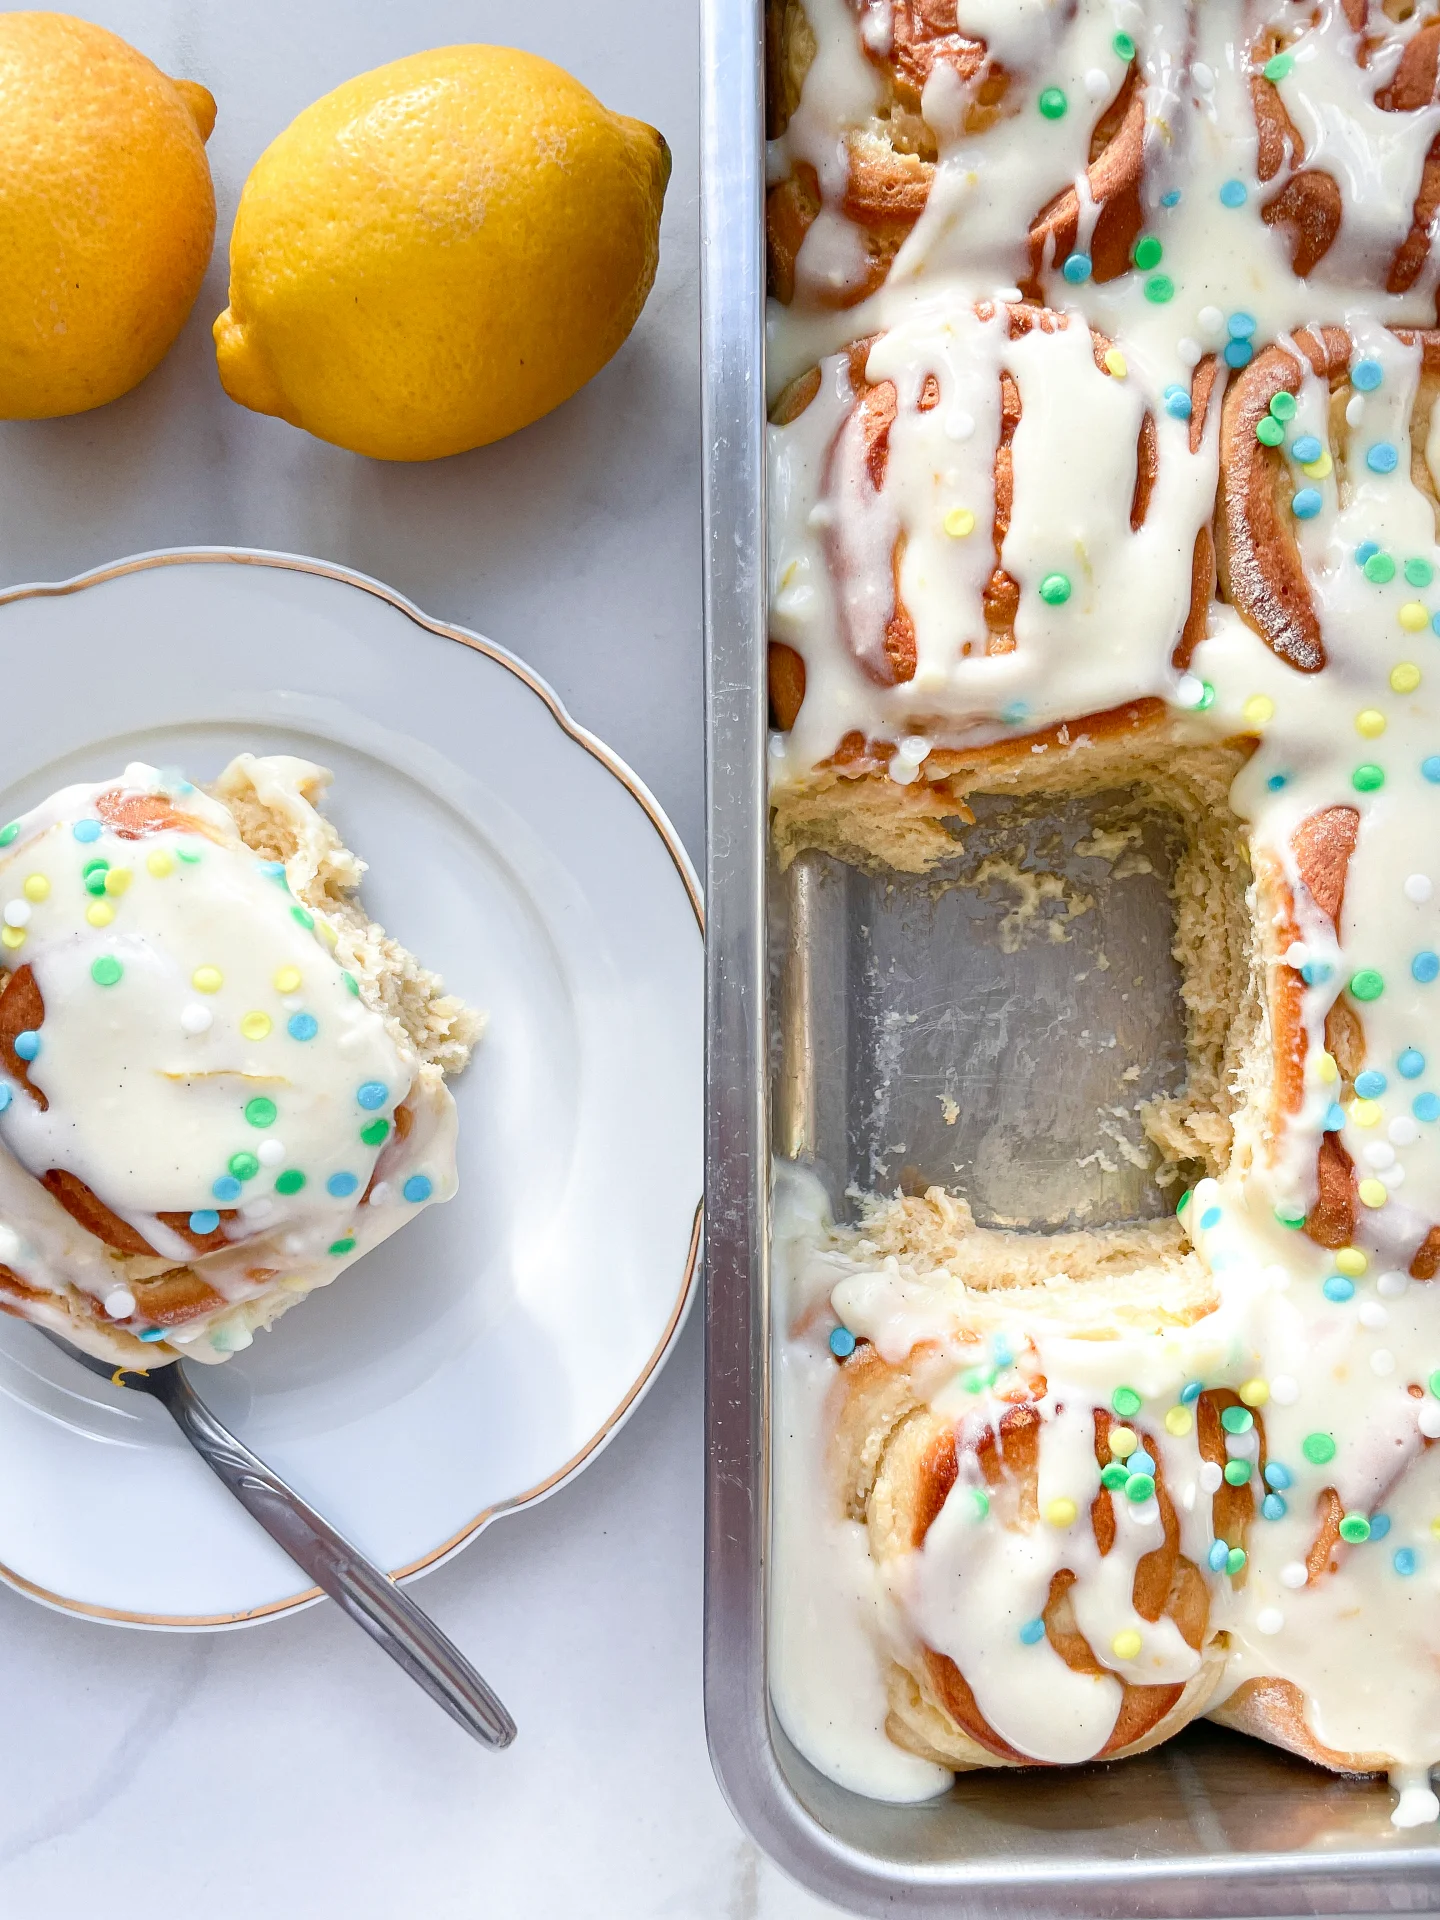
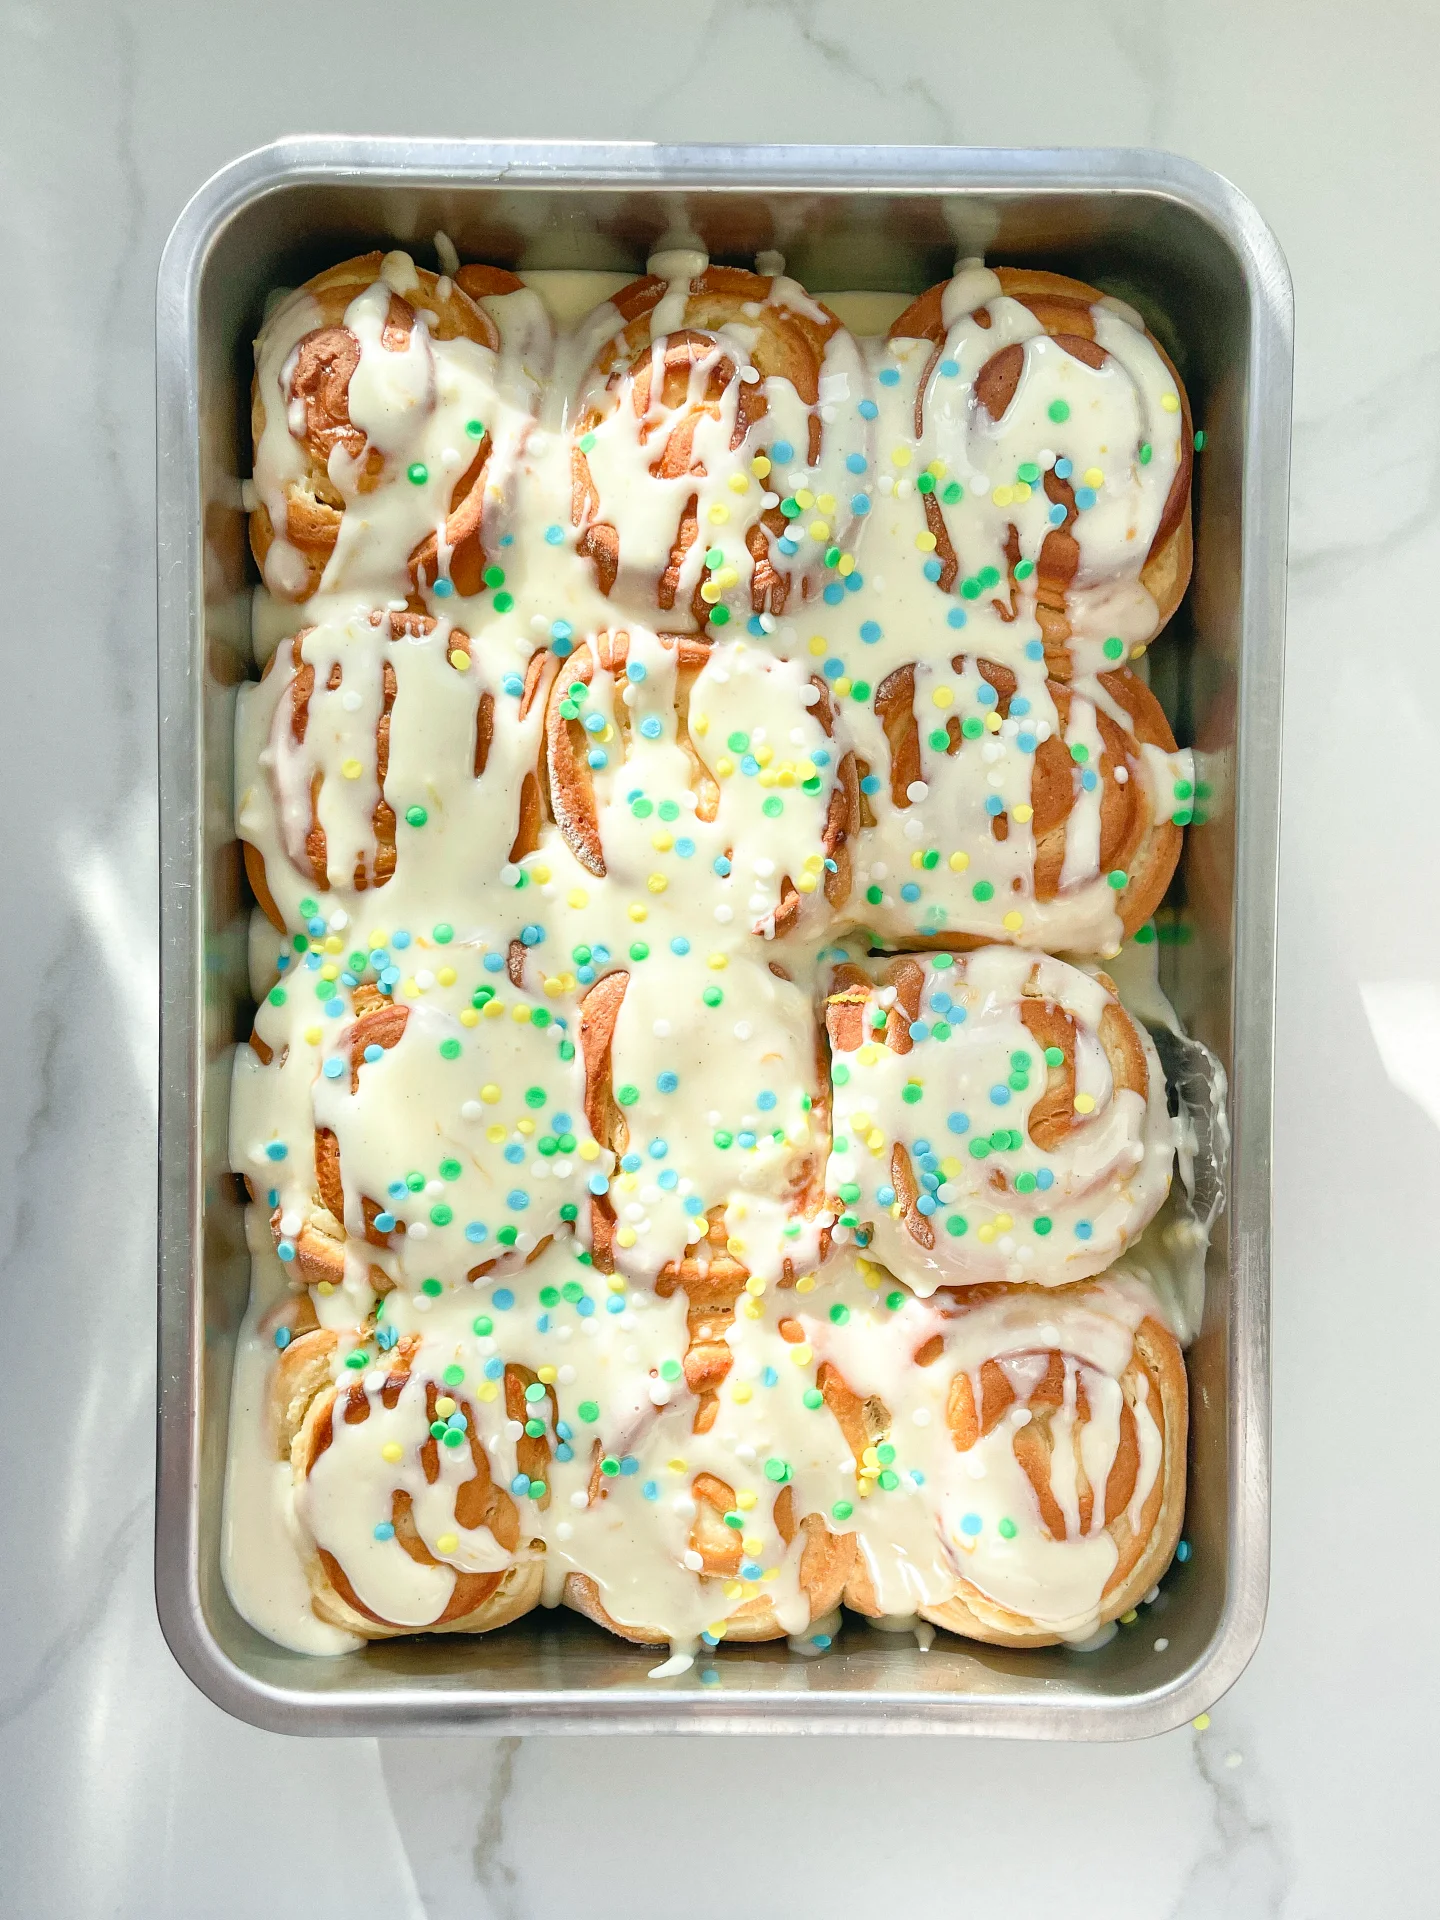
Vanilla Lemon Cream Cheese Rolls

Vanilla Lemon Cream Cheese Rolls

Vanilla Lemon Cream Cheese Rolls

Vanilla Lemon Cream Cheese Rolls

April 17, 2024 by Kimberly

Savor the blissful bite of Vanilla Lemon Cream Cheese Rolls! A heavenly blend of zesty lemon and sweet vanilla wrapped in a soft, fluffy pastry.

3.5 HOURS

INTERMEDIATE

VEGETARIAN

INT.

455 PER ROLL

FLUFFY
SWEET

EVERYDAY

DESSERT
CAKE

SPRING
SUMMER

INTRODUCTION

ABOUT THE RECIPE

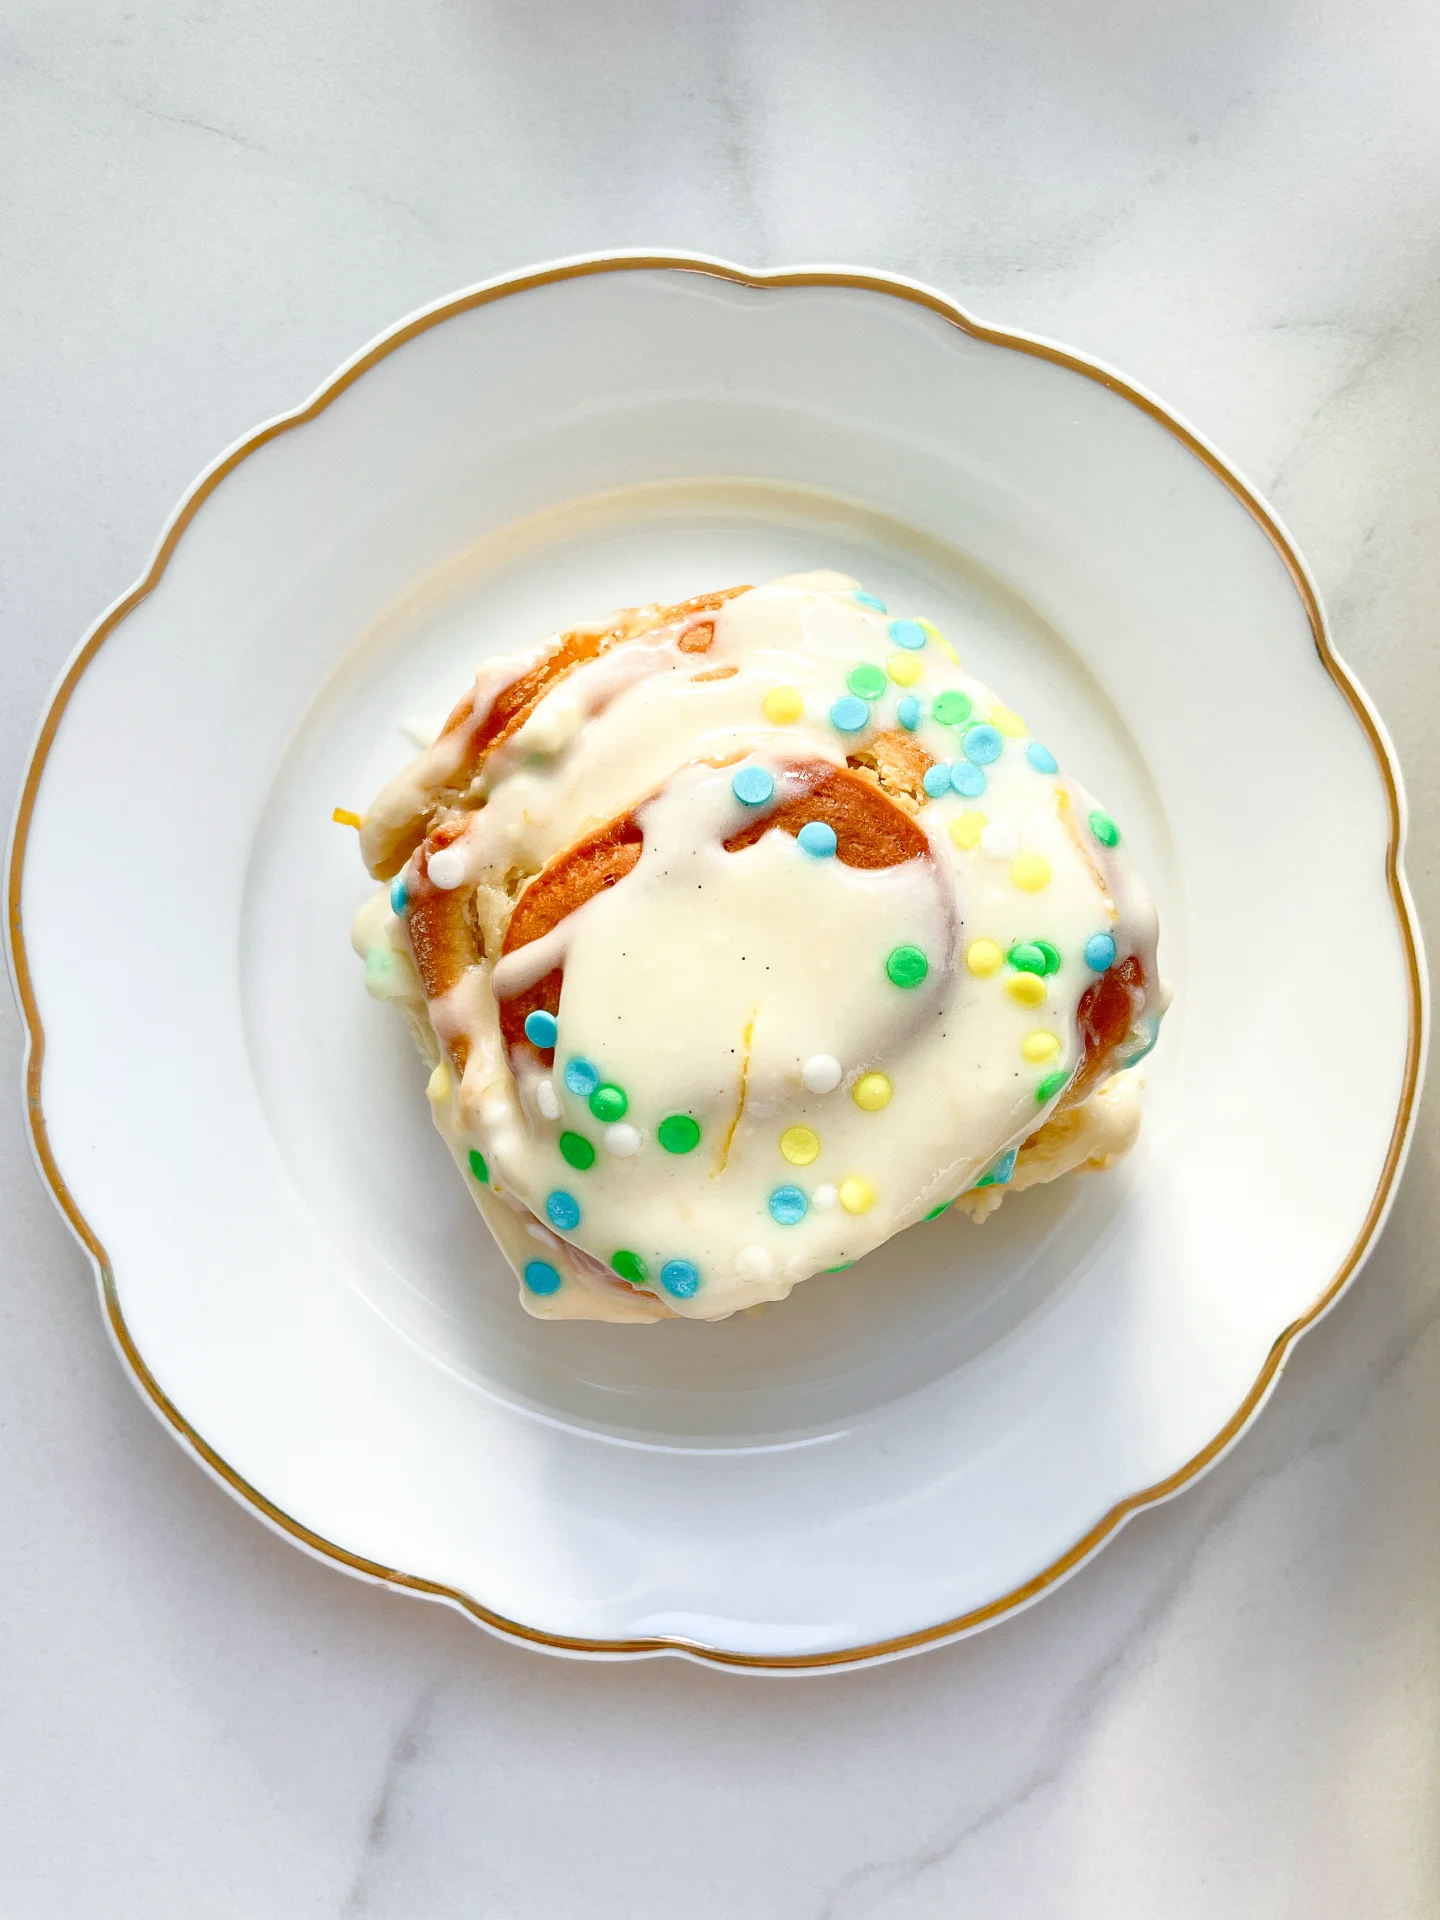
Wake up to the sweet aroma of Vanilla Lemon Cream Cheese Rolls! These gourmet pastries blend the tangy zest of lemon with the rich sweetness of vanilla and cream cheese, all nestled in a tender, fluffy roll. Perfect for indulging your sweet tooth or impressing guests at brunch, these rolls are a delightful twist on classic flavors, creating a memorable experience with every bite.

How to serve:
They’re perfect alongside your morning coffee or as an afternoon treat. For an extra special touch, garnish with lemon zest or thin lemon slices. These rolls are sure to be a hit at any brunch, breakfast, or tea time, offering a beautiful balance of flavors and textures.

How to store:
Keep leftover Vanilla Lemon Cream Cheese Rolls in an airtight container in the refrigerator for up to 4 days.

Hi, I'm Kimberly!

Hi, I'm Kimberly.

A passionate food lover who believes in the magic of homemade deliciousness that spreads love and warmth. Join me on this culinary adventure as I prepare wonderful dishes and let’s spread some happiness together!

Kimberly the Zett Signature

If you want to get to know me better, click here!


Vanilla Lemon Cream Cheese Rolls
„Let’s make a piece of happiness“

INGREDIENTS

FOR 12 ROLLS

DOUGH

  • 550g all-purpose flour (the germans can use type 550) (4.5 cups)
  • 250ml whole-fat milk (1 cup)
  • 50g white sugar (1/4 cup)
  • 75g butter (1/3 cup)
  • 1 egg
  • 20g fresh yeast (0.7 oz)
  • pinch of salt

FILLING

  • 300g cream cheese (1 + 1/3 cup)
  • 60g powdered sugar (1/2 cup)
  • 100g lemon curd (1 cup)
  • 1 tbsp cornstarch 
  • 1/2 tsp vanilla extract

GLAZE

  • 150g powdered sugar (1.5 cups)
  • 50g butter (1/4 cup)
  • 150g cream cheese (2/3 cup)
  • zest of one lemon
  • juice of half a lemon
  • 1/2 tsp vanilla extract
  • funfetti sprinkles
Vanilla Lemon Cream Cheese Rolls
}

ACTIVE: –

PASSIVE: –

PREPARATIONS

Recommended Equipment
  • medium-sized bowl
  • small pot (or microwave)
  • rolling pin
  • baking dish – my used measurements were 20x26cm (8×10 inch)
  • whisk
  • sewing thread
  • none
}

ACTIVE: 25 min

PASSIVE: 3 hrs

COOKING

1. First, in a medium-sized bowl, stir together the filling. Mix 300g of cream cheese, 60g of powdered sugar, 1 tsp of vanilla extract, and 1 tbsp of cornstarch and put it in the fridge.

2. Next, prepare the dough. In a small pot, warm 250ml of full-fat milk to no more than 38°C (100°F) so the yeast isn’t killed. Take 1 tbsp from the 50g (1/4 cup) of sugar intended for the dough and add it to the warm milk along with the yeast. Stir everything well with a whisk until the yeast is completely dissolved in the milk. Set aside.

3. In a large bowl, add flour, the remaining sugar, the soft butter, an egg, and a pinch of salt. Mix everything using your hands. Now pour in the yeast-milk mixture and knead everything into a soft, pliable dough for a good 10 minutes. Cover the bowl with a damp towel or cling film and let it rise for 2 hours at 20°-23°C (68°-73°F). The dough should double in volume.

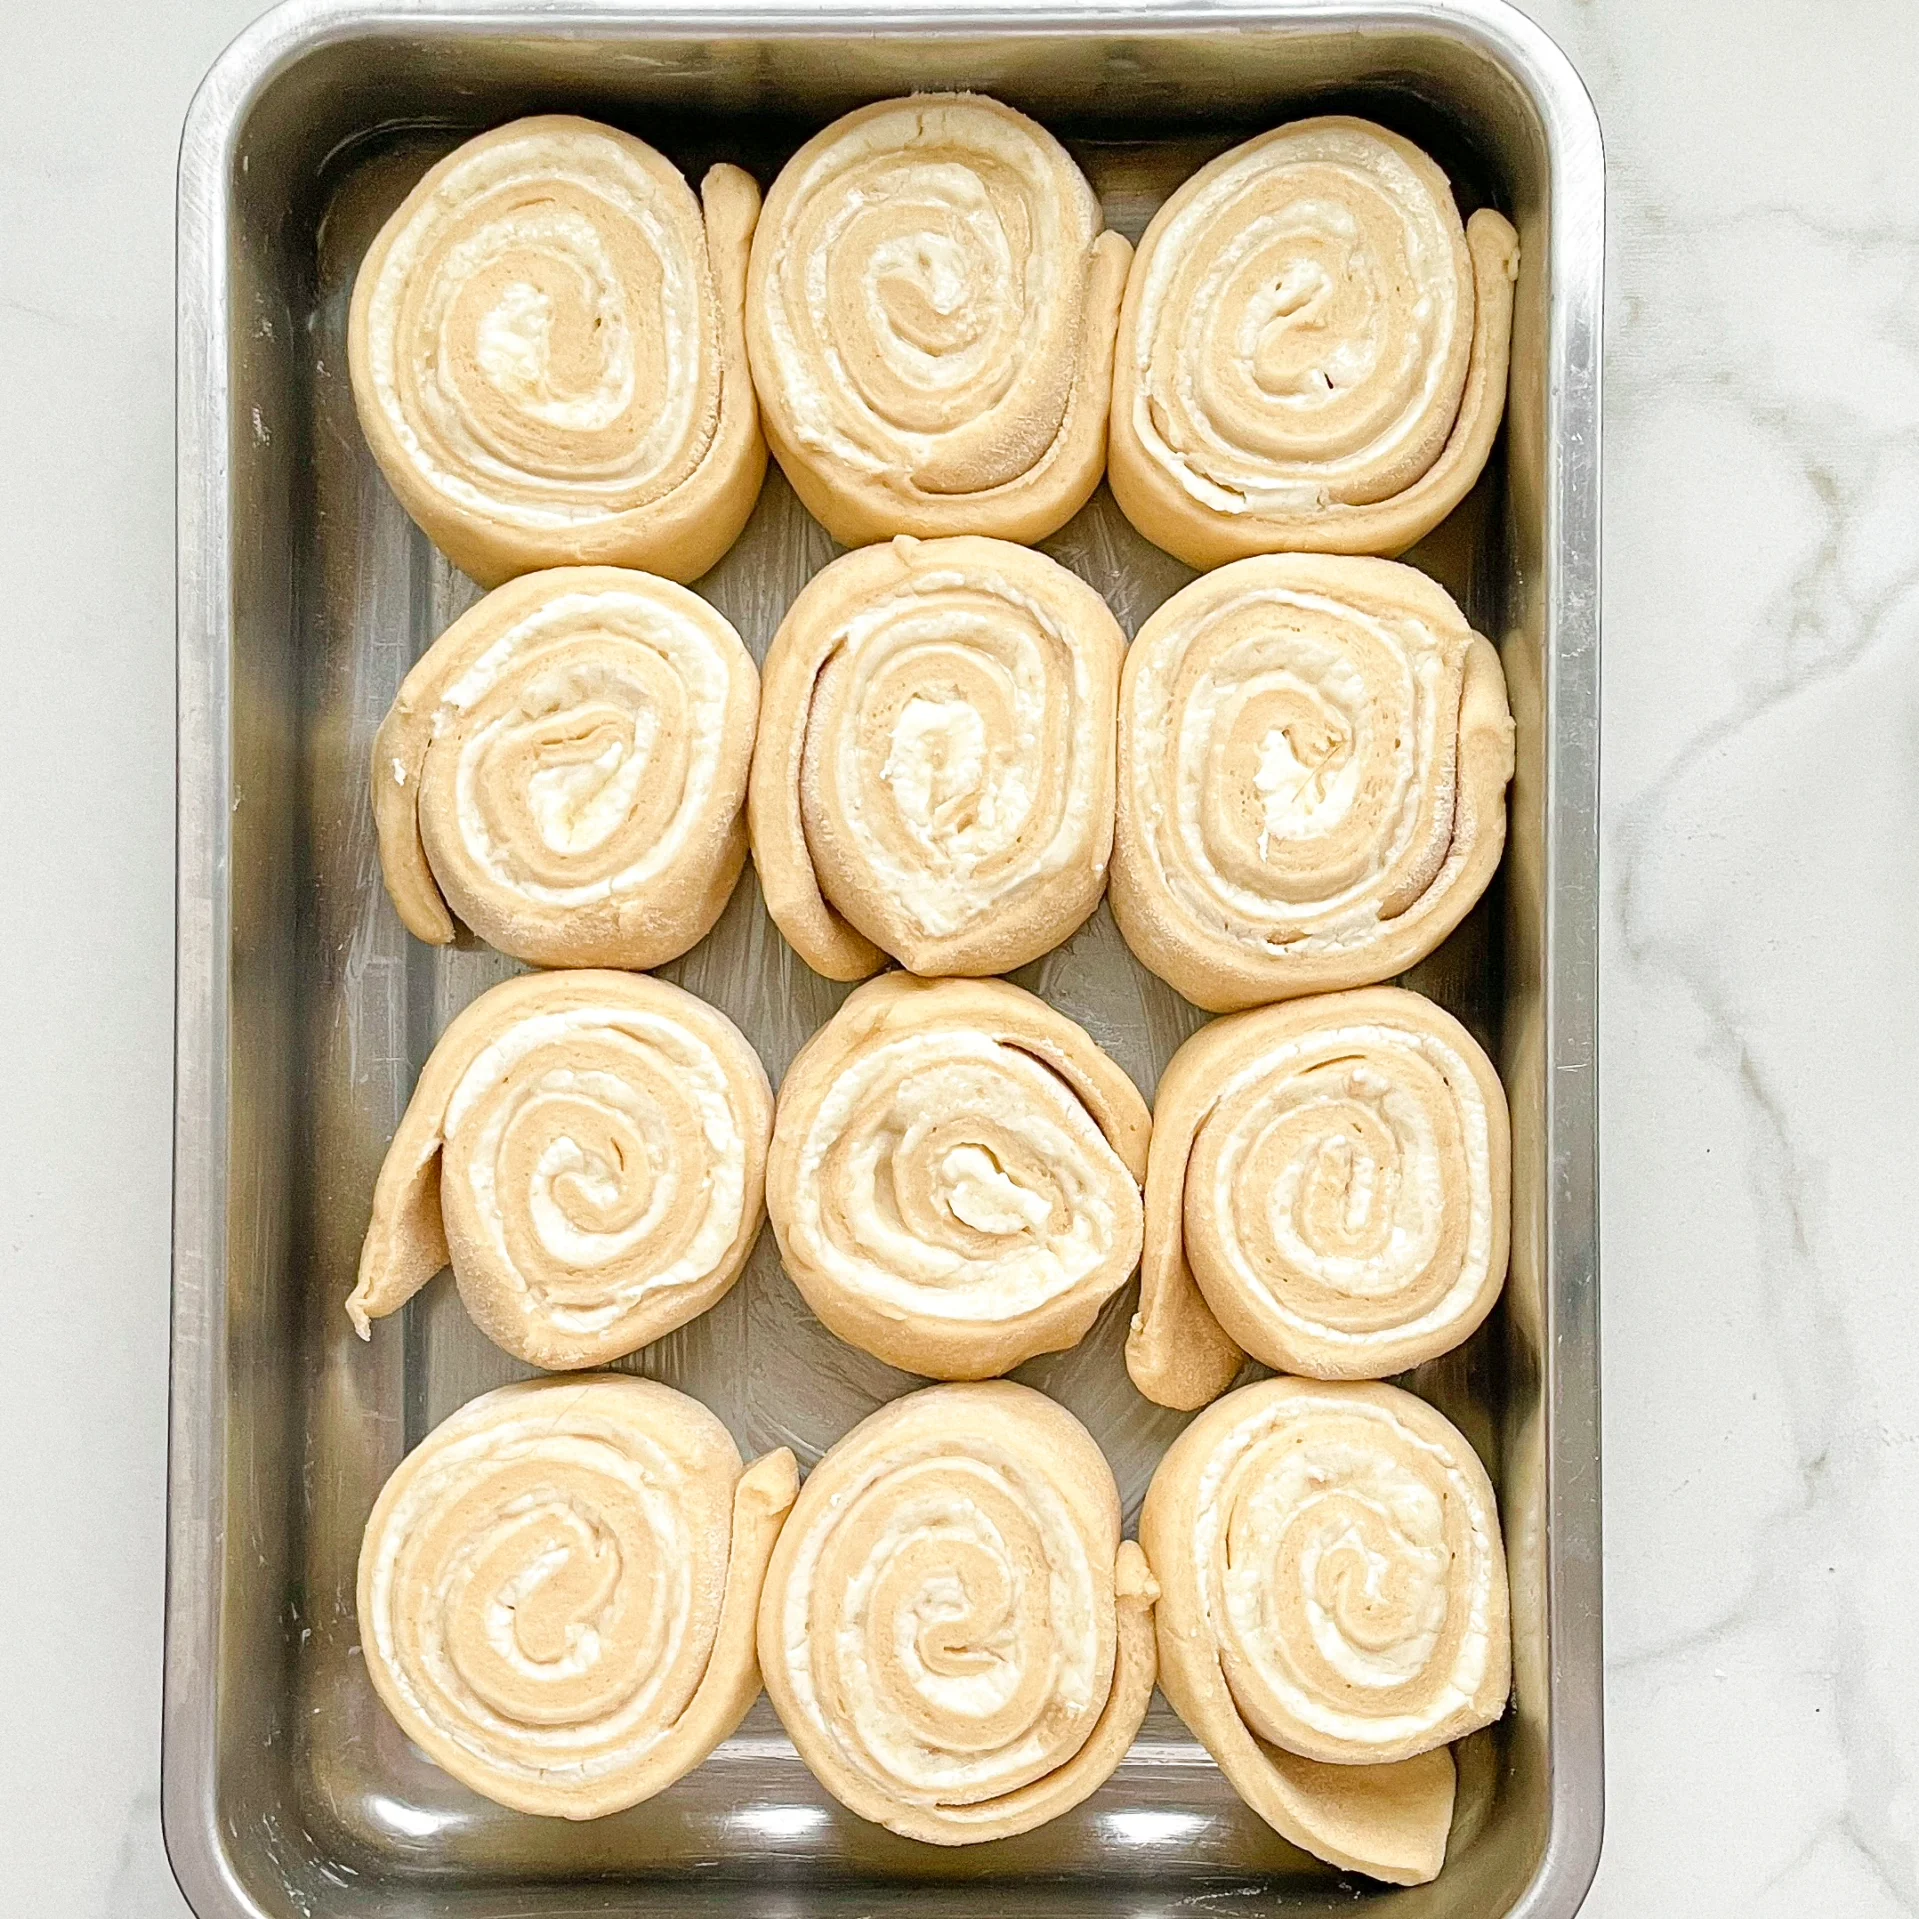
4. After the two hours sprinkle some flour on a clean work surface and place the dough on it. Dust a bit more flour on the dough and roll it out until it’s rectangular and about 1 cm (1/2″) thick throughout.

5. Take the cream cheese filling out of the fridge and spread it evenly over the dough. Now also spread the lemon curd over the cream, working it in a bit – depending on the consistency of the curd.

6. Start rolling up the dough from the longer side. Keep it nice and loose, not too tight, or the filling might ooze out.

7. Cut a long piece of sewing thread and slide it under the middle of the roll. Gently lift both ends of the thread, cross them over the top, and pull downwards, cutting the dough cleanly without squishing it. Proceed with the entire roll, making a total of 12 buns.

8. Place the individual rolls in a baking dish, cover again with the damp towel, and let them rise for another 15 minutes.

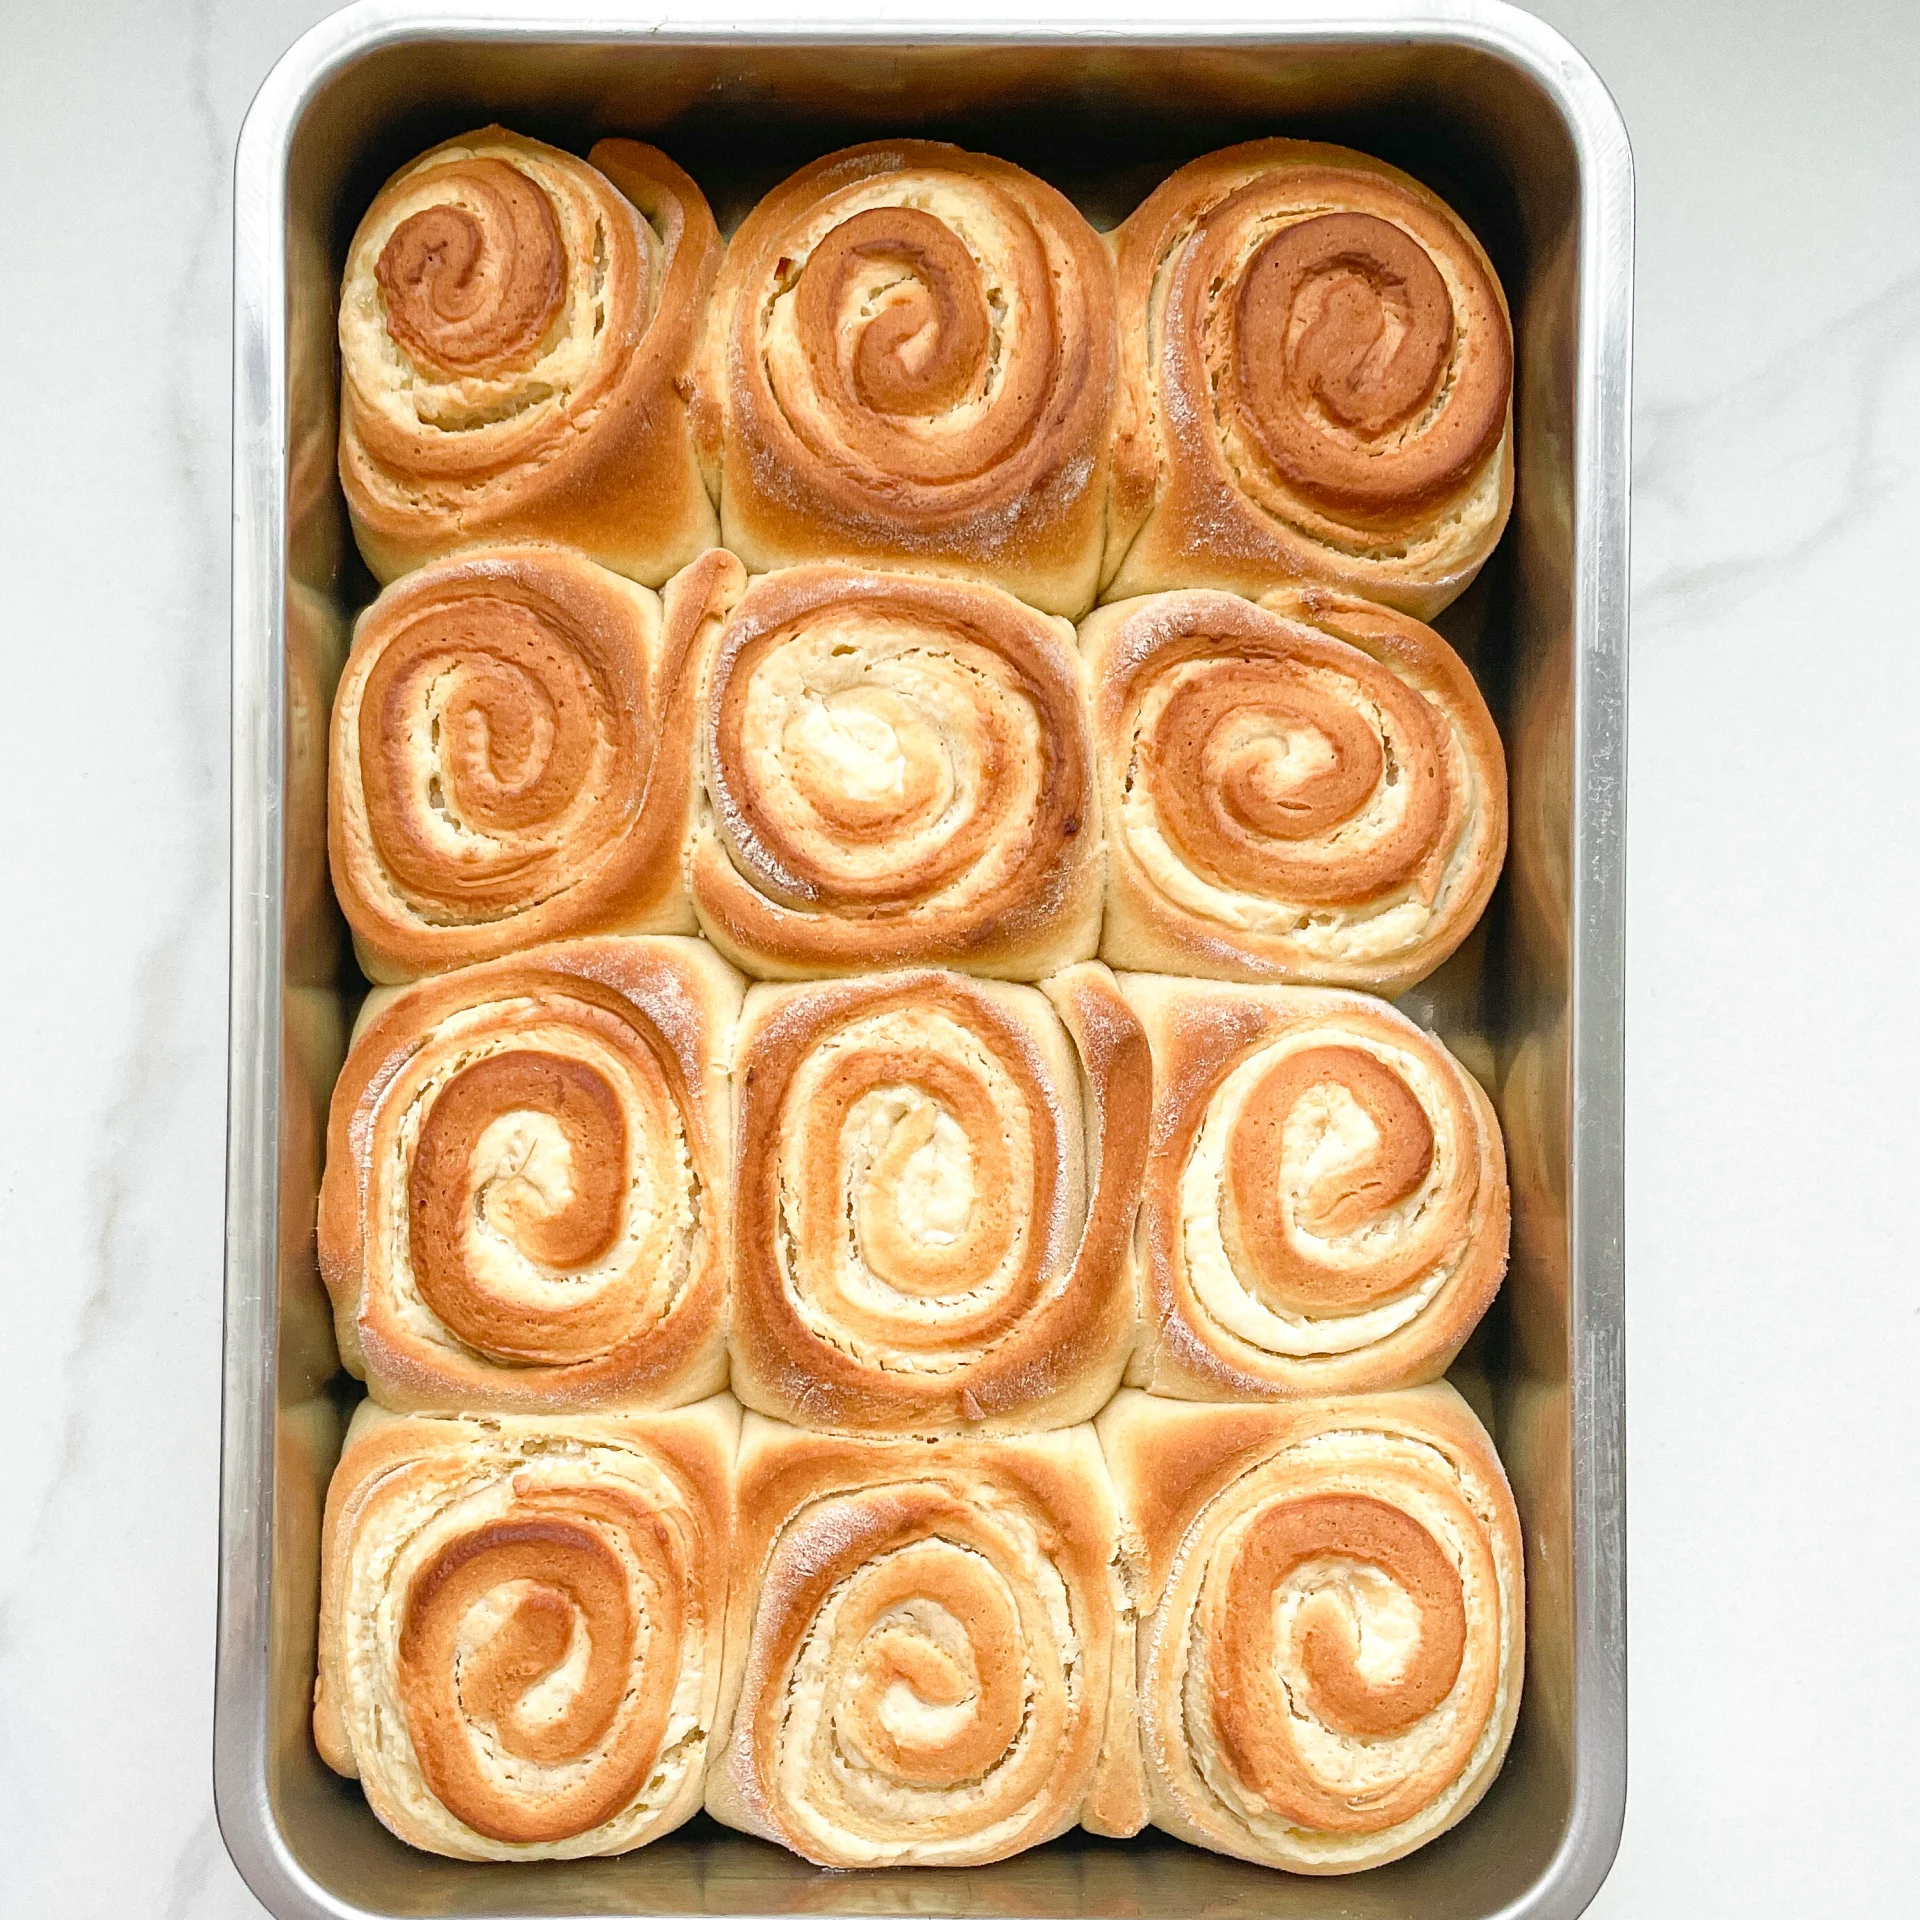
9. Meanwhile, preheat the oven to 180°C (356°F).

10. After the final 15 minutes of rising, bake the buns in the oven for 30 minutes. They should turn a golden color.

11. Let the buns cool completely. In the meantime, whisk together the glaze made of 150g (1.5 cups) powdered sugar, 150g (2/3 cups) cream cheese, 50g (1/4 cup) soft butter, 1 tsp vanilla extract, the zest of one lemon, and the juice of half a lemon.

12. Once the buns are cool, spread the glaze all over them and, if you like, sprinkle some funfetti on top – but that’s optional 😉

NOTE: The calorie information may vary depending on the product used, country and region.

German Bacon Pancake

German Bacon Pancake

German Bacon Pancake

German Bacon Pancake

April 15, 2024 by Kimberly

Experience a German classic! A perfect blend of crispy bacon and fluffy pancake, it’s the dinner you’ve been dreaming of.

30 MINUTES

EASY

OMNIVORE

GERMAN

512 PER PANCAKE

CRISPY
FLUFFY
COMFORT FOOD

EVERYDAY

DINNER

ALL YEAR

INTRODUCTION

ABOUT THE RECIPE

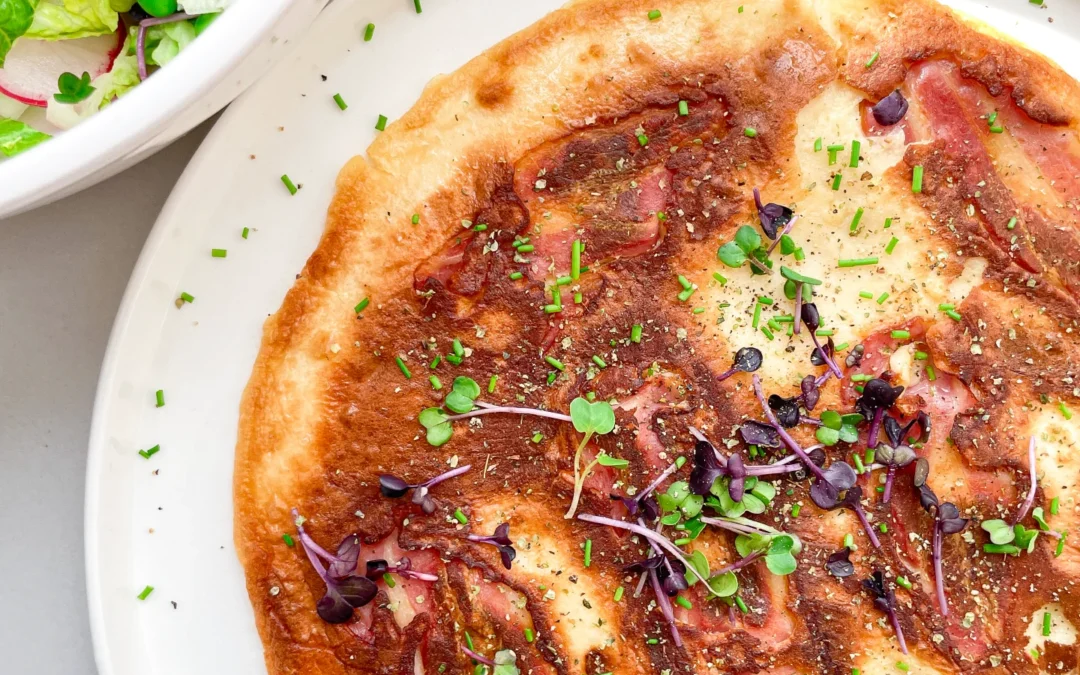
This savory twist on the classic pancake combines the crispiness of bacon with the soft, fluffy texture of pancakes to create a dinner that’s both satisfying and unique. It’s a traditional German dish that has stood the test of time, offering a perfect balance of flavors that will have everyone asking for seconds.

How to serve:
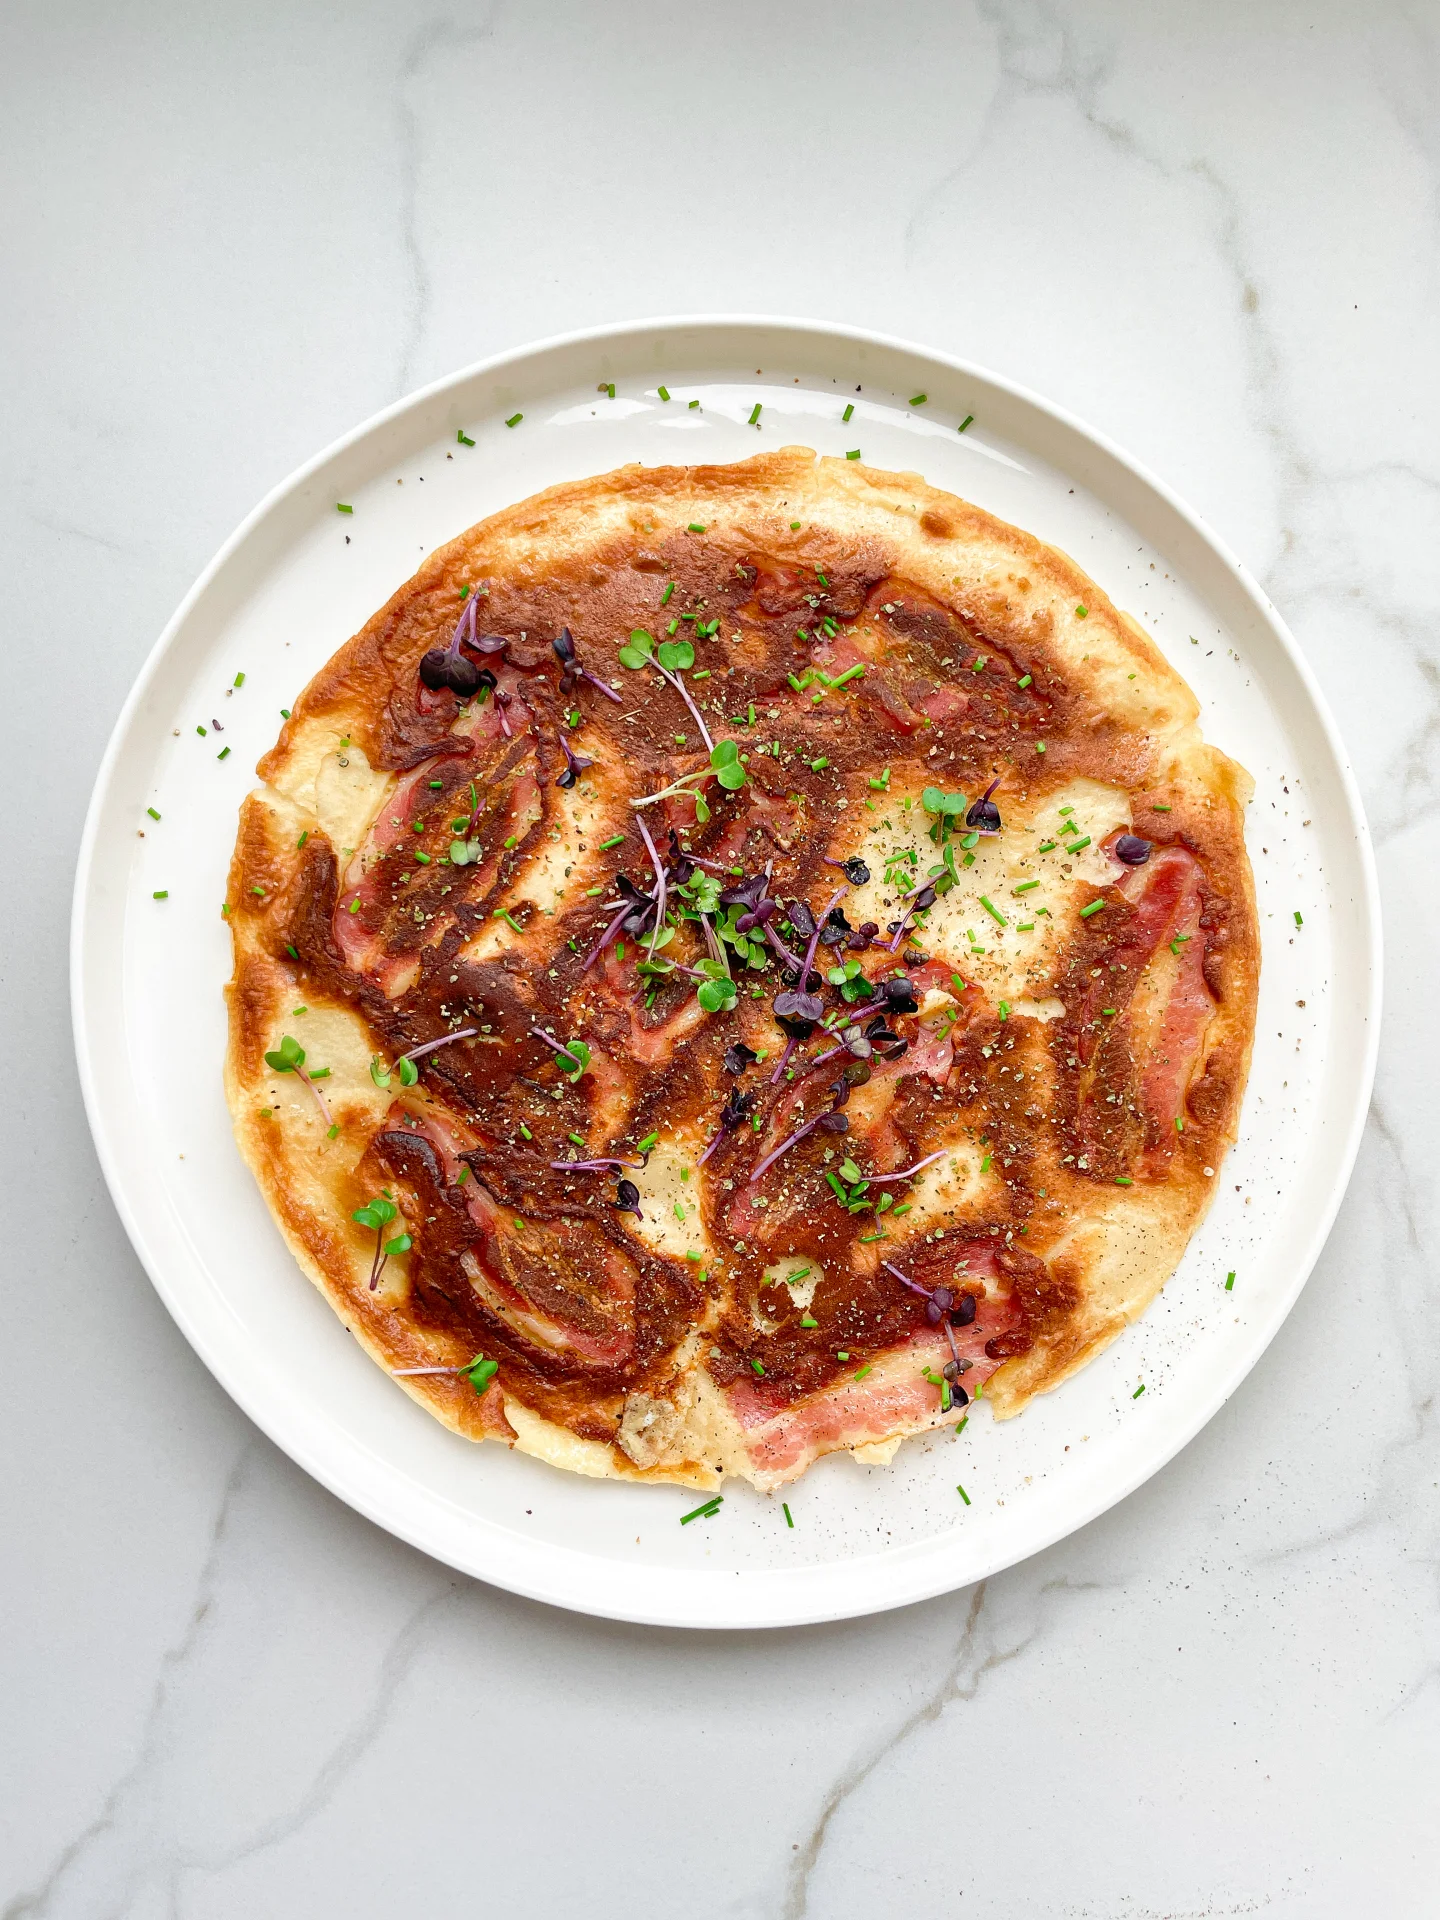
Serve these mouth-watering pancake fresh off the griddle, topped with some micro greens and chives. This dish is perfect for a lazy weeknight dinner or a brunch gathering with friends and family. Pair with a white wine or a side side salad to round out the meal and turn it into a feast fit for any appetite.

How to store:
Store your Bacon Pancake in the refrigerator, tightly covered, for up to one day. Reheat in the oven or on the stovetop to bring back that fresh-from-the-griddle warmth and crispiness.

Hi, I'm Kimberly!

Hi, I'm Kimberly.

A passionate food lover who believes in the magic of homemade deliciousness that spreads love and warmth. Join me on this culinary adventure as I prepare wonderful dishes and let’s spread some happiness together!

Kimberly the Zett Signature

If you want to get to know me better, click here!


German Bacon Pancake
„Let’s make a piece of happiness“

INGREDIENTS

FOR 2 PANCAKES

Batter

  • 125g all-purpose flour (1 cup)
  • 125ml whole-fat milk (1/2 cup)
  • 2 eggs
  • 1/2 tsp salt

FRYING

  • 70g bacon (2.5 oz)
  • 2 tsp clarified butter

TOPPINGS

  • chives
  • cress
  • majoram
  • black pepper
German Bacon Pancake
}

ACTIVE: 2 min

PASSIVE: –

PREPARATIONS

Recommended Equipment
  • sharp knife
  • cutting board
  • medium-sized bowl
  • whisk
  • large frying pan
  • spatula
  • Cut the bacon strips in half or thirds – depending on your preference.
}

ACTIVE: 15 min

PASSIVE: 15 min

COOKING

1. In a medium-sized bowl, whisk together milk and eggs. Now add the salt and flour and beat with the whisk until smooth. Let the batter sit for 10-15 minutes to thicken.

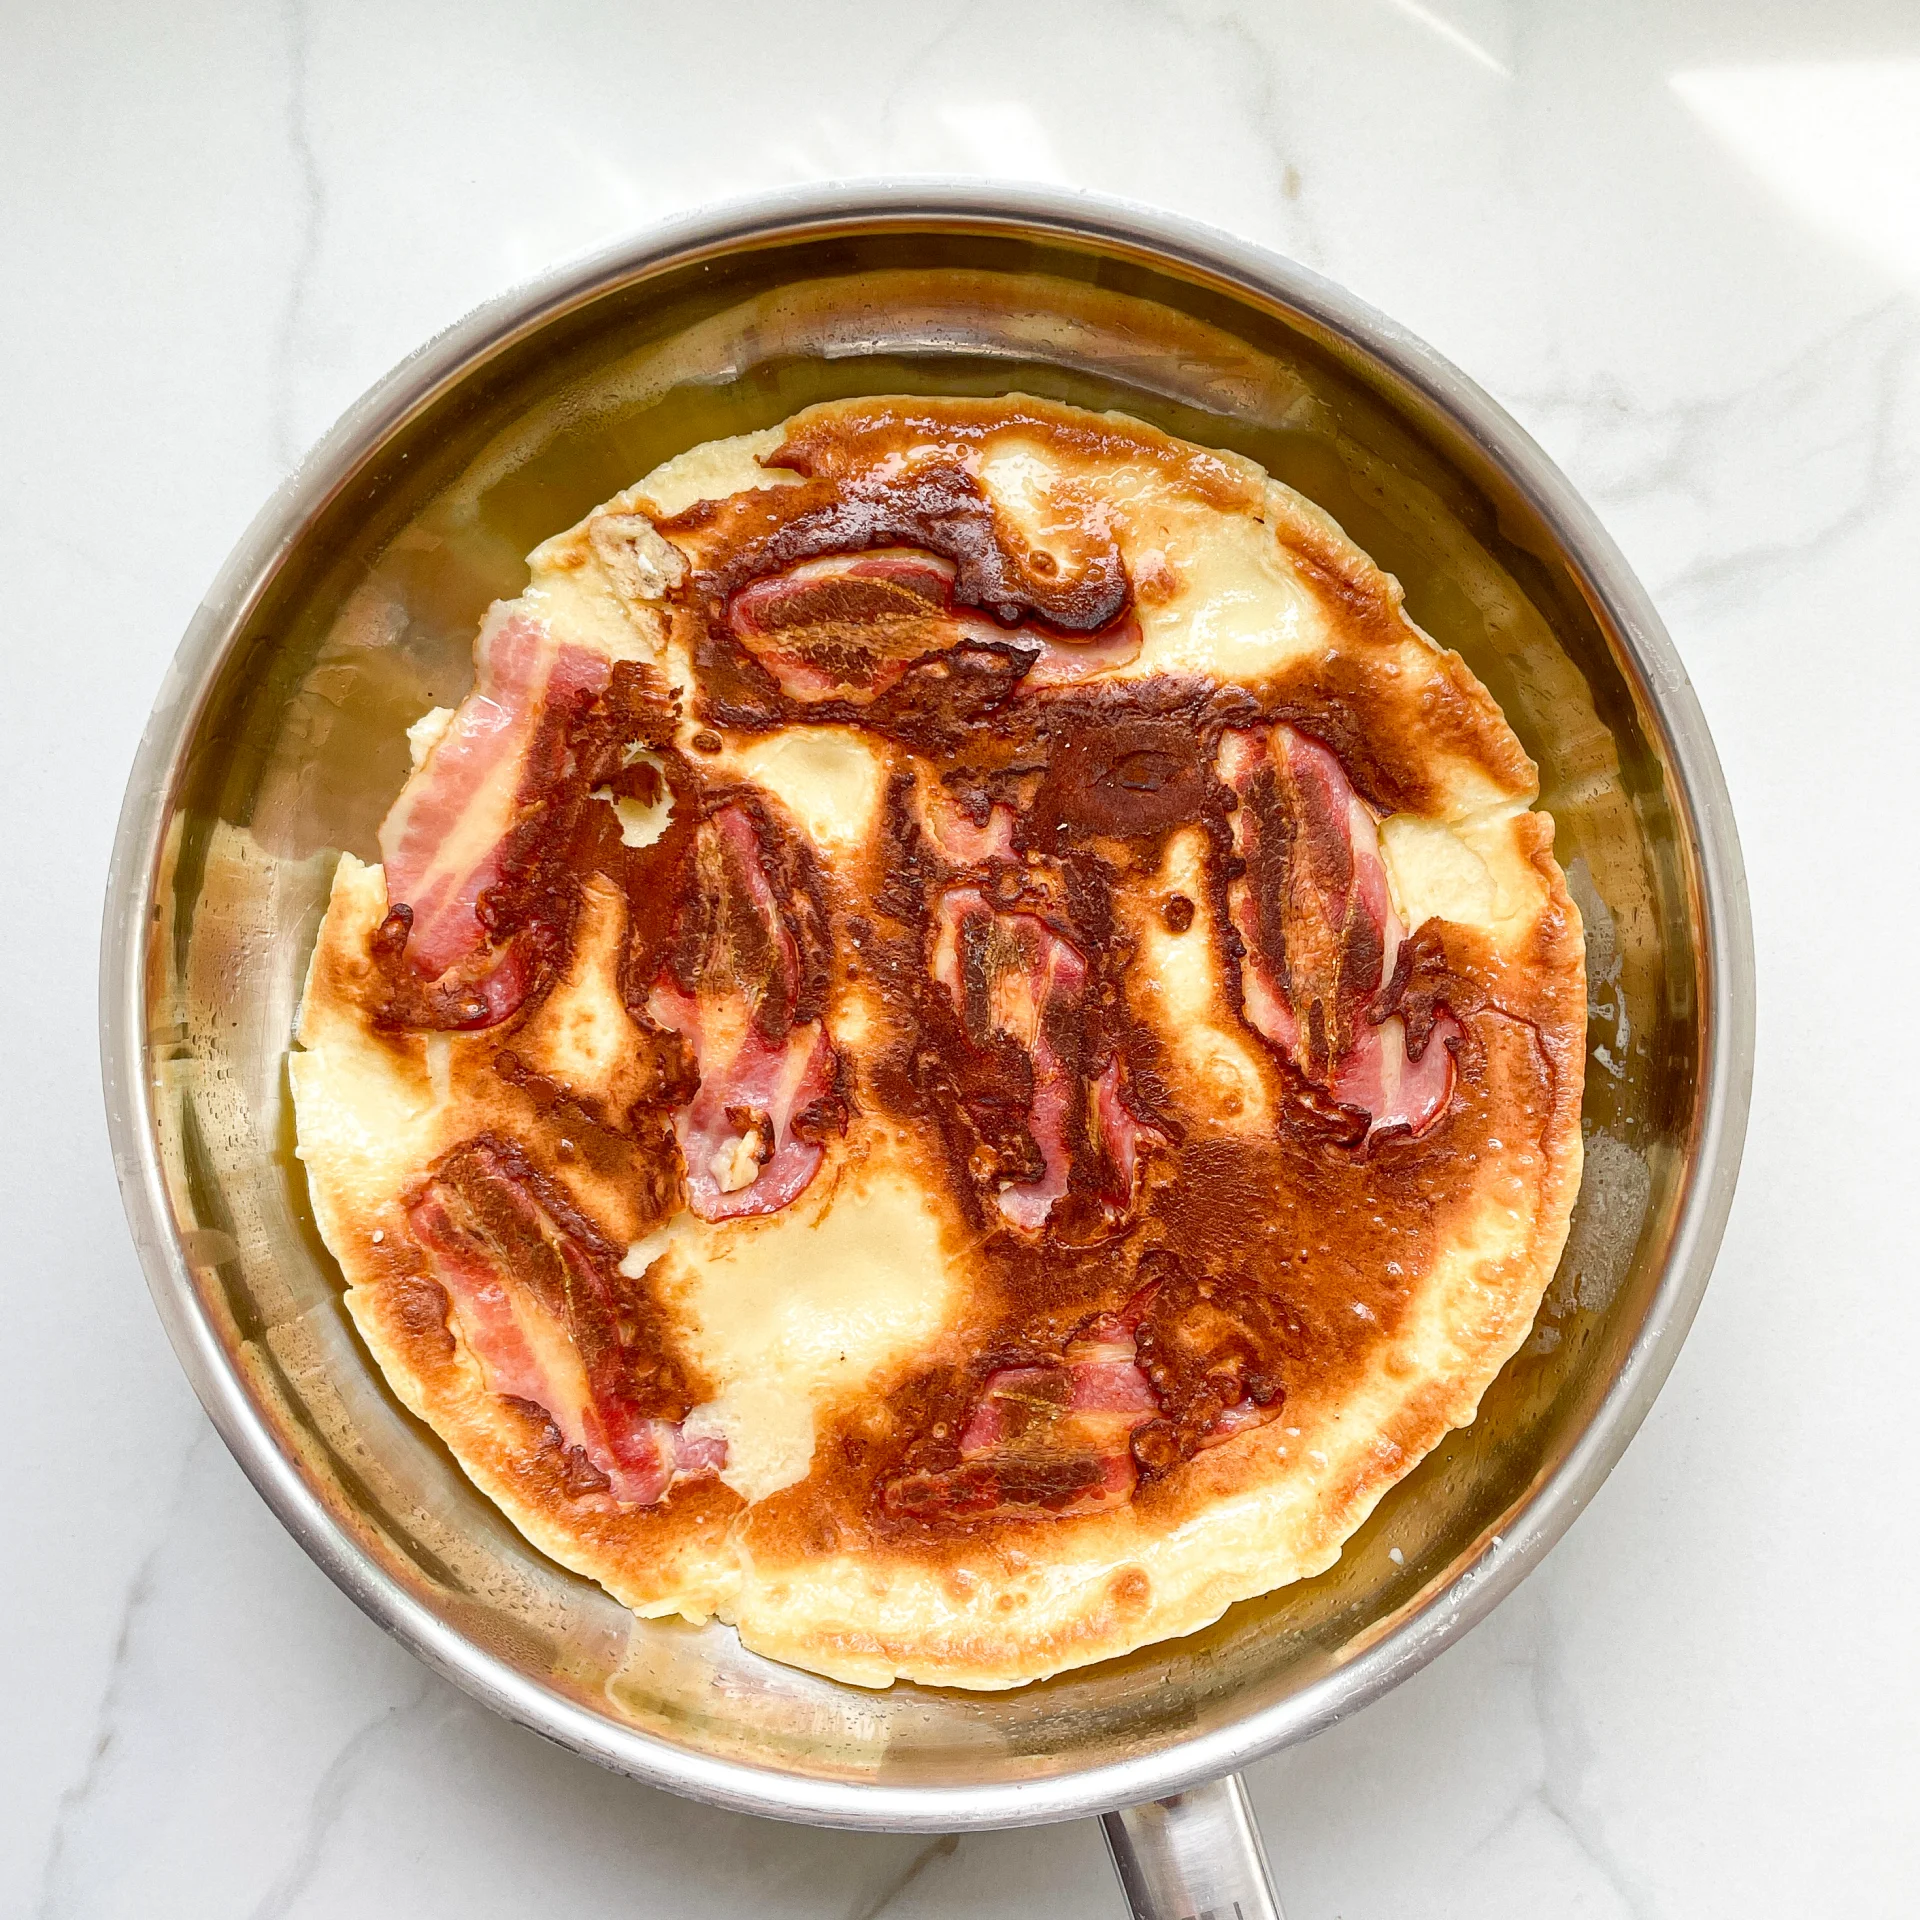
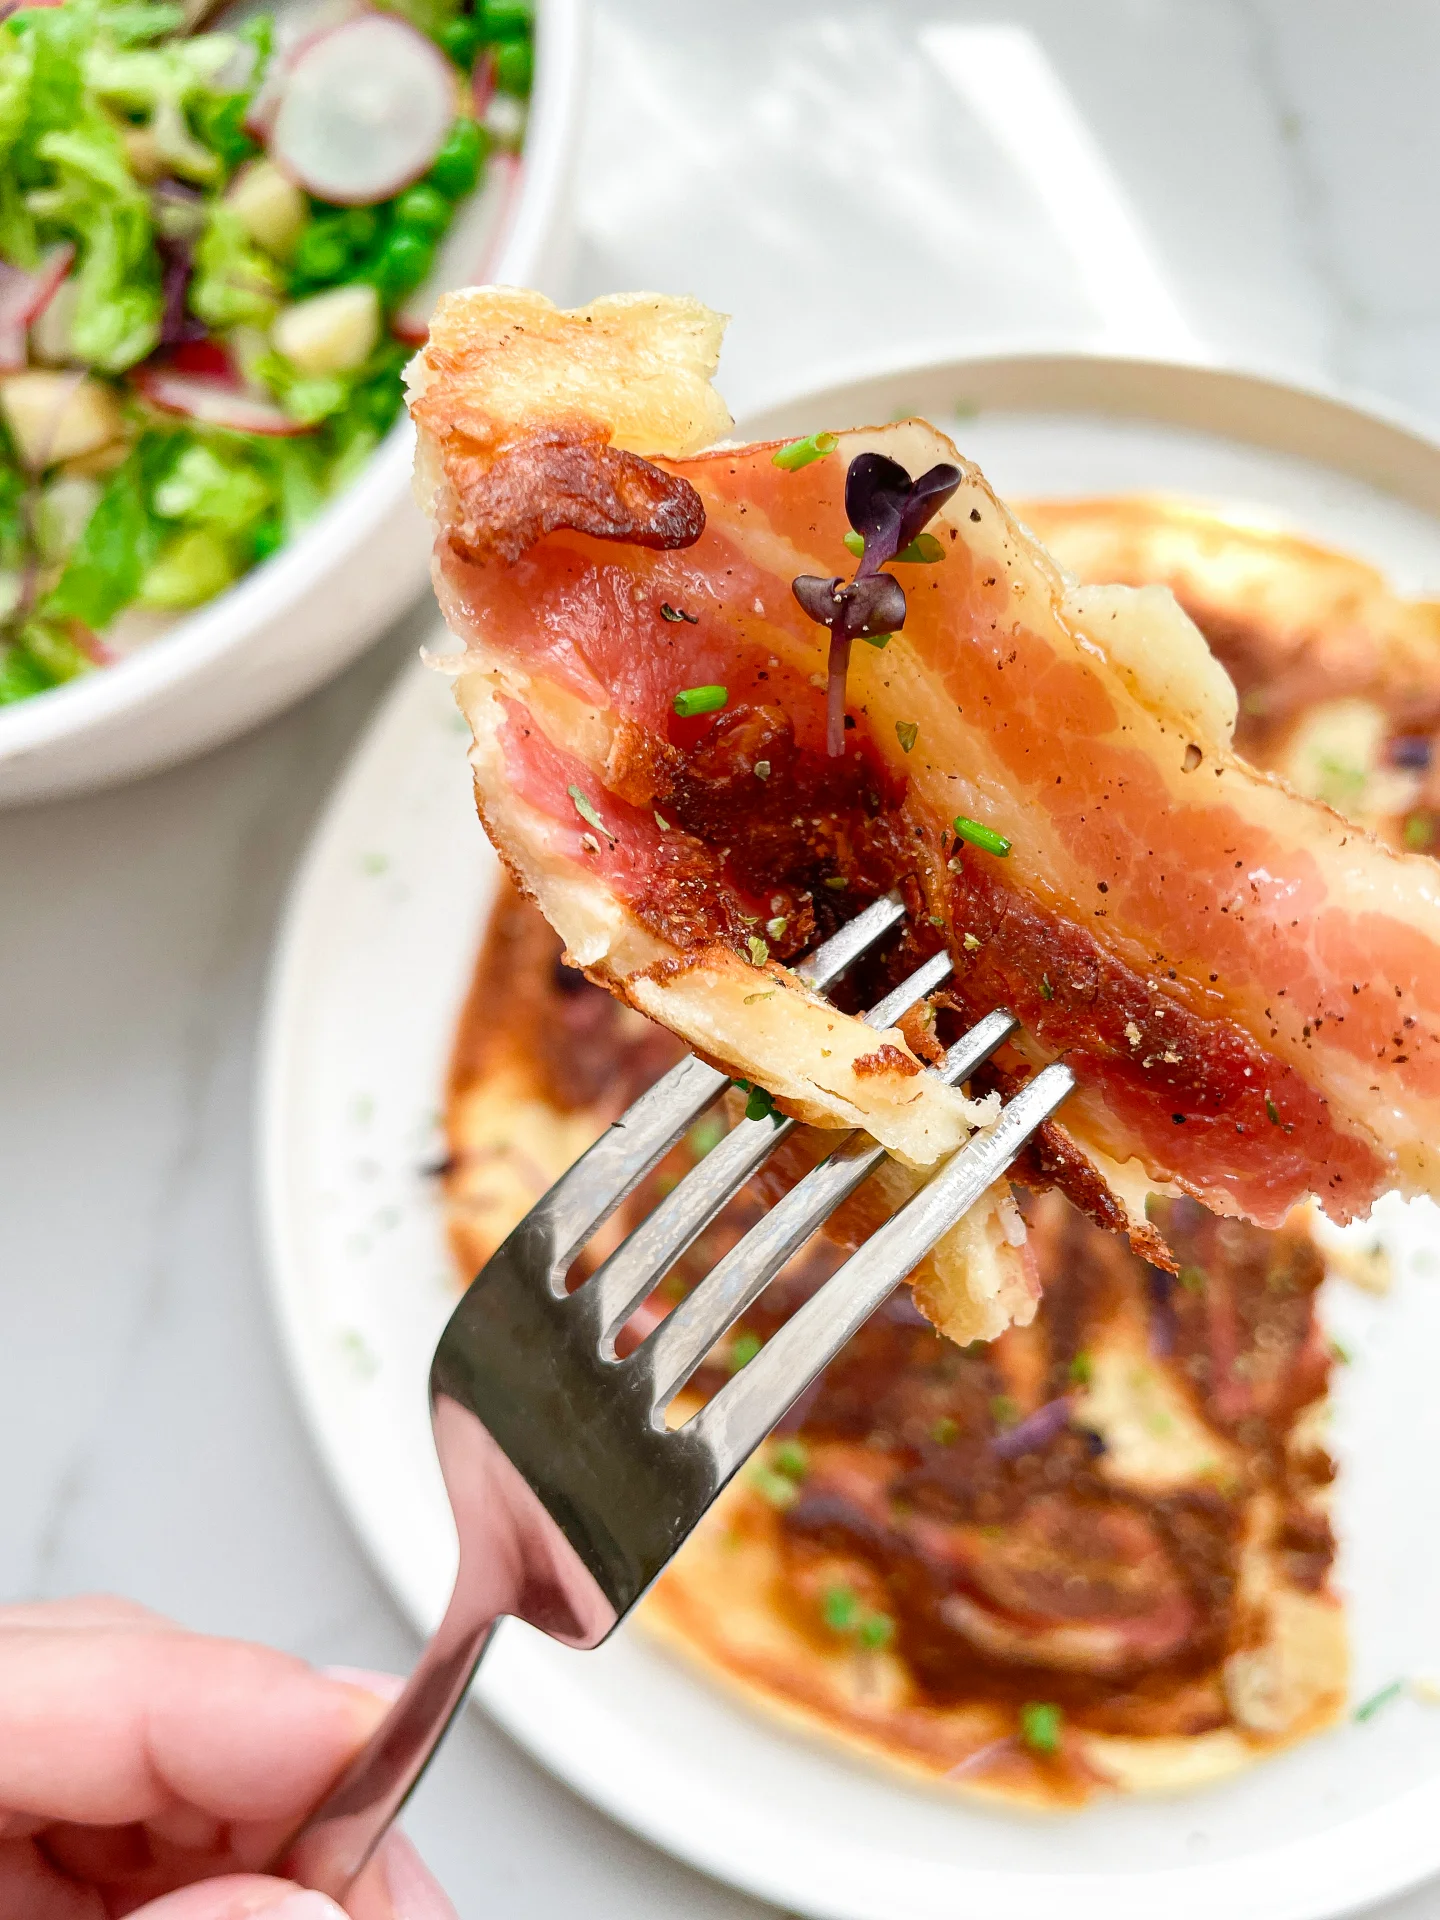
2. Place the bacon slices in a cold pan and cook over medium heat until they start to shrink and turn slightly brown. Then add a teaspoon of clarified butter and continue cooking the bacon for another 2-3 minutes—it should be dark pink but not too crispy.

3. Pour half of the batter over the bacon and let it cook for about 6-8 minutes. The batter should be fully cooked on one side, firm, and barely liquid before flipping.

4. Use a spatula to flip the pancake and cook for another minute on the other side, then transfer to a plate. Serve garnished with marjoram, freshly ground pepper, and microgreens.

NOTE: The calorie information may vary depending on the product used, country and region.