Mango Feta Salad with Passionfruit Cilantro Dressing & Oven-Roasted Corn on the Cob

Mango Feta Salad with Passionfruit Cilantro Dressing & Oven-Roasted Corn on the Cob

Mango Feta Salad with Passionfruit Cilantro Dressing & Oven-Roasted Corn on the Cob

Mango Feta Salad with Passionfruit Cilantro Dressing & Oven-Roasted Corn on the Cob

March 14, 2025 by Kimberly

Sweet, salty, tangy, and fresh!! This is the salad of the season. Juicy mango, creamy cheese, bright herbs, and a citrusy punch that’ll make your taste buds do a little happy dance.

25 MINUTES

EASY

VEGETARIAN

INT.

2 PORTIONS

REFRESHING

EASTER

LUNCH

SPRING
SUMMER

INTRODUCTION

ABOUT THE RECIPE

You know those salads that just hit different? This is one of them. It’s got all the good stuff. Juicy, sun-ripened fruit, salty creamy goodness, a punchy herb dressing, and golden roasted corn that adds the perfect sweet crunch. It’s bright, fresh, and so ridiculously flavorful that you might just eat it straight from the bowl (no judgment). Whether you need a no-fuss summer side or a feel-good meal that’s anything but boring, this one’s got you covered.

How to serve
This salad is giving effortless brunch energy. Throw it on the table with a crusty baguette, maybe some grilled shrimp if you’re feeling fancy, and let everyone dig in. It’s just as good as a light lunch or a colorful side at your next barbecue. Bonus points if you serve it with a chilled glass of white wine.

How to store
Keep leftovers in an airtight container in the fridge for up to one day. Corn is best enjoyed fresh, but you do you.

Hi, I'm Kimberly!

Hi, I'm Kimberly.

A passionate food lover who believes in the magic of homemade deliciousness that spreads love and warmth. Join me on this culinary adventure as I prepare wonderful dishes and let’s spread some happiness together!

Kimberly the Zett Signature

If you want to get to know me better, click here!


Mango Feta Salad with Passionfruit Cilantro Dressing & Oven-Roasted Corn on the Cob
„Let’s make a piece of happiness“
Print
clock clock iconcutlery cutlery iconflag flag iconfolder folder iconinstagram instagram iconpinterest pinterest iconfacebook facebook iconprint print iconsquares squares iconheart heart iconheart solid heart solid icon
Mango Feta Salad with Passionfruit Cilantro Dressing & Oven-Roasted Corn on the Cob

Mango Feta Salad with Passionfruit Cilantro Dressing & Oven-Roasted Corn on the Cob


5 Stars 4 Stars 3 Stars 2 Stars 1 Star

No reviews

  • Author: Kimberly
  • Total Time: 25 min
  • Yield: 2 1x

Description

RECOMMENDED EQUIPMENT

  • small bowl
  • kitchen brush
  • large bowl
  • sharp knife
  • cutting board

Ingredients

Units Scale

CORN ON THE COB

SALAD

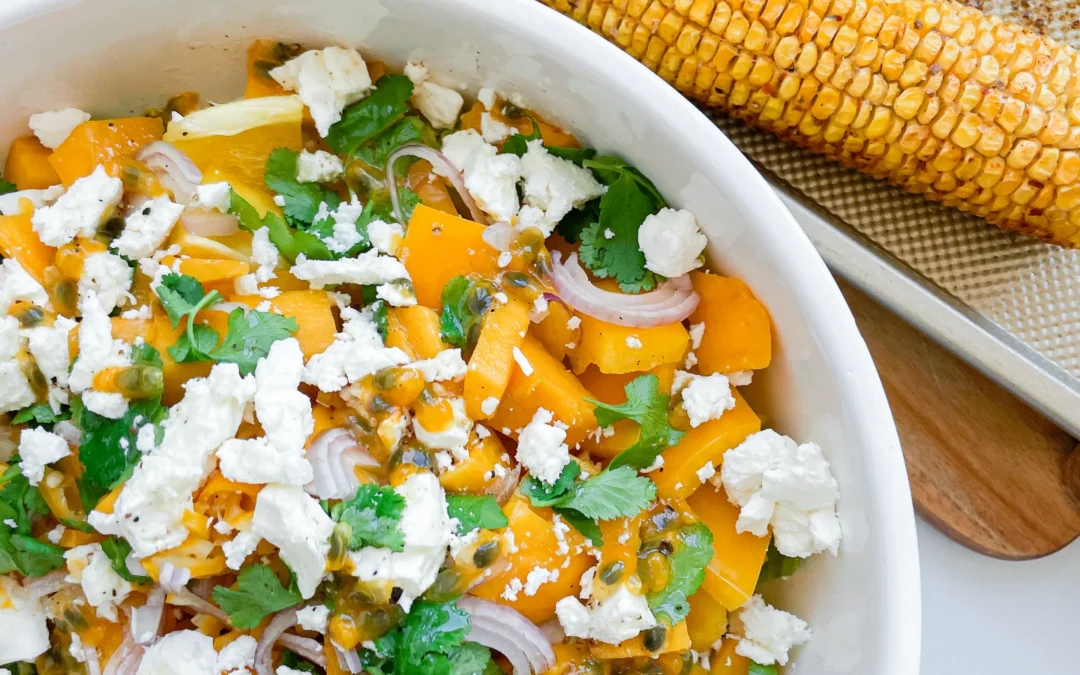
  • 150 grams white cabbage
  • 100 grams romaine lettuce
  • 1 mango
  • 1 yellow bell pepper
  • 1 shallot
  • 100 grams feta cheese
  • 1/2 fresh yellow chili
  • handful fresh cilantro
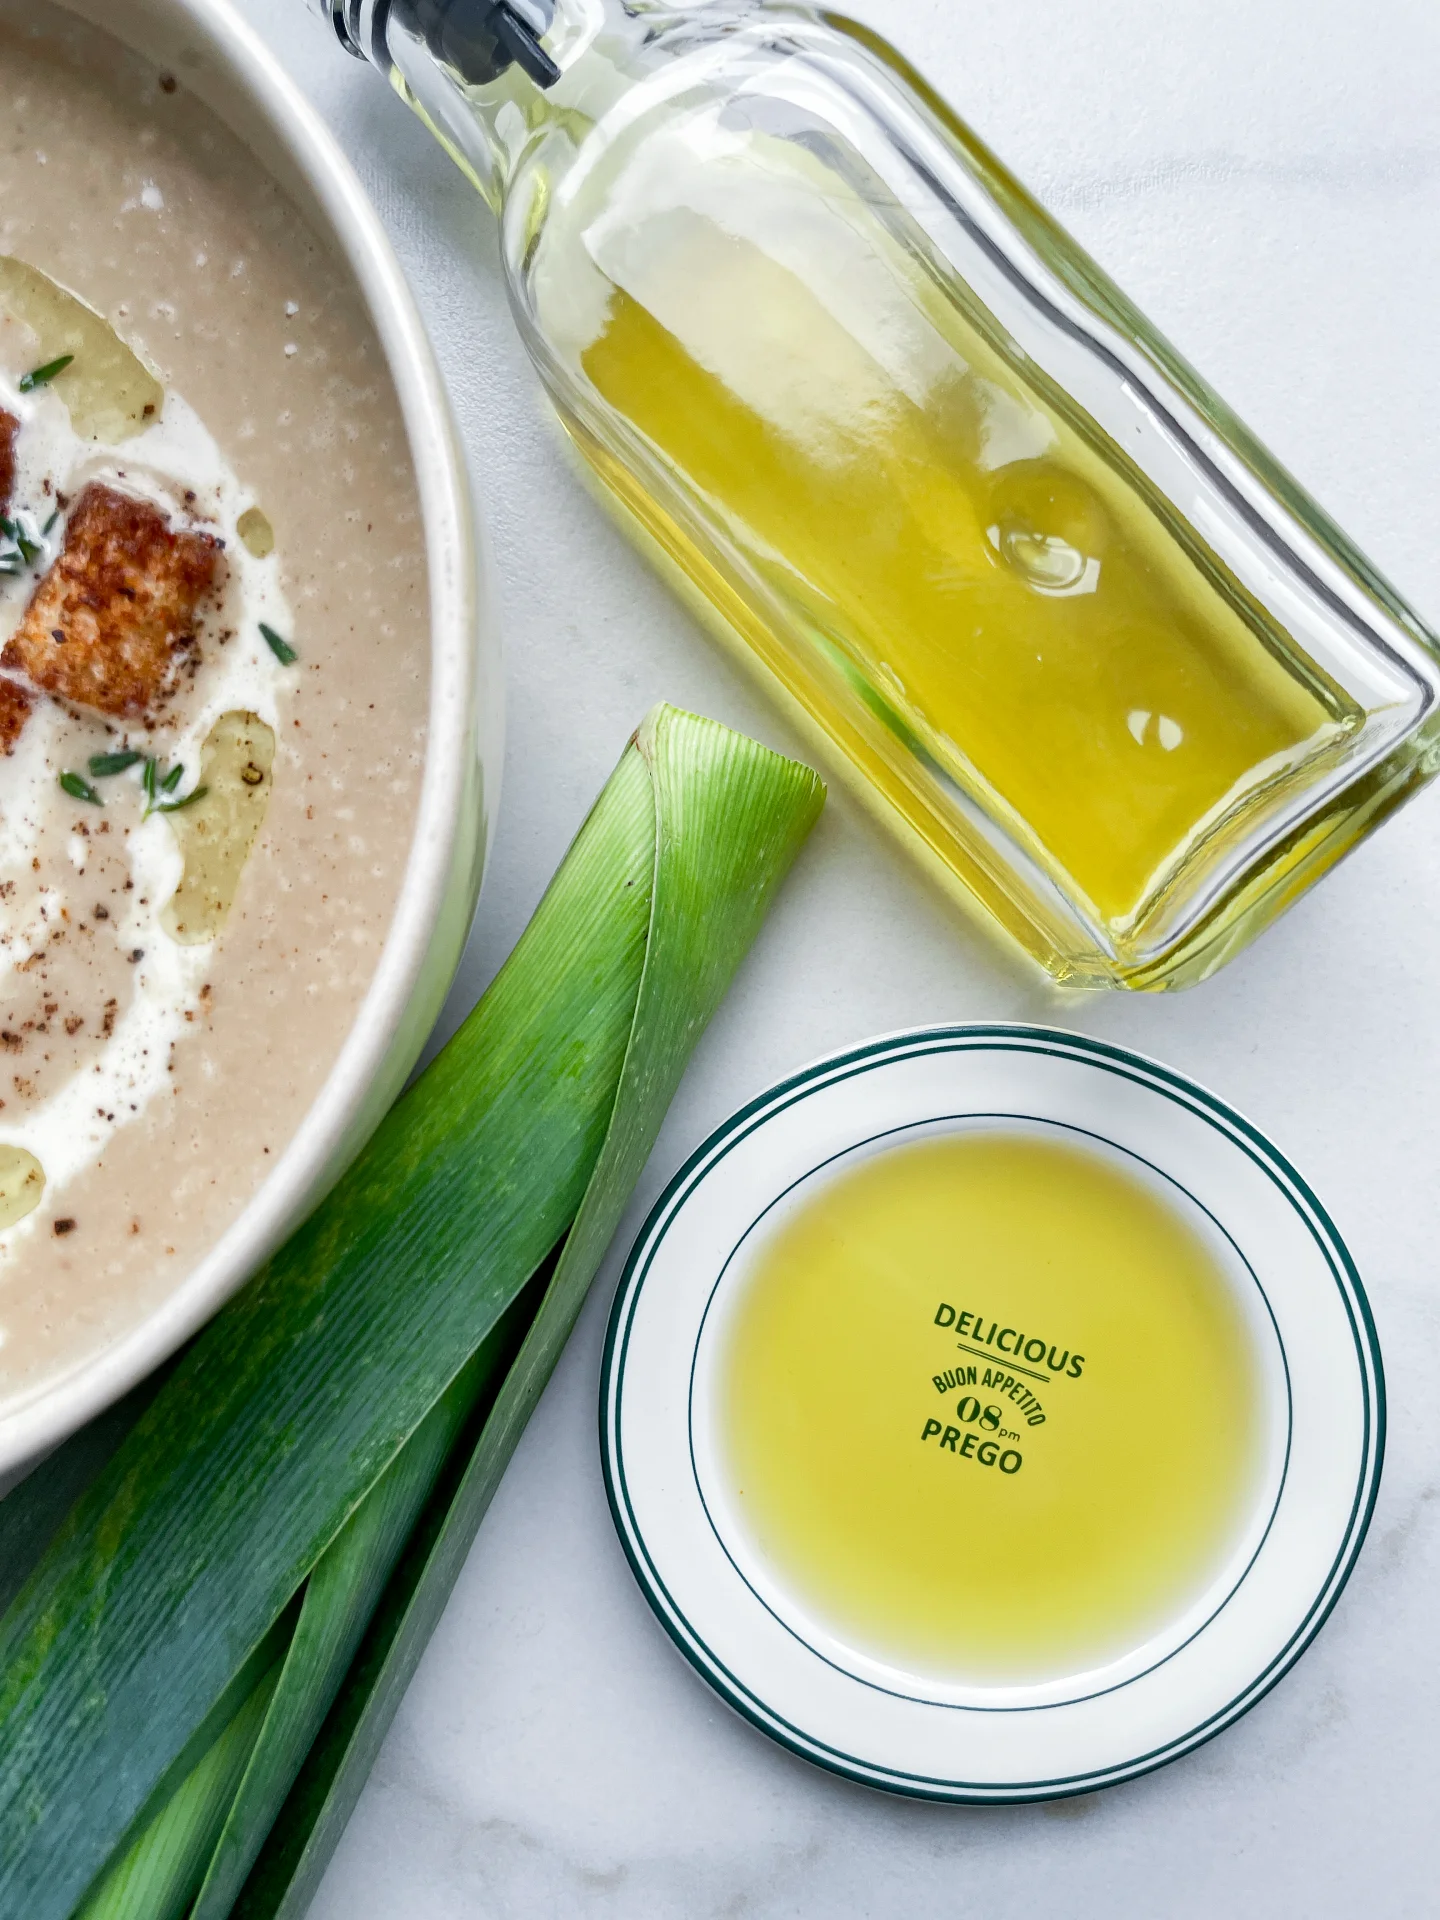
DRESSING

  • 3 tbsp olive oil
  • juice of 1 lime
  • 1 passionfruit
  • salt & pepper to taste

Instructions

  1. Prepare the corn first. Mix the butter with Cajun seasoning, rub it all over the corn, and place them on a baking sheet. Roast in a preheated oven at 210°C / 410°F for about 20 to 30 minutes until golden brown and fragrant.
  2. While the corn is roasting, make the salad. Thinly slice the cabbage and romaine lettuce, wash thoroughly, and place them in a large salad bowl.
  3. Peel and chop the mango into pieces. Cut the yellow bell pepper into chunks. Thinly slice the shallot and finely chop the yellow chili. Pick the cilantro leaves off the stems and tear them lightly. Add everything to the salad bowl, then crumble the feta over the top.
  4. Mix olive oil, lime juice, passionfruit pulp, salt, and pepper in a small bowl. Set aside.
  5. Once the corn is done, take it out of the oven. Drizzle the dressing over the salad and toss well. Divide the salad between two plates and serve each with a roasted corn cob.
  • Cook Time: 25 min

Cheese Fondue Oil

Cheese Fondue Oil

Cheese Fondue Oil

Cheese Fondue Oil

December 23, 2024 by Kimberly

Velvety and savory, this infused oil captures the essence of garlic and cheese, delivering pure fondue vibes. Drizzle it, dip with it, or savor it – it’s a total flavor bomb.

40 MINUTES

ADVANCED

VEGETARIAN

INT.

40 PER TSP

UMAMI

MICHELIN

OIL

WINTER

INTRODUCTION

ABOUT THE RECIPE

This oil was a fun experiment that turned into a total win! Infused with Gruyere, Parmesan, and garlic, it packs a cheesy, savory punch that’s perfect for dipping or drizzling. While the salt didn’t quite come through, the rich flavors of garlic and cheese infused beautifully into the oil, creating a gourmet touch for any meal. Whether you’re hosting friends or elevating a simple dinner, this oil is a little bottle of magic.

How to serve
Drizzle this flavorful oil over fresh bread, roasted vegetables, or pasta to take your meal to the next level. Use it as a dip for crusty baguettes or even as a topping for grilled meats. It’s also a game-changer when swirled into soups for an extra burst of richness. For cheese lovers, this oil is the ultimate gourmet hack for effortless flavor in seconds. By the way it pairs perfectly with my Cottage Pie!

How to store
Store the oil in an airtight glass container in the fridge for up to one week. Keep it away from direct sunlight to preserve the flavor. If you notice any changes in smell or texture, it’s time to make a fresh batch!

Hi, I'm Kimberly!

Hi, I'm Kimberly.

A passionate food lover who believes in the magic of homemade deliciousness that spreads love and warmth. Join me on this culinary adventure as I prepare wonderful dishes and let’s spread some happiness together!

Kimberly the Zett Signature

If you want to get to know me better, click here!


Cheese Fondue Oil
Cheese Fondue Oil
Cheese Fondue Oil
„Let’s make a piece of happiness“
Print
clock clock iconcutlery cutlery iconflag flag iconfolder folder iconinstagram instagram iconpinterest pinterest iconfacebook facebook iconprint print iconsquares squares iconheart heart iconheart solid heart solid icon
Cheese Fondue Oil

Cheese Fondue Oil


  • Author: Kimberly
  • Total Time: 40 min
  • Yield: 1 cup / 250ml 1x

Description

RECOMMENDED EQUIPMENT

  • blender
  • medium-sized saucepan
  • whisk
  • a bowl which the medium saucepan fits into
  • 2 medium-sized bowls
  • 2 fine sieves
  • sealable container (oil bottle)
  • ice cubes
  • coffee filter

Ingredients

Units Scale
  • 50 grams parmesan
  • 30 grams gruyere
  • 4 garlic cloves
  • 1 tbsp sea salt
  • 250 milliliter oil

Instructions

  1. Cut the cheese into coarse pieces and peel the garlic cloves. Add everything to the blender along with the salt and oil.
  2. Pour the mixture from the blender into a medium-sized pot and heat it over medium heat to a temperature of about 101°-104°C (213°-219°F), and maintain this temperature for the next 15 minutes. Stir occasionally, making sure the temperature remains steady and nothing gets burned.
  3. Prepare a bowl large enough to fit a medium-sized pot, and fill it with cold water and a handful of ice cubes. Also, hang a fine sieve strainer over one medium-sized bowl and another fine sieve strainer, with a coffee filter inside it, over another medium-sized bowl.
  4. Now, place the pot in the ice water and stir to cool the oil quickly. Once the oil is almost cold, remove the pot from the water and pour the oil into the prepared fine sieve to catch the coarse particles.
  5. Then, pour the oil into the second sieve, which is equipped with a coffee filter, to catch the remaining finer particles.
  6. Allow the oil to drip through for about 20 minutes or maybe less depending on how many remaining particles are in the coffee filter. Once all the oil has passed through the coffee filter, transfer the collected amount of oil into a sealable container or directly into an oil bottle. Store in the refrigerator for up to one week.
  • Prep Time: 5 min
  • Passive Time: 20 min
  • Cook Time: 15 min

Brussels Sprout Salad with Bacon Figs and Chili Cinnamon Croutons

Brussels Sprout Salad with Bacon Figs and Chili Cinnamon Croutons

Brussels Sprout Radicchio Salad with Bacon, Figs, Tangerine, and Chili Cinnamon Croutons

Brussels Sprout Salad with Bacon Figs & Chili Cinnamon Croutons

December 17, 2024 by Kimberly

This salad is a cozy mix of crunchy, creamy, and sweet-spicy vibes. Think warm croutons, tangy cheese, and a mulled wine dressing – perfect for holiday feels or a fancy brunch.

40 MINUTES

EASY

OMNIVORE

INT.

688 PER PORTION

COMFORT FOOD

EVERYDAY

LUNCH

AUTUMN
WINTER

INTRODUCTION

ABOUT THE RECIPE

This salad hits that perfect balance of cozy and chic. Crunchy brussels sprouts meet the bold bitterness of radicchio, paired with crispy bacon, juicy figs, and creamy gorgonzola. The real star? A mulled wine oil dressing that wraps everything in warm, spiced magic. Perfect for holidays or whenever you want to impress without breaking a sweat. Sweet, savory, and a little spicy – it’s giving festive food vibes!

How to serve
Serve this salad as a statement starter or a bold side dish at your next dinner party. It pairs beautifully with roasted meats or as a vibrant centerpiece for a cozy brunch spread. Add fresh tangerine slices right before serving for an extra citrusy pop, and don’t forget the chili cinnamon croutons for a spicy-sweet crunch that ties the whole dish together.

How to store
Keep leftovers in an airtight container for up to two days, but store the croutons separately to maintain their crunch. Re-dress with a splash of the mulled wine oil before serving.

Hi, I'm Kimberly!

Hi, I'm Kimberly.

A passionate food lover who believes in the magic of homemade deliciousness that spreads love and warmth. Join me on this culinary adventure as I prepare wonderful dishes and let’s spread some happiness together!

Kimberly the Zett Signature

If you want to get to know me better, click here!


Brussels Sprout Radicchio Salad with Bacon, Figs, Tangerine, and Chili Cinnamon Croutons
„Let’s make a piece of happiness“
Print
clock clock iconcutlery cutlery iconflag flag iconfolder folder iconinstagram instagram iconpinterest pinterest iconfacebook facebook iconprint print iconsquares squares iconheart heart iconheart solid heart solid icon
Brussels Sprout Radicchio Salad with Bacon, Figs, Tangerine, and Chili Cinnamon Croutons

Brussels Sprout Salad with Bacon Figs and Chili Cinnamon Croutons


  • Author: Kimberly
  • Total Time: 40 min
  • Yield: 2 as main / 4 as starter 1x

Description

Recommended Equipment

  • sharp knife
  • cutting board
  • small pan
  • small bowl

Ingredients

Units Scale

SALAD

  • 200 grams brussels sprout
  • 150 grams red radicchio
  • 1 shallot
  • 1 tsp butter
  • 2 mandarins
  • 2 fresh figs
  • 8 bacon strips
  • 50 grams gorgonzola
  • 50 grams walnuts

CROUTONS

  • 6 slices baguette
  • 1/2 tsp chili flakes
  • 1/2 tsp cinnamon
  • 1 tbsp butter

DRESSING

  • 4 tbsp mulled wine oil
  • 12 tbsp red wine vinegar
  • 1 tsp date syrup
  • 1 tsp dijon mustard
  • salt & pepper to taste

TOPPINGS

  • fresh thyme
  • fresh chives

Instructions

PREPARATIONS

  • Here’s the recipe for mulled wine oil. You’ll need about 3–4 tbsp of it.

INSTRUCTIONS

  1. Wash the Brussels sprouts and slice them into thin strips or shave them finely. Do the same with the radicchio, then wash it. Add both to a large salad bowl.
  2. Lay the bacon strips on a baking tray lined with parchment paper and bake them in a preheated oven at 180 °C (350 °F) for 15–20 minutes until crispy. Use the time to work on the next steps.
  3. Peel the mandarins and remove the white fibers. Cut the figs into eighths and set them aside.
  4. Strip the thyme leaves from the stems and slice the chives into small rings. Set these aside as well.
  5. Toast the walnuts in a dry pan until they smell aromatic. Remove them from the pan and set aside.
  6. Slice the shallot into thin rings. Heat a bit of butter in the same pan and fry the shallot rings until crispy. Remove them and let them cool on a paper towel.
  7. Cut the baguette into large cubes. In the pan, sauté them with butter, cinnamon, and chili flakes until crispy. Remove and set aside.
  8. For the dressing, mix the mulled wine oil, red wine vinegar, date syrup, Dijon mustard, salt, and pepper well. Pour the dressing over the Brussels sprouts and radicchio in the salad bowl, then toss thoroughly.
  9. Top the salad with mandarins, figs, walnuts, crispy shallots, bacon strips, croutons, and a few pieces of Gorgonzola. Finish with fresh thyme and chives before serving.

Blini Appetizers

Blini Appetizers

Blini Appetizers

Blini Appetizers

December 15, 2024 by Kimberly

Tiny pillows of heaven! These fluffy blini with a creamy ricotta base and versatile toppings bring bold flavors and cozy vibes. Perfect for casual nights or fancy parties!

40 MINUTES

EASY

OMNIVORE

RUSSIA

40-80 PER BLINI

FLUFFY

DINNER PARTY

APPETIZER

ALL YEAR

INTRODUCTION

ABOUT THE RECIPE

Imagine a table full of vibrant, delicious little bites that disappear as soon as you serve them! These foolproof blini are soft, golden mini pancakes topped with a silky ricotta cream that goes with anything. Whether you’re hosting a cozy brunch or an elegant dinner party, these creative toppings take your appetizer game to the next level. From smoky and herby to sweet and nutty, there’s a flavor for everyone. It’s all about the balance of textures, flavors, and a little drizzle of oil magic!

How to serve
Prepare the blini as mini pancakes, then spread a dollop of the ricotta cream on top and add your chosen toppings. You can serve them pre-assembled for easy grabbing or turn it into a fun DIY setup where everyone can mix and match their toppings. Perfect for any vibe – casual or fancy! You can also prepare the batter and ricotta cream in advance and keep it in the fridge for up to 24 hours. The blini pancakes can also be made ahead of time since they’re typically served cold.

How to store
Store the blini and ricotta cream separately in airtight containers. Keep the blini in the fridge for up to 2 days. The ricotta cream stays fresh in the fridge for 3-4 days.

Hi, I'm Kimberly!

Hi, I'm Kimberly.

A passionate food lover who believes in the magic of homemade deliciousness that spreads love and warmth. Join me on this culinary adventure as I prepare wonderful dishes and let’s spread some happiness together!

Kimberly the Zett Signature

If you want to get to know me better, click here!


Blini Appetizers
Blini Appetizers
Blini Appetizers
Blini Appetizers
„Let’s make a piece of happiness“
Print
clock clock iconcutlery cutlery iconflag flag iconfolder folder iconinstagram instagram iconpinterest pinterest iconfacebook facebook iconprint print iconsquares squares iconheart heart iconheart solid heart solid icon
Blini Appetizers

Blini Appetizers


  • Author: Kimberly
  • Total Time: 40 min
  • Yield: 20 blini 1x

Description

RECOMMENDED EQUIPMENT

  • mixing bowl
  • whisk
  • pan
  • spatula
  • cooling rack
  • piping bag (optional)
  • kitchen knife
  • cutting board


Ingredients

Units Scale

BATTER

  • 90 grams all-purpose flour
  • 1 tsp baking powder
  • 1 egg
  • 125 milliliter buttermilk
  • 1 tbsp olive oil
  • 1/4 tsp salt
  • oil for frying

RICOTTA CREAM

  • 250 grams ricotta
  • 1 tbsp olive oil
  • 1 tbsp lemon juice
  • salt & pepper to taste

BLINI TOPPING 1

  • walnuts
  • shallot
  • oil for frying
  • honey
  • chili oil
  • fresh thyme
  • red pepper flakes

BLINI TOPPING 2

  • fresh fig
  • gorgonzola
  • truffle oil
  • chives
  • black pepper

BLINI TOPPING 3

  • cooked salmon
  • red onion
  • capers
  • olive oil
  • fresh dill
  • black pepper

BLINI TOPPING 4

  • pastrami
  • cornichons
  • walnut oil
  • fresh parsley

BLINI TOPPING 5

  • radishes
  • cress
  • basil oil

Instructions

  1. First, we’re making the blini batter. Mix all the ingredients together until smooth, then let it chill for like 5-10 minutes. Once the batter’s had its lil rest, heat up a pan with a bit of oil or butter and spoon in small circles of batter. I usually use 3/4 of a tablespoon. Here’s the pro tip: when you see those cute little holes popping up on the surface, it’s time to flip them. Cook each side for about 2-3 minutes until they’re golden and gorgeous. Boom, your blinis are born. Pop them on a cooling rack to chill out – no soggy bottoms here.
  2. Grab a bowl and mix the ricotta cream. For this, stir together ricotta, olive oil, lemon juice, salt & pepper until it’s smooth and creamy. Then load it into a piping bag if you’re feeling fancy, or just keep a spoon handy for the easy aesthetic.
  3. Once your blinis are cool, dollop or pipe some ricotta cream onto each one. Get creative – a little swirl, a casual blob, whatever your heart desires. Now they’re ready for toppings.
  4. For Blini topping 1, toast the walnuts in a pan without adding additional fat. Take them out and let them cool. Thinly slice the shallots into delicate rings and fry them in a bit of oil until crispy. Set aside to cool. Add half a walnut onto the blini, as well as about 1 tsp of the crispy onions. Finish with a drizzle of honey and a sprinkle of pink peppercorns. Toss on a few fresh thyme leaves and finish with a few drops of chili oil for a spicy kick that ties it all together.
  5. For Blini topping 2, slice fresh figs into eighths. Place one fig wedge on the ricotta cream, then crumble some blue cheese on the other side – as much or as little as your vibe calls for. Add a few drops of truffle oil, sprinkle with freshly ground pepper, and garnish with a touch of chopped chives to seal the deal.
  6. For Blini topping 3, flake some cooked salmon into bite-sized pieces and nestle it onto the ricotta cream. Slice red onions into thin strips, then scatter a few pieces on top along with some capers. Add a few drops of olive oil, a grind of fresh black pepper, and finish with a couple of dill sprigs.
  7. For Blini topping 4, tear thin slices of pastrami into strips, roll them into little spirals, and press them onto the ricotta. Diagonally halve some cornichons and place one half on the blini. Drizzle a few drops of walnut oil for a rich, nutty twist. Top it all off with a sprig of fresh parsley for a classy finishing touch.
  8. For Blini topping 5, thinly slice radishes into delicate rounds and place two slices on one side of the blini. On the other side, gently press on a little bunch of radish cress for that pop of green. Finish with a few drops of basil oil for a fresh, herbaceous flair.
  9. Serve these cute appetizers on a platter and watch them disappear in seconds.

  • Cook Time: 40 min

French Onion Soup

French Onion Soup

French Onion Soup

French Onion Soup

December 11, 2024 by Kimberly

Cozy up with this rich, caramelized onion soup topped with broiled gruyere and crispy baguette. It’s warm, indulgent, and feels like a hug in a bowl.

75 MINUTES

EASY

OMNIVORE

FRENCH

455 PER PORTION

UMAMI

EVERYDAY

DINNER

WINTER

INTRODUCTION

ABOUT THE RECIPE

There’s something magical about a bowl of caramelized onion soup. The rich, slow-cooked onions melt into a deeply savory broth that feels like pure comfort. And when you top it with a slice of crispy baguette smothered in broiled gruyere? Game over. It’s everything you need on a chilly evening. This dish takes time to build flavor, but trust me, it’s worth every minute. Cozy, rustic, and oh-so-satisfying, it’s the perfect way to warm up your soul.

How to serve
Serve this soup straight from the oven for the best experience. Ladle the rich broth into bowls, top with baguette slices, and load on the gruyere. Broil until the cheese bubbles and turns golden. Place the piping-hot bowls on a trivet or a wooden board, and serve with extra baguette for dipping. Pair it with a simple green salad or a crisp glass of white wine for a true French-inspired meal that hits all the cozy vibes.

How to store
Store leftover soup (without the bread) in an airtight container in the fridge for up to 3 days. Reheat gently on the stove before serving. Broil baguette slices and cheese when ready to enjoy. The flavors deepen, making it even better the next day!

Hi, I'm Kimberly!

Hi, I'm Kimberly.

A passionate food lover who believes in the magic of homemade deliciousness that spreads love and warmth. Join me on this culinary adventure as I prepare wonderful dishes and let’s spread some happiness together!

Kimberly the Zett Signature

If you want to get to know me better, click here!


French Onion Soup
French Onion Soup
French Onion Soup
„Let’s make a piece of happiness“
Print
clock clock iconcutlery cutlery iconflag flag iconfolder folder iconinstagram instagram iconpinterest pinterest iconfacebook facebook iconprint print iconsquares squares iconheart heart iconheart solid heart solid icon
French Onion Soup

French Onion Soup


  • Author: Kimberly
  • Total Time: 75 min
  • Yield: 6 1x

Description

Recommended Equipment

  • large, heavy pot with lid
  • garlic press
  • sharp knife
  • cutting board
  • grater
  • ovenproof soup bowls

Ingredients

Units Scale

SOUP

  • 800 grams onions, sliced
  • 1 tbsp butter
  • 2 tbsp avocado oil
  • 1 tsp salt
  • 3 garlic cloves
  • 1.5 tbsp all-purpose flour
  • 150 milliliter dry white wine
  • 1 liter beef stock
  • some sprigs fresh thyme
  • 2 bay leaves
  • salt & pepper to taste

BAGUETTE

  • 12 slices of baguette
  • 300 grams Gruyere cheese
  • butter
  • garlic powder

TOPPING

  • fresh thyme
  • freshly cracked pepper

Instructions

PREPARATIONS

  • Peel the onions, halve them, and slice into thin half-rings.
  • Peel the garlic cloves; they’ll be pressed into the onions later.

INSTRUCTIONS

  1. Melt butter and oil in a large pot over medium heat. Add the onions, sprinkle with a pinch of salt, and sauté for about 30 minutes, stirring occasionally. The goal? Dreamy, golden-brown caramelization. Yes, it takes patience, but trust me, it’s worth it.
  2. Press the garlic through a garlic press and sauté with the onions for 1 minute until fragrant. Sprinkle the flour like fairy dust over the onions and stir well.
  3. Pour in the white wine and let it cook down briefly. Add the beef broth, thyme sprigs, and bay leaves. Bring to a boil, then cover and simmer over low heat for 30 minutes. Season with salt and pepper to taste.
  4. While the soup simmers, preheat the oven to its highest broil setting. Slice the baguette, butter one side, and sprinkle with a bit of garlic powder. Grate the Gruyère.
  5. Once the soup is done, ladle it into ovenproof bowls. Place the baguette slices on top and generously cover with Gruyère. Broil for 5–10 minutes until the cheese is golden and bubbling.
  6. Garnish with fresh thyme and a pinch of black pepper. Serve hot, grab a spoon, and get ready to impress yourself (and everyone else)!
  • Prep Time: 15 min
  • Passive Time: 15 min
  • Cook Time: 45 min

Gorgonzola Spinach Gnocchi with Salsiccia Walnut Topping

Gorgonzola Spinach Gnocchi with Salsiccia Walnut Topping

Gorgonzola Spinach Gnocchi with Salsiccia Walnut Topping

Gorgonzola Spinach Gnocchi with Salsiccia Walnut Topping

November 25, 2024 by Kimberly

Creamy, cheesy, and just the right touch of indulgence! This cozy dish feels like a warm hug, with bold Italian vibes and a satisfying crunch that’s absolutely unforgettable.

50 MINUTES

EASY

OMNIVORE

ITALIAN

854 PER PORTION

COMFORT FOOD

EVERYDAY

DINNER

AUTUMN
WINTER

INTRODUCTION

ABOUT THE RECIPE

This dish is the ultimate comfort meal you didn’t know you needed! Think soft pillows of gnocchi wrapped in a velvety, cheesy sauce, with just enough spinach to feel balanced. The topping? A game-changing mix of savory sausage and crunchy walnuts that takes it to the next level. It’s one of those meals that feels fancy but is super easy to whip up. Perfect for impressing guests or treating yourself to a cozy night in!

How to serve
Serve this dish straight from the pan, steaming and ready to impress. Sprinkle a touch of freshly grated Parmesan or a drizzle of olive oil on top for that extra flair. Pair it with a crisp arugula salad or some roasted veggies to balance the richness. Want to make it truly unforgettable? A glass of chilled white wine or sparkling water with a citrus twist will make the flavors pop.

How to store
Got leftovers? Lucky you! Store them in an airtight container in the fridge for up to 3 days. Reheat gently in a pan over low heat, adding a splash of milk or cream to revive that creamy magic. Avoid freezing – it’s best enjoyed fresh!

Hi, I'm Kimberly!

Hi, I'm Kimberly.

A passionate food lover who believes in the magic of homemade deliciousness that spreads love and warmth. Join me on this culinary adventure as I prepare wonderful dishes and let’s spread some happiness together!

Kimberly the Zett Signature

If you want to get to know me better, click here!


Gorgonzola Spinach Gnocchi with Salsiccia Walnut Topping
„Let’s make a piece of happiness“
Print
clock clock iconcutlery cutlery iconflag flag iconfolder folder iconinstagram instagram iconpinterest pinterest iconfacebook facebook iconprint print iconsquares squares iconheart heart iconheart solid heart solid icon
Gorgonzola Spinach Gnocchi with Salsiccia Walnut Topping

Gorgonzola Spinach Gnocchi with Salsiccia Walnut Topping


  • Author: Kimberly
  • Total Time: 50 min
  • Yield: 4 1x

Description

RECOMMENDED EQUIPMENT

  • large frying pan
  • medium frying pan
  • large pot
  • strainer
  • sharp knife
  • cutting board


Ingredients

Units Scale

SPINACH GORGONZOLA SAUCE

  • 200 grams gorgonzola
  • 200 grams heavy cream
  • 1 tbsp butter
  • 250 milliliter chicken stock
  • 50 milliliter dry white wine
  • 4 garlic cloves
  • 1 shallot
  • 50 grams baby spinach
  • fresh oregano
  • fresh thyme
  • nutmeg, salt & pepper to taste

SALSICCIA WALNUT TOPPING

  • 200 grams salsiccia with fennel
  • 50 milliliter dry white wine
  • 40 grams walnuts
  • 2 tsp honey
  • fresh oregano
  • fresh thyme
  • cayenne pepper, salt & pepper to taste

OTHER INGREDIENTS

  • 800 grams gnocchi
  • parmesan for topping

Instructions

PREPARATIONS

  • Chop the shallot and garlic cloves into small, fine pieces. Take the salsiccia sausage out of its casing—either tear it into chunky bits with your hands or crumble it up, whichever feels less chaotic. Slice the gorgonzola into chunks—don’t overthink it; it’ll melt anyway. Wash the baby spinach thoroughly and spin it dry. Set everything aside.

INSTRUCTIONS

  1. Melt some butter in a large pan over medium heat. Toss in the shallots and cook until they’re glossy and translucent. Add the garlic and stir it until your kitchen smells incredible.
  2. Deglaze with a splash of white wine. Let it simmer for 1-2 minutes to let the alcohol cook off. Pour in the chicken broth and bring it to a boil. Once it boils, lower the heat to a simmer and stir in the cream. Let this dreamy mix simmer gently for 10-15 minutes while you prepare the salsiccia.
  3. Toss the sausage bits into a cold pan. Slowly heat it up so the fat renders out—no extra oil needed! Cook until the pieces are golden and crispy on the outside. Deglaze with another splash of white wine, simmering until most of the liquid evaporates and you’re left with a creamy coating. Toss in the walnuts, a pinch of cayenne pepper, salt, and a drizzle of honey. Stir everything and let it caramelize for 1-2 minutes. Add fresh oregano and thyme, mix, and let those flavors pop.
  4. Keep your cream and broth mixture on low heat. Stir in the Gorgonzola until it’s completely melted into the sauce—smooth, rich, and irresistible. Grate in some fresh nutmeg, then stir in more oregano and thyme. Add the spinach and stir until it wilts down. Keep everything warm and cozy over low heat.
  5. Fill a large pot with water, bring it to a boil, and add the gnocchi. Cook for 3-5 minutes, or until they float to the surface. Drain the gnocchi and toss them directly into the Gorgonzola-spinach sauce. Stir until every pillowy bite is coated in the sauce.
  6. Plate the gnocchi in deep bowls. Spoon the crispy salsiccia-walnut mixture on top and finish with a shower of freshly grated Parmesan.

  • Prep Time: 10 min
  • Passive Time: 15 min
  • Cook Time: 25 min