Juicy Pan-Fried Pork Dumplings

Juicy Pan-Fried Pork Dumplings

Juicy Pan-Fried Pork Dumplings

Juicy Pan-Fried Pork Dumplings

March 12, 2024 by Kimberly

Dive into the world of flavors with these pan-fried pork Dumplings! Perfectly golden, irresistibly tasty, and just the right crunch to satisfy your cravings.

75 MINUTES

INTERMEDIATE

OMNIVORE

ASIAN

50 PER DUMPLING

COMFORT FOOD / UMAMI

EVERYDAY

DINNER / APPETIZER

ALL YEAR

INTRODUCTION

ABOUT THE RECIPE

Discover the joy of making juicy pan-fried pork Dumplings at home! A staple in Asian cuisine, these dumplings are a perfect blend of juicy filling and crispy skin. Easy to make and incredibly delicious, they’re sure to become a family favorite. Whether you’re a dumpling enthusiast or a first-timer, follow this simple guide to bring a taste of tradition into your kitchen.

How to serve:
Serve these golden delights with a side of dumpling dipping sauce. These juicy pan-fried pork Dumplings are best enjoyed hot, allowing the flavors to truly shine. They make a fantastic appetizer, a satisfying main, or a delightful side dish. Pair with a fresh cucumber salad or a steaming bowl of soup to complete a mouthwatering meal that’s sure to impress.

How to store:
Store leftover dumplings in an airtight container in the refrigerator for up to three days. Reheat in a pan to retain their crispiness or microwave if in a hurry. You can also freeze them immediately after filling, so you always have fresh dumplings on hand.

Hi, I'm Kimberly!

Hi, I'm Kimberly.

A passionate food lover who believes in the magic of homemade deliciousness that spreads love and warmth. Join me on this culinary adventure as I prepare wonderful dishes and let’s spread some happiness together!

Kimberly the Zett Signature

If you want to get to know me better, click here!


Juicy Pan-Fried Pork Dumplings
„Let’s make a piece of happiness“

INGREDIENTS

FOR 40 Dumplings

DUMPLINGS

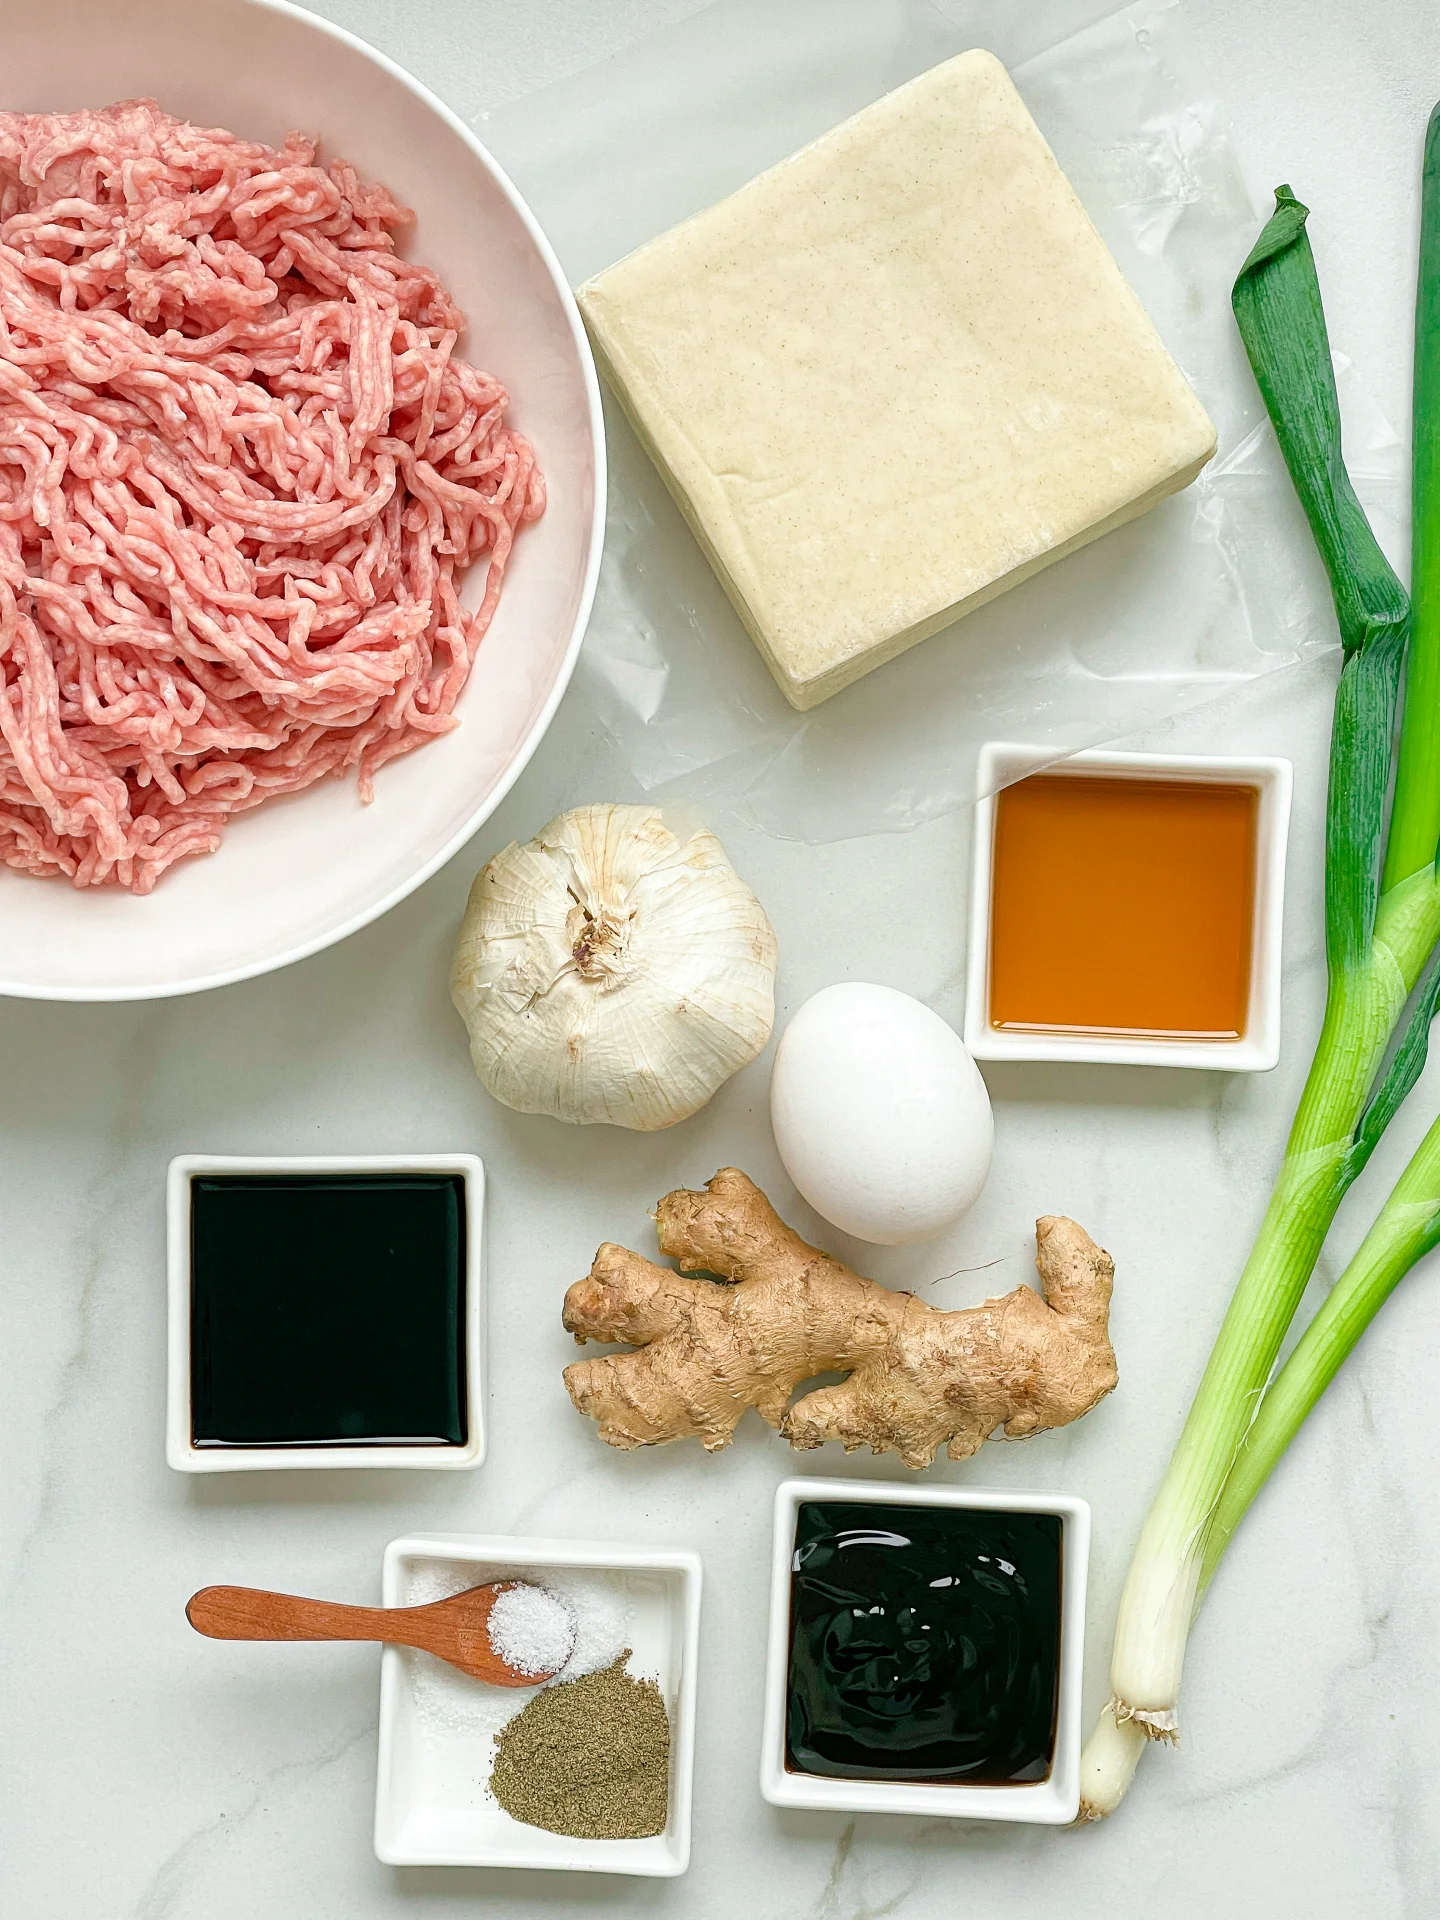
  • 40 dumpling wrappers
  • 400g minced pork (14 oz)
  • 1 tbsp minced ginger
  • 4 garlic cloves
  • 3 spring onions
  • 1 egg
  • 1 tbsp soy sauce
  • 1 tbsp oyster sauce
  • 1 tsp sesame oil
  • 1/4 tsp salt
  • 1/4 tsp ground pepper

ADDITIONAL

  • all-purpose flour
  • neutral cooking oil
Juicy Pan-Fried Pork Dumplings
}

ACTIVE: 5 min

PASSIVE: –

PREPARATIONS

Recommended Equipment
  • sharp knife
  • cutting board
  • large bowl
  • small bowl
  • large pan with lid
  • Defrost the dumpling wrappers if necessary.
  • Peel the ginger, finely chop or grate and add to a large bowl.
  • Peel and finely chop or crush the garlic cloves and add to the ginger in the large bowl.
  • Separate the spring onions into whites and greens. Cut the white part into fine rings and add to the bowl with the ginger and garlic. Cut the green part into fine strips. Set aside.
}

ACTIVE: 40 min

PASSIVE: 30 min
COOKING

1. Also add the ground meat into the large bowl. Additionally, add: 1/4 tsp salt, 1/4 tsp ground pepper, one egg, 1 tbsp oyster sauce, 1 tbsp soy sauce, and 1 tsp sesame oil. Mix the entire mixture with two chopsticks and set aside.

2. As preparation for your dumplings, sprinkle a work surface or serving plate with a little flour, so you can place your filled dumplings there before frying them. Without flour, the dough would stick to the surface after a while.

3. Now, it’s time to fill the dumplings. For this, you will need the bowl with your filling, a small bowl with fresh, cold water, a teaspoon, and the dumpling wrappers.

4. For the filling and folding feel free to watch my video on this (located at the bottom of this page) as visuals always help 😉

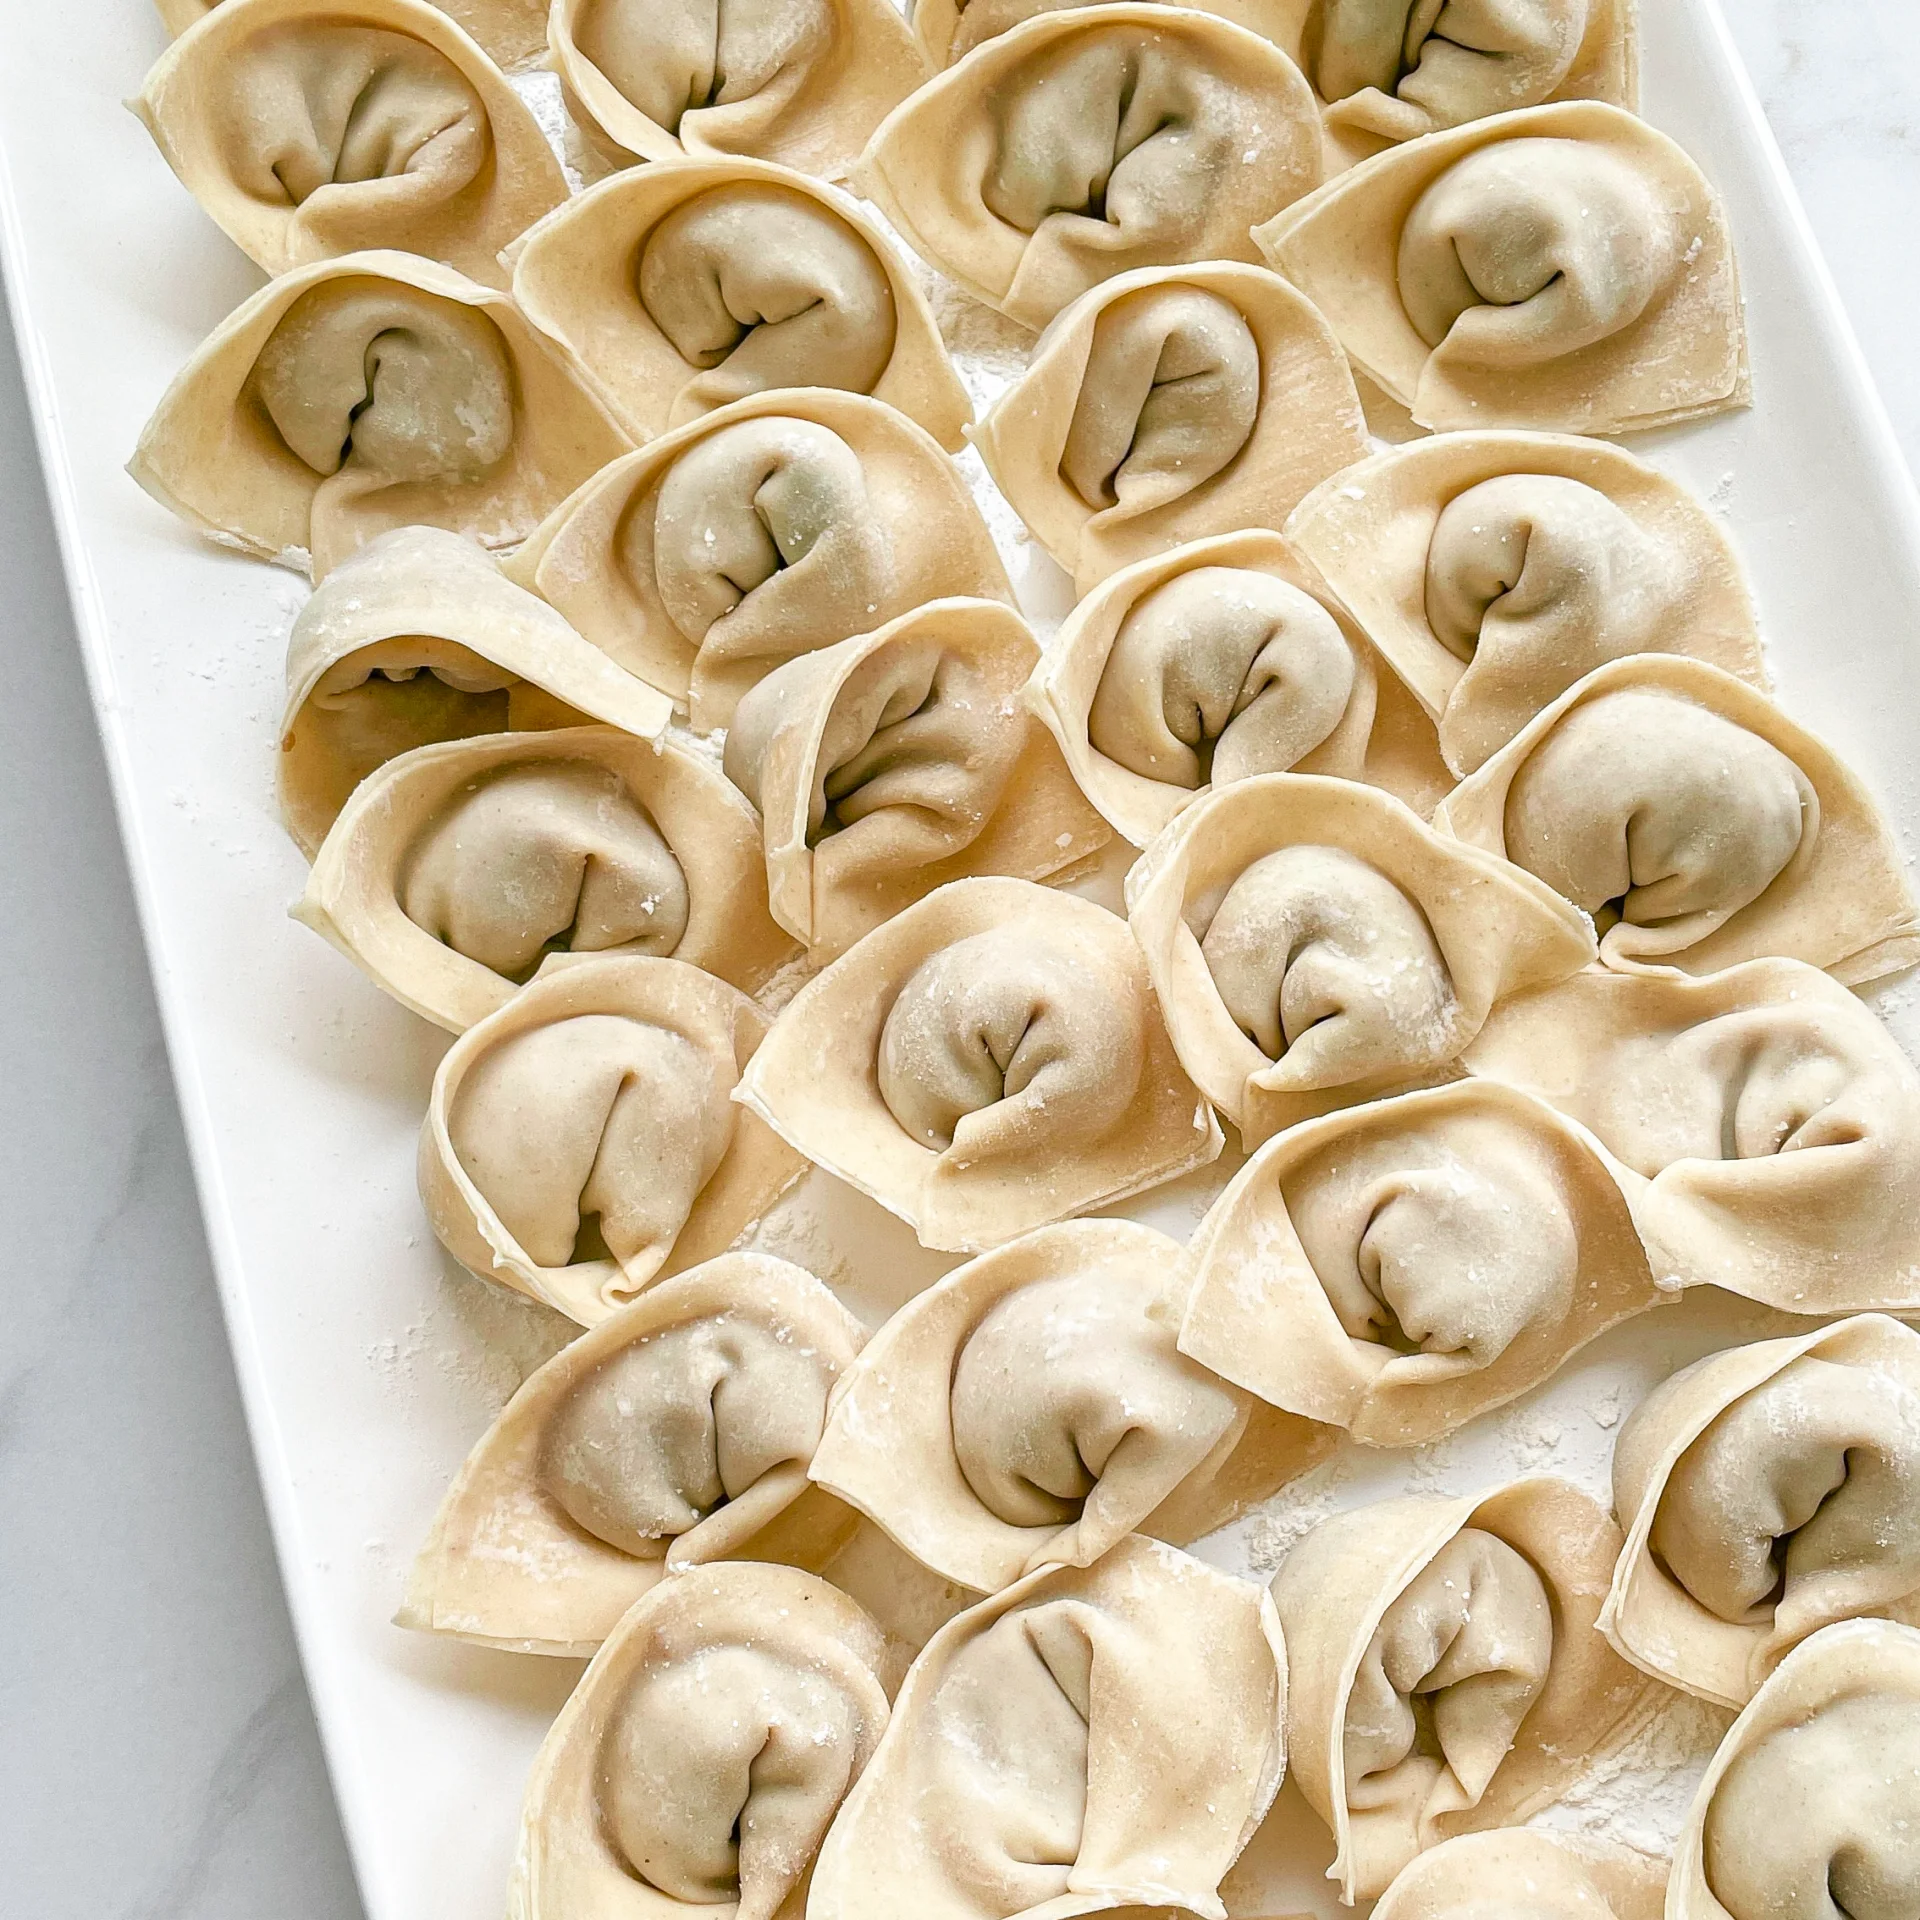
Fill each dumpling wrapper with about 1 tsp of filling. Place the filling in the center of the wrapper. Dab a bit of the cold water on one half of the edges of the wrapper along the edge with a finger. Fold the wrapper in half so that the filling is enclosed by the edges. Press the edges tightly together. Once you have enclosed the filling in the dough, take the two rear corners, moisten one corner from one side and fold the corners onto each other from behind. Press tightly and place the dumpling on the floured work surface. Continue this process until for the remaining dumpling wrappers. For 40 dumplings, this can take about 15 to 30 minutes, depending on your speed.
5. If you want to freeze the dumplings, I recommend doing it now and not after the dumplings have been fried.

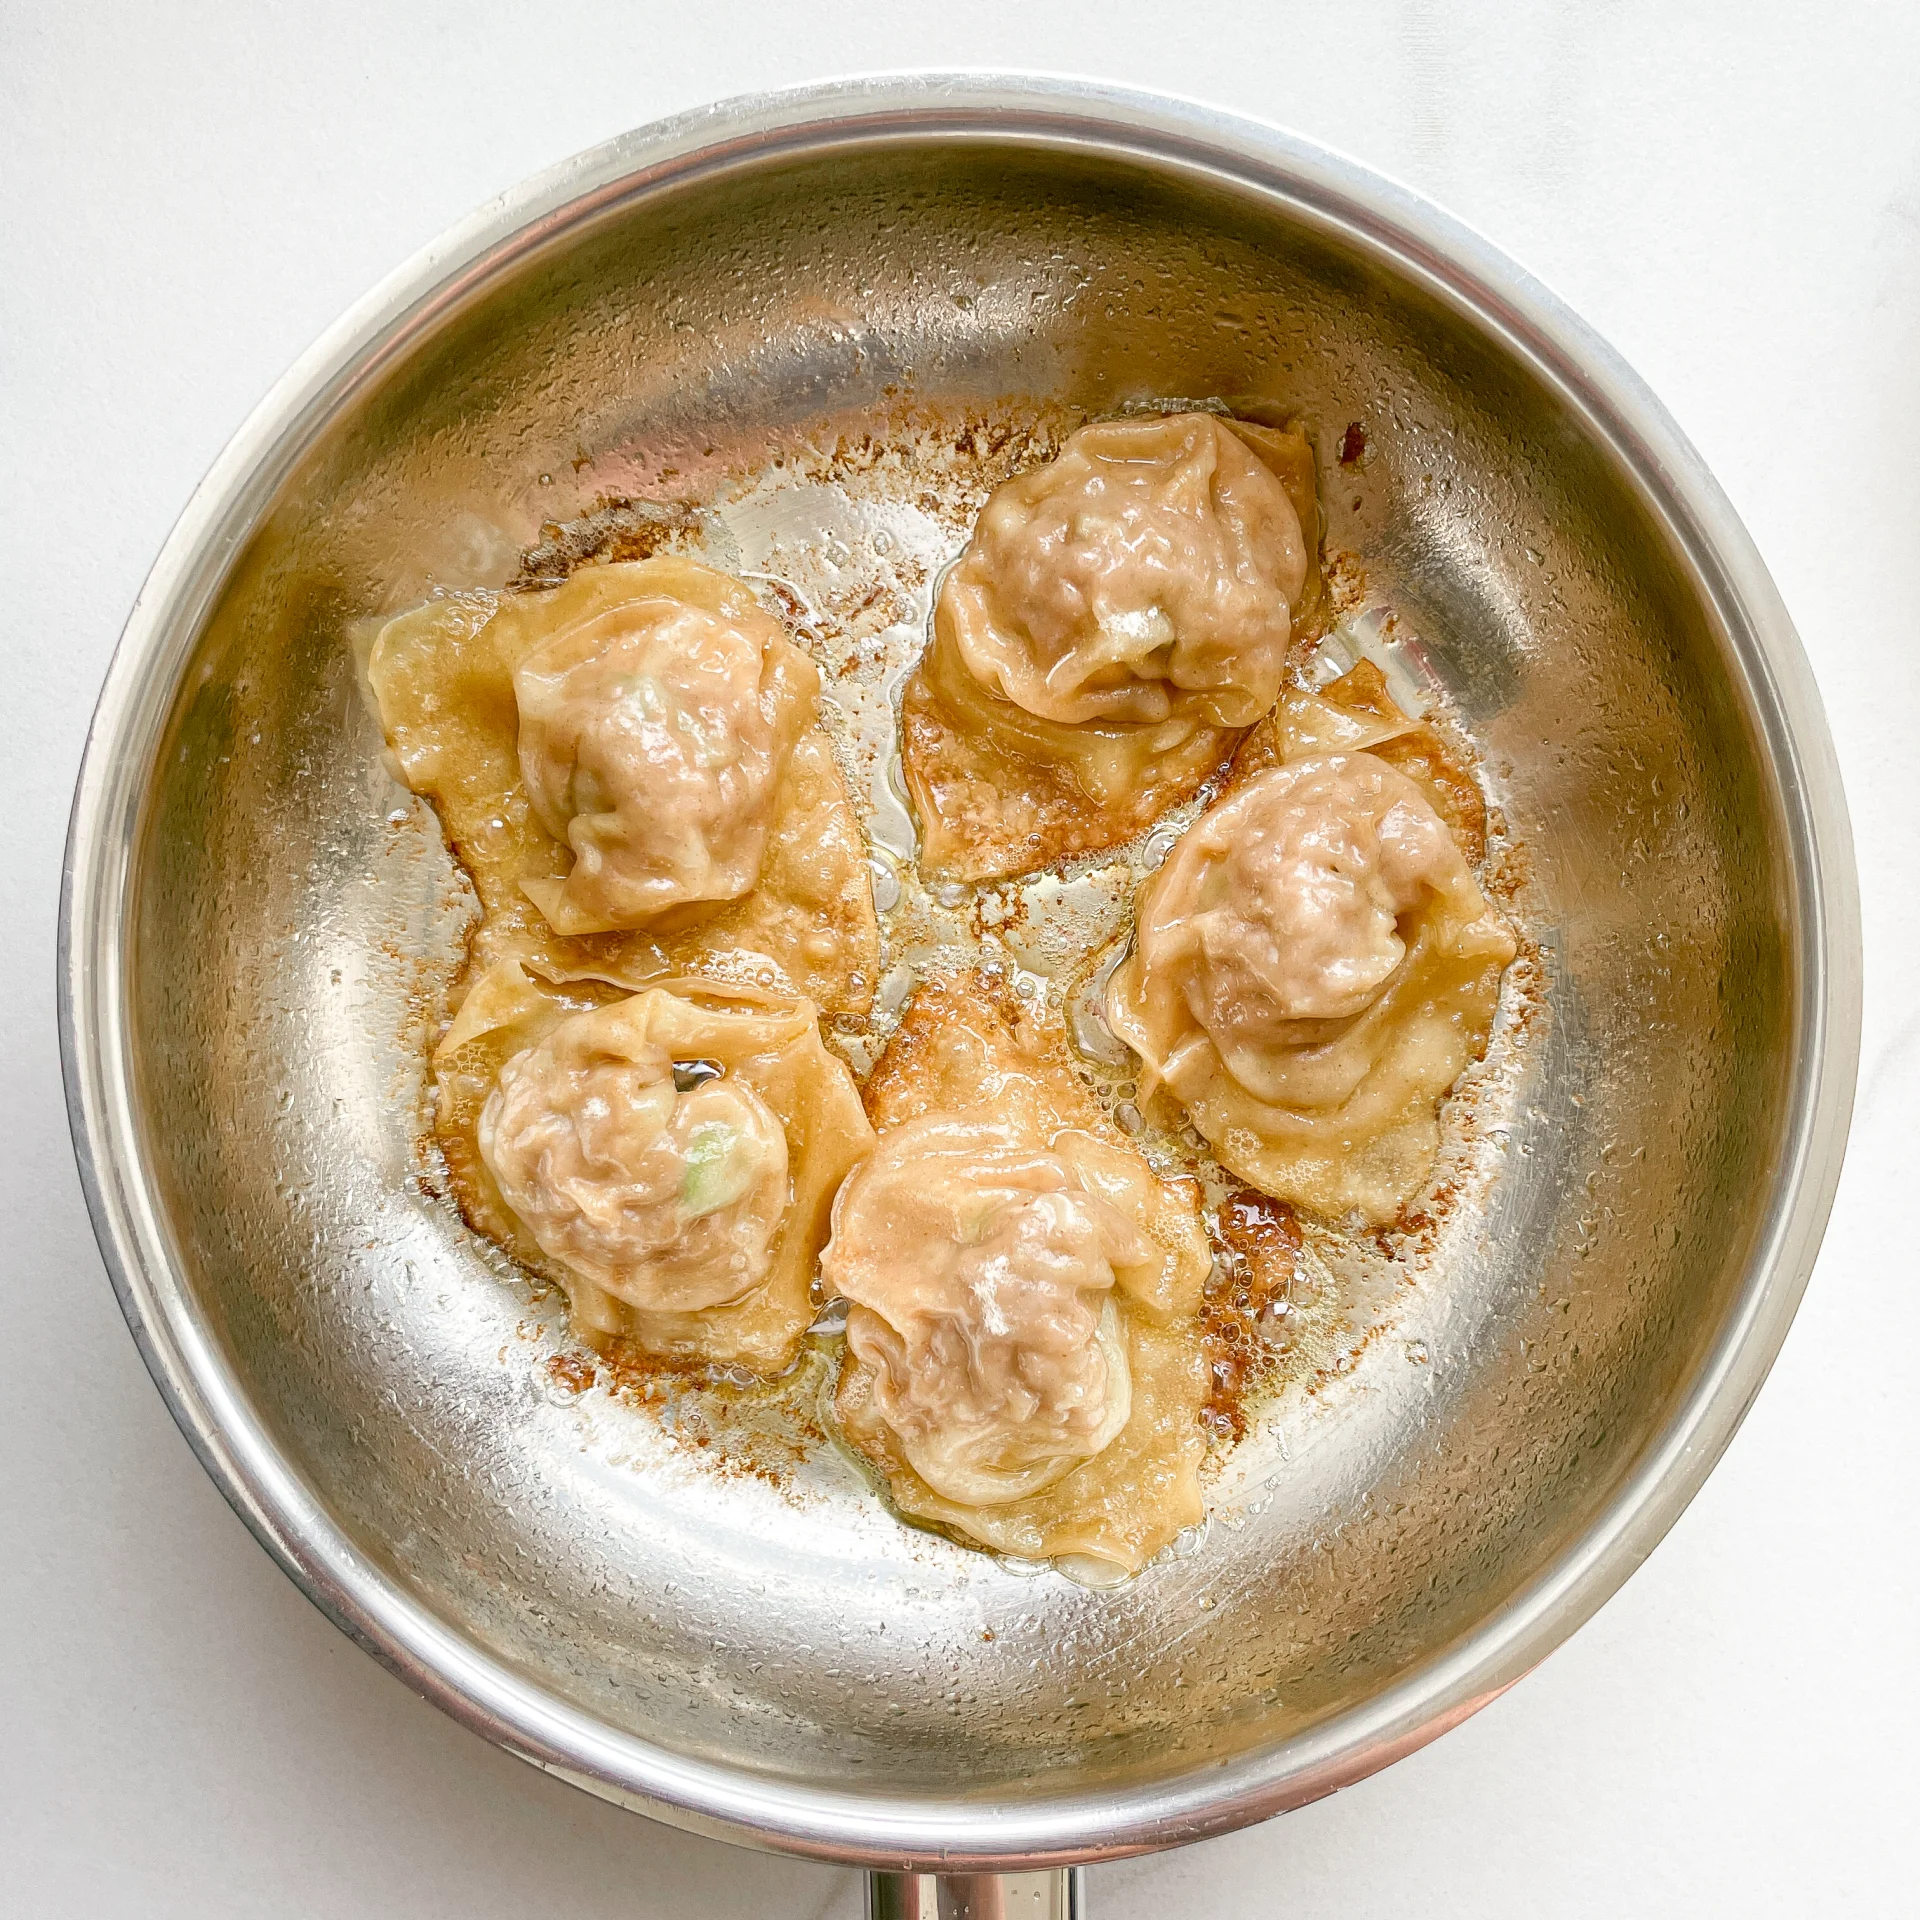
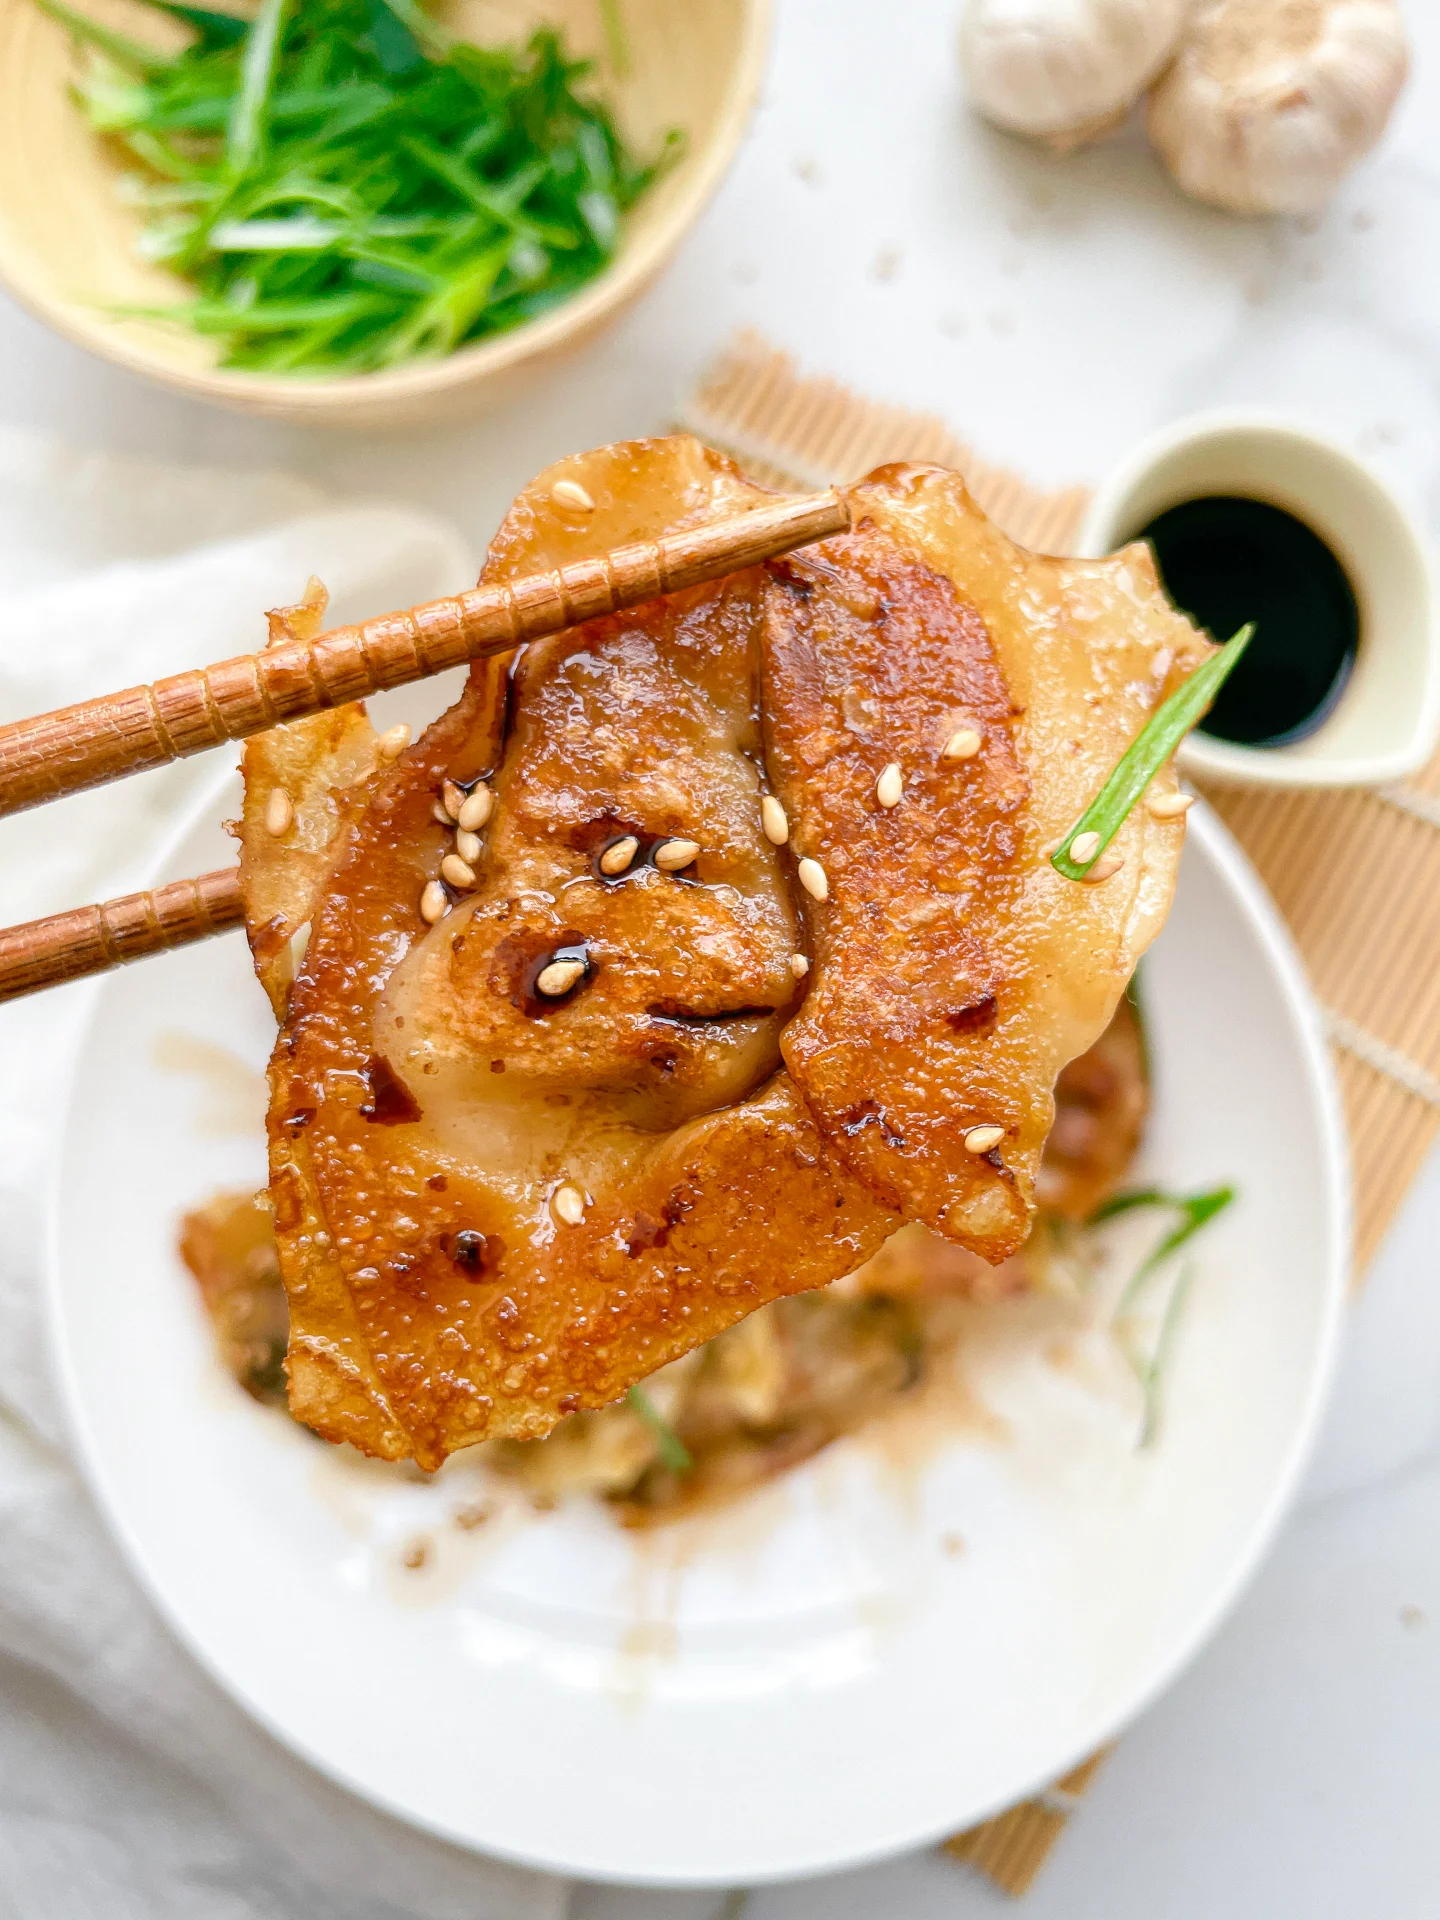
6. Once you have finished all the dumplings, heat a large pan over medium heat. Add 1 tbsp of oil to the pan and place as many dumplings as you can fit on the flat side in the pan. Let them fry for a few minutes until the bottom has become crispy. Then reduce the heat to low and pour a little water into the pan. Immediately cover the pan with the lid. Be careful that the oil in the pan is not too hot, otherwise there is a risk of burning. The dumplings will now be steamed with the water in the pan. Keep the lid closed until the dumpling skins have become translucent. This can take about 10-15 minutes. If they are not yet translucent and there is no more water in the pan, simply add some more. Now you can remove the lid and turn the heat back up to medium. Let them fry for about 5 more minutes without the lid, so that the bottom of the dumplings can become crispy again. Remove the dumplings from the pan and process the next batch in the same way.

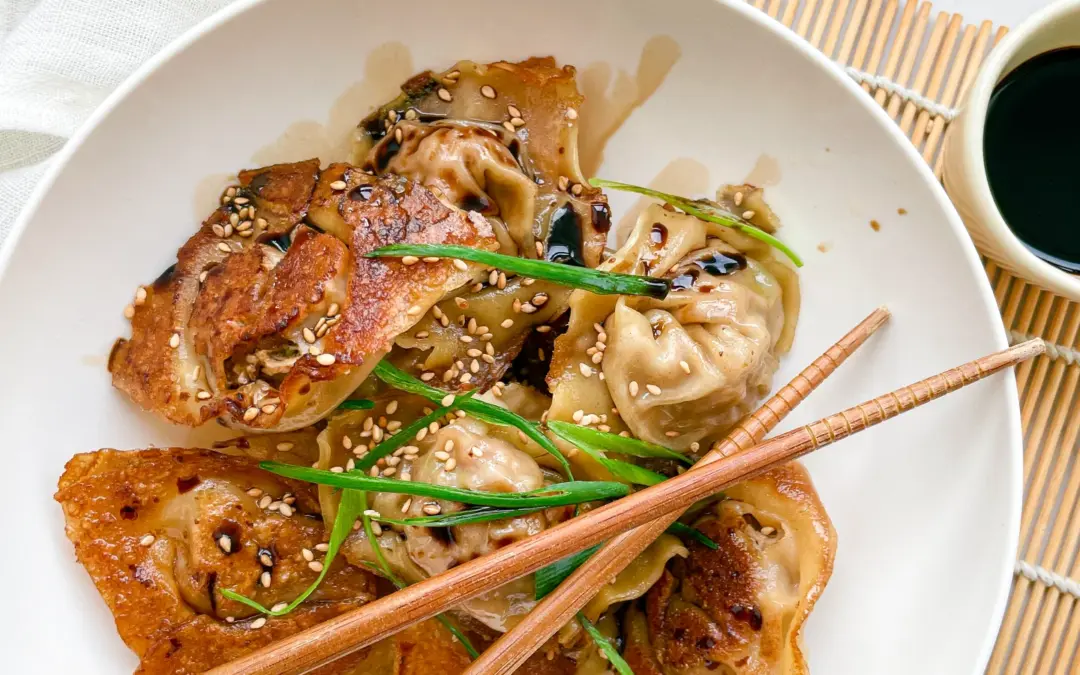
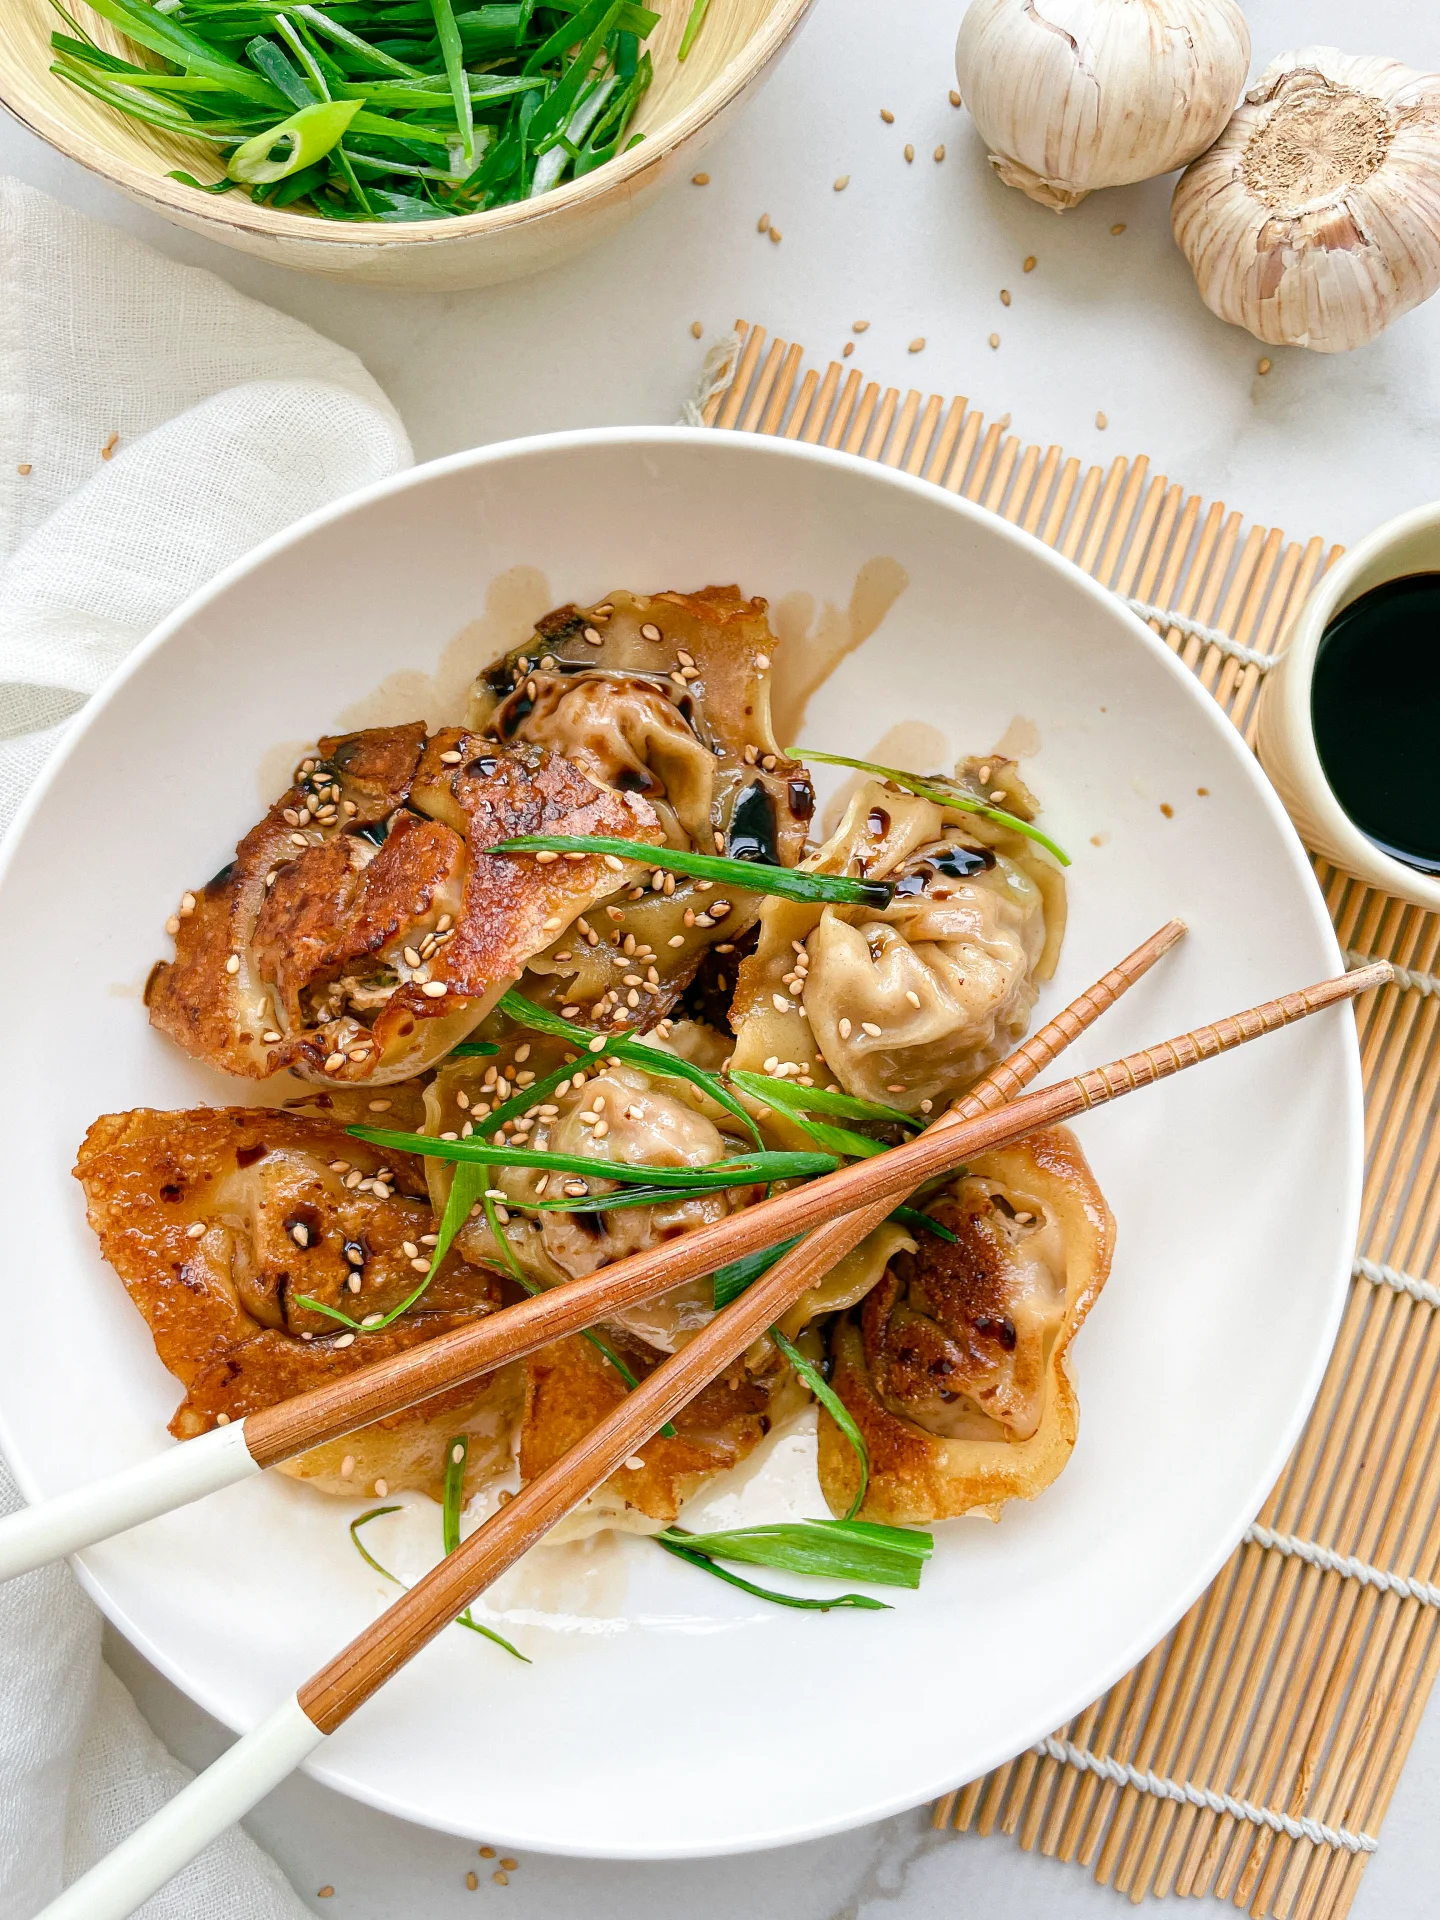
7. When all the dumplings are done, serve them in a bowl with this dumpling dipping sauce and the green parts of the spring onion. You can also top them with roasted sesame seeds if you like.

NOTE: The calorie information may vary depending on the product used, country and region.

Basic Meringues

Basic Meringues

Basic Meringues

Basic Meringues

March 9, 2024 by Kimberly

This melt-in-your-mouth meringue is the perfect treat. Enjoy the crisp exterior and soft, marshmallow-like interior. Pure, sugary bliss awaits!

100 MINUTES

INTERMEDIATE

VEGETARIAN

INT.

43 PER PIECE

CRISPY / SWEET

EVERYDAY

DESSERT

ALL YEAR

INTRODUCTION

ABOUT THE RECIPE

Dive into the ethereal world of Baiser, the classic French meringue that’s as enchanting as it is sweet. These light, airy treats are a testament to the elegance of simplicity in baking. Perfect for those who love a crisp, sugary crunch with a soft, tender heart. Whether you’re a novice or an expert baker, this easy Meringue recipe will add a touch of sophistication to your dessert repertoire.

How to serve:
Serve your freshly baked Meringue as a standalone sweet treat, or pair it with fresh berries and a dollop of whipped cream for an exquisite dessert. They’re the perfect finale to a sophisticated dinner or a delightful addition to your afternoon tea. For an extra indulgent twist, dip them in dark chocolate or sandwich with lemon curd. Let these delicate confections be the star of your next gathering!

How to store:
Store your Baiser in an airtight container at room temperature to maintain its crispness. Avoid humidity to keep them from becoming sticky. Enjoy these heavenly meringues within a week for the best texture and flavor experience.

Hi, I'm Kimberly!

Hi, I'm Kimberly.

A passionate food lover who believes in the magic of homemade deliciousness that spreads love and warmth. Join me on this culinary adventure as I prepare wonderful dishes and let’s spread some happiness together!

Kimberly the Zett Signature

If you want to get to know me better, click here!


Basic Meringues
Basic Meringues
Basic Meringues
„Let’s make a piece of happiness“

INGREDIENTS

FOR 30 PIECES

MERINGUES

  • 6 fresh eggs 
  • 300g sugar (1.5 cups)
  • pinch of salt
Basic Meringues
}

ACTIVE: 2 min

PASSIVE: –

PREPARATIONS

Recommended Equipment
  • mixer
  • large bowl
  • piping bag with star nozzle (or two spoons)
  • sealable container
  • Line two baking trays with parchment paper
  • Preheat the oven to 100°C (210°F) with convection (fan-assisted)
}

ACTIVE: 20 min

PASSIVE: 80 min

COOKING

1. Separate the egg whites from the yolks and start to whisk the egg whites in a grease-free bowl. Do not throw away the egg yolks. You can make cured egg yolks from them, for example. Once the egg whites start to foam, gradually add the sugar and continue to whisk until stiff. Once the sugar has dissolved and the meringue has become almost blue-white and glossy, you can tell that the meringue is ready when long peaks form on the mixer attachment.

2. Next, fill the meringue into a piping bag with a star nozzle. If you do not have a piping bag, you can also shape the meringue with two spoons. Use the piping bag to form small mounds on the parchment paper in circular motions.

3. Place the baking trays in the oven and bake for approximately 80-100 minutes (depending on the size). Occasionally open the oven door for a few seconds to allow moisture to escape. Ensure that the meringues do not turn brownish.

4. The meringues are ready when they can be easily lifted off the parchment paper. Remove the trays from the oven and let them cool completely.

5. Store the meringues in an airtight container to keep them fresh for several months.

NOTE: The calorie information may vary depending on the product used, country and region.

Spicy Butter Chicken

Spicy Butter Chicken

Spicy Butter Chicken

Spicy Butter Chicken

February 22, 2024 by Kimberly

Dive into the creamy delight of Spicy Butter Chicken with Coconut Cream! Perfect for those who love a rich, flavorful twist on a classic dish. Easy and satisfying!

75 MINUTES

INTERMEDIATE

OMNIVORE

INDIAN

715 PER PORTION

SPICY / CREAMY /
COMFORT FOOD

EVERYDAY

DINNER

AUTUMN / WINTER

INTRODUCTION

ABOUT THE RECIPE

Indulge in the rich flavors of my spicy Butter Chicken. This dish offers a perfect balance of creamy texture and fiery spices, bringing a delightful twist to traditional Indian cuisine. Ideal for dinner parties or a cozy night in, this easy-to-make recipe promises to impress with its deep flavors and comforting warmth.

How to serve:
Serve this luxurious spicy Butter Chicken with fragrant basmati rice or warm naan bread to soak up the creamy sauce. Garnish with fresh cilantro and a squeeze of lemon for an added zest. This dish is perfect for spice lovers and can be easily adjusted to suit any palate, making it a versatile addition to your culinary repertoire.

How to store:
Store leftovers in an airtight container in the refrigerator for up to three days. Reheat gently, adding a splash of stock or coconut milk to retain the creamy texture. Avoid freezing as it may affect the sauce’s consistency.

Hi, I'm Kimberly!

Hi, I'm Kimberly.

A passionate food lover who believes in the magic of homemade deliciousness that spreads love and warmth. Join me on this culinary adventure as I prepare wonderful dishes and let’s spread some happiness together!

Kimberly the Zett Signature

If you want to get to know me better, click here!


Spicy Butter Chicken

„Let’s make a piece of happiness“

INGREDIENTS

FOR 4 PORTIONS

CHICKEN & MARINADE

  • 800g chicken breast (1.8 lbs)
  • 60g full-fat yogurt (2 oz)
  • 4 garlic cloves
  • 1 tbsp garam masala
  • 1 tsp cayenne pepper
  • 1 tsp ginger powder
  • 1 tsp cumin
  • 1 tsp turmeric
  • 1 tsp salt

SAUCE

  • 300ml chicken broth (1 + 1/2 cup)
  • 400ml canned coconut milk (1 + 3/4 cup)
  • 100g tomato paste (3.5 oz)
  • 1 white onion
  • 4 garlic cloves
  • 1 fresh chili pepper
  • 2 tbsp butter
  • 1 tbsp clarified butter
  • 1 tbsp fresh ginger
  • 1 tbsp fresh cilantro
  • 1 tbsp garam masala
  • 1 tsp cumin
  • 1 tsp tumeric
  • salt & pepper to taste
  • lemon juice to taste

SIDES & TOPPING

  • 200g basmati rice (7 oz)
  • 4 naan bread slices
  • 2 tsp fresh cilantro
Spicy Butter Chicken
}

ACTIVE: 15 min

PASSIVE: 30 min

PREPARATIONS

Recommended Equipment
  • sharp knife
  • cutting board
  • 2 medium sized bowls
  • rice cooker (or pot with lid)
  • large pan
  • medium sized pan
  • Peel all the garlic cloves.
  • In a medium sized bowl, prepare the marinade for the chicken. To do this, mix 60g (1/4 cup) yogurt, 1 tsp salt, 1 tsp ginger powder, 1 tsp turmeric, 1 tbsp garam masala, 1 tsp cumin, 1 tsp cayenne pepper and 4 of the minced garlic cloves together.
  • Roughly chop the chicken breast into bite-sized pieces and mix with the marinade. Place the bowl in the fridge for at least 30 minutes (overnight if you prefer) and let the meat marinate.
  • In the meantime, cut the white onion into small pieces and set aside.
  • Finely chop the remaining 4 cloves of garlic or put them through a garlic press later. Set aside.
  • Peel the fresh ginger and either grate finely or chop finely and set aside.
  • Finely chop the fresh chilli pepper and use all the seeds or just a few, depending on your preference. Set aside.
  • Pluck the coriander leaves from the stalks and chop finely. Set aside.
  • Wash the rice and cook in a rice cooker or pot with lid and keep warm.
}

ACTIVE: 15 min

PASSIVE: 15 min

COOKING

1. Heat a large frying pan over medium heat and add 1 tbsp clarified butter. Take the chicken pieces out of the fridge and place directly in the hot pan. Fry on both sides until crispy. The chicken should still be on the raw side on the inside at this point, as it will finish cooking in the sauce later and become so tender this way. Remove the chicken from the pan into a bowl and set aside.

2. Put the pan back on the stove, add 1 tsp of butter and fry the onion pieces over a medium heat until they are transparent and soft.

3. Now add 100ml chicken broth and deglaze. Simmer over a medium heat until a kind of cream has formed, about 5 minutes.

4. Now add 1 tbsp butter, 1 tbsp freshly chopped ginger, 1 tbsp garam masala, 1 tsp cumin, 1 tsp turmeric, the chopped chilli pepper and the 4 minced garlic cloves to the pan and fry for 30 seconds. Then add 100g (3.5 oz) tomato paste, mix everything together and fry again for 1-2 minutes. Reduce the temperature to low.

5. Now add 200ml chicken broth and 400ml coconut milk. Stir everything well and bring the sauce to a boil. Add the chicken and meat juice to the sauce in the pan and simmer until the sauce thickens and the fat from the butter appears dark on the surface in some places. Small lakes of butter will form, so to speak. This will take about 15 minutes.

6. Stir the butter chicken well and add another tablespoon of butter. Remove the pan from the heat and season to taste with salt, pepper, chopped coriander and lemon juice.

7. Pour the rice into deep plates or bowls and top with the butter chicken. Serve with a slice of naan bread and fresh coriander.

NOTE: The calorie information may vary depending on the product used, country and region.

Bechamel Sauce

Bechamel Sauce

Béchamel Sauce

Béchamel Sauce

December 1, 2023 by Kimberly

Discover the magic of Béchamel Sauce! This creamy, smooth classic is a culinary staple, perfect for enhancing your favorite dishes.

25 MINUTES

INTERMEDIATE

VEGETARIAN

FRENCH

147 PER PORTION

CREAMY

CLASSICS

SAUCE

ALL YEAR

INTRODUCTION

ABOUT THE RECIPE

Embark on a culinary journey with the classic Béchamel Sauce, a cornerstone of French cuisine. This creamy, smooth sauce is not just a recipe – it’s a gateway to elevating your meals. Whether you’re dressing up a lasagna or making a rich, savory Croque Monsieur, Béchamel Sauce brings a touch of elegance and flavor to your dishes. It’s simple to whip up with just a few ingredients.

How to serve:
Pour it over vegetables for a comforting gratin, use it as a base for creamy pasta dishes, or layer it in lasagnas and moussakas for a moist, flavorful experience. It’s also perfect for creating a luxurious mac and cheese. The key is to let the sauce slightly thicken to coat your spoon, ensuring it blends seamlessly with your dish, enhancing every bite.

How to store:
To keep your Béchamel Sauce fresh, cool it at room temperature before refrigerating in a tightly sealed container. It lasts up to 3 days.

Hi, I'm Kimberly!

Hi, I'm Kimberly.

A passionate food lover who believes in the magic of homemade deliciousness that spreads love and warmth. Join me on this culinary adventure as I prepare wonderful dishes and let’s spread some happiness together!

Kimberly the Zett Signature

If you want to get to know me better, click here!


Béchamel Sauce

„Let’s make a piece of happiness“

INGREDIENTS

FOR 6 PORTIONS

SAUCE

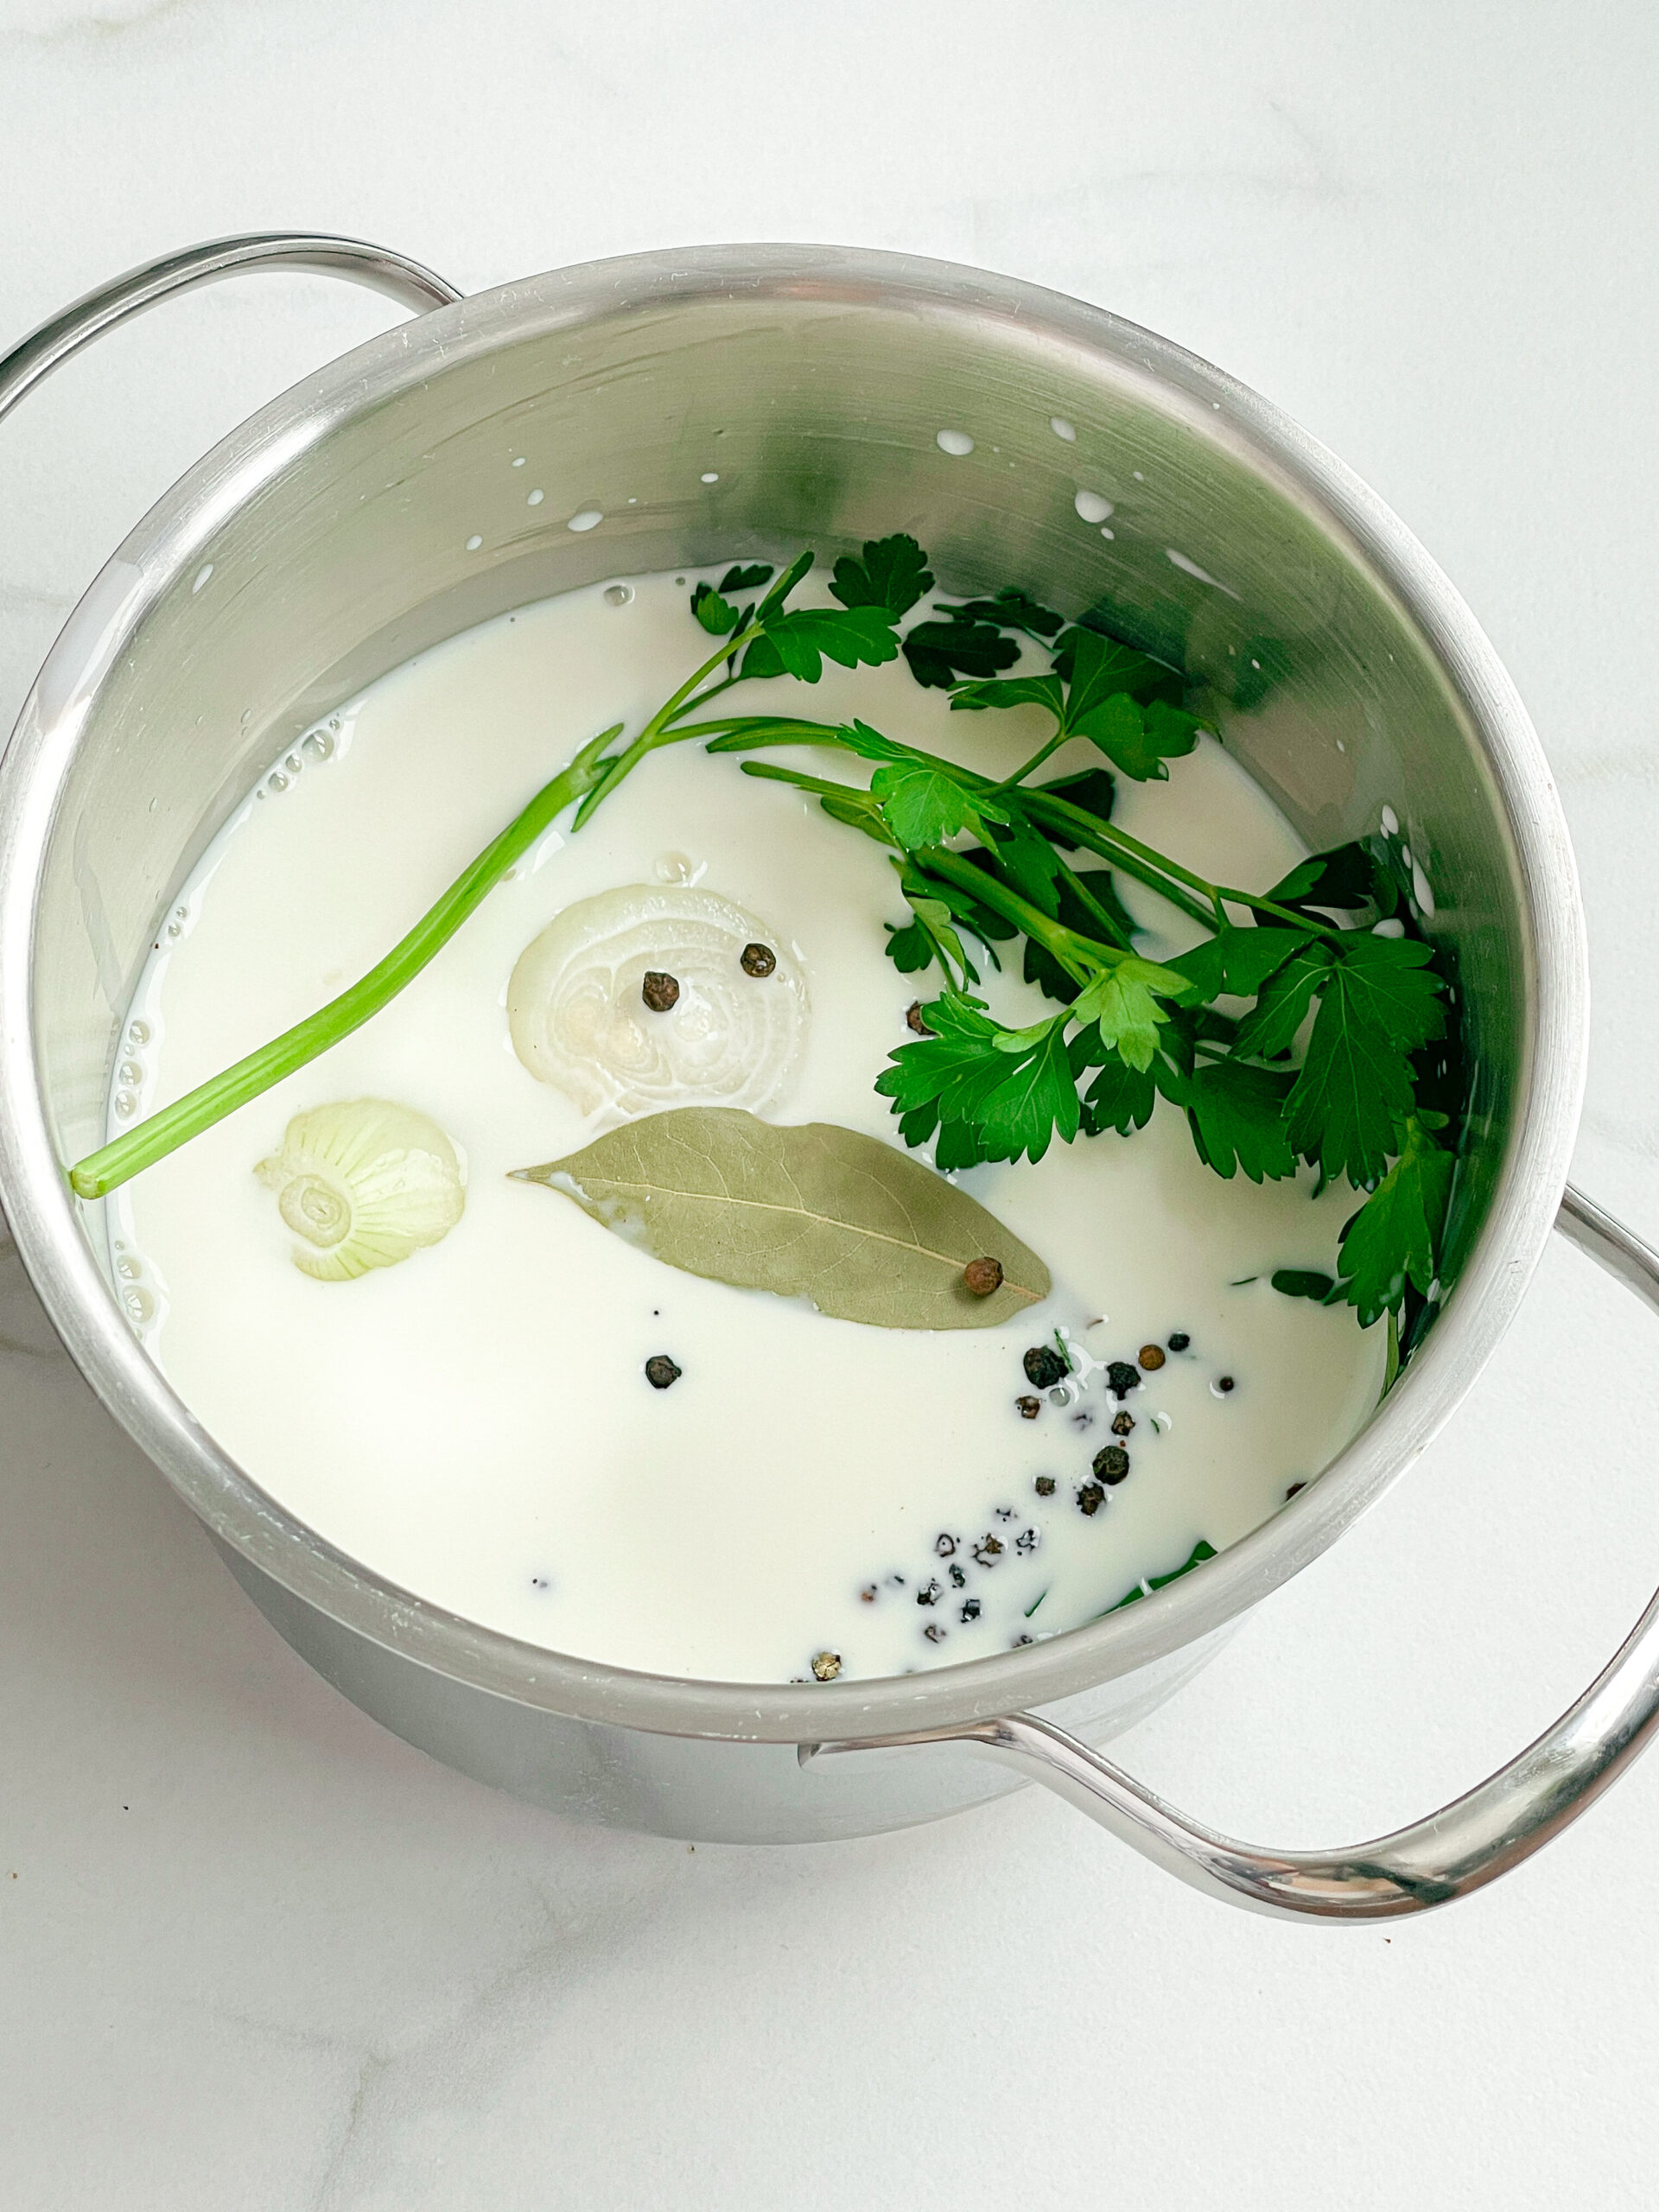
  • 500ml full-fat cow milk (2 cups)
  • 50g unsalted butter (3.5 tbsp)
  • 50g all-purpose flour (5 tbsp)
  • 1/2 nutmeg
  • 1 garlic clove
  • 3/8 tsp salt
  • 1/4 tsp white pepper


Béchamel Sauce
}

ACTIVE: 1 min.

PASSIVE: –

PREPARATIONS

Recommended Equipment
  • small pot
  • whisk
  • small wooden spoon
  • Peel and halve the garlic clove. Set aside.
    }

    ACTIVE: 25 min

    PASSIVE: –

    COOKING

    1. Melt the butter in a pan over a medium heat. Add the garlic clove and fry briefly in the butter. Remove the garlic clove.

    2. Now add all the flour to the melted butter and stir quickly with a wooden spoon until smooth. The consistency should be like a paste. Remove the pot directly from the heat and stir in the first 100ml of milk with a whisk until smooth. Place the pan back on the stove and bring to a boil briefly, stirring constantly. Now remove the pot from the heat and pour in the next 100ml (3 fl oz) of milk. Stir well, place the pot back on the stove and bring to a boil, stirring constantly. Now do the same with the next 3 rounds of 100ml (3 fl oz). Remove from the heat, pour in, stir, return to the stove, bring to the boil, remove from the heat and so on…

    3. After about 20 minutes, the sauce should have a consistency similar to melted cheese. You should no longer be able to taste the flour. The sauce can now be removed from the heat and seasoned to taste. To do this, grate the nutmeg freshly and add 3/8 teaspoon of salt and 1/4 teaspoon of pepper.

    NOTE: The calorie information may vary depending on the product used, country and region.

    Cod with Caper Lemon Butter Baked Asparagus & Vine Tomatoes

    Cod with Caper Lemon Butter Baked Asparagus & Vine Tomatoes

    Cod with Caper Lemon Butter Baked Asparagus & Vine Tomatoes

    Cod with Caper Lemon Butter Baked Asparagus & Vine Tomatoes

    January 17, 2024 by Kimberly

    Savor the zesty blend of Cod with Caper Lemon Butter, complemented by tender baked asparagus and juicy vine tomatoes. A delicious, wholesome dinner for any day!

    25 MINUTES

    INTERMEDIATE

    OMNIVORE

    INT.

    466 PER PORTION

    UMAMI

    EVERYDAY

    DINNER

    SPRING / SUMMER

    INTRODUCTION

    ABOUT THE RECIPE

    Delight your taste buds with this exquisite Cod with Caper Lemon Butter, Baked Asparagus & Vine Tomatoes recipe. This dish is a perfect blend of flavors, combining the mild, flaky texture of cod with the zesty tang of caper lemon butter. Complemented by the earthy taste of baked asparagus and the sweetness of vine tomatoes, it’s a healthy seafood dish that’s both nutritious and indulgent. Ideal for a quick, yet elegant family dinner, this recipe brings gourmet home cooking to your table with simple, seasonal ingredients.

    How to serve:
    To serve this delightful meal, plate the perfectly cooked cod as the centerpiece. Drizzle it generously with the aromatic caper lemon butter sauce, ensuring each bite is infused with its rich flavor. Accompany the fish with a side of tender, oven-roasted asparagus and ripe, juicy baked vine tomatoes, enhancing the dish’s freshness and color. This combination not only offers a harmonious blend of tastes but also presents a visually appealing dish, perfect for any occasion. For a complete dining experience, pair this meal with a light, crisp white wine or a lemon-infused water.

    How to store:
    Keep the cod and vegetables in separate airtight containers in the refrigerator. They will maintain their quality for up to one day. Reheat gently to preserve the texture of the fish and the crispness of the vegetables. Enjoy the convenience of a delicious, homemade meal, ready to be savored again.

    Hi, I'm Kimberly!

    Hi, I'm Kimberly.

    A passionate food lover who believes in the magic of homemade deliciousness that spreads love and warmth. Join me on this culinary adventure as I prepare wonderful dishes and let’s spread some happiness together!

    Kimberly the Zett Signature

    If you want to get to know me better, click here!


    Cod with Caper Lemon Butter Baked Asparagus & Vine Tomatoes
    Cod with Caper Lemon Butter Baked Asparagus & Vine Tomatoes
    Cod with Caper Lemon Butter Baked Asparagus & Vine Tomatoes

    „Let’s make a piece of happiness“

    INGREDIENTS

    FOR 2 PORTIONS

    COD

    • 300g cod filet (11 oz)
    • 2 tbsp all-purpose flou
    • 2 tbsp olive oil
    • 1 tbsp butter

    SAUCE

    • 1 tbsp capers
    • 1 tsp butter
    • juice of half a lemon

      VEGETABLES

      • 250g vine tomatoes
      • 250g green asparagus (fresh or frozen)
      • 2 tbsp olive oil
      • salt
      • pepper

        TOPPINGS

        • parsley
        • the other half of the lemon
          Cod with Caper Lemon Butter Baked Asparagus & Vine Tomatoes
          }

          ACTIVE: 3 min

          PASSIVE: –

          PREPARATIONS

          Recommended Equipment
          • sharp knife
          • cutting board
          • frying pan
          • Preheat the oven to 200°C (400°F)
          • Pluck the parsley leaves from the stalks and chop finely.
            }

            ACTIVE: 20 min

            PASSIVE: –

            COOKING

            1. Place the frozen asparagus and tomatoes on a baking tray lined with baking paper, drizzle with olive oil and season with salt and pepper. Roast the asparagus and tomatoes in the oven on the middle shelf for approx. 15 minutes until golden brown.

            2. Pat the cod dry and then roll in flour. Set aside.

            3. Heat 2 tbsp olive oil and 1 tbsp butter in a frying pan over a medium heat. Add the cod and fry on one side for approx. 5 minutes. Carefully flip the fish and fry for a further 1-3 minutes (depending on the thickness of the fish). At this point, the fat in the pan can be poured over the fish with a spoon so that the side that is facing up does not dry out.

            4. Remove the pan from the heat and arrange the fish on plates – warm the plates in advance if you like. Put the pan back on the heat.

            5. Now pour the juice of half a lemon over the remaining oil and butter in the pan. Stir briefly and allow to warm. Now add the capers, toss well and deglaze whats on the bottom of the pan. Remove the pan from the heat and stir in 1 teaspoon of butter. The sauce can now be poured over the fish.

            6. Remove the vegetables from the oven and place on the plates next to the fish. Garnish with parsley and lemon slices.

            NOTE: The calorie information may vary depending on the product used, country and region.

            Chicken Schnitzel with Caramalized Onions & Sauce Hollandaise

            Chicken Schnitzel with Caramalized Onions & Sauce Hollandaise

            Chicken Schnitzel with Caramalized Onions & Sauce Hollandaise

            Chicken Schnitzel with Caramalized Onions & Sauce Hollandaise

            November 24, 2023 by Kimberly

            Delicious Chicken Schnitzel topped with caramelized onions and drizzled with creamy Hollandaise sauce. A mouthwatering combination of flavors for a satisfying and comforting meal.

            55 MINUTES

            INTERMEDIATE

            OMNIVORE

            GERMAN

            631 PER PORTION

            COMFORT FOOD

            EVERYDAY

            DINNER

            AUTUMN / WINTER

            INTRODUCTION

            ABOUT THE RECIPE

            Treat yourself to some real comfort food with my chicken schnitzel topped with sweet caramelized onions and drizzled with a delicious hollandaise sauce. This recipe promises a symphony of flavors that will enhance your dining experience.

            How to serve:
            Serve this delectable Chicken Schnitzel on its own or alongside your favorite sides, such as my potato salad with eggs, bacon and pickles or a crisp cucumber salad. The crispy texture of the schnitzel, the sweetness of caramelized onions, and the richness of the Hollandaise sauce create a harmonious combination.

            How to store:
            For optimal freshness, store any leftover Chicken Schnitzel in an airtight container in the refrigerator for up to two days. To reheat, use an oven or toaster oven to maintain its crispy texture. Avoid microwaving to preserve the schnitzel’s delightful crunch.

            Hi, I'm Kimberly!

            Hi, I'm Kimberly.

            A passionate food lover who believes in the magic of homemade deliciousness that spreads love and warmth. Join me on this culinary adventure as I prepare wonderful dishes and let’s spread some happiness together!

            Kimberly the Zett Signature

            If you want to get to know me better, click here!


            Chicken Schnitzel with Caramalized Onions & Sauce Hollandaise
            Chicken Schnitzel with Caramalized Onions & Sauce Hollandaise

            „Let’s make a piece of happiness“

            INGREDIENTS

            For 4 PORTIONS

            CHICKEN SCHNITZEL

            • 160g bread crumbs (1 cup)
            • 120g all-purpose flour (1 cup)
            • 2 eggs
            • 600g chicken breasts (1.5 lbs.)
            • 1 tbsp clarified butter
            • 1/4 tsp salt
            • 1/4 tsp pepper

            CARAMELIZED ONIONS

            • 600g onions (1.5 lbs.)
            • 1/2 tsp salt
            • 1 tsp clarified butter

            TOPPINGS

            • 1 lemon
            • parsley
            Chicken Schnitzel with Caramalized Onions & Sauce Hollandaise
            }

            ACTIVE: 15 min

            PASSIVE: 0 min

            PREPARATIONS

            Recommended Equipment
            • sharp knife
            • cutting board
            • two large pans
            • small pot
            • Peel the onions and cut into thin stripes.
            • Prepare three shallow plates of the same size. Pour flour into the first plate, break 2 eggs into the second plate and whisk with a fork. Season the egg with salt and pepper. Pour breadcrumbs into the third plate.
              }

              ACTIVE: 40 min

              PASSIVE: 0 min

              COOKING

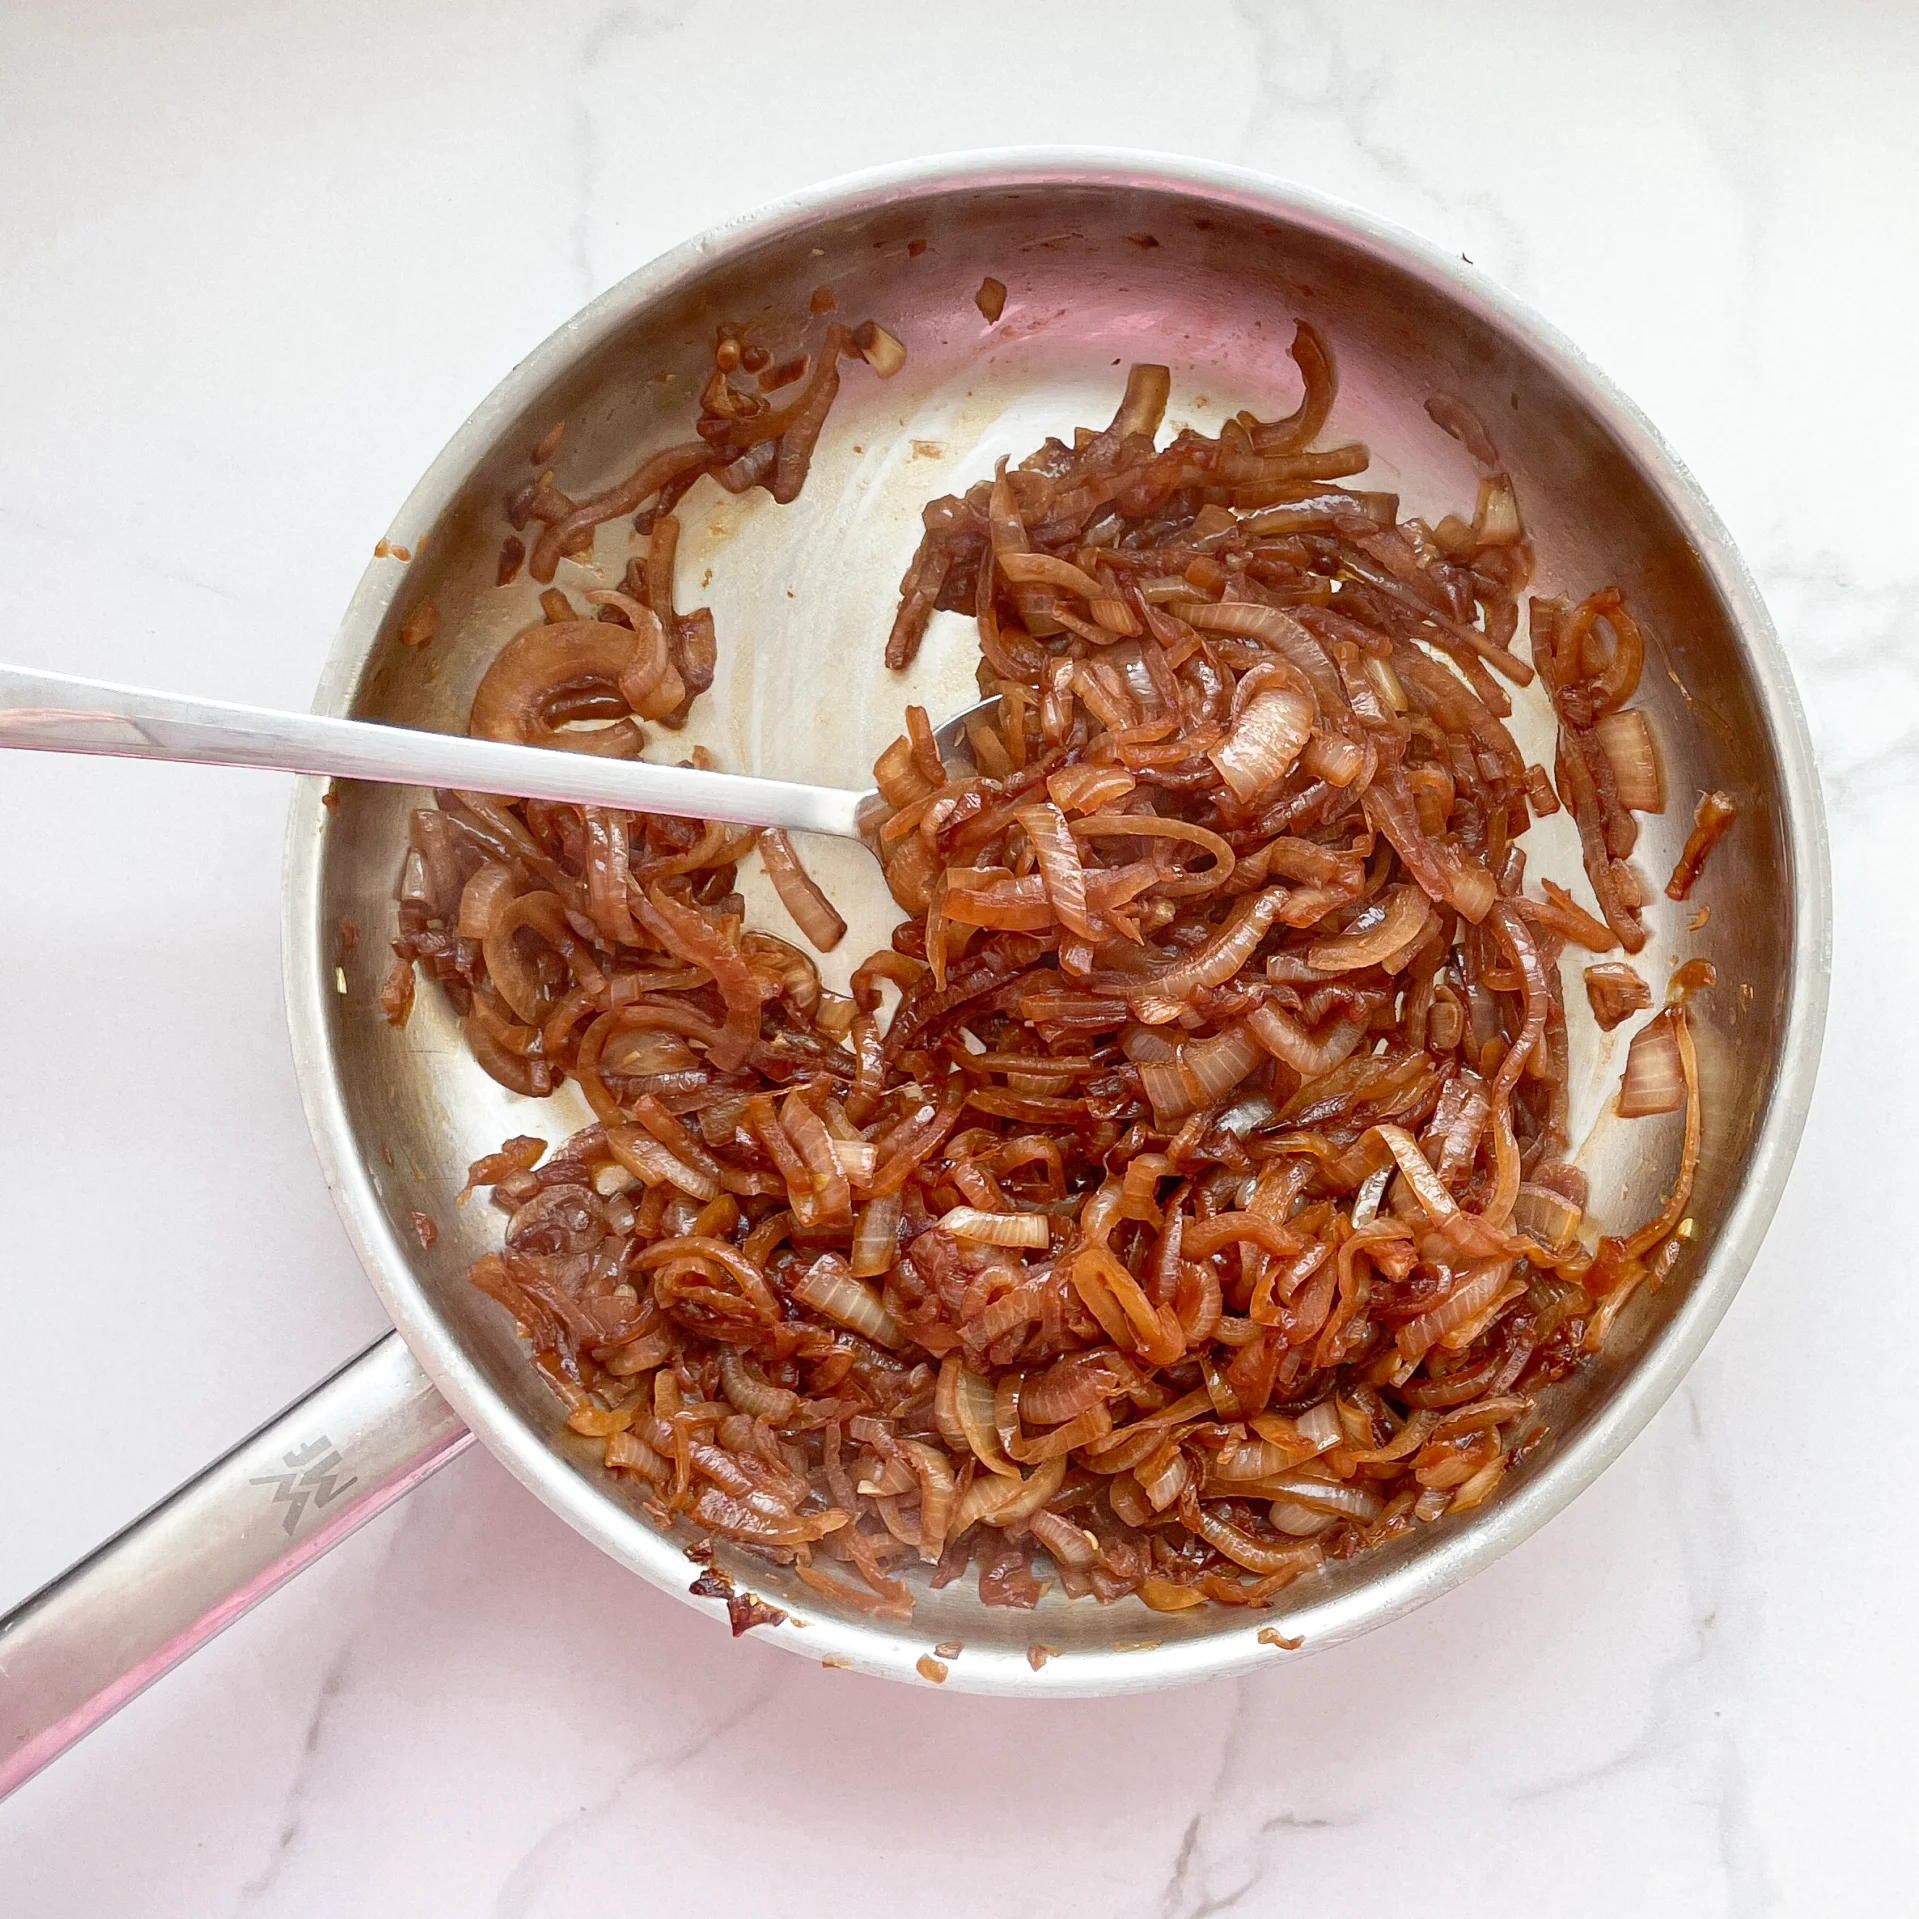
              1. Melt 1 teaspoon of clarified butter in a large frying pan. Add the onions and sprinkle with 1/2 teaspoon of salt. Now caramelize slowly over a medium heat until they are almost dark brown. This can take a good 30-40 minutes.

              2. Meanwhile, bread the chicken breast. To do this, cut the meat in a butterfly cut. Place the chicken breast fillets between two layers of cling film and pound with a little force and a meat mallet to a thickness of about 5-8 mm.

              3. Now dredge each piece of meat in the flour first and press down well on all sides. Next, pull through the egg so that the piece of meat is well coated on all sides and finally pull through the breadcrumbs and press down well.

              4. Heat 1 tbsp clarified butter in a large frying pan over a medium heat and allow to melt. Now fry the breaded chicken breast fillets in the fat until golden brown. Fry for about 4 minutes on each side, depending on how thick the meat is.

              5. While the meat is cooking, slowly heat the hollandaise sauce in a small pan over a low heat.

              6. Arrange the meat on plates, pour over the hollandaise sauce and top with the caramelized onions and freshly chopped parsley.

              NOTE: The calorie information may vary depending on the product used, country and region.