Chicken Shawarma Plate

Chicken Shawarma Plate

Chicken Shawarma Plate

Chicken Shawarma Plate

December 12, 2023 by Kimberly

Experience a taste symphony with this Chicken Shawarma Plate – succulent spiced chicken, vibrant fresh veggies, and a zesty mint-garlic dip. A flavorful journey on every plate!

This website uses affiliate links which may earn commission for purchases made at no additional cost to you.

TOTAL TIME

60 min

SERVES

2 plates

DIET

omnivore

EVERY RECIPE DESERVES

A Little Love Letter

Savor the exotic flavors of my Chicken Shawarma Plate! Succulent, spice-infused chicken, paired with a medley of fresh tomatoes and cucumbers, all enhanced by a zesty mint-garlic dip. This culinary masterpiece promises a taste journey that’s as bold and exciting as it is delicious. Elevate your dining experience with this harmonious fusion of textures and spices, making every bite a celebration of Middle Eastern culinary delights.

Serve a delicious chicken shawarma plate by combining the seasoned chicken with the fresh tomato, cucumber and parsley salad and the spicy mint garlic dip. Feel free to add rice or chubz, a Lebanese bread, as well. This versatile dish offers a fusion of flavors and textures that can be enjoyed on any occasion. A simple but delicious culinary adventure awaits!

To store the Chicken Shawarma Plate, refrigerate any leftovers promptly. Keep the spiced chicken, tomato-cucumber salad, mint-garlic dip, and other components in separate airtight containers. This helps maintain their individual flavors and textures. When reheating, warm the chicken separately to preserve its tenderness. Consume within a day or two for the best taste and freshness.

Hi, I'm Kimberly!

Hi, I'm Kimberly.

A hopeless romantic when it comes to food. Every recipe I share is a love letter to food itself. I’m so glad you’re here. Make yourself at home and stay a while.

Love,
Kimberly

Kimberly the Zett Signature

If you want to get to know me better,
click here!


Chicken Shawarma Plate

LET’S MAKE A PIECE OF HAPPINESS

Print
clock clock iconcutlery cutlery iconflag flag iconfolder folder iconinstagram instagram iconpinterest pinterest iconfacebook facebook iconprint print iconsquares squares iconheart heart iconheart solid heart solid icon
Chicken Shawarma Plate

Chicken Shawarma Plate


5 Stars 4 Stars 3 Stars 2 Stars 1 Star

No reviews

  • Author: Kimberly
  • Total Time: 60 min
  • Yield: 2

Description

RECOMMENDED EQUIPMENT

  • sharp knife
  • cutting board
  • small bowl
  • medium bowl
  • frying pan

Ingredients

Units Scale
CHICKEN
  • 400 grams chicken breast or boneless, skinless chicken thighs
  • 1 tbsp olive oil
  • 1 tbsp lemon juice
  • 3 garlic cloves
  • 1 tsp cumin
  • 1 tsp smoked paprika
  • 1 tsp salt
  • 1/4 tsp turmeric
  • 1/4 tsp curry
  • 1/8 tsp cinnamon
  • 1/8 tsp pepper
SALAD
  • 200 grams tomatoes
  • 150 grams cucumber
  • 80 grams red onion
  • 1 tbsp parsley
  • 2 tbsp olive oil
  • 1 tbsp lemon juice
  • 1/8 tsp salt
  • 1/8 tsp pepper
DIP
  • 200 grams yogurt
  • 12 leaves fresh mint
  • 1 garlic clove
  • 1/4 tsp salt
  • 1/8 tsp pepper

Instructions

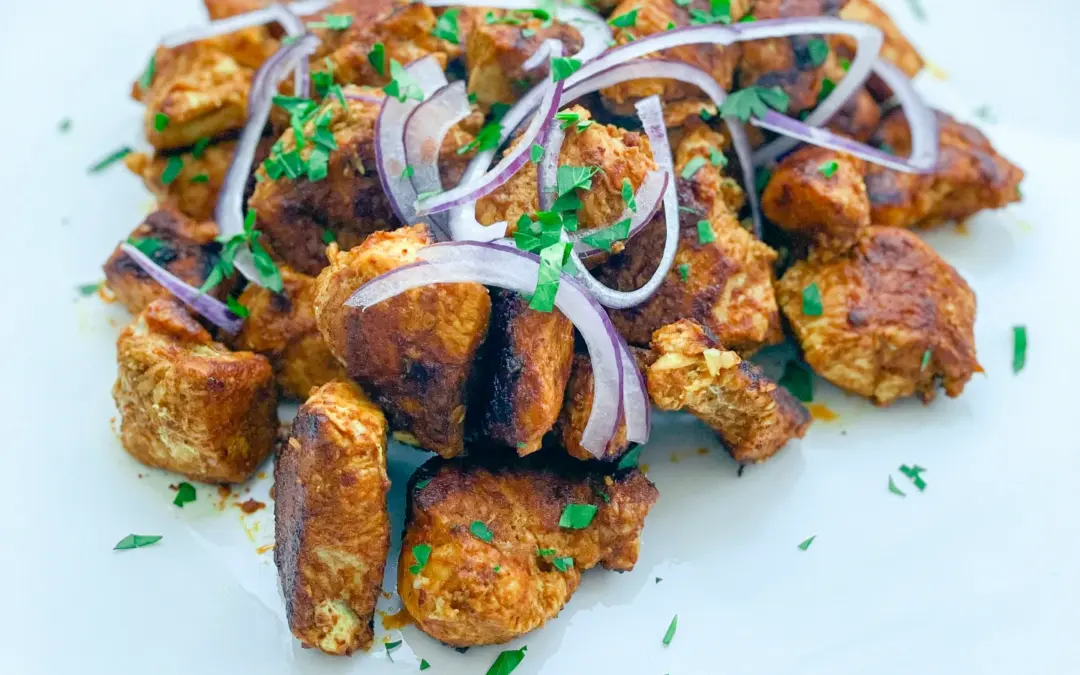
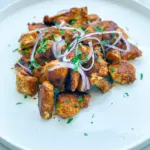
  1. Start by preparing the chicken marinade, since it needs resting time. Cut the chicken into small pieces if using breast, or leave boneless thighs whole. In a bowl, mix 1 tbsp olive oil with 1 tbsp lemon juice. Remove the skin from 3 garlic cloves, press them into the bowl, and add 1 tsp cumin, 1 tsp smoked paprika powder, ¼ tsp turmeric, ¼ tsp curry powder, ⅛ tsp cinnamon, 1 tsp salt, and ⅛ tsp black pepper. Stir well, then add the chicken and mix until every piece is coated. Cover the bowl and place it in the fridge for about 30 minutes.
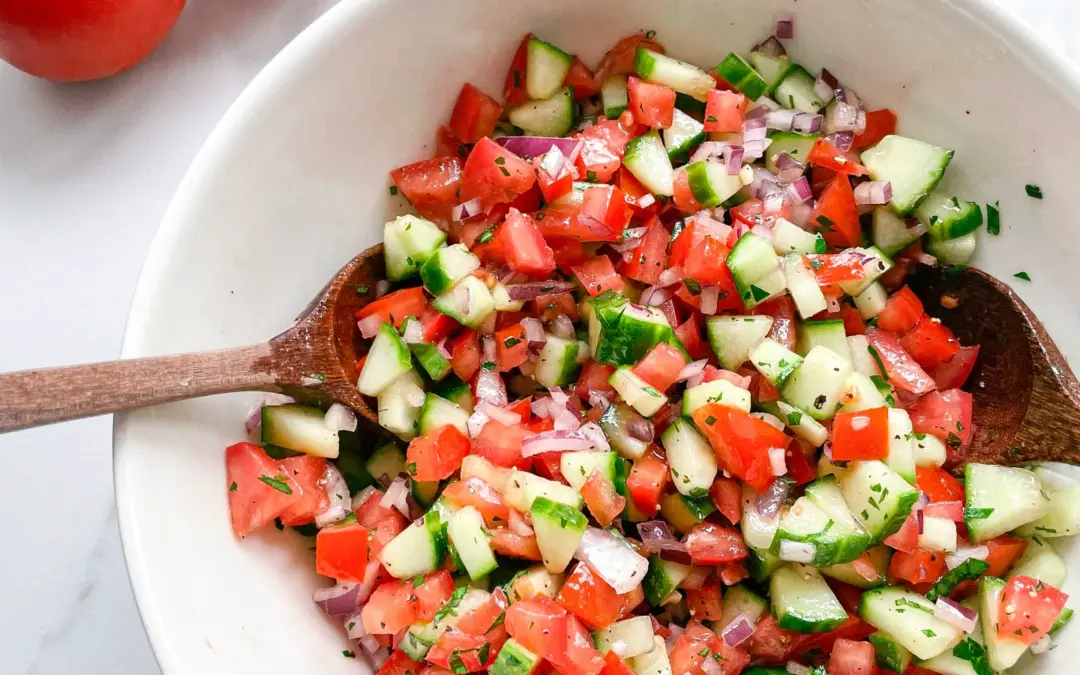
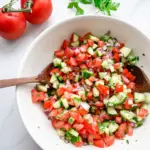
  2. While the chicken marinates, move on to the salad and dip. Cut the tomatoes, cucumber, and onion into small pieces. Pluck the parsley leaves, chop them finely, and set everything aside. In a small bowl, whisk together 2 tbsp olive oil, 1 tbsp lemon juice, and a pinch of salt and pepper, but don’t combine the salad yet; that comes right before serving.
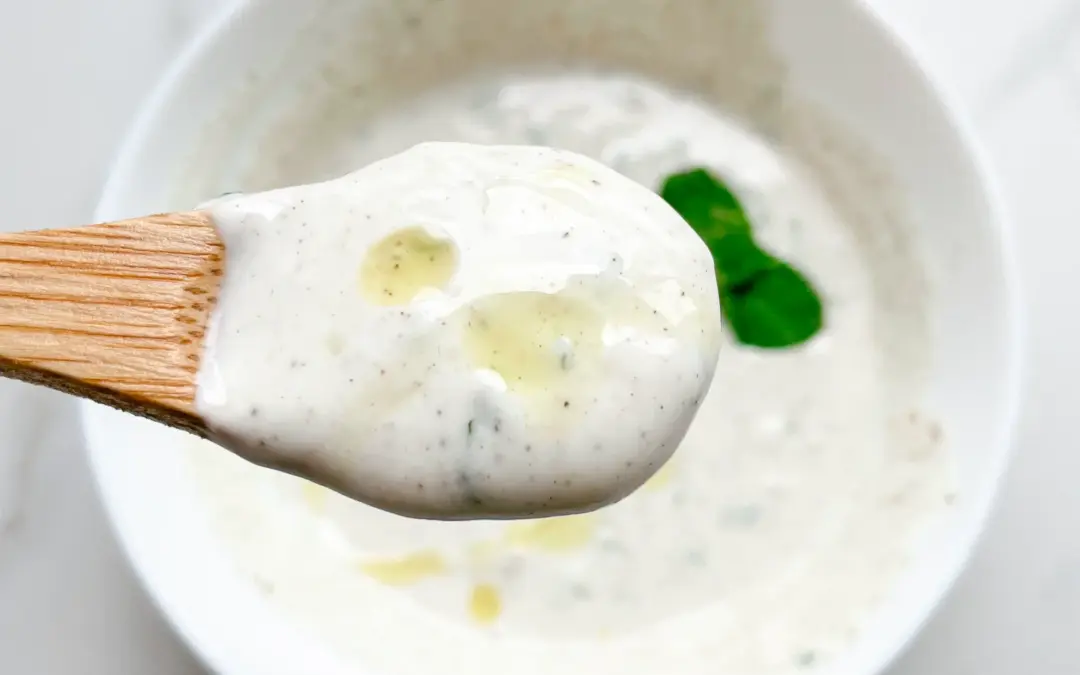
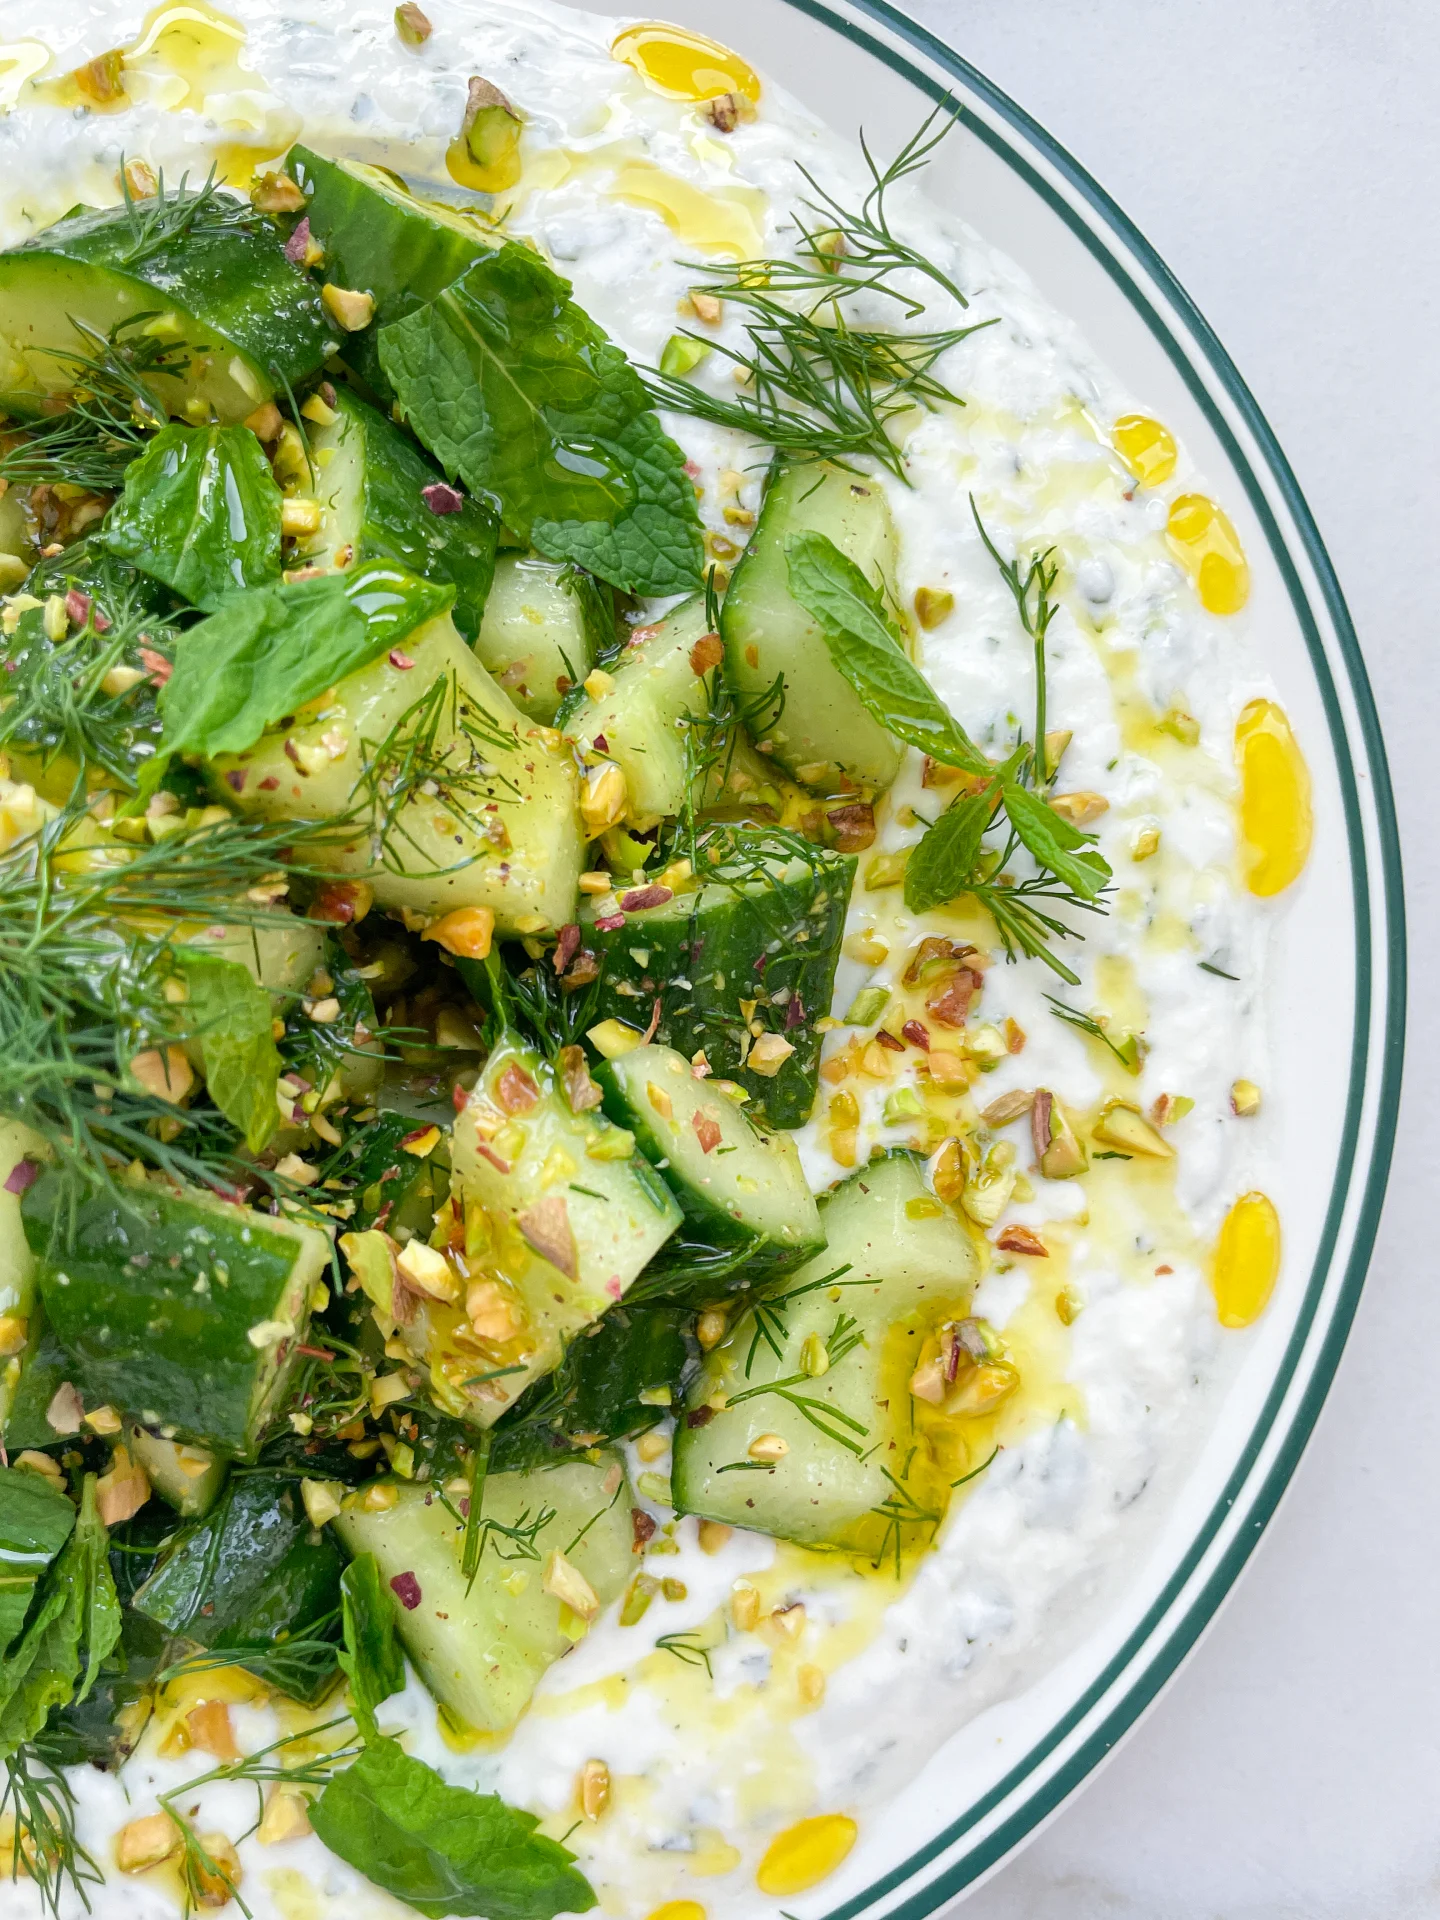
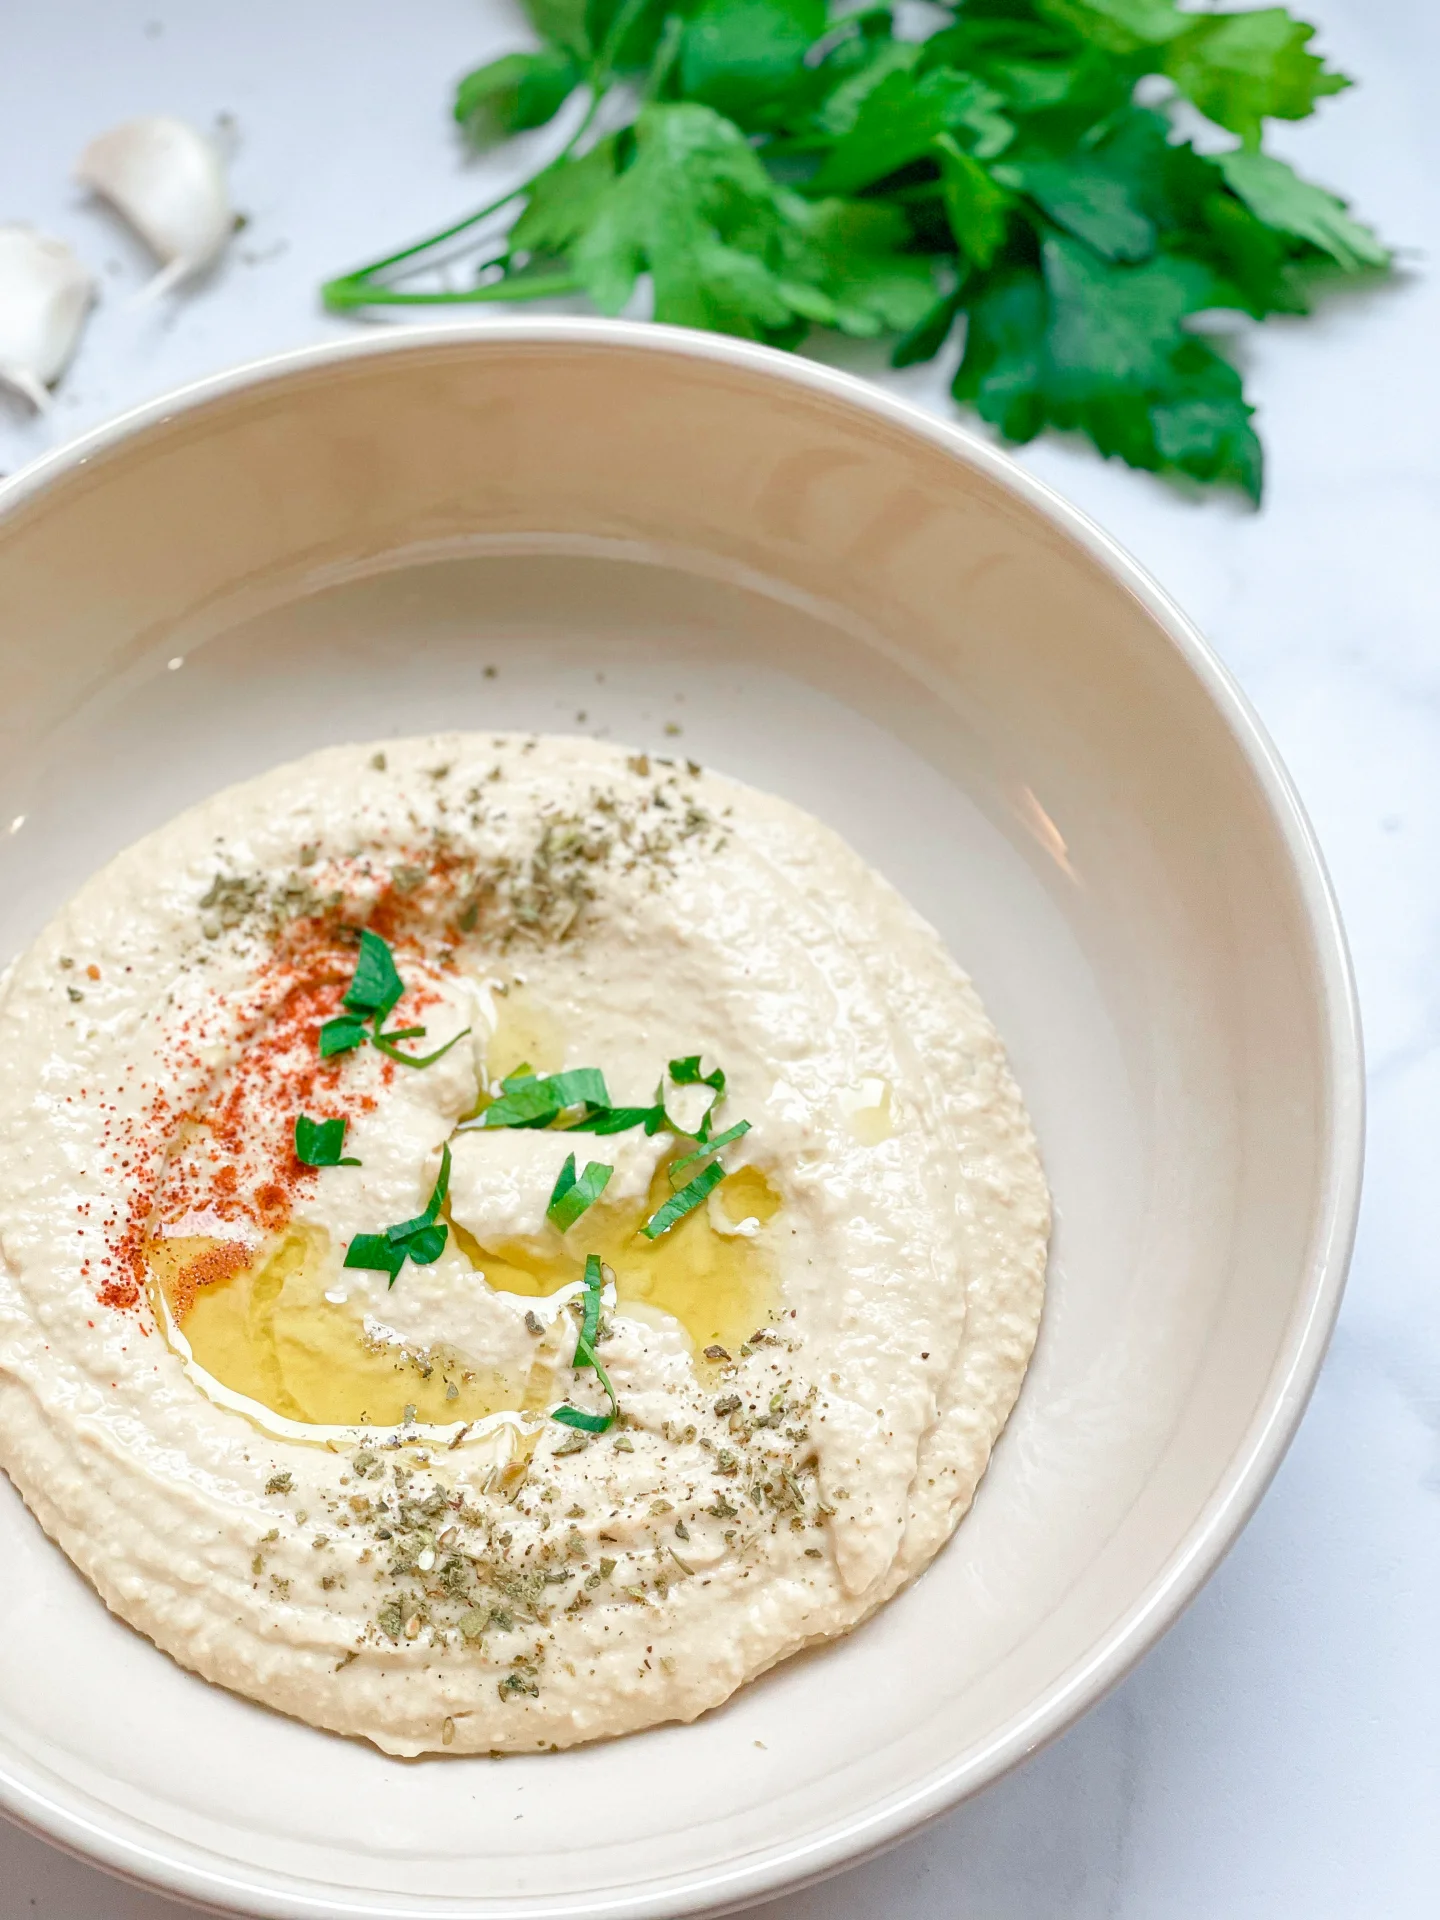
  3. Next, prepare the yogurt dip. Peel 1 garlic clove and chop or press it. Stack a few mint leaves, roll them up, slice into fine rings, and chop finely. In another small bowl, add the yogurt, garlic, mint, ¼ tsp salt, and ⅛ tsp black pepper. Stir until creamy, then refrigerate the dip while finishing the chicken.
  4. When the chicken has marinated long enough, heat a large frying pan over medium heat. There’s no need to add extra oil — the marinade already has enough. (Optional: Thread the chicken onto soaked wooden or metal skewers.) Place the chicken in the hot pan and let it cook without moving it, until it turns white around the edges and golden underneath. Then flip and cook for the same amount of time on the other side, until golden brown and cooked through.
  5. While the chicken cooks, quickly finish the salad. Add the chopped tomato, cucumber, onion, and parsley to the olive oil–lemon dressing and toss everything together. Once the chicken is ready, arrange it on plates, add the salad on the side, and either spoon the mint garlic yogurt dip over the top or serve it separately.
  • Passive Time: 30 min
  • Cook Time: 30 min

CRAVING MORE?

Follow along here & don’t forget to subscribe to my substack!

Tomato, Cucumber & Parsley Side Salad

Tomato, Cucumber & Parsley Side Salad

Tomato, Cucumber & Parsley Side Salad

Tomato, Cucumber & Parsley Side Salad

December 11, 2023 by Kimberly

A vibrant medley of juicy tomatoes, crisp cucumbers, and fresh parsley harmonize in a refreshing salad. Bursting with flavors, it’s a delightful symphony of taste and texture on your plate.

This website uses affiliate links which may earn commission for purchases made at no additional cost to you.

TOTAL TIME

15 min

SERVES

2 portions

DIET

vegan

EVERY RECIPE DESERVES

A Little Love Letter

Enjoy a tasty side salad with fresh tomatoes, crunchy cucumbers, and flavorful parsley. It’s a simple mix that brings a burst of deliciousness to your meals. This easy-to-make salad is perfect with bread or shawarma chicken and this easy mint garlic dip, adding a refreshing and light touch to your plate. Try it for a quick, fresh bite that makes any meal better.

Serve this delightful salad by tossing the fresh tomatoes, crunchy cucumbers, and flavorful parsley together in a bowl. Drizzle with a light vinaigrette or a squeeze of lemon for an extra kick. Pair it with your favorite bread or alongside chicken as a wonderful component for a whole meal, take a look at my Chicken Shawarma Plate. Keep it chilled for a cool, refreshing experience. Quick, easy, and bursting with flavors, this salad is a perfect addition to any table.

Store the salad in an airtight container in the refrigerator. If you’ve added dressing, store it separately to maintain the crunch. Consume within a day or two for optimal taste. A quick toss before serving revives its flavors, ensuring a crisp and delicious experience every time.

Hi, I'm Kimberly!

Hi, I'm Kimberly.

A hopeless romantic when it comes to food. Every recipe I share is a love letter to food itself. I’m so glad you’re here. Make yourself at home and stay a while.

Love,
Kimberly

Kimberly the Zett Signature

If you want to get to know me better,
click here!


Tomato, Cucumber & Parsley Side Salad

LET’S MAKE A PIECE OF HAPPINESS

Print
.tasty-recipe-responsive-iframe-container-33049e72 { position: relative; overflow: hidden; padding-top: 177.62%; } .tasty-recipe-responsive-iframe-container-33049e72 iframe { position: absolute; top: 0; left: 0; width: 100%; height: 100%; border: 0; } clock clock iconcutlery cutlery iconflag flag iconfolder folder iconinstagram instagram iconpinterest pinterest iconfacebook facebook iconprint print iconsquares squares iconheart heart iconheart solid heart solid icon
Tomato, Cucumber & Parsley Side Salad

Tomato, Cucumber & Parsley Side Salad


  • Author: Kimberly
  • Total Time: 10 min
  • Yield: 2

Description

RECOMMENDED EQUIPMENT

  • sharp knife
  • cutting board
  • medium sized bowl

Ingredients

Units Scale
DRESSING
  • 2 tbsp olive oil
  • 1 tbsp lemon juice
  • 1/8 tsp salt
  • 1/8 tsp pepper
SALAD
  • 200g tomatoes (7 oz.)
  • 150g cucumber (5 oz.)
  • 80g red onion (3 oz.)
  • 1 tbsp parsley

Instructions

  1. Cut the tomatoes, cucumber and onion into small pieces. Pluck the parsley from the stalks and chop finely.
  2. In a medium-sized bowl, mix 2 tbsp olive oil, 1 tbsp lemon juice and salt and pepper to taste.
  3. Now add the chopped tomatoes, cucumber and onion and the finely chopped parsley and mix everything into a salad.
  • Cook Time: 10 min

CRAVING MORE?

Follow along here & don’t forget to subscribe to my substack!

Chicken Shawarma Marinade

Chicken Shawarma Marinade

Chicken Shawarma Marinade

Chicken Shawarma Marinade

December 9, 2023 by Kimberly

Transform your chicken shawarma with a zesty marinade featuring garlic, lemon, and a harmonious mix of Middle Eastern spices. Infuse bold flavor for a mouthwatering culinary adventure.

This website uses affiliate links which may earn commission for purchases made at no additional cost to you.

TOTAL TIME

50 min

SERVES

2 portions

DIET

omnivore

EVERY RECIPE DESERVES

A Little Love Letter

Get ready to whip up the best chicken shawarma ever with this amazing marinade! Mix in some garlic, fresh lemon juice, olive oil, and a bunch of delightful Middle Eastern flavors. Whether you grill it or roast it, you’re in for some seriously joyous, tasty bites that will send your taste buds on a magical journey. Make your own piece of happiness with this fantastic chicken shawarma marinade – it’s an absolute blast!

Serve your delicious chicken shawarma meat by placing it on warm pita bread or flatbread. Top with crunchy vegetables such as a tomato cucumber salad. Drizzle with a spicy tahini or mint garlic dip for a special kick. You can also use the chicken as a wonderful component for a whole meal, take a look at my Chicken Shawarma Plate. A perfect feast so that every bite is a hearty delight!

Maximize the flavor of your chicken shawarma by storing it in a jar or airtight container, letting the marinade work its magic for up to 5 days. The longer it sits, the more the flavors meld together, creating an even more delicious and satisfying dish when you’re ready to savor it. Store the roasted marinated chicken shawarma meat by placing it in an airtight container in the refrigerator and consume within 2 to 3 days to ensure optimum freshness.

Hi, I'm Kimberly!

Hi, I'm Kimberly.

A hopeless romantic when it comes to food. Every recipe I share is a love letter to food itself. I’m so glad you’re here. Make yourself at home and stay a while.

Love,
Kimberly

Kimberly the Zett Signature

If you want to get to know me better,
click here!


Chicken Shawarma Marinade

LET’S MAKE A PIECE OF HAPPINESS

Print
.tasty-recipe-responsive-iframe-container-ba12b7a8 { position: relative; overflow: hidden; padding-top: 177.62%; } .tasty-recipe-responsive-iframe-container-ba12b7a8 iframe { position: absolute; top: 0; left: 0; width: 100%; height: 100%; border: 0; } clock clock iconcutlery cutlery iconflag flag iconfolder folder iconinstagram instagram iconpinterest pinterest iconfacebook facebook iconprint print iconsquares squares iconheart heart iconheart solid heart solid icon
Chicken Shawarma Marinade

Chicken Shawarma Marinade


  • Author: Kimberly
  • Total Time: 50 min
  • Yield: 2

Description

RECOMMENDED EQUIPMENT

  • sharp knife
  • cutting board
  • medium sized bowl
  • frying pan

Ingredients

Units Scale
  • 400 grams chicken breast or boneless, skinless chicken thighs
  • 1 tsbp olive oil
  • 1 tbsp lemon juice
  • 3 garlic cloves
  • 1 tsp cumin
  • 1 tsp smoked paprika
  • 1 tsp salt
  • 1/4 tsp turmeric
  • 1/4 tsp curry
  • 1/8 tsp cinnamon
  • 1/8 tsp pepper

Instructions

  1. Mix 1 tbsp olive oil and 1 tbsp lemon juice in a bowl.
  2. Squeeze the garlic cloves into the bowl with the olive oil and lemon juice. Now add 1 tsp cumin, 1 tsp smoked paprika powder, 1/4 tsp turmeric, 1/4 tsp curry powder, 1/8 tsp cinnamon, 1 tsp salt and 1/8 tsp black pepper and mix well.
  3. Add the chicken to the marinade and mix well so that all the chicken is coated with the marinade.
  4. Now place the bowl in the fridge. If you want it to be super quick, leave it to marinate for at least 30 minutes. For a longer preparation time, you can leave it in the fridge for up to 4 hours.
  5. After the marinating time, heat a large frying pan over a medium heat. The chicken can now be placed on wooden or metal skewers before frying, but this is not a must. Tip: If you want to use wooden skewers, place them in a bowl of water 1 hour before use so that they can soak up the water and won’t burn during frying.
  6. Either place the chicken on skewers in the pan or fry them individually. To ensure the right juiciness in chicken meat so that it does not become dry, turn it only once during frying. When you place the raw chicken in the pan, let it cook on this side over a medium heat until it turns white around the edges, which is the sign that the bottom half is cooked through. Then you can turn it over. Then fry for the same amount of time on the other side.
  • Passive Time: 30 min
  • Cook Time: 20 min

CRAVING MORE?

Follow along here & don’t forget to subscribe to my substack!

Mint Garlic Dip

Mint Garlic Dip

Mint Garlic Dip

Mint Garlic Dip

December 10, 2024 by Kimberly

Savor the goodness of a minty garlic dip with creamy yogurt. It’s a tasty twist that adds extra flavor to your snacks and meals. Dip in and enjoy!

This website uses affiliate links which may earn commission for purchases made at no additional cost to you.

TOTAL TIME

5 min

SERVES

2 portions

DIET

vegetarian

EVERY RECIPE DESERVES

A Little Love Letter

This dip is a creamy mix of yogurt, fresh mint, and zesty garlic. The refreshing mint adds a burst of flavor, while the garlic gives it a zing. Whether you’re snacking or serving at a party, this dip is sure to be a hit. Easy to make and even easier to enjoy—transform your meals with the delightful taste of mint garlic goodness!

Serve up the delightful Mint Garlic Dip to elevate your meals! Ideal for dipping veggies and chips, it also makes a tasty spread for sandwiches. You can also use the salad as a wonderful component for a whole meal, take a look at my Chicken Shawarma Plate. The cool and zesty blend of mint and garlic adds a burst of flavor to any dish.

Keep your yogurt mint garlic dip fresh by storing it in an airtight container in the refrigerator. This ensures its creamy texture and delicious flavor stay intact. For a longer shelf life, avoid leaving it at room temperature.

Hi, I'm Kimberly!

Hi, I'm Kimberly.

A hopeless romantic when it comes to food. Every recipe I share is a love letter to food itself. I’m so glad you’re here. Make yourself at home and stay a while.

Love,
Kimberly

Kimberly the Zett Signature

If you want to get to know me better,
click here!


Mint Garlic Dip
Mint Garlic Dip

LET’S MAKE A PIECE OF HAPPINESS

Print
.tasty-recipe-responsive-iframe-container-9c105aa6 { position: relative; overflow: hidden; padding-top: 177.62%; } .tasty-recipe-responsive-iframe-container-9c105aa6 iframe { position: absolute; top: 0; left: 0; width: 100%; height: 100%; border: 0; } clock clock iconcutlery cutlery iconflag flag iconfolder folder iconinstagram instagram iconpinterest pinterest iconfacebook facebook iconprint print iconsquares squares iconheart heart iconheart solid heart solid icon
Mint Garlic Dip

Mint Garlic Dip


  • Author: Kimberly
  • Total Time: 5 minutes
  • Yield: 2

Description

RECOMMENDED EQUIPMENT

  • sharp knife
  • small cutting board
  • small bowl

Ingredients

Units Scale
  • 200 grams yogurt
  • 12 leaves fresh mint
  • 1 garlic clove
  • 1/4 tsp salt
  • 1/8 tsp pepper

Instructions

  1. Remove the peel from the garlic clove.
  2. Stack the mint leaves on top of each other and roll them up. Then cut into fine rings and chop finely.
  3. Add yogurt to the bowl. Add the garlic clove with a press. Finally, add salt and finely ground pepper, as well as the finely chopped mint, and stir everything into a creamy dip.
  • Cook Time: 5 min

CRAVING MORE?

Follow along here & don’t forget to subscribe to my substack!

Cranberry Cumberland Sauce

Cranberry Cumberland Sauce

Cranberry Cumberland Sauce

Cranberry Cumberland Sauce

December 5, 2023 by Kimberly

Tangy, fruity, and a little zesty – this sauce brings festive vibes to your table. Perfect for cozy dinners or holiday feasts, it’s like a warm hug for your taste buds.

This website uses affiliate links which may earn commission for purchases made at no additional cost to you.

TOTAL TIME

30 min

SERVES

6 portions

DIET

vegan

EVERY RECIPE DESERVES

A Little Love Letter

You know that feeling when a dish just makes the meal? This fruity, tangy, and slightly spiced sauce does exactly that. Whether you’re hosting a big holiday gathering, elevating a simple roast dinner, or looking for the perfect pairing for your appetizers, this recipe is your go-to for adding a pop of flavor and elegance to any plate. It’s absolutely divine with my Fingerfood Beef Wellington, bringing out those rich, savory notes, and pairs beautifully with my Cranberry Orange Glazed Pork Roast for a show-stopping main course. It’s classic, cozy, and totally irresistible, making every bite feel festive and full of love. Bonus? It’s ridiculously easy to whip up.

Pair this zesty goodness with roasted meats like turkey, pork, or ham for a perfect balance of sweet and savory. It’s also a surprising win drizzled over creamy brie or slathered on a crusty sandwich. Looking for a quick appetizer? Serve it with crackers, a wedge of sharp cheese, and nuts for a crowd-pleasing snack board. It’s versatile enough to go beyond holiday feasts – any time you want a hit of bold, fruity flavor, this sauce has you covered.

Keep it fresh by storing it in an airtight container in the fridge for up to 3 days. You can also freeze it for up to three months – just thaw in the fridge overnight when needed.

Hi, I'm Kimberly!

Hi, I'm Kimberly.

A hopeless romantic when it comes to food. Every recipe I share is a love letter to food itself. I’m so glad you’re here. Make yourself at home and stay a while.

Love,
Kimberly

Kimberly the Zett Signature

If you want to get to know me better,
click here!


Cranberry Cumberland Sauce

LET’S MAKE A PIECE OF HAPPINESS

Print
clock clock iconcutlery cutlery iconflag flag iconfolder folder iconinstagram instagram iconpinterest pinterest iconfacebook facebook iconprint print iconsquares squares iconheart heart iconheart solid heart solid icon
Cranberry Cumberland Sauce

Cranberry Cumberland Sauce


  • Author: Kimberly
  • Total Time: 30 min
  • Yield: 6

Description

RECOMMENDED EQUIPMENT
  • sharp knife
  • chopping board
  • peeler
  • grater
  • small pot
  • measuring cup
  • juicer (or by hand)

Ingredients

Units Scale
  • 1 lemon
  • 1 orange
  • 200 milliliter port wine
  • 1 shallot
  • 3/4 tsp fresh ginger, grated
  • 1 tsp dijon mustard
  • 100 grams fresh cranberries
  • 200 grams redcurrant jelly
  • salt & finely grated black pepper

Instructions

  1. Thoroughly wash and dry the lemon and orange. Peel 3–4 strips from each using a peeler, then slice the peels into fine julienne strips. Juice the orange, aiming for about 100 ml (3 fl. oz.) of juice.
  2. In a small saucepan, bring water to a boil and simmer the julienne strips for 5 minutes to soften and reduce their bitterness. Drain and set aside.
  3. Finely dice the shallot and grate the ginger directly into the saucepan. Add the port wine, orange juice, mustard, and cranberries. Bring everything to a boil over medium heat. Once boiling, lower the heat and simmer for about 15 minutes, until the cranberries soften and the liquid reduces.
  4. Next, stir in the redcurrant jelly and continue simmering for another 6–7 minutes, or until the sauce thickens. Season with salt and finely ground pepper to taste.
  5. Finally, fold the julienne strips into the sauce and let it cool. The sauce will thicken further as it cools and can be reheated anytime for serving.
  • Passive Time: 20 min
  • Cook Time: 10 min

CRAVING MORE?

Follow along here & don’t forget to subscribe to my substack!

Gluten-Free Bread From Nuts & Seeds

Gluten-Free Bread From Nuts & Seeds

Gluten-Free Bread From Nuts & Seeds

Gluten-Free Bread From Nuts & Seeds

December 7, 2023 by Kimberly

Enjoy a nutty, seedy bread made with just nuts, seeds, salt, oil, and eggs. Each bite is rich and hearty, providing a delicious and wholesome flavor experience. And I promise: you can’t taste the egg at all!

This website uses affiliate links which may earn commission for purchases made at no additional cost to you.

TOTAL TIME

1 hr + 10 min

SERVES

18 slices

DIET

vegetarian

EVERY RECIPE DESERVES

A Little Love Letter

Experience a nutritious bread crafted solely from nuts, seeds, salt, oil, and eggs. This wholesome blend delivers a rich and hearty flavor, providing a satisfying, protein-packed option for those seeking a gluten-free and flavorful bread. Simple yet nutritious, it ensures a fulfilling treat without compromising on taste. And the best is: you can’t taste the egg at all!

Enjoy this nutritious bread in different ways! Toast it with simple butter for breakfast or pair it with cheese and fruits for a tasty snack. The rich, nutty flavor also goes well with soups and salads, adding a satisfying crunch. Whether on its own or part of a snack spread, this bread suits everyone’s taste, making it a yummy addition to any meal.

Store this nutritious bread in a bread box, preferably wrapped in parchment paper to prevent moisture buildup. For extended freshness, freeze it in slices with parchment paper between layers. Thaw in the refrigerator and toast for a delicious experience whenever you’re ready to enjoy.

Hi, I'm Kimberly!

Hi, I'm Kimberly.

A hopeless romantic when it comes to food. Every recipe I share is a love letter to food itself. I’m so glad you’re here. Make yourself at home and stay a while.

Love,
Kimberly

Kimberly the Zett Signature

If you want to get to know me better,
click here!


Gluten-Free Bread From Nuts & Seeds

LET’S MAKE A PIECE OF HAPPINESS

Print
.tasty-recipe-responsive-iframe-container-adfe142a { position: relative; overflow: hidden; padding-top: 177.62%; } .tasty-recipe-responsive-iframe-container-adfe142a iframe { position: absolute; top: 0; left: 0; width: 100%; height: 100%; border: 0; } clock clock iconcutlery cutlery iconflag flag iconfolder folder iconinstagram instagram iconpinterest pinterest iconfacebook facebook iconprint print iconsquares squares iconheart heart iconheart solid heart solid icon
Gluten-Free Bread From Nuts & Seeds

Gluten-Free Bread From Nuts & Seeds


  • Author: Kimberly
  • Total Time: 70 min
  • Yield: 18 slices

Description

RECOMMENDED EQUIPMENT

  • medium sized bowl
  • ovenproof dish (I used a loaf pan 25x10cm (10×4 inch))

Ingredients

Units Scale
  • 5 eggs
  • 1/2 tsp salt
  • 50 milliliters olive oil
  • 100 grams flaxseeds
  • 200 grams mixes nuts
  • 100 grams sunflower seeds
  • 50 grams pumpkin seeds
  • 50 grams white sesame

Instructions

  1. Preheat the oven to 160°C (320°F).
  2. Line the loaf tin with baking paper.
  3. Whisk the 5 eggs with 1/2 tsp salt in a bowl. Meanwhile, add the 50ml (10 tsp) olive oil and mix well.
  4. Pour 100g (1/2 cup + 2 tbsp) flaxseeds , 200g (1 cup + 1/3 cup) mixed nuts, 100g (1/2 cup + 1/4 cup) sunflower seeds, 50g (1/4 cup) pumpkin seeds and 50g (1/3 cup + 2 tsp) white sesame seeds into the bowl with the egg mixture and mix everything together.
  5. Pour the entire mixture onto the baking paper in the loaf tin and spread evenly.
  6. Bake in the oven on the middle shelf for 60 minutes. The bread can be eaten warm, but make sure that the slices are not cut too thinly. Once the bread has cooled, thin slices can also be cut.
  • Passive Time: 60 min
  • Cook Time: 10 min

CRAVING MORE?

Follow along here & don’t forget to subscribe to my substack!