Kimchi Scallion Pancake

Kimchi Scallion Pancake

Kimchi Scallion Pancake

Kimchi Scallion Pancake

February 29, 2024 by Kimberly

Experience the sizzling joy of a Kimchi Scallion Pancake! Perfect for sharing, these crispy delights blend zesty kimchi and fresh scallions for a mouthwatering treat.

This website uses affiliate links which may earn commission for purchases made at no additional cost to you.

TOTAL TIME

20 min

SERVES

2 pancakes

DIET

vegan

EVERY RECIPE DESERVES

A Little Love Letter

Dive into the flavorful world of Korean cuisine with my Kimchi Scallion Pancakes! These savory pancakes offer a delightful combination of tangy kimchi and aromatic scallions, pan-fried to golden perfection. Whether you’re a seasoned foodie or new to Korean flavors, these pancakes are sure to spice up your mealtime!

Serve these sizzling Kimchi Scallion Pancakes hot off the pan for the best experience. They’re perfect as a hearty breakfast, a unique appetizer, or a side dish for your main meals. Pair them with a dipping sauce made from soy sauce, sriracha and lemon juice to elevate their flavor. Cut them into wedges, and share the joy with friends and family.

Store leftover pancakes in the refrigerator, wrapped tightly in plastic wrap or in an airtight container. They’ll stay fresh for up to two days. Reheat in a pan over medium heat to retain their crispiness and flavor.

Hi, I'm Kimberly!

Hi, I'm Kimberly.

A hopeless romantic when it comes to food. Every recipe I share is a love letter to food itself. I’m so glad you’re here. Make yourself at home and stay a while.

Love,
Kimberly

Kimberly the Zett Signature

If you want to get to know me better,
click here!


Kimchi Scallion Pancake

LET’S MAKE A PIECE OF HAPPINESS

Print
clock clock iconcutlery cutlery iconflag flag iconfolder folder iconinstagram instagram iconpinterest pinterest iconfacebook facebook iconprint print iconsquares squares iconheart heart iconheart solid heart solid icon
Kimchi Scallion Pancake

Kimchi Scallion Pancake


5 Stars 4 Stars 3 Stars 2 Stars 1 Star

No reviews

  • Author: Kimberly
  • Total Time: 20 min
  • Yield: 2

Description

GOOD TO HAVE ON HAND

  • sharp knife
  • cutting board
  • medium bowl
  • medium sized pan


Ingredients

Units Scale
  • 100 grams kimchi
  • 3 spring onions
  • 100 grams all-purpose flour
  • 20 grams cornstarch
  • 1/2 tsp turmeric
  • 1/4 tsp baking powder
  • 1/4 tsp salt
  • 100 milliliters water
  • 2 tsp clarified butter

Instructions

  1. Roughly chop the kimchi and place in a medium-sized bowl with 2 tbsp of its marinade.
  2. Wash the spring onions and cut into fine strips. Set aside a small portion of the green strips as a topping for later. Add the rest to the bowl.
  3. Now add the flour, cornstarch, water, salt, turmeric and baking powder to the kimchi and spring onions in the bowl and mix to form a smooth batter.
  4. Heat a medium-sized frying pan with 1 tsp clarified butter. Pour half of the batter into the pan and fry on both sides until crispy. Now add another teaspoon of clarified butter to the pan and fry the second half of the batter in the pan.
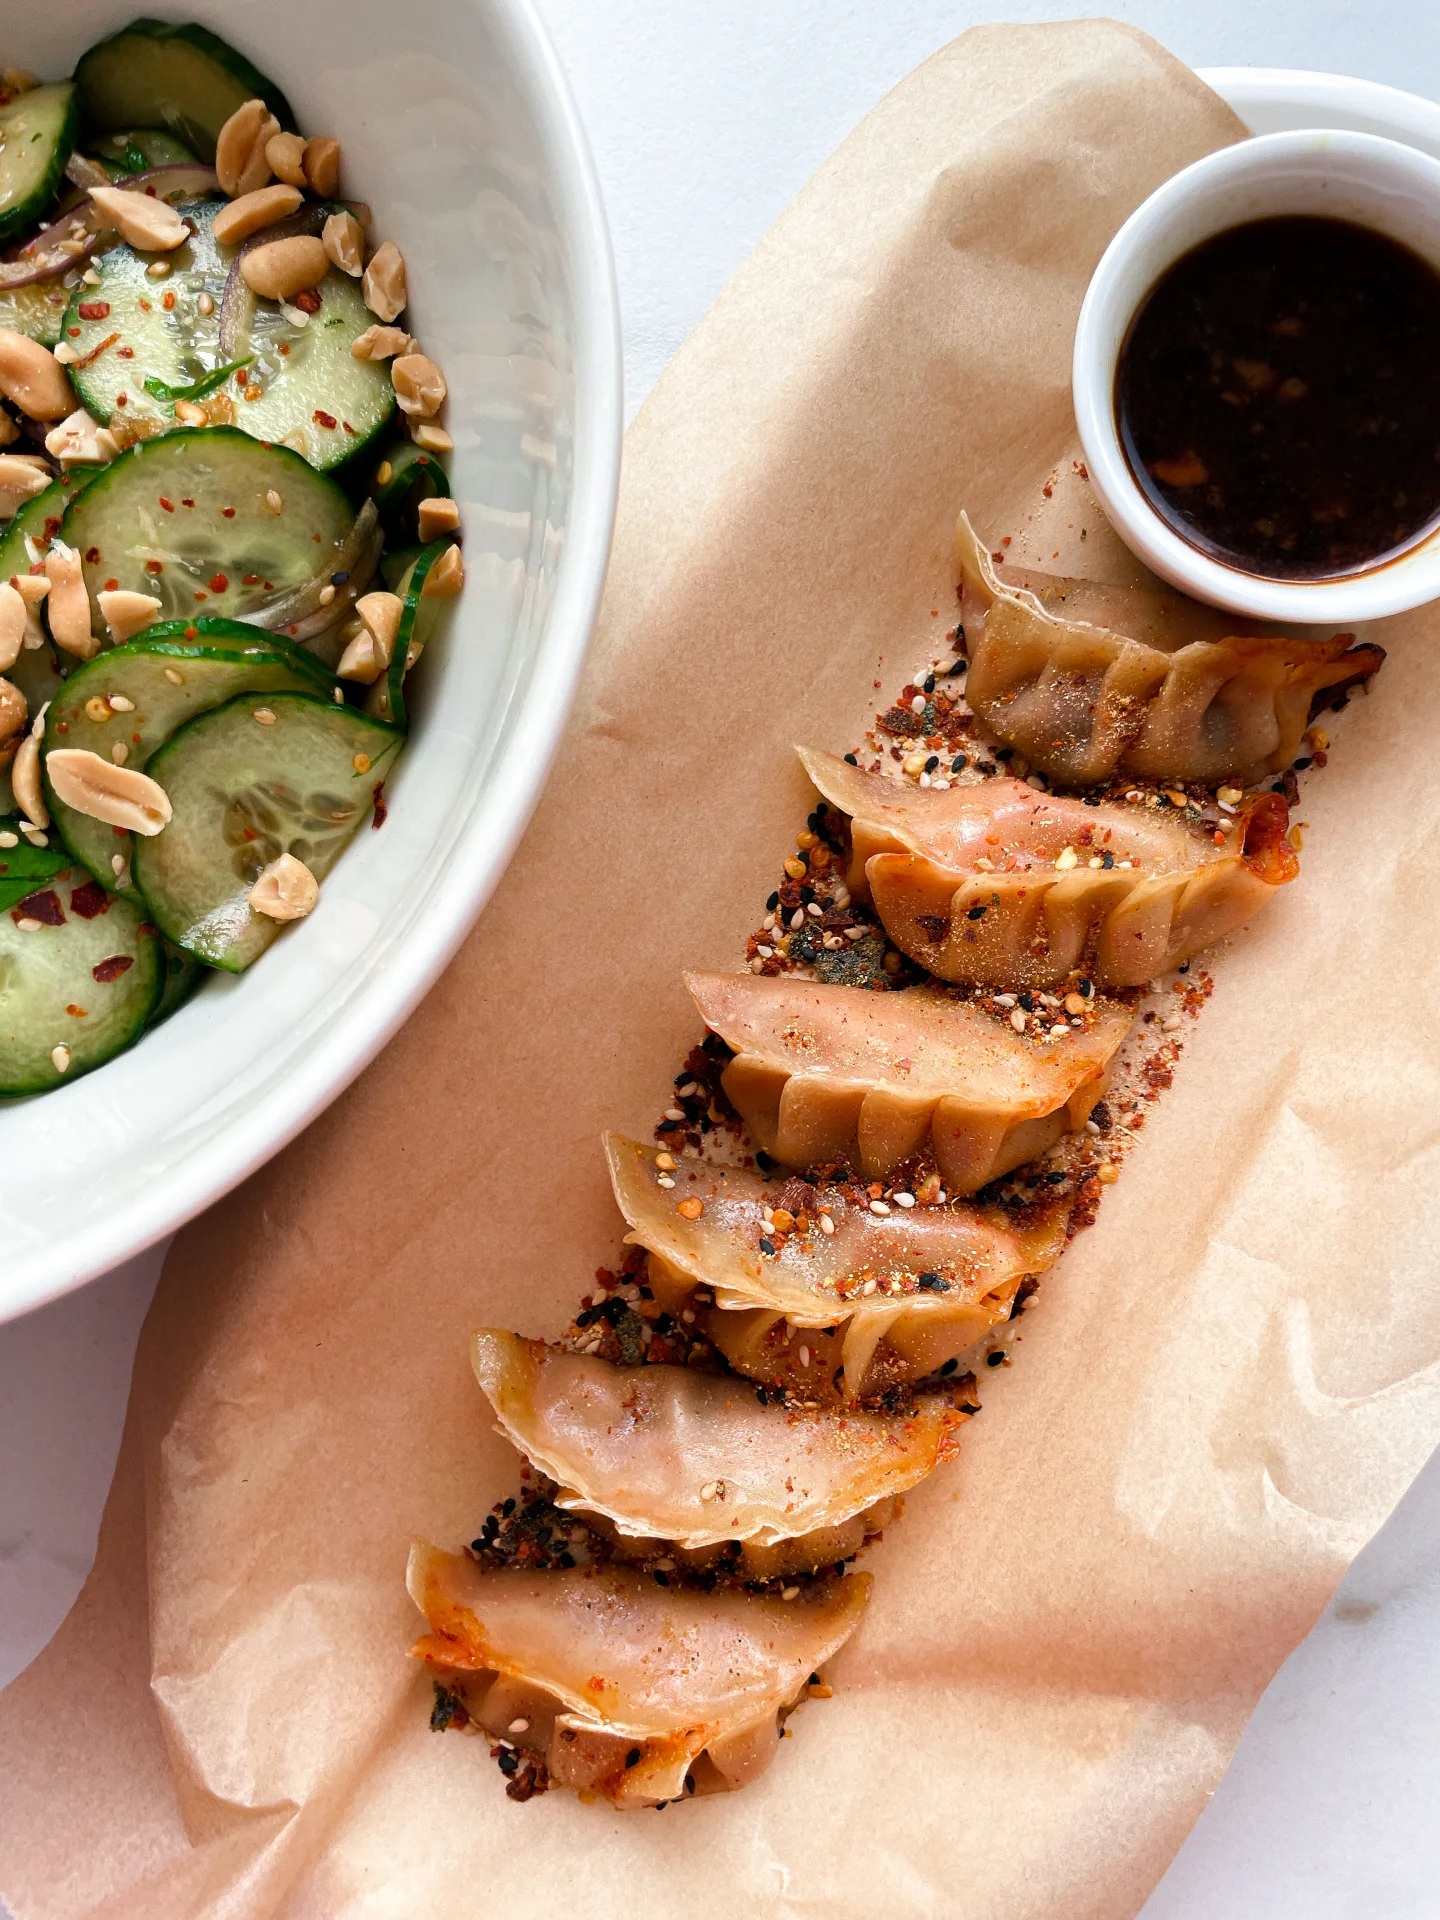
  5. Cut the kimchi pancake into large pieces, serve hot on a plate and top with the remaining green spring onions.
  • Cook Time: 20 min

CRAVING MORE?

Follow along here & don’t forget to subscribe to my substack!

Garam Masala

Garam Masala

Garam Masala

Garam Masala

February 15, 2024 by Kimberly

Discover the magic of Garam Masala! Aromatic, flavorful, and versatile, it’s the perfect addition to elevate your cooking and bring warmth to your dishes.

This website uses affiliate links which may earn commission for purchases made at no additional cost to you.

TOTAL TIME

10 min

SERVES

3 tbsp 

DIET

vegan

EVERY RECIPE DESERVES

A Little Love Letter

Immerse yourself in the rich flavors of India with this homemade Garam Masala. A quintessential mixture that combines aromatic spices, it’s the heart of many Indian dishes. Making your own blend ensures freshness and a burst of authentic flavor that store-bought versions can’t match. Embark on a culinary journey with this easy-to-make, fragrant seasoning that will transform your cooking.

Garam Masala is incredibly versatile. Sprinkle it over your favorite curries, soups, and stews to add depth and warmth. It’s perfect for marinating meats or enhancing vegetable dishes. Start with a small amount and adjust according to taste, as its potent flavors go a long way in elevating any dish to an exotic masterpiece.

Store your Garam Masala in an airtight container, away from direct sunlight and heat. This keeps the spices fresh and aromatic for longer, ensuring each dish you prepare is bursting with authentic Indian flavors.

Hi, I'm Kimberly!

Hi, I'm Kimberly.

A hopeless romantic when it comes to food. Every recipe I share is a love letter to food itself. I’m so glad you’re here. Make yourself at home and stay a while.

Love,
Kimberly

Kimberly the Zett Signature

If you want to get to know me better,
click here!


Garam Masala
Garam Masala

LET’S MAKE A PIECE OF HAPPINESS

Print
clock clock iconcutlery cutlery iconflag flag iconfolder folder iconinstagram instagram iconpinterest pinterest iconfacebook facebook iconprint print iconsquares squares iconheart heart iconheart solid heart solid icon
Garam Masala

Garam Masala Spice Blend


  • Author: Kimberly
  • Total Time: 10 min
  • Yield: 3 tbsp

Description

GOOD TO HAVE ON HAND

  • small pan
  • mortar & pestle
  • airtight container


Ingredients

WHOLE SPICES
  • 2 tbsp cumin seeds
  • 1 tbsp coriander seeds
  • 1 tbsp cardamom seeds
  • 1/2 cinnamon stick
  • 1 tsp black peppercorns
  • 6 cloves
  • 2 bay leaves
GROUND SPICES
  • 1 tbsp cumin powder
  • 1 tsp coriander powder
  • 1/2 tsp cardamom powder
  • 1/2 tsp cinnamon powder
  • 1/4 tsp ground black pepper
  • 1/4 tsp clove powder
  • 1/4 tsp ground bay leaves

Instructions

  1. IF USING WHOLE SPICES:
    • Toast the whole spices in a dry pan over medium heat for 2–3 minutes until fragrant.
    • Let the spices cool, then grind them into a fine powder using a spice grinder or mortar and pestle.
    • Transfer your spice blend into an airtight container or jar. Store in a cool, dry place for up to 6 months.
  2. IF USING GROUND SPICES:
    • Skip the toasting step. Simply combine all the ground spices in a bowl and mix well.
    • Transfer your spice blend into an airtight container or jar. Store in a cool, dry place for up to 6 months.
  • Prep Time: 10 min

CRAVING MORE?

Follow along here & don’t forget to subscribe to my substack!

Pico de Gallo

Pico de Gallo

Pico de Gallo

Pico de Gallo

February 12, 2024 by Kimberly

Discover the vibrant and fresh Pico de Gallo, a perfect blend of flavors to elevate any meal. Easy to make, it’s a delightful, colorful addition to your table!

This website uses affiliate links which may earn commission for purchases made at no additional cost to you.

TOTAL TIME

10 min

SERVES

4 portions

DIET

vegan

EVERY RECIPE DESERVES

A Little Love Letter

Dive into the world of Mexican cuisine with the simple yet exquisite Pico de Gallo. This refreshing salsa combines the bold flavors of tomato, onion, and cilantro, offering a burst of freshness with every bite. Perfect for health-conscious foodies, this easy-to-make dish serves as a versatile accompaniment to countless meals. Embrace the joy of homemade salsa and add a splash of color to your dining experience.

Pico de Gallo is incredibly versatile, making it a must-have for any gathering. Serve it alongside grilled meats or fish for a refreshing contrast, or scoop it up with crispy tortilla chips for the ultimate snack. It’s also the perfect topping for tacos, burritos, quesadillas and enchiladas, adding a fresh, crunchy element. For a lighter option, spoon it over avocado toast or mixed into a vibrant salad.

To keep your Pico de Gallo fresh, store it in an airtight container in the refrigerator. It’s best enjoyed within 2-3 days, as the flavors meld beautifully over time, yet the ingredients retain their crispness.

Hi, I'm Kimberly!

Hi, I'm Kimberly.

A hopeless romantic when it comes to food. Every recipe I share is a love letter to food itself. I’m so glad you’re here. Make yourself at home and stay a while.

Love,
Kimberly

Kimberly the Zett Signature

If you want to get to know me better,
click here!


Pico de Gallo
Pico de Gallo

LET’S MAKE A PIECE OF HAPPINESS

Print
.tasty-recipe-responsive-iframe-container-36180689 { position: relative; overflow: hidden; padding-top: 177.62%; } .tasty-recipe-responsive-iframe-container-36180689 iframe { position: absolute; top: 0; left: 0; width: 100%; height: 100%; border: 0; } clock clock iconcutlery cutlery iconflag flag iconfolder folder iconinstagram instagram iconpinterest pinterest iconfacebook facebook iconprint print iconsquares squares iconheart heart iconheart solid heart solid icon
Pico de Gallo

Pico de Gallo


  • Author: Kimberly
  • Total Time: 10 min
  • Yield: 4

Description

GOOD TO HAVE ON HAND

  • sharp knife
  • cutting board
  • medium sized bowl


Ingredients

Units Scale
  • 250 grams tomatoes
  • juice of 1 lime
  • 1 small onion
  • 3 garlic cloves
  • 1 jalapeno (fresh or pickled)
  • a few stems cilantro
  • salt & pepper to taste

Instructions

  1. Wash the tomatoes thoroughly under running water.
  2. If you are using fresh jalapenos, wash them thoroughly too.
  3. Halve the tomatoes and remove the seeds. Then quarter them and cut them into small cubes. Place the diced tomatoes in a medium-sized bowl.
  4. Peel the onion, cut it in half and then finely dice it. Add the diced onion to the tomatoes in the bowl.
  5. Pluck the coriander leaves from the stalks and chop them finely. Add the chopped coriander to the bowl.
  6. Peel the garlic cloves and chop them finely or press them directly into the bowl using a garlic press.
  7. Finely chop the jalapeno and add it to the other ingredients in the bowl.
  8. Halve the lime and squeeze the juice over the ingredients in the bowl. Mix all the ingredients together thoroughly and season to taste with salt and pepper.
  • Cook Time: 10 min

CRAVING MORE?

Follow along here & don’t forget to subscribe to my substack!

Guacamole with Tomatoes & Red Onion

Guacamole with Tomatoes & Red Onion

Guacamole with Tomatoes & Red Onion

Guacamole with Tomatoes & Red Onion

February 10, 2024 by Kimberly

Indulge in the best Guacamole with Tomatoes & Red Onion! Simple, healthy, and bursting with flavor, it’s the perfect snack for every avocado lover. Quick and delicious!

This website uses affiliate links which may earn commission for purchases made at no additional cost to you.

TOTAL TIME

10 min

SERVES

4 portions

DIET

vegan

EVERY RECIPE DESERVES

A Little Love Letter

Dive into the creamy, tangy world of my easy Guacamole with tomatoes & red onion! Perfect for any occasion, this homemade guacamole recipe combines ripe avocados, juicy tomatoes, and sharp red onions to create a mouthwatering dip. Whether you’re hosting a party, looking for healthy snack ideas, or simply craving a fresh, vegan-friendly treat, this quick avocado recipe is the way to go.

Serve this vibrant guacamole with a side of crunchy tortilla chips, as a topping for tacos, alongside your favorite grilled dishes or fresh out of the oven enchiladas for an added burst of flavor. Its versatility makes it a hit for any gathering or a cozy night in.

Keep any leftover guacamole fresh by storing it in an airtight container in the fridge. Press plastic wrap or directly onto the surface to prevent browning, and enjoy within 2 days for the best taste and texture.

Hi, I'm Kimberly!

Hi, I'm Kimberly.

A hopeless romantic when it comes to food. Every recipe I share is a love letter to food itself. I’m so glad you’re here. Make yourself at home and stay a while.

Love,
Kimberly

Kimberly the Zett Signature

If you want to get to know me better,
click here!


Guacamole with Tomatoes & Red Onion

LET’S MAKE A PIECE OF HAPPINESS

Print
.tasty-recipe-responsive-iframe-container-04ace0b0 { position: relative; overflow: hidden; padding-top: 177.62%; } .tasty-recipe-responsive-iframe-container-04ace0b0 iframe { position: absolute; top: 0; left: 0; width: 100%; height: 100%; border: 0; } clock clock iconcutlery cutlery iconflag flag iconfolder folder iconinstagram instagram iconpinterest pinterest iconfacebook facebook iconprint print iconsquares squares iconheart heart iconheart solid heart solid icon
Guacamole with Tomatoes & Red Onion

Guacamole with Tomatoes & Red Onion


  • Author: Kimberly
  • Total Time: 10 min
  • Yield: 4

Description

GOOD TO HAVE ON HAND

  • sharp knife
  • cutting board
  • medium sized bowl


Ingredients

  • 2 avocados
  • 1/2 red onion
  • 4 cocktail tomatoes
  • juice of 1/2 lime
  • salt & pepper to taste

Instructions

  1. Slice the avocado lengthways, remove the pit and place the flesh in the bowl. Cut the lime in half and squeeze one half over the avocado. Mash the avocado with a fork until a cream is formed.
  2. Wash and halve the tomatoes. Remove the seeds. Halve the tomatoes again and cut into small pieces and add to the avocado in the bowl.
  3. Halve, peel and dice the onion and add to the bowl.
  4. Season everything with salt and pepper. If you like, you can squeeze in a clove of garlic at this point or stir in 100g of crème fraiche for even more creaminess.
  • Cook Time: 10 min

CRAVING MORE?

Follow along here & don’t forget to subscribe to my substack!

Easy Red Cabbage Salad

Easy Red Cabbage Salad

Easy Red Cabbage Salad

Easy Red Cabbage Salad

January 30, 2024 by Kimberly

Enjoy the vibrant and healthy Easy Red Cabbage Salad, bursting with fresh flavors and a colorful crunch, perfect for a quick and nutritious meal!

This website uses affiliate links which may earn commission for purchases made at no additional cost to you.

TOTAL TIME

50 min

SERVES

8 portions

DIET

vegan

EVERY RECIPE DESERVES

A Little Love Letter

Dive into the world of vibrant colors and fresh flavors with this easy Red Cabbage Salad. This healthy cabbage recipe is not just a feast for the eyes but also a powerhouse of nutrition. Perfect for those seeking a quick salad idea that doesn’t skimp on taste or health benefits, this simple salad recipe brings together the crunchy goodness of red cabbage with a medley of fresh ingredients, making it an ideal choice for a nutritious veggie dish.

It’s perfect as a light meal option on its own or as a colorful side dish that complements any main course. The versatility of this crunchy vegetable salad allows it to pair beautifully with grilled meats, sandwiches, or as a refreshing addition to your buffet table. For an extra twist, you can add a sprinkle of seeds or nuts for added texture. Its vibrant presentation and refreshing taste make it a hit for family meals or a quick lunchtime fix.

Keep it in an airtight container in the refrigerator, and it will stay crisp and delicious for up to 3 days. The salad’s robust texture makes it ideal for meal prep, ensuring that you have a healthy, vegan cabbage salad ready to enjoy whenever you like. Its ease of storage and lasting freshness makes it a practical and appealing choice for busy lifestyles.

Hi, I'm Kimberly!

Hi, I'm Kimberly.

A hopeless romantic when it comes to food. Every recipe I share is a love letter to food itself. I’m so glad you’re here. Make yourself at home and stay a while.

Love,
Kimberly

Kimberly the Zett Signature

If you want to get to know me better,
click here!


Easy Red Cabbage Salad

LET’S MAKE A PIECE OF HAPPINESS

Print
.tasty-recipe-responsive-iframe-container-01ced9a1 { position: relative; overflow: hidden; padding-top: 177.62%; } .tasty-recipe-responsive-iframe-container-01ced9a1 iframe { position: absolute; top: 0; left: 0; width: 100%; height: 100%; border: 0; } clock clock iconcutlery cutlery iconflag flag iconfolder folder iconinstagram instagram iconpinterest pinterest iconfacebook facebook iconprint print iconsquares squares iconheart heart iconheart solid heart solid icon
Easy Red Cabbage Salad

Easy Red Cabbage Salad


  • Author: Kimberly
  • Total Time: 50 min
  • Yield: 8

Description

GOOD TO HAVE ON HAND

  • sharp knife
  • chopping board


Ingredients

Units Scale
  • 1 kilogram red cabbage
  • 2 tbsp olive oil
  • 4 tbsp pomegranate juice (or Grenadine)
  • juice of 1 lemon
  • 1/2 tsp salt

Instructions

  • Remove the top leaves from the red cabbage. Cut the red cabbage into quarters. Cut the two quarters of the red cabbage into thin strips on the short side. Place the strips in a large bowl.
  • Squeeze the lemon over the red cabbage and add the olive oil, pomegranate juice and salt. Mix everything well and leave to marinate in the fridge for approx. 40 minutes.
  • Passive Time: 40 min
  • Cook Time: 10 min

CRAVING MORE?

Follow along here & don’t forget to subscribe to my substack!

Chocolate Peanut Oat Bites

Chocolate Peanut Oat Bites

Chocolate Peanut Oat Bites

Chocolate Peanut Oat Bites

January 29, 2024 by Kimberly

Indulge in Chocolate Peanut Oat Bites – a heavenly blend of rich chocolate, nutty peanuts, and wholesome oats, perfect for a deliciously satisfying sweet snack!

This website uses affiliate links which may earn commission for purchases made at no additional cost to you.

TOTAL TIME

70 min

SERVES

12 pieces

DIET

vegan

EVERY RECIPE DESERVES

A Little Love Letter

Experience the joy of snacking with this Chocolate Peanut Oat Bites, a delightful fusion of flavors that satisfies your sweet tooth while providing nourishment. These no-bake snack ideas are a perfect blend of rich chocolate, creamy peanut butter, and hearty oats, creating a treat that’s not only delicious but also health-conscious. Ideal for those seeking a quick energy boost or a vegan chocolate bite, these homemade energy bites are a crowd-pleaser.

They make a fantastic snack for any time of the day, be it a mid-morning break, an afternoon pick-me-up, or a post-workout treat. Their bite-sized nature makes them a convenient option for on-the-go snacking or for packing in lunchboxes. You can also serve them as a dessert at casual get-togethers or as a healthy alternative to traditional sweets. Their versatility and universally appealing flavor make them suitable for various dietary preferences, including gluten-free and vegan options.

Keep them in an airtight container in the refrigerator, where they can last for up to a week. This ensures that they remain fresh and retain their delightful texture. Perfect for meal prep or when you need a sweet and nutritious snack on hand, these Chocolate Peanut Oat Bites are your go-to for a quick, healthy, and satisfying treat.

Hi, I'm Kimberly!

Hi, I'm Kimberly.

A hopeless romantic when it comes to food. Every recipe I share is a love letter to food itself. I’m so glad you’re here. Make yourself at home and stay a while.

Love,
Kimberly

Kimberly the Zett Signature

If you want to get to know me better,
click here!


Chocolate Peanut Oat Bites

LET’S MAKE A PIECE OF HAPPINESS

Print
.tasty-recipe-responsive-iframe-container-0d0b384f { position: relative; overflow: hidden; padding-top: 177.62%; } .tasty-recipe-responsive-iframe-container-0d0b384f iframe { position: absolute; top: 0; left: 0; width: 100%; height: 100%; border: 0; } clock clock iconcutlery cutlery iconflag flag iconfolder folder iconinstagram instagram iconpinterest pinterest iconfacebook facebook iconprint print iconsquares squares iconheart heart iconheart solid heart solid icon
Chocolate Peanut Oat Bites

Chocolate Peanut Oat Bites


  • Author: Kimberly
  • Total Time: 65 min
  • Yield: 12 pieces

Description

GOOD TO HAVE ON HAND

  • small pot
  • medium-sized bowl
  • rectangular container
  • baking paper


Ingredients

Units Scale
  • 1.5 tbsp peanut butter
  • 60 milliliters maple syrup
  • 1/2 banana
  • 2 tbsp coconut oil
  • 2 tbsp cocoa powder
  • 90 grams rolled oats
  • 1/8 tsp salt

Instructions

  • Melt the coconut oil in the microwave or in a small pan.
  • Line a rectangular container with baking paper.
  • In a medium-sized bowl, mash half the banana with a fork. Mix the peanut butter and maple syrup with the banana.
  • Now add the coconut oil, cocoa powder and salt to the bowl and mix well to form a homogeneous mixture.
  • Pour the mixture onto the baking paper in the rectangular tin and spread out evenly.
  • Leave to harden in the freezer for approx. 1 hour and then cut into 12 equal pieces. Store the pieces in the fridge.
  • Passive Time: 60 min
  • Cook Time: 5 min

CRAVING MORE?

Follow along here & don’t forget to subscribe to my substack!