


Description
GOOD TO HAVE ON HAND
- sharp knife
- cutting board
- medium bowl
- small bowl
Ingredients
Units Scale
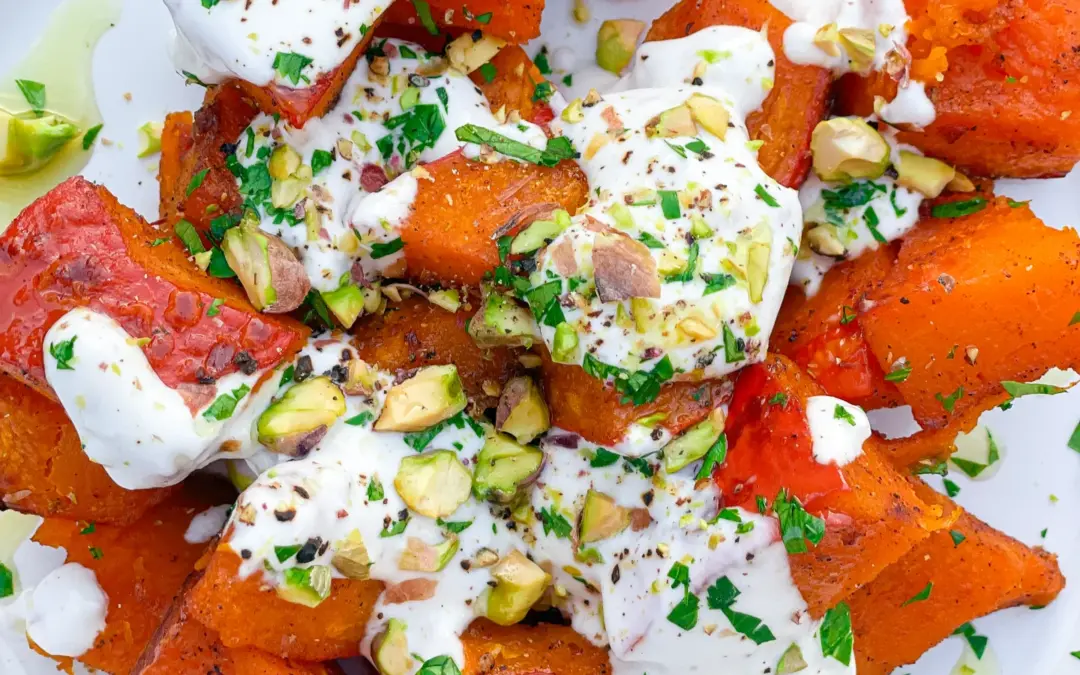
PUMPKIN
- 750 grams pumpkin (I used Hokkaido)
- 2 tbsp olive oil
- 1/4 tsp salt
- 1/4 tsp black pepper
- 1/4 tsp onion powder
- 1/4 tsp garlic powder
- 1/4 tsp cilantro powder
- 1/4 tsp smoked paprika powder
- 250 grams yogurt
- 1 garlic clove
- 1/8 tsp salt
- 1/8 tsp black pepper
- pistachios
- parsley
- olive oil
Instructions
- Preheat the oven to 230°C (450°F).
- Remove the seeds from the pumpkin and cut into bite-sized pieces. You do not need to peel the Hokkaido.
- Place the pumpkin pieces in a medium-sized bowl. Now pour the olive oil and 1/4 tsp each of salt, pepper, dried coriander, smoked paprika, garlic and onion over the pumpkin pieces and mix so that the pieces are evenly coated with everything. Place the pumpkin pieces on a baking tray lined with baking paper.
- Place the baking tray in the preheated oven and roast for 20 minutes.
- While the pumpkin is in the oven, mix the yoghurt, fresh garlic, salt and pepper together in a small bowl and season to taste.
- Remove the shells from the pistachios and chop them into small pieces. Pluck the parsley from the stalks and chop finely too.
- Now remove the tray from the oven. Pour the yoghurt sauce over the pumpkin and then top with olive oil, parsley and pistachios.
- Cook Time: 25 min