White Chocolate Macadamia Peanut Caramel Bites

White Chocolate Macadamia Peanut Caramel Bites

White Chocolate Macadamia Peanut Caramel Bites

White Chocolate Macadamia Peanut Caramel Bites

December 13, 2023 by Kimberly

Savor the festive season with these dreamy, creamy bites loaded with smooth caramel and crunchy nutty goodness. Christmas bliss in every delightful bite.

This website uses affiliate links which may earn commission for purchases made at no additional cost to you.

TOTAL TIME

1 hr + 40 min

SERVES

50 bites

DIET

vegetarian

EVERY RECIPE DESERVES

A Little Love Letter

Imagine that moment when you want a treat that’s just the right mix of creamy, crunchy, and rich in flavor—these caramel and nutty bites deliver exactly that! Each little piece is packed with macadamias, peanuts, caramel and smooth white chocolate, making it the ultimate indulgence without the hassle of a big dessert. They’re perfect for holiday spreads, cozy evenings, or anytime you want something sweet and satisfying in your life. Whether you’re a caramel lover, a white chocolate fan, or just need a no-fuss recipe, these bites will steal your heart.

Arrange them on a dessert platter for holiday gatherings or family movie nights. If you want to keep things casual, just pop them in a bowl and let everyone grab a few. They’re also perfect for gift-giving: pack them up in a cute box or jar for friends and family.

Store any leftovers in an airtight container at room temperature for up to 10 days. If you prefer a firmer texture, keep them in the fridge – they’ll stay fresh and delicious!

Hi, I'm Kimberly!

Hi, I'm Kimberly.

A hopeless romantic when it comes to food. Every recipe I share is a love letter to food itself. I’m so glad you’re here. Make yourself at home and stay a while.

Love,
Kimberly

Kimberly the Zett Signature

If you want to get to know me better,
click here!


White Chocolate Macadamia Peanut Caramel Bites

LET’S MAKE A PIECE OF HAPPINESS

Print
clock clock iconcutlery cutlery iconflag flag iconfolder folder iconinstagram instagram iconpinterest pinterest iconfacebook facebook iconprint print iconsquares squares iconheart heart iconheart solid heart solid icon
White Chocolate Macadamia Peanut Caramel Bites

White Chocolate Macadamia Peanut Caramel Bites


5 Stars 4 Stars 3 Stars 2 Stars 1 Star

No reviews

  • Author: Kimberly
  • Total Time: 105 min
  • Yield: 50 squares

Description

RECOMMENDED EQUIPMENT
  • medium bowl
  • cling film
  • small pot
  • sharp knife
  • cutting board
  • small bowl that fits the small pot

Ingredients

Units Scale
DOUGH
  • 125 grams butter, room-temperature
  • 75 grams white sugar
  • 250 grams all-purpose flour
  • 8g vanilla sugar
  • pinch of salt
  • 1 egg
CARAMEL
  • 225 grams white sugar
  • 250 grams macadamia nuts
  • 200 grams peanuts
  • 2 tbsp butter
  • 50 grams heavy cream
TOPPING
  • 300 grams white chocolate
  • 1.5 tsp coconut oil

Instructions

PREPARATIONS

  • Weigh out all the ingredients beforehand and have them ready. Make sure you have the right amount of nuts to hand, as you need to prepare the caramel quickly.

INSTRUCTIONS

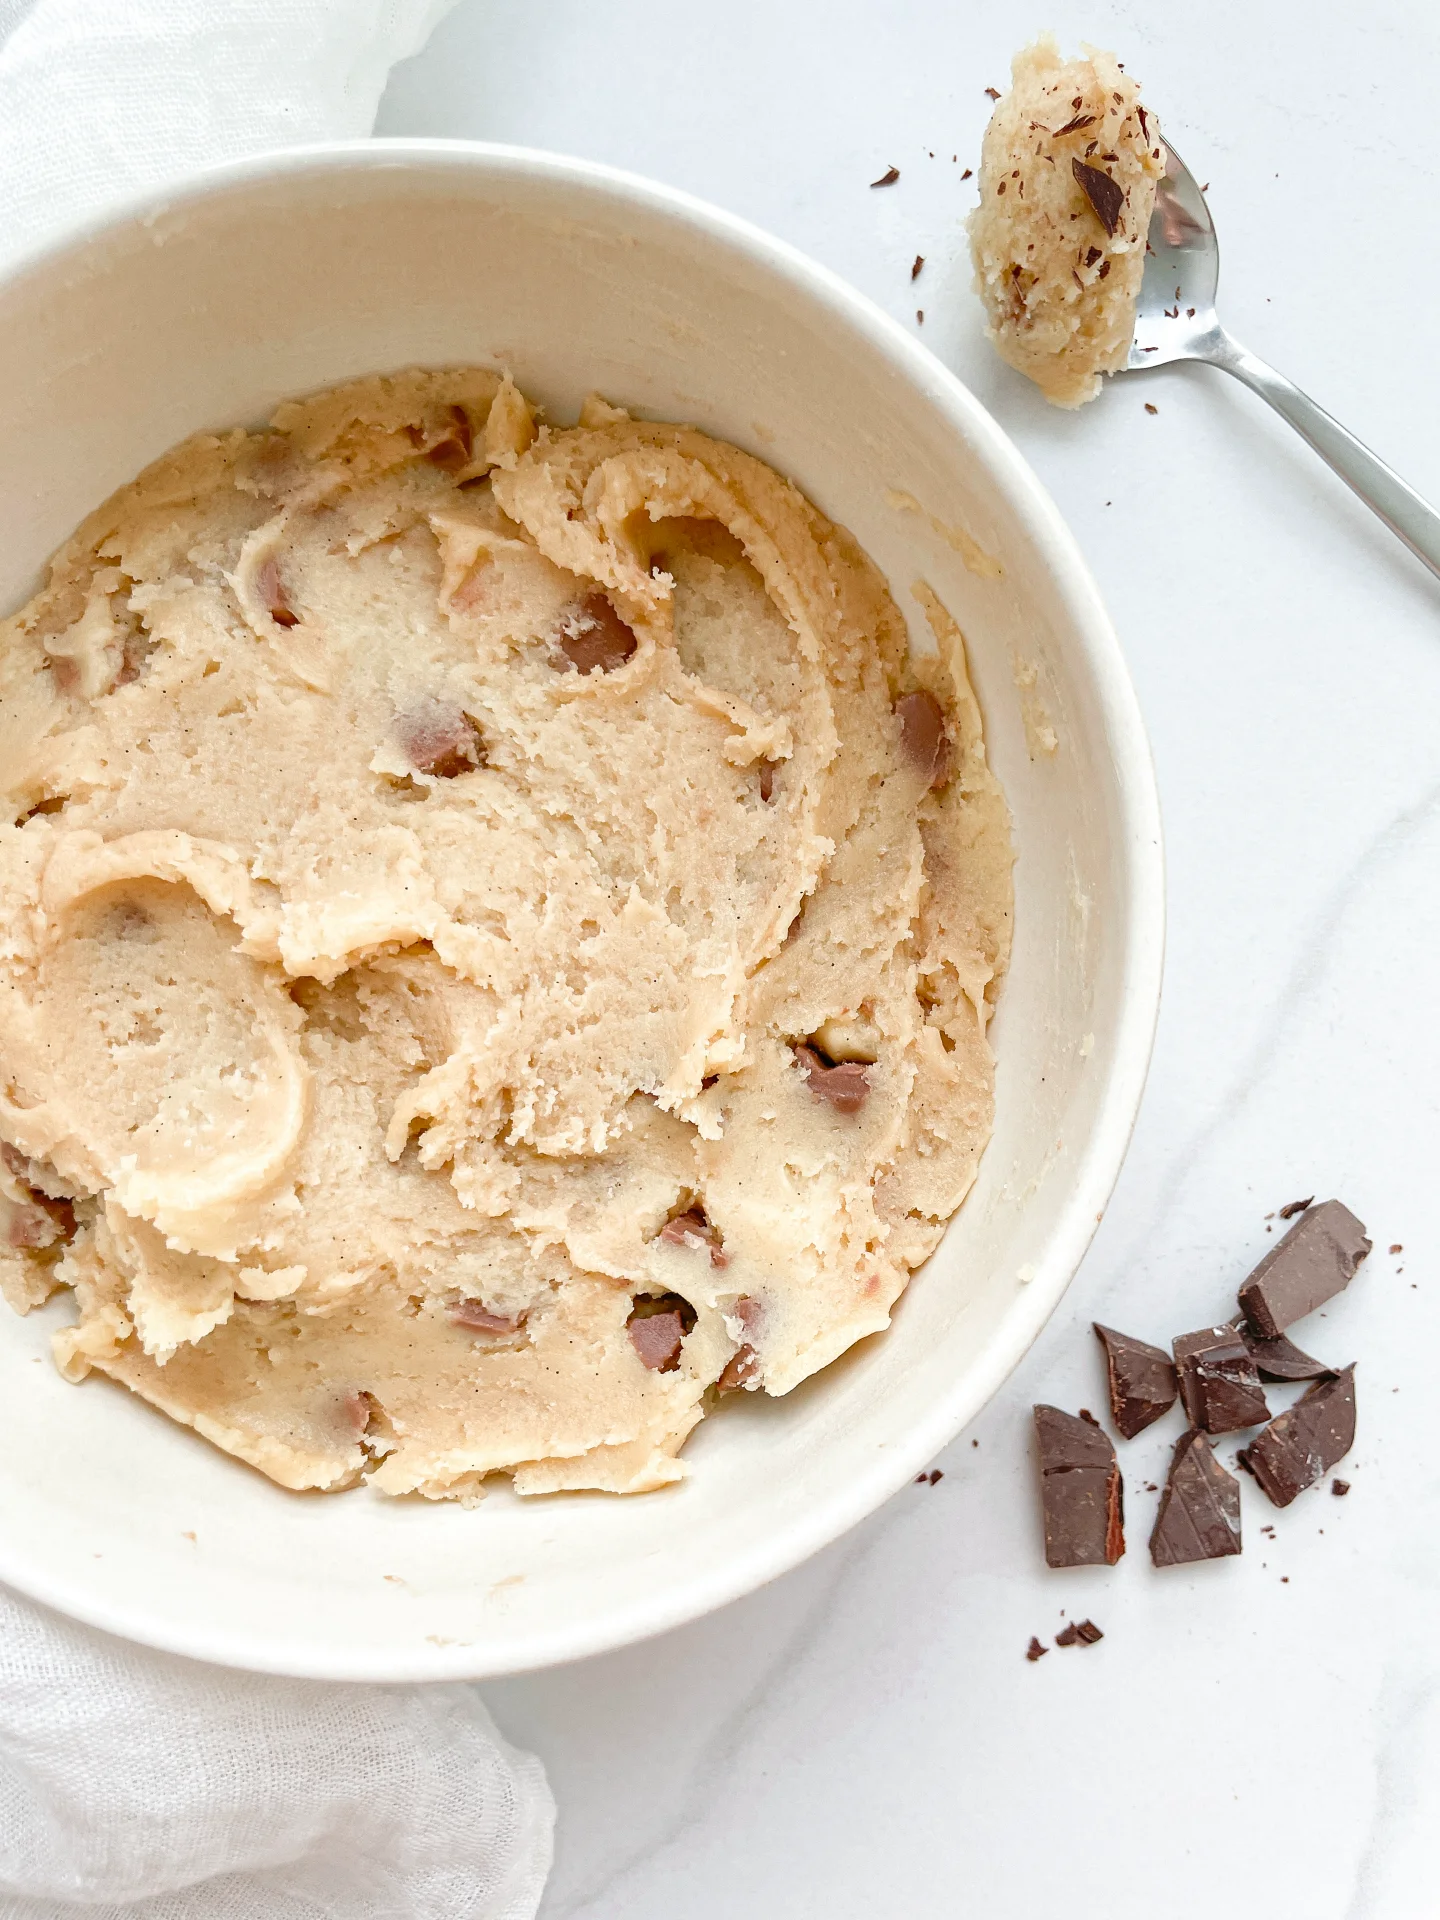
  1. Place butter, sugar, all-purpose flour, vanilla sugar, a pinch of salt and an egg in a medium-sized bowl. Knead into a shortcrust pastry. Wrap the ball of dough in cling film and place in the fridge for 30 minutes.
  2. After 30 minutes, preheat the oven to 200°C / 390°F and spread a layer of baking paper on a work surface. Sprinkle with a little flour and roll out the dough ball from the fridge to a size of about 31×24 cm (approximately 12×9 inches). Now place the baking paper with the dough on a baking tray and bake in the oven for around 12-13 minutes. The dough should be light in color when it comes out of the oven and at most slightly brown at the edges. Then remove the dough from the oven and leave to cool.
  3. Meanwhile make the caramel in a small pot. To do this, melt sugar over a low to medium heat, stirring constantly. As soon as the sugar has completely melted and turned amber, remove from the heat and stir in butter and heavy cream, one at a time. Don’t panic it’s normal that it gets bubbly just keep stirring, but be careful not to burn yourself. While stirring let it simmer for a minute or so on a low heat.
  4. Once the mixture has become a smooth caramel, stir in whole macadamia nuts and peanuts. Now quickly spread the nut-caramel mixture evenly over the cooled dough and press lightly onto the dough so that the caramel and the dough can combine, and leave to stand for around 45-60 minutes so that the caramel can harden.
  5. In the meantime, place the chocolate and coconut oil in a small heatproof glass or stainless steel bowl and fill the pot in which you prepared the caramel with water and bring to the boil over a medium heat on the stove. This not only makes it very easy to remove the caramel residue but also melts the chocolate for the next step. Do not pour the water away, but hang the bowl with the chocolate in the pot. But it shouldn’t touch the water. White chocolate is a little diva and only needs the steam to melt. Leave it to stand for approx. 10-15 minutes. Stir the chocolate from time to time and make sure no water gets in the bowl.
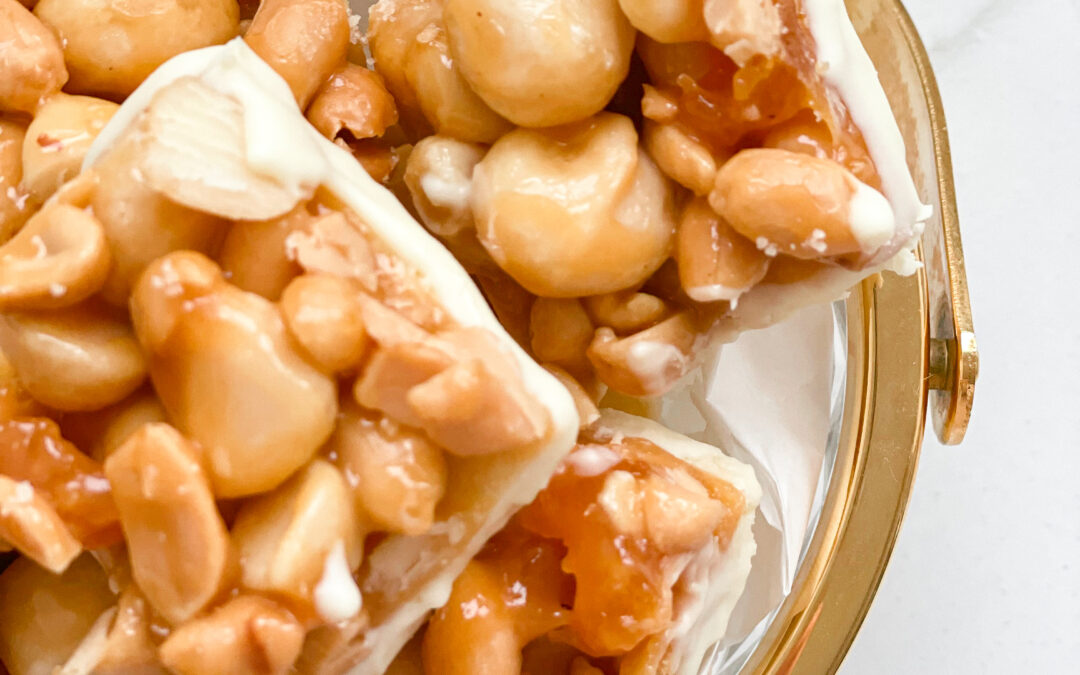
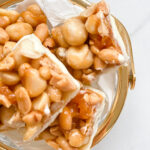
  6. As soon as the caramel hardened, use a sharp knife to cut the nut caramel sheet as desired. I opted for squares. Now hold the squares by the nut-caramel layer and dip them with the dough layer into the melted chocolate and allow to drip off well. Leave the squares to dry on the nut-caramel layer. For quicker drying, place the squares in the fridge.
  7. Enjoy 🙂
  • Prep Time: 5 min
  • Passive Time: 40 min
  • Cook Time: 60 min

CRAVING MORE?

Follow along here & don’t forget to subscribe to my substack!

Chicken Shawarma Plate

Chicken Shawarma Plate

Chicken Shawarma Plate

Chicken Shawarma Plate

December 12, 2023 by Kimberly

Experience a taste symphony with this Chicken Shawarma Plate – succulent spiced chicken, vibrant fresh veggies, and a zesty mint-garlic dip. A flavorful journey on every plate!

This website uses affiliate links which may earn commission for purchases made at no additional cost to you.

TOTAL TIME

60 min

SERVES

2 plates

DIET

omnivore

EVERY RECIPE DESERVES

A Little Love Letter

Savor the exotic flavors of my Chicken Shawarma Plate! Succulent, spice-infused chicken, paired with a medley of fresh tomatoes and cucumbers, all enhanced by a zesty mint-garlic dip. This culinary masterpiece promises a taste journey that’s as bold and exciting as it is delicious. Elevate your dining experience with this harmonious fusion of textures and spices, making every bite a celebration of Middle Eastern culinary delights.

Serve a delicious chicken shawarma plate by combining the seasoned chicken with the fresh tomato, cucumber and parsley salad and the spicy mint garlic dip. Feel free to add rice or chubz, a Lebanese bread, as well. This versatile dish offers a fusion of flavors and textures that can be enjoyed on any occasion. A simple but delicious culinary adventure awaits!

To store the Chicken Shawarma Plate, refrigerate any leftovers promptly. Keep the spiced chicken, tomato-cucumber salad, mint-garlic dip, and other components in separate airtight containers. This helps maintain their individual flavors and textures. When reheating, warm the chicken separately to preserve its tenderness. Consume within a day or two for the best taste and freshness.

Hi, I'm Kimberly!

Hi, I'm Kimberly.

A hopeless romantic when it comes to food. Every recipe I share is a love letter to food itself. I’m so glad you’re here. Make yourself at home and stay a while.

Love,
Kimberly

Kimberly the Zett Signature

If you want to get to know me better,
click here!


Chicken Shawarma Plate

LET’S MAKE A PIECE OF HAPPINESS

Print
.tasty-recipe-responsive-iframe-container-8e06529f { position: relative; overflow: hidden; padding-top: 177.62%; } .tasty-recipe-responsive-iframe-container-8e06529f iframe { position: absolute; top: 0; left: 0; width: 100%; height: 100%; border: 0; } clock clock iconcutlery cutlery iconflag flag iconfolder folder iconinstagram instagram iconpinterest pinterest iconfacebook facebook iconprint print iconsquares squares iconheart heart iconheart solid heart solid icon
Chicken Shawarma Plate

Chicken Shawarma Plate


  • Author: Kimberly
  • Total Time: 60 min
  • Yield: 2

Description

RECOMMENDED EQUIPMENT

  • sharp knife
  • cutting board
  • small bowl
  • medium bowl
  • frying pan

Ingredients

Units Scale
CHICKEN
  • 400 grams chicken breast or boneless, skinless chicken thighs
  • 1 tbsp olive oil
  • 1 tbsp lemon juice
  • 3 garlic cloves
  • 1 tsp cumin
  • 1 tsp smoked paprika
  • 1 tsp salt
  • 1/4 tsp turmeric
  • 1/4 tsp curry
  • 1/8 tsp cinnamon
  • 1/8 tsp pepper
SALAD
  • 200 grams tomatoes
  • 150 grams cucumber
  • 80 grams red onion
  • 1 tbsp parsley
  • 2 tbsp olive oil
  • 1 tbsp lemon juice
  • 1/8 tsp salt
  • 1/8 tsp pepper
DIP
  • 200 grams yogurt
  • 12 leaves fresh mint
  • 1 garlic clove
  • 1/4 tsp salt
  • 1/8 tsp pepper

Instructions

  1. Start by preparing the chicken marinade, since it needs resting time. Cut the chicken into small pieces if using breast, or leave boneless thighs whole. In a bowl, mix 1 tbsp olive oil with 1 tbsp lemon juice. Remove the skin from 3 garlic cloves, press them into the bowl, and add 1 tsp cumin, 1 tsp smoked paprika powder, ¼ tsp turmeric, ¼ tsp curry powder, ⅛ tsp cinnamon, 1 tsp salt, and ⅛ tsp black pepper. Stir well, then add the chicken and mix until every piece is coated. Cover the bowl and place it in the fridge for about 30 minutes.
  2. While the chicken marinates, move on to the salad and dip. Cut the tomatoes, cucumber, and onion into small pieces. Pluck the parsley leaves, chop them finely, and set everything aside. In a small bowl, whisk together 2 tbsp olive oil, 1 tbsp lemon juice, and a pinch of salt and pepper, but don’t combine the salad yet; that comes right before serving.
  3. Next, prepare the yogurt dip. Peel 1 garlic clove and chop or press it. Stack a few mint leaves, roll them up, slice into fine rings, and chop finely. In another small bowl, add the yogurt, garlic, mint, ¼ tsp salt, and ⅛ tsp black pepper. Stir until creamy, then refrigerate the dip while finishing the chicken.
  4. When the chicken has marinated long enough, heat a large frying pan over medium heat. There’s no need to add extra oil — the marinade already has enough. (Optional: Thread the chicken onto soaked wooden or metal skewers.) Place the chicken in the hot pan and let it cook without moving it, until it turns white around the edges and golden underneath. Then flip and cook for the same amount of time on the other side, until golden brown and cooked through.
  5. While the chicken cooks, quickly finish the salad. Add the chopped tomato, cucumber, onion, and parsley to the olive oil–lemon dressing and toss everything together. Once the chicken is ready, arrange it on plates, add the salad on the side, and either spoon the mint garlic yogurt dip over the top or serve it separately.
  • Passive Time: 30 min
  • Cook Time: 30 min

CRAVING MORE?

Follow along here & don’t forget to subscribe to my substack!

Tomato, Cucumber & Parsley Side Salad

Tomato, Cucumber & Parsley Side Salad

Tomato, Cucumber & Parsley Side Salad

Tomato, Cucumber & Parsley Side Salad

December 11, 2023 by Kimberly

A vibrant medley of juicy tomatoes, crisp cucumbers, and fresh parsley harmonize in a refreshing salad. Bursting with flavors, it’s a delightful symphony of taste and texture on your plate.

This website uses affiliate links which may earn commission for purchases made at no additional cost to you.

TOTAL TIME

15 min

SERVES

2 portions

DIET

vegan

EVERY RECIPE DESERVES

A Little Love Letter

Enjoy a tasty side salad with fresh tomatoes, crunchy cucumbers, and flavorful parsley. It’s a simple mix that brings a burst of deliciousness to your meals. This easy-to-make salad is perfect with bread or shawarma chicken and this easy mint garlic dip, adding a refreshing and light touch to your plate. Try it for a quick, fresh bite that makes any meal better.

Serve this delightful salad by tossing the fresh tomatoes, crunchy cucumbers, and flavorful parsley together in a bowl. Drizzle with a light vinaigrette or a squeeze of lemon for an extra kick. Pair it with your favorite bread or alongside chicken as a wonderful component for a whole meal, take a look at my Chicken Shawarma Plate. Keep it chilled for a cool, refreshing experience. Quick, easy, and bursting with flavors, this salad is a perfect addition to any table.

Store the salad in an airtight container in the refrigerator. If you’ve added dressing, store it separately to maintain the crunch. Consume within a day or two for optimal taste. A quick toss before serving revives its flavors, ensuring a crisp and delicious experience every time.

Hi, I'm Kimberly!

Hi, I'm Kimberly.

A hopeless romantic when it comes to food. Every recipe I share is a love letter to food itself. I’m so glad you’re here. Make yourself at home and stay a while.

Love,
Kimberly

Kimberly the Zett Signature

If you want to get to know me better,
click here!


Tomato, Cucumber & Parsley Side Salad

LET’S MAKE A PIECE OF HAPPINESS

Print
.tasty-recipe-responsive-iframe-container-33049e72 { position: relative; overflow: hidden; padding-top: 177.62%; } .tasty-recipe-responsive-iframe-container-33049e72 iframe { position: absolute; top: 0; left: 0; width: 100%; height: 100%; border: 0; } clock clock iconcutlery cutlery iconflag flag iconfolder folder iconinstagram instagram iconpinterest pinterest iconfacebook facebook iconprint print iconsquares squares iconheart heart iconheart solid heart solid icon
Tomato, Cucumber & Parsley Side Salad

Tomato, Cucumber & Parsley Side Salad


  • Author: Kimberly
  • Total Time: 10 min
  • Yield: 2

Description

RECOMMENDED EQUIPMENT

  • sharp knife
  • cutting board
  • medium sized bowl

Ingredients

Units Scale
DRESSING
  • 2 tbsp olive oil
  • 1 tbsp lemon juice
  • 1/8 tsp salt
  • 1/8 tsp pepper
SALAD
  • 200g tomatoes (7 oz.)
  • 150g cucumber (5 oz.)
  • 80g red onion (3 oz.)
  • 1 tbsp parsley

Instructions

  1. Cut the tomatoes, cucumber and onion into small pieces. Pluck the parsley from the stalks and chop finely.
  2. In a medium-sized bowl, mix 2 tbsp olive oil, 1 tbsp lemon juice and salt and pepper to taste.
  3. Now add the chopped tomatoes, cucumber and onion and the finely chopped parsley and mix everything into a salad.
  • Cook Time: 10 min

CRAVING MORE?

Follow along here & don’t forget to subscribe to my substack!

Chicken Shawarma Marinade

Chicken Shawarma Marinade

Chicken Shawarma Marinade

Chicken Shawarma Marinade

December 9, 2023 by Kimberly

Transform your chicken shawarma with a zesty marinade featuring garlic, lemon, and a harmonious mix of Middle Eastern spices. Infuse bold flavor for a mouthwatering culinary adventure.

This website uses affiliate links which may earn commission for purchases made at no additional cost to you.

TOTAL TIME

50 min

SERVES

2 portions

DIET

omnivore

EVERY RECIPE DESERVES

A Little Love Letter

Get ready to whip up the best chicken shawarma ever with this amazing marinade! Mix in some garlic, fresh lemon juice, olive oil, and a bunch of delightful Middle Eastern flavors. Whether you grill it or roast it, you’re in for some seriously joyous, tasty bites that will send your taste buds on a magical journey. Make your own piece of happiness with this fantastic chicken shawarma marinade – it’s an absolute blast!

Serve your delicious chicken shawarma meat by placing it on warm pita bread or flatbread. Top with crunchy vegetables such as a tomato cucumber salad. Drizzle with a spicy tahini or mint garlic dip for a special kick. You can also use the chicken as a wonderful component for a whole meal, take a look at my Chicken Shawarma Plate. A perfect feast so that every bite is a hearty delight!

Maximize the flavor of your chicken shawarma by storing it in a jar or airtight container, letting the marinade work its magic for up to 5 days. The longer it sits, the more the flavors meld together, creating an even more delicious and satisfying dish when you’re ready to savor it. Store the roasted marinated chicken shawarma meat by placing it in an airtight container in the refrigerator and consume within 2 to 3 days to ensure optimum freshness.

Hi, I'm Kimberly!

Hi, I'm Kimberly.

A hopeless romantic when it comes to food. Every recipe I share is a love letter to food itself. I’m so glad you’re here. Make yourself at home and stay a while.

Love,
Kimberly

Kimberly the Zett Signature

If you want to get to know me better,
click here!


Chicken Shawarma Marinade

LET’S MAKE A PIECE OF HAPPINESS

Print
.tasty-recipe-responsive-iframe-container-ba12b7a8 { position: relative; overflow: hidden; padding-top: 177.62%; } .tasty-recipe-responsive-iframe-container-ba12b7a8 iframe { position: absolute; top: 0; left: 0; width: 100%; height: 100%; border: 0; } clock clock iconcutlery cutlery iconflag flag iconfolder folder iconinstagram instagram iconpinterest pinterest iconfacebook facebook iconprint print iconsquares squares iconheart heart iconheart solid heart solid icon
Chicken Shawarma Marinade

Chicken Shawarma Marinade


  • Author: Kimberly
  • Total Time: 50 min
  • Yield: 2

Description

RECOMMENDED EQUIPMENT

  • sharp knife
  • cutting board
  • medium sized bowl
  • frying pan

Ingredients

Units Scale
  • 400 grams chicken breast or boneless, skinless chicken thighs
  • 1 tsbp olive oil
  • 1 tbsp lemon juice
  • 3 garlic cloves
  • 1 tsp cumin
  • 1 tsp smoked paprika
  • 1 tsp salt
  • 1/4 tsp turmeric
  • 1/4 tsp curry
  • 1/8 tsp cinnamon
  • 1/8 tsp pepper

Instructions

  1. Mix 1 tbsp olive oil and 1 tbsp lemon juice in a bowl.
  2. Squeeze the garlic cloves into the bowl with the olive oil and lemon juice. Now add 1 tsp cumin, 1 tsp smoked paprika powder, 1/4 tsp turmeric, 1/4 tsp curry powder, 1/8 tsp cinnamon, 1 tsp salt and 1/8 tsp black pepper and mix well.
  3. Add the chicken to the marinade and mix well so that all the chicken is coated with the marinade.
  4. Now place the bowl in the fridge. If you want it to be super quick, leave it to marinate for at least 30 minutes. For a longer preparation time, you can leave it in the fridge for up to 4 hours.
  5. After the marinating time, heat a large frying pan over a medium heat. The chicken can now be placed on wooden or metal skewers before frying, but this is not a must. Tip: If you want to use wooden skewers, place them in a bowl of water 1 hour before use so that they can soak up the water and won’t burn during frying.
  6. Either place the chicken on skewers in the pan or fry them individually. To ensure the right juiciness in chicken meat so that it does not become dry, turn it only once during frying. When you place the raw chicken in the pan, let it cook on this side over a medium heat until it turns white around the edges, which is the sign that the bottom half is cooked through. Then you can turn it over. Then fry for the same amount of time on the other side.
  • Passive Time: 30 min
  • Cook Time: 20 min

CRAVING MORE?

Follow along here & don’t forget to subscribe to my substack!

Mint Garlic Dip

Mint Garlic Dip

Mint Garlic Dip

Mint Garlic Dip

December 10, 2024 by Kimberly

Savor the goodness of a minty garlic dip with creamy yogurt. It’s a tasty twist that adds extra flavor to your snacks and meals. Dip in and enjoy!

This website uses affiliate links which may earn commission for purchases made at no additional cost to you.

TOTAL TIME

5 min

SERVES

2 portions

DIET

vegetarian

EVERY RECIPE DESERVES

A Little Love Letter

This dip is a creamy mix of yogurt, fresh mint, and zesty garlic. The refreshing mint adds a burst of flavor, while the garlic gives it a zing. Whether you’re snacking or serving at a party, this dip is sure to be a hit. Easy to make and even easier to enjoy—transform your meals with the delightful taste of mint garlic goodness!

Serve up the delightful Mint Garlic Dip to elevate your meals! Ideal for dipping veggies and chips, it also makes a tasty spread for sandwiches. You can also use the salad as a wonderful component for a whole meal, take a look at my Chicken Shawarma Plate. The cool and zesty blend of mint and garlic adds a burst of flavor to any dish.

Keep your yogurt mint garlic dip fresh by storing it in an airtight container in the refrigerator. This ensures its creamy texture and delicious flavor stay intact. For a longer shelf life, avoid leaving it at room temperature.

Hi, I'm Kimberly!

Hi, I'm Kimberly.

A hopeless romantic when it comes to food. Every recipe I share is a love letter to food itself. I’m so glad you’re here. Make yourself at home and stay a while.

Love,
Kimberly

Kimberly the Zett Signature

If you want to get to know me better,
click here!


Mint Garlic Dip
Mint Garlic Dip

LET’S MAKE A PIECE OF HAPPINESS

Print
.tasty-recipe-responsive-iframe-container-9c105aa6 { position: relative; overflow: hidden; padding-top: 177.62%; } .tasty-recipe-responsive-iframe-container-9c105aa6 iframe { position: absolute; top: 0; left: 0; width: 100%; height: 100%; border: 0; } clock clock iconcutlery cutlery iconflag flag iconfolder folder iconinstagram instagram iconpinterest pinterest iconfacebook facebook iconprint print iconsquares squares iconheart heart iconheart solid heart solid icon
Mint Garlic Dip

Mint Garlic Dip


  • Author: Kimberly
  • Total Time: 5 minutes
  • Yield: 2

Description

RECOMMENDED EQUIPMENT

  • sharp knife
  • small cutting board
  • small bowl

Ingredients

Units Scale
  • 200 grams yogurt
  • 12 leaves fresh mint
  • 1 garlic clove
  • 1/4 tsp salt
  • 1/8 tsp pepper

Instructions

  1. Remove the peel from the garlic clove.
  2. Stack the mint leaves on top of each other and roll them up. Then cut into fine rings and chop finely.
  3. Add yogurt to the bowl. Add the garlic clove with a press. Finally, add salt and finely ground pepper, as well as the finely chopped mint, and stir everything into a creamy dip.
  • Cook Time: 5 min

CRAVING MORE?

Follow along here & don’t forget to subscribe to my substack!

Apple Cucumber Brie Turkey Sandwich

Apple Cucumber Brie Turkey Sandwich

Apple Cucumber Brie Turkey Sandwich

Apple Cucumber Brie Turkey Sandwich

December 4, 2023 by Kimberly

Experience a healthy morning with a delightful wholegrain sandwich. Fresh apples, crisp cucumbers, creamy Brie, and lean turkey combine for a flavorful delight.

This website uses affiliate links which may earn commission for purchases made at no additional cost to you.

TOTAL TIME

10 min

SERVES

1 sandwich

DIET

omnivore

EVERY RECIPE DESERVES

A Little Love Letter

Start your day right with a tasty Apple Cucumber Brie Turkey Sandwich on wholegrain bread. It’s got crunchy apples, fresh cucumbers, creamy Brie, and lean turkey for a delicious combo. This sandwich isn’t just good for you—it’s a yummy way to kick off your morning with lots of flavor.

Enjoy it in the morning or prep it ahead for on-the-go — quick, easy, and packed with nutrients. It provides a healthy start in the morning and serves as a convenient option when prepared as a meal prep. The combination of crisp apple, refreshing cucumber, creamy Brie, and lean turkey not only makes it delicious but also ensures you get essential nutrients. Easy to assemble and perfect for a flavorful energy boost.

Store this sandwich in an airtight container to keep it fresh. The layer of lettuce between the ingredients, especially the cucumber, acts as a barrier and prevents moisture from reaching the other ingredients. In this respect, this sandwich is very suitable for preparing the evening before or in the morning and taking with you on the go or simply enjoying at home.

Hi, I'm Kimberly!

Hi, I'm Kimberly.

A hopeless romantic when it comes to food. Every recipe I share is a love letter to food itself. I’m so glad you’re here. Make yourself at home and stay a while.

Love,
Kimberly

Kimberly the Zett Signature

If you want to get to know me better,
click here!


Apple Cucumber Brie Turkey Sandwich

LET’S MAKE A PIECE OF HAPPINESS

Print
.tasty-recipe-responsive-iframe-container-07ff274b { position: relative; overflow: hidden; padding-top: 177.62%; } .tasty-recipe-responsive-iframe-container-07ff274b iframe { position: absolute; top: 0; left: 0; width: 100%; height: 100%; border: 0; } clock clock iconcutlery cutlery iconflag flag iconfolder folder iconinstagram instagram iconpinterest pinterest iconfacebook facebook iconprint print iconsquares squares iconheart heart iconheart solid heart solid icon
Apple Cucumber Brie Turkey Sandwich

Apple Cucumber Brie Turkey Sandwich


  • Author: Kimberly
  • Total Time: 10 min
  • Yield: 1

Description

RECOMMENDED EQUIPMENT

  • sharp knife
  • normal knife
  • cutting board

Ingredients

Units Scale
  • 2 slices wholegrain bread
  • 30 grams turkey
  • 6 slices cucumber
  • 3 slices apple
  • some salad leaves
  • 3 slices camembert
  • 2 tsp cream cheese

Instructions

  1. Wash the cucumber and cut off six slices.
  2. Wash the apple and cut off three slices. Remove the core.
  3. Cut three slices off the Camembert.
  4. Wash the lettuce and cut off several leaves.
  5. Spread cream cheese on the two slices of bread.
  6. Now top one slice in the following order: Turkey, apple, camembert, lettuce & cucumber.
  7. Close the sandwich with the other slice. Cut in the middle with a sharp knife.
  • Cook Time: 10 min

CRAVING MORE?

Follow along here & don’t forget to subscribe to my substack!