


Description
GOOD TO HAVE ON HAND
- sharp knife
- cutting board
- small baking dish
- small bowl
Ingredients
PEACHES
- 2 peaches
- 1.5 tbsp brown sugar
- 1 tbsp butter
- 1/2 tsp vanilla extract
- pinch of salt
- 2 scoops vanilla ice cream
- 2 tsp chopped pistacchios
Instructions
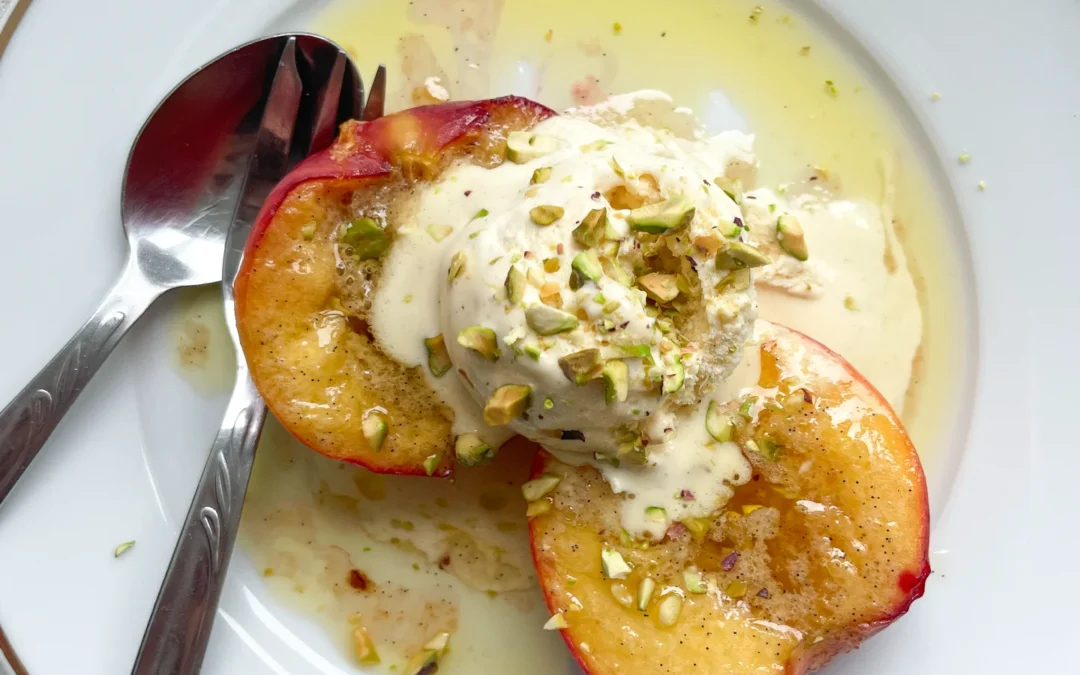
- Preheat the oven to 180°C/350°F. Meanwhile, wash the peaches and cut them in half. Carefully remove the pit and place the peaches, cut side up, in a small baking dish.
- In a small bowl, mix butter, sugar, vanilla extract, and a pinch of salt. Spread this mixture evenly over the peaches.
- Bake the peaches in the oven for 15 minutes. Take the ice cream out of the freezer. While the peaches are baking, shell and finely chop the pistachios.
- Place two peach halves on each plate, top with a scoop of vanilla ice cream and some chopped pistachios. Drizzle the remaining sauce from the baking dish over the top and enjoy.
Notes
The calorie information may vary depending on the product used, country and region.
- Passive Time: 15 min
- Cook Time: 10 min