")


")
")
Description
Recommended Equipment
- measuring cup
- large bowl
- plastic wrap
- pan
- rolling pin
- small bowl
- kitchen brush
- sharp knife
- cutting board
Ingredients
Units Scale
DOUGH
- 250 grams all-purpose flour
- 80 milliliters warm water
- 80 milliliters warm full-fat milk
- 3/4 tsp active dry yeast
- 1/2 tbsp white sugar
- 1/2 tsp salt
- 1 tbsp butter
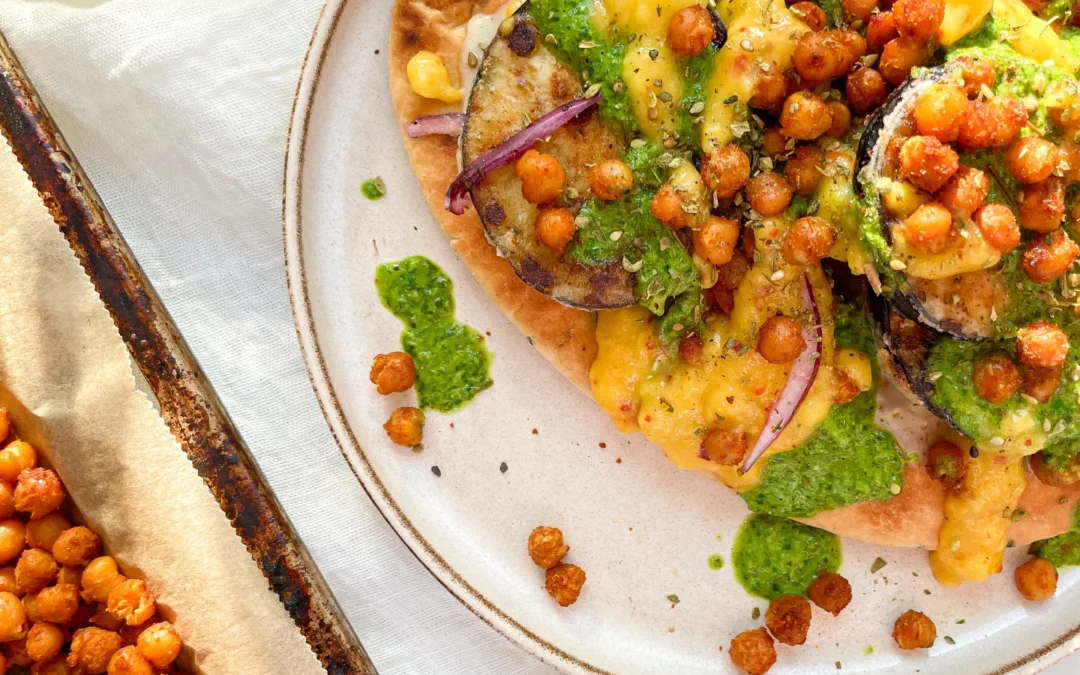
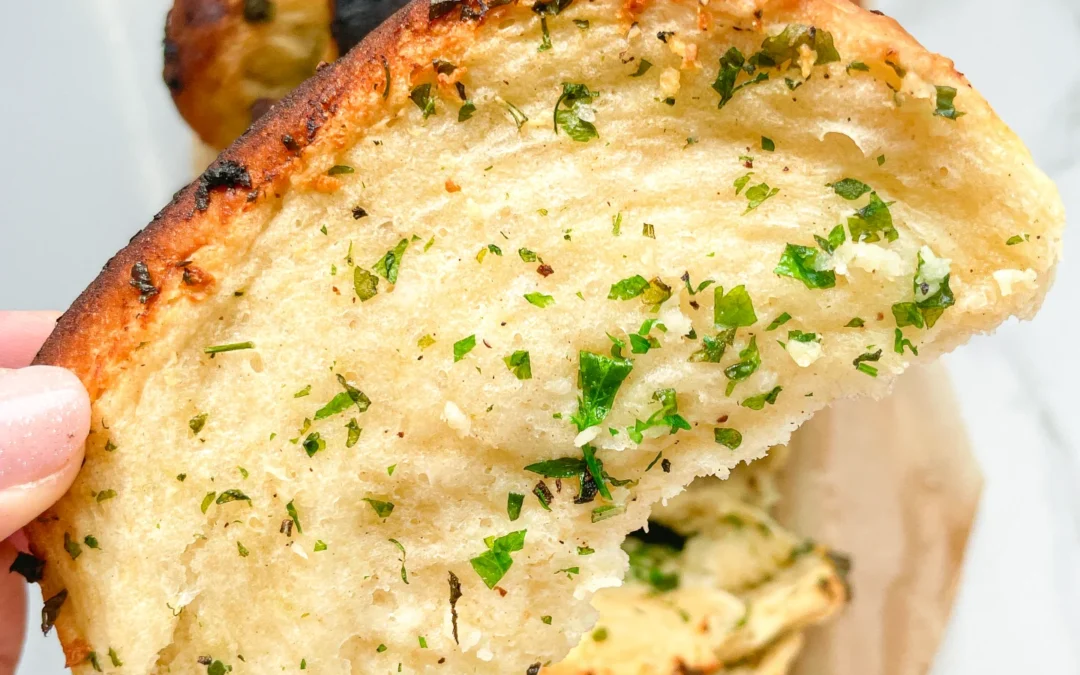
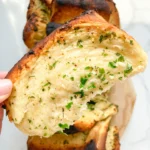
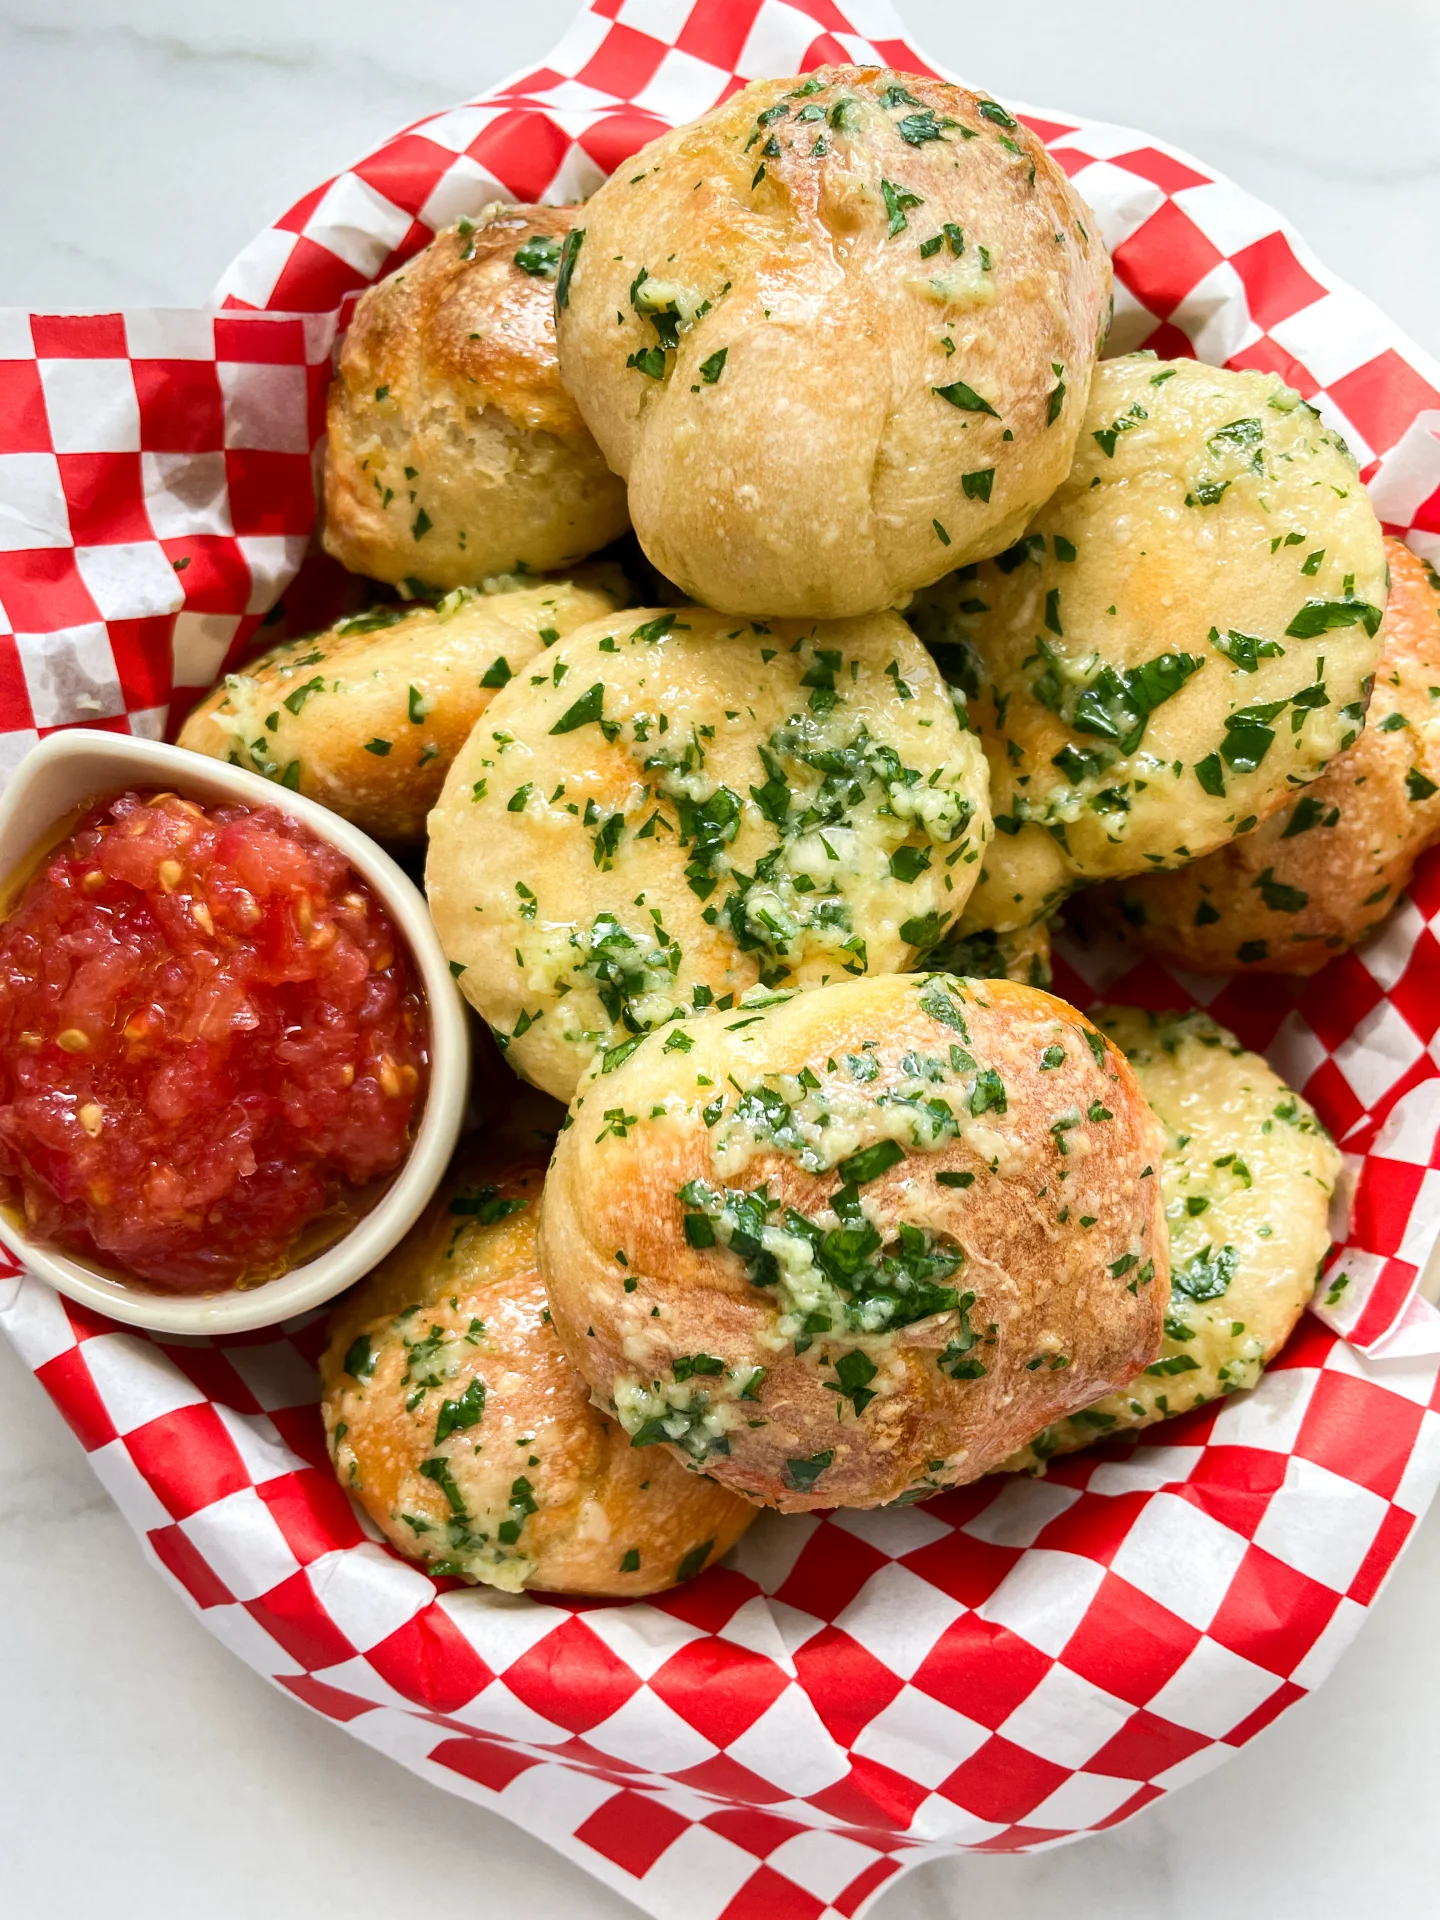
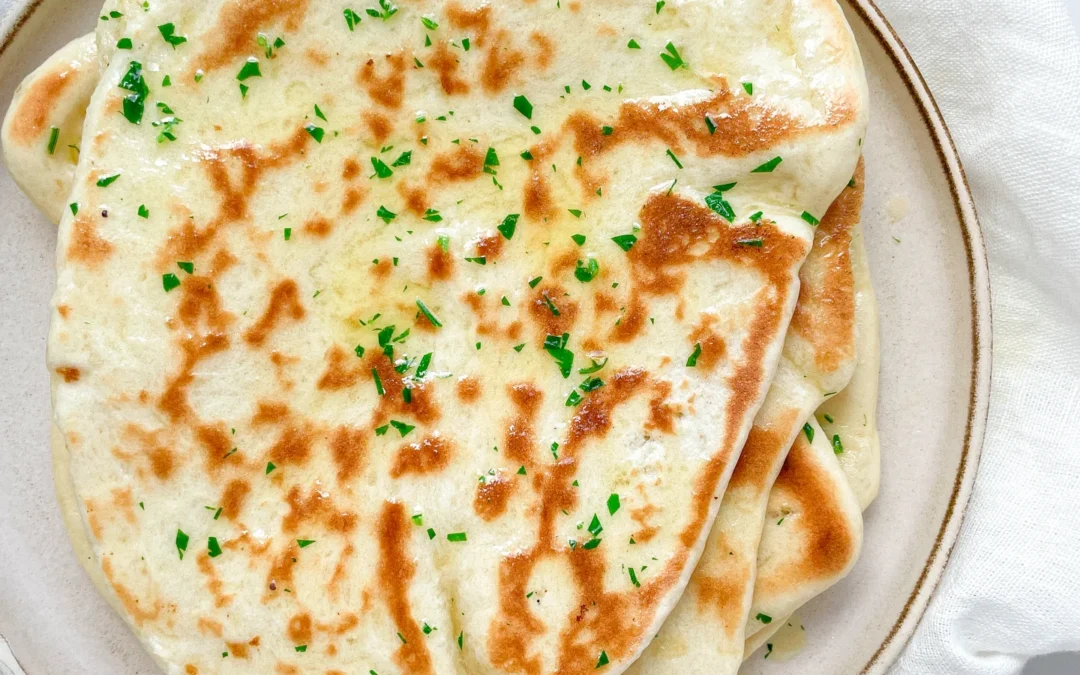
- 1 tbsp chopped parsley
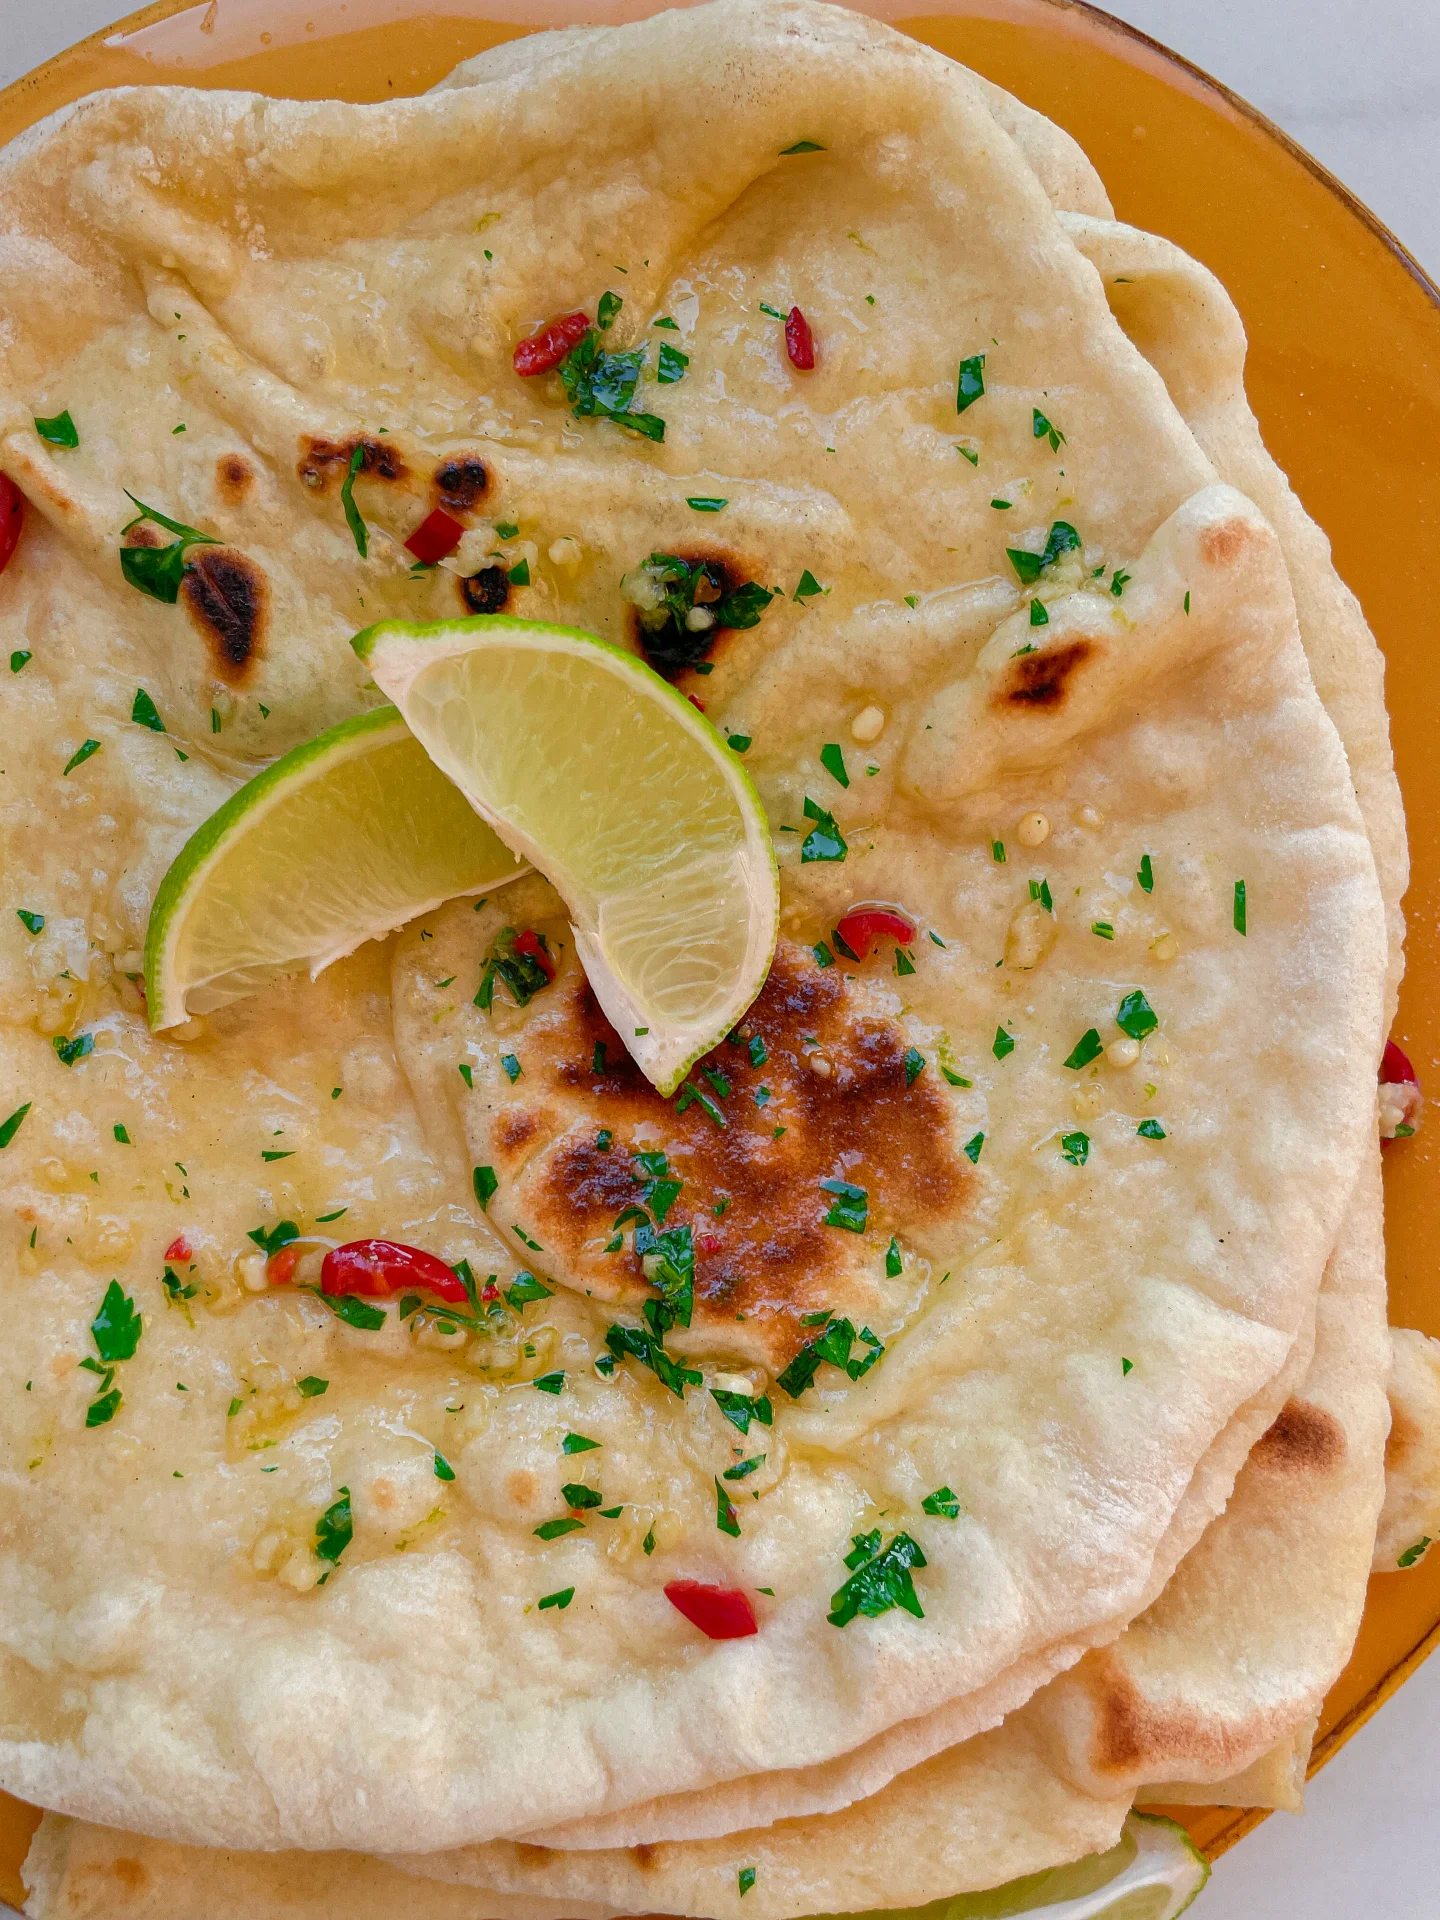
Instructions
- In a measuring cup, mix warm water and warm milk with sugar and dry yeast, and let it sit for 10 minutes. Meanwhile, combine flour and salt in a bowl.
- Add the yeast mixture to the flour and stir with a spoon until it becomes crumbly.
- Place the dough on a clean surface and knead by hand until it is smooth and no longer sticky. Shape the dough into a ball, place it back in the bowl, cover well with plastic wrap, and let it rise for at least 1 hour.
- Divide the dough into 4 pieces (for larger flatbreads) or 8 pieces (for smaller flatbreads). Keep the individual pieces in the bowl and loosely cover with plastic wrap.
- Heat a pan over medium heat without adding any fat.
- Roll each piece of dough into a very thin, round flatbread using a rolling pin. If the dough is too sticky, sprinkle a little flour on the surface.
- Cook the flatbreads one at a time in the pan without adding any fat. Once you see several bubbles, flip the flatbread to the other side. Remove from the pan and keep warm under a cloth.
- While the first flatbread is cooking, melt the butter and chop the parsley. Mix the parsley with the melted butter and brush each flatbread with the butter mixture.
- Serve the bread immediately for the best taste.
- Passive Time: 60 min
- Cook Time: 30 min