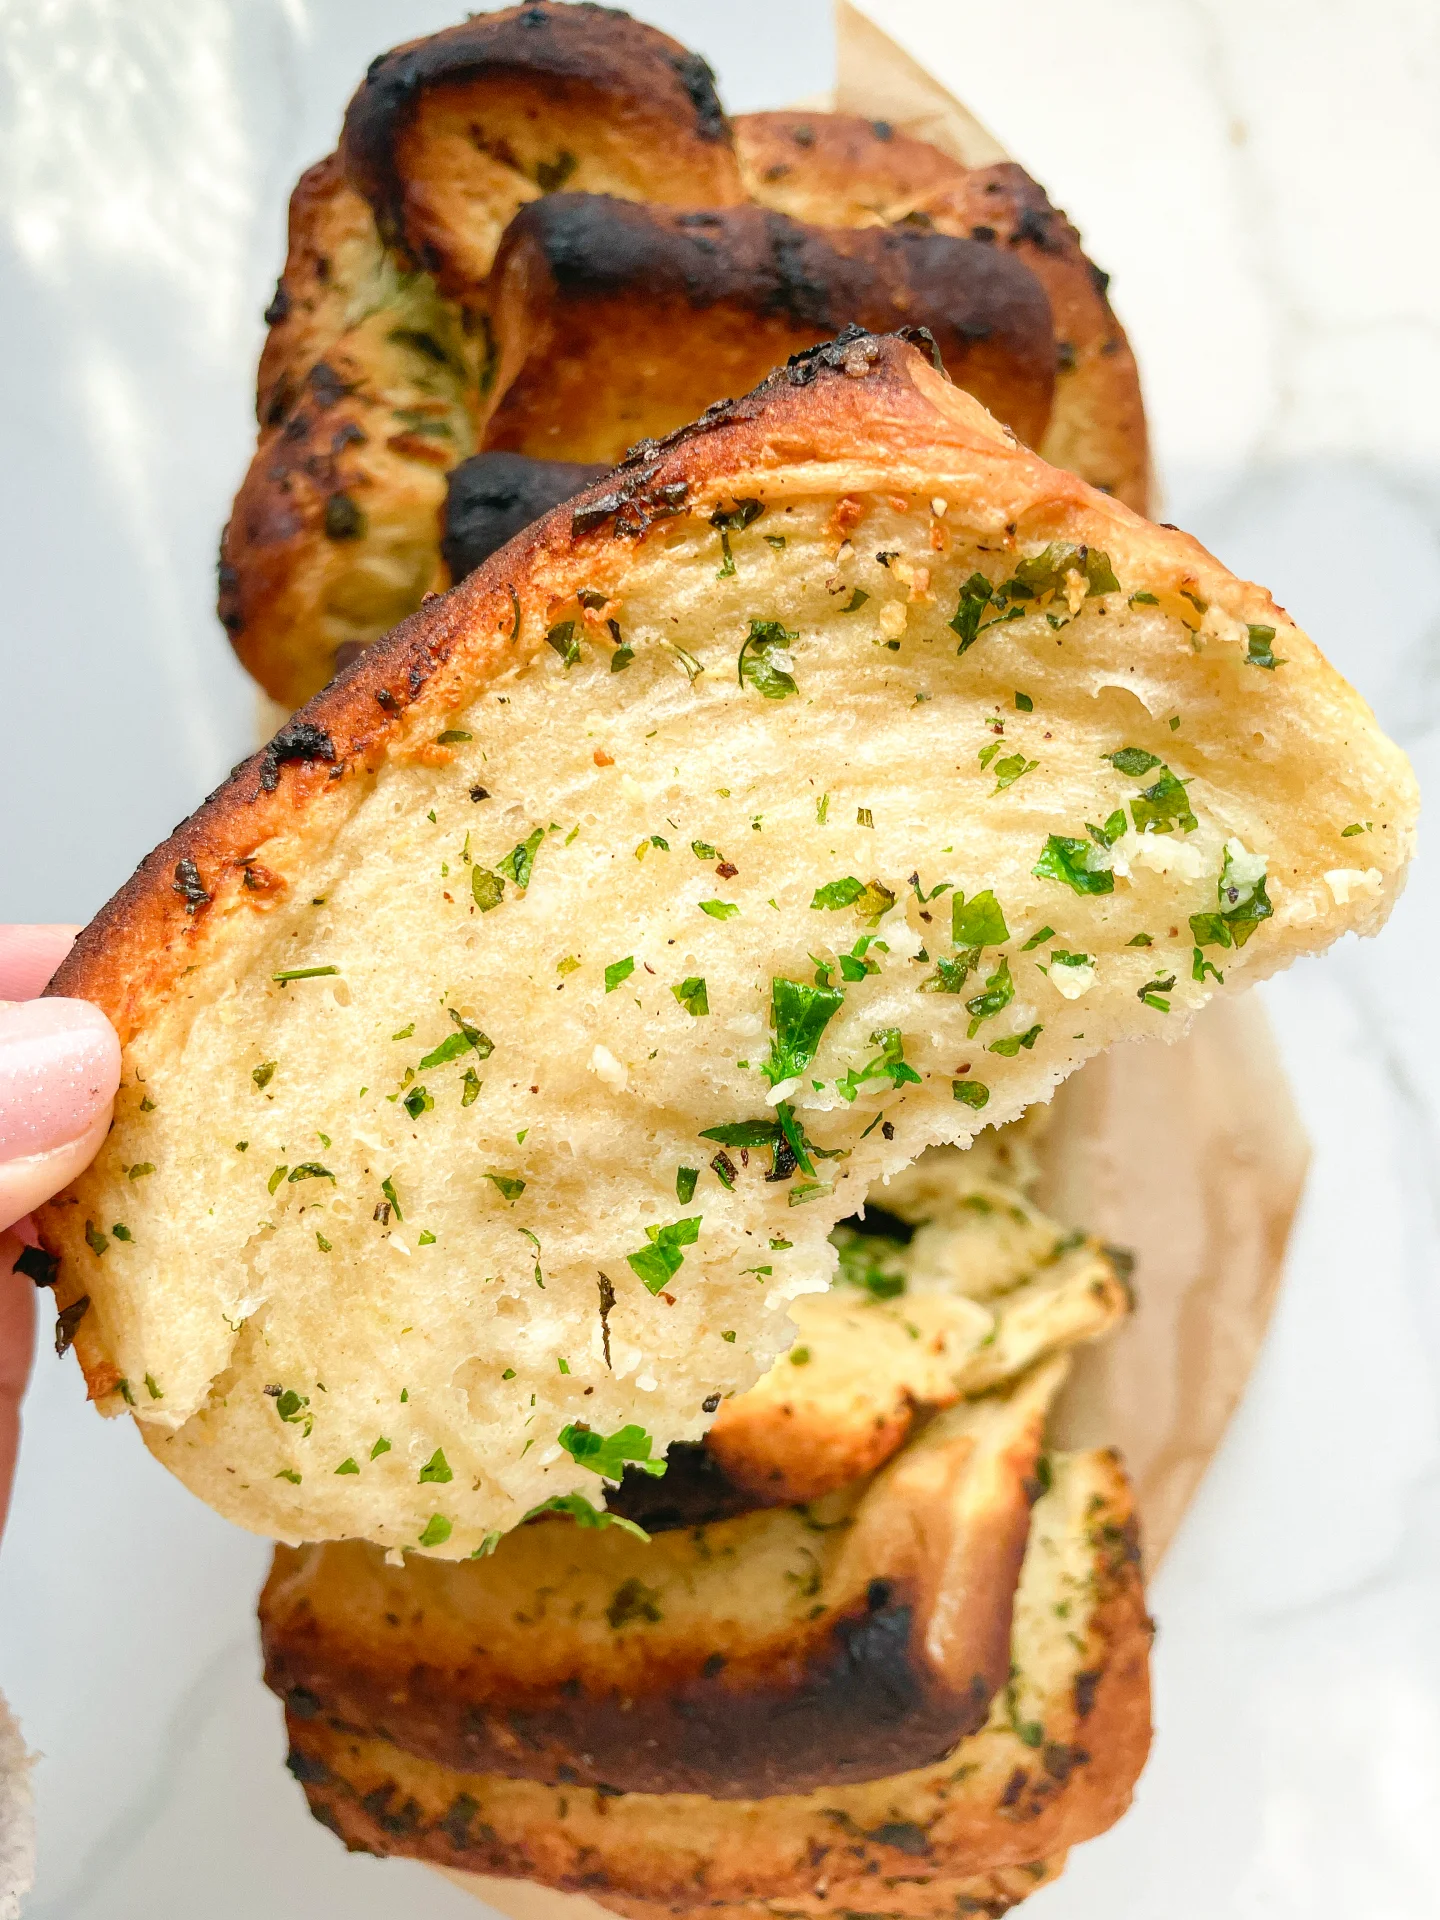
Garlic Parmesan Butter Knots & Grated Tomato Dip

Garlic Parmesan Butter Knots & Grated Tomato Dip

Garlic Parmesan Butter Knots & Grated Tomato Dip

Garlic Parmesan Butter Knots & Grated Tomato Dip

September 2, 2024 by Kimberly

Indulge in warm, buttery knots with a savory garlic kick, paired perfectly with a fresh and tangy tomato dip. This treat feels like a cozy hug for your taste buds.

2x OVERNIGHT
7 HOURS
45 MINUTES

EASY

VEGETARIAN

INT.

150 PER KNOT

COMFORT FOOD

PICNIC

APPETIZER

ALL YEAR

INTRODUCTION

ABOUT THE RECIPE

Get ready to cozy up with these irresistible, buttery garlic knots that are as delicious as they are easy to make. Packed with savory garlic and parmesan, these warm, soft knots are the ultimate comfort food snack. Paired with a fresh, tangy tomato dip, they’re perfect for sharing with friends or enjoying on your own. Whether you’re hosting a party or just craving something deliciously savory, these knots are sure to become a favorite in your recipe collection.

How to serve
These garlic parmesan knots are best served warm, straight out of the oven. Serve alongside a bowl of the grated tomato dip for a refreshing contrast to the rich, buttery flavor. This dish makes a great appetizer or a tasty side for soups and salads.

How to store
To keep these knots fresh, store them in an airtight container at room temperature for up to two days. If you need to keep them longer, freeze them in a sealed bag for up to a month. Reheat in the oven at a low temperature to bring back that fresh-from-the-oven warmth. The tomato dip can be stored in the fridge for up to three days, and it’s best served slightly chilled.

Hi, I'm Kimberly!

Hi, I'm Kimberly.

A passionate food lover who believes in the magic of homemade deliciousness that spreads love and warmth. Join me on this culinary adventure as I prepare wonderful dishes and let’s spread some happiness together!

Kimberly the Zett Signature

If you want to get to know me better, click here!


Garlic Parmesan Butter Knots & Grated Tomato Dip
„Let’s make a piece of happiness“
Print
clock clock iconcutlery cutlery iconflag flag iconfolder folder iconinstagram instagram iconpinterest pinterest iconfacebook facebook iconprint print iconsquares squares iconheart heart iconheart solid heart solid icon
Garlic Parmesan Butter Knots & Grated Tomato Dip

Garlic Parmesan Butter Knots & Grated Tomato Dip


5 Stars 4 Stars 3 Stars 2 Stars 1 Star

No reviews

  • Author: Kimberly
  • Total Time: 2x over night + 7 hrs + 45 min
  • Yield: 11 knots 1x

Description

Recommended Equipment

  • tall glass with a lid
  • two large bowls
  • spatula
  • two medium-sized bowls
  • grater
  • sharp knife
  • cutting board

Ingredients

Units Scale

PRE-DOUGH

  • 50 grams pizza flour (in Germany Typ 00)
  • 50 grams water, luke warm
  • 1/8 tsp dry active yeast

DOUGH

  • 250 grams pizza flour (in Germany Typ 00)
  • 150 grams water, room temperature
  • 1/8 tsp dry active yeast
  • 1 tsp salt

BUTTE PARMESAN GARLIC SAUCE

  • 50 grams butter
  • 20 grams parmesan
  • 8 garlic cloves
  • 2 tbsp fresh parsley
  • pinch of salt

GRATED TOMATO DIP

  • 3 mid-sized tomatoes
  • 1 tbsp olive oil
  • pinch of salt

Instructions

PREPARATIONS

  • Evening before Day 1: Prepare the pre-dough. Mix flour, dry active yeast, and water in a tall glass until no lumps remain and the consistency is sticky. Cover loosely with a lid and let it sit at room temperature overnight.
  • Day 1: Combine the pre-dough from the first evening with the dough ingredients in a medium-sized bowl. Stir with a wooden spoon until everything just comes together. Use a dough scraper or spatula to clean the sides of the bowl. Cover the bowl tightly with plastic wrap and let it rest for 30 minutes. After this time, grab the dough with a wet hand on one side, gently lift it, and fold it over onto the other side. Continue this process until the dough has been lifted and folded all the way around. Repeat this step 3 more times, every 30 minutes. After the 4th stretch and fold, shape the dough into a round ball with a taut surface and place it back in the bowl. Cover the bowl tightly with a lid or plastic wrap and refrigerate overnight.
  • Day 2: Take the dough out of the fridge and divide it into 11-12 equal portions with 50g / 1.8o each on a lightly floured surface. Roll each portion into a long dough rope, then form a knot and press the ends together on the back of the knot. Place the knots on a baking sheet lined with parchment paper, leaving enough space between them. Cover them with a damp kitchen towel and let them rise at room temperature for the next 3 hours. Preheat the oven to 190°C / 375°F towards the end of the rising time.

INSTRUCTIONS

  1. Once the oven is hot, place the baking sheet with the dough knots in the oven and bake for about 15 minutes. Then, brown them for an additional 5 minutes using the grill function at 250°C / 480°F.
  2. Meanwhile, prepare the butter-parmesan sauce. Melt butter in a medium-sized bowl, then finely grate the parmesan into it. Peel the garlic and either grate or press it into the bowl. Finely chop the parsley and add it to the bowl as well. Mix everything together and season with a pinch of salt. Set aside.
  3. For the dip, finely grate the tomatoes, leaving the skin behind (it won’t be used in the dip). Transfer the grated tomatoes to a bowl, mix with a bit of olive oil and salt, and pour into a small serving dish.
  4. Take the knots out of the oven and immediately place them in a large bowl. Pour the butter-parmesan sauce over them and toss well to coat each knot. Transfer the knots to a basket and serve with the dip. They taste best warm and fresh from the oven.
  • Prep Time: 25 min
  • Passive Time: 2x over night + 7 hrs
  • Cook Time: 20 min

Homemade Bagels

Homemade Bagels

Homemade Bagels

Homemade Bagels

August 15, 2024 by Kimberly

Indulge in these cozy, chewy homemade bagels with irresistible toppings! Perfect for breakfast or brunch, they bring a warm, homemade touch to your mornings. Once you try these, you’ll never buy bagels again!

2 HOURS

INTERMEDIATE

VEGETARIAN

US AMERICAN

274 PER BAGEL

CHEWY

BRUNCH

BREAKFAST

ALL YEAR

INTRODUCTION

ABOUT THE RECIPE

Imagine starting your day with the warm, comforting aroma of freshly baked bagels wafting through your kitchen. These delightful homemade bagels are not only easy to make but also offer a chewy, satisfying bite that pairs perfectly with your favorite toppings. Whether you prefer the nutty flavor of sesame seeds, the subtle crunch of poppyseeds, the spicy kick of cheddar and jalapeno, or the classic mix of everything bagel seasoning, there’s a bagel for everyone to love.

How to serve
Slice them in half and spread on some creamy butter, tangy cream cheese, or your favorite jam. They also make fantastic bases for sandwiches – think smoked salmon with capers and red onion on a sesame bagel, or a turkey and avocado combo on a poppyseed bagel. For a real treat, try a cheddar and jalapeno bagel with a smear of guacamole. These bagels are versatile enough to be enjoyed any time of day, making them a must-have in your kitchen.

How to store
To keep your bagels fresh, store them in an airtight container at room temperature for up to two days. For longer storage, slice them in half and freeze them. When you’re ready to enjoy, simply pop them in the toaster straight from the freezer. This way, you’ll always have a delicious bagel ready whenever the craving strikes.

Hi, I'm Kimberly!

Hi, I'm Kimberly.

A passionate food lover who believes in the magic of homemade deliciousness that spreads love and warmth. Join me on this culinary adventure as I prepare wonderful dishes and let’s spread some happiness together!

Kimberly the Zett Signature

If you want to get to know me better, click here!


Homemade Bagels
Homemade Bagels
Homemade Bagels
„Let’s make a piece of happiness“
Print
clock clock iconcutlery cutlery iconflag flag iconfolder folder iconinstagram instagram iconpinterest pinterest iconfacebook facebook iconprint print iconsquares squares iconheart heart iconheart solid heart solid icon
Homemade Bagels

Homemade Bagels


  • Author: Kimberly
  • Total Time: 2 hrs
  • Yield: 8-12 1x

Description

Recommended Equipment

  • tall container
  • large bowl
  • damp cloth
  • oven
  • large pot

Ingredients

Units Scale

DOUGH – YEAST MIXTURE

  • 500 milliliters lukewarm water
  • 7 grams active dry yeast
  • 1 tbsp sugar

DOUGH – DRY INGREDIENTS

  • 900 grams bread flour (in Germany flour type 550)
  • 2 tsp salt
  • 30 grams white sugar

WATER BATH

  • 2 liters simmering water
  • 1/4 cup brown sugar

TOPPINGS

  • white sesame seeds
  • poppy seeds
  • everything but the bagel seasoning
  • cheddar & jalapeño

Instructions

  1. In a tall container, briefly stir together the yeast mixture ingredients: lukewarm water, yeast, and sugar, then let it sit for 10 minutes.
  2. Meanwhile, in a large bowl, mix the dry ingredients: flour, salt, and sugar. Add the yeast-water-sugar mixture and stir until just combined.
  3. Transfer the dough to a clean work surface and knead by hand until it barely sticks anymore.
  4. Shape the dough into 8 balls of 180g / 6oz each for large bagels or 12 balls of 120g / 4oz each for smaller bagels. Let them rest under a damp cloth for about 20 minutes.
  5. Poke a hole in the center of each dough ball with your finger and form a bagel by stretching the dough evenly.
  6. Place the bagels on parchment paper and let them rise for another 30 minutes.
  7. Preheat the oven to 175°C / 350°F. Bring water to a simmer in a large pot and dissolve the brown sugar in it. Simmer each bagel for 1 minute on each side.
  8. Remove the bagels from the water and dip them in your favorite toppings or leave them plain. I like using poppy seeds, sesame seeds, everything but the bagel seasoning, or jalapenos and cheddar cheese.
  9. Once all bagels are topped, place them on a parchment-lined baking sheet and bake in the oven for about 25-30 minutes depending on their size.
  10. Remove the baking sheet and enjoy the bagels 🙂
  • Passive Time: 1 hr 30 min
  • Cook Time: 30 min

Caramelized Bacon Fried Goat Cheese Salad with Blackberry Balsamic Vinaigrette

Caramelized Bacon Fried Goat Cheese Salad with Blackberry Balsamic Vinaigrette

Caramelized Bacon Fried Goat Cheese Salad with Blackberry Balsamic Vinaigrette

Caramelized Bacon Fried Goat Cheese Salad with Blackberry Balsamic Vinaigrette

August 13, 2024 by Kimberly

Indulge in this irresistibly crunchy, savory-sweet salad that’s bursting with flavor. Each bite is a vibrant mix of textures and tastes, making it the ultimate comfort food meets gourmet delight.

30 MINUTES

EASY

OMNIVORE

INT.

714 PER PORTION

COMFORT FOOD

EVERYDAY

LUNCH
DINNER

SPRING
SUMMER

INTRODUCTION

ABOUT THE RECIPE

Imagine sitting down to a salad that feels like a hug on a plate – some warm components, some crispy ones, and bursting with flavors that dance together perfectly. The savory crunch of caramelized bacon paired with the creamy, tangy goat cheese is an experience in itself. Add in the fresh burst of blackberries, crisp cucumber, and the subtle sweetness of pear, and you’ve got a dish that’s not just a salad but a full-on flavor journey.

How to serve
This salad is perfect as a main dish or a side, but honestly, it’s so good you’ll want to make it the star of the meal. Serve it on a large platter, allowing all those gorgeous colors to pop. Drizzle the blackberry balsamic vinaigrette just before serving for that fresh, tangy finish. Pair it with a light white wine or sparkling water with a splash of lemon, and you’ve got yourself a meal that feels like a treat.

How to store
If you’ve got leftovers, store the salad and dressing separately to keep everything crisp and fresh. Place the salad in an airtight container in the fridge, and it should stay good for about 1-2 days. The vinaigrette can be stored in a jar for up to three days.

Hi, I'm Kimberly!

Hi, I'm Kimberly.

A passionate food lover who believes in the magic of homemade deliciousness that spreads love and warmth. Join me on this culinary adventure as I prepare wonderful dishes and let’s spread some happiness together!

Kimberly the Zett Signature

If you want to get to know me better, click here!


Caramelized Bacon Fried Goat Cheese Salad with Blackberry Balsamic Vinaigrette
„Let’s make a piece of happiness“
Print
clock clock iconcutlery cutlery iconflag flag iconfolder folder iconinstagram instagram iconpinterest pinterest iconfacebook facebook iconprint print iconsquares squares iconheart heart iconheart solid heart solid icon
Caramelized Bacon Fried Goat Cheese Salad with Blackberry Balsamic Vinaigrette

Caramelized Bacon Fried Goat Cheese Salad with Blackberry Balsamic Vinaigrette


  • Author: Kimberly
  • Total Time: 30 min
  • Yield: 2 1x

Description

Recommended Equipment

  • tall container
  • hand blender
  • sharp knife
  • cutting board
  • three deep plates
  • small frying pan
  • oven
  • salad bowl

Ingredients

Units Scale

VINAIGRETTE

  • 50 grams blackberries
  • 1 tbsp balsamic vinegar
  • 2 tbsp olive oil
  • 1 tbsp honey
  • 1 tsp Dijon mustard
  • 1 garlic clove
  • salt, pepper & cayennepepper to taste

GOAT CHEESE

  • 100 grams goat cheese
  • 2 tbsp all purpose flour
  • 1 egg
  • 2 tbsp breadcrumbs
  • 2 tbsp panko
  • 1 tsp dried thyme
  • clarified butter for frying

BACON

  • 50 grams bacon
  • brown sugar

SALAD

  • 150 grams mixed green salad
  • 50 grams blackberries
  • 1 small red onion
  • 2 tbsp pecan nuts
  • 1/4 cucumber
  • 1/2 pear
  • 2 radishes
  • chives

Instructions

  1. In a tall container, add all the ingredients for the vinaigrette and blend with a hand blender until you get a smooth dressing. If it seems too thick, you can add 1-2 tablespoons of cold water. Place it in the fridge until ready to use.
  2. Next, cut the salad into bite-sized pieces, wash thoroughly, and place in a salad bowl. Wash the chives thoroughly as well, and cut them into fine rings.
  3. Wash and dry the radishes, cucumber, and pear. Peel the red onion. Slice everything thinly and distribute over the salad, along with the blackberries.
  4. Preheat the oven to 180°C / 350°F. Lay the bacon strips on a sheet of baking paper and sprinkle each strip with about 1/2 teaspoon of brown sugar and a pinch of cayenne pepper. Bake for about 10 minutes or until the sugar has melted and caramelized.
  5. Now prepare three small deep plates. Fill the first one with wheat flour, beat an egg with salt in the second, and mix breadcrumbs, panko, and thyme in the third. Cut the goat cheese into thick slices, then coat each slice first in flour, then in the egg, and finally in the breadcrumb-panko mixture. Press everything down firmly.
  6. Take the bacon out of the oven and let it cool. Once cooled, tear it into pieces and sprinkle over the salad.
  7. Heat some clarified butter in a pan and fry the goat cheese rounds until crispy on all sides. Place them on the salad.
  8. Finally, sprinkle a bit of chives on top as a garnish. Drizzle the vinaigrette over the salad just before serving.
  • Cook Time: 30 min

Green Veggies on Whipped Ricotta with Fried Capers & Shallots

Green Veggies on Whipped Ricotta with Fried Capers & Shallots

Green Veggies on Whipped Ricotta with Fried Capers & Shallots

Green Veggies on Whipped Ricotta with Fried Capers & Shallots

August 2, 2024 by Kimberly

Picture this: a cozy evening with a plate of vibrant, green goodness atop fluffy whipped ricotta, crowned with crispy capers and shallots. It’s like a warm hug from the inside out!

30 MINUTES

EASY

VEGETARIAN

INT.

556 PER PORTION

REFRESHING
CREAMY

EVERYDAY

APPETIZER
LUNCH

SPRING
SUMMER

INTRODUCTION

ABOUT THE RECIPE

If you’re craving a dish that’s both cozy and sophisticated, this is it. Imagine a creamy, dreamy spread of whipped ricotta topped with an array of vibrant green veggies, crispy fried capers, and sweet caramelized shallots. This delightful combination will transport your taste buds to a place of pure bliss. It’s perfect for a casual dinner with friends or a quiet night in when you want something special but easy to make.

How to serve
Serve this dish as a stunning centerpiece at your next dinner party or as a comforting solo meal. Spread the whipped ricotta generously over a crusty slice of bread or a crisp cracker, then pile on the fresh, sautéed green vegetables. Sprinkle the fried capers and caramelized shallots on top for that irresistible crunch and sweet-savory finish. Pair it with a glass of chilled white wine or a refreshing herbal tea to elevate the flavors even more.

How to store
Store any leftovers in an airtight container in the refrigerator. The whipped ricotta will stay fresh for up to three days, while the green veggies and toppings are best enjoyed within one day to maintain their crispiness and vibrant flavors. Before serving again, give everything a quick toss or reheat gently to revive the textures and aromas.

Hi, I'm Kimberly!

Hi, I'm Kimberly.

A passionate food lover who believes in the magic of homemade deliciousness that spreads love and warmth. Join me on this culinary adventure as I prepare wonderful dishes and let’s spread some happiness together!

Kimberly the Zett Signature

If you want to get to know me better, click here!


Green Veggies on Whipped Ricotta with Fried Capers & Shallots
„Let’s make a piece of happiness“
Print
clock clock iconcutlery cutlery iconflag flag iconfolder folder iconinstagram instagram iconpinterest pinterest iconfacebook facebook iconprint print iconsquares squares iconheart heart iconheart solid heart solid icon
Green Veggies on Whipped Ricotta with Fried Capers & Shallots

Green Veggies on Whipped Ricotta with Fried Capers & Shallots


  • Author: Kimberly
  • Total Time: 30 min
  • Yield: 2 1x

Description

Recommended Equipment

  • food processor
  • sharp knife
  • cutting board
  • two small bowls
  • small pan
  • paper towels
  • slotted spoon
  • medium-sized pot
  • medium-sized bowl
  • ice cubes

Ingredients

Units Scale

WHIPPED RICOTTA

  • 250 grams ricotta
  • juice of half a lemon
  • 2 tbsp olive oil
  • salt & pepper to taste

GREMOLATA

  • 3tbsp – 4 tbsp rosemary oil
  • 10 grams fresh parsley
  • juice of half a lemon
  • 1 garlic clove
  • salt & pepper to taste

GREEN VEGGIES

  • 100 grams broccolini
  • 100 grams green asparagus
  • 50 grams frozen peas

TOPPINGS

  • clarified butter for frying
  • 1 shallot
  • 1 tsp cornstarch
  • 1 tbsp capers
  • rosemary oil

Instructions

PREPARATIONS

  • Here you’ll find the recipe for the rosemary oil. You’ll need about 4-5 tablespoons of it.

INSTRUCTIONS

  1. For the whipped ricotta, put the ricotta cheese in a food processor. Add lemon juice, olive oil, salt, and pepper, and blend for 1-2 minutes until creamy. Place in the fridge for later use.
  2. Next, make the gremolata. Prepare a small bowl. Finely chop the parsley and put it in the bowl. Halve the lemon and squeeze the juice from one half into the parsley. Add the rosemary oil, salt, and pepper and grate the garlic clove. Place in the fridge for later use.
  3. Now prepare the toppings. Heat some clarified butter in a small pan. While the ghee is heating, peel and finely slice the shallot into rings. Mix the rings with cornstarch in a small bowl and set aside. Drain the capers and pat them dry with a paper towel.
  4. Once the ghee is hot, add the capers and fry for 1 minute or so until they burst open. Remove from the fat and drain on a paper towel. Next, add the shallot rings to the hot fat and fry until golden brown. Drain on a paper towel and set aside.
  5. Bring water to a boil in a medium-sized pot. Meanwhile, trim the ends of the asparagus and remove the tough leaves from the broccolini. Wash both well under cold water and place them on a plate. Prepare a medium-sized bowl with ice water and set it aside. Once the water is boiling, add the asparagus, broccolini, and frozen peas to the pot and blanch for 2 minutes. Use a slotted spoon to transfer them directly into the ice water for a minute. Remove the vegetables from the ice water and place them on a paper towel to drain. If you want to eat the vegetables cold, you’re done. If you prefer them warm, you can briefly sauté them in a pan with some butter or roast them in the oven. I used them cold.
  6. Take a large plate and spread the whipped ricotta in a large circle. Place the vegetables in the center on top of the whipped ricotta. Next, distribute the gremolata over the vegetables and top everything with the fried capers and shallots. For a final touch, drizzle more rosemary oil over the vegetables.
  • Cook Time: 30 min

Whipped Ricotta & Tomato Confit

Whipped Ricotta & Tomato Confit

Whipped Ricotta & Tomato Confit

Whipped Ricotta & Tomato Confit

July 15, 2024 by Kimberly

Discover the creamy magic of whipped ricotta paired with sweet tomato confit. An easy, delightful dish that brings a touch of gourmet to your everyday meals!

45 MINUTES

EASY

VEGETARIAN

ITALIAN

387 PER PORTION

CREAMY
UMAMI

EVERYDAY

DIPS & SPREADS

SUMMER

INTRODUCTION

ABOUT THE RECIPE

Bring a little gourmet to your table with this simple whipped ricotta and sweet tomato confit. It’s the perfect combination of creamy and rich flavors to elevate any meal!

How to serve
Serve this creamy ricotta on a rustic slice of toasted bread or as a dip with crispy crackers. It’s perfect for impressing guests during a summer evening or adding a fancy touch to your family dinner. The sweet tomato confit complements the smooth ricotta beautifully, making each bite a delightful experience.

How to store
Keep leftover whipped ricotta and tomato confit in separate airtight containers in the fridge. They’ll stay fresh and tasty for up to two days.

Hi, I'm Kimberly!

Hi, I'm Kimberly.

A passionate food lover who believes in the magic of homemade deliciousness that spreads love and warmth. Join me on this culinary adventure as I prepare wonderful dishes and let’s spread some happiness together!

Kimberly the Zett Signature

If you want to get to know me better, click here!


Whipped Ricotta & Tomato Confit
„Let’s make a piece of happiness“
Print
clock clock iconcutlery cutlery iconflag flag iconfolder folder iconinstagram instagram iconpinterest pinterest iconfacebook facebook iconprint print iconsquares squares iconheart heart iconheart solid heart solid icon
Whipped Ricotta & Tomato Confit

Whipped Ricotta & Tomato Confit


  • Author: Kimberly
  • Total Time: 45 min
  • Yield: 4 1x

Description

Recommended Equipment

  • sharp knife
  • cutting board
  • baking dish
  • food processor
  • frying pan

Ingredients

Units Scale
  • a few slices of your favorite baguette or ciabatta

WHIPPED RICOTTA

  • 250 grams ricotta
  • 1 tbsp olive oil
  • zest of half a lemon
  • 1 tbsp lemon juice

TOMATO CONFIT

  • 500 grams cocktail tomatoes
  • 50 milliliters olive oil
  • 8 garlic cloves
  • 1 tbsp balsamic vinegar
  • 1/4 tsp oregano
  • 1/4 tsp chili flakes
  • a few basil leaves
  • salt & pepper to taste


Instructions

  1. Preheat the oven to 175°C / 347°F.
  2. Wash the tomatoes, quarter them, and place them in an oven-safe dish. Peel and slice the garlic, and add it to the tomatoes. Cut the basil into fine strips and add it to the tomatoes as well. Next, add olive oil, balsamic vinegar, oregano, chili, salt, and pepper, stir well, and bake in the oven for 45 minutes.
  3. Meanwhile, prepare the ricotta cream. For this, blend the ricotta with lemon zest, lemon juice, 1 tablespoon of olive oil, salt, and pepper in a food processor until smooth. Spread the mixture on a flat plate and store in the refrigerator until further use.
  4. Slice the baguette and lightly butter each piece. Toast the slices in a pan on both sides until crispy. Tip: I also like to use the liquid that forms in the dish with the tomatoes. Dip one side of the bread into it and then toast it in the pan. Set the baguette aside until further use.
  5. Take the tomatoes out of the oven, let them cool slightly, and get the ricotta from the refrigerator. Place the tomatoes and their juice on the ricotta, and optionally drizzle with some honey. Serve with the baguette and enjoy 🙂
  • Passive Time: 20 min
  • Cook Time: 25 min

Ham & Cheese Croissant

Ham & Cheese Croissant

Ham&Cheese Croissant

Ham & Cheese Croissant

November 27, 2023 by Kimberly

Imagine a buttery croissant hugging tasty ham and melted Gruyère cheese. It’s like a delicious duet of flavors that makes each bite a delight. Happy eating!

15 MINUTES

EASY

OMNIVORE

FRENCH

453 PER PORTION

CRUNCHY / COMFORT FOOD

EVERYDAY

BREAKFAST

ALL YEAR

INTRODUCTION

ABOUT THE RECIPE

Enjoy a ham and Gruyère croissant featuring a special brown sugar butter glaze. Imagine a buttery treat with sweet brown sugar, poppy seeds, onion, and zesty Dijon mustard. Each bite delivers flaky pastry, tasty ham, creamy Gruyère, and a burst of unique flavors. It’s a simple, delicious snack that promises savory goodness.

How to serve
Whether enjoyed warm or cold, it’s an ideal take-away breakfast or a special morning treat. Paired with a side salad, it transforms into a quick and delightful lunch option, making for a deliciously convenient meal that’s perfect for both planned and spontaneous gatherings.

How to store
For optimal freshness, store the croissant in an airtight container or tightly wrapped in plastic. Refrigerate for short-term use, or freeze for extended freshness. Whether reheated in the oven or enjoyed cold, these croissants maintain their deliciousness.

Hi, I'm Kimberly!

Hi, I'm Kimberly.

A passionate food lover who believes in the magic of homemade deliciousness that spreads love and warmth. Join me on this culinary adventure as I prepare wonderful dishes and let’s spread some happiness together!

Kimberly the Zett Signature

If you want to get to know me better, click here!


Ham&Cheese Croissant

„Let’s make a piece of happiness“

Print
clock clock iconcutlery cutlery iconflag flag iconfolder folder iconinstagram instagram iconpinterest pinterest iconfacebook facebook iconprint print iconsquares squares iconheart heart iconheart solid heart solid icon
Ham&Cheese Croissant

Ham & Cheese Croissant


5 from 1 review

  • Author: Kimberly
  • Total Time: 14 min
  • Yield: 2-4 1x

Description

Recommended Equipment
  • small bowl
  • bread knife
  • cheese grater
  • kitchen basting brush

Ingredients

Units Scale
  • 4 croissants
  • 60 grams cheese of your choice (I used Gruyére)
  • 100 grams deli ham
  • 1 tsp chives

GLAZE

  • 1 tbsp butter
  • 1 tsp poppy seeds
  • 1/2 tsp brown sugar
  • 1/2 tsp dijon mustard
  • 1/4 tsp garlic powder
  • 1/4 tsp onion powder
  • 1/4 tsp salt

Instructions

PREPARATIONS

  • Grate Gruyère cheese.
  • Cut the chives into thin rolls.
  • Melt 1 tbsp butter in a small bowl in the microwave or in a saucepan.
  • Preheat the oven to 150°C / 302°F

INSTRUCTIONS

  1.  Add the following ingredients to the melted butter: onion powder, garlic powder, salt, brown sugar, poppy seeds and Dijon mustard. Mix well and set aside.
  2. Slice the croissants lengthwise, but not all the way through. Now place the ham inside and top with the grated Gruyère. Sprinkle with chives. Fold the croissants closed and brush the tops with the glaze. Place them in a baking dish or directly on a baking tray.
    1. Bake the croissants for 7 minutes until the cheese has melted then turn on the broiler for 2-3 minutes until golden brown and crispy.
  • Prep Time: 4 min
  • Passive Time: 5 min
  • Cook Time: 5 min