Homemade Bagels

Homemade Bagels

Homemade Bagels

Homemade Bagels

August 15, 2024 by Kimberly

Indulge in these cozy, chewy homemade bagels with irresistible toppings! Perfect for breakfast or brunch, they bring a warm, homemade touch to your mornings. Once you try these, you’ll never buy bagels again!

This website uses affiliate links which may earn commission for purchases made at no additional cost to you.

TOTAL TIME

2 hrs

SERVES

8 bagels

DIET

vegetarian

EVERY RECIPE DESERVES

A Little Love Letter

Imagine starting your day with the warm, comforting aroma of freshly baked bagels wafting through your kitchen. These delightful homemade bagels are not only easy to make but also offer a chewy, satisfying bite that pairs perfectly with your favorite toppings. Whether you prefer the nutty flavor of sesame seeds, the subtle crunch of poppyseeds, the spicy kick of cheddar and jalapeno, or the classic mix of everything bagel seasoning, there’s a bagel for everyone to love.

Slice them in half and spread on some creamy butter, tangy cream cheese, or your favorite jam. They also make fantastic bases for sandwiches – think smoked salmon with capers and red onion on a sesame bagel, or a turkey and avocado combo on a poppyseed bagel. For a real treat, try a cheddar and jalapeno bagel with a smear of guacamole. These bagels are versatile enough to be enjoyed any time of day, making them a must-have in your kitchen.

To keep your bagels fresh, store them in an airtight container at room temperature for up to two days. For longer storage, slice them in half and freeze them. When you’re ready to enjoy, simply pop them in the toaster straight from the freezer. This way, you’ll always have a delicious bagel ready whenever the craving strikes.

Hi, I'm Kimberly!

Hi, I'm Kimberly.

A hopeless romantic when it comes to food. Every recipe I share is a love letter to food itself. I’m so glad you’re here. Make yourself at home and stay a while.

Love,
Kimberly

Kimberly the Zett Signature

If you want to get to know me better,
click here!


Homemade Bagels
Homemade Bagels
Homemade Bagels
Homemade Bagels

LET’S MAKE A PIECE OF HAPPINESS

Print
clock clock iconcutlery cutlery iconflag flag iconfolder folder iconinstagram instagram iconpinterest pinterest iconfacebook facebook iconprint print iconsquares squares iconheart heart iconheart solid heart solid icon
Homemade Bagels

Homemade Bagels


5 Stars 4 Stars 3 Stars 2 Stars 1 Star

No reviews

  • Author: Kimberly
  • Total Time: 2 hrs
  • Yield: 8-12

Description

Recommended Equipment

  • tall container
  • large bowl
  • damp cloth
  • oven
  • large pot

Ingredients

Units Scale
DOUGH - YEAST MIXTURE
  • 500 milliliters lukewarm water
  • 7 grams active dry yeast
  • 1 tbsp sugar
DOUGH - DRY INGREDIENTS
  • 900 grams bread flour (in Germany flour type 550)
  • 2 tsp salt
  • 30 grams white sugar
WATER BATH
  • 2 liters simmering water
  • 1/4 cup brown sugar
TOPPINGS
  • white sesame seeds
  • poppy seeds
  • everything but the bagel seasoning
  • cheddar & jalapeño

Instructions

  1. In a tall container, briefly stir together the yeast mixture ingredients: lukewarm water, yeast, and sugar, then let it sit for 10 minutes.
  2. Meanwhile, in a large bowl, mix the dry ingredients: flour, salt, and sugar. Add the yeast-water-sugar mixture and stir until just combined.
  3. Transfer the dough to a clean work surface and knead by hand until it barely sticks anymore.
  4. Shape the dough into 8 balls of 180g / 6oz each for large bagels or 12 balls of 120g / 4oz each for smaller bagels. Let them rest under a damp cloth for about 20 minutes.
  5. Poke a hole in the center of each dough ball with your finger and form a bagel by stretching the dough evenly.
  6. Place the bagels on parchment paper and let them rise for another 30 minutes.
  7. Preheat the oven to 175°C / 350°F. Bring water to a simmer in a large pot and dissolve the brown sugar in it. Simmer each bagel for 1 minute on each side.
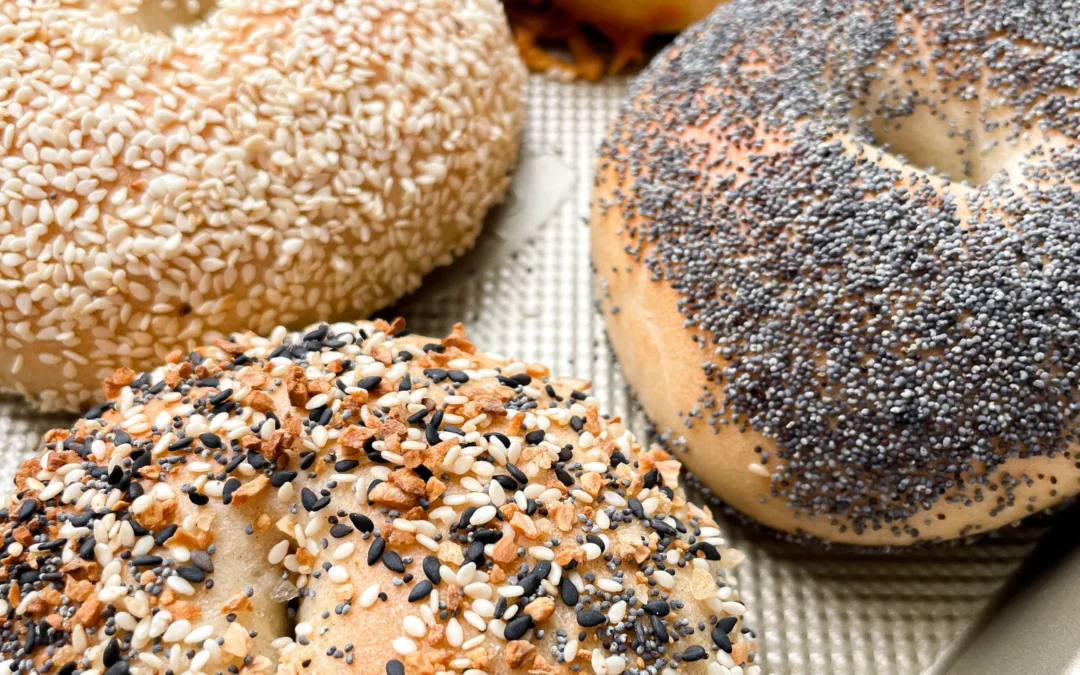
  8. Remove the bagels from the water and dip them in your favorite toppings or leave them plain. I like using poppy seeds, sesame seeds, everything but the bagel seasoning, or jalapenos and cheddar cheese.
  9. Once all bagels are topped, place them on a parchment-lined baking sheet and bake in the oven for about 25-30 minutes depending on their size.
  10. Remove the baking sheet and enjoy the bagels 🙂
  • Passive Time: 1 hr 30 min
  • Cook Time: 30 min

CRAVING MORE?

Follow along here & don’t forget to subscribe to my substack!

Caramelized Bacon Fried Goat Cheese Salad with Blackberry Balsamic Vinaigrette

Caramelized Bacon Fried Goat Cheese Salad with Blackberry Balsamic Vinaigrette

Caramelized Bacon Fried Goat Cheese Salad with Blackberry Balsamic Vinaigrette

Caramelized Bacon Fried Goat Cheese Salad with Blackberry Balsamic Vinaigrette

August 13, 2024 by Kimberly

Indulge in this irresistibly crunchy, savory-sweet salad that’s bursting with flavor. Each bite is a vibrant mix of textures and tastes, making it the ultimate comfort food meets gourmet delight.

This website uses affiliate links which may earn commission for purchases made at no additional cost to you.

TOTAL TIME

30 min

SERVES

2 portions

DIET

omnivore

EVERY RECIPE DESERVES

A Little Love Letter

Imagine sitting down to a salad that feels like a hug on a plate – some warm components, some crispy ones, and bursting with flavors that dance together perfectly. The savory crunch of caramelized bacon paired with the creamy, tangy goat cheese is an experience in itself. Add in the fresh burst of blackberries, crisp cucumber, and the subtle sweetness of pear, and you’ve got a dish that’s not just a salad but a full-on flavor journey.

This salad is perfect as a main dish or a side, but honestly, it’s so good you’ll want to make it the star of the meal. Serve it on a large platter, allowing all those gorgeous colors to pop. Drizzle the blackberry balsamic vinaigrette just before serving for that fresh, tangy finish. Pair it with a light white wine or sparkling water with a splash of lemon, and you’ve got yourself a meal that feels like a treat.

If you’ve got leftovers, store the salad and dressing separately to keep everything crisp and fresh. Place the salad in an airtight container in the fridge, and it should stay good for about 1-2 days. The vinaigrette can be stored in a jar for up to three days.

Hi, I'm Kimberly!

Hi, I'm Kimberly.

A hopeless romantic when it comes to food. Every recipe I share is a love letter to food itself. I’m so glad you’re here. Make yourself at home and stay a while.

Love,
Kimberly

Kimberly the Zett Signature

If you want to get to know me better,
click here!


Caramelized Bacon Fried Goat Cheese Salad with Blackberry Balsamic Vinaigrette

LET’S MAKE A PIECE OF HAPPINESS

Print
.tasty-recipe-responsive-iframe-container-2080bdbf { position: relative; overflow: hidden; padding-top: 56.3%; } .tasty-recipe-responsive-iframe-container-2080bdbf iframe { position: absolute; top: 0; left: 0; width: 100%; height: 100%; border: 0; } clock clock iconcutlery cutlery iconflag flag iconfolder folder iconinstagram instagram iconpinterest pinterest iconfacebook facebook iconprint print iconsquares squares iconheart heart iconheart solid heart solid icon
Caramelized Bacon Fried Goat Cheese Salad with Blackberry Balsamic Vinaigrette

Caramelized Bacon Fried Goat Cheese Salad with Blackberry Balsamic Vinaigrette


  • Author: Kimberly
  • Total Time: 30 min
  • Yield: 2

Description

Recommended Equipment

  • tall container
  • hand blender
  • sharp knife
  • cutting board
  • three deep plates
  • small frying pan
  • oven
  • salad bowl

Ingredients

Units Scale
VINAIGRETTE
  • 50 grams blackberries
  • 1 tbsp balsamic vinegar
  • 2 tbsp olive oil
  • 1 tbsp honey
  • 1 tsp Dijon mustard
  • 1 garlic clove
  • salt, pepper & cayennepepper to taste
GOAT CHEESE
  • 100 grams goat cheese
  • 2 tbsp all purpose flour
  • 1 egg
  • 2 tbsp breadcrumbs
  • 2 tbsp panko
  • 1 tsp dried thyme
  • clarified butter for frying
BACON
  • 50 grams bacon
  • brown sugar
SALAD
  • 150 grams mixed green salad
  • 50 grams blackberries
  • 1 small red onion
  • 2 tbsp pecan nuts
  • 1/4 cucumber
  • 1/2 pear
  • 2 radishes
  • chives

Instructions

  1. In a tall container, add all the ingredients for the vinaigrette and blend with a hand blender until you get a smooth dressing. If it seems too thick, you can add 1-2 tablespoons of cold water. Place it in the fridge until ready to use.
  2. Next, cut the salad into bite-sized pieces, wash thoroughly, and place in a salad bowl. Wash the chives thoroughly as well, and cut them into fine rings.
  3. Wash and dry the radishes, cucumber, and pear. Peel the red onion. Slice everything thinly and distribute over the salad, along with the blackberries.
  4. Preheat the oven to 180°C / 350°F. Lay the bacon strips on a sheet of baking paper and sprinkle each strip with about 1/2 teaspoon of brown sugar and a pinch of cayenne pepper. Bake for about 10 minutes or until the sugar has melted and caramelized.
  5. Now prepare three small deep plates. Fill the first one with wheat flour, beat an egg with salt in the second, and mix breadcrumbs, panko, and thyme in the third. Cut the goat cheese into thick slices, then coat each slice first in flour, then in the egg, and finally in the breadcrumb-panko mixture. Press everything down firmly.
  6. Take the bacon out of the oven and let it cool. Once cooled, tear it into pieces and sprinkle over the salad.
  7. Heat some clarified butter in a pan and fry the goat cheese rounds until crispy on all sides. Place them on the salad.
  8. Finally, sprinkle a bit of chives on top as a garnish. Drizzle the vinaigrette over the salad just before serving.
  • Cook Time: 30 min

CRAVING MORE?

Follow along here & don’t forget to subscribe to my substack!

Turkish Beef Manti in Yogurt Sauce

Turkish Beef Manti in Yogurt Sauce

Turkish Beef Manti in Yogurt Sauce

Turkish Beef Manti in Yogurt Sauce

August 8, 2024 by Kimberly

Experience a taste of Turkey with this comforting, homemade dumpling dish. Tender beef manti drenched in creamy yogurt sauce with a spicy tomato and red pepper kick. Simply irresistible!

This website uses affiliate links which may earn commission for purchases made at no additional cost to you.

TOTAL TIME

2 hrs + 15 min

SERVES

4 portions

DIET

vegetarian

EVERY RECIPE DESERVES

A Little Love Letter

Today, I’m bringing a slice of Turkey straight to your kitchen with a recipe that’s sure to warm your heart and tantalize your taste buds. Imagine soft, beef-filled dumplings, each bite bursting with rich flavors, sitting in a creamy yogurt sauce that’s perfectly balanced by a spicy tomato and red pepper kick. This dish is the epitome of comfort food and is sure to become a favorite in your home.

When it comes to serving this delightful dish, presentation is key. Arrange cool, creamy yogurt sauce on a large platter, then place the tender beef dumplings on top. Finish off with the vibrant, spicy tomato and red pepper oil for a pop of color and flavor. Garnish with a sprinkle of sumac and dried mint. Pair it with a side of warm, crusty bread to soak up every bit of that delicious sauce.

If you have any leftovers (though I doubt you will!), store them in an airtight container in the refrigerator for up to three days. To reheat, simply warm them up in a microwave or on the stove, adding a splash of water to keep the dumplings moist and tender.

Hi, I'm Kimberly!

Hi, I'm Kimberly.

A hopeless romantic when it comes to food. Every recipe I share is a love letter to food itself. I’m so glad you’re here. Make yourself at home and stay a while.

Love,
Kimberly

Kimberly the Zett Signature

If you want to get to know me better,
click here!


Turkish Beef Manti in Yogurt Sauce

LET’S MAKE A PIECE OF HAPPINESS

Print
.tasty-recipe-responsive-iframe-container-14626b4b { position: relative; overflow: hidden; padding-top: 56.3%; } .tasty-recipe-responsive-iframe-container-14626b4b iframe { position: absolute; top: 0; left: 0; width: 100%; height: 100%; border: 0; } clock clock iconcutlery cutlery iconflag flag iconfolder folder iconinstagram instagram iconpinterest pinterest iconfacebook facebook iconprint print iconsquares squares iconheart heart iconheart solid heart solid icon
Turkish Beef Manti in Yogurt Sauce

Turkish Beef Manti in Yogurt Sauce


  • Author: Kimberly
  • Total Time: 2 hrs + 15 min
  • Yield: 4

Description

Recommended Equipment

  • shallow bowl
  • plastic wrap
  • two medium-sized bowls
  • grater
  • small pot
  • large plate
  • kitchen towel
  • rolling pin
  • sharp knife
  • medium-sized pot
  • slotted spoon

Ingredients

Units Scale
DOUGH
  • 240 grams all-purpose flour
  • 1 egg
  • 1/2 tsp salt
  • 80 milliliters water
FILLING
  • 250 grams minced beef
  • 1 small white onion
  • 2 tbsp red bell pepper oil
  • 1 tbsp minced fresh parsley
  • 1/2 tsp salt
  • 1/2 tsp ground pepper
  • 1/4 tsp cumin
  • 1/4 tsp chili flakes
YOGURT SAUCE
  • 600 grams
  • 6 garlic cloves
  • 1/8 tsp salt
TOMATO BELL PEPPER OIL SAUCE
  • 6 tbsp red bell pepper oil
  • 2 tbsp tomato paste
  • 2 tsp sumach
  • 2 tsp dried mint
  • pinch of salt
TOPPINGS
  • dried mint
  • sumach
  • parsely

Instructions

  1. First, you’ll prepare the Manti dough. Take a shallow bowl, add flour and sugar, and mix them together. Create a large well in the middle and crack the egg into it. Beat the egg with a fork and then add water. Mix everything with the fork until it forms a dough. Transfer the dough to a clean work surface and knead it into a smooth ball. If the dough is too sticky, add a bit more flour. Place the dough back in the bowl, cover it with plastic wrap, and let it rest for at least 1 hour.
  2. Next, take a medium-sized bowl and add the ground meat. Peel the onion and grate it directly into the bowl with the meat. Chop the parsley and add it to the meat as well. Season the meat with cumin, chili, salt, and pepper. Put the meat mixture in the fridge until you’re ready to use it.
  3. For the yogurt sauce, mix the yogurt with some salt. Peel the garlic cloves and grate them directly into the yogurt. Stir everything well and refrigerate until needed.
  4. To prepare the tomato-pepper sauce, mix the red pepper oil, tomato paste, sumac, mint, and a pinch of salt in a small pot. Place the pot on the stove but don’t heat it yet. We’ll get to this later.
  5. Take a large plate and sprinkle a thin layer of flour on it. Set it aside, you’ll need it soon to place your finished Manti. Also, prepare a clean kitchen towel to cover the Manti so they don’t dry out.
  6. Once the dough has rested, sprinkle a bit of flour on a clean work surface and place your dough ball on it. Sprinkle some flour on the dough ball as well. Roll out the dough into a rectangular shape measuring 36×50 cm / 14×20”. Cut the dough into squares measuring 6×6 cm / 2.3×2.3” using a pizza cutter or a sharp knife. You should get about 45-50 Manti squares from the dough.
  7. Place 1/2 to 1 teaspoon of filling on each square and fold them into Manti. To do this, bring the diagonal corners together and then fold the open corners towards the center, pressing the seams together. They should look like little envelopes.
  8. Take your 4 serving plates and evenly distribute the yogurt sauce on them. Set the plates aside.
  9. Fill a medium-sized pot about 3/4 full with water and bring it to a boil. Once the water is boiling, reduce the heat to medium and let it simmer. Add all the Manti to the water and cook for about 6-7 minutes.
  10. While the Manti are cooking, heat the pot with the tomato paste and red pepper oil over low heat. Stir well and keep it on low heat until the Manti are ready.
  11. Once the Manti are cooked, use a slotted spoon to remove them from the water and place them directly on the yogurt sauce on the plates. Pour the tomato-pepper oil sauce over the Manti and sprinkle with a bit of sumac and dried mint to finish.
  • Passive Time: 40 min
  • Cook Time: 1 hr + 35 min

CRAVING MORE?

Follow along here & don’t forget to subscribe to my substack!

Green Veggies on Whipped Ricotta with Fried Capers & Shallots

Green Veggies on Whipped Ricotta with Fried Capers & Shallots

Green Veggies on Whipped Ricotta with Fried Capers & Shallots

Green Veggies on Whipped Ricotta with Fried Capers & Shallots

August 2, 2024 by Kimberly

Picture this: a cozy evening with a plate of vibrant, green goodness atop fluffy whipped ricotta, crowned with crispy capers and shallots. It’s like a warm hug from the inside out!

This website uses affiliate links which may earn commission for purchases made at no additional cost to you.

TOTAL TIME

30 min

SERVES

2 portions

DIET

vegetarian

EVERY RECIPE DESERVES

A Little Love Letter

If you’re craving a dish that’s both cozy and sophisticated, this is it. Imagine a creamy, dreamy spread of whipped ricotta topped with an array of vibrant green veggies, crispy fried capers, and sweet caramelized shallots. This delightful combination will transport your taste buds to a place of pure bliss. It’s perfect for a casual dinner with friends or a quiet night in when you want something special but easy to make.

Serve this dish as a stunning centerpiece at your next dinner party or as a comforting solo meal. Spread the whipped ricotta generously over a crusty slice of bread or a crisp cracker, then pile on the fresh, sautéed green vegetables. Sprinkle the fried capers and caramelized shallots on top for that irresistible crunch and sweet-savory finish. Pair it with a glass of chilled white wine or a refreshing herbal tea to elevate the flavors even more.

Store any leftovers in an airtight container in the refrigerator. The whipped ricotta will stay fresh for up to three days, while the green veggies and toppings are best enjoyed within one day to maintain their crispiness and vibrant flavors. Before serving again, give everything a quick toss or reheat gently to revive the textures and aromas.

Hi, I'm Kimberly!

Hi, I'm Kimberly.

A hopeless romantic when it comes to food. Every recipe I share is a love letter to food itself. I’m so glad you’re here. Make yourself at home and stay a while.

Love,
Kimberly

Kimberly the Zett Signature

If you want to get to know me better,
click here!


Green Veggies on Whipped Ricotta with Fried Capers & Shallots

LET’S MAKE A PIECE OF HAPPINESS

Print
.tasty-recipe-responsive-iframe-container-2d4b547d { position: relative; overflow: hidden; padding-top: 56.3%; } .tasty-recipe-responsive-iframe-container-2d4b547d iframe { position: absolute; top: 0; left: 0; width: 100%; height: 100%; border: 0; } clock clock iconcutlery cutlery iconflag flag iconfolder folder iconinstagram instagram iconpinterest pinterest iconfacebook facebook iconprint print iconsquares squares iconheart heart iconheart solid heart solid icon
Green Veggies on Whipped Ricotta with Fried Capers & Shallots

Green Veggies on Whipped Ricotta with Fried Capers & Shallots


  • Author: Kimberly
  • Total Time: 30 min
  • Yield: 2

Description

Recommended Equipment

  • food processor
  • sharp knife
  • cutting board
  • two small bowls
  • small pan
  • paper towels
  • slotted spoon
  • medium-sized pot
  • medium-sized bowl
  • ice cubes

Ingredients

Units Scale
WHIPPED RICOTTA
  • 250 grams ricotta
  • juice of half a lemon
  • 2 tbsp olive oil
  • salt & pepper to taste
GREMOLATA
  • 3tbsp - 4 tbsp rosemary oil
  • 10 grams fresh parsley
  • juice of half a lemon
  • 1 garlic clove
  • salt & pepper to taste
GREEN VEGGIES
  • 100 grams broccolini
  • 100 grams green asparagus
  • 50 grams frozen peas
TOPPINGS
  • clarified butter for frying
  • 1 shallot
  • 1 tsp cornstarch
  • 1 tbsp capers
  • rosemary oil

Instructions

PREPARATIONS

  • Here you’ll find the recipe for the rosemary oil. You’ll need about 4-5 tablespoons of it.

INSTRUCTIONS

  1. For the whipped ricotta, put the ricotta cheese in a food processor. Add lemon juice, olive oil, salt, and pepper, and blend for 1-2 minutes until creamy. Place in the fridge for later use.
  2. Next, make the gremolata. Prepare a small bowl. Finely chop the parsley and put it in the bowl. Halve the lemon and squeeze the juice from one half into the parsley. Add the rosemary oil, salt, and pepper and grate the garlic clove. Place in the fridge for later use.
  3. Now prepare the toppings. Heat some clarified butter in a small pan. While the ghee is heating, peel and finely slice the shallot into rings. Mix the rings with cornstarch in a small bowl and set aside. Drain the capers and pat them dry with a paper towel.
  4. Once the ghee is hot, add the capers and fry for 1 minute or so until they burst open. Remove from the fat and drain on a paper towel. Next, add the shallot rings to the hot fat and fry until golden brown. Drain on a paper towel and set aside.
  5. Bring water to a boil in a medium-sized pot. Meanwhile, trim the ends of the asparagus and remove the tough leaves from the broccolini. Wash both well under cold water and place them on a plate. Prepare a medium-sized bowl with ice water and set it aside. Once the water is boiling, add the asparagus, broccolini, and frozen peas to the pot and blanch for 2 minutes. Use a slotted spoon to transfer them directly into the ice water for a minute. Remove the vegetables from the ice water and place them on a paper towel to drain. If you want to eat the vegetables cold, you’re done. If you prefer them warm, you can briefly sauté them in a pan with some butter or roast them in the oven. I used them cold.
  6. Take a large plate and spread the whipped ricotta in a large circle. Place the vegetables in the center on top of the whipped ricotta. Next, distribute the gremolata over the vegetables and top everything with the fried capers and shallots. For a final touch, drizzle more rosemary oil over the vegetables.
  • Cook Time: 30 min

CRAVING MORE?

Follow along here & don’t forget to subscribe to my substack!

Whipped Ricotta & Tomato Confit

Whipped Ricotta & Tomato Confit

Whipped Ricotta & Tomato Confit

Whipped Ricotta & Tomato Confit

July 15, 2024 by Kimberly

Discover the creamy magic of whipped ricotta paired with sweet tomato confit. An easy, delightful dish that brings a touch of gourmet to your everyday meals!

This website uses affiliate links which may earn commission for purchases made at no additional cost to you.

TOTAL TIME

45 min

SERVES

4 portions

DIET

vegetarian

EVERY RECIPE DESERVES

A Little Love Letter

Bring a little gourmet to your table with this simple whipped ricotta and sweet tomato confit. It’s the perfect combination of creamy and rich flavors to elevate any meal!

Serve this creamy ricotta on a rustic slice of toasted bread or as a dip with crispy crackers. It’s perfect for impressing guests during a summer evening or adding a fancy touch to your family dinner. The sweet tomato confit complements the smooth ricotta beautifully, making each bite a delightful experience.

Keep leftover whipped ricotta and tomato confit in separate airtight containers in the fridge. They’ll stay fresh and tasty for up to two days.

Hi, I'm Kimberly!

Hi, I'm Kimberly.

A hopeless romantic when it comes to food. Every recipe I share is a love letter to food itself. I’m so glad you’re here. Make yourself at home and stay a while.

Love,
Kimberly

Kimberly the Zett Signature

If you want to get to know me better,
click here!


Whipped Ricotta & Tomato Confit

LET’S MAKE A PIECE OF HAPPINESS

Print
.tasty-recipe-responsive-iframe-container-935cabee { position: relative; overflow: hidden; padding-top: 56.3%; } .tasty-recipe-responsive-iframe-container-935cabee iframe { position: absolute; top: 0; left: 0; width: 100%; height: 100%; border: 0; } clock clock iconcutlery cutlery iconflag flag iconfolder folder iconinstagram instagram iconpinterest pinterest iconfacebook facebook iconprint print iconsquares squares iconheart heart iconheart solid heart solid icon
Whipped Ricotta & Tomato Confit

Whipped Ricotta & Tomato Confit


  • Author: Kimberly
  • Total Time: 45 min
  • Yield: 4

Description

GOOD TO HAVE ON HAND
  • sharp knife
  • cutting board
  • baking dish
  • food processor
  • frying pan


Ingredients

Units Scale
  • a few slices of your favorite baguette or ciabatta
WHIPPED RICOTTA
  • 250 grams ricotta
  • 1 tbsp olive oil
  • zest of half a lemon
  • 1 tbsp lemon juice
TOMATO CONFIT
  • 500 grams cocktail tomatoes
  • 50 milliliters olive oil
  • 8 garlic cloves
  • 1 tbsp balsamic vinegar
  • 1/4 tsp oregano
  • 1/4 tsp chili flakes
  • a few basil leaves
  • salt & pepper to taste
 

Instructions

  1. Preheat the oven to 175°C / 347°F.
  2. Wash the tomatoes, quarter them, and place them in an oven-safe dish. Peel and slice the garlic, and add it to the tomatoes. Cut the basil into fine strips and add it to the tomatoes as well. Next, add olive oil, balsamic vinegar, oregano, chili, salt, and pepper, stir well, and bake in the oven for 45 minutes.
  3. Meanwhile, prepare the ricotta cream. For this, blend the ricotta with lemon zest, lemon juice, 1 tablespoon of olive oil, salt, and pepper in a food processor until smooth. Spread the mixture on a flat plate and store in the refrigerator until further use.
  4. Slice the baguette and lightly butter each piece. Toast the slices in a pan on both sides until crispy. Tip: I also like to use the liquid that forms in the dish with the tomatoes. Dip one side of the bread into it and then toast it in the pan. Set the baguette aside until further use.
  5. Take the tomatoes out of the oven, let them cool slightly, and get the ricotta from the refrigerator. Place the tomatoes and their juice on the ricotta, and optionally drizzle with some honey. Serve with the baguette and enjoy 🙂
  • Passive Time: 20 min
  • Cook Time: 25 min

CRAVING MORE?

Follow along here & don’t forget to subscribe to my substack!

Ham & Cheese Croissant

Ham & Cheese Croissant

Ham&Cheese Croissant

Ham & Cheese Croissant

December 6, 2023 by Kimberly

This Ham & Cheese Croissant brings together buttery crispness, melted cheese, and a flavorful cream that adds sweetness, savoriness, and depth. Perfect as a quick breakfast, a hearty snack, or warm finger food for guests. These croissants come together in minutes and taste irresistible straight from the oven. If you’re looking for an easy, impressive comfort recipe everyone will love, this ham and cheese croissant is about to become your new favorite.

This website uses affiliate links which may earn commission for purchases made at no additional cost to you.

TOTAL TIME

15 min


SERVES

4 croissants


DIET

omnivore

EVERY RECIPE DESERVES

A Little Love Letter

There are recipes that stay with you for so long, they eventually feel like part of your own biography. My Ham & Cheese Croissant is one of those. Maybe because, at its core, it has always been there, long before I knew cooking even had rules.

As a kid, all I ever wanted was to invent something. And in my mind, I was absolutely convinced: I did. My “invention” was a slice of ham folded in half, a slice of cheese tucked inside, and the whole thing pan-fried on both sides. I swear, I felt like the greatest chef alive. Today, that childhood creation has gotten a little upgrade: a crisp, buttery croissant filled with good ham, melted cheese, and a creamy topping that ties everything together. Sweetness, savoriness, a little depth, that balance is what makes this so unbelievably good. It’s comfort food without feeling heavy. Quick to make, yet it still feels like a tiny moment of luxury.

I serve it in the morning when I want to treat myself. At lunch, when hunger suddenly hits harder than expected. And most of all when friends are coming over. Slice the croissants, add ham and cheese, sprinkle in some chives, close them, spread the cream on top, pop them in the oven and a few minutes later, the whole kitchen smells like warm, buttery happiness. It’s the perfect “I thought of you” kind of recipe. Maybe that’s the real magic of this recipe: That a childhood fantasy turned into a snack that makes people happy and just a little bit in love.

Hi, I'm Kimberly!

Hi, I'm Kimberly.

A hopeless romantic when it comes to food. Every recipe I share is a love letter to food itself. I’m so glad you’re here. Make yourself at home and stay a while.

Love,
Kimberly

Kimberly the Zett Signature

If you want to get to know me better,
click here!


Ham&Cheese Croissant

LET’S MAKE A PIECE OF HAPPINESS

Print
clock clock iconcutlery cutlery iconflag flag iconfolder folder iconinstagram instagram iconpinterest pinterest iconfacebook facebook iconprint print iconsquares squares iconheart heart iconheart solid heart solid icon
Ham&Cheese Croissant

Ham & Cheese Croissant


5 from 1 review

  • Author: Kimberly
  • Total Time: 15 min
  • Yield: 4

Description

This Ham & Cheese Croissant brings together buttery crispness, melted cheese, and a flavorful cream that adds sweetness, savoriness, and depth. Perfect as a quick breakfast, a hearty snack, or warm finger food for guests. These croissants come together in minutes and taste irresistible straight from the oven. If you’re looking for an easy, impressive comfort recipe everyone will love, this ham and cheese croissant is about to become your new favorite.

GOOD TO HAVE ON HAND

  • small bowl
  • bread knife
  • cheese grater
  • kitchen basting brush


Ingredients

Units Scale
  • 4 croissants
  • 60 grams cheese of your choice (I used Gruyére)
  • 100 grams deli ham
  • 1 tsp chives
GLAZE
  • 1 tbsp butter
  • 1 tsp poppy seeds
  • 1/2 tsp brown sugar
  • 1/2 tsp dijon mustard
  • 1/4 tsp garlic powder
  • 1/4 tsp onion powder
  • 1/4 tsp salt

Instructions

PREPARATIONS

  • Grate Gruyère cheese.
  • Cut the chives into thin rolls.
  • Melt 1 tbsp butter in a small bowl in the microwave or in a saucepan.
  • Preheat the oven to 150°C / 302°F

INSTRUCTIONS

  1.  Add the following ingredients to the melted butter: onion powder, garlic powder, salt, brown sugar, poppy seeds and Dijon mustard. Mix well and set aside.
  2. Slice the croissants lengthwise, but not all the way through. Now place the ham inside and top with the grated Gruyère. Sprinkle with chives. Fold the croissants closed and brush the tops with the glaze. Place them in a baking dish or directly on a baking tray.
  3. Bake the croissants for 7 minutes until the cheese has melted then turn on the broiler for 2-3 minutes until golden brown and crispy.
@kimberlyzett

I'd do anything for a ham and cheese croissant 🥐 recipe is on my website thezett.com #croissant #hamcheesecroissant #breakfastgoals

♬ sonido original - Vibes by Ley
  • Passive Time: 5 min
  • Cook Time: 10 min

CRAVING MORE?

Follow along here & don’t forget to subscribe to my substack!