


Description
RECOMMENDED EQUIPMENT
- sharp knife
- cutting board
- two large pans
- small pot
Ingredients
Units Scale
CHICKEN SCHNITZEL
- 160 grams bread crumbs
- 120 grams all-purpose flour
- 2 eggs
- 600 grams chicken breasts
- 1 tbsp clarified butter
- 1/4 tsp salt
- 1/4 tsp pepper
- 600 grams onions
- 1/2 tsp salt
- 1 tsp clarified butter
- 1 lemon
- parsley
Instructions
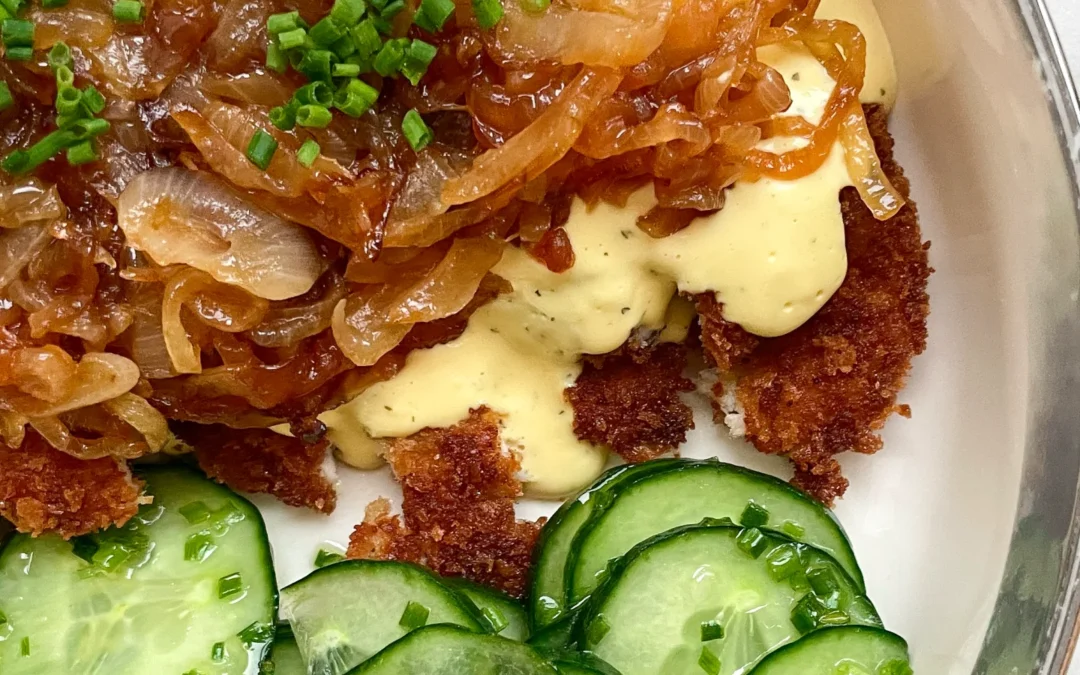
- Peel the onions and cut into thin stripes. Prepare three shallow plates of the same size. Pour flour into the first plate, break 2 eggs into the second plate and whisk with a fork. Season the egg with salt and pepper. Pour breadcrumbs into the third plate.
- Melt 1 teaspoon of clarified butter in a large frying pan. Add the onions and sprinkle with 1/2 teaspoon of salt. Now caramelize slowly over a medium heat until they are almost dark brown. This can take a good 30-40 minutes.
- Meanwhile, bread the chicken breast. To do this, cut the meat in a butterfly cut. Place the chicken breast fillets between two layers of cling film and pound with a little force and a meat mallet to a thickness of about 5-8 mm.
- Now dredge each piece of meat in the flour first and press down well on all sides. Next, pull through the egg so that the piece of meat is well coated on all sides and finally pull through the breadcrumbs and press down well.
- Heat 1 tbsp clarified butter in a large frying pan over a medium heat and allow to melt. Now fry the breaded chicken breast fillets in the fat until golden brown. Fry for about 4 minutes on each side, depending on how thick the meat is.
- While the meat is cooking, slowly heat the hollandaise sauce in a small pan over a low heat.
- Arrange the meat on plates, pour over the hollandaise sauce and top with the caramelized onions and freshly chopped parsley.
- Cook Time: 55 min


")
")