Chicken Katsudon with Napa Cabbage

Chicken Katsudon with Napa Cabbage

Chicken Katsudon with Napa Cabbage

Chicken Katsudon with Napa Cabbage

August 27, 2024 by Kimberly

Savor a golden bite of crispy chicken wrapped in rich, savory sauces, fluffy rice and tender napa cabbage – this dish is a warm hug for your taste buds, perfect for a cozy night in and better than take out.

80 MINUTES

EASY

OMNIVORE

JAPANESE

928 PER PORTION

COMFORT FOOD

EVERYDAY

DINNER

ALL YEAR

INTRODUCTION

ABOUT THE RECIPE

Get ready to dive into a bowl of pure comfort with this deliciously crispy chicken paired with rich, savory sauces and tender cabbage. This dish is like a cozy night in a bowl, combining the crunch of perfectly fried chicken with the deep, satisfying flavors of homemade, roasted sesame, tonkatsu and tsuyu sauces. Whether you’re new to Japanese cooking or a seasoned pro, this recipe will quickly become your go-to for a quick and comforting dinner idea that never disappoints.

How to serve
Serve this flavorful chicken dish over a bed of steaming hot rice. Add a generous portion of tender cabbage on the side for a bit of freshness that perfectly balances the crispy, savory chicken. For an extra crunch, sprinkle some toasted sesame seeds and scallions on top. This dish is ideal for a cozy dinner at home, but it’s also a fantastic option for impressing guests with something both comforting and deliciously unique. For that extra fancy touch massage the napa cabbage with 1-2 tbsp of this Chinese Holy Trinity Oil.

How to store
If you have leftovers (which is rare because it’s so good!), store the chicken, cabbage and rice separately in airtight containers in the fridge. The chicken will stay crispy for up to two days, and you can reheat it in the oven to keep that satisfying crunch. The sauces can be stored in the fridge for up to a week, ready to drizzle over fresh rice or veggies whenever you crave a quick, tasty meal.

Hi, I'm Kimberly!

Hi, I'm Kimberly.

A passionate food lover who believes in the magic of homemade deliciousness that spreads love and warmth. Join me on this culinary adventure as I prepare wonderful dishes and let’s spread some happiness together!

Kimberly the Zett Signature

If you want to get to know me better, click here!


Chicken Katsudon with Napa Cabbage
„Let’s make a piece of happiness“
Print
clock clock iconcutlery cutlery iconflag flag iconfolder folder iconinstagram instagram iconpinterest pinterest iconfacebook facebook iconprint print iconsquares squares iconheart heart iconheart solid heart solid icon
Chicken Katsudon with Napa Cabbage

Chicken Katsudon with Napa Cabbage


5 Stars 4 Stars 3 Stars 2 Stars 1 Star

5 from 1 review

  • Author: Kimberly
  • Total Time: 80 min
  • Yield: 4 1x

Description

Recommended Equipment

  • small pan
  • mortar & pestle
  • medium-sized bowl
  • two squeeze bottles
  • small pot
  • sharp knife
  • cutting board
  • hand blender
  • fine mesh strainer
  • plastic wrap
  • meat tenderizer
  • three shallow bowls for breading
  • medium-sized pot
  • large pan
  • paper towels
  • salad spinner

Ingredients

Units Scale

SESAME SAUCE

  • 2 tbsp tahini
  • 1 tbsp rice vinegar
  • 1.5 tbsp soy sauce
  • 1 tbsp mirin
  • 1/8 tsp salt
  • 1 tbsp white sesame seeds
  • 2 tbsp mayonnaise
  • 1 tsp sesame oil
  • 1 tbsp water
  • 1 garlic clove

TONKATSU SAUCE

  • 1 tbsp tomato paste
  • 1 tsp honey
  • 1 tsp white sugar
  • 1 tbsp apple cider vinegar
  • 100 milliliter cold water
  • pinch of salt
  • 2 tbsp soy sauce
  • 2 tbsp Worcestershire sauce
  • 2 tbsp Hoisin sauce
  • 1 tbsp brown sugar
  • 4 dried plums
  • 1/4 of 1 apple
  • 1 tbsp mirin
  • 1 centimeter fresh ginger
  • 1 garlic cloves

CHICKEN SCHNITZEL

  • 400 grams chicken breast
  • 12 eggs
  • 4 tbsp all-purpose flour
  • 8 tbsp bread crumbs
  • 8 tbsp panko
  • clarified butter for frying

RICE & CABBAGE

TSUYU SAUCE

  • 6 tbsp soy sauce
  • 6 tbsp mirin
  • 1 tbsp white sugar
  • 1/2 tsp dashi powder
  • 6 tbsp water
  • 4 small yellow onions

TOPPING

  • green part of 2 scallions

Instructions

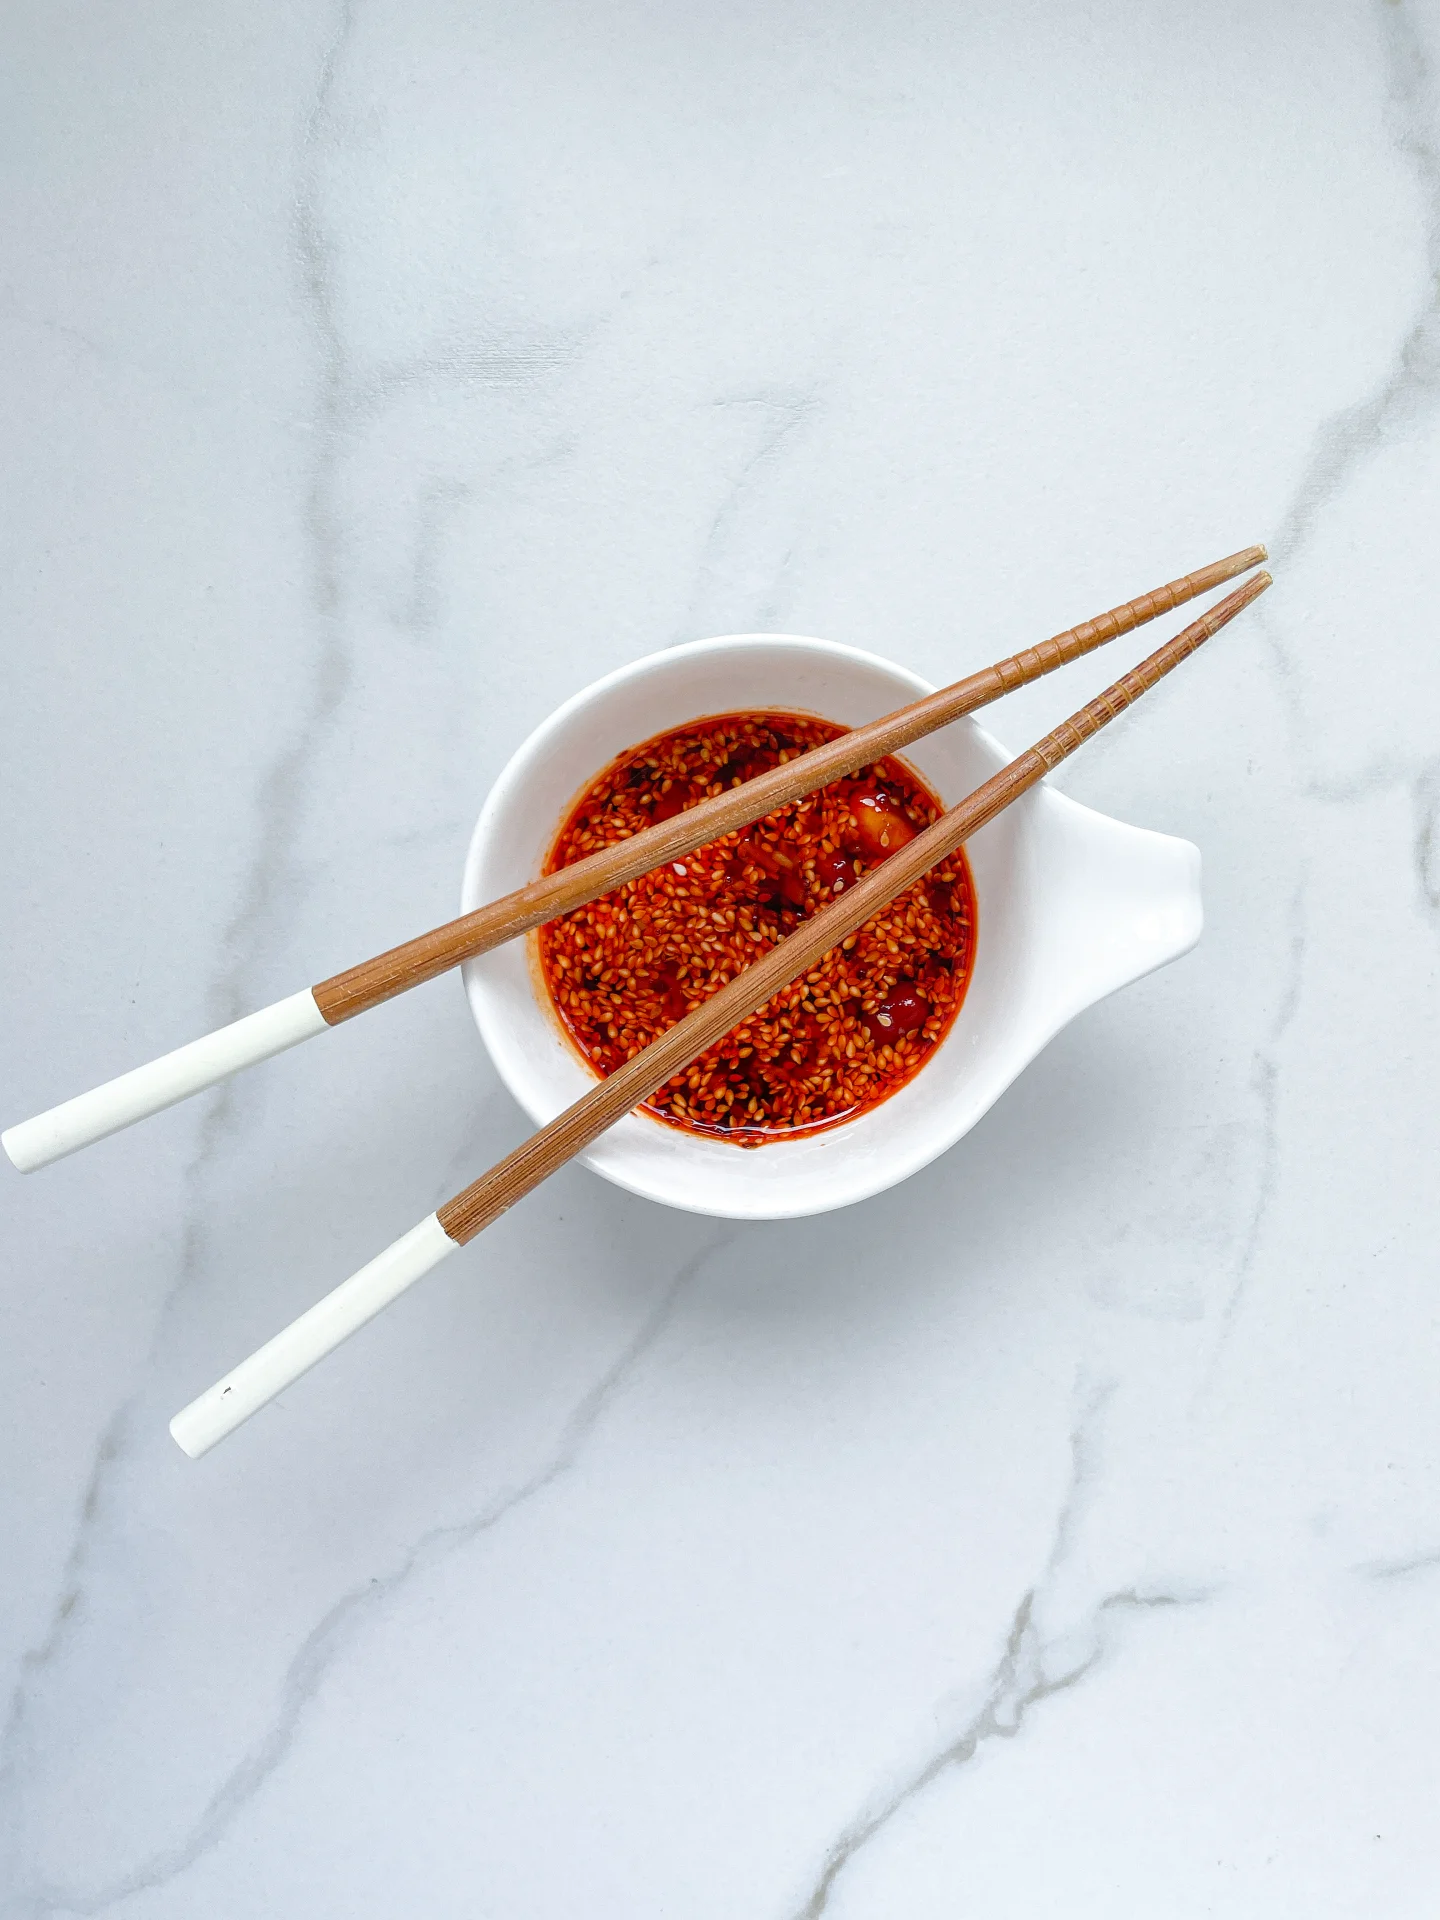
  1. Sesame Sauce: First, toast the white sesame seeds in a small pan until they turn golden brown, without adding any oil. Transfer the toasted sesame seeds to a mortar and grind them to a semi-coarse consistency. Then, place the sesame in a medium-sized bowl and mix it with tahini, rice vinegar, soy sauce, mirin, salt, mayonnaise, sesame oil, water, and a grated clove of garlic to create a creamy sauce. Pour the sauce into a squeeze bottle and refrigerate.
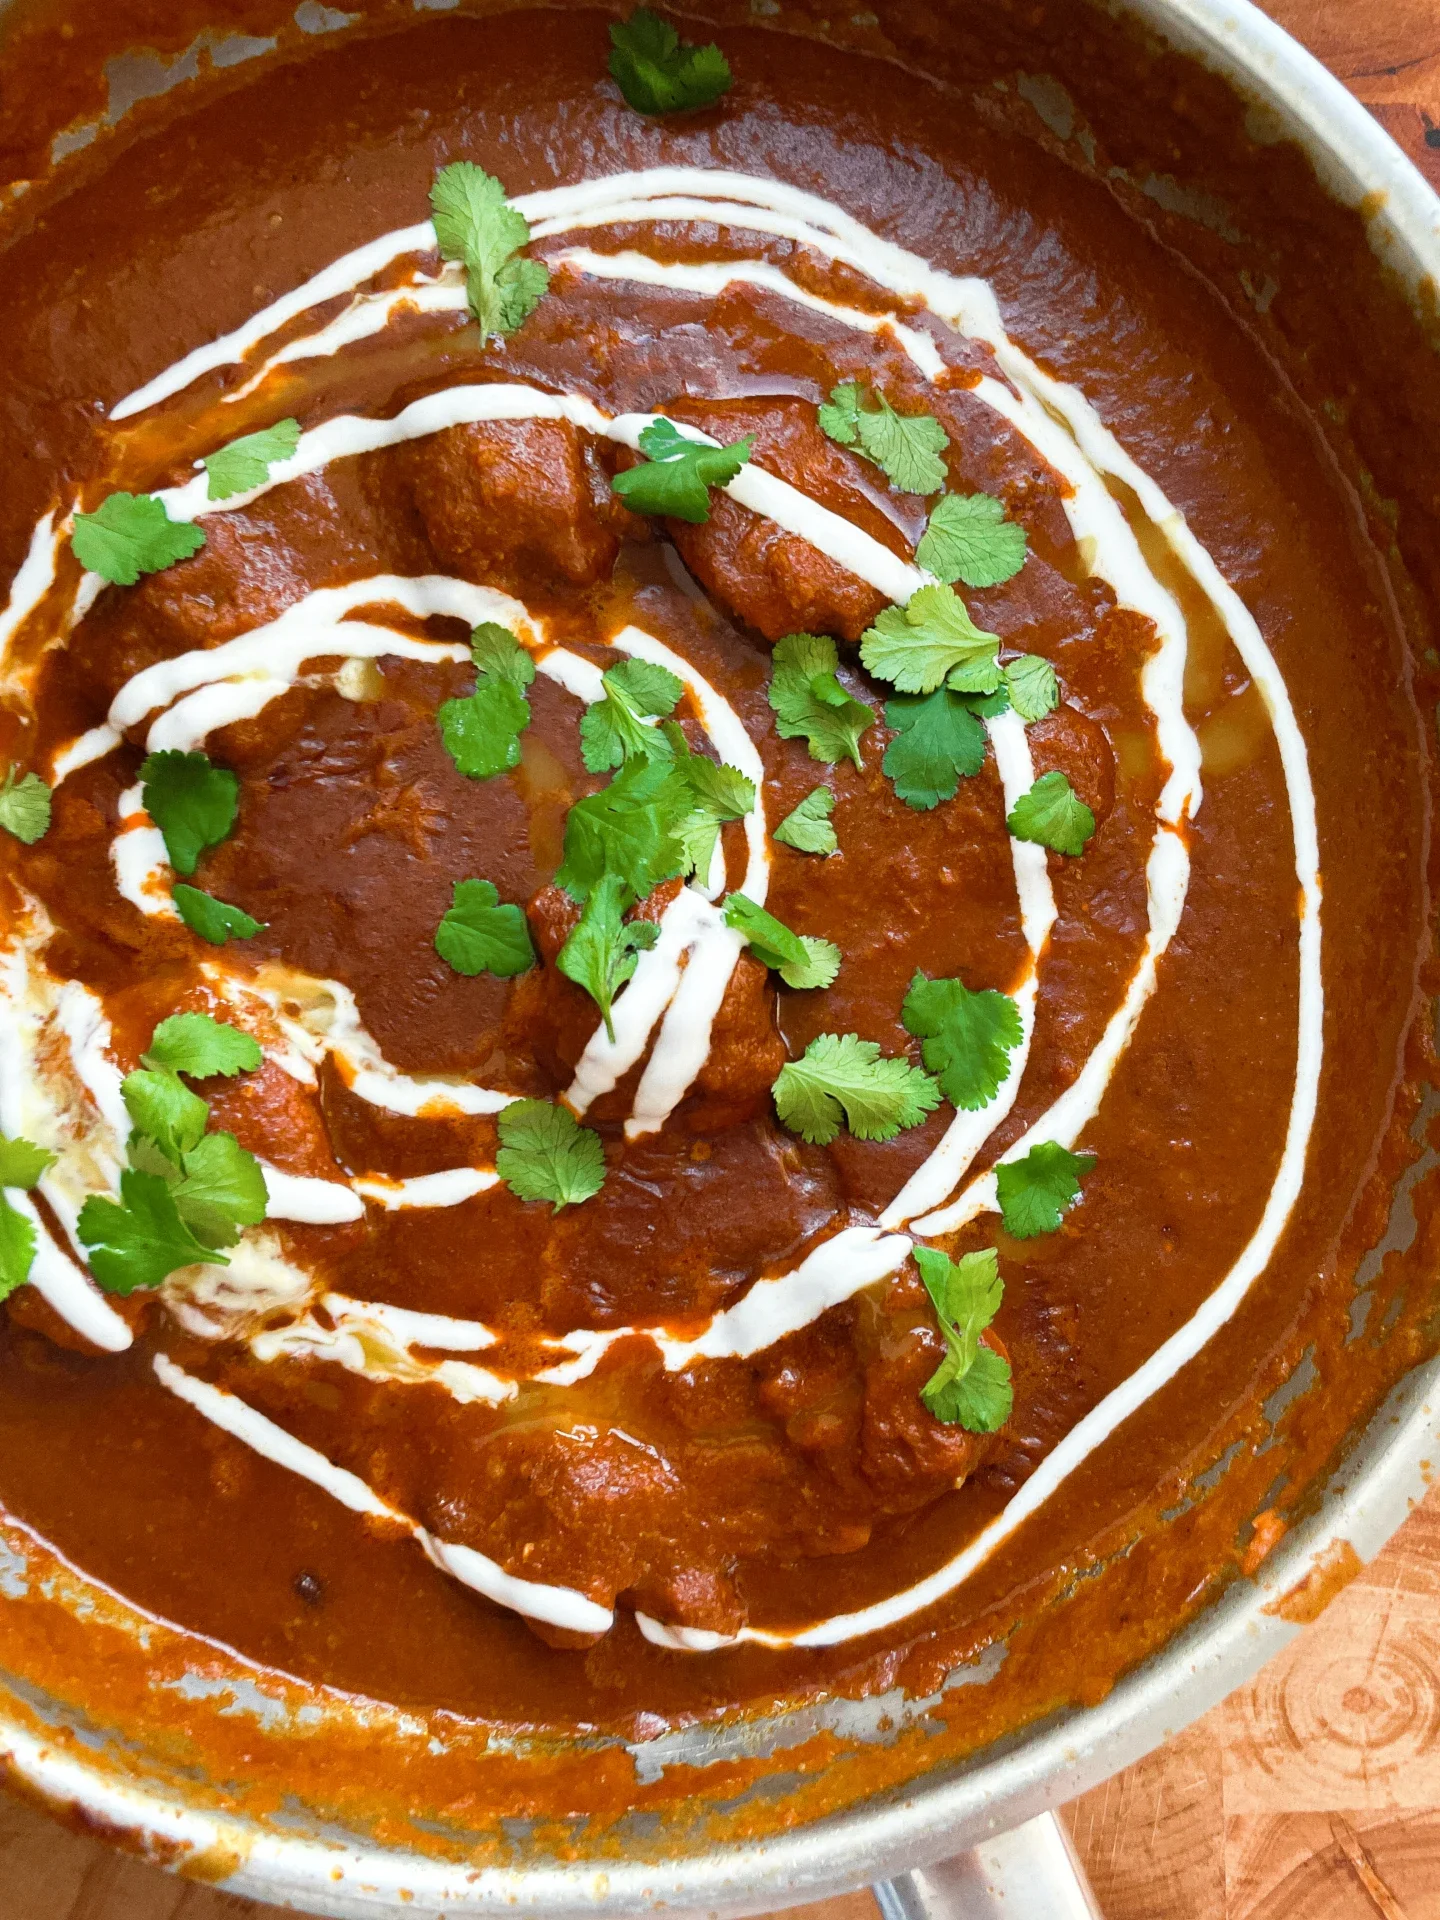
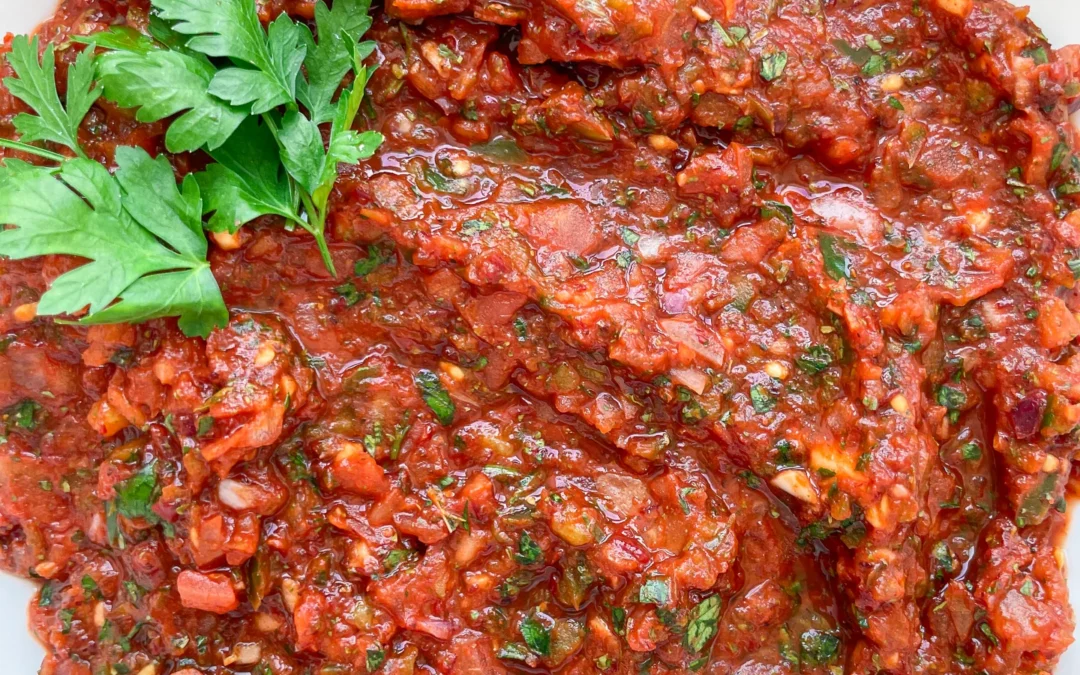
  2. Tonkatsu Sauce: In a small pot, mix together tomato paste, honey, sugar, apple cider vinegar, water, and salt, and gently heat the mixture. Meanwhile, cut the dried plums into small pieces and add them to the pot. Peel the apple, cut a quarter of it into small pieces, and add it to the pot along with the other ingredients. Peel the ginger and garlic clove, grate them into the pot, and stir well. Finally, add soy sauce, Worcestershire sauce, hoisin sauce, brown sugar, and mirin. Heat the mixture for a few minutes and bring it to a brief boil until the sugar dissolves and the apple softens. If your sauce it still too thick, add gradually more water until it reaches your desired consistency. Use a hand blender to puree the sauce until smooth, and if needed, strain it through a fine mesh strainer. Pour the sauce into a squeeze bottle and refrigerate.
  3. Chicken Schnitzel: If you bought whole chicken breasts, cut them horizontally using a butterfly cut so that you end up with two teardrop-shaped pieces. Place each piece between two layers of plastic wrap and gently and evenly flatten them with a meat tenderizer. Repeat this process with each piece of chicken and set them aside on a plate. Prepare the breading station using three shallow bowls. In the first bowl, place the flour; in the second bowl, beat the eggs; and in the third bowl, mix the breadcrumbs with panko. Dredge each chicken piece in flour, making sure it’s fully coated, then shake off the excess and dip it in the beaten egg, coating both sides. Finally, press the chicken into the breadcrumb-panko mixture, ensuring it’s well-covered on all sides. Set the breaded chicken pieces aside on a plate.
  4. Rice: Cook the rice according to the package instructions. If you don’t have the instructions, rinse the rice in a medium-sized pot until the water runs clear. Drain the water, then add fresh water in a 1.5:1 ratio to the rice (so, for this recipe, use 420g of water for 280g of rice after rinsing). Place the pot on the stove over high heat and cover with a lid. Once the water comes to a boil, reduce the heat to the lowest setting. Let the rice cook with the lid on for about 15 minutes. The rice is done when you see small, even holes forming between the grains. Leave the pot on the turned-off stove with the lid on.
  5. While the rice is cooking, heat a large pan for the schnitzel. Add clarified butter or another high-heat oil to the pan and fry the chicken on both sides over medium heat until golden brown. Place the fried schnitzel on paper towels to drain.
  6. While the chicken is frying, slice the onions for the Tsuyu sauce. Halve the onions and then cut them into thin strips.
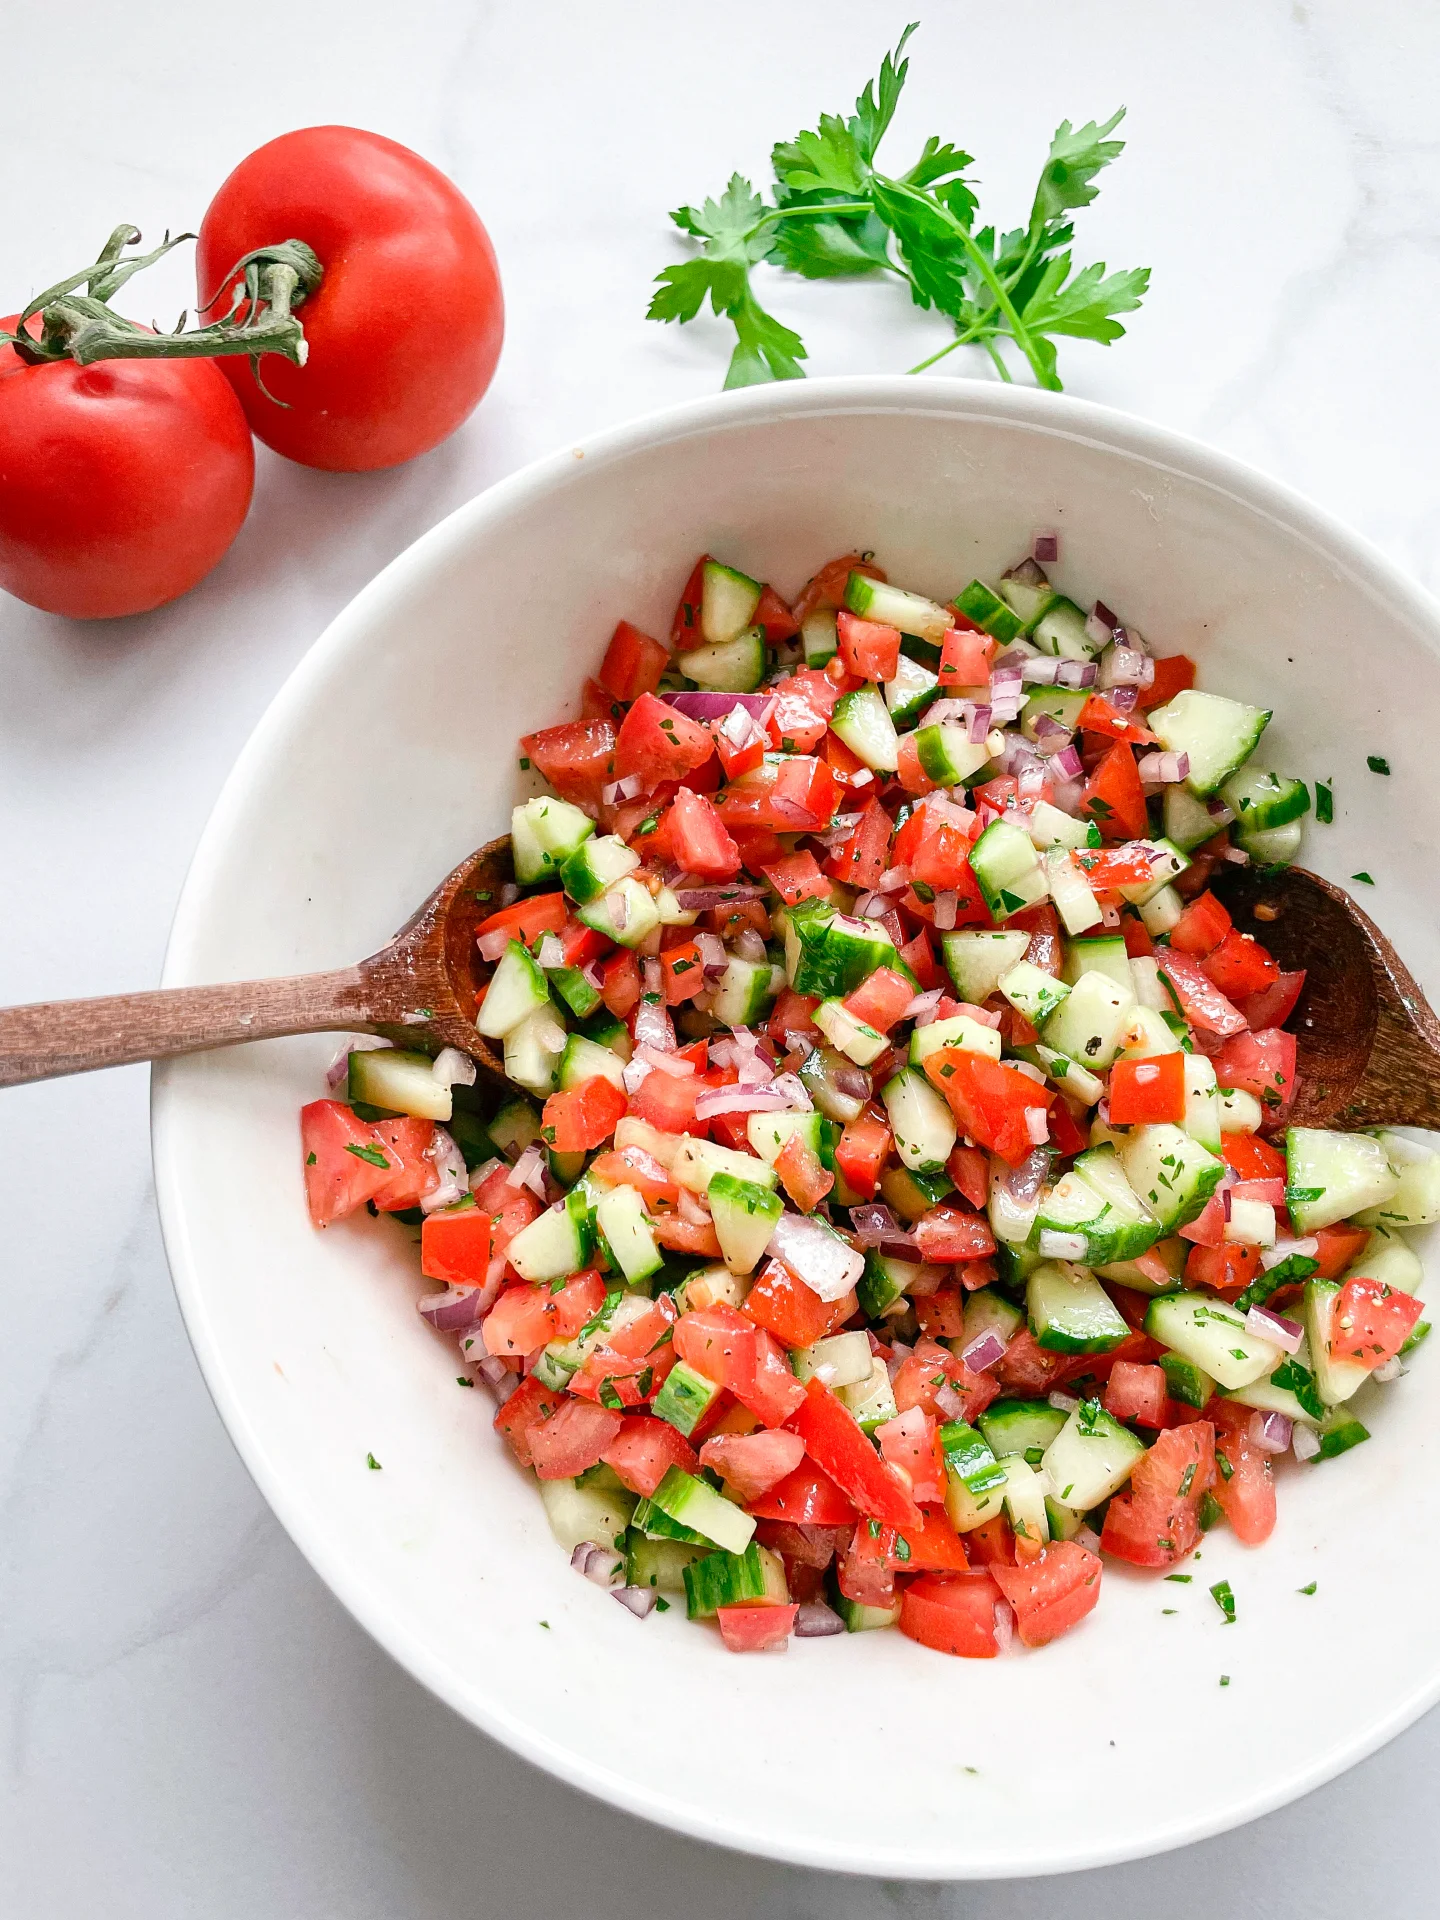
  7. Napa Cabbage: While the chicken is frying, quarter the napa cabbage and slice two quarters into thin strips. Wash them under cold water and spin them dry. Set the cabbage aside. If you’d like to add a special touch, you can drizzle 1-2 tablespoons of my Chinese Holy Trinity Oil over the cabbage and massage it in.
  8. Tsuyu Sauce: Once the chicken is done frying, remove the remaining fat from the pan and place it back on the stove. Add soy sauce, mirin, sugar, dashi powder, and water to the pan and bring it to a quick boil. Then, add the onions and let it simmer for 5-7 minutes until the onions are soft but still slightly firm.
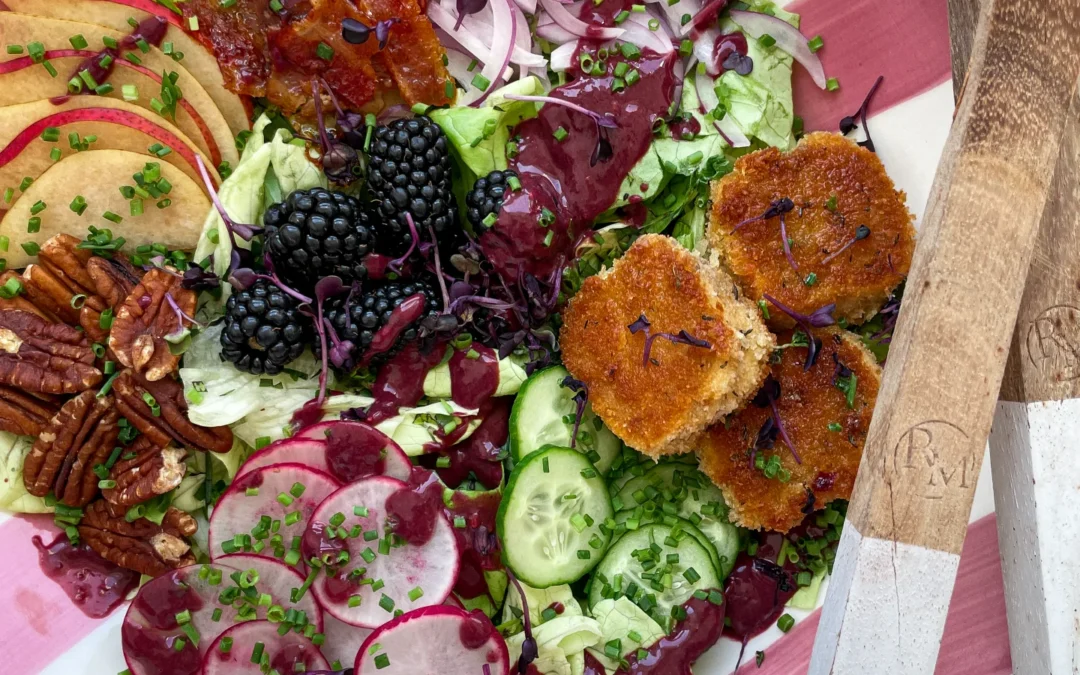
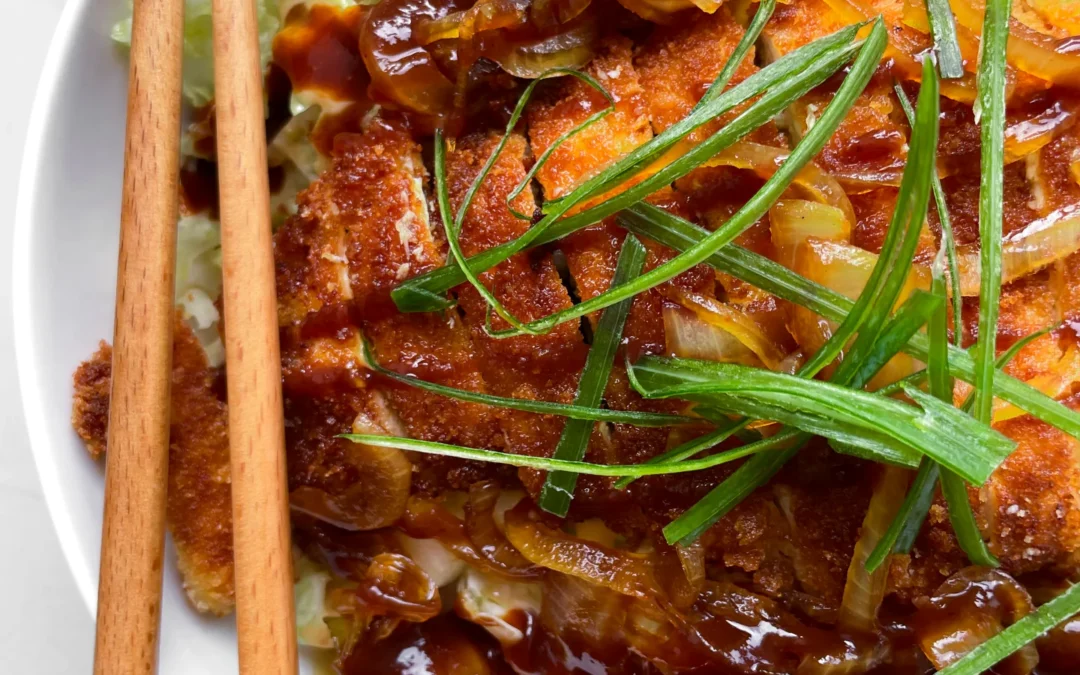
  9. Once the Tsuyu sauce is ready, you can start plating. Take four bowls. First, add the rice, then drizzle 1-2 tablespoons of Tsuyu sauce and some onions over the rice. Next, add a handful of napa cabbage on top, and drizzle the sesame sauce over it in a zigzag pattern. Slice the schnitzel into thin strips and place it on top of the cabbage. Finally, drizzle the remaining Tsuyu sauce and onions over the chicken, and finish with a zigzag of Tonkatsu sauce. Optional: garnish with fresh scallions.
  • Cook Time: 80 min

Spicy Turkish Vegetable Spread (Ezme)

Spicy Turkish Vegetable Spread (Ezme)

Spicy Turkish Vegetable Spread (Ezme)

Spicy Turkish Vegetable Spread (Ezme)

August 20, 2024 by Kimberly

Experience a burst of flavors with this spicy Turkish veggie spread! Fresh, zesty, and vibrant – it’s the perfect addition to your meals, bringing a touch of excitement and warmth.

20 MINUTES

EASY

VEGAN

TURKISH

65 PER PORTION

SPICY

EVERYDAY

DIPS & SPREADS

ALL YEAR

INTRODUCTION

ABOUT THE RECIPE

Ready to spice up your snack game? Meet Ezme, a fiery and flavorful Turkish vegetable spread that’s about to become your new favorite. Packed with fresh ingredients and a spicy kick, this spread is perfect for those who love a bit of heat in their meals. Easy to make and bursting with vibrant flavors, Ezme is not just a dish – it’s an experience. Let’s dive into this exciting world of Turkish cuisine together!

How to serve
It’s an excellent companion to warm, crusty bread or pita. For a traditional touch, pair it with other mezze like hummus, baba ganoush, or tzatziki. It also makes a fantastic topping for grilled meats or veggies, adding a zesty punch to your meals. For a quick snack, spread it on toast or use it as a dip for fresh veggies. The spicy, tangy flavors will elevate any dish you serve it with. I like to serve it with this Turkish Flatbread (Bazlama) and Mint Yogurt & Cucumber Dill Salad (Cacik inspired) as a Meze variation.

How to store
Place it in an airtight container and keep it in the fridge. It stays fresh for up to 5 days, allowing you to enjoy its spicy goodness throughout the week. If you’re planning to make a big batch, you can freeze portions for up to a month. Just thaw it in the fridge overnight, and it’s ready to bring that burst of flavor back to your table.

Hi, I'm Kimberly!

Hi, I'm Kimberly.

A passionate food lover who believes in the magic of homemade deliciousness that spreads love and warmth. Join me on this culinary adventure as I prepare wonderful dishes and let’s spread some happiness together!

Kimberly the Zett Signature

If you want to get to know me better, click here!


Spicy Turkish Vegetable Spread (Ezme)
„Let’s make a piece of happiness“
Print
clock clock iconcutlery cutlery iconflag flag iconfolder folder iconinstagram instagram iconpinterest pinterest iconfacebook facebook iconprint print iconsquares squares iconheart heart iconheart solid heart solid icon
Spicy Turkish Vegetable Spread (Ezme)

Spicy Turkish Vegetable Spread (Ezme)


  • Author: Kimberly
  • Total Time: 20 min
  • Yield: 4-6 1x

Description

Recommended Equipment

  • sharp knife
  • cutting board
  • food processor
  • sieve
  • bowl
  • medium bowl

Ingredients

Units Scale

SALAD

  • 2 tomatoes
  • 1 red onion
  • 1 green bell pepper
  • 2 garlic cloves
  • 15 grams parsley

DRESSING

  • 2 tbsp pepper paste
  • 1 tbsp tomato paste
  • 2 tbsp pomegranate molasses
  • 1 tbsp lemon juice
  • 1 tbsp olive oil
  • 1 tsp sumach
  • 1 tsp dried mint
  • 1/2 tsp salt
  • 1/2 tsp paprika powder

Instructions

  1. Wash and thoroughly dry the tomatoes, bell pepper, and parsley. Quarter the tomatoes, deseed the bell pepper and cut into large pieces. Peel and quarter the red onion, peel the garlic cloves, and roughly remove the thick stems from the parsley. Place everything in a food processor and pulse until everything is finely chopped but still recognizable. We don’t want a paste!
  2. Transfer the mixture to a fine sieve over a bowl and press it with a spoon to extract as much liquid as possible. Let the mixture continue to drain in the sieve and set aside.
  3. In a bowl, mix the dressing ingredients: hot paprika paste, tomato paste, olive oil, sumac, dried mint, salt, pomegranate syrup, and lemon juice until it forms a creamy consistency.
  4. Place the vegetable mixture into a larger bowl and add the dressing. Stir well until it becomes a creamy, firm, dark red mixture. Taste and adjust seasoning if needed. You can serve it immediately or refrigerate it for a few hours to enhance the flavors.
  • Cook Time: 20 min

Mint Yogurt & Cucumber Dill Salad (Cacik inspired)

Mint Yogurt & Cucumber Dill Salad (Cacik inspired)

Mint Yogurt & Cucumber Dill Salad (Cacik inspired)

Mint Yogurt & Cucumber Dill Salad (Cacik inspired)

August 20, 2024 by Kimberly

Refresh your taste buds with this creamy & crunchy yogurt cucumber salad. The blend of mint and dill brings a burst of summer flavors that’s perfect for any occasion. Light, tangy, and irresistible!

15 MINUTES

EASY

VEGETARIAN

TURKISH

153 PER PORTION

CREAMY
CRUNCHY

EVERYDAY

DIPS & SPREADS

ALL YEAR

INTRODUCTION

ABOUT THE RECIPE

If you’re craving something light, refreshing, and bursting with flavor, you’re going to adore this Cacik-inspired dip-salad situation. It’s a delightful mix of creamy yogurt, fresh cucumbers, and aromatic herbs like mint and dill. Perfect for hot summer days or when you need a quick, healthy snack, this dip-salad is a breeze to whip up and incredibly satisfying. Trust me, once you try it, you’ll be hooked on its cool and tangy goodness!

How to serve
Enjoy it as a refreshing side dish with your grilled meats or fish, or as a cool appetizer to start your meal. It’s also perfect as a dip with some warm pita bread or crispy veggies. For a more substantial meal, pair it with a quinoa or grain bowl. This salad’s creamy, tangy flavor profile complements a wide range of dishes, making it a fantastic addition to any menu. I like to serve it with this Turkish Flatbread (Bazlama) and Spicy Turkish Vegetable Spread (Ezme) as a Meze variation.

How to store
Transfer it to an airtight container and keep it in the fridge. It stays fresh for up to three days, but it’s best enjoyed within the first day or two to maintain its crisp texture. Keep it chilled, and you’ll have a delicious, refreshing dip-salad ready whenever you need it.

Hi, I'm Kimberly!

Hi, I'm Kimberly.

A passionate food lover who believes in the magic of homemade deliciousness that spreads love and warmth. Join me on this culinary adventure as I prepare wonderful dishes and let’s spread some happiness together!

Kimberly the Zett Signature

If you want to get to know me better, click here!


Mint Yogurt & Cucumber Dill Salad (Cacik inspired)
„Let’s make a piece of happiness“
Print
clock clock iconcutlery cutlery iconflag flag iconfolder folder iconinstagram instagram iconpinterest pinterest iconfacebook facebook iconprint print iconsquares squares iconheart heart iconheart solid heart solid icon
Mint Yogurt & Cucumber Dill Salad (Cacik inspired)

Mint Yogurt & Cucumber Dill Salad (Cacik inspired)


  • Author: Kimberly
  • Total Time: 15 min
  • Yield: 4-6 1x

Description

RECOMMENDED EQUIPMENT

  • sharp knife
  • cutting board
  • small bowl
  • medium bowl

Ingredients

Units Scale

SALAD

  • 1 cucumber
  • 2 tbsp extra virgin olive oil
  • 1 tbsp lemon juice
  • 1 tbsp dill
  • salt & pepper to taste

YOGURT

  • 300 grams 10% fat yogurt
  • 2 garlic cloves
  • 1 tbsp fresh mint, chopped
  • pinch of salt

TOPPING

  • pistachios
  • dill
  • mint

Instructions

  1. Peel the garlic and grate it into a small bowl. Wash and dry the mint thoroughly. Pluck the leaves from the stems, finely chop them, and add them to the garlic. Then add the yogurt and salt. Mix everything well.
  2. Next, wash and dry the cucumber. Halve it lengthwise, then halve each piece again lengthwise and remove the seeds. Quarter the cucumber again lengthwise and cut into large chunks. Place the cucumber pieces in a medium bowl and season with salt, olive oil, lemon juice, and pepper. Wash, dry, and roughly chop the dill, then add it to the cucumbers. Mix everything well.
  3. Shell and finely chop the pistachios. Set aside.
  4. Spread the yogurt on a deep plate and top with the cucumber salad. Sprinkle with pistachios. Optionally, garnish with a few mint leaves and dill, and drizzle with a bit of olive oil.
  • Cook Time: 15 min

Salmon Poke Bowl & Spicy Mayo Sauce

Salmon Poke Bowl & Spicy Mayo Sauce

Salmon Poke Bowl & Spicy Mayo Sauce

Salmon Poke Bowl & Spicy Mayo Sauce

August 21, 2024 by Kimberly

Dive into a fresh and vibrant bowl of goodness, packed with zesty spicy flavors, creamy textures, and a satisfying crunch. Perfect for a wholesome quick meal!

20 MINUTES

EASY

OMNIVORE

US AMERICAN

710 PER PORTION

REFRESHING

EVERYDAY

LUNCH

SPRING
SUMMER

INTRODUCTION

ABOUT THE RECIPE

This dish is like a hug in a bowl – a refreshing and vibrant mix of flavors that will take your taste buds on a little adventure. Perfect for when you’re craving something light yet satisfying, this bowl is loaded with fresh veggies like juicy mango, crisp red cabbage, and tender edamame, all sitting on a bed of fluffy rice. And the kicker? A drizzle of spicy mayo sauce that ties everything together with just the right amount of heat.

How to serve
To serve, grab a big, beautiful bowl and start with a generous layer of rice. Arrange the colorful veggies on top – think creamy avocado, bright mango, and that gorgeous purple cabbage. Lay your protein of choice (like tender salmon) over the top, and then drizzle on the spicy mayo sauce. Sprinkle with sesame seeds and a little wakame salad for that extra touch. Serve it chilled and watch your guests (or yourself) light up with every bite!

How to store
Got leftovers? Store each component separately in airtight containers to keep everything fresh. The rice and veggies will last about 2-3 days in the fridge. Just keep the sauce in a small jar and give it a good shake before using it again. It’s best not to store thawed raw salmon. If you can’t finish it, cook it and enjoy it the next day or later the same day.

Hi, I'm Kimberly!

Hi, I'm Kimberly.

A passionate food lover who believes in the magic of homemade deliciousness that spreads love and warmth. Join me on this culinary adventure as I prepare wonderful dishes and let’s spread some happiness together!

Kimberly the Zett Signature

If you want to get to know me better, click here!


Salmon Poke Bowl & Spicy Mayo Sauce
„Let’s make a piece of happiness“
Print
clock clock iconcutlery cutlery iconflag flag iconfolder folder iconinstagram instagram iconpinterest pinterest iconfacebook facebook iconprint print iconsquares squares iconheart heart iconheart solid heart solid icon
Salmon Poke Bowl & Spicy Mayo Sauce

Salmon Poke Bowl & Spicy Mayo Sauce


  • Author: Kimberly
  • Total Time: 20 min
  • Yield: 1 1x

Description

RECOMMENDED EQUIPMENT

  • sharp knife
  • cutting board
  • two small bowls
  • small pot
  • grater
  • paper towels

Ingredients

Units Scale

PRODUCE

  • 3 tbsp edamame
  • 1 tbsp avocado
  • a quarter of a lime
  • 1/4 mini cucumber
  • 2 tbsp wakame salad
  • 80 grams farmed salmon, sushi-grade, frozen and then thawed
  • 2 tbsp red cabbage
  • 1 radish
  • 1/4 mango

RICE

  • 80 grams sushi rice
  • 1 tbsp rice vinegar
  • 1/4 tsp salt

SPICY MAYO SAUCE

  • 1 tbsp mayonnaise or yogurt
  • 2 tbsp cold water
  • 1 tbsp sriracha
  • 1/4 tsp ginger, grated
  • 1 garlic clove, grated
  • 1/2 tsp soy sauce
  • 1/8 tsp sesame oil
  • pinch of white pepper

TOPPINGS

  • white sesame seeds
  • black sesame seeds
  • nori sheets
  • cress

Instructions

  1. Start by washing the rice until the water runs clear, then cook it in a rice cooker or small pot. Once it’s done, mix in rice vinegar and salt.
  2. Place the edamame in a small bowl, cover with hot water, and let it sit for 5 minutes. Drain the water afterward.
  3. For the spicy mayo sauce, peel the ginger and garlic, and grate them into a bowl. Add the rest of the sauce ingredients and mix everything together until smooth. Set aside.
  4. Wash and dry the cucumber, then slice it thinly. Remove the outer leaves of the red cabbage, cut it into quarters, and finely grate it. Wash the radishes and slice them thinly or use a mandoline. Peel the mango and cut it into pieces. Scoop the avocado out of its skin, drizzle it with lime juice, and cut it into cubes. Arrange the sliced fruits and veggies on a plate for later.
  5. Rinse and pat dry the salmon, then cut it into cubes with a sharp knife.
  6. In a deep bowl, start by layering the rice. Place the wakame salad in the center, then arrange the other components around it in a circle on top of the rice. Sprinkle the salmon with black and white sesame seeds and add a bit of cress. Place nori sheets on the side.
  7. Serve the sauce in a small bowl on the side, or drizzle it directly over the bowl.
  • Cook Time: 20 min

Homemade Bagels

Homemade Bagels

Homemade Bagels

Homemade Bagels

August 15, 2024 by Kimberly

Indulge in these cozy, chewy homemade bagels with irresistible toppings! Perfect for breakfast or brunch, they bring a warm, homemade touch to your mornings. Once you try these, you’ll never buy bagels again!

2 HOURS

INTERMEDIATE

VEGETARIAN

US AMERICAN

274 PER BAGEL

CHEWY

BRUNCH

BREAKFAST

ALL YEAR

INTRODUCTION

ABOUT THE RECIPE

Imagine starting your day with the warm, comforting aroma of freshly baked bagels wafting through your kitchen. These delightful homemade bagels are not only easy to make but also offer a chewy, satisfying bite that pairs perfectly with your favorite toppings. Whether you prefer the nutty flavor of sesame seeds, the subtle crunch of poppyseeds, the spicy kick of cheddar and jalapeno, or the classic mix of everything bagel seasoning, there’s a bagel for everyone to love.

How to serve
Slice them in half and spread on some creamy butter, tangy cream cheese, or your favorite jam. They also make fantastic bases for sandwiches – think smoked salmon with capers and red onion on a sesame bagel, or a turkey and avocado combo on a poppyseed bagel. For a real treat, try a cheddar and jalapeno bagel with a smear of guacamole. These bagels are versatile enough to be enjoyed any time of day, making them a must-have in your kitchen.

How to store
To keep your bagels fresh, store them in an airtight container at room temperature for up to two days. For longer storage, slice them in half and freeze them. When you’re ready to enjoy, simply pop them in the toaster straight from the freezer. This way, you’ll always have a delicious bagel ready whenever the craving strikes.

Hi, I'm Kimberly!

Hi, I'm Kimberly.

A passionate food lover who believes in the magic of homemade deliciousness that spreads love and warmth. Join me on this culinary adventure as I prepare wonderful dishes and let’s spread some happiness together!

Kimberly the Zett Signature

If you want to get to know me better, click here!


Homemade Bagels
Homemade Bagels
Homemade Bagels
„Let’s make a piece of happiness“
Print
clock clock iconcutlery cutlery iconflag flag iconfolder folder iconinstagram instagram iconpinterest pinterest iconfacebook facebook iconprint print iconsquares squares iconheart heart iconheart solid heart solid icon
Homemade Bagels

Homemade Bagels


  • Author: Kimberly
  • Total Time: 2 hrs
  • Yield: 8-12 1x

Description

Recommended Equipment

  • tall container
  • large bowl
  • damp cloth
  • oven
  • large pot

Ingredients

Units Scale

DOUGH – YEAST MIXTURE

  • 500 milliliters lukewarm water
  • 7 grams active dry yeast
  • 1 tbsp sugar

DOUGH – DRY INGREDIENTS

  • 900 grams bread flour (in Germany flour type 550)
  • 2 tsp salt
  • 30 grams white sugar

WATER BATH

  • 2 liters simmering water
  • 1/4 cup brown sugar

TOPPINGS

  • white sesame seeds
  • poppy seeds
  • everything but the bagel seasoning
  • cheddar & jalapeño

Instructions

  1. In a tall container, briefly stir together the yeast mixture ingredients: lukewarm water, yeast, and sugar, then let it sit for 10 minutes.
  2. Meanwhile, in a large bowl, mix the dry ingredients: flour, salt, and sugar. Add the yeast-water-sugar mixture and stir until just combined.
  3. Transfer the dough to a clean work surface and knead by hand until it barely sticks anymore.
  4. Shape the dough into 8 balls of 180g / 6oz each for large bagels or 12 balls of 120g / 4oz each for smaller bagels. Let them rest under a damp cloth for about 20 minutes.
  5. Poke a hole in the center of each dough ball with your finger and form a bagel by stretching the dough evenly.
  6. Place the bagels on parchment paper and let them rise for another 30 minutes.
  7. Preheat the oven to 175°C / 350°F. Bring water to a simmer in a large pot and dissolve the brown sugar in it. Simmer each bagel for 1 minute on each side.
  8. Remove the bagels from the water and dip them in your favorite toppings or leave them plain. I like using poppy seeds, sesame seeds, everything but the bagel seasoning, or jalapenos and cheddar cheese.
  9. Once all bagels are topped, place them on a parchment-lined baking sheet and bake in the oven for about 25-30 minutes depending on their size.
  10. Remove the baking sheet and enjoy the bagels 🙂
  • Passive Time: 1 hr 30 min
  • Cook Time: 30 min

Caramelized Bacon Fried Goat Cheese Salad with Blackberry Balsamic Vinaigrette

Caramelized Bacon Fried Goat Cheese Salad with Blackberry Balsamic Vinaigrette

Caramelized Bacon Fried Goat Cheese Salad with Blackberry Balsamic Vinaigrette

Caramelized Bacon Fried Goat Cheese Salad with Blackberry Balsamic Vinaigrette

August 13, 2024 by Kimberly

Indulge in this irresistibly crunchy, savory-sweet salad that’s bursting with flavor. Each bite is a vibrant mix of textures and tastes, making it the ultimate comfort food meets gourmet delight.

30 MINUTES

EASY

OMNIVORE

INT.

714 PER PORTION

COMFORT FOOD

EVERYDAY

LUNCH
DINNER

SPRING
SUMMER

INTRODUCTION

ABOUT THE RECIPE

Imagine sitting down to a salad that feels like a hug on a plate – some warm components, some crispy ones, and bursting with flavors that dance together perfectly. The savory crunch of caramelized bacon paired with the creamy, tangy goat cheese is an experience in itself. Add in the fresh burst of blackberries, crisp cucumber, and the subtle sweetness of pear, and you’ve got a dish that’s not just a salad but a full-on flavor journey.

How to serve
This salad is perfect as a main dish or a side, but honestly, it’s so good you’ll want to make it the star of the meal. Serve it on a large platter, allowing all those gorgeous colors to pop. Drizzle the blackberry balsamic vinaigrette just before serving for that fresh, tangy finish. Pair it with a light white wine or sparkling water with a splash of lemon, and you’ve got yourself a meal that feels like a treat.

How to store
If you’ve got leftovers, store the salad and dressing separately to keep everything crisp and fresh. Place the salad in an airtight container in the fridge, and it should stay good for about 1-2 days. The vinaigrette can be stored in a jar for up to three days.

Hi, I'm Kimberly!

Hi, I'm Kimberly.

A passionate food lover who believes in the magic of homemade deliciousness that spreads love and warmth. Join me on this culinary adventure as I prepare wonderful dishes and let’s spread some happiness together!

Kimberly the Zett Signature

If you want to get to know me better, click here!


Caramelized Bacon Fried Goat Cheese Salad with Blackberry Balsamic Vinaigrette
„Let’s make a piece of happiness“
Print
clock clock iconcutlery cutlery iconflag flag iconfolder folder iconinstagram instagram iconpinterest pinterest iconfacebook facebook iconprint print iconsquares squares iconheart heart iconheart solid heart solid icon
Caramelized Bacon Fried Goat Cheese Salad with Blackberry Balsamic Vinaigrette

Caramelized Bacon Fried Goat Cheese Salad with Blackberry Balsamic Vinaigrette


  • Author: Kimberly
  • Total Time: 30 min
  • Yield: 2 1x

Description

Recommended Equipment

  • tall container
  • hand blender
  • sharp knife
  • cutting board
  • three deep plates
  • small frying pan
  • oven
  • salad bowl

Ingredients

Units Scale

VINAIGRETTE

  • 50 grams blackberries
  • 1 tbsp balsamic vinegar
  • 2 tbsp olive oil
  • 1 tbsp honey
  • 1 tsp Dijon mustard
  • 1 garlic clove
  • salt, pepper & cayennepepper to taste

GOAT CHEESE

  • 100 grams goat cheese
  • 2 tbsp all purpose flour
  • 1 egg
  • 2 tbsp breadcrumbs
  • 2 tbsp panko
  • 1 tsp dried thyme
  • clarified butter for frying

BACON

  • 50 grams bacon
  • brown sugar

SALAD

  • 150 grams mixed green salad
  • 50 grams blackberries
  • 1 small red onion
  • 2 tbsp pecan nuts
  • 1/4 cucumber
  • 1/2 pear
  • 2 radishes
  • chives

Instructions

  1. In a tall container, add all the ingredients for the vinaigrette and blend with a hand blender until you get a smooth dressing. If it seems too thick, you can add 1-2 tablespoons of cold water. Place it in the fridge until ready to use.
  2. Next, cut the salad into bite-sized pieces, wash thoroughly, and place in a salad bowl. Wash the chives thoroughly as well, and cut them into fine rings.
  3. Wash and dry the radishes, cucumber, and pear. Peel the red onion. Slice everything thinly and distribute over the salad, along with the blackberries.
  4. Preheat the oven to 180°C / 350°F. Lay the bacon strips on a sheet of baking paper and sprinkle each strip with about 1/2 teaspoon of brown sugar and a pinch of cayenne pepper. Bake for about 10 minutes or until the sugar has melted and caramelized.
  5. Now prepare three small deep plates. Fill the first one with wheat flour, beat an egg with salt in the second, and mix breadcrumbs, panko, and thyme in the third. Cut the goat cheese into thick slices, then coat each slice first in flour, then in the egg, and finally in the breadcrumb-panko mixture. Press everything down firmly.
  6. Take the bacon out of the oven and let it cool. Once cooled, tear it into pieces and sprinkle over the salad.
  7. Heat some clarified butter in a pan and fry the goat cheese rounds until crispy on all sides. Place them on the salad.
  8. Finally, sprinkle a bit of chives on top as a garnish. Drizzle the vinaigrette over the salad just before serving.
  • Cook Time: 30 min