Easy Same Day Basic Focaccia

Easy Same Day Basic Focaccia

Quick & Easy - The Best Focaccia Recipe

Easy Same Day Basic Focaccia

October 26, 2024 by Kimberly

Golden-crisp on the outside, airy and soft inside, this fresh focaccia is the ultimate comfort! Perfect for dipping, snacking, or as a side – it’s irresistible, warm, and baked-to-perfection bliss.

This website uses affiliate links which may earn commission for purchases made at no additional cost to you.

TOTAL TIME

3 hrs + 30 min

SERVES

1 tray

DIET

vegetarian

EVERY RECIPE DESERVES

A Little Love Letter

Craving something warm, cozy, and seriously easy to bake? This focaccia is your answer! It’s got that perfect golden crust that you can’t resist breaking into and a soft, fluffy center that just melts in your mouth. Whether you’re new to baking or a seasoned bread lover, this focaccia has that fresh-baked, olive-oil-kissed goodness that makes it the ultimate comfort food. Plus, it’s ready in just 3.5 hours – no need to wait around for endless rises. Just mix, bake, and enjoy some bakery-style vibes at home!

This focaccia is so versatile – it pairs perfectly with just about anything! Tear off pieces to dip in olive oil and balsamic vinegar for a classic Italian feel, or serve it alongside a warm soup or pasta for a cozy meal. It also makes a great base for an open-faced sandwich or as an appetizer with some herby olive oil and fresh tomatoes. However you serve it, the fluffy texture and crispy edges will make it an instant favorite for everyone around the table. For an in-depth guide with secret tips & tricks, check out my ‚How-To Guide‘ for the Best Focaccia Recipe!

To keep that bakery-fresh vibe, store your focaccia in an airtight container or plastic wrap at room temperature for up to 2 days. You can also freeze it – wrap it tightly, and it’ll last up to 2 months. Just warm it in the oven to bring back the freshness.

Hi, I'm Kimberly!

Hi, I'm Kimberly.

A hopeless romantic when it comes to food. Every recipe I share is a love letter to food itself. I’m so glad you’re here. Make yourself at home and stay a while.

Love,
Kimberly

Kimberly the Zett Signature

If you want to get to know me better,
click here!


Easy Same Day Basic Focaccia

LET’S MAKE A PIECE OF HAPPINESS

Print
clock clock iconcutlery cutlery iconflag flag iconfolder folder iconinstagram instagram iconpinterest pinterest iconfacebook facebook iconprint print iconsquares squares iconheart heart iconheart solid heart solid icon
Quick & Easy - The Best Focaccia Recipe

Easy Same Day Basic Focaccia


5 Stars 4 Stars 3 Stars 2 Stars 1 Star

No reviews

  • Author: Kimberly
  • Total Time: 3 hrs + 30 min

Description

Recommended Equipment

  • large bowl
  • kitchen scale
  • thermometer (even a medicine one works)
  • measuring cup
  • wooden spoon
  • cling film, beeswax wrap, or a shower cap
  • baking dish or tray (mine is 20x26cm / 8×10 inch)
  • oven


Ingredients

Units Scale
  • 500 grams pizza flour (type 00 in Germany)
  • 400 grams luke-warm water
  • 1.5 tsp active dry-yeast
  • 1 tbsp olive oil
  • 1 tsp honey
  • 1.5 tsp salt
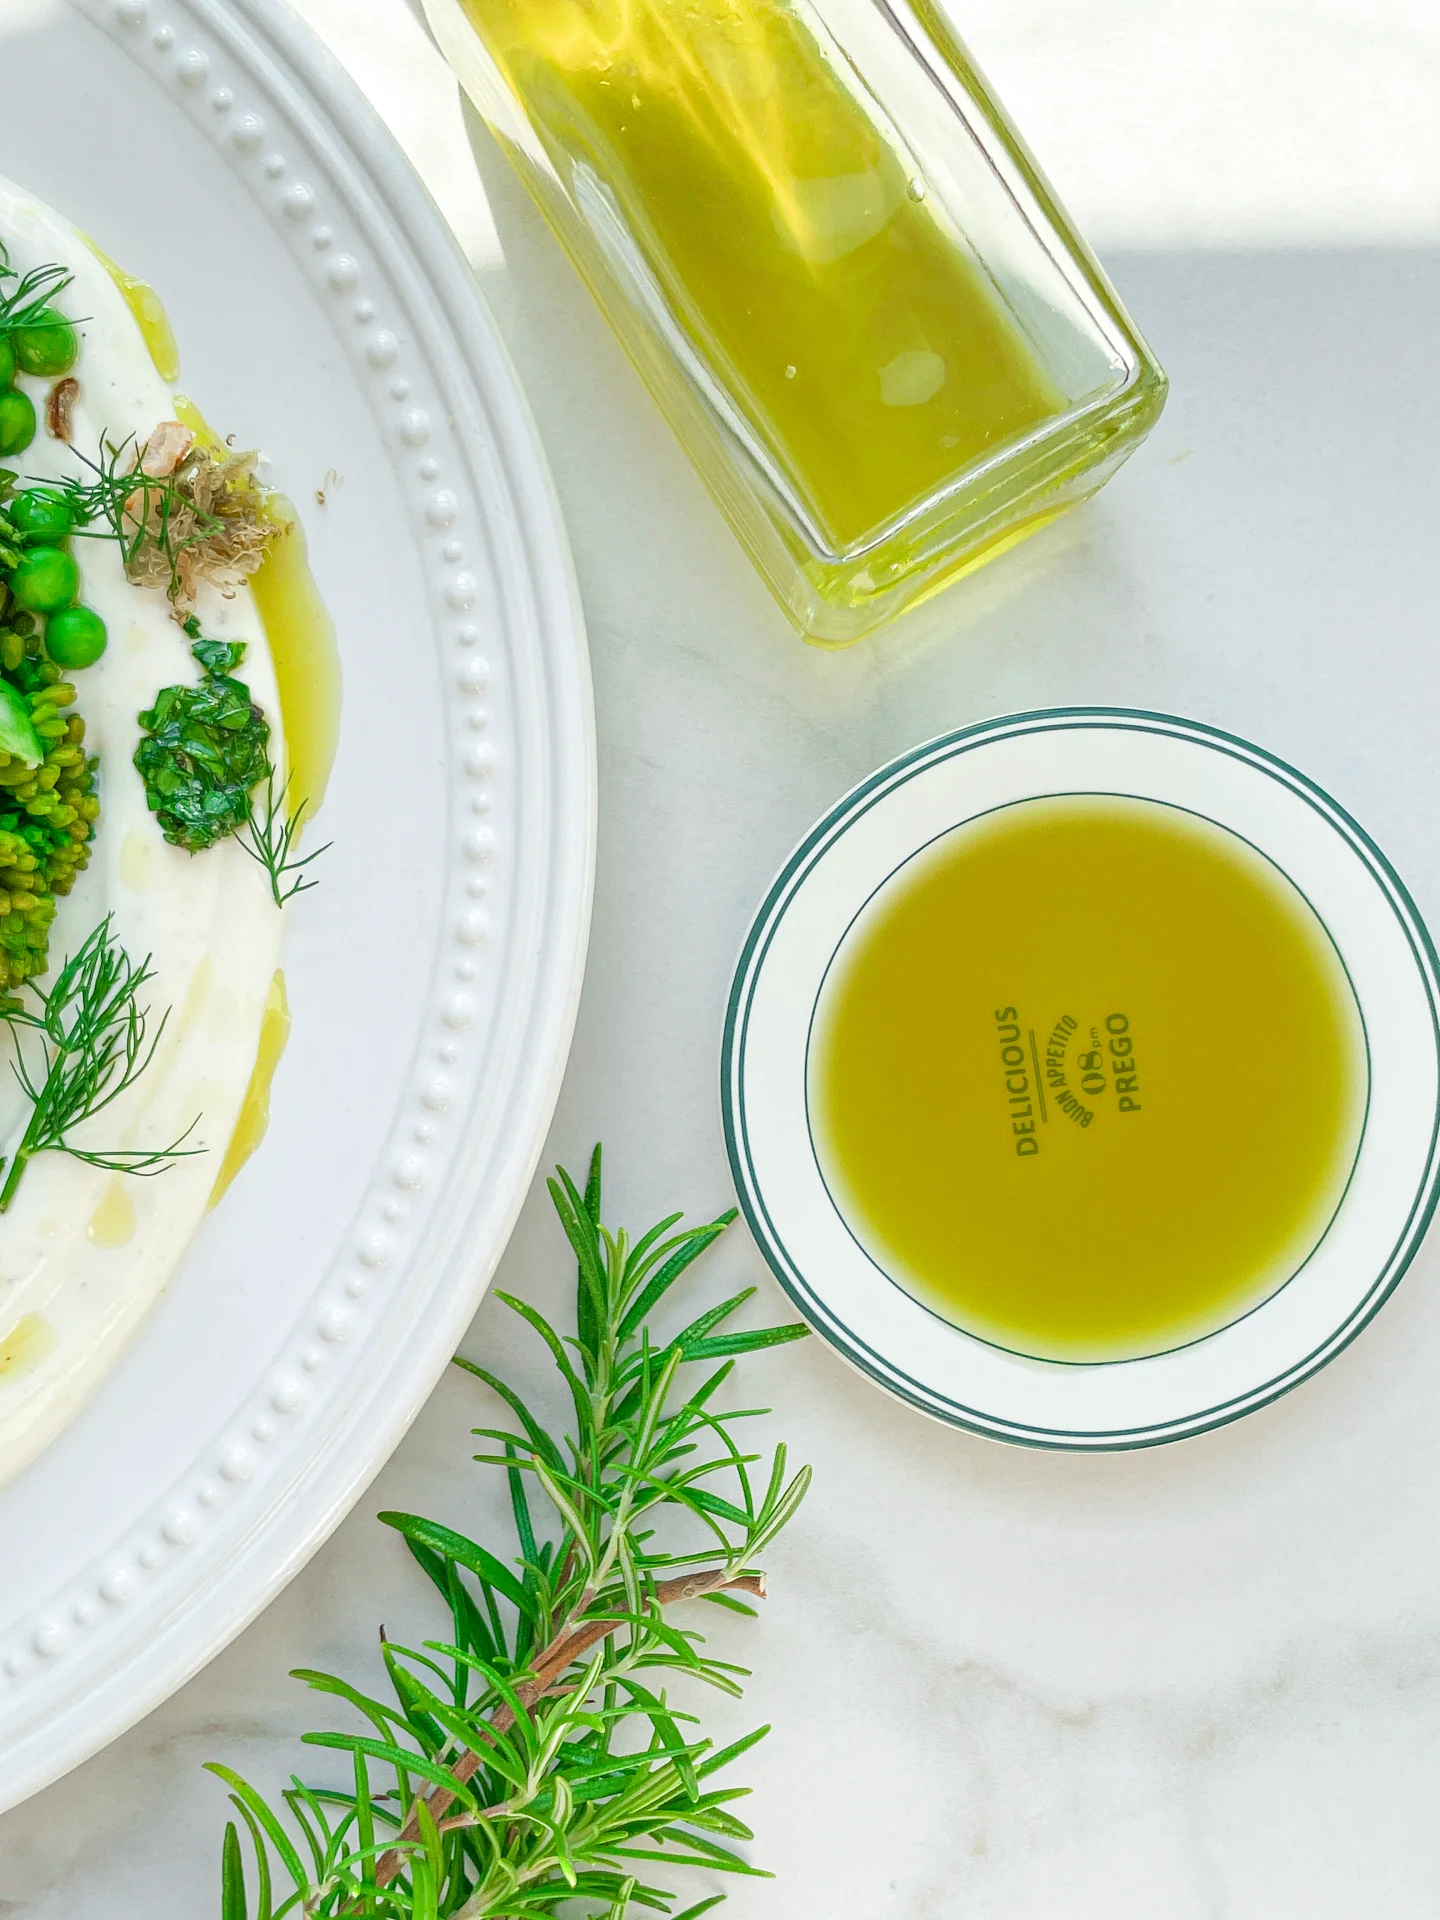
  • 50 milliliters olive oil for greasing and dipping

Instructions

  1. Combine the active-dry yeast with warm water (between 34-38°C / 93-100°F), olive oil, and a teaspoon of honey to get things started. Let it sit for about 10 minutes until it becomes bubbly and the oil floats on top with the activated yeast. Meanwhile, in a large bowl, mix your flour with the salt.
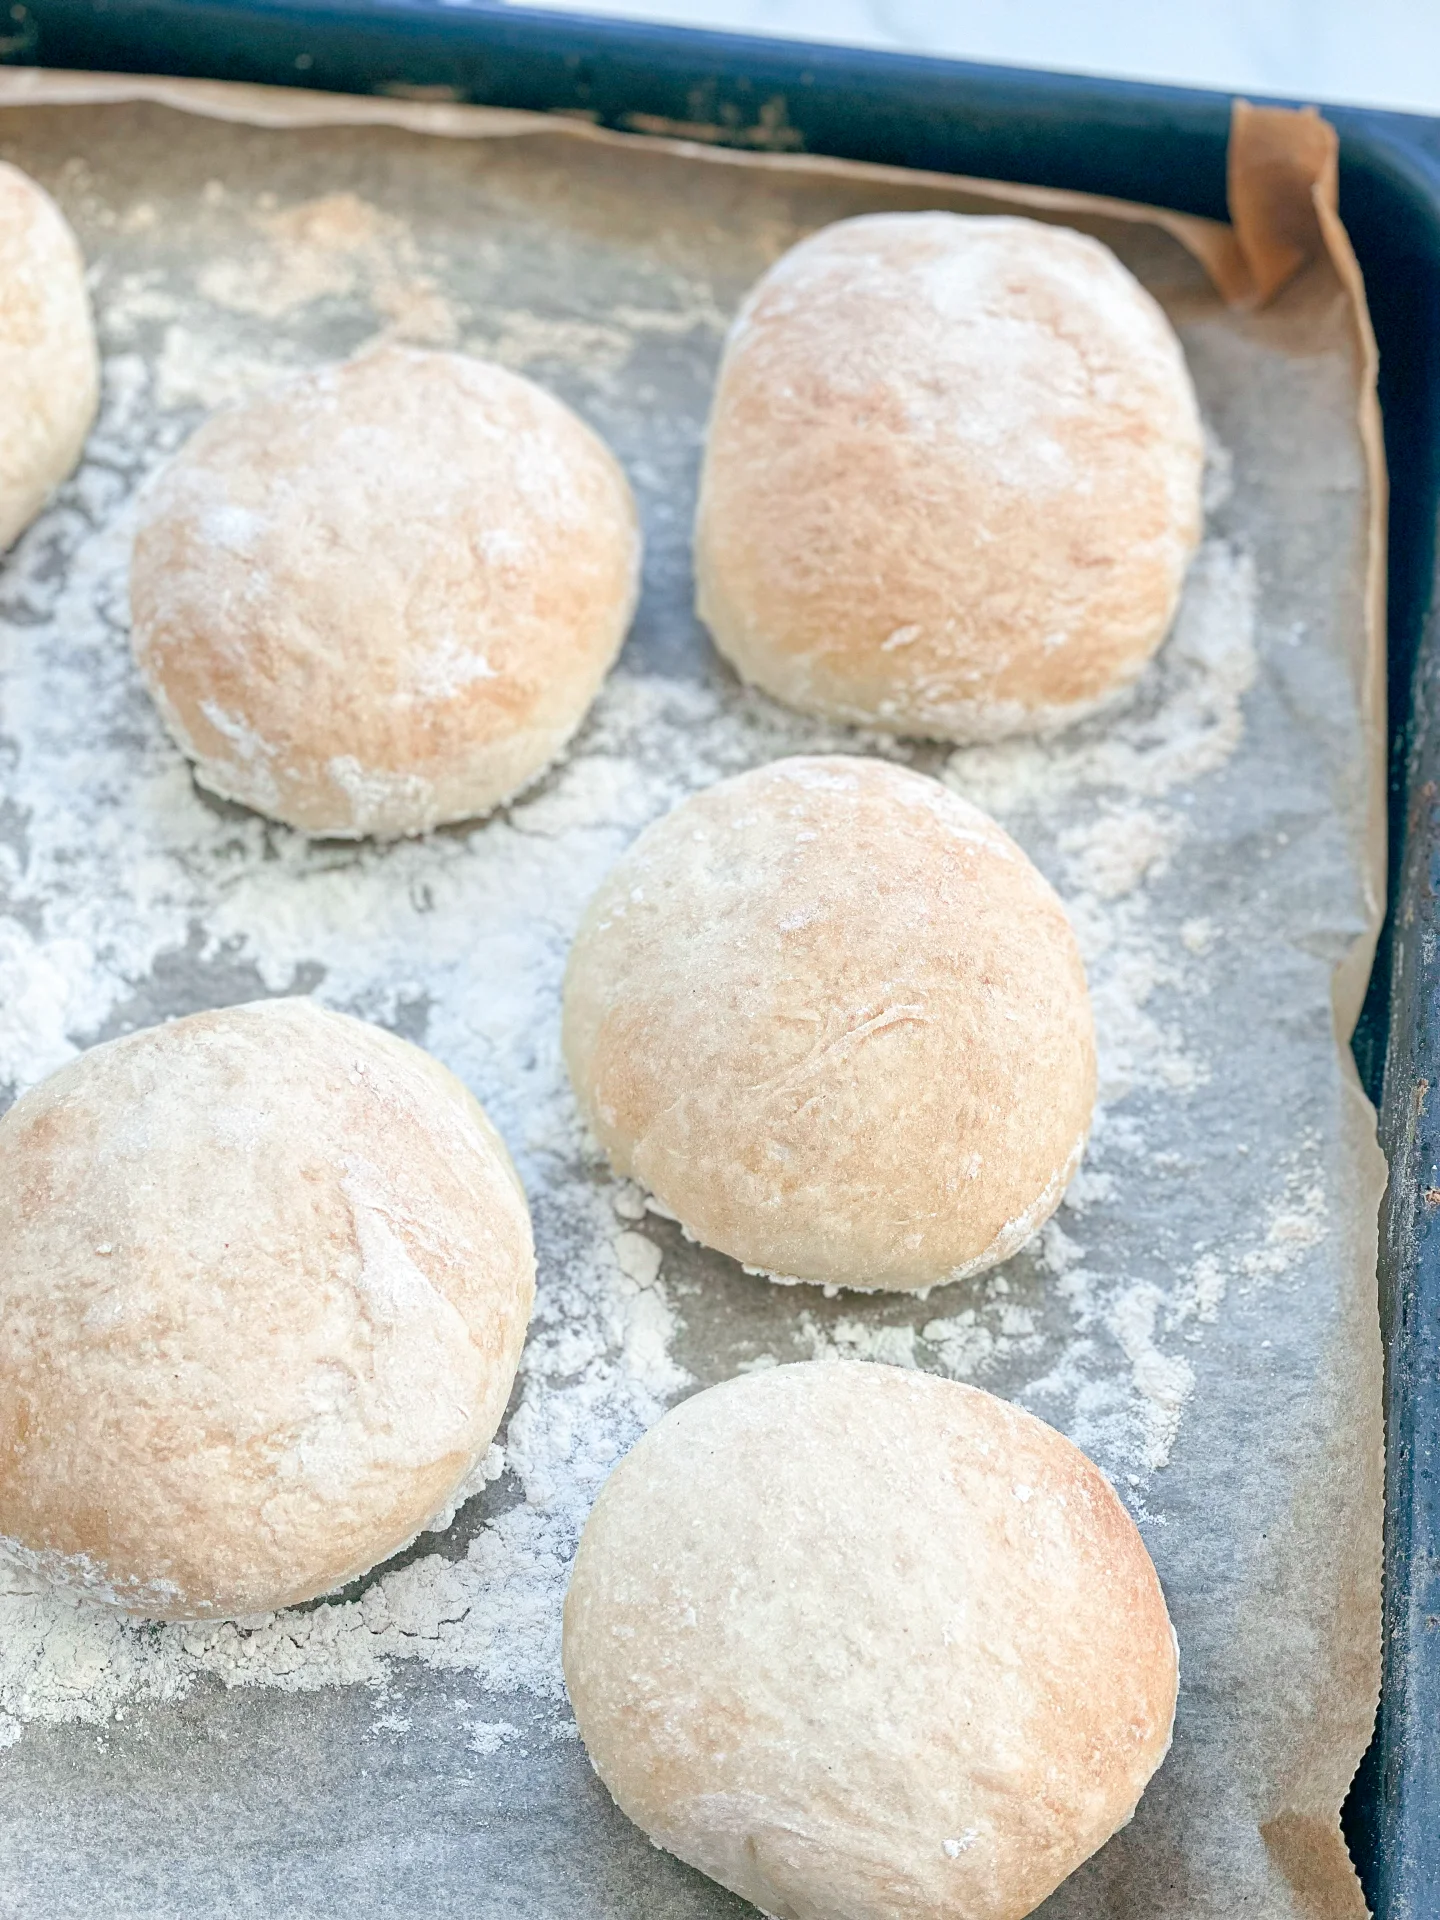
  2. Pour the activated yeast mixture into the flour. Using a wooden spoon, mix everything together until it forms a dough and no dry flour is left. It might look a bit shaggy at first, but that’s totally fine! Scrape down any dough stuck to the sides and cover the bowl with cling film, a beeswax towel, or a shower cap. Let it sit for 20 minutes to allow the flour to hydrate and the dough to start developing elasticity.
  3. After 20 minutes, uncover the dough and prepare a small bowl of warm water to dip your hands in for the stretch & fold process. This technique helps develop the gluten without kneading. To do it, gently pull one side of the dough up, stretch it, and fold it over the center. Rotate the bowl a quarter turn and repeat on all four sides. You’ll do this about three times, letting the dough rest in between. This method strengthens the dough and helps create that light, airy texture! Follow these steps:
    • First stretch & fold, then let the dough rest for 20 minutes covered
    • Second stretch & fold, then rest another 20 minutes covered
    • Third stretch & fold, then let it rest for 60 minutes covered
  4. After the final 60-minute rest, grab your oven dish and drizzle 2-3 tablespoons of olive oil to coat it generously. Carefully transfer the dough to the dish, lifting it gently with both hands. Place it back in the dish, folding any hanging dough underneath itself to give it structure and elasticity.
  5. Cover the dish and let the dough rest for another 60 minutes. During this time, the dough will rise and settle into the dish, preparing for its final transformation.
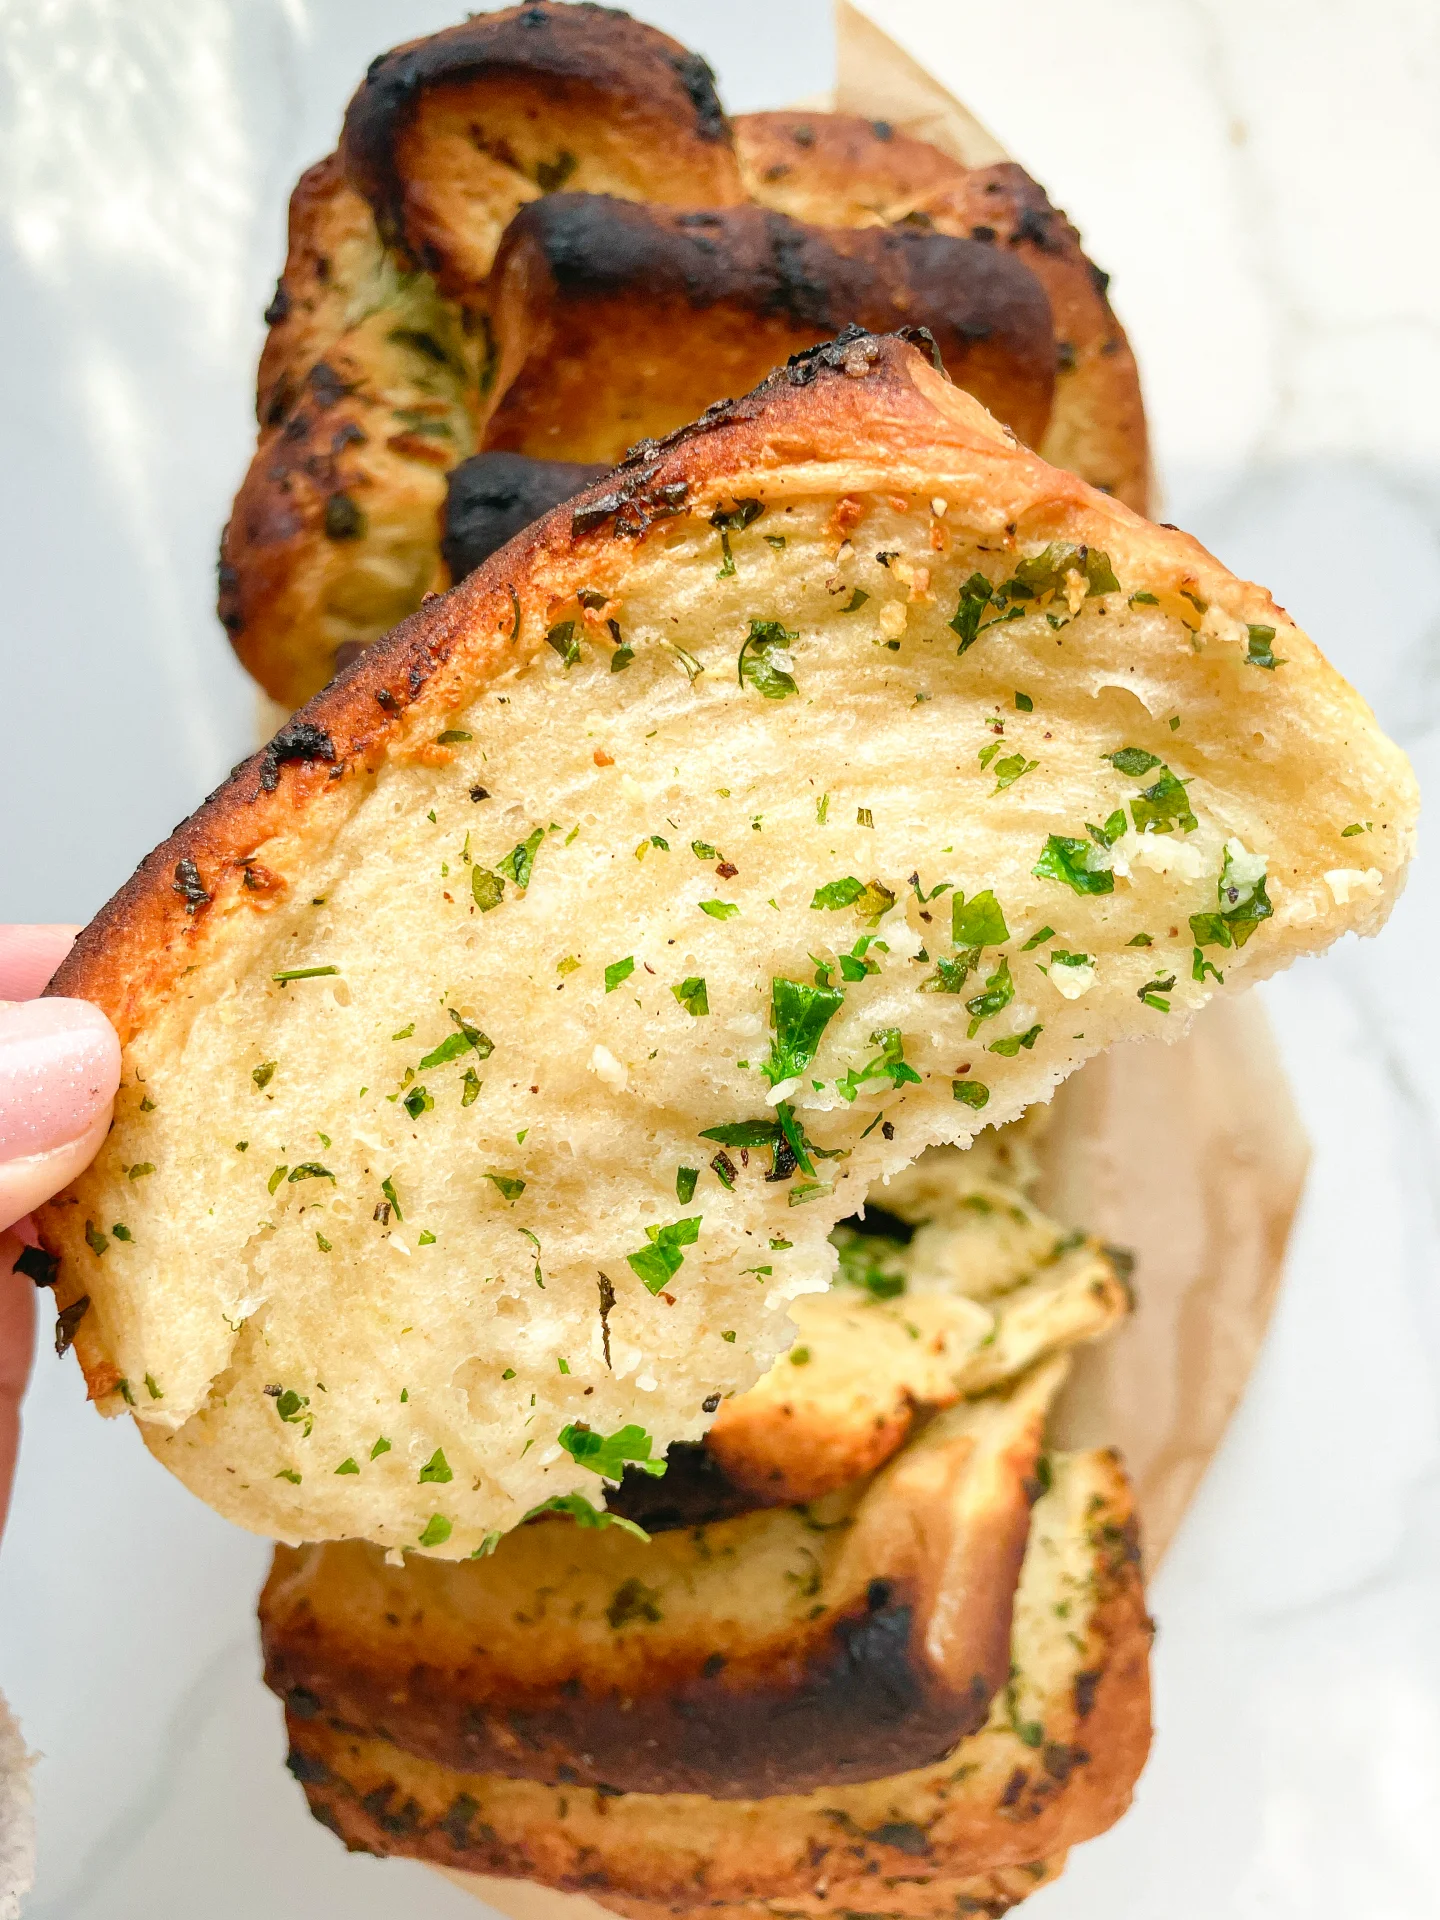
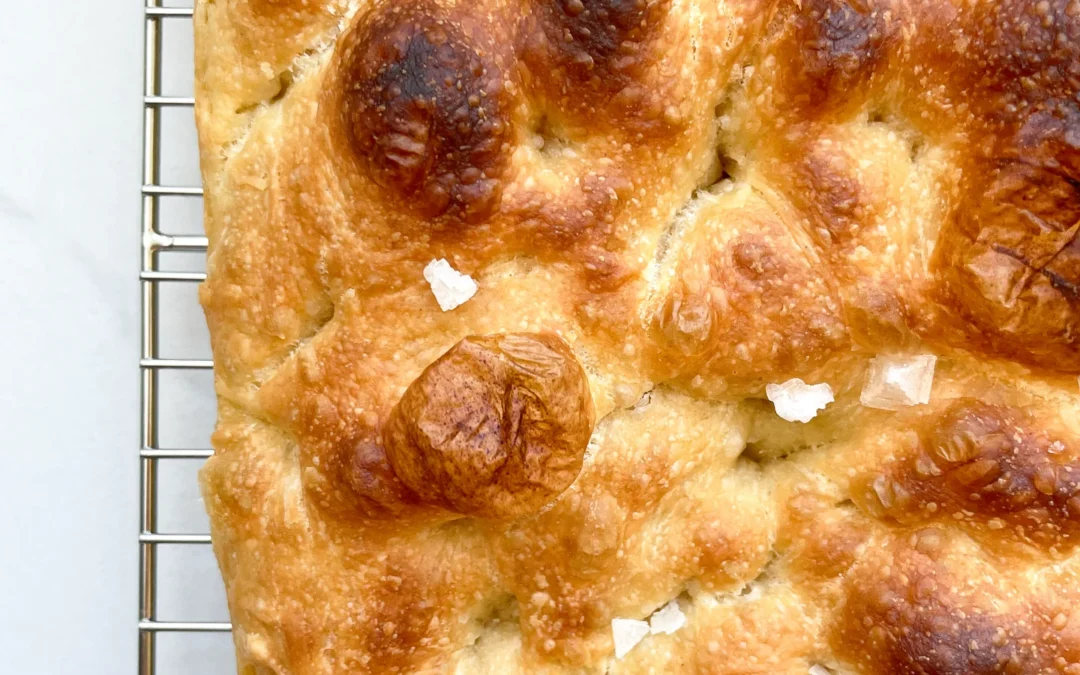
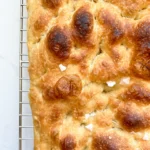
  6. Preheat the oven to 220°C / 430°F. After the dough’s last rest, uncover it and drizzle a little extra olive oil over the top. Use your fingers to gently press into the dough, forming dimples. This will encourage those signature bubbles to form during baking.
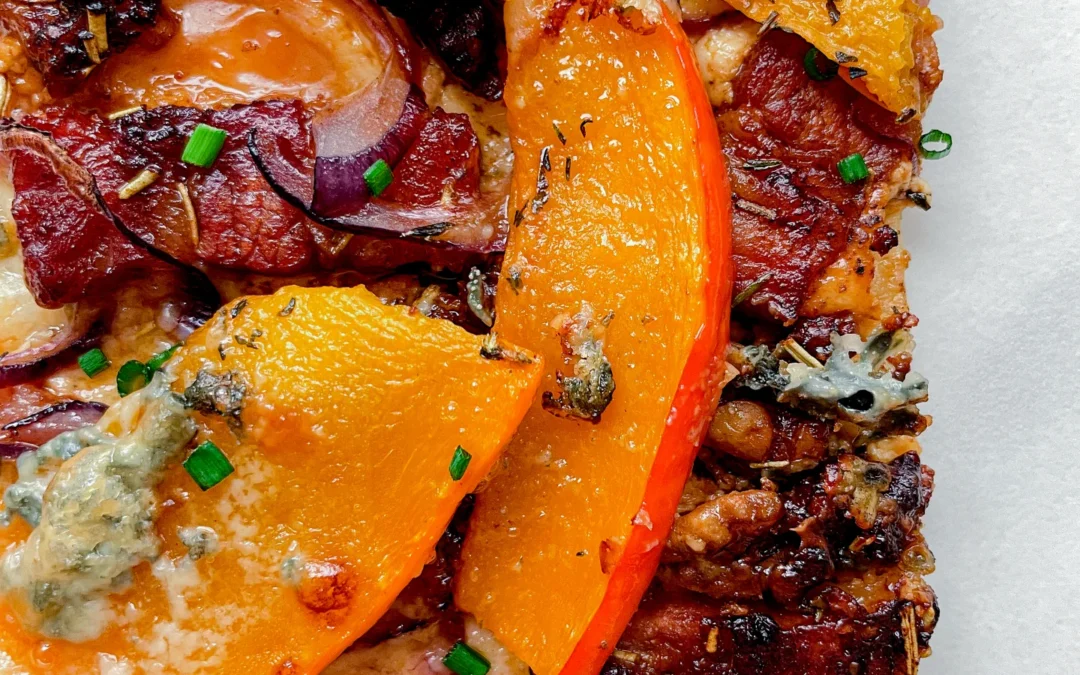
  7. Bake the focaccia for 20-25 minutes, or until it’s golden and crisp. Enjoy your freshly baked focaccia! Let the focaccia cool to room temperature. If you cut it while it’s still hot, it might tear apart. But honestly, it tastes sooo good when it’s warm. Just tear it up and dip it into your favorite dips!

  • Passive Time: 3 hrs + 20 min
  • Cook Time: 10 min

CRAVING MORE?

Follow along here & don’t forget to subscribe to my substack!

Baked Goat Cream Cheese & Hot Pepper Jelly

Baked Goat Cream Cheese & Hot Pepper Jelly

Baked Goat Cream Cheese & Hot Pepper Jelly

Baked Goat Cream Cheese & Hot Pepper Jelly

October 20, 2024 by Kimberly

Imagine a warm, melty goat cream cheese, topped with a sweet-spicy hot pepper jelly as a dip for your favorite potato chips. It’s a burst of flavor that feels like a cozy, fiery hug.

This website uses affiliate links which may earn commission for purchases made at no additional cost to you.

TOTAL TIME

40 min

SERVES

1 small baking dish

DIET

vegetarian

EVERY RECIPE DESERVES

A Little Love Letter

This baked goat cream cheese dish is the perfect combo of creamy, tangy, and sweet with a little kick. The warm, melty center and the hot pepper jelly on top brings the perfect balance of sweet and spicy. It’s one of those appetizers that makes everyone go “wow” after the first bite, but it’s surprisingly easy to make. Whether you’re hosting friends or just treating yourself to something special, this warm, cozy snack is the ultimate crowd-pleaser.

Serve this baked goat cheese dish with crispy crackers, warm slices of baguette, or even fresh veggies like cucumber or carrots for a light crunch. The sweet-spicy jelly on top works perfectly with some fresh herbs like thyme or chives. It’s an easy, yet impressive appetizer for dinner parties, game nights, or even a cozy night in. Trust me, people will be coming back for seconds – so maybe make a double batch!

If you have leftovers (which, let’s be real, you probably won’t), just pop the baked goat cheese in an airtight container in the fridge. It keeps for about 2 days and can be easily reheated in the oven.

Hi, I'm Kimberly!

Hi, I'm Kimberly.

A hopeless romantic when it comes to food. Every recipe I share is a love letter to food itself. I’m so glad you’re here. Make yourself at home and stay a while.

Love,
Kimberly

Kimberly the Zett Signature

If you want to get to know me better,
click here!


Baked Goat Cream Cheese & Hot Pepper Jelly

LET’S MAKE A PIECE OF HAPPINESS

Print
clock clock iconcutlery cutlery iconflag flag iconfolder folder iconinstagram instagram iconpinterest pinterest iconfacebook facebook iconprint print iconsquares squares iconheart heart iconheart solid heart solid icon
Baked Goat Cream Cheese & Hot Pepper Jelly

Baked Goat Cream Cheese & Hot Pepper Jelly


5 from 1 review

  • Author: Kimberly
  • Total Time: 20 min
  • Yield: 40 min 1x

Description

Recommended Equipment

  • jar with a screw-on lid
  • sharp knife
  • cutting board
  • small pot
  • tongs
  • small plate
  • food processor

Ingredients

Units Scale
HOT PEPPER JELLY
  • 1/2 red bell pepper
  • 1/4 green bell pepper
  • 1/2 jalapeno
  • 1/2 fresh chili pepper
  • 75 grams preserving sugar
  • 30 grams apple cider vinegar
CHEESE
  • 150 grams cream cheese
  • 100 grams goat cream cheese
  • 1 garlic clove
  • 1 tbsp fresh chives
  • salt to taste
OTHER INGREDIENTS
  • bread, cracker or veggie sticks for dipping

Instructions

  1. For the hot pepper jelly, first pour boiling water over the jar and lid, and let them sit for about 10 minutes. Meanwhile, chop the red pepper, green pepper, jalapeno, and chili into small pieces. Put them in a small pot. Next, add the preserving sugar and apple cider vinegar, and stir well. Bring everything to a boil over medium-high heat and let it simmer for about 10 minutes. Use tongs to carefully remove the jar and lid from the hot water and let them drain. Set aside.
  2. Now, test if the jelly is ready by placing half a teaspoon of the mixture on a plate and tilting it back and forth. If it thickens and doesn’t run like water, it’s done and can be carefully poured into the sterilized jar. Let it cool in the fridge until further use.
  3. Preheat the oven to 200°C / 400°F. For the cheese cream, peel the garlic clove and finely chop the chives. Add both to a food processor along with the cream cheese, goat cheese, and a pinch of salt. Blend until smooth. Transfer the cream to a small ovenproof dish with a lid (or cover with foil) and bake for about 15 minutes. Then remove the lid and bake for another 5 minutes until the top is slightly browned. Take it out of the oven and let it cool briefly.
  4. Finally, spread the hot pepper jelly over the cheese and serve with bread or chips.

Notes

  • If you don’t have preserving sugar on hand, use 60-65g of regular sugar with 1-1.5g of pectin and 5ml of lemon juice instead of 75g preserving sugar.
  • Cook Time: 20 min

CRAVING MORE?

Follow along here & don’t forget to subscribe to my substack!

White Chocolate Cookies with Blue Spirulina Butter Cream Frosting

White Chocolate Cookies with Blue Spirulina Butter Cream Frosting

White Chocolate Cookies with Blue Spirulina Butter Cream Frosting

White Chocolate Cookies with Blue Spirulina Butter Cream Frosting

October 22, 2024 by Kimberly

Imagine biting into soft, buttery cookies with creamy frosting that’s as vibrant as the sky. These dreamy bites combine sweet indulgence with a fun, colorful twist that feels like pure joy!

This website uses affiliate links which may earn commission for purchases made at no additional cost to you.

TOTAL TIME

1 hr + 30 min

SERVES

12 cookies

DIET

vegetarian

EVERY RECIPE DESERVES

A Little Love Letter

Ready to level up your cookie game? These soft, melt-in-your-mouth treats bring together creamy white chocolate and a frosting that’s as eye-catching as it is delicious. The vibrant blue spirulina frosting not only adds a pop of color but also gives a playful, natural twist to the classic buttercream. Perfect for making an impression at parties or just when you’re craving something special, these cookies are the kind of treat that feels like a celebration with every bite.

These cookies are best served at room temperature, giving that perfect balance between a tender bite and creamy frosting. They’re ideal for a dessert table or as a show-stopping treat for a special occasion. You can serve them alongside a cup of tea, coffee, or even milk for the ultimate comfort experience. And let’s be real, they make for a pretty impressive addition to any cookie swap or holiday gathering.

To keep these cookies fresh, store them in an airtight container in the fridge for up to a 5 days. You can also freeze them (without the frosting) for up to a month and just whip up the buttercream fresh when you’re ready to serve.

Hi, I'm Kimberly!

Hi, I'm Kimberly.

A hopeless romantic when it comes to food. Every recipe I share is a love letter to food itself. I’m so glad you’re here. Make yourself at home and stay a while.

Love,
Kimberly

Kimberly the Zett Signature

If you want to get to know me better,
click here!


White Chocolate Cookies with Blue Spirulina Butter Cream Frosting

LET’S MAKE A PIECE OF HAPPINESS

Print
clock clock iconcutlery cutlery iconflag flag iconfolder folder iconinstagram instagram iconpinterest pinterest iconfacebook facebook iconprint print iconsquares squares iconheart heart iconheart solid heart solid icon
White Chocolate Cookies with Blue Spirulina Butter Cream Frosting

White Chocolate Cookies with Blue Spirulina Butter Cream Frosting


  • Author: Kimberly
  • Total Time: 1 hr + 30 min
  • Yield: 12 1x

Description

Recommended Equipment

  • small pot (or microwave)
  • two medium-sized bowls
  • whisk
  • spatula
  • sharp knife
  • cutting board
  • cookie scoop
  • parchment paper

Ingredients

Units Scale
COOKIE DOUGH
  • 120 grams butter
  • 100 grams brown sugar
  • 100 grams white sugar
  • 2 tsp vanilla extract
  • 1 egg
  • 220 grams all-purpose flour
  • 1/2 tsp salt
  • 1/2 tsp baking soda
  • 150 grams white chocolate
BUTTERCREAM
  • 200 grams butter
  • 300 grams powdered sugar
  • 1 tbsp heavy cream
  • 1 tsp blue spirulina powder

Instructions

  1. Melt the butter in a small pot or microwave. In a medium-sized bowl, whisk together the melted butter, brown and white sugar, and vanilla extract for a few minutes. Then add the egg and mix again. Set aside.
  2. In another bowl, mix together the flour, baking soda, and salt. Set aside.
  3. Roughly chop the white chocolate and add it to the wet ingredients as well as the dry ingredients. Then mix with a spatula until there are no more visible streaks of flour.
  4. Use a medium-sized cookie scoop to form 12 evenly sized dough balls and place them on parchment paper. Chill the dough balls in the fridge for at least 1 hour.
  5. A few minutes before baking, preheat the oven to 150°C / 302°F. Place the cookies on a parchment-lined baking sheet, leaving enough space between them, and bake for 12-13 minutes or until the edges are lightly golden. Take them out of the oven and let them cool on a rack for about 10 minutes.
  6. Now, make the frosting. I recommend preparing it once the cookies have reached room temperature so the buttercream doesn’t melt when adding to the cookies. In a mixing bowl, beat the softened butter with an electric mixer until smooth and nearly white.
  7. Gradually add the powdered sugar, starting on low speed and then increasing to medium, mixing for 1 to 2 minutes until fully combined.
  8. Mix the cream with the spirulina powder and add it to the buttercream. Stir everything together until you get a vibrant blue color. Fill a piping bag with the buttercream, and once the cookies have cooled to room temperature, decorate them. Alternatively, you can spread the buttercream with a knife. Optionally, sprinkle a bit of spirulina powder on top of the frosting.
  • Passive Time: 1 hr + 20 min
  • Cook Time: 12 min

CRAVING MORE?

Follow along here & don’t forget to subscribe to my substack!

Pumpkin Oil

Pumpkin Oil

Pumpkin Oil

Pumpkin Oil

October 12, 2024 by Kimberly

This rich oil is infused with the essence of pumpkin, adding a velvety warmth and earthy sweetness to any dish. Perfect for drizzling on salads, soups, or roasted veggies!

This website uses affiliate links which may earn commission for purchases made at no additional cost to you.

TOTAL TIME

65 min

SERVES

1 cup / 250 ml

DIET

vegan

EVERY RECIPE DESERVES

A Little Love Letter

Pumpkin-infused oil is a total game-changer for your fall dishes! It’s packed with the natural flavors and warmth of pumpkin, giving a subtle, earthy sweetness to everything it touches. Whether you’re drizzling it over a fresh salad, using it as a finishing oil for soups, or adding a luxurious touch to roasted veggies, this infused oil brings a comforting, cozy vibe to any meal. Plus, it’s super easy to make at home and keeps your cooking fresh and seasonal.

You’ll love using this pumpkin-infused oil as a finishing touch! Drizzle it over a hearty bowl of soup, use it to elevate your favorite salads, or even toss roasted veggies in it for an extra layer of fall flavor. The velvety richness and beautiful color also make it perfect for adding a gourmet vibe to your meals without any fuss. Experiment with it as a dip for bread or mix it into your favorite dressings! Maybe you want to try it out with this Pumpkin Tarte Flambée with Bacon Walnuts Gorgonzola & Lamb’s Lettuce.

Store your pumpkin-infused oil in a clean, airtight bottle or jar, and keep it in a cool, dark place, like a pantry. It should last for about 1-2 months, but make sure to give it a good shake before using to keep the flavors mixed.

Hi, I'm Kimberly!

Hi, I'm Kimberly.

A hopeless romantic when it comes to food. Every recipe I share is a love letter to food itself. I’m so glad you’re here. Make yourself at home and stay a while.

Love,
Kimberly

Kimberly the Zett Signature

If you want to get to know me better,
click here!


Pumpkin Oil
Pumpkin Oil
Pumpkin Oil
Pumpkin Oil

LET’S MAKE A PIECE OF HAPPINESS

Print
clock clock iconcutlery cutlery iconflag flag iconfolder folder iconinstagram instagram iconpinterest pinterest iconfacebook facebook iconprint print iconsquares squares iconheart heart iconheart solid heart solid icon
Pumpkin Oil

Pumpkin Oil


  • Author: Kimberly
  • Total Time: 65 min
  • Yield: 1 cup / 250 ml 1x

Description

This recipe uses affiliate links which may earn commission for purchase made at no additional cost to you.

RECOMMENDED EQUIPMENT


Ingredients

Units Scale
  • 150 grams hokkaido pumpkin
  • 250 milliliters oil

Instructions

  1. Chop the pumpkin in half and scrape out all the seeds. Cut the flesh into coarse pieces and put them into the blender. Pour in the oil. Blend on the highest setting until it becomes a thick consistency and no coarse pieces of pumpkin are longer visible.
  2. Pour the mixture from the blender into a medium-sized pot and heat it over medium heat, constantly stirring, to a temperature of about 102°-103°C (215°-217°F). Then, let the oil simmer with the lid partially on for the next 30 minutes. Stir only occasionally, making sure the temperature remains steady and nothing gets burned. The cooking time is essential for all the water to evaporate. You’ll know all the water has evaporated when the oil in the pot barely bubbles anymore – so if it’s still bubbling vigorously, keep it simmering.
  3. At the end of the cooking process, prepare a bowl large enough to fit the medium-sized pot, filled with cold water and a handful of ice cubes. Also, hang a fine mesh sieve strainer over a medium-sized bowl.
  4. Now, place the pot in the ice water and stir to stop the cooking process. Once the oil is almost cold, remove the pot from the water and pour the oil into the first fine mesh sieve to catch the coarse particle.
  5. Then, pour the oil into the second fine mesh sieve, which you before equipped with a coffee filter, to catch the remaining finer particles.
  6. Allow the oil to drip through for about 30 minutes or maybe less depending on how many remaining particles are in the coffee filter. Once all the oil has passed through the coffee filter, transfer the collected amount of oil into an oil bottle. Store in the refrigerator for up to 1-2 weeks.
  • Prep Time: 5 min
  • Passive Time: 30 min
  • Cook Time: 30 min

CRAVING MORE?

Follow along here & don’t forget to subscribe to my substack!

Pumpkin Tarte Flambée with Bacon Walnuts Gorgonzola & Lamb’s Lettuce

Pumpkin Tarte Flambée with Bacon Walnuts Gorgonzola & Lamb’s Lettuce

Pumpkin Tarte Flambée with Bacon Walnuts Gorgonzola & Lamb's Lettuce

Pumpkin Tarte Flambée with Bacon Walnuts Gorgonzola & Lamb’s Lettuce

October 12, 2024 by Kimberly

This cozy fall gem combines crispy bacon, rich Gorgonzola, crunchy walnuts, and and sweet pumpkin. The flavors are warm and savory, perfect for curling up on a chilly evening.

This website uses affiliate links which may earn commission for purchases made at no additional cost to you.

TOTAL TIME

45 min

SERVES

2 trays

DIET

omnivore

EVERY RECIPE DESERVES

A Little Love Letter

Nothing says cozy fall like this delicious pumpkin tarte flambée. It’s packed with crispy bacon, creamy Gorgonzola, sweet pumpkin and the crunch of walnuts. This simple yet sophisticated dish brings the perfect blend of salty, sweet, and nutty flavors that will make you feel like you’re indulging in something extra special. Perfect for a weekend night or when you want something quick and comforting without too much effort. Pair it with a fresh salad, and you’ve got the ultimate cozy meal!

Serve this flatbread hot and fresh, right from the oven! Slice it up into easy-to-grab pieces and drizzle with a bit of pumpkin oil for that extra touch of warmth. It’s ideal as a cozy dinner with a side of lamb’s lettuce tossed in a pumpkin oil dressing, or you can cut it into smaller squares for a party-ready appetizer. Pair it with a glass of white wine or a cold cider, and you’ve got the perfect fall feast. Pro tip: If you’re feeling fancy, swap the olive oil for some pumpkin infused oil.

If you have any leftovers, store the flatbread in an airtight container in the fridge for up to two days. To reheat, simply pop it in the oven or air fryer until it’s crispy again. Avoid the microwave as it can make the crust soggy.

Hi, I'm Kimberly!

Hi, I'm Kimberly.

A hopeless romantic when it comes to food. Every recipe I share is a love letter to food itself. I’m so glad you’re here. Make yourself at home and stay a while.

Love,
Kimberly

Kimberly the Zett Signature

If you want to get to know me better,
click here!


Pumpkin Tarte Flambée with Bacon Walnuts Gorgonzola & Lamb's Lettuce

LET’S MAKE A PIECE OF HAPPINESS

Print
clock clock iconcutlery cutlery iconflag flag iconfolder folder iconinstagram instagram iconpinterest pinterest iconfacebook facebook iconprint print iconsquares squares iconheart heart iconheart solid heart solid icon
Pumpkin Tarte Flambée with Bacon Walnuts Gorgonzola & Lamb's Lettuce

Pumpkin Tarte Flambée with Bacon Walnuts Gorgonzola & Lamb’s Lettuce


  • Author: Kimberly
  • Total Time: 45 minutes
  • Yield: 6 1x

Description

This recipe uses affiliate links which may earn commission for purchase made at no additional cost to you.

Recommended Equipment


Ingredients

Units Scale
DOUGH
  • 250 grams all-purpose flour
  • 125 milliliters cold water
  • 1 tbsp olive oil
  • 1 tsp salt
PUMPKIN TOPPING
  • 250 grams hokkaido pumpkin
  • 3 tbsp olive oil
  • 1/2 tsp dried thyme
BACON WALNUT TOPPING
  • 300 grams bacon
  • 30 grams walnuts
  • 2 tsp honey
  • 1/4 tsp dried rosemary
  • 1/4 tsp cayenne pepper
  • 70 milliliters dry white wine
  • salt & pepper to taste
OTHER TOPPINGS
  • 1 big red onion
  • 150 grams gorgonzola cheese
  • 200 grams creme fraiche
  • black pepper
SALAD
  • 200 grams lamb's lettuce
  • 2 tbsp fresh chives
  • 4 tbsp pumpkin seeds
DRESSING
  • 4 tbsp olive oil
  • 2 tbsp apple cider vinegar
  • 2 tsp honey
  • 2 tsp Dijon mustard
  • salt & pepper to taste

Instructions

  1. For the dough, add water, salt, olive oil, and flour into a bowl. Stir with a spoon until just combined. Transfer the dough to a clean surface and knead by hand for about 3 minutes until smooth. Wrap the dough in plastic wrap and let it rest at room temperature for about 30 minutes.
  2. Slice the pumpkin into thin pieces and place them in a shallow dish. Rub with oil and thyme, then set aside to marinate.
  3. Cut the bacon into chunks (or use pre-cut bacon) and place it in a cold pan. Fry over medium heat until golden brown without adding extra fat. Once you’ve got a nice crispy base, add walnuts, rosemary, and cayenne pepper. Deglaze with white wine and let it simmer until the wine has evaporated. Add honey at the end, season with salt and pepper, and stir well. Set aside.
  4. For the other toppings, cut the red onion into thin half-rings and set them aside. Have the Gorgonzola, crème fraîche, and pepper ready. Preheat the oven to 250°C (482°F) on the grill setting.
  5. Divide the dough into two equal pieces. On a lightly floured surface, roll them out as thin as possible. Place each dough on a baking sheet lined with parchment paper and spread an even layer of crème fraîche over the top. Sprinkle freshly ground black pepper. Then, layer the other toppings: first the bacon-walnut mixture, followed by the pumpkin slices and onion rings, and finally small dollops of Gorgonzola. Bake in the oven for about 8-11 minutes or until the cheese has melted and the crust is golden and crispy.
  6. While the dough is baking, prepare the salad and dressing. Wash the lamb’s lettuce thoroughly and place it in a large bowl. Sprinkle pumpkin seeds on top and slice the chives into rings. Set some of the chives aside to garnish the tarte flambée.
  7. For the dressing, mix oil, apple cider vinegar, honey, Dijon mustard, salt, and pepper well. Add the dressing to the salad right before serving to avoid sogginess.
  8. Remove the tarte flambée from the oven, slice it up, and serve with the salad.
  • Cook Time: 45 min

CRAVING MORE?

Follow along here & don’t forget to subscribe to my substack!