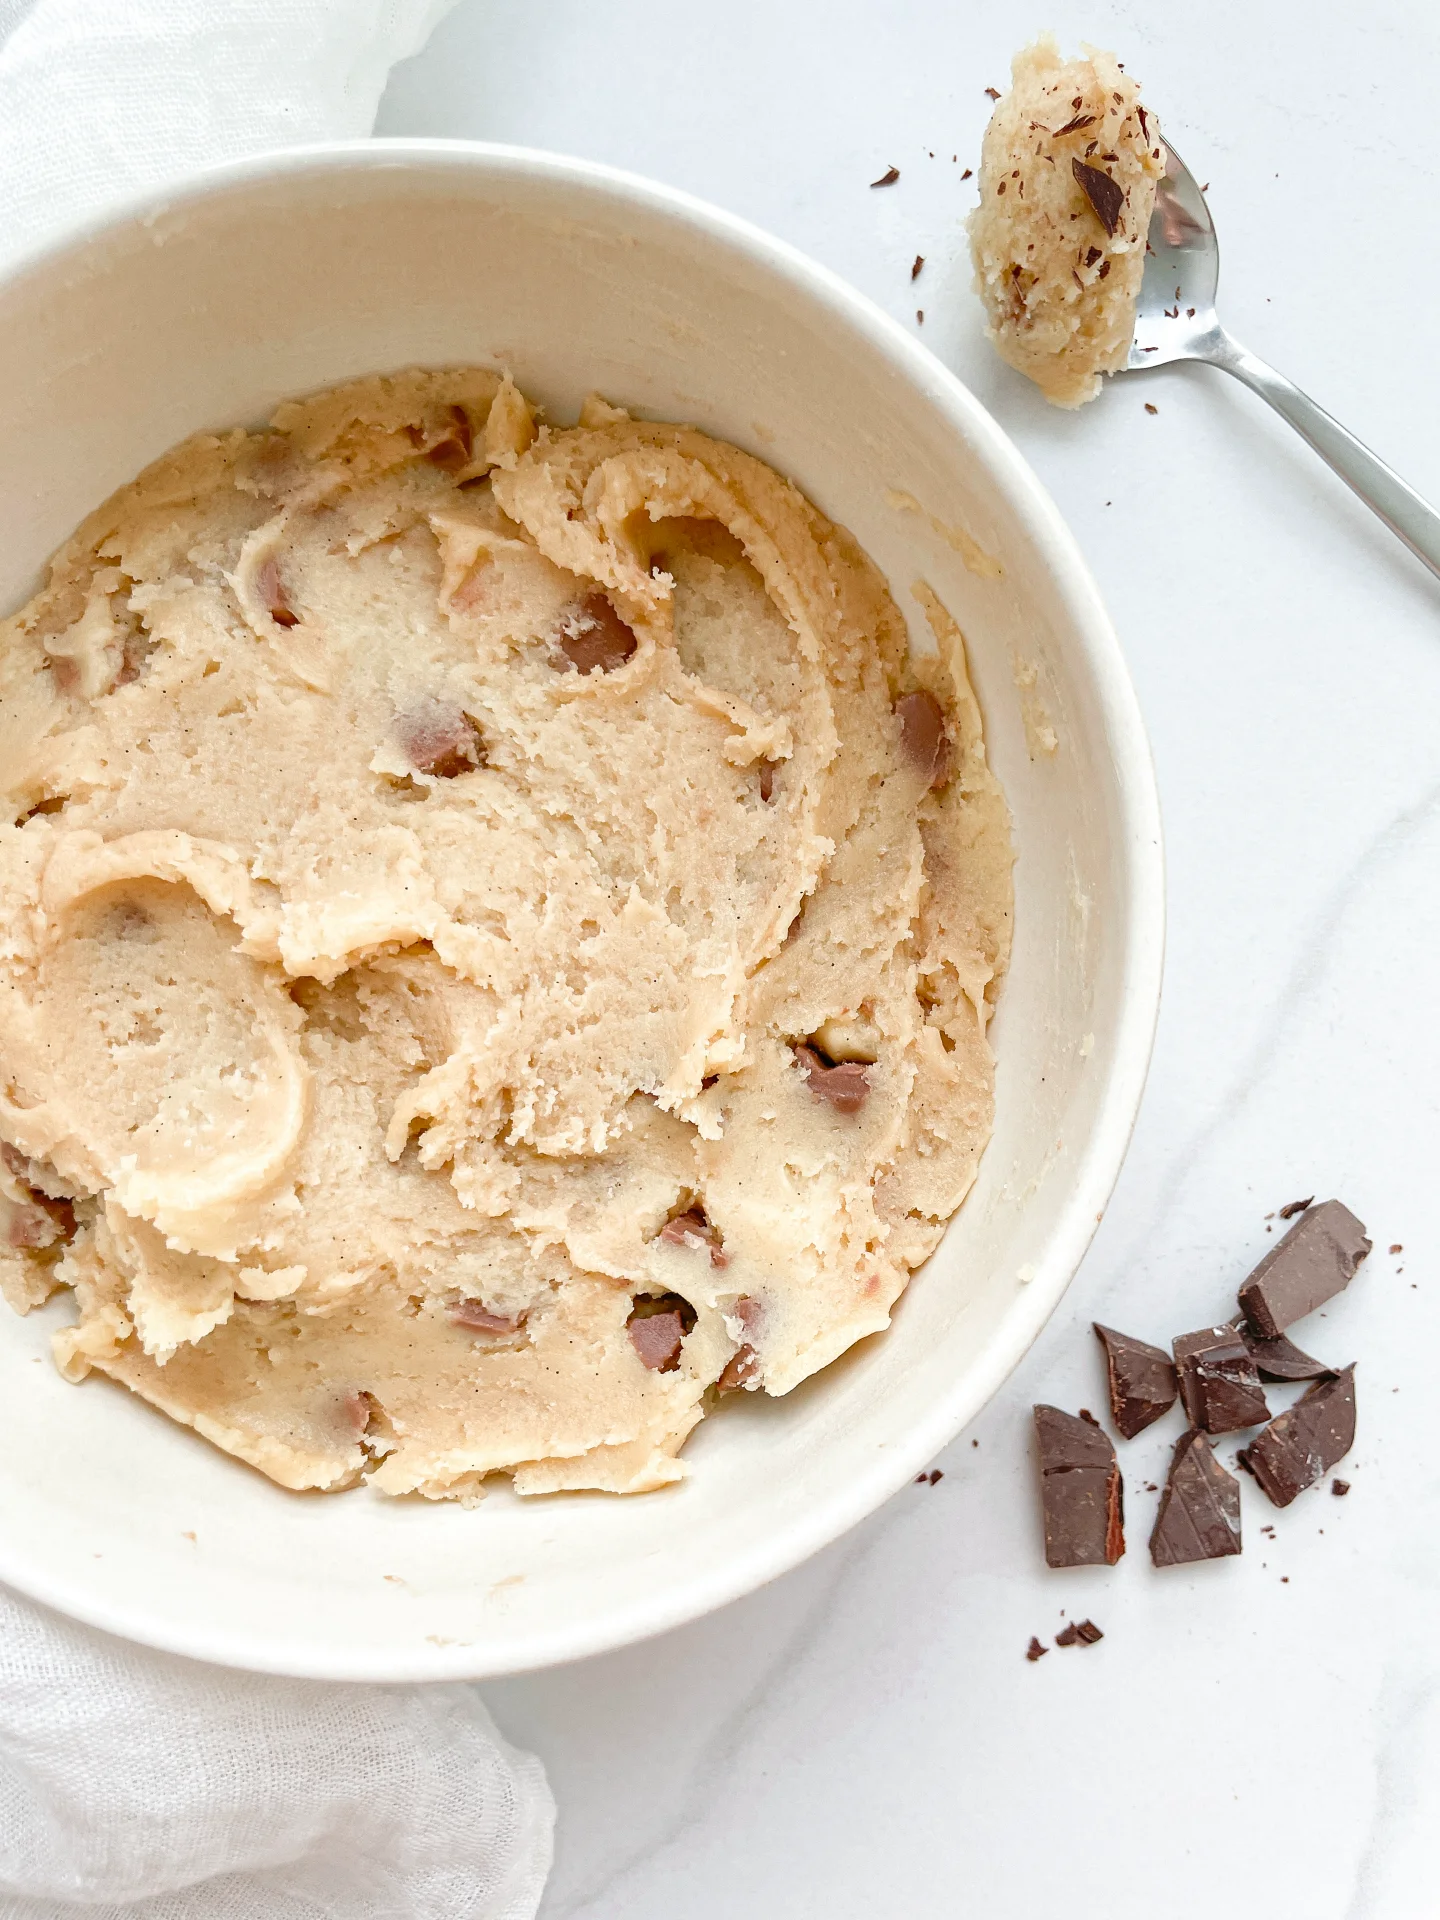
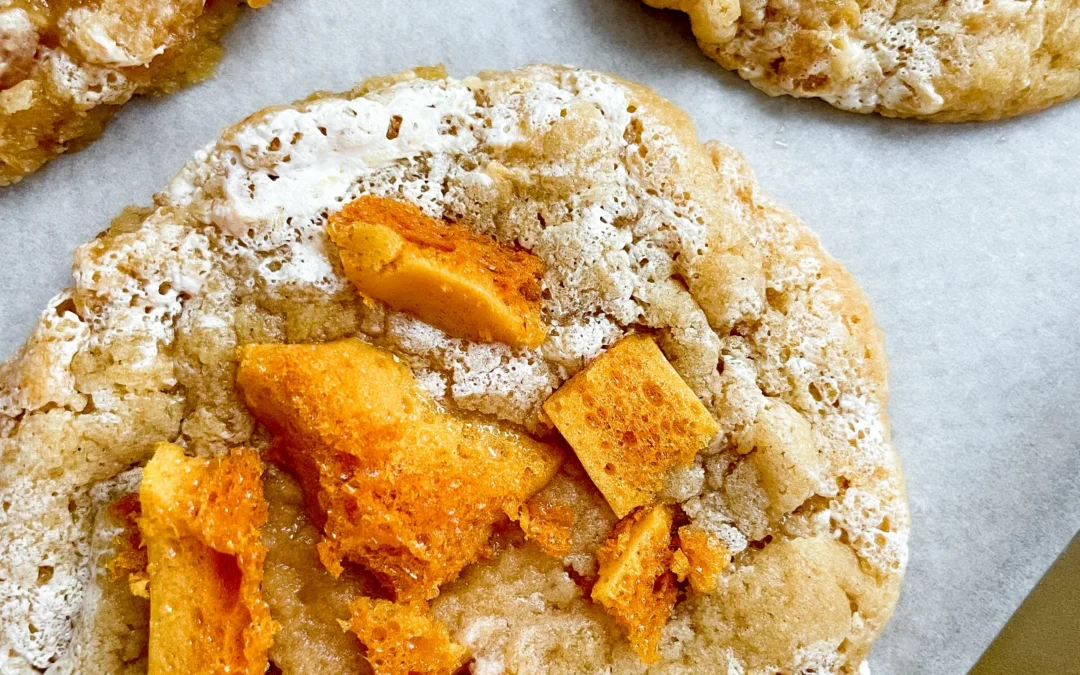
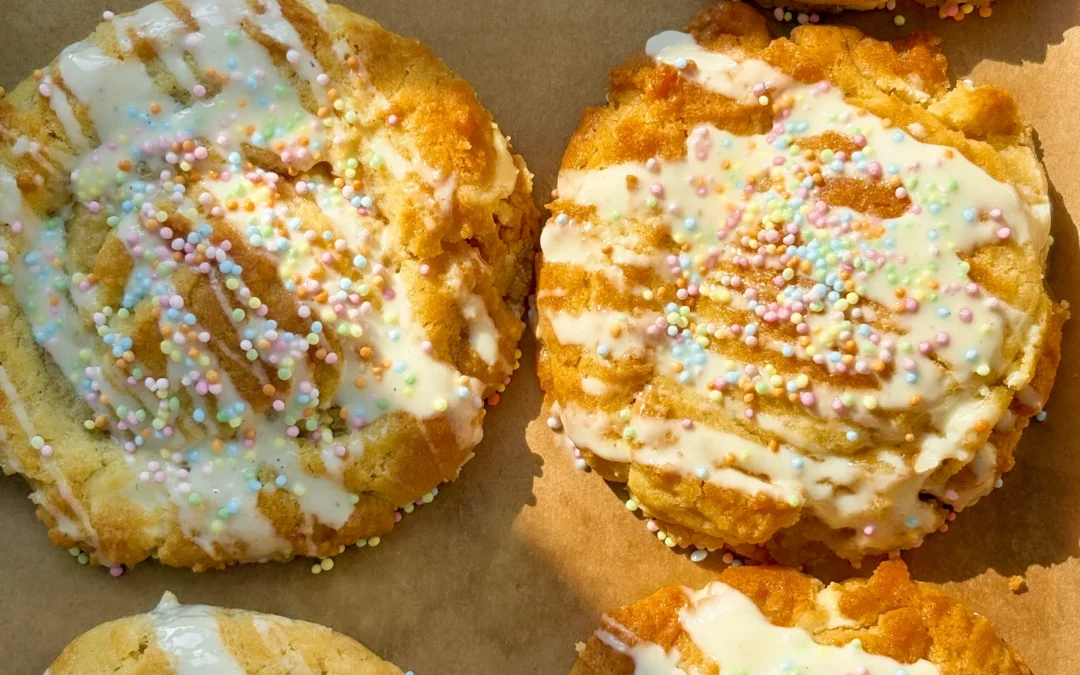
Virgin Passionfruit Margarita

Virgin Passionfruit Margarita

Virgin Passionfruit Margarita

Virgin Passionfruit Margarita

March 23, 2025 by Kimberly

Sip into a tropical escape with this zesty, alcohol-free passionfruit concoction. It’s like a mini-vacation in a glass. Tangy, refreshing, and effortlessly cool. Perfect for those sunny vibes without the buzz.

This website uses affiliate links which may earn commission for purchases made at no additional cost to you.

TOTAL TIME

10 min

SERVES

2 glasses

DIET

vegan

EVERY RECIPE DESERVES

A Little Love Letter

Craving a tropical getaway without leaving your backyard? This vibrant, alcohol-free drink blends the exotic taste of passionfruit with zesty lime and a hint of sweetness, delivering a refreshing experience that’s so indulgent.

The finishing touch? A juicy half of passionfruit floating on top—because why not go all in? A little spoon is optional but highly recommended, because scooping out those passionfruit seeds mid-sip just hits different.

While this drink is best enjoyed fresh, you can prepare the passionfruit and lime mixture in advance. Store it in an airtight container in the refrigerator for up to two days. When ready to serve, simply pour over ice, top with sparkling water, and garnish as desired.

Hi, I'm Kimberly!

Hi, I'm Kimberly.

A hopeless romantic when it comes to food. Every recipe I share is a love letter to food itself. I’m so glad you’re here. Make yourself at home and stay a while.

Love,
Kimberly

Kimberly the Zett Signature

If you want to get to know me better,
click here!


Virgin Passionfruit Margarita

LET’S MAKE A PIECE OF HAPPINESS

Print
clock clock iconcutlery cutlery iconflag flag iconfolder folder iconinstagram instagram iconpinterest pinterest iconfacebook facebook iconprint print iconsquares squares iconheart heart iconheart solid heart solid icon
Virgin Passionfruit Margarita

Virgin Passionfruit Margarita


5 Stars 4 Stars 3 Stars 2 Stars 1 Star

No reviews

  • Author: Kimberly
  • Total Time: 10 min
  • Yield: 2

Description

RECOMMENDED EQUIPMENT

  • small plate
  • cocktail glasses
  • cocktail shaker

Ingredients

RIM SPICES
  • chili flakes
  • lime zest
  • salt
  • lime juice
DRINK
  • 4 tbsp passionfruit purée
  • 2 tsp agave syrup
  • juice of 2 limes
  • crushed ice

Instructions

  1. Prepare the rim spices on a flat plate by zesting a fresh lime and mixing it with dried chili and a pinch of salt.
  2. Prep the glasses by rubbing a lime wedge around the rim, then dipping the glass into the lime-chili-salt mixture to create a flavorful edge. Set the glasses aside.
  3. In a cocktail shaker, combine freshly squeezed lime juice, passionfruit purée, and agave syrup. Add a handful of ice cubes and shake well until chilled.
  4. Take a prepared glass and add a few ice cubes. Strain the shaken mixture into the glass, then top it off with sparkling water.
  5. Cut a passionfruit in half and place one half into each drink for that final tropical touch.
  6. Note: If you’d like to enjoy this drink with alcohol, simply add 1 shot of tequila while shaking. Just like that, your virgin margarita transforms into a classic passionfruit margarita!
  • Cook Time: 10 min

CRAVING MORE?

Follow along here & don’t forget to subscribe to my substack!

Cajun Shrimp Tacos with Passionfruit Lime Slaw

Cajun Shrimp Tacos with Passionfruit Lime Slaw

Cajun Shrimp Tacos with Passionfruit Lime Slaw

Cajun Shrimp Tacos with Passionfruit Lime Slaw

March 15, 2025 by Kimberly

A little smoky, a little sweet, and a whole lot of flavor. Spiced shrimp, crispy slaw, and a punchy citrus glaze wrapped in warm tortillas. Every bite is giving peak summer energy.

This website uses affiliate links which may earn commission for purchases made at no additional cost to you.

TOTAL TIME

25 min

SERVES

4 tacos

DIET

omnivore

EVERY RECIPE DESERVES

A Little Love Letter

If you’re looking for tacos that actually hit to spot, this is the one. Smoky, spicy shrimp caramelized in a honey mustard butter glaze, crisp cabbage slaw tossed with fresh passionfruit and lime, all tucked into warm tortillas. It’s the perfect balance of heat, sweetness, and freshness. This is not your basic taco night, this is tropical and vibrant.

These tacos are best served fresh, straight off the pan, while the shrimp are still warm and juicy. A chilled margarita or a sparkling lime soda? Absolute game-changer. And if you’re feeling extra, a drizzle of extra honey mustard glaze over the top seals the deal. Tacos this good deserve to be the main event.

Shrimp are best eaten fresh, but if you have leftovers, store them separately in an airtight container in the fridge for up to one day. Reheat gently in a pan to keep them from drying out. The slaw can last a day, but keep the dressing separate until serving.

Hi, I'm Kimberly!

Hi, I'm Kimberly.

A hopeless romantic when it comes to food. Every recipe I share is a love letter to food itself. I’m so glad you’re here. Make yourself at home and stay a while.

Love,
Kimberly

Kimberly the Zett Signature

If you want to get to know me better,
click here!


Cajun Shrimp Tacos with Passionfruit Lime Slaw

LET’S MAKE A PIECE OF HAPPINESS

Print
.tasty-recipe-responsive-iframe-container-efc144ce { position: relative; overflow: hidden; padding-top: 56.3%; } .tasty-recipe-responsive-iframe-container-efc144ce iframe { position: absolute; top: 0; left: 0; width: 100%; height: 100%; border: 0; } clock clock iconcutlery cutlery iconflag flag iconfolder folder iconinstagram instagram iconpinterest pinterest iconfacebook facebook iconprint print iconsquares squares iconheart heart iconheart solid heart solid icon
Cajun Shrimp Tacos with Passionfruit Lime Slaw

Cajun Shrimp Tacos with Passionfruit Lime Slaw


  • Author: Kimberly
  • Total Time: 25 min
  • Yield: 4 tacos / 2 portions

Description

RECOMMENDED EQUIPMENT

  • oven
  • aluminum foil
  • large pan
  • sharp knife
  • cutting board
  • small bowl

Ingredients

Units Scale
SHRIMPS SAUCE
  • 2 tbsp honey
  • 1 tsp Dijon mustard
  • 2 tbsp avocado oil
  • 2 garlic cloves
  • 1 fresh chili
  • 1/4 tsp cayenne pepper
  • 1 tbsp butter
PASSIONFRUIT LIME SLAW
  • 200 grams white cabbage
  • 5 grams fresh cilantro
  • 1 red onion
  • 100 grams yogurt
  • juice of 1 lime
  • 1 passionfruit
  • salt & pepper to taste
OTHER INGREDIENTS
  • 4 corn tortillas
  • fresh cilantro, for topping
  • scallions, for topping

Instructions

  • Preheat the oven to 200°C / 392°F. Stack the tortillas, wrap them tightly in aluminum foil, and place them in the oven to keep them warm and soft.
  • Prepare the Cajun seasoning. Toss the shrimp with the seasoning and set aside.
  • Make the Passionfruit Lime Slaw. Thinly slice the cabbage and red onion. Pick the cilantro leaves off the stems and add everything to a large bowl. Mix in yogurt, lime juice, salt, and pepper, and toss well. Cut open a passionfruit, scoop out the pulp and juice, and mix it into the slaw.
  • Prep the toppings. Thinly slice the green part of the scallions and pick some extra cilantro leaves. Set aside for later.
  • Make the glaze. In a small bowl, mix honey, Dijon mustard, avocado oil, pressed garlic, finely chopped fresh chili, cayenne pepper, and melted butter. Set aside.
  • Cook the shrimp. Heat a large pan over high heat. Once hot, add a little oil and sear the shrimp quickly. Pour in the prepared glaze and let it simmer over medium heat until it thickens into a creamy consistency.
  • Assemble the tacos. Remove the tortillas from the oven and place two on each plate. Layer with the slaw, then spoon the glazed shrimp (with sauce) on top. Finish with sliced scallions and fresh cilantro. Serve immediately.
  • Cook Time: 25 min

CRAVING MORE?

Follow along here & don’t forget to subscribe to my substack!

Everything But The Bagel Seasoning

Everything But The Bagel Seasoning

Everything But The Bagel Seasoning

Everything But The Bagel Seasoning

February 10, 2024 by Kimberly

This crunchy, garlicky, toasty magic takes anything from basic to brilliant. Sprinkle it on eggs, avo toast, or even buttered bread, and suddenly, breakfast feels like a weekend brunch moment.

This website uses affiliate links which may earn commission for purchases made at no additional cost to you.

TOTAL TIME

5 min

SERVES

11 tbsp

DIET

vegan

EVERY RECIPE DESERVES

A Little Love Letter

If you’ve ever wished your food had that little extra something, this crunchy, garlicky, nutty magic – this is the answer. Inspired by the iconic everything bagel topping, this homemade blend is an absolute game-changer. Sprinkle it on avo toast, eggs, cottage cheese, or even a basic buttered bread slice – it instantly upgrades anything. And the best part? You can whip it up in minutes with pantry staples.

This seasoning is the ultimate finishing touch for pretty much everything. Stir it into cream cheese for an instant dip, sprinkle it over popcorn for a salty-savory snack, or coat roasted veggies in olive oil and this mix before baking for an unreal crunch. It’s also a next-level game-changer for grilled cheese, scrambled eggs, and even fried rice.

Keep your seasoning blend fresh by storing it in an airtight jar in a cool, dry spot. It stays crunchy and flavorful for up to six months (if you don’t use it all before then). A quick shake before each use keeps the flavors evenly distributed.

Hi, I'm Kimberly!

Hi, I'm Kimberly.

A hopeless romantic when it comes to food. Every recipe I share is a love letter to food itself. I’m so glad you’re here. Make yourself at home and stay a while.

Love,
Kimberly

Kimberly the Zett Signature

If you want to get to know me better,
click here!


Everything But The Bagel Seasoning

LET’S MAKE A PIECE OF HAPPINESS

Print
clock clock iconcutlery cutlery iconflag flag iconfolder folder iconinstagram instagram iconpinterest pinterest iconfacebook facebook iconprint print iconsquares squares iconheart heart iconheart solid heart solid icon
Everything But The Bagel Seasoning

Everything But The Bagel Seasoning


  • Author: Kimberly
  • Total Time: 5 min
  • Yield: 110g / 11 tbsp

Description

Recommended Equipment

  • small bowl
  • airtight container

Ingredients

  • 6 tsp white sesame seeds
  • 5 tsp dried minced onion
  • 4 tsp black sesame seeds
  • 4 tsp dried minced garlic
  • 4 tsp sea salt
  • 3 tsp poppy seeds

Instructions

Add all spices to a bowl, mix well, and transfer to an airtight container.

  • Prep Time: 5 min

CRAVING MORE?

Follow along here & don’t forget to subscribe to my substack!

Honeycomb Apricot Marshmallow Fluff Cookies

Honeycomb Apricot Marshmallow Fluff Cookies

Honeycomb Apricot Marshmallow Fluff Cookies

Honeycomb Apricot Marshmallow Fluff Cookies

December 19, 2024 by Kimberly

Soft, gooey cookie layers meet tangy apricot sauce, marshmallowy swirls, and honeycomb crunch. Every bite is an explosion of textures and flavors – sweet, sticky, and irresistibly cozy vibes in cookie form.

This website uses affiliate links which may earn commission for purchases made at no additional cost to you.

TOTAL TIME

2 hrs + 25 min

SERVES

12 cookies

DIET

vegetarian

EVERY RECIPE DESERVES

A Little Love Letter

Imagine sinking your teeth into layers of soft cookie dough, creamy marshmallow fluff, tangy apricot sauce, and crunchy honeycomb pieces. It’s not just a dessert – it’s a flavor-packed adventure! These cookies are a mash-up of textures and tastes that scream fun and indulgence. Whether it’s for a cozy night in or to impress your friends, they’re bound to disappear fast.

These cookies are best enjoyed slightly chilled for that perfect contrast of gooey and crunchy. Pair them with a cup of tea or coffee for a casual treat, or bring them out as the star of a dessert platter. Hosting a party? Stack them up on a pretty plate and watch them vanish in minutes.

Keep leftovers in an airtight container for up to 3 days. For extra freshness, separate layers with parchment paper to avoid sticking.

Hi, I'm Kimberly!

Hi, I'm Kimberly.

A hopeless romantic when it comes to food. Every recipe I share is a love letter to food itself. I’m so glad you’re here. Make yourself at home and stay a while.

Love,
Kimberly

Kimberly the Zett Signature

If you want to get to know me better,
click here!


Honeycomb Apricot Marshmallow Fluff Cookies

LET’S MAKE A PIECE OF HAPPINESS

Print
.tasty-recipe-responsive-iframe-container-29eecc58 { position: relative; overflow: hidden; padding-top: 56.3%; } .tasty-recipe-responsive-iframe-container-29eecc58 iframe { position: absolute; top: 0; left: 0; width: 100%; height: 100%; border: 0; } clock clock iconcutlery cutlery iconflag flag iconfolder folder iconinstagram instagram iconpinterest pinterest iconfacebook facebook iconprint print iconsquares squares iconheart heart iconheart solid heart solid icon
Honeycomb Apricot Marshmallow Fluff Cookies

Honeycomb Apricot Marshmallow Fluff Cookies


5 from 1 review

  • Author: Kimberly
  • Total Time: 85 min
  • Yield: 12 cookies

Description

Recommended Equipment

  • 2 small pots
  • 1 medium pot
  • baking dish (approx. 20×20 cm)
  • parchment paper
  • spatula
  • whisk
  • thermometer
  • electric mixer
  • sharp knife
  • cutting board
  • mixing bowl
  • cookie scoop

Ingredients

Units Scale
HONEYCOMB
  • 100 grams white sugar
  • 20 grams honey
  • 20 milliliter water
  • 1 tsp baking soda
MARSHMALLOW FLUFF
  • 60 grams white sugar
  • 60 grams water
  • 80 grams corn syrup
  • 1 egg white
APRICOT SAUCE
  • 100 grams dried apricots
  • 80 milliliter apricot juice
  • 10 grams powdered sugar
  • 1/2 tsp vanilla extract
  • 1 tsp lemon juice
  • 2 tsp cornstarch
COOKIE DOUGH
  • 120 grams butter, room temperature
  • 100 grams white sugar
  • 50 grams brown sugar
  • 1 egg
  • 1 tsp vanilla extract
  • 220 grams all-purpose flour
  • 1/2 tsp baking soda
  • 1/2 tsp salt

Instructions

  1. Honeycomb: First, line a heatproof baking dish with parchment paper. Combine sugar, honey, and water in a medium pot. Heat over medium until it boils, monitoring the temperature with a thermometer until it reaches 149°C (300°F). Remove from heat and quickly stir in the baking soda just until combined. Be careful—it will foam up a lot! Immediately pour the mixture into the prepared dish without stirring or spreading it, as this would break the air bubbles. Scrape any remaining mixture from the pot and add it on top. Let it cool completely (about 1–2 hours).
  2. Marshmallow Fluff: Heat water, sugar, and corn syrup in a small pot to 115°C (240°F). Meanwhile, beat egg whites in a clean bowl until stiff peaks form. Slowly pour the hot sugar syrup in a thin, steady stream into the egg whites, mixing continuously with an electric hand mixer. After adding all the syrup, beat on high for another 5 minutes until light and fluffy. Set aside.
  3. Apricot Sauce: Chop the dried apricots and combine them with apricot juice, powdered sugar, vanilla extract, and lemon juice in a small pot. Simmer for about 10 minutes until softened. Dissolve the cornstarch in a bit of cold water, stir it in, and bring everything to a boil until thickened. Set aside to cool.
  4. Cookie Dough: Cream butter with the white and brown sugar. Add the egg and vanilla extract, mixing well. Stir in the flour, baking soda, and salt until just combined—don’t overmix!
  5. In a deep dish, layer the components: a part of cookie dough, a tablespoon of marshmallow fluff, and a tablespoon of apricot sauce. Repeat until all ingredients are used. Tip: Store leftover fluff in a jar in the fridge for up to two weeks.
  6. Use a cookie scoop (or tablespoon) to form 12 evenly sized balls from the layered dough. Place them on the prepared baking tray. Chill the cookies in the fridge for 1 hour – don’t skip this step! Chilling ensures the cookies hold their shape and don’t spread too much when baked.
  7. Preheat the oven to 150°C (300°F) and bake the cookies for 13–15 minutes. While baking, carefully cut the honeycomb into small pieces. Remove the warm cookies from the oven, adjust their shape if necessary, and gently press the honeycomb pieces onto the tops. Let the cookies rest for about 10 minutes before enjoying.
  • Passive Time: 85 min
  • Cook Time: 60 min

CRAVING MORE?

Follow along here & don’t forget to subscribe to my substack!

Pecan Caramel Pie Cobbler

Pecan Caramel Pie Cobbler

Pecan Caramel Pie Cobbler

Pecan Caramel Pie Cobbler

November 27, 2024 by Kimberly

This warm, gooey cobbler is the ultimate comfort dessert – melty caramel candies, crunchy pecans, and buttery dough baked into golden perfection. A cozy, sweet treat for every dessert lover out there!

This website uses affiliate links which may earn commission for purchases made at no additional cost to you.

TOTAL TIME

1 hr + 15 min

SERVES

8 portions

DIET

vegetarian

EVERY RECIPE DESERVES

A Little Love Letter

There’s something magical about desserts that feel like a warm hug, and this cobbler delivers just that. Melty caramel candies and crunchy pecans create a gooey filling, while the buttery dough bakes into a golden, rustic crust. It’s the perfect dessert for chilly evenings or holiday gatherings, combining the cozy flavors of caramel and pecans into one irresistible dish. Trust me, once you try this cobbler, it’ll quickly become a go-to comfort dessert for every season.

This cobbler is best served warm, straight out of the oven, with a scoop of vanilla ice cream or a dollop of whipped cream on top. The cold creaminess of the topping perfectly balances the gooey caramel and crunchy pecans. Sprinkle a few extra pecans over the top for added texture. It’s perfect for family gatherings, dinner parties, or just a cozy night in.

Store any leftovers in an airtight container at room temperature for up to one day, or in the fridge for up to four days. Reheat individual portions in the microwave for 20-30 seconds to bring back the gooey, warm goodness.

Hi, I'm Kimberly!

Hi, I'm Kimberly.

A hopeless romantic when it comes to food. Every recipe I share is a love letter to food itself. I’m so glad you’re here. Make yourself at home and stay a while.

Love,
Kimberly

Kimberly the Zett Signature

If you want to get to know me better,
click here!


Pecan Caramel Pie Cobbler

LET’S MAKE A PIECE OF HAPPINESS

Print
.tasty-recipe-responsive-iframe-container-e5b63db7 { position: relative; overflow: hidden; padding-top: 56.3%; } .tasty-recipe-responsive-iframe-container-e5b63db7 iframe { position: absolute; top: 0; left: 0; width: 100%; height: 100%; border: 0; } clock clock iconcutlery cutlery iconflag flag iconfolder folder iconinstagram instagram iconpinterest pinterest iconfacebook facebook iconprint print iconsquares squares iconheart heart iconheart solid heart solid icon
Pecan Caramel Pie Cobbler

Pecan Caramel Pie Cobbler


4.3 from 3 reviews

  • Author: Kimberly
  • Total Time: 75 min
  • Yield: 8

Description

RECOMMENDED EQUIPMENT

  • baking dish (approx. 20×30 cm or similar)
  • mixing bowl
  • whisk or hand mixer
  • kettle (for boiling water)


Ingredients

Units Scale
  • 120 grams butter
  • 125 grams all-purpose flour
  • 125 grams white sugar
  • 3 tsp baking powder
  • 1/4 tsp salt
  • 170 milliliter full-fat cow milk
  • 1 tsp vanilla extract
  • 100 grams pecans
  • 50 grams brown sugar
  • 125 grams caramel candies
  • 250 milliliter boiling water
  • vanilla ice cream

Instructions

  1. Preheat the oven to 175°C / 350°F. Grab a baking dish, drop in the butter, and pop it into the oven for a few minutes and let it melt.
  2. In a bowl, combine flour, sugar, baking powder, and a pinch of salt. Stir in milk and a splash of vanilla extract until it’s all smooth, creamy, and totally lump-free.
  3. Carefully pull the now-buttery baking dish out of the oven. Pour the batter right over that melted butter. Trust the process – it looks weird now, but it’s all part of trust the process. Sprinkle pecans on top and follow up with a layer of brown sugar. Finally, add the caramel candies. Whole or crushed? Dealer’s choice.
  4. Next, get that kettle boiling and slowly pour the hot water over everything in the dish. Yes, everything. No stirring allowed! Just trust me on this one.
  5. Bake uncovered for 30–35 minutes or until the top is golden brown and smells like a caramel dream.
  6. Take it out and let it cool for about 30 minutes. Patience is key – the caramel sauce underneath thickens and gets all creamy during this time.
  7. Scoop it into bowls, drizzle with that caramel sauce hiding underneath, and top with a big ol’ scoop of vanilla ice cream.

  • Passive Time: 60 min
  • Cook Time: 15 min

CRAVING MORE?

Follow along here & don’t forget to subscribe to my substack!

Cinnamon Rolls

Cinnamon Rolls

Cinnamon Rolls

Cinnamon Rolls

October 2, 2024 by Kimberly

When the days get shorter and autumn rolls in, there’s nothing better than a tray of freshly baked cinnamon rolls. Soft yeast dough, cinnamon, sugar, and a creamy glaze make this recipe my ultimate comfort classic, one that has become a yearly tradition in our home. Cozy, indulgent, and just perfect for marking the start of fall. These cinnamon rolls are fluffy, sweet, and impossible to resist, filling your kitchen with the scent of warm spices. A bake that turns any chilly day into a cozy moment of pure comfort.

This website uses affiliate links which may earn commission for purchases made at no additional cost to you.

TOTAL TIME

100 min

SERVES

12 rolls

DIET

vegetarian

EVERY RECIPE DESERVES

A Little Love Letter

There are recipes that feel less like baking and more like holding onto a little piece of childhood. For me, that’s cinnamon rolls. As you might know, I was born and raised in Germany. And when I was a kid, American products were nowhere to be found in German stores. Reese’s? Never heard of them. Five Guys? Not a clue. We had amazing German bakeries, of course, where they offered raisin swirls, streusel buns, all sorts of cakes, breads, but never those soft, fluffy, cream-covered rolls I had only seen in American movies.

Even back then, I was already a little food enthusiast, but I couldn’t imagine what cinnamon rolls might taste like. Sweet and soft, for sure, but beyond that? So at some point, since they simply didn’t exist in Germany, I created my very own cinnamon roll recipe, exactly the way my childhood self would have dreamed them. Pillowy, fluffy, full of cinnamon and sugar, with a creamy glaze that melts into the warm rolls.

And maybe that’s why I love them so much to this day, because they carry that little spark of wonder with them. The rolls are delicious, of course, but they’re also a reminder that food can hold stories, dreams, and even a sense of belonging. It’s a recipe that turned from imagination into reality.

Today, they’ve become a tradition. Every autumn, I pull out this recipe again. The kitchen filling with the scent of cinnamon, everyone at home knowing that cinnamon roll season has officially begun. I love to enjoy them with a big latte or a German Eggnog, lit a cozy candle, and suddenly the world feels just a little more whole again.

Hi, I'm Kimberly!

Hi, I'm Kimberly.

A hopeless romantic when it comes to food. Every recipe I share is a love letter to food itself. I’m so glad you’re here. Make yourself at home and stay a while.

Love,
Kimberly

Kimberly the Zett Signature

If you want to get to know me better,
click here!


Cinnamon Rolls
Cinnamon Rolls
Cinnamon Rolls
Cinnamon Rolls

LET’S MAKE A PIECE OF HAPPINESS

Print
.tasty-recipe-responsive-iframe-container-fcffccfc { position: relative; overflow: hidden; padding-top: 56.3%; } .tasty-recipe-responsive-iframe-container-fcffccfc iframe { position: absolute; top: 0; left: 0; width: 100%; height: 100%; border: 0; } clock clock iconcutlery cutlery iconflag flag iconfolder folder iconinstagram instagram iconpinterest pinterest iconfacebook facebook iconprint print iconsquares squares iconheart heart iconheart solid heart solid icon
Cinnamon Rolls

Cinnamon Rolls


5 from 1 review

  • Author: Kimberly
  • Total Time: 100 min
  • Yield: 12 rolls

Description

When the days get shorter and autumn rolls in, there’s nothing better than a tray of freshly baked cinnamon rolls. Soft yeast dough, cinnamon, sugar, and a creamy glaze make this recipe my ultimate comfort classic, one that has become a yearly tradition in our home. Cozy, indulgent, and just perfect for marking the start of fall. These cinnamon rolls are fluffy, sweet, and impossible to resist, filling your kitchen with the scent of warm spices. A bake that turns any chilly day into a cozy moment of pure comfort.

GOOD TO HAVE ON HAND

  • small bowl
  • small whisk
  • large bowl
  • plastic wrap
  • two medium bowls
  • rolling pin
  • sharp knife
  • baking dish
  • oven

Ingredients

Units Scale
DOUGH
  • 500 grams bread flour (in Germany that's Type 550)
  • 170 grams yogurt
  • 1/2 tsp salt
  • 1 egg
  • 130 milliliters full-fat milk
  • 1 tbsp white sugar
  • 21 grams fresh yeast
FILLING
  • 115 grams butter, room temperature
  • 150 grams brown sugar
  • 2 tbsp cinnamon
  • 1/4 tsp salt
  • 100 milliliters heavy cream
  • 50 milliliters cinnamon oil (optional)
FROSTING
  • 120 grams cream cheese
  • 120 grams powdered sugar
  • 50 grams butter, room temperature
  • 1 tsp vanilla extract
  • 1 tsp lemon juice

Instructions

  1. First, we activate the fresh yeast. Heat 130ml full-fat milk to a temperature between 32°C and 38°C (90°F to 100°F). Add 1 tbsp white sugar and stir well. Crumble in 21g fresh yeast and whisk until fully dissolved. Let the mixture sit for 5 minutes. You should see small bubbles forming on the surface by then.
  2. Meanwhile, in a large bowl, add 500g bread flour (Type 550 in Germany), 1/2 tsp salt, 170g yogurt, and 1 egg. Pour in the yeast mixture and stir everything together with a wooden spoon. Transfer the dough to a clean work surface and knead by hand for about 10–15 minutes. The goal is to get a smooth and elastic dough. Using an electric mixer will cut the time in half. The dough is ready when you can stretch a piece thin enough to let light through without tearing. Place the dough back in the bowl and cover it with plastic wrap to keep it from drying out. Let it rise in a warm, draft-free spot for about an hour until it doubles in size.
  3. In the meantime, prepare the filling. Mix together 115g room-temperature butter, 150g brown sugar, 2 tbsp cinnamon, and 1/4 tsp salt into a creamy mixture. Set it aside at room temperature.
  4. Next, prepare the frosting. Mix together 120g cream cheese, 120g powdered sugar, 50g room-temperature butter, 1 tsp vanilla extract, and 1 tsp lemon juice until smooth and creamy. Store in the fridge until ready to use.
  5. After the dough has risen for an hour, it should have doubled in size and is ready to work with. Prepare a large baking dish. Transfer the dough to a lightly floured, clean surface and roll it out to a 50×30 cm (about 20×12 inch) rectangle. Spread the butter-sugar-cinnamon mixture evenly over the dough. Then, cut the dough lengthwise into 12 equal strips. Roll each strip into a spiral and place them in the baking dish, forming 3 rows of 4 rolls. Let the rolls rise again for another 30 minutes.
  6. About 10 minutes before the rising time is up, preheat the oven to 190°C (375°F). Once the rolls have risen, pour 100ml heavy cream and, if you like, 50ml cinnamon oil in between the rolls. Bake for 20–25 minutes until the tops are golden brown. Be careful not to overbake them, as they may become dry.
  7. Remove the rolls from the oven and let them cool for about 10 minutes. Take the frosting out of the fridge and spread it evenly over the warm rolls. Enjoy!
  • Prep Time: 15 min
  • Passive Time: 60 min
  • Cook Time: 25 min

CRAVING MORE?

Follow along here & don’t forget to subscribe to my substack!