


Description
RECOMMENDED EQUIPMENT
- small saucepan
- whisk
- small bowl
- stand mixer or electric hand mixer
- plastic wrap
- rectangular baking dish
Ingredients
Units Scale
DOUGH
- 250 milliliters full-fat cow milk
- 7 grams dry active yeast
- 60 grams white sugar
- 525 grams all-purpose flour (in Germany 550er)
- 75 grams butter, soft
- 1 egg
- pinch of salt
- 200 grams heavy cream
- 90 milliliters full-fat cow milk
- 1 tsp vanilla extract
- 60 grams white sugar
- 1 egg yolk
- 20 grams cornstarch
- 100 grams all-purpose flour
- 70 grams butter, soft
- 70 grams white sugar
- 1 tsp vanilla extract
- pinch of salt
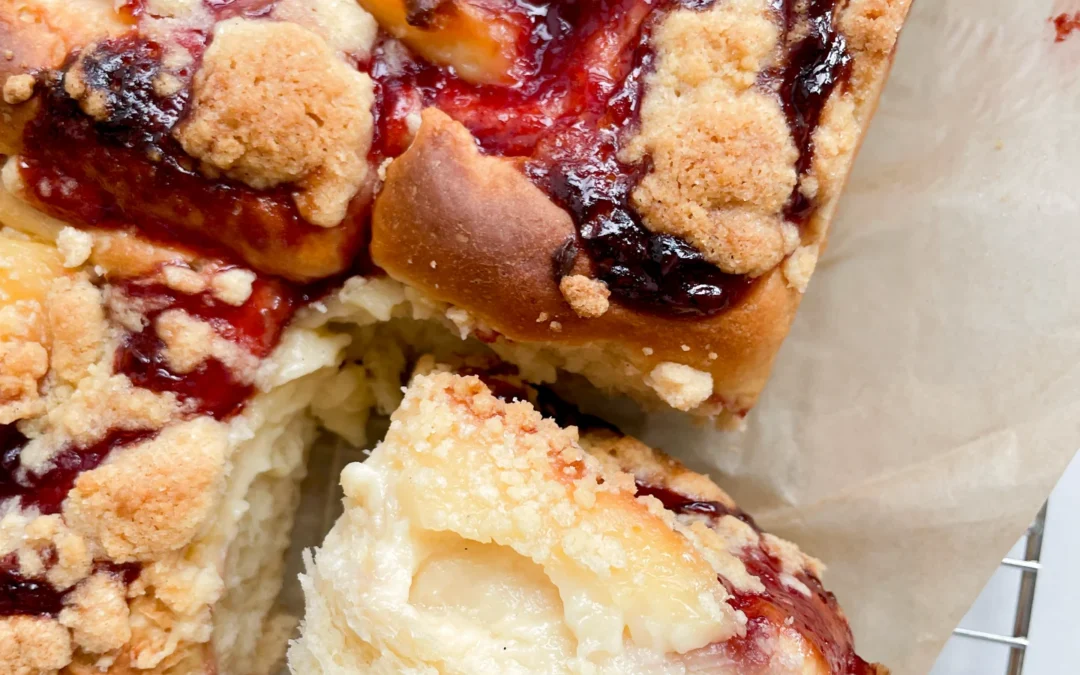
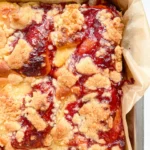
- 200 grams strawberry jam (homemade or store-bought)
- confectioners sugar
Instructions
- In a small saucepan, heat the cream with the sugar, vanilla extract, and half of the milk until it comes to a boil. In a separate bowl, whisk together the cornstarch, egg yolk, and remaining milk. Slowly pour the starch mixture into the boiling cream while whisking constantly until it thickens into a smooth pudding. Remove from heat and let cool completely. Set aside for later.
- Gently warm the milk to 38°C / 100°F and stir in the yeast and 1 tablespoon of the sugar. Let it sit for a few minutes until slightly foamy. In a large mixing bowl, combine the flour, remaining sugar, egg, soft butter, and salt. Add the yeast mixture and knead for about 10 minutes until you get a smooth, soft dough that doesn’t stick. Cover the bowl tightly with plastic wrap and let rise in a warm spot for 90 minutes.
- Combine the butter, sugar, flour, vanilla extract and a pinch of salt and mix until crumbly. Chill the streusel until ready to use.
- Once the dough has risen, knead it briefly and divide into 12 equal balls, about 80g / 3oz each. Line a rectangular baking dish with parchment paper and arrange the dough balls inside. Let them rest for 20 minutes.
- Use your thumbs and press in the middle of the dough ball to form kind of a bowl shape that is going to be filled each with 1 tablespoon of vanilla pudding and 1 heaping teaspoon of strawberry jam side by side.
- Preheat the oven to 180°C / 350°Ft. Sprinkle the chilled streusel generously over the buns and bake for about 55 minutes, or until golden. Serve slightly warm or fully cooled—both are delicious. Finish with a dusting of powdered sugar before serving.
- Passive Time: 3 hours
- Cook Time: 30 min