Apple Sauce

Apple Sauce

Apple Sauce

Apple Sauce

May 15, 2024 by Kimberly

Indulge in homemade apple sauce—sweet, comforting, and perfect for pairing with a variety of dishes. A simple treat that’s both nutritious and delicious!

This website uses affiliate links which may earn commission for purchases made at no additional cost to you.

TOTAL TIME

30 min

SERVES

10 portions

DIET

vegan

EVERY RECIPE DESERVES

A Little Love Letter

Discover the joys of making your own apple sauce at home with my easy recipe. This delightful condiment is not only tasty but also packs a nutritious punch, perfect for any season.

Enjoy apple sauce as a snack, a dessert topping, or a side with potato pancakes . It’s especially delicious when warmed and sprinkled with a dash of cinnamon or mixed into your morning yogurt.

Store your apple sauce in an airtight container in the refrigerator. It keeps well for up to two weeks, making it a handy addition to your daily meals.

Hi, I'm Kimberly!

Hi, I'm Kimberly.

A hopeless romantic when it comes to food. Every recipe I share is a love letter to food itself. I’m so glad you’re here. Make yourself at home and stay a while.

Love,
Kimberly

Kimberly the Zett Signature

If you want to get to know me better,
click here!


Apple Sauce
Apple Sauce

LET’S MAKE A PIECE OF HAPPINESS

Print
clock clock iconcutlery cutlery iconflag flag iconfolder folder iconinstagram instagram iconpinterest pinterest iconfacebook facebook iconprint print iconsquares squares iconheart heart iconheart solid heart solid icon
Apple Sauce

Apple Sauce


5 Stars 4 Stars 3 Stars 2 Stars 1 Star

No reviews

  • Author: Kimberly
  • Total Time: 30 min
  • Yield: 10

Description

GOOD TO HAVE ON HAND

  • peeler
  • sharp knife
  • cutting board
  • medium-sized pot
  • immersion blender
  • sealable jars


Ingredients

Units Scale
  • 1 kilograms red apples
  • 100 milliliters water
  • juice of half a lemon
  • 50 grams white sugar

Instructions

  1. Peel the apples and cut them into large chunks.
  2. In a medium-sized pot, combine the apple pieces with water, lemon juice, and sugar. Cover and simmer over medium heat for about 20 minutes.
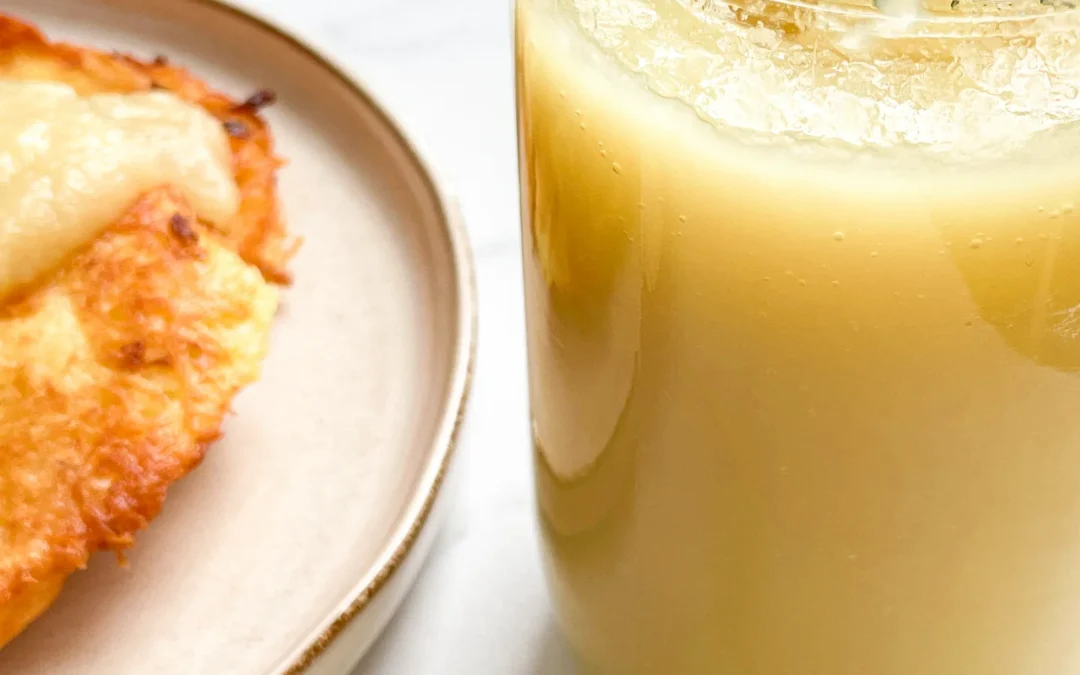
  3. Remove the pot from the heat and puree the mixture until smooth using an immersion blender.
  4. Transfer the applesauce into sterilized jars with screw tops or serve immediately.

Notes

The calorie information may vary depending on the product used, country and region.

  • Passive Time: 20 min
  • Cook Time: 10 min

CRAVING MORE?

Follow along here & don’t forget to subscribe to my substack!

Gnocchi Romaine Salad with Oven-Roasted Tomatoes & Parmesan

Gnocchi Romaine Salad with Oven-Roasted Tomatoes & Parmesan

Gnocchi Romaine Salad with Oven-Roasted Tomatoes & Parmesan

Gnocchi Romaine Salad with Oven-Roasted Tomatoes & Parmesan

May 15, 2024 by Kimberly

Savor the charm of this gnocchi romaine salad combined with roasted tomatoes and parmesan in a creamy garlic-yogurt dressing – perfect for a refreshing, hearty meal!

This website uses affiliate links which may earn commission for purchases made at no additional cost to you.

TOTAL TIME

25 min

SERVES

2 bowls

DIET

vegetarian

EVERY RECIPE DESERVES

A Little Love Letter

Elevate your dining experience with this gnocchi romaine salad, featuring oven-roasted tomatoes and a sprinkle of parmesan, all tossed in a zesty garlic-vinegar yogurt dressing. A delightful twist on classic ingredients!

This salad shines whether served chilled or with tomatoes fresh out of the oven and gnocchi straight from the pan, making it a delightful choice for warm days. Pair it with red wine or a chilled rosé to complement the tangy yogurt dressing, along with a bit of baguette. Perfect for picnics or light lunches.

Keep the salad fresh by storing its components separately in sealed containers in the refrigerator. It’s best enjoyed within two days to ensure the flavors stay vibrant and the gnocchi retains its texture.

Hi, I'm Kimberly!

Hi, I'm Kimberly.

A hopeless romantic when it comes to food. Every recipe I share is a love letter to food itself. I’m so glad you’re here. Make yourself at home and stay a while.

Love,
Kimberly

Kimberly the Zett Signature

If you want to get to know me better,
click here!


Gnocchi Romaine Salad with Oven-Roasted Tomatoes & Parmesan

LET’S MAKE A PIECE OF HAPPINESS

Print
.tasty-recipe-responsive-iframe-container-6406821e { position: relative; overflow: hidden; padding-top: 56.3%; } .tasty-recipe-responsive-iframe-container-6406821e iframe { position: absolute; top: 0; left: 0; width: 100%; height: 100%; border: 0; } clock clock iconcutlery cutlery iconflag flag iconfolder folder iconinstagram instagram iconpinterest pinterest iconfacebook facebook iconprint print iconsquares squares iconheart heart iconheart solid heart solid icon
Gnocchi Romaine Salad with Oven-Roasted Tomatoes & Parmesan

Gnocchi Romaine Salad with Oven-Roasted Tomatoes & Parmesan


  • Author: Kimberly
  • Total Time: 25 minutes
  • Yield: 2
  • Diet: Vegetarian

Description

GOOD TO HAVE ON HAND

  • sharp knife
  • cutting board
  • medium-sized frying pan
  • two salad bowls
  • small bowl


Ingredients

Units Scale
DRESSING & SALAD
  • 2 romaine lettuces
  • 1 garlic clove
  • 20 grams parmesan
  • 8 grams Worcestershire sauce
  • 1 tsp dijon mustard
  • 100 grams yogurt
  • 12 grams red wine vinegar
ROASTED TOMATOES
  • 250 grams cocktail tomatoes
  • 1 tbsp olive oil
  • 1 garlic clove
GNOCCHI
  • 400 grams soft gnocchi
  • 2 tbsp olive oil
TOPPINGS
  • chives
  • parmesan
  • black pepper

Instructions

PREPARATIONS

  • Wash tomatoes, lettuce, and chives.
  • Chop the chives into fine rolls and cut the lettuce into bite-sized pieces.
  • Peel the garlic cloves and finely chop or press them.
  • Grate the Parmesan finely.
  • Line a baking tray with parchment paper.
  • Preheat the oven to 200°C/392°F.

INSTRUCTIONS

  1. Place the tomatoes on the baking tray. Mix with 1 tablespoon of olive oil and a pressed garlic clove, and roast in the oven for about 15 minutes.
  2. Heat 2 tablespoons of olive oil in a medium frying pan and sauté the gnocchi until crispy.
  3. Meanwhile, divide the Romaine lettuce between two bowls. In a small bowl, thoroughly mix all the ingredients for the dressing. Evenly distribute the dressing over the lettuce in the two bowls, toss well to coat the lettuce with the dressing.
  4. Remove the tomatoes from the oven and distribute them and the gnocchi among the bowls. Toss briefly. Top everything with chives and Parmesan and serve immediately.

Notes

The calorie information may vary depending on the product used, country and region.

  • Prep Time: 10
  • Cook Time: 15
  • Category: SALAD
  • Cuisine: ITALIAN

CRAVING MORE?

Follow along here & don’t forget to subscribe to my substack!

White Chocolate Mousse

White Chocolate Mousse

White Chocolate Mousse

White Chocolate Mousse

May 8, 2024 by Kimberly

Indulge in a heavenly white chocolate mousse, the ultimate creamy delight! Luxurious, velvety, and decadently sweet – perfect for any dessert lover.

This website uses affiliate links which may earn commission for purchases made at no additional cost to you.

TOTAL TIME

2 hrs + 20 min

SERVES

4 portions

DIET

vegetarian

EVERY RECIPE DESERVES

A Little Love Letter

Experience the sheer decadence of this white chocolate mousse, a dessert that promises to elevate your dining experience. Its smooth, creamy texture and rich chocolate flavor make it a favorite among sweet tooth fans.

This white chocolate mousse is best served chilled, making it a refreshing end to any meal. Present it in elegant glasses topped with a sprinkle of chocolate flakes or fresh strawberries for a touch of sophistication. It’s ideal for dinner parties or a romantic evening, offering a light yet indulgent dessert option that’s sure to impress.

Store it in the refrigerator covered with plastic wrap. It will stay fresh for up to two days, ensuring you can enjoy its luxurious taste at its best.

Hi, I'm Kimberly!

Hi, I'm Kimberly.

A hopeless romantic when it comes to food. Every recipe I share is a love letter to food itself. I’m so glad you’re here. Make yourself at home and stay a while.

Love,
Kimberly

Kimberly the Zett Signature

If you want to get to know me better,
click here!


White Chocolate Mousse

LET’S MAKE A PIECE OF HAPPINESS

Print
.tasty-recipe-responsive-iframe-container-4ad0d9f5 { position: relative; overflow: hidden; padding-top: 56.3%; } .tasty-recipe-responsive-iframe-container-4ad0d9f5 iframe { position: absolute; top: 0; left: 0; width: 100%; height: 100%; border: 0; } clock clock iconcutlery cutlery iconflag flag iconfolder folder iconinstagram instagram iconpinterest pinterest iconfacebook facebook iconprint print iconsquares squares iconheart heart iconheart solid heart solid icon
White Chocolate Mousse

White Chocolate Mousse


  • Author: Kimberly
  • Total Time: 20 min + 2 hrs
  • Yield: 4

Description

RECOMMENDED EQUIPMENT

  • 2 medium-sized bowls
  • whisk
  • electric mixer
  • small pot
  • small metal or glass bowl

Ingredients

Units Scale
  • 45 grams butter
  • 15g powdered sugar
  • 2 egg yolks
  • 100 grams white chocolate
  • 200 grams heavy whipping cream

Instructions

  1. Cream the butter and powdered sugar together in a medium-sized bowl with a whisk. Separate the eggs and add the yolks to the butter and sugar. Beat the mixture with an electric mixer until creamy and stiff, about 5 minutes. The egg whites won’t be used further, but to avoid waste, you could make a meringue with them.
  2. Melt the white chocolate in a double boiler, let it cool slightly, then stir it into the mixture.
  3. Whip the cold cream until it forms peaks and gently fold it into the mixture until everything is well combined.
  4. Divide the mixture into 4 dessert bowls and refrigerate for at least 2 hours.

Notes

The calorie information may vary depending on the product used, country and region.

  • Passive Time: 2 hrs
  • Cook Time: 20 min

CRAVING MORE?

Follow along here & don’t forget to subscribe to my substack!

Vegan Dumplings in Sesame Miso Soup

Vegan Dumplings in Sesame Miso Soup

Vegan Dumplings in Sesame Miso Soup

Vegan Dumplings in Sesame Miso Soup

May 6, 2024 by Kimberly

Indulge in a comforting bowl full of flavor, perfect for cozy nights. Healthy, hearty, and absolutely delicious!

This website uses affiliate links which may earn commission for purchases made at no additional cost to you.

TOTAL TIME

1 hr + 30 min

SERVES

4 bowls

DIET

vegan

EVERY RECIPE DESERVES

A Little Love Letter

Savor the warmth and richness of these vegan Dumplings in Sesame Miso Soup, a delightful dish that combines hearty plant-based dumplings with a savory miso broth. This soup is not only nourishing but also packed with exquisite flavors that will satisfy both vegans and non-vegans alike. It’s a perfect choice for those seeking a comforting meal that’s both healthful and satisfying.

Serve this aromatic Sesame Miso Soup hot, with its soft, tender dumplings soaking up the flavorful broth. Garnish with chopped green onions or cilantro, a sprinkle of sesame seeds, and a drizzle of crispy chili oil for an extra touch of luxury.

Store leftovers in an airtight container in the refrigerator for up to 2 days. Reheat gently to preserve the flavors and textures of the dumplings and broth. Freezing is not recommended as it may affect the soup’s quality.

Hi, I'm Kimberly!

Hi, I'm Kimberly.

A hopeless romantic when it comes to food. Every recipe I share is a love letter to food itself. I’m so glad you’re here. Make yourself at home and stay a while.

Love,
Kimberly

Kimberly the Zett Signature

If you want to get to know me better,
click here!


Vegan Dumplings in Sesame Miso Soup

LET’S MAKE A PIECE OF HAPPINESS

Print
.tasty-recipe-responsive-iframe-container-93a195b4 { position: relative; overflow: hidden; padding-top: 177.62%; } .tasty-recipe-responsive-iframe-container-93a195b4 iframe { position: absolute; top: 0; left: 0; width: 100%; height: 100%; border: 0; } clock clock iconcutlery cutlery iconflag flag iconfolder folder iconinstagram instagram iconpinterest pinterest iconfacebook facebook iconprint print iconsquares squares iconheart heart iconheart solid heart solid icon
Vegan Dumplings in Sesame Miso Soup

Vegan Dumplings in Sesame Miso Soup


  • Author: Kimberly
  • Total Time: 90 min
  • Yield: 4

Description

RECOMMENDED EQUIPMENT

  • sharp knife
  • cutting board
  • vegetable peeler
  • salad spinner
  • large frying pan
  • two medium-sized pots
  • large plate

Ingredients

Units Scale
FILLING
  • 200 grams mushrooms
  • 200 grams napa cabbage
  • 3 spring onions
  • 1 carrot
  • 1/2 tsp ginger
  • 3 garlic cloves, grated
  • 1 tbsp cilantro
  • 1 tbsp clarified butter
  • 1 tbsp soy sauce
  • 1/4 tsp sesame oil
  • 1/8 tsp ground white pepper
SESAME MISO SOUP
  • 800 milliliters water
  • 6 tbsp tahini
  • 4 tbsp white miso paste
  • 2 tbsp crispy chili oil
  • 2 tbsp soy sauce
  • 2 tbsp rice vinegar
  • 2 tsp ginger, grated
  • 2 tsp sugar
  • 2 garlic cloves, grated
TOPPINGS
  • cilantro
  • crispy chili oil
  • sesame seeds

Instructions

PREPARATIONS

  • Prepare dumpling wrappers or defrost store-bought ones.
  • Peel and finely chop or grate the ginger. Set aside.
  • Peel and finely chop or press the garlic cloves. Set aside.
  • Clean the mushrooms and dice them into small pieces. Set aside.
  • Chop the napa cabbage into small pieces and wash it. Set aside.
  • Peel and finely dice the carrots. Set aside.
  • Pluck the cilantro leaves from the stems and finely chop them. Set aside.
  • Separate the green and white parts of the green onions and slice both into fine rings. Set aside.

INSTRUCTIONS

  1. Heat a large pan over medium heat and add 1 tablespoons of clarified butter. Start by sautéing the white parts of the green onions, ginger, and garlic for a few minutes. Next, add the carrot pieces and sauté for a few more minutes. Then, add the mushroom pieces, mix well, and finally add the napa cabbage. Let the napa cabbage cook until soft, then stir everything together. Remove the pan from the heat and let it cool.
  2. Once the mixture has cooled down, add 2 tablespoons of chopped cilantro, the green parts of the green onions, 1/4 teaspoon of ground white pepper, 2 tablespoons soy sauce, and 1/2 tablespoon sesame oil. Mix everything well.
  3. Set up your vegetable filling, the dumpling wrappers, and a small bowl of cold water. Also, prepare a large plate dusted with a little flour where you can place your finished dumplings. Now, put on your favorite series or podcast and start filling your dumplings.
  4. Take a wrapper and place about 1-1.5 teaspoons of the vegetable mixture in the center. Dip a finger in the water and moisten the edge of the upper half of the wrapper. Fold the wrapper like a taco shell upwards and press the left tip of the wrapper with your left hand. Now, with the right hand’s index finger and thumb, hold the closed tip with your left thumb, place a small fold at the top edge against the backside of the wrapper and press it firmly. Continue this until the wrapper is completely closed and you have a finished dumpling in your hand. Place the finished dumpling on the floured plate. This folding technique might take a little practice. For a visual demonstration, just scroll down to my video at the end of the recipe. Continue this process until all the dumpling wrappers and filling are used up.
  5. Fill a medium-sized pot with enough water to fill just over half the pot. Bring the water to a boil.
  6. Meanwhile, you can prepare the Sesame Miso Soup in the other pot. Add the following ingredients to the pot: tahini, white miso paste, soy sauce, rice vinegar, sugar, crispy chili oil, water, and grated garlic and ginger. Bring everything to a simmer over medium heat. Keep the soup on a low flame on the stove.
  7. Once the water in the other pot is boiling, turn it down slightly and add 6-8 dumplings depending on the size of your pot and let them cook for about 8 minutes. Since dumplings expand while cooking, do not overcrowd your pot. Once the dumplings become translucent and the filling is clearly visible, they are done. Place the dumplings in the bowls in which you want to serve them. Continue this for all dumplings until all are cooked.
  8. Once all dumplings are ready, evenly distribute the soup from the other pot over the dumplings. Top each bowl with some cilantro, Crispy Chili Oil, and toasted sesame seeds.
  • Passive Time: 20 min
  • Cook Time: 70 min

CRAVING MORE?

Follow along here & don’t forget to subscribe to my substack!

Tuna Melt

Tuna Melt

Tuna Melt

Tuna Melt

April 29, 2024 by Kimberly

Experience the ultimate comfort with this tuna melt – crispy bread, creamy tuna salad, melted cheese, and a little heat combine for a mouthwatering lunch you can’t resist!

This website uses affiliate links which may earn commission for purchases made at no additional cost to you.

TOTAL TIME

20 min

SERVES

2 sandwiches

DIET

omnivore

EVERY RECIPE DESERVES

A Little Love Letter

Craving a quick and satisfying meal? Look no further than the classic Tuna Melt with a twist! It’s the perfect blend of creamy tuna, gooey melted cheese, and toasted bread – a true comfort food staple.

The best way to enjoy a Tuna Melt is freshly made and hot off the pan. Serve with a side of crispy potato chips or a light salad for a balanced meal. It’s ideal for a quick lunch or a casual dinner, guaranteed to please both kids and adults alike!

For best results, consume your Tuna Melt fresh. However, if you need to store it, keep the unassembled tuna salad in the refrigerator in an airtight container for up to two days, and assemble before reheating to maintain the best quality.

Hi, I'm Kimberly!

Hi, I'm Kimberly.

A hopeless romantic when it comes to food. Every recipe I share is a love letter to food itself. I’m so glad you’re here. Make yourself at home and stay a while.

Love,
Kimberly

Kimberly the Zett Signature

If you want to get to know me better,
click here!


Tuna Melt
Tuna Melt
Tuna Melt
Tuna Melt

LET’S MAKE A PIECE OF HAPPINESS

Print
.tasty-recipe-responsive-iframe-container-c09d2113 { position: relative; overflow: hidden; padding-top: 56.3%; } .tasty-recipe-responsive-iframe-container-c09d2113 iframe { position: absolute; top: 0; left: 0; width: 100%; height: 100%; border: 0; } clock clock iconcutlery cutlery iconflag flag iconfolder folder iconinstagram instagram iconpinterest pinterest iconfacebook facebook iconprint print iconsquares squares iconheart heart iconheart solid heart solid icon
Tuna Melt

Tuna Melt


  • Author: Kimberly
  • Total Time: 20 min
  • Yield: 2 sandwiches

Description

RECOMMENDED EQUIPMENT

  • sharp knife
  • cutting board
  • medium-sized bowl
  • medium-sized frying pan
  • spatula

Ingredients

Units Scale
TUNA CREME
  • 150 grams canned tuna in water (drained)
  • 50 grams mayonnaise
  • 1 pickled cucumber
  • 1 tsp lemon juice
  • 1 garlic clove
  • 1/2 tsp dijon mustard
  • dill
  • chives
  • salt & pepper to taste
OTHER INGREDIENTS
  • 1/2 red onion
  • 4 slices bread of your choice
  • 2 slices cheddar cheese
  • 80 grams mozzarella cheese
  • 1 jalapeno
  • butter
  • Tabasco (optional)

Instructions

PREPARATIONS

  1. Peel the onion, halve it, and slice it into fine half circles. Set aside.
  2. Wash the jalapeño and slice it into thin rings. Set aside.
  3. Squeeze the mozzarella in paper towels to remove as much moisture as possible, then slice it thinly. Set aside.

COOKING

  1. For the tuna cream: Drain the can of tuna so there’s no water left. Place the tuna in a medium-sized bowl. Mix it with mayonnaise, lemon juice, Dijon mustard, salt, and pepper. Now chop the pickle into small pieces and add it to the bowl. Finely chop the dill and chives and add them to the bowl as well. Peel and finely chop the garlic clove, or press it into the bowl. Mix everything together. Season to taste and set aside.
  2. Heat a pan over medium heat without adding any additional fat. Meanwhile, spread a little butter on two slices of bread. Place the bread slices in the pan, buttered side down. Spread each with half of the tuna cream, then top with the red onions. Add half of the mozzarella and a slice of cheddar cheese to each. Top with the jalapeño slices. Let it all cook for a few minutes on low to medium heat.
  3. Meanwhile butter the other two bread slices. Once the bottom of the bread in the pan is golden brown and crispy, place the other bread slices, buttered side up, on top of the sandwiches in the pan. Use a spatula to lift the sandwich and quickly flip it, so it can brown on the other side.
  4. Let everything cook for another 5-8 minutes on low heat, allowing the cheese to melt and the bread slice to become crispy.
  5. Remove from the pan and cut in half. Serve immediately, drizzle with Tabasco to taste and enjoy your pieces of happiness.

Notes

The calorie information may vary depending on the product used, country and region.

  • Prep Time: 5 min
  • Cook Time: 15 min

CRAVING MORE?

Follow along here & don’t forget to subscribe to my substack!

Sesame Chili Dumpling Dipping Sauce

Sesame Chili Dumpling Dipping Sauce

Sesame Chili Dumpling Dipping Sauce

Sesame Chili Dumpling Dipping Sauce

April 21, 2024 by Kimberly

Kick up your dumpling game with Sesame Chili Dumpling Dipping Sauce! Spicy, nutty, and bursting with flavor, it’s the perfect match for any dumpling.

This website uses affiliate links which may earn commission for purchases made at no additional cost to you.

TOTAL TIME

5 min

SERVES

2 portions

DIET

vegan

EVERY RECIPE DESERVES

A Little Love Letter

Elevate your dumplings with this Sesame Chili Dumpling Dipping Sauce, a bold blend that combines the nutty depth of toasted sesame with the fiery kick of chili. This sauce is not just a side but a star, turning any dumpling, whether homemade or store-bought, into a gourmet treat. It’s perfect for those who love a little heat and a lot of flavor in their meals.

Serve this Sesame Chili Dumpling Dipping Sauce alongside your favorite dumplings. Its vibrant flavor complements everything from classic pork dumplings to vegetable gyoza. It’s also fantastic as a dressing for Asian salads or as a spicy drizzle over grilled meats. Whether you’re hosting a dinner party or enjoying a quiet meal at home, this sauce will add a delicious, zesty twist to your dishes.

Keep this sauce fresh by storing it in an airtight container in the refrigerator. It stays vibrant and tasty for up to three days, making it a convenient and flavorful addition to quick meals and snacks.

Hi, I'm Kimberly!

Hi, I'm Kimberly.

A hopeless romantic when it comes to food. Every recipe I share is a love letter to food itself. I’m so glad you’re here. Make yourself at home and stay a while.

Love,
Kimberly

Kimberly the Zett Signature

If you want to get to know me better,
click here!


Sesame Chili Dumpling Dipping Sauce

LET’S MAKE A PIECE OF HAPPINESS

Print
.tasty-recipe-responsive-iframe-container-89a2f15e { position: relative; overflow: hidden; padding-top: 177.62%; } .tasty-recipe-responsive-iframe-container-89a2f15e iframe { position: absolute; top: 0; left: 0; width: 100%; height: 100%; border: 0; } clock clock iconcutlery cutlery iconflag flag iconfolder folder iconinstagram instagram iconpinterest pinterest iconfacebook facebook iconprint print iconsquares squares iconheart heart iconheart solid heart solid icon
Sesame Chili Dumpling Dipping Sauce

Sesame Chili Dumpling Dipping Sauce


  • Author: Kimberly
  • Total Time: 5 minutes
  • Yield: 2

Description

GOOD TO HAVE ON HAND

  • sharp knife
  • cutting board
  • small bowl
  • small frying pan


Ingredients

  • 2 tbsp soy sauce
  • 1 tbsp hot water
  • 1 tsp crispy chili oil
  • 1 tsp sugar
  • 1/2 tsp sesame oil
  • 1/2 tsp rice vinegar
  • 1.5 tsp sesame seeds
  • 2 garlic cloves

Instructions

  1. Dissolve the sugar in the bowl by stirring in hot water.
  2. Then, in a small pan without adding any oil, toast the sesame seeds until they are golden brown and fragrant.
  3. Meanwhile, add the following ingredients to the sugar in the bowl: 2 tablespoons soy sauce, 1 teaspoon crispy chili oil, 1/2 teaspoon sesame oil, and 1/2 teaspoon rice vinegar. Peel and finely chop or press two garlic cloves and add them to the sauce. Stir everything well.
  4. Carefully pour the hot sesame seeds into the sauce. It will sizzle beautifully 🙂 Now stir everything together and serve.
  • Cook Time: 5 min

CRAVING MORE?

Follow along here & don’t forget to subscribe to my substack!